The editor announced two days ago that there is an interesting dynamic magnification effect. When you point the mouse at a certain area, the area will be enlarged. Today, the editor will reveal its production method and extend it to a beautiful map application case.
Create a dynamic "magnifying glass"
First, let’s take a look at the final effect of this example. As can be seen from this small animation, as long as the cursor points to a certain label, the label will display a dynamic magnification effect.

First, import the pictures you want to make a dynamic presentation into PowerPoint 2016. I use the interface diagram of Word, adjust the size to be the same as the size of the slide, and then copy a few more copies of this slide for later use.
Next, make an enlarged picture of the "Start" tag of the picture Word. Click on the second slide, then make a copy of the picture in the slide and enlarge it appropriately, then switch to the "Picture Tools-Format" tab, click the "Crop" drop-down button on the toolbar, and select "Crop" for the shape" circle below.
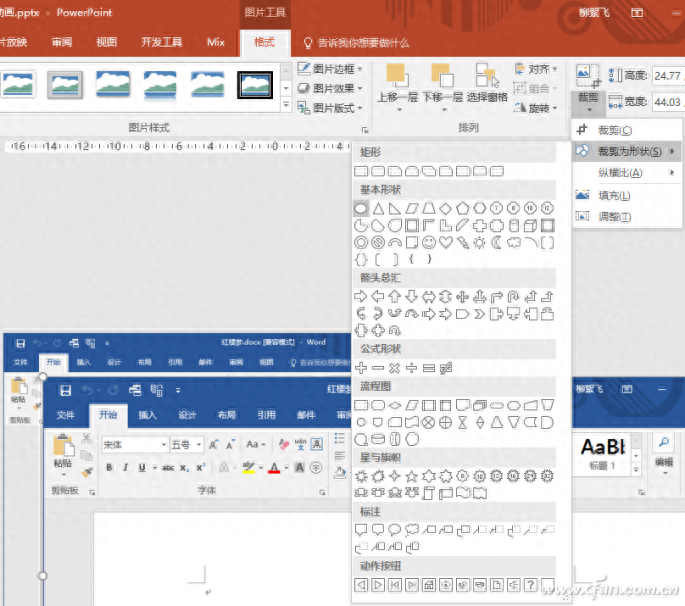
Crop this copied graphic into a circle, leaving only the "Start" part of the word picture, and set a three-dimensional effect through "Picture Effect". Note that after the magnifying glass effect is completed, be sure to align it with the "start" position in the original picture.

Now let's go back to slide 1, switch to the "Insert" tab, insert a shape and draw a rectangle to circle the "start" position in the picture in Word. Then click the "Action" button on the toolbar to bring up the operation settings window, switch to "Mouse Hover", select "Hyperlink to", and select Hyperlink to "Slideshow" below, another window will open. , select "Slide 2", which is the slide with the magnifying glass you just created.

Click "OK" continuously to return to the main interface. At this time, right-click the rectangle, and from the right-click menu, set "Border" and "Fill" to no fill and no border respectively.

At this time, press the F5 key to demonstrate the slide show, and you will find that as long as you move the cursor to the "start" of the picture Word, the magnifying glass effect there will be displayed. However, there is a problem at this time. After the cursor is moved away, the magnifying glass effect is always displayed and does not disappear.
The solution to this problem is to switch to the second slide in the editing interface, and then select the Word interface diagram. Use the same method as above, and insert an action for it. The same is to set the "mouseover" effect, but make it super For the linked slide, just set it to return to the first slide.
In the same way, create corresponding magnifying glass effects for several other tags in the picture Word, and set up hyperlinks to each other to complete the dynamic magnifying glass effect at the beginning of the article.
Create a dynamic map
Extending the above method, we can also make an interesting dynamic map. As long as the cursor is pointed at a certain area, the area will automatically be enlarged or become a different color from other areas.
The production method is exactly the same, but the details are different. You only need to extract the area you want to display dynamically, and perform discoloration or magnification processing (in the above example, it is a three-dimensional magnifying glass effect). I won’t repeat the specific steps. Here I will show you the effect animation made by the editor.

Articles are uploaded by users and are for non-commercial browsing only. Posted by: Lomu, please indicate the source: https://www.daogebangong.com/en/articles/detail/zhi-na-kan-na-miao-yong-PPT-tu-pian-ju-bu-fang-da.html
 支付宝扫一扫
评论列表(196条)
测试