Task: Make a resume (form creation)
Task Objective
Clarify the design ideas and use the relevant commands of the [Insert] tab in the Word ribbon to create some more complex posters or electronic newspapers.
Task description
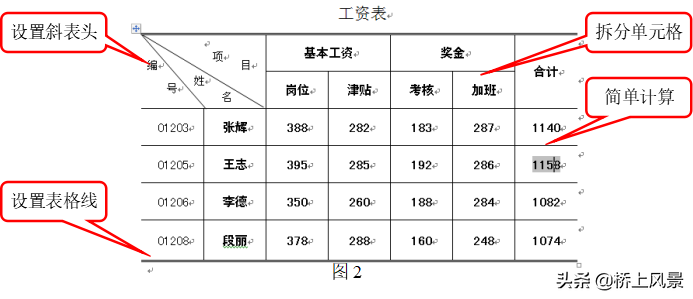
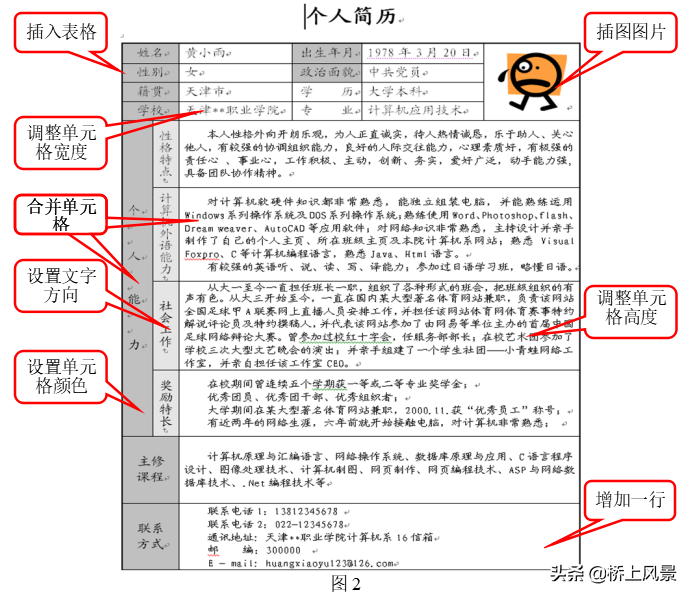
Master the usage of the functions shown in Figure 1 and create a resume similar to that shown in Figure 1 and a salary table shown in Figure 2.
Implementation plan
1) Open the Word program, create a new blank document, name the new document and save it;
2) Insert a table in the document editing area
3) Enter content and merge cells
4) Draw an inclined table header and adjust cell width and height
5) Split cells
6) Simple calculation
7) Set the text direction of the cell
8) Set cell color
9) Set table lines
10) Insert pictures
The video explains in detail how office workers use PPT triggers for human-computer interaction - Xigua Video https://www.ixigua.com/i6726042633723969544/
Specific steps:
1. Create a new document and save the document with a name
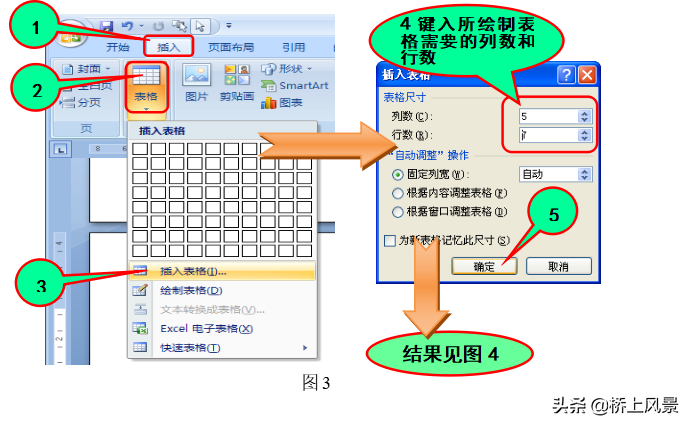
2. Insert a table in the document editing area
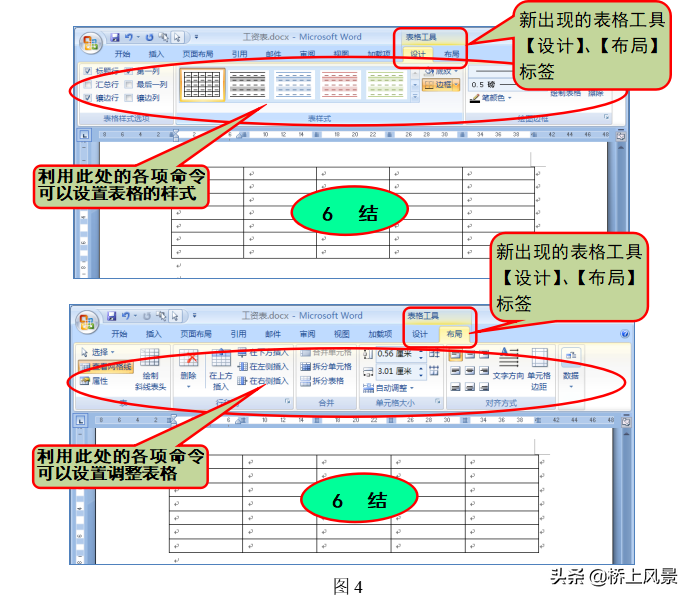
Follow the steps shown in Figure 3 to insert a table
3. Enter content and merge cells
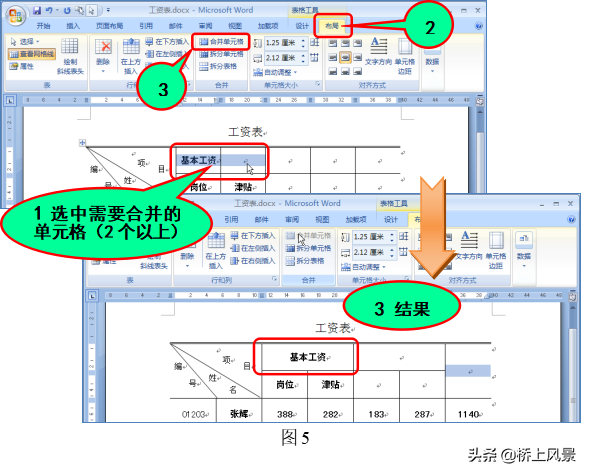
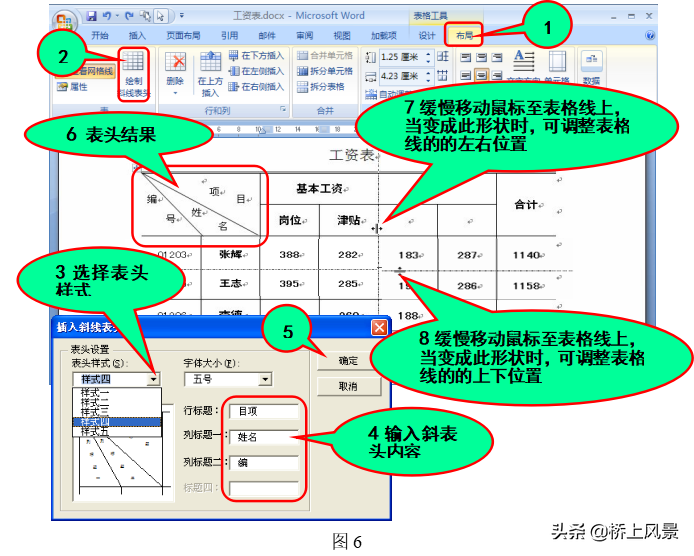
4. Draw an inclined table header and adjust the cell width and height.
According to the steps shown in Figure 5, you can draw a slanted header and adjust the height and width of the cell.
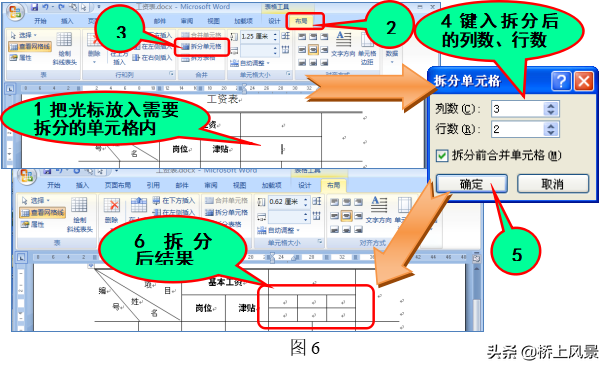
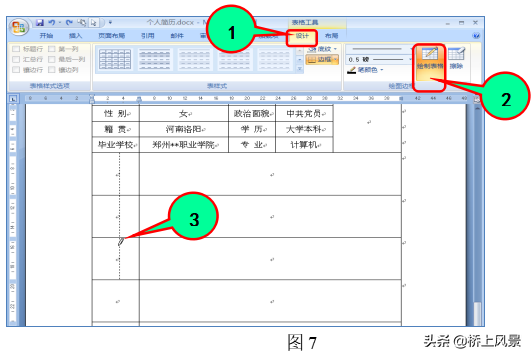
5. Split cells
Follow the steps shown in Figure 6 to complete the splitting of cells. It can also be split by directly drawing lines in Figure 7. The split cells in Figure 6 are uniform, while the cells drawn in Figure 7 are unevenly wide.
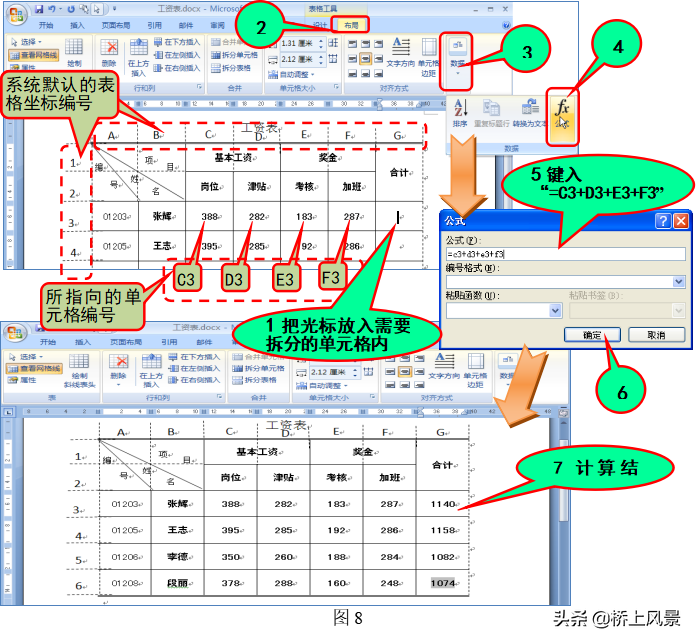
6. Perform simple calculations
The table in Word2007 can perform some simple calculations such as "sum" and "average". According to the steps shown in Figure 8, the total salary of each person can be calculated.
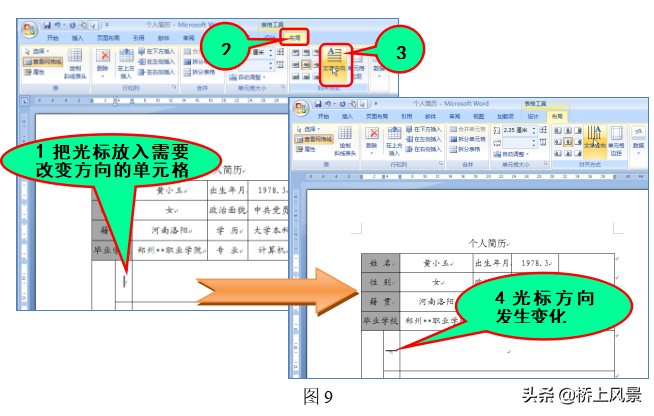
7. Set the text direction of the cell
Follow the steps shown in Figure 9 to complete the setting of the text direction.
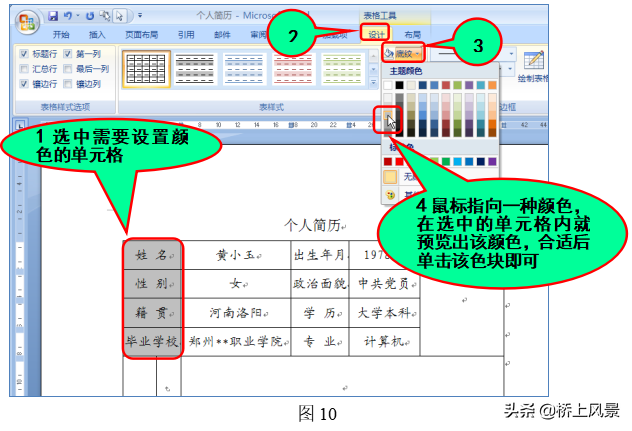
8. Set cell color
Follow the steps shown in Figure 10 to complete the setting of cell color.
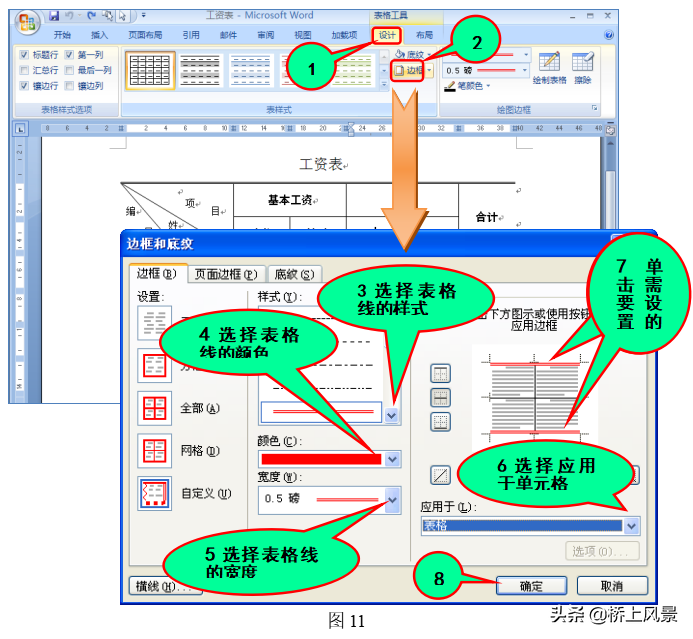
9. Set table lines
Follow the steps shown in Figure 11 to complete the setting of the table lines.
10. Insert pictures
Inserting a picture into a table is the same as inserting a picture into a document. First place the cursor into the cell where the picture needs to be inserted, and then insert the picture.
Articles are uploaded by users and are for non-commercial browsing only. Posted by: Lomu, please indicate the source: https://www.daogebangong.com/en/articles/detail/zai-word-zhong-ru-he-zhi-zuo-ge-ren-jian-li-zhi-chang-gao-xiao-cao-zuo.html
 支付宝扫一扫
评论列表(196条)
测试