Due to the complex lighting at the demo conference, using a dark background can improve the contrast of the image:
The light-colored background can easily cause visual fatigue for the audience and affect the shooting effect. The bright screen behind the speaker is a huge light source, creating backlighting, and the photos can easily turn into "silhouettes":

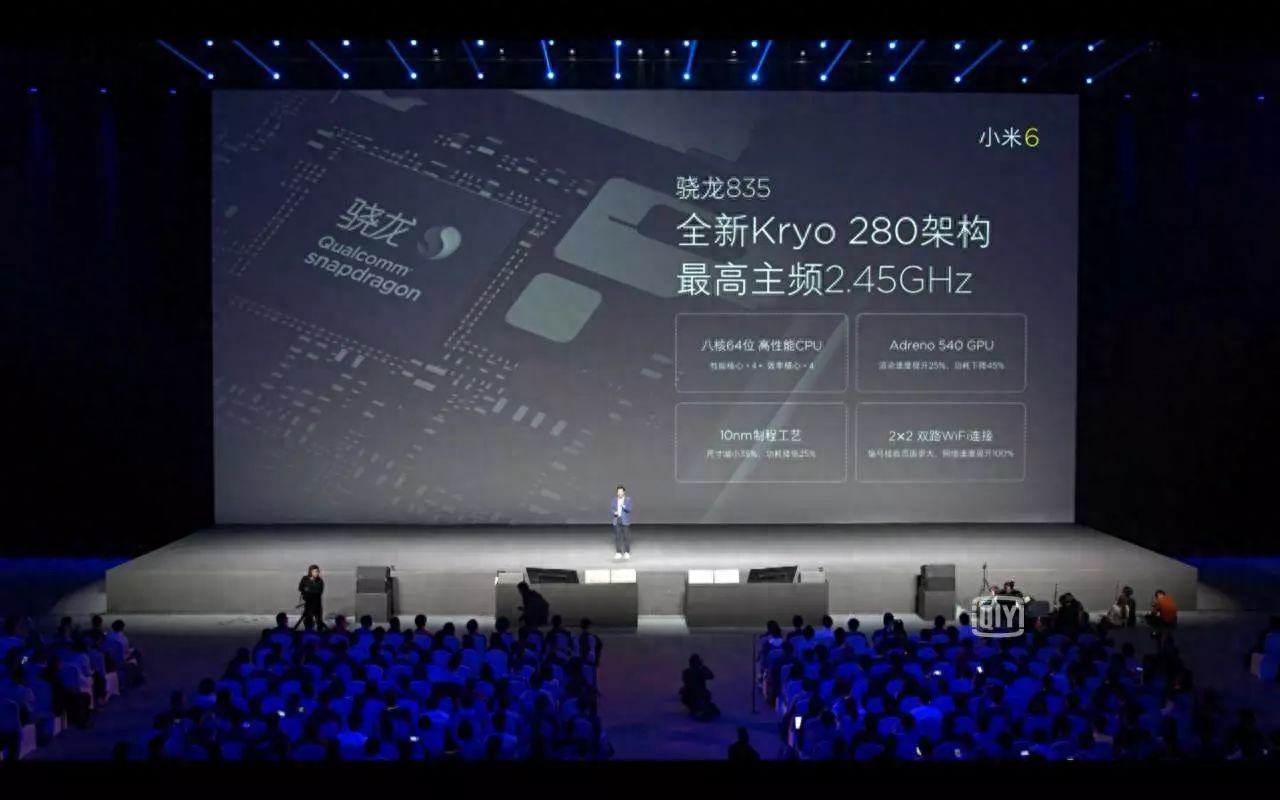
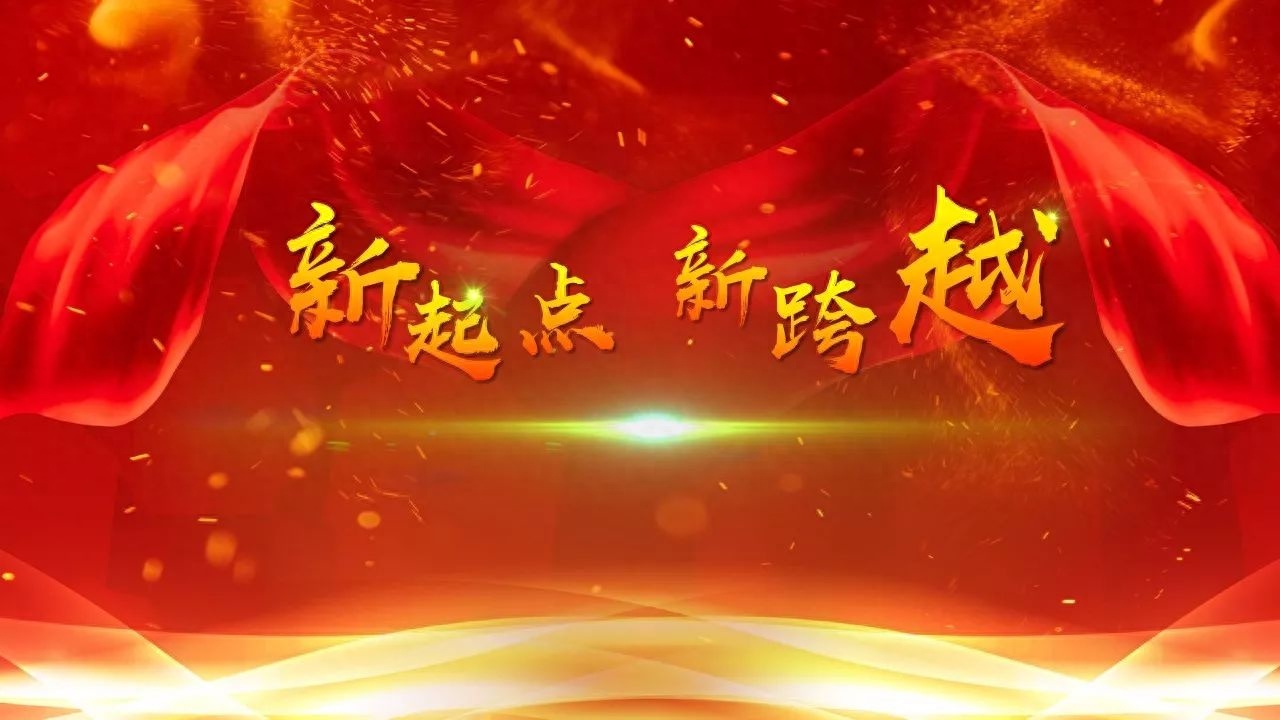
In addition to using color contrast to highlight key content on a dark background, you can use glare effects to make the page look cooler, such as the glare on the text in the picture below:

The contrast between light and dark colors makes the whole picture more impactful. The highlights in the background are accomplished using "light". Light and dark are a very extreme contrast effect, just like lighting a match in a dark room, it will have a strong impact:

How to apply glare effect in PPT? Here are two methods for you:
1 material method
This method is relatively simple, just insert glare picture material directly in the corresponding position. Since the picture material has been cut out and is in PNG format with a transparent background, it can be placed directly on top of text or pictures:

You can find a large amount of glare materials on Huabian.com or Qianku.com.
Glare materials are generally placed in text corners and content separation:
2 plug-in method
The material method is convenient and efficient to implement, but it still looks a bit rough in detail. Let me explain to you how to use PS plug-in to achieve more realistic glare effects.
PScomes witha great glare filterLensFlare
First, save the PPT page as a picture in jpg format.
Then, open this image in PS, click [Filter] - [Rendering] - [Lens Flare...] in order, and the settings window will pop up:
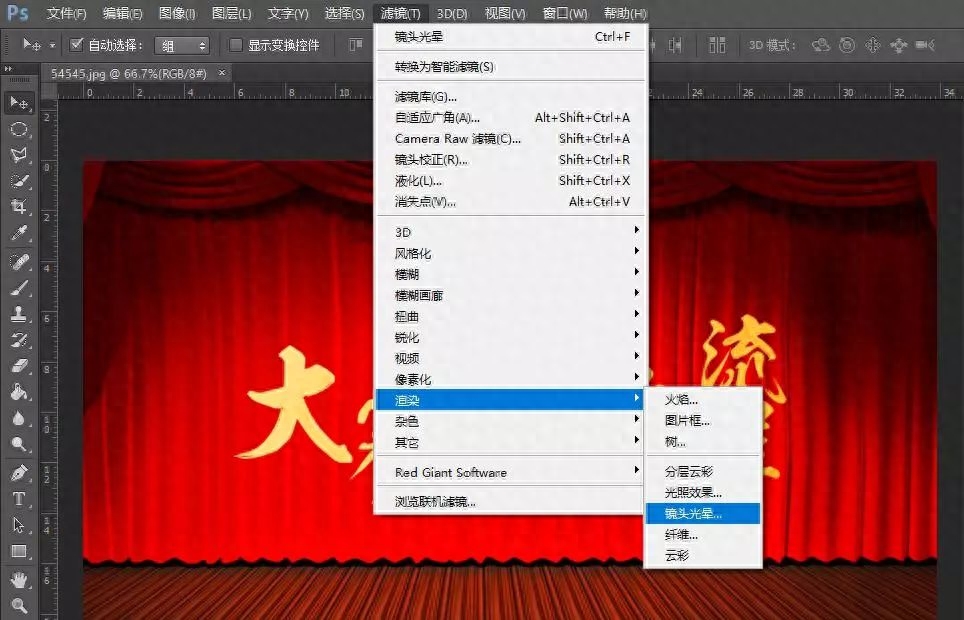
4 lens types are provided here, namely: 50-300mm zoom, 35mm focus, 105mm focus and cine lens. Each lens simulates real light effects:

Move the light effect position in the preview window, adjust the brightness and lens type as needed, and simulate a real glare effect:

One thing to note: this operation is to modify the original image directly. Please make sure that the original image is backed up before saving. Remember!
However, the parameters provided by PS’s own glare filter are still limited. If you want to get more special effects, it is recommended to use the third-party PS plug-in Knoll Light Factory (Chinese name: Light Factory, please download the address from Baidu):
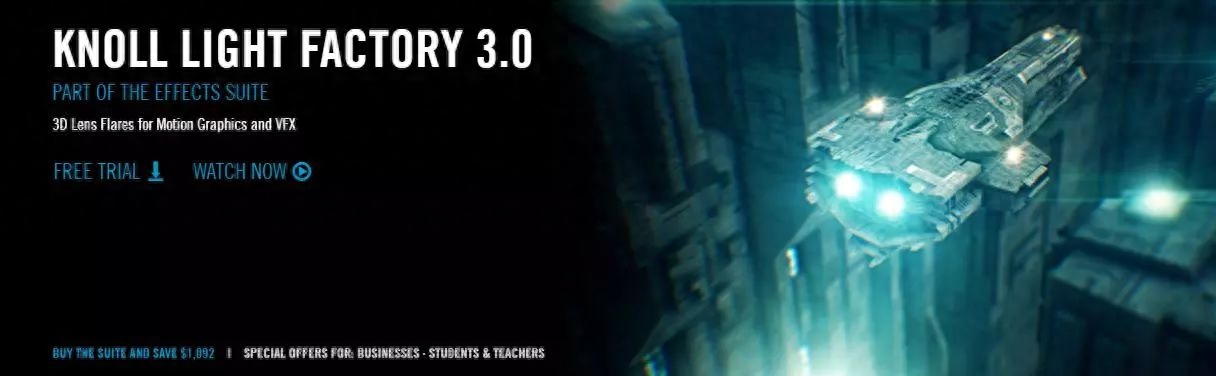
This is a very professional light effect filter that can be used to create various light sources and halo effects. The effect is more realistic and natural. It is equivalent to an enhanced version of the built-in LensFlare filter in Photoshop:
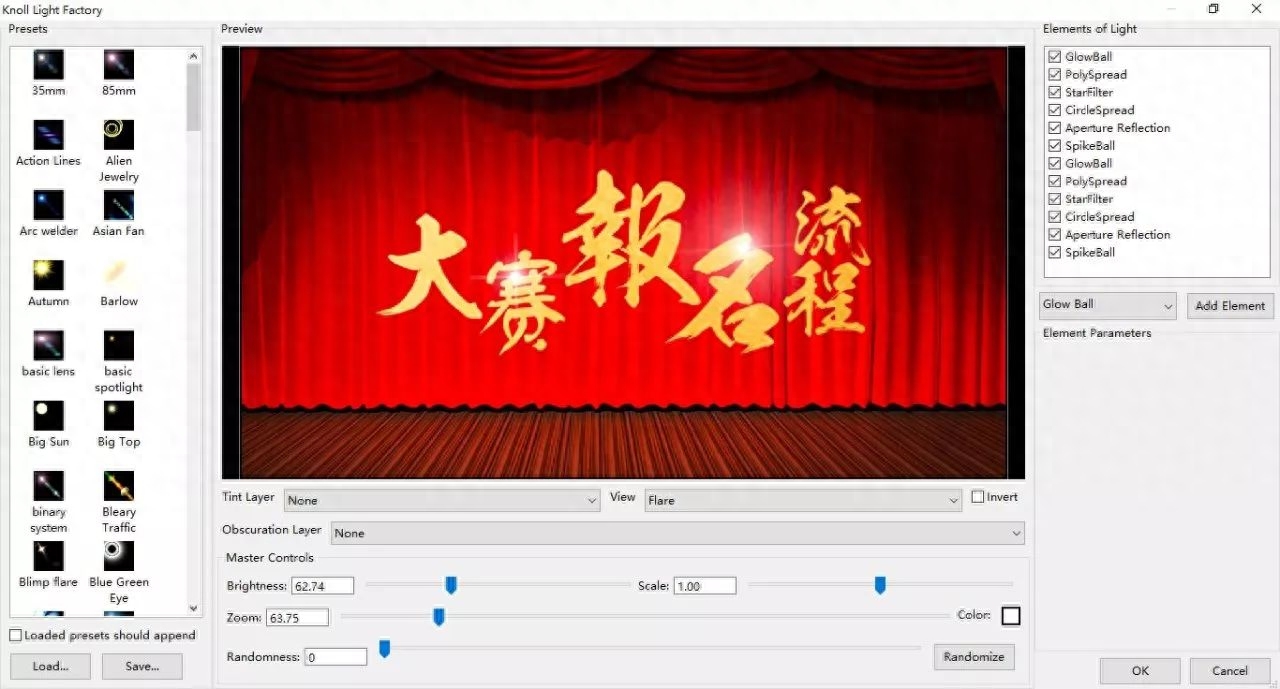
This filter provides dozens of light sources and halo effects, as well as a real-time preview function to facilitate our viewing of the effects. Effects can be superimposed on each other, and the combined effects can be stored and loaded directly for use next time, which is very convenient:

This plug-in can also achieve post-processing special effects for images, such as backlighting, sunny atmosphere, etc. It is a very practical post-processing tool:


Articles are uploaded by users and are for non-commercial browsing only. Posted by: Lomu, please indicate the source: https://www.daogebangong.com/en/articles/detail/yue-ye-yue-mei-li-wei-PPT-jia-yi-dao-xuan-mu-di-guang.html
 支付宝扫一扫
评论列表(196条)
测试