One slide needs to display multiple pictures. How can the layout be better?
Share four here A graphic layout method

01
Picture splicing

Click [Insert 】-[Picture], select from local, hold down shift to select the picture to be added, click [Open]
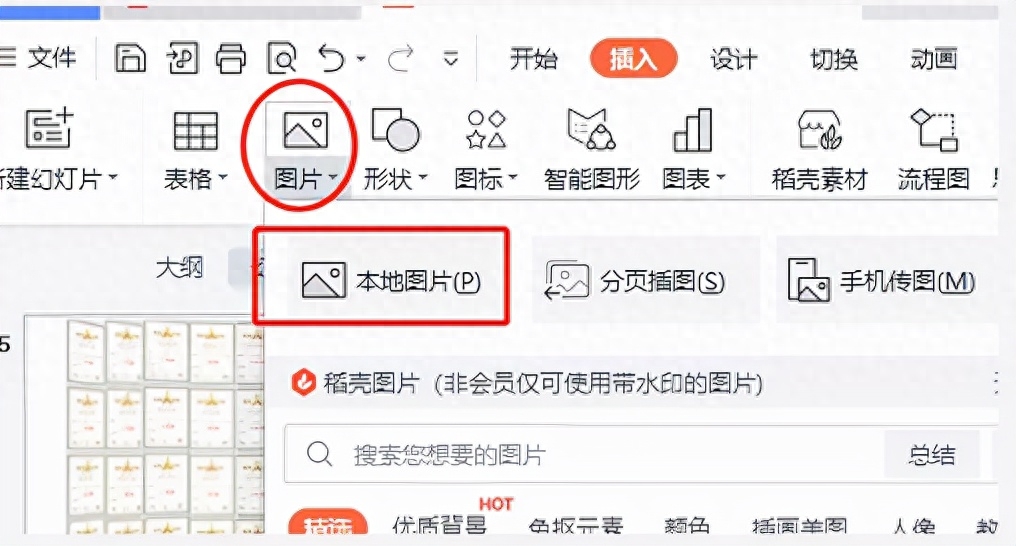
Then, select the [Image Stitching] function.

There is a difference here You can choose the number of pictures. I am adding four pictures here, so choose four as the number of pictures, and then select the picture style you want, and you can layout it with one click.

02
Multi-image carousel

Multiple image wheels Play, mainly through carousel animation to achieve image display effect.
Click [Insert ]-[Picture], select [Multiple Picture Carousel]
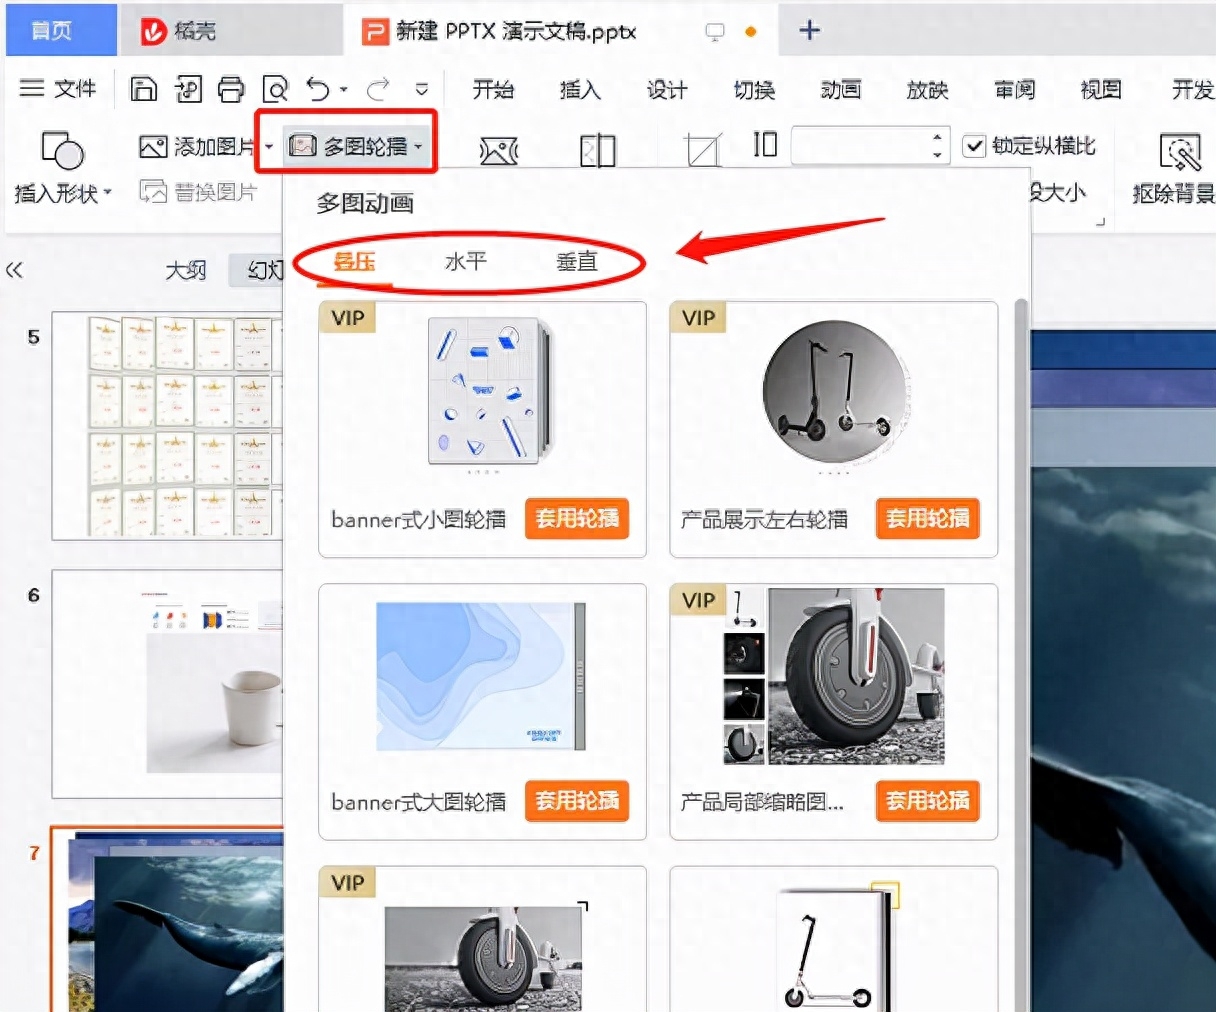
There are three types here The animation forms are overlay, horizontal , vertical.
I choose here is "horizontal", and a carousel animation is selected from it. After double-clicking the carousel area, the multi-image carousel editing box will automatically jump out on the right.
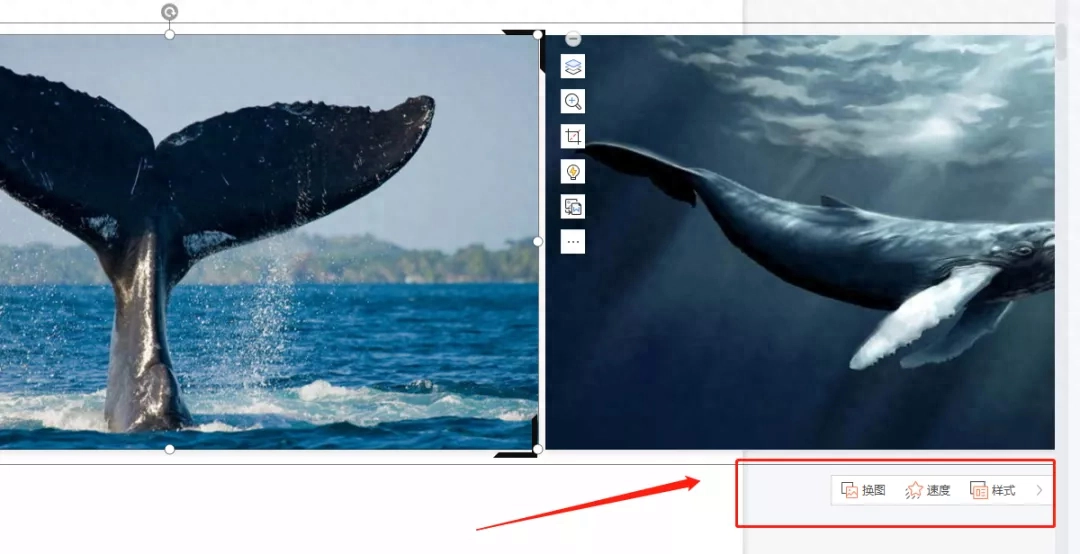
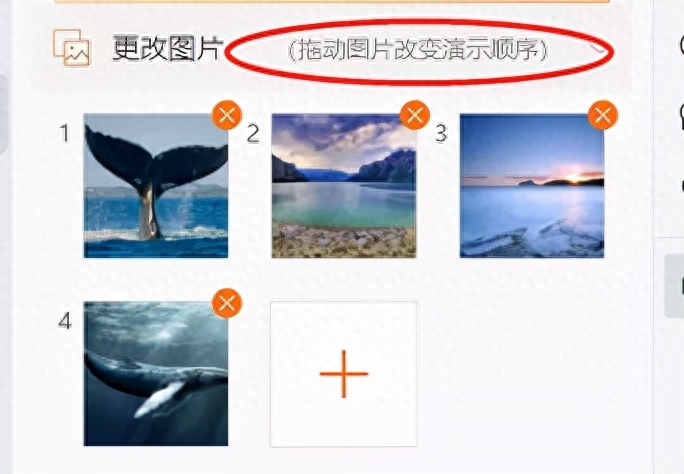
In the edit box , you can click [Change Picture] to enter the "Change Picture" interface, where you can add pictures or delete existing pictures at any time;
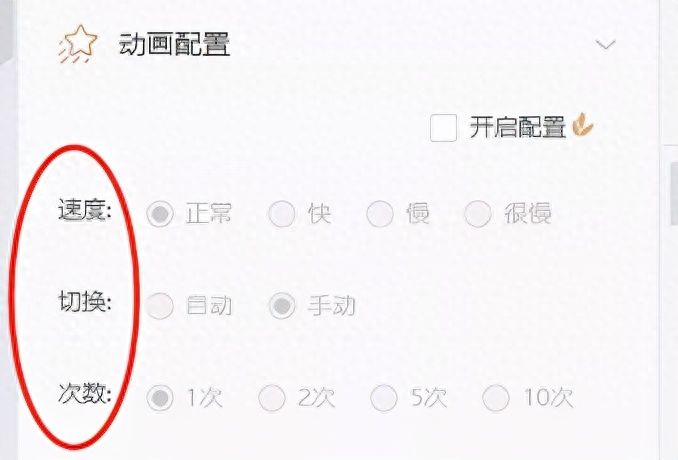
[Animation configuration 】 function can adjust the playback speed, switch between automatic and manual playback, and set the number of playback times. This feature requires WPS membership to experience.
As for [Others Carousel] function can quickly change the playback style.


03
Smart graphics

Previous issue , we shared the layout forms of image splicing and multi-image carousel. In this issue, we share smart graphics with everyone.
Come and see operate.
Click [Insert 】-[Smart Graphics] In the pop-up dialog box, we can see that smart graphics is a very comprehensive system.

Depending on the function , including lists, processes, relationships, loops, juxtapositions, timelines, etc.
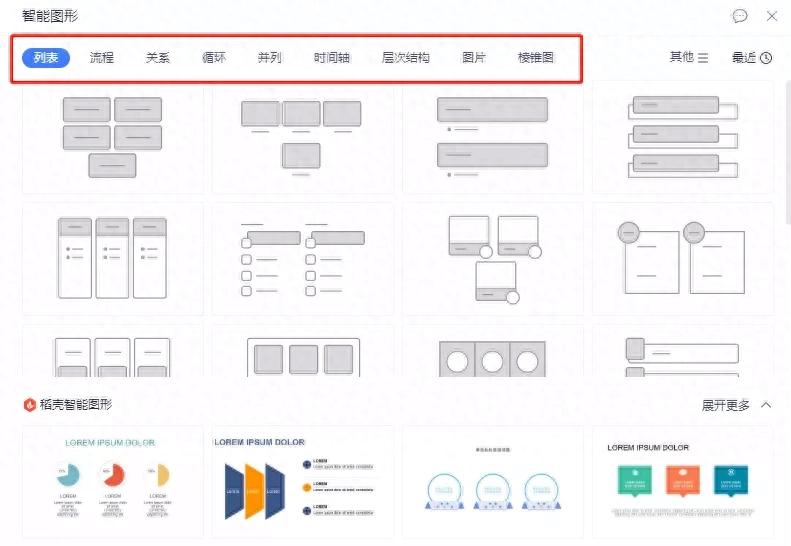
We can Choose the graphic that meets your needs. For example, if we want to reflect the process structure, we can click "Process".
In process options Select the appropriate graphic style below the card and click OK.
After selection Style also supports further optimization and adjustment.
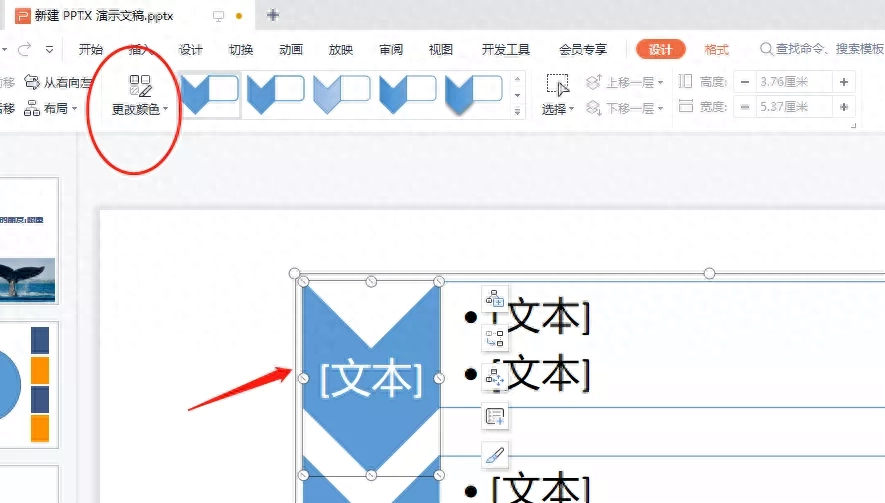
For example, we For this selected style, if you want to modify the color of the graphic, you can select the graphic, click [Change Color], and then choose the coloring you are satisfied with.
Include this style The overall size can be scaled and adjusted.
In the production process , if you want to add items, you can select the graphic, then click [Add Item] on the menu bar that pops up on the right, and choose to add before, after, or above and below.

Want to delete Or change the location of the project, or adjust the layout through promotion/demotion, forward/backward movement.
Picture splicing, Multi-image carousels, smart graphics, and the typesetting styles that come with the system are simply not very efficient for lazy people who don’t want to design.

04
Customized layout< /span>

The first two issues The graphic layout formats shared are all based on templates, which is simple and efficient, but for some friends who have ideas, it is of course better to design by yourself!
Preset in advance I really want the layout style, and then combine it by inserting different shapes, and finally fill in the picture to complete the layout.
Today’s sharing four The most common graphic style, simple and easy to use, learn it quickly.
①Arrange up and down
Below the text Pictures, neatly arranged horizontally
This type of layout Most commonly used, simple, elegant and attractive.
②Arrange left and right

Left picture right Text or pictures on the left and pictures on the right, the pictures can be displayed in a staggered manner to reflect a sense of staggeredness.
③Arrangement of pictures and text


Picture placement All around, leave a blank area in the middle for text.
Or in overlapping form, with pictures overlapping and text on the top.
④Diagonal layout

Two pictures Make a diagonal line, leaving the diagonal corners blank for text
For example, introduction For the animal whale, we can introduce the characteristics of the whale through a full picture of the whale + a detailed picture of the tail, and text in the blank area.
These four The layout style can basically solve various picture layout problems encountered in daily life, and the overall atmosphere is sufficient.
You got it ?
More PPT For operational skills, please follow us.
Articles are uploaded by users and are for non-commercial browsing only. Posted by: Lomu, please indicate the source: https://www.daogebangong.com/en/articles/detail/yi-jian-gao-ding-PPT-zui-quan-tu-xing-pai-ban-gong-lve.html
 支付宝扫一扫
评论列表(196条)
测试