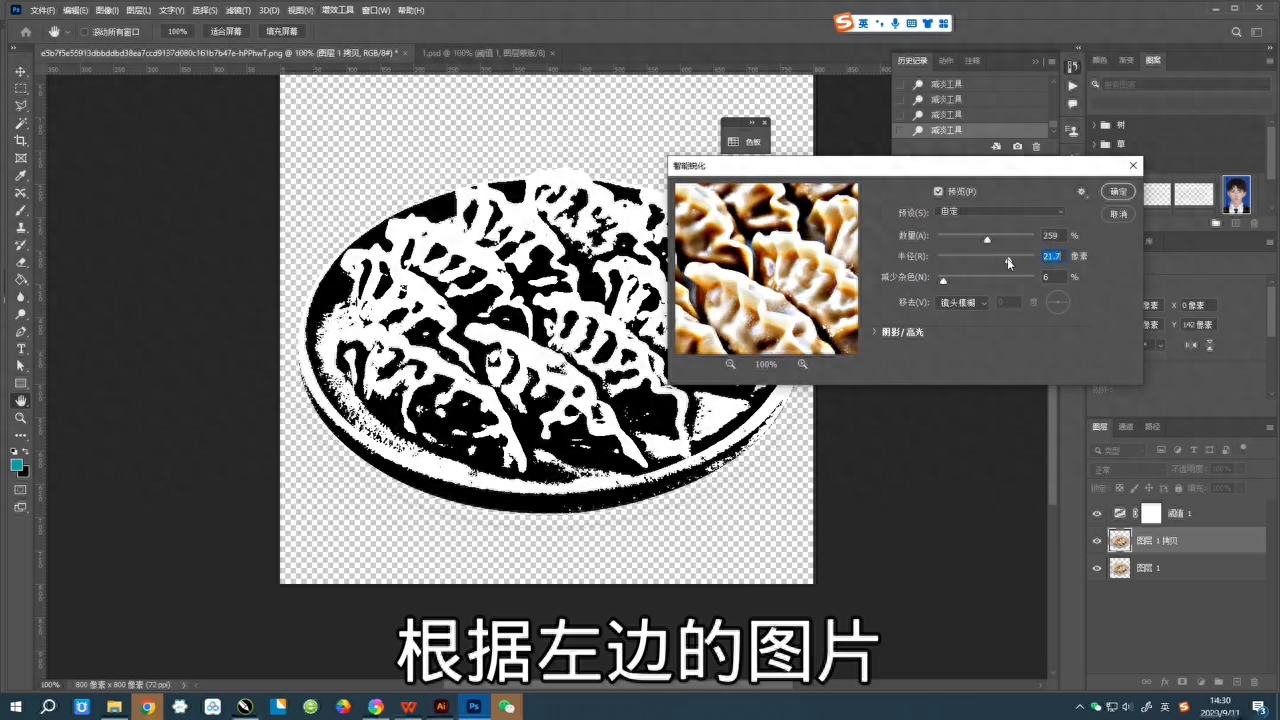
How is this retro LOGO made? Let’s put it into practice together.
1. First, duplicate a layer and select Threshold.
2. Next, pull the threshold to the right and select the image to be processed.
3. Then, use the burn tool to deepen the parts that need to be emphasized, as shown in the picture.

4. Next, use the Dodge tool to dodge the parts that need to be weakened, and select "Filter" - "Sharpen" - "Smart Sharpen". Adjust the sharpening degree, the value is as shown in the figure.
5. According to the picture on the left, click "OK", directly stamp the layer, drag the picture into the AI file, and select "Window" - "Image Tracing".

6. Select the image, then open the "Advanced" option, adjust the parameters, as shown in the figure, click "Ignore White", then click "Preview", and finally click "Extend" to confirm.
7. Finally, fill it with a retro blue color, adjust the size, and drag it into the prepared text, and a retro LOGO is completed.
Articles are uploaded by users and are for non-commercial browsing only. Posted by: Lomu, please indicate the source: https://www.daogebangong.com/en/articles/detail/ps-tu-pian-zhuan-fu-gu-logo-jiao-cheng-ping-mian-she-ji-ji-qiao-gan-huo-fen-xiang.html

 支付宝扫一扫
评论列表(196条)
测试