In actual scientific research or projects related to deep learning, it is often necessary to reproduce other people's code on the local machine. However, due to the incompatibility between the various versions of Python and Pytorch, The most troublesome thing is the environment configuration problem of deep learning, especially when GPU is needed for acceleration. After configuring this, it affects the previous project. How to solve it? Please read this tutorial for this pain point issue.
Compared with other tutorials on the Internet, the biggest advantage of the method shown in this tutorial is that it can execute projects with different environment configuration requirements. At this time, there is no need to repeatedly install/uninstall the computer's native CUDA program, which can greatly save environment configuration time. More importantly, changing the graphics card configuration will not affect the normal operation of other software or programs.
This article finally verifies the effectiveness of this method through the deep learning introductory case handwritten font recognition (MNIST) program.
- Anaconda
Anaconda is a free open source distribution for scientific computing and data analysis, including Many commonly used Python data science libraries and tools, such as NumPy, Pandas, Matplotlib, SciPy, etc. Anaconda provides a package manager that allows users to easily install, update, and remove packages. Using Anaconda to configure the environment has the following advantages over configuring the environment directly:
- Convenient management of dependencies: Anaconda’s own package manager Conda can easily install and manage Python packages and their dependencies, avoiding the need to manually install dependencies. cumbersome process. At the same time, using Conda, you can easily create and delete virtual environments, avoiding the problems of environmental pollution and version conflicts.
- Contains commonly used data analysis and scientific computing tools: Anaconda has many data analysis and scientific computing libraries installed by default, such as NumPy, Pandas, Matplotlib, SciPy, etc. These libraries are frequently used tools in data analysis and scientific computing. Using Anaconda can avoid the tedious process of manually installing these libraries and dependencies.
- Cross-platform support: Anaconda can run on multiple operating systems such as Windows, Linux and MacOS, so the same Python code and dependencies can be shared across different development environments , avoiding compatibility issues caused by different operating systems.
In contrast, directly configuring the environment requires manual installation of dependencies and environment configuration, which is relatively cumbersome and prone to problems such as version conflicts and environmental pollution. . Therefore, using Anaconda to configure the environment can complete environment configuration more conveniently and quickly, improving development efficiency and code maintainability.
- Pytorch
PyTorch is a Python-based open source machine learning framework developed by Facebook, mainly used for Build neural network and deep learning models. PyTorch provides a flexible tensor calculation library that enables efficient numerical calculations on GPUs and CPUs, and supports automatic derivation and dynamic calculation graphs. PyTorch has been widely used in the field of deep learning and is used in many fields such as image classification, target detection, speech recognition, and natural language processing. At the same time, PyTorch is also used in the research field, and many of the latest research results are implemented based on PyTorch.
- Anaconda3 installation: relatively easy, you can refer to other online tutorials.
- Environment configuration based on Anaconda3
1. Choose to run Anaconda Prompt as administrator
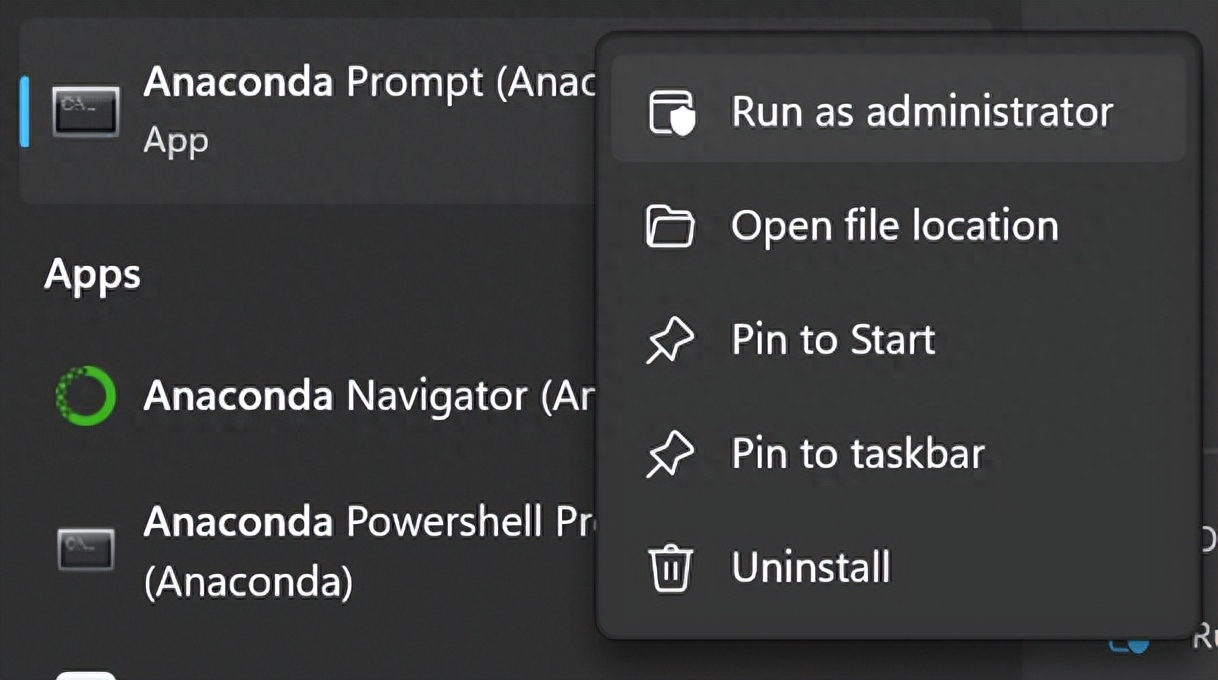
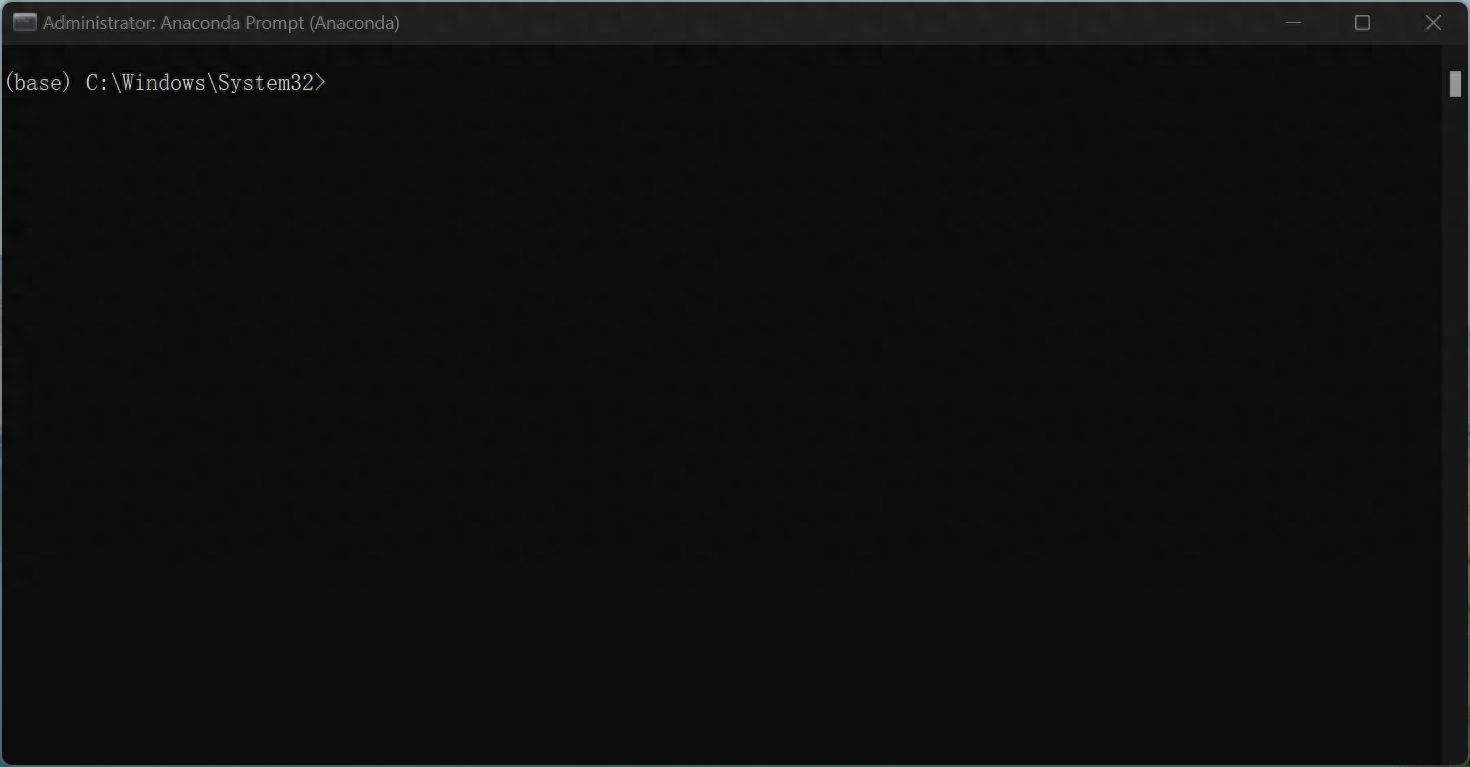
The front of the command line after opening is (base), "base" refers to the Python environment created by default. When using Anaconda to create a new Python environment, you can choose the basis of the "base" environment Create a new environment on or from scratch. The newly created environment will not contain the default packages and tools from the "base" environment, but the functionality of the environment can be extended by installing new packages and tools. The purpose of writing this article is to prevent various python projects from affecting each other, so try not to do any changing operations in the base environment!
2. Next, consider what kind of environment you want to create. This article uses creating an environment using python3.6.2 and pytorch 1.7 as an example. (The python version and the pytorch version here, as well as the subsequent cudatoolkit version, need to correspond)
Input:
conda create --name pytorch17 python==3.6.2The purpose of this code is to create a file named "pytorch17" Environment, using python=3.6.2
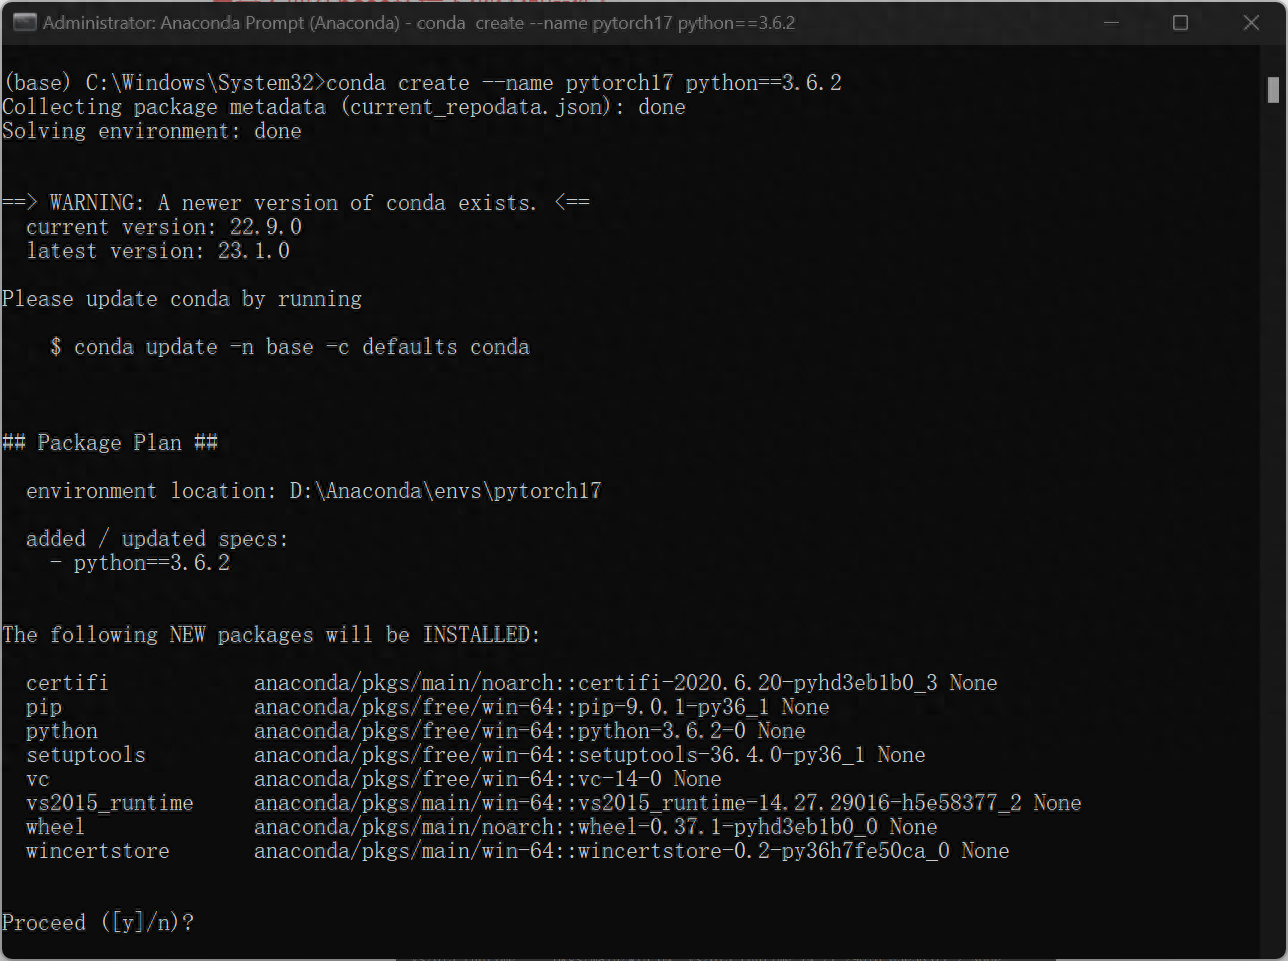
Confirm installation, enter y
Then download and install
Enter after installation is complete
conda activate pytorch17Enter the pytorch17 environment just created. At this time, you find that the front of the command line changes to (pytorch17), and then type : conda list, displays the python packages installed by pytorch, and the environment has been created.
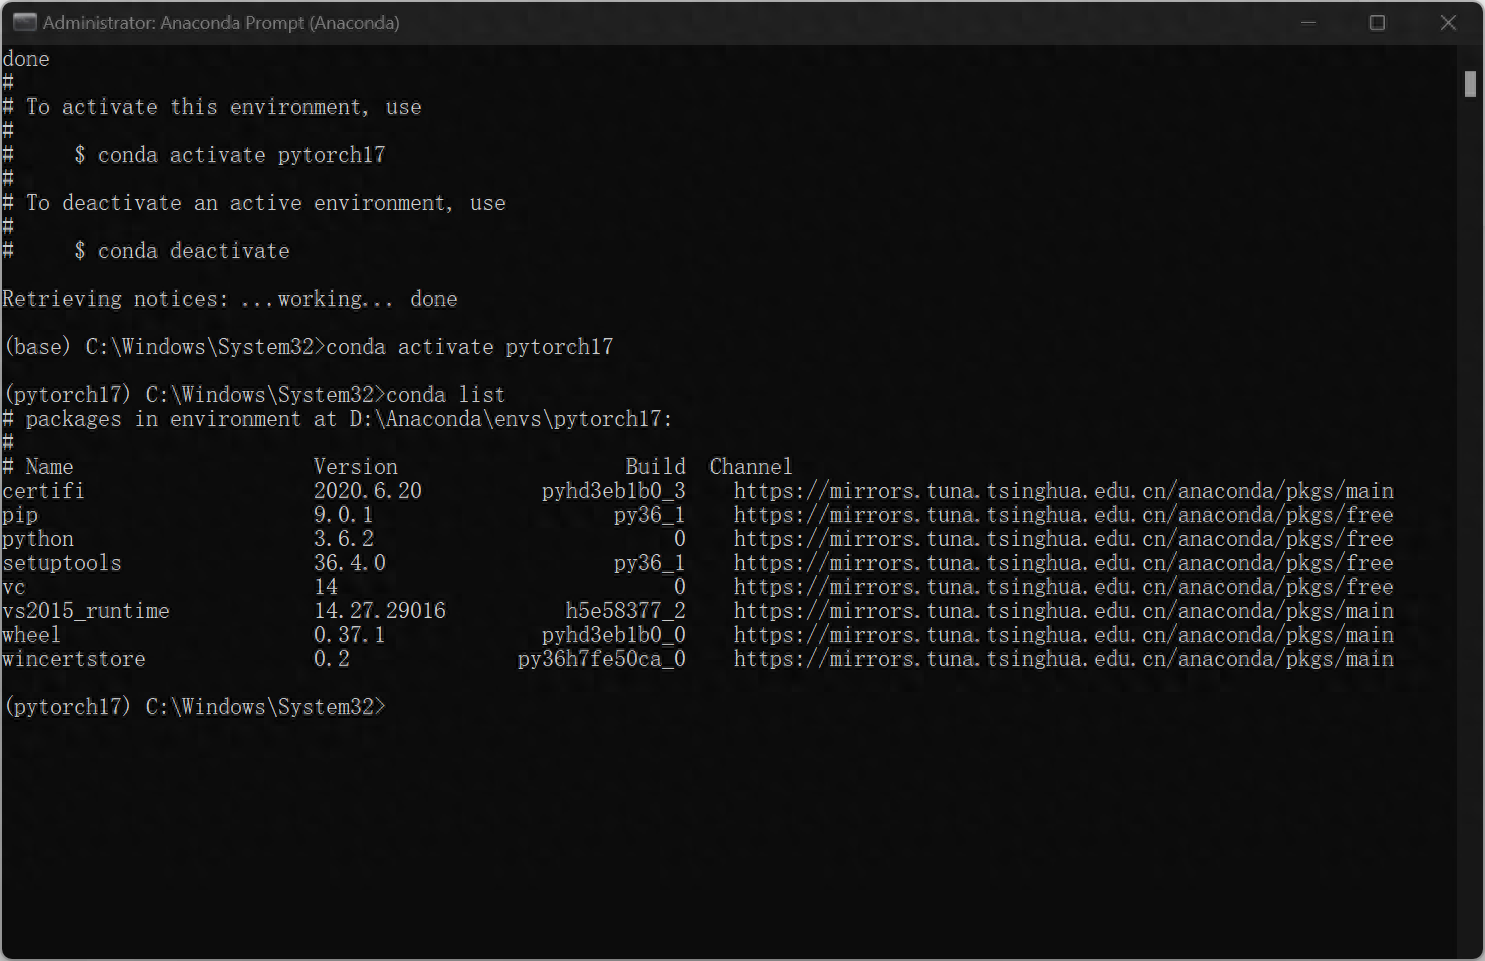
3. Next configure Pytorch-GPU. In the example, the pytorch version the author wants to create is 1.7.0, and the cuda version is 11.0
Enter:
conda install pytorch==1.7.0 torchvision==0.8.0 torchaudio==0.7.0 cudatoolkit=11.0 -c pytorchIf you want to install different versions of pytorch and cuda, you can check the website: https://pytorch.org/get-started/previous-versions/
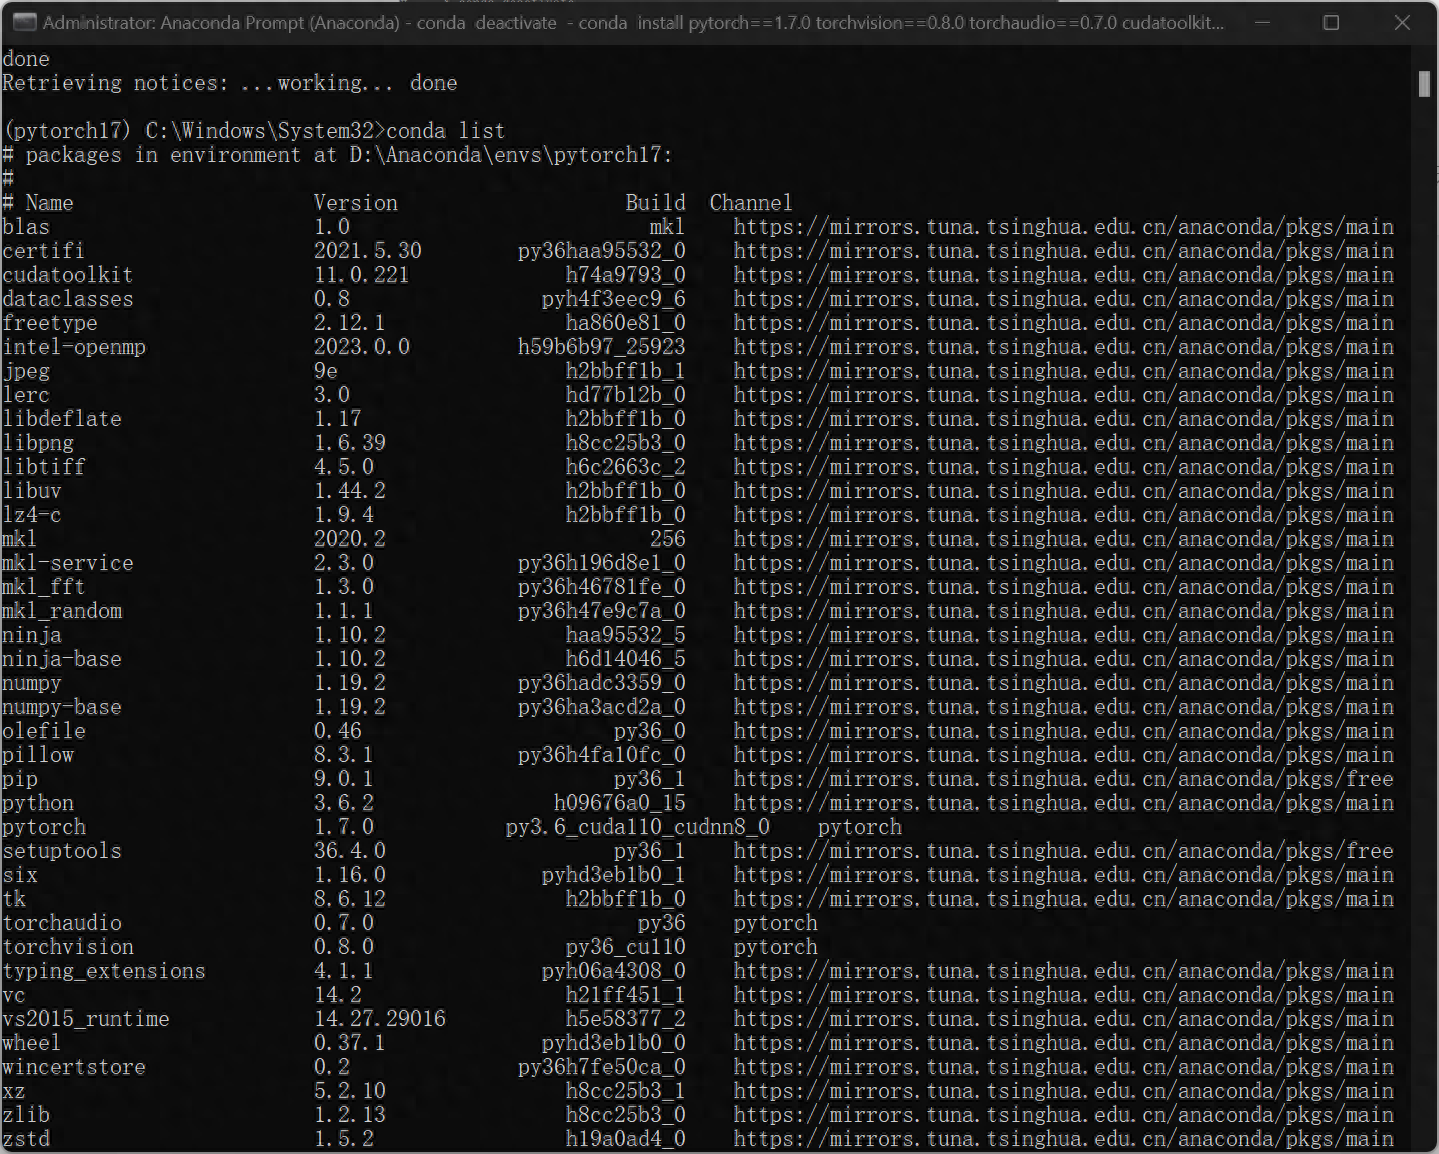
4. Verify whether the GPU is working
python>>import torch>>torch.cuda.is_available()Returning True means the GPU is working normally.

5. Configure the environment in pycharm (the pycharm installation process is omitted)
In the process of creating a new project, select the existing interpreter, and then select the pytorch17 you just created, as shown in the figure:
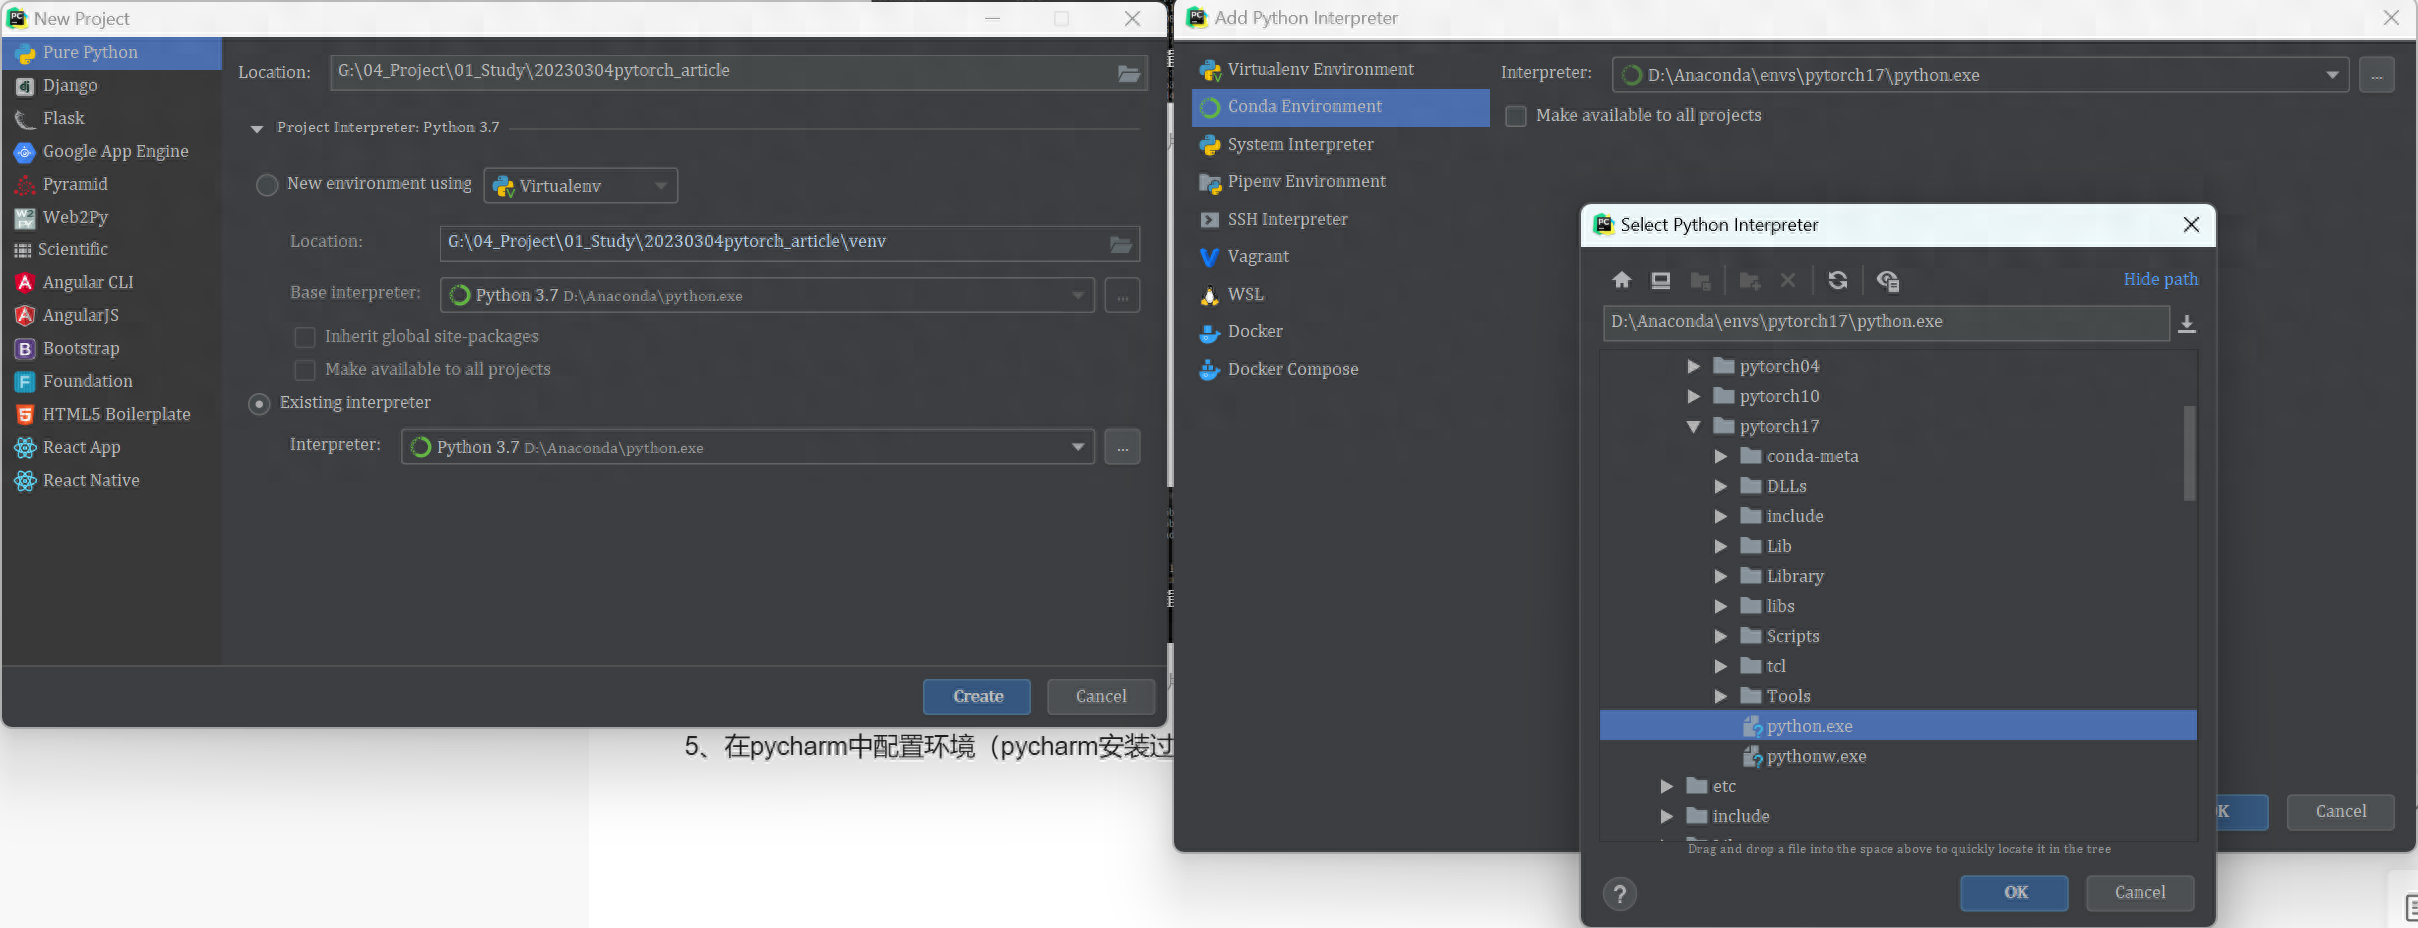
At this point, you can start programming.
6. The handwriting font recognition verification environment is correct
Create file:
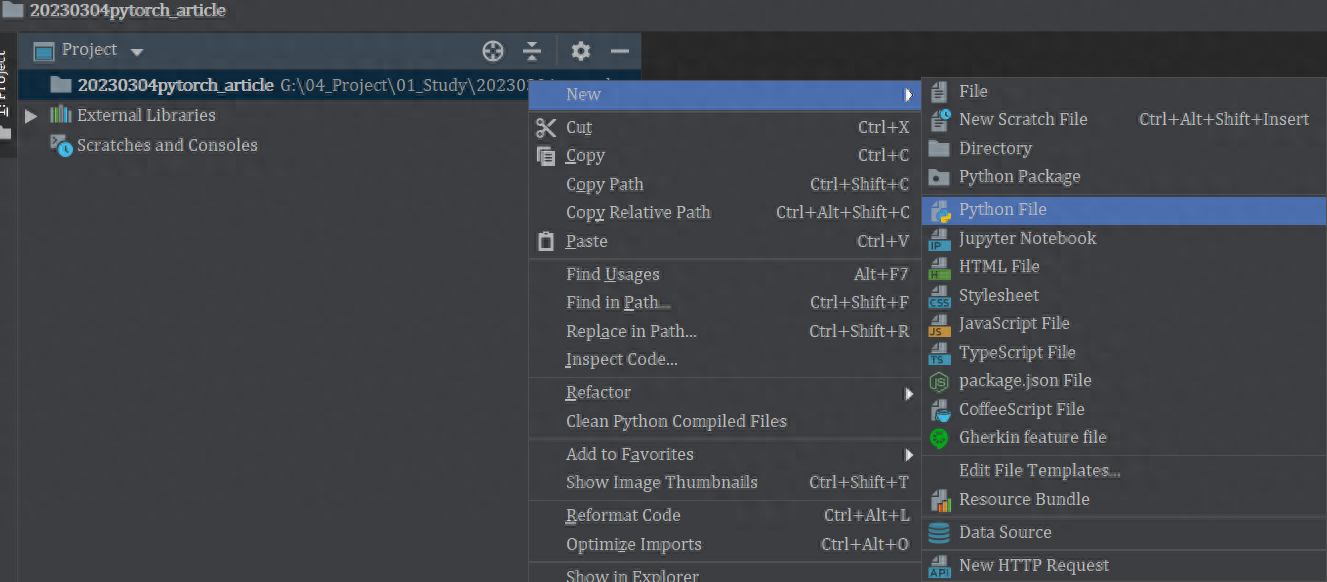
Copy this code and execute it (if you want to get all the code, please follow the official account: Control what I think VS Control and balance)
import torchimport torch.nn as nnimport torch.nn.functional as Fimport torch.optim as optimfrom torchvision import datasets, transformsBATCH_SIZE = 1024*50 # Each batch of data DEVICE = torch.device("cuda" if torch.cuda.is_available() else "cpu")print(torch.cuda.is_available())EPOCHS = 20 # Rounds of training data set pipeline = transforms.Compose([ transforms.ToTensor(), # Convert the image into tensor transforms.Normalize((0.1307,), (0.3081,)) # Reduce model complexity, regularize]) from torch.utils.data import DataLoader# Download the dataset train_set = datasets.MNIST("data", train= True, download=True, transform=pipeline)test_set = datasets.MNIST("data", train=False, download=True, transform=pipeline)# Load data train_loader = DataLoader(train_set, batch_size=BATCH_SIZE, shuffle=True)test_loader = DataLoader(test_set, batch_size=BATCH_SIZE, shuffle=True)# Build network class Digit(nn.Module): def __init__(self): super().__init__() self.conv1 = nn.Conv2d(1, 10, 5 ) self.conv2 = nn.Conv2d(10, 20, 3) self.fc1 = nn.Linear(20 * 10 * 10, 500) self.fc2 = nn.Linear(500, 10) def forward(self, x) : input_size = x.size(0) x = self.conv1(x) x = F.relu(x) x = F.max_pool2d(x, 2, 2) x = self.conv2(x) x = F.relu (x) x = x.view(input_size, -1) x = self.fc1(x) x = F.relu(x) x = self.fc2(x) output = F.log_softmax(x, dim=1) # After calculating the classification, the probability value of each number return outputmodel = Digit().to(DEVICE)optimizer = optim.Adam(model.parameters())def train_model(model, device, train_loader, optimizer, epoch): # Model Training model.train() for batch_index, (data, target) in enumerate(train_loader): # Deploy to device data, target = data.to(device), target.to(device) optimizer.zero_grad() output = model (data) loss = F.cross_entropy(output, target) # Backpropagation loss.backward() optimizer.step() if batch_index % 3000 == 0: print("Train Epoch : {} \t Loss : {:. 6f}".format(epoch, loss.item()))def test_model(model, device, test_loader): model.eval() correct = 0.0 test_loss = 0.0 with torch.no_grad(): for data, target in test_loader: data, target = data.to(device), target.to(device) output = model(data) test_loss += F.cross_entropy(output, target).item() pred = output.max(1, keepdim=True) [1] correct += pred.eq(target.view_as(pred)).sum().item() test_loss /= len(test_loader.dataset) print("Test Average loss : {:.4f},Accuracy : { :.3f}\n".format(test_loss,100.0 * correct / len(test_loader.dataset)))for epoch in range(1, EPOCHS + 1): train_model(model, DEVICE, train_loader, optimizer, epoch) test_model( model, DEVICE, test_loader)The code starts to run and downloads the MNIST handwritten font recognition data set.

Training starts:

Use win+R at this time, enter cmd, and then enter nvidia-smi to check the status of the graphics card. The graphics card is working.
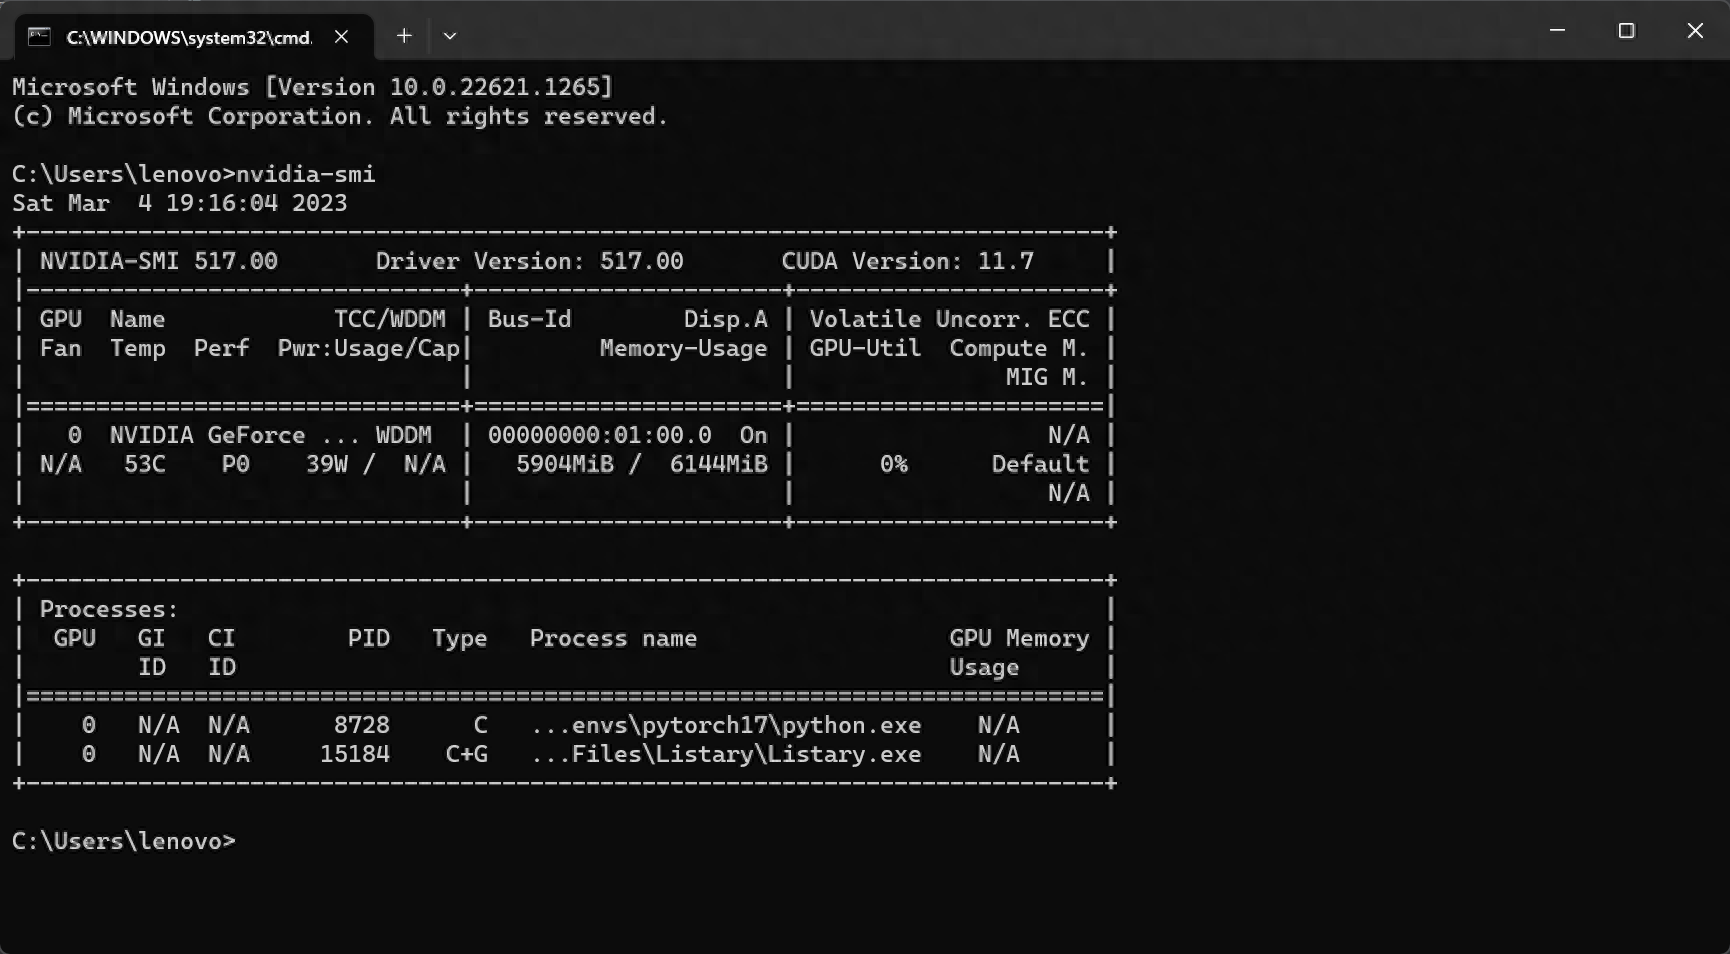
Now that everything is done, you can focus on writing code.
7. If you want to delete the configured environment, reopen Anaconda Prompt and enter the following code
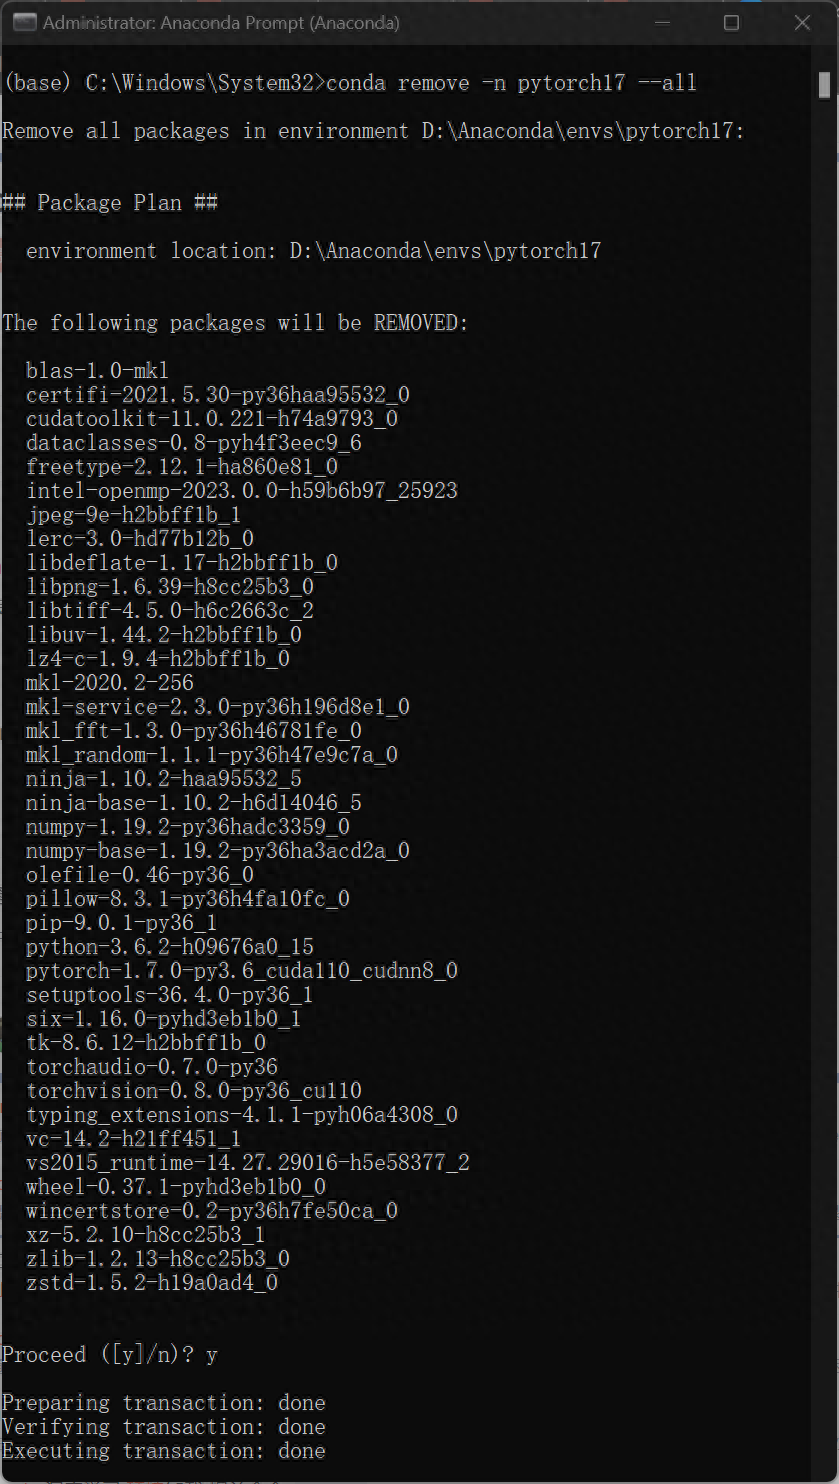
The biggest advantage of the method shown in this tutorial is that it can be executed in different environments When configuring the required projects, there is no need to repeatedly install/uninstall the cuda files on the computer, which can greatly save environment configuration time. More importantly, changing the graphics card configuration will not affect the normal operation of other software or programs.
It’s not easy to make. If you like it, please like, leave a message, collect, and follow!
Articles are uploaded by users and are for non-commercial browsing only. Posted by: Lomu, please indicate the source: https://www.daogebangong.com/en/articles/detail/pei-zhi-shen-du-xue-xi-PytorchGPU-Cuda-huan-jing-tu-wen-jiao-cheng-ji-shou-xie-zi-ti-shi-bie-yan-zheng.html

 支付宝扫一扫
评论列表(196条)
测试