In PowerPoint, slide layouts for different purposes have their own masters. Users can customize slides for each type as needed. A kind of master template for layout design. By using the master template to design the courseware interface, you can also apply different master template styles to slides with different content structures.
1 Get to know the master
In PowerPoint, the master is actually a special slide. The master saves slides that meet different needs. The layout information of the piece and the style information of the component elements have been set in the master.
In the application master When creating a slideshow, there is no need to re-set the slideshow, just enter the required content in the corresponding position. Flexible use of masters can effectively avoid repeated operations and improve work efficiency. More importantly, using a master allows the presentation slides to have a unified style and style.
PowerPoint Master It is divided into three types: slide master, handout master and notes master. Among them, the slide master can be understood as the mold for making slides, the handout master is the mold for making handouts, and the notes master is used for making slides. Tablet notes for the mold.
Slide Master It is actually a slide on which you can add, delete or edit any elements, and these elements will be displayed in the slide according to the settings of the master.
In the slide master In the layout view, the list on the left lists the slide masters used in different occasions. The top-level slide master is the slide theme master, and the slide masters below it are the master slides specifically used for different layouts. Placing the mouse pointer on a slide master will display the name of the master and the slides that are using the slide master in the courseware, as shown in Figure 1.
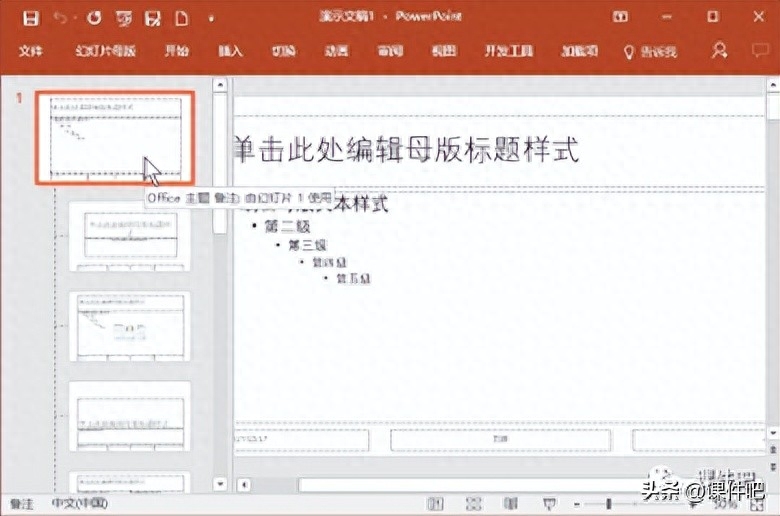
Figure 1 Slide Master View
Slide Master The master slides in can be used to design the layout of slides for different purposes in the courseware. The layout slides designed in the master slides will be displayed in the "New Slide" list of the "Home" tab, such as As shown in Figure 2. Click an option in the list to apply that layout slide to the courseware.
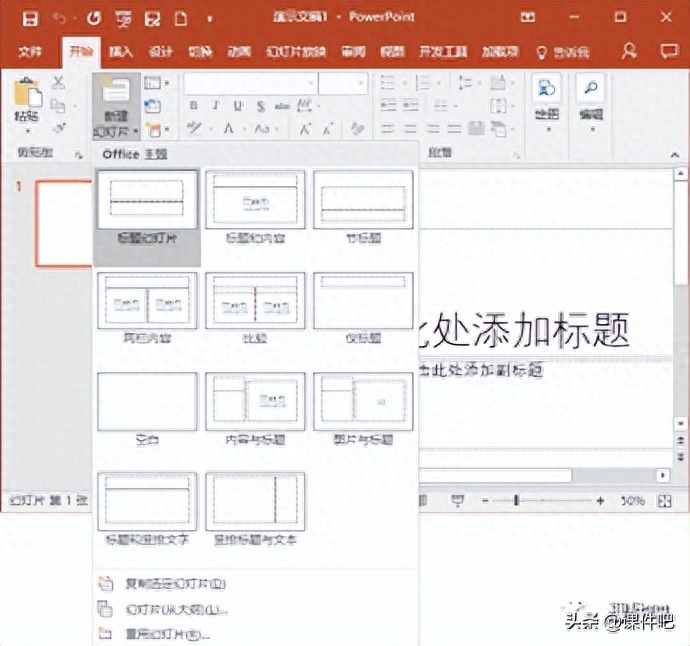
Figure 2 Slide layout listed in the "New Slide" list
2 Use slide master to design courseware interface
When using the master to make courseware, you need to design the layout of the courseware interface and provide different Different masters are designed for interface types. When designing the master, you should plan the elements needed in each functional slide, decide which elements are common elements needed in each slide, and place these elements in the master. In particular, the interface elements of the courseware should be placed in the master so that they can be reused in different slides, which can greatly improve the efficiency of courseware production.
As shown in Figure 3 Display, place the navigation button required for each slide in the courseware in the lower right corner of the theme master, place the subtitle in the upper left corner of the theme master, and create a courseware background in the theme master. In this way, when making other master slides or making courseware, you don't need to draw these graphics in each slide.
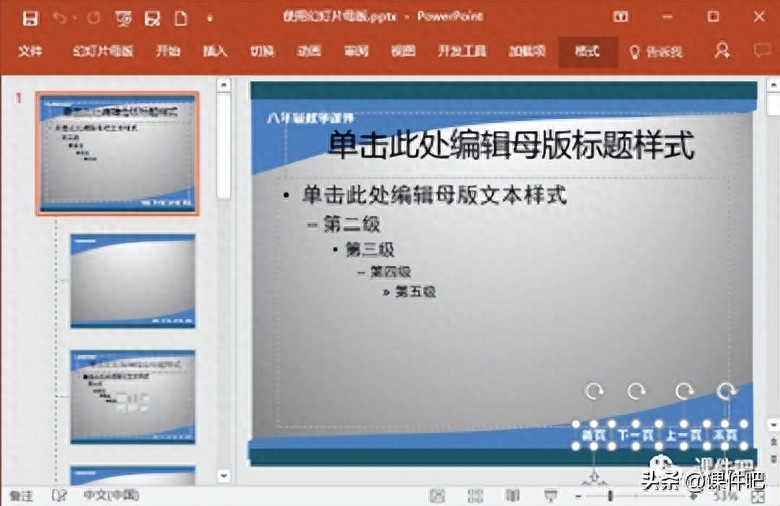
Figure 3 Using the theme master to create courseware interface
Using slides When mastering, users can create the layout they need. Click the "Insert Layout" button in the "Edit Master" option group of the "Slide Master" tab to create a new master layout, as shown in Figure 4. Click the "Insert Placeholder" button in the "Master Layout" option group, select the required placeholder in the open drop-down list, as shown in Figure 5, and then use the placeholder in the master slide You can design the layout of this slide.
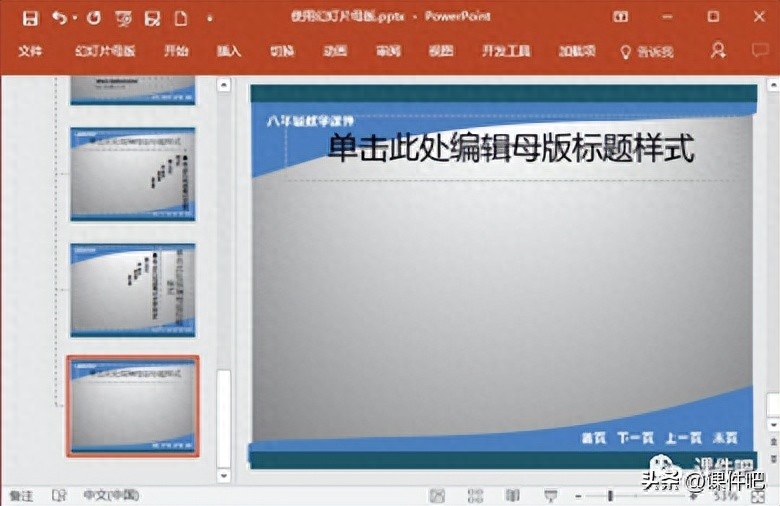
Figure 4 Create a new slide layout
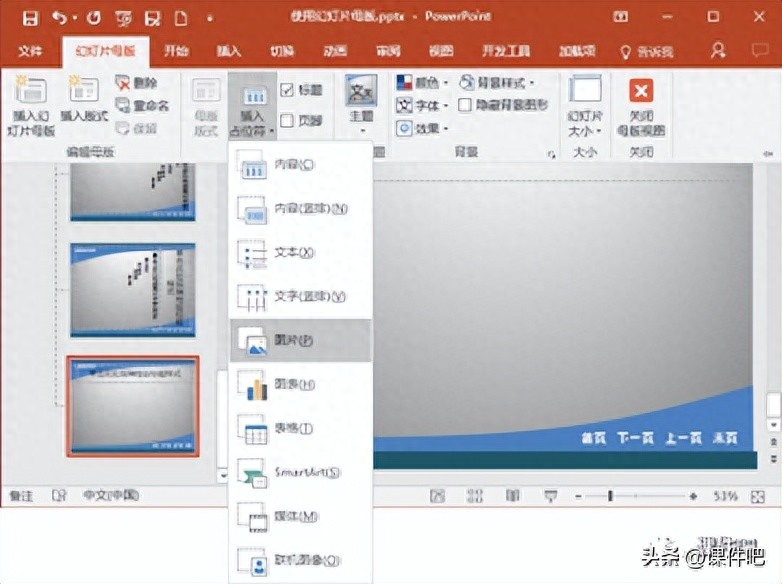
Figure 5 Select the placeholder to be inserted
Insert in courseware Customize the layout slide, and the placeholders in the slide occupy a certain position according to the settings in the master. Click on the prompt text of the placeholder, the prompt text will disappear, and you can enter text directly at that position. Click the button in the placeholder to add the corresponding element. For example, click the "Insert Table" button in the picture placeholder to insert a table at this location, as shown in Figure 6.
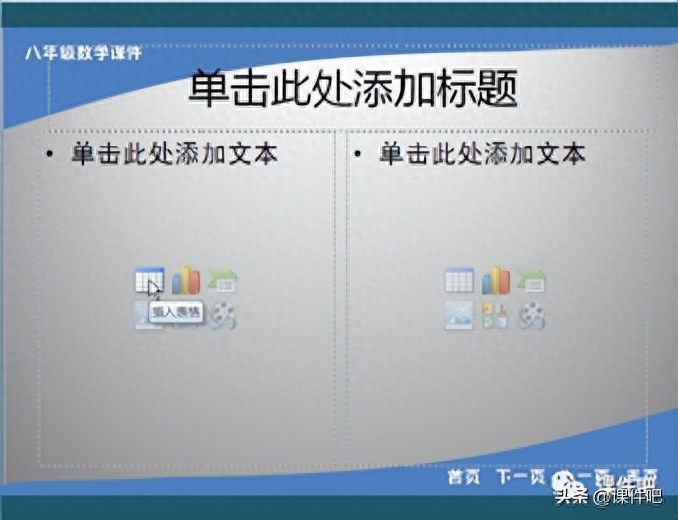
Figure 6 Click the placeholder button
Please click to watch Video tutorial about mastering!
Articles are uploaded by users and are for non-commercial browsing only. Posted by: Lomu, please indicate the source: https://www.daogebangong.com/en/articles/detail/mu-ban-bu-shi-mu-ban-PPT-ke-jian-jie-mian-she-ji-de-li-qi.html

 支付宝扫一扫
评论列表(196条)
测试