During this period, Yiyiyijun has shared with you a lot about text and picture technology from scratch. Let’s start our high-end journey from today~
For ONE PIECE, um, I made a mistake, it’s for our poster-level PPT!
I believe that after reading this series, you will have a new understanding of PPT.
We will target the following four posters in the next few tutorials. Because the information capacity is relatively large, it will be divided into 4 articles, from advanced techniques to practical finished products. Friends who are interested, please stay tuned.

Make a poster-level PPT! Come on! Friends of Yiyijun! (Is this inexplicable passion because Yinyijun is watching One Piece?)
一
————
Arbitrary polygon splitting method
For example, the effect of shading between strokes in this poster below. There are two ways to achieve this effect. One is to use gradient colors with irregular shapes. The other is to separate the strokes of each character individually.

Splitting words is a matter that tests your patience. Secondly, you need to master a technology - Boolean operation (super powerful PPT combination function. You will have a separate introduction on this page in the future. Boolean operation)
First we need to find the word that needs to be split, such as the word "change" in "change". We need to pay attention to where the designer has made shadow changes. They are the following 5 places.
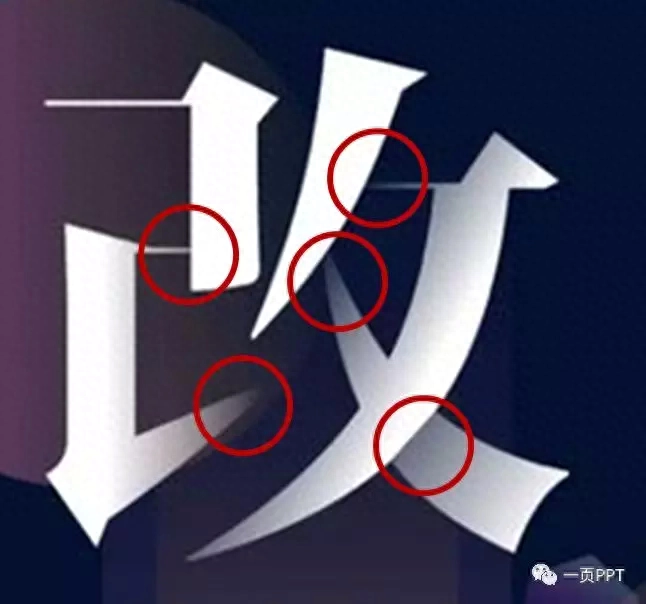
These five places are the places we want to demolish (it seems to be the urban management).
Before the formal disassembly, you need to prepare the word "change" in your favorite font. It is important to have a backup of the original state of this word. Useful during final assembly.
It is recommended to look for horizontal and vertical serif fonts or sans-serif fonts. Do not use calligraphy fonts without fully mastering them. The difficulty will increase, which will damage your self-confidence, and the effect will be unsatisfactory.
First we need to find "Arbitrary Polygon: Shape" in the insert, this is it:

Then circle the parts that need to be removed or retained with any polygon, like this: (The picture below is a GIF)

Pay attention to the overlapping parts of the strokes that require careful line use.
Be sure to pay attention to the next few steps and follow them one by one~
Select the font first, be sure to select the font first. Then hold down Ctrl to select the shape you just drew. like this.
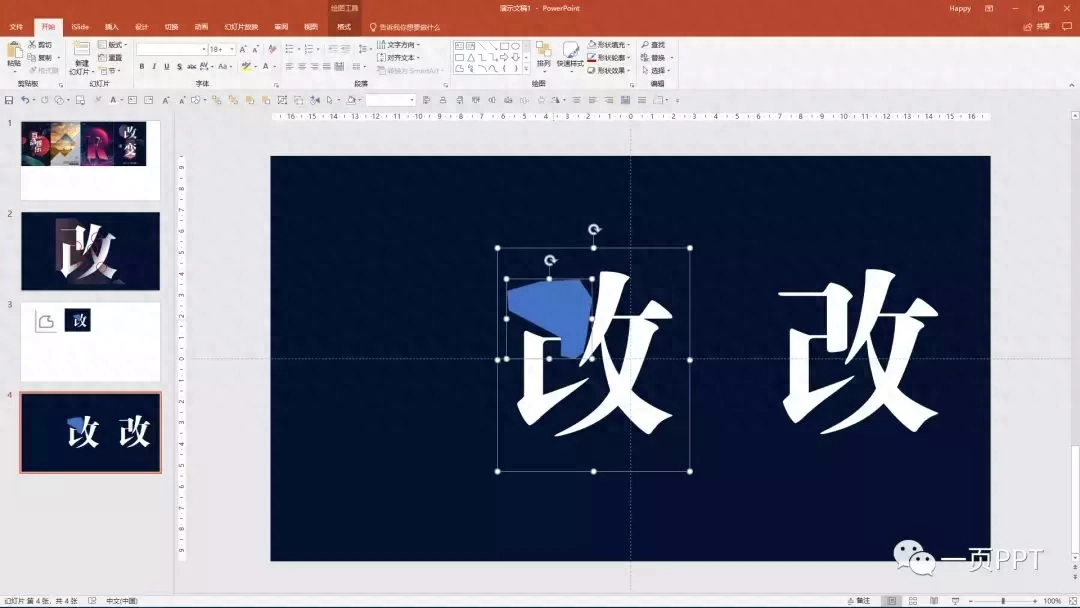
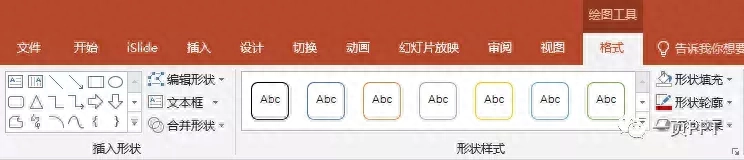
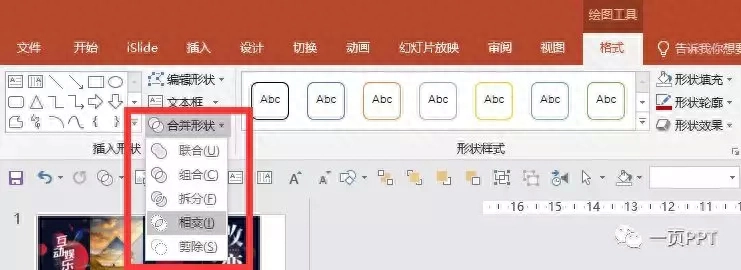
Then find the "Merge Shapes" option in the "Format" tab, select "Intersect", and the shapes we need will be split.
Then copy the backup just left, find the corresponding point, and continue the split just now.
The final result looks like this:

Then, change the color of the backup of the retained words, and as for the bottom layer, start putting the split words where they should be.
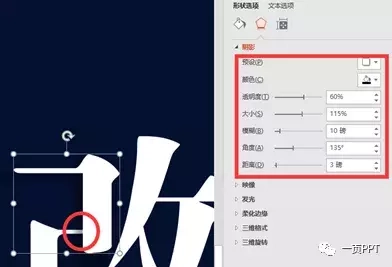
Once completed we start setting the shadow.
Here we take the first split stroke of a page as an example.
The first thing to note is the location of the shadow. The shadow of the first stroke is overlaid on the second split stroke. So the shadow we want to set is also biased to the left. It ended up looking like this:
Friends, please follow the tutorial and try the remaining transactions yourself.
The final result looks like this:

Is it basically the same as the original poster? There are some small modifications that require a little bit of work from everyone. Friends, go and accept the results of these periods.
The whole process of splitting:
It’s such a sense of accomplishment to make it! Get new PPT skills √.
二
————
Arbitrary polygon cutout method
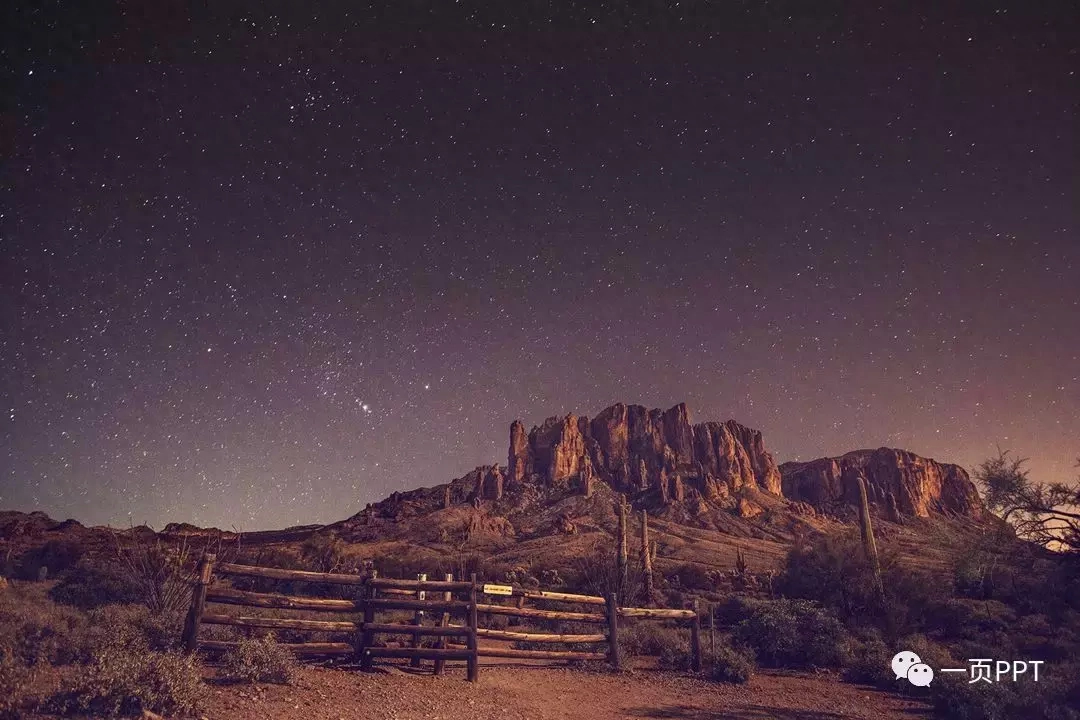
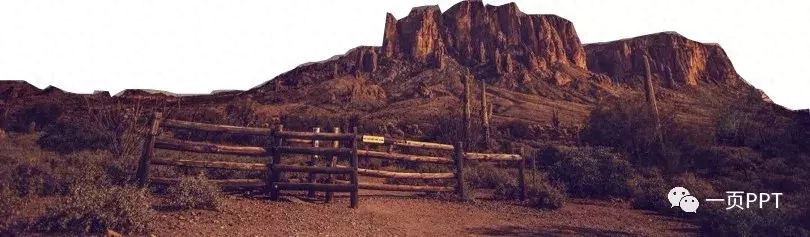
If you have already mastered the method just mentioned. Then the next skill will definitely be easy for everyone to master. Let’s take the “bigness of the universe” we shared yesterday as an example. Let’s pave the way for our poster.

Find the picture of the universe (obtained by replying to keyword 0927),
Then zoom in, outline the outlines that need to be cropped like splitting fonts, and connect them into a closed shape. Something like this:
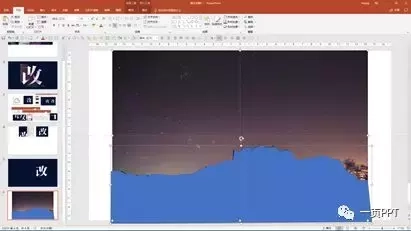
Then, select the image first. Notice! First select the picture, then select the closed shape. Select "Intersect" in the Boolean operation. Finish!
There are some small corners, you can use polygons to outline them, and then after selecting them, we then select "Subtract" in the Boolean operation to trim the corners. . That’s it.
If you feel it is not natural enough, you can fill it into the corresponding rectangle and adjust it. For example, transparency gradient, etc.
Of course, this operation may not cause some trouble.
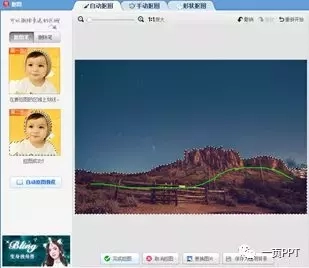
Here, Yiyijun, recommends two more convenient cutouts.
→ 1. Online Ps website
In a previous article, Yiyijun recommended this website to everyone, which requires some basic PS operations. It is enough to use the "Lasso Tool" and "Pen Tool" to cut out the image. (By the way, do any of you friends want to learn PS? If so, Yiyijun can open a basic tutorial on PS for everyone~)
→ 2. Beautiful pictures

The computer version of MeituXiuXiu is a boon to students who don’t know how to use Photoshop.
Take image cutout as an example. MeituXiuXiu’s automatic image cutout is also relatively easy to use.

The operation is relatively simple. You can try it more. Due to space reasons, I will not go into details here~
In the next few issues, Yiyijun will show you how to turn a poster into a PPT and make a poster-level PPT.
I am the man who wants to be the Pirate King (P circle). Please call me Page · P · Luffy from now on! Hehe~
Articles are uploaded by users and are for non-commercial browsing only. Posted by: Lomu, please indicate the source: https://www.daogebangong.com/en/articles/detail/lai-ba-re-xue-ba-rang-wo-men-zuo-chu-hai-bao-ji-bie-de-PPT-ba-yi.html
 支付宝扫一扫
评论列表(196条)
测试