Today I will share a cool PPT ending, which can add extra points to your PPT!
Although the production process is a bit complicated, once it is done, it will become a template, and you only need to change the picture for future use, which is quite convenient.
If you still don’t know how, I will also provide a template download at the end of the article, so you can take it back and modify it yourself!
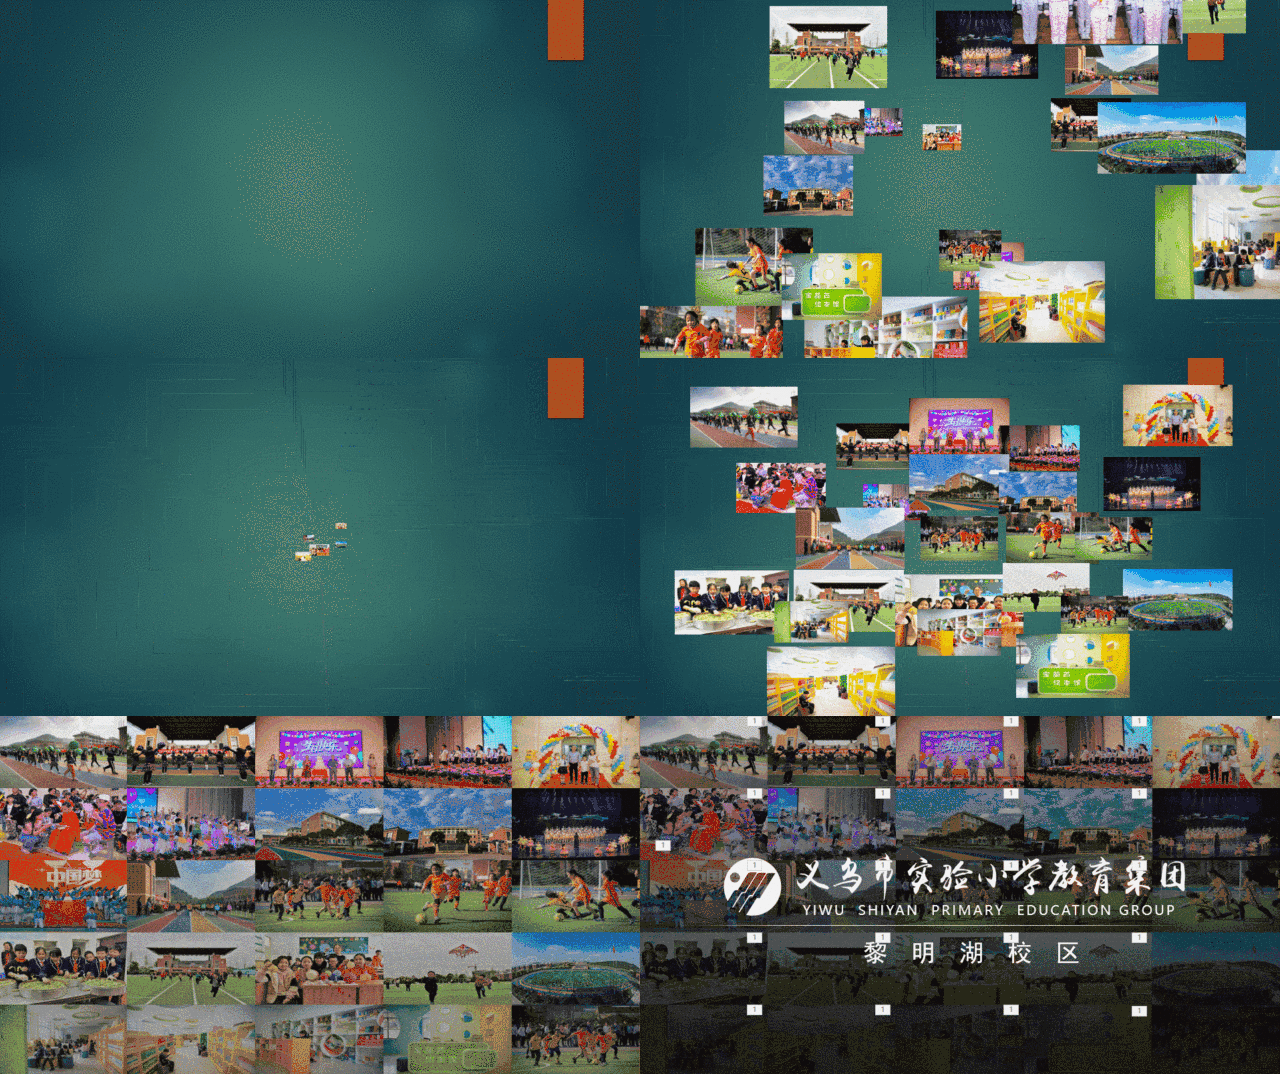
Let’s look at the effect first:
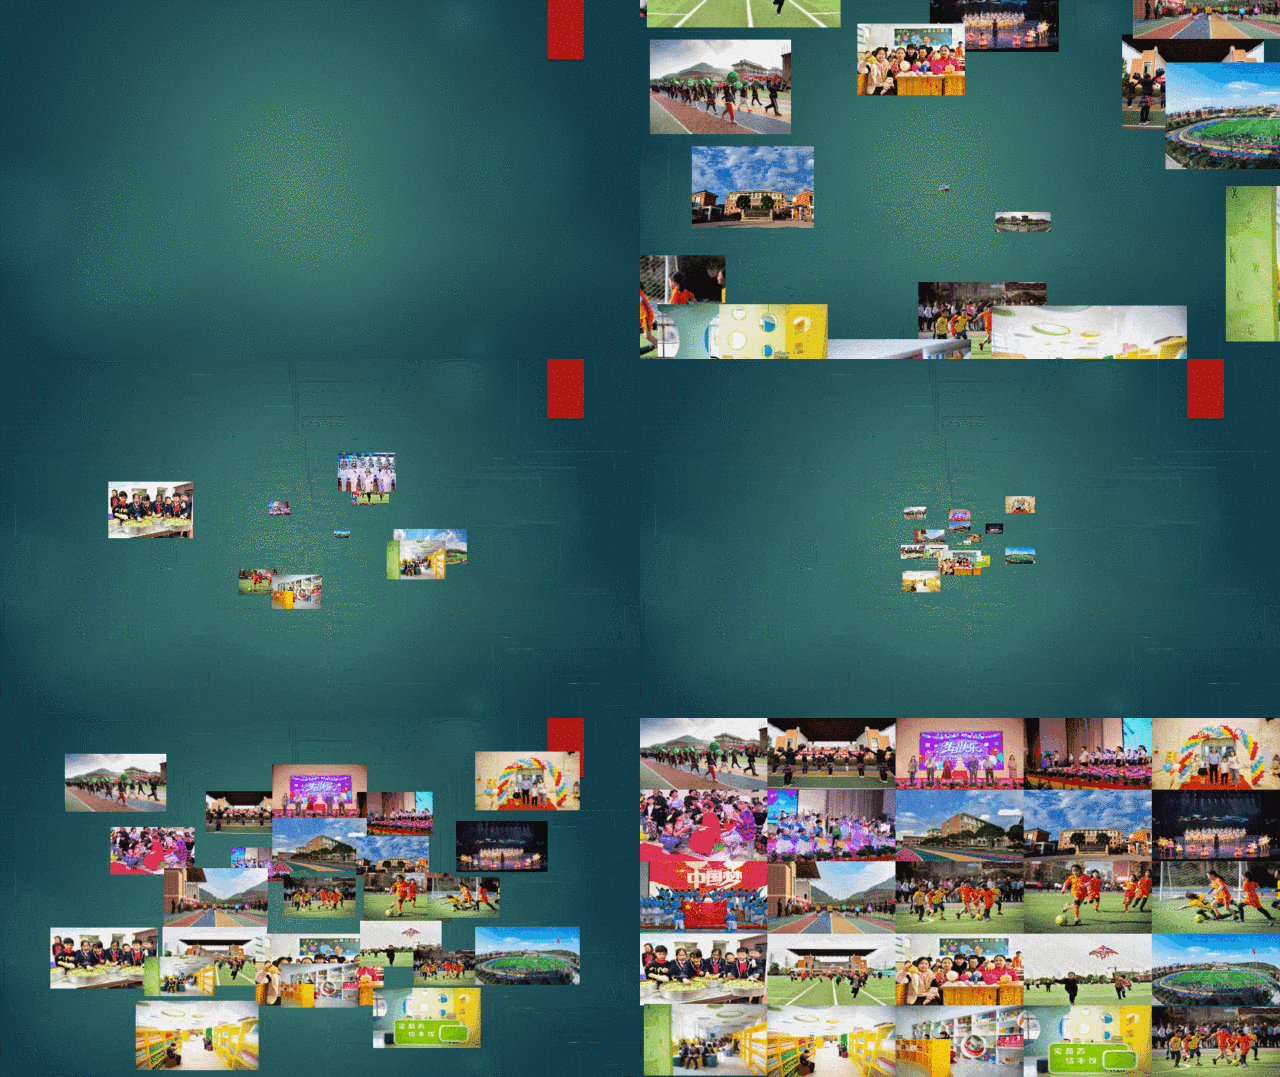
This ending animation is composed of two parts.
One is that all pictures fly into the center of the screen,
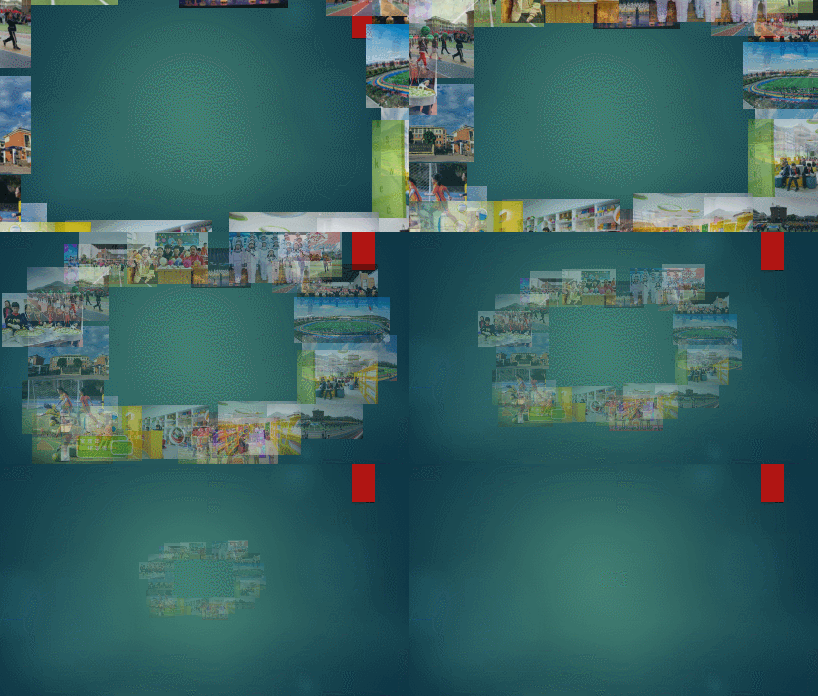
One pops up from the center of the screen.
Let’s first look at the production of animation that flies into the center of the screen.
The pictures fly in from the outside of the screen to the center of the screen, so the pictures must first be arranged around the screen.
Step 1: Hold down the "ctrl" key and scroll the mouse wheel at the same time to zoom out.

Step 2: Arrange the pictures around the screen, do not put them inside the screen (the more pictures, the better the effect of flying in)
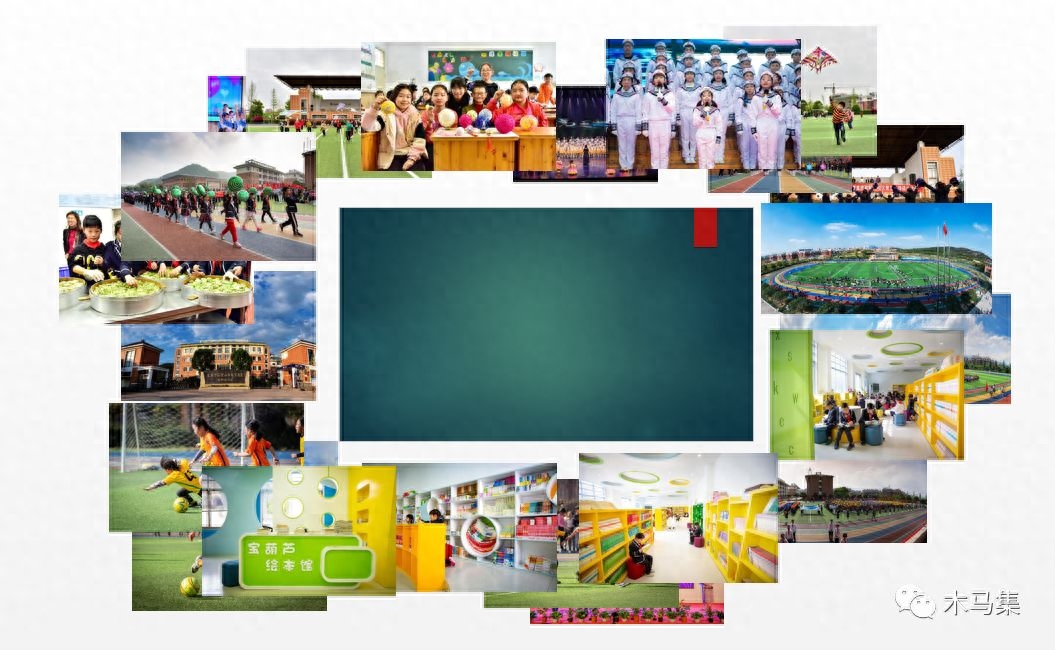
The third step is to set the animation.
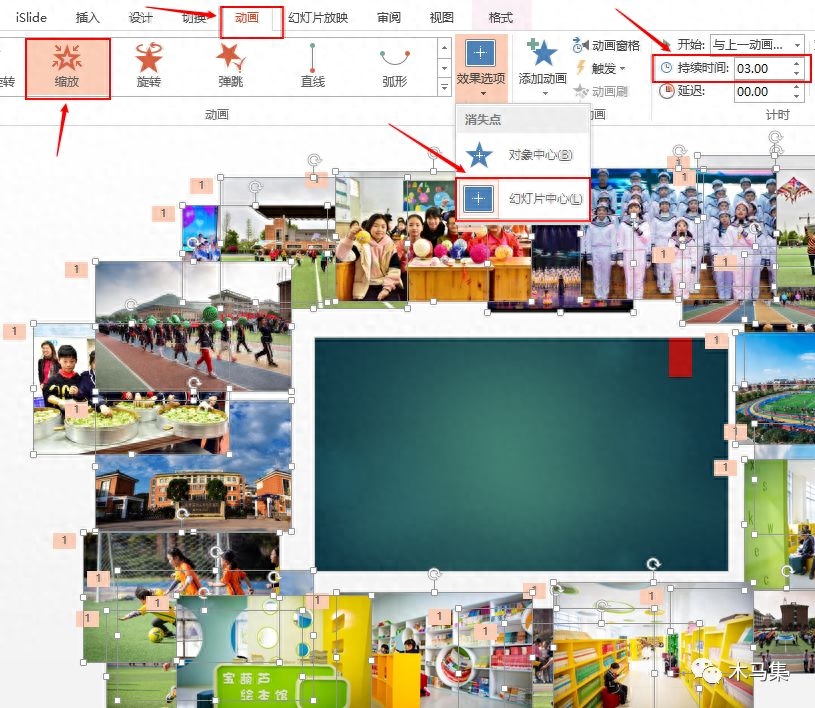
Select all the pictures, click [Animation] - [Exit] - [Zoom], select [Slide Center] in [Effect Options], and set the duration to 3-4 seconds.
At this time, the pictures are flying into the center of the screen together. To make them fly in sequentially and quickly, the fourth step is required.
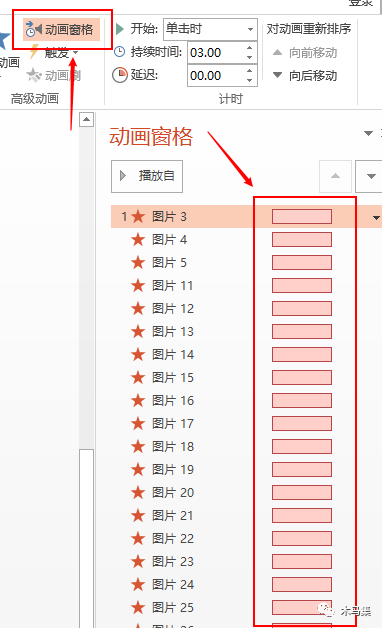
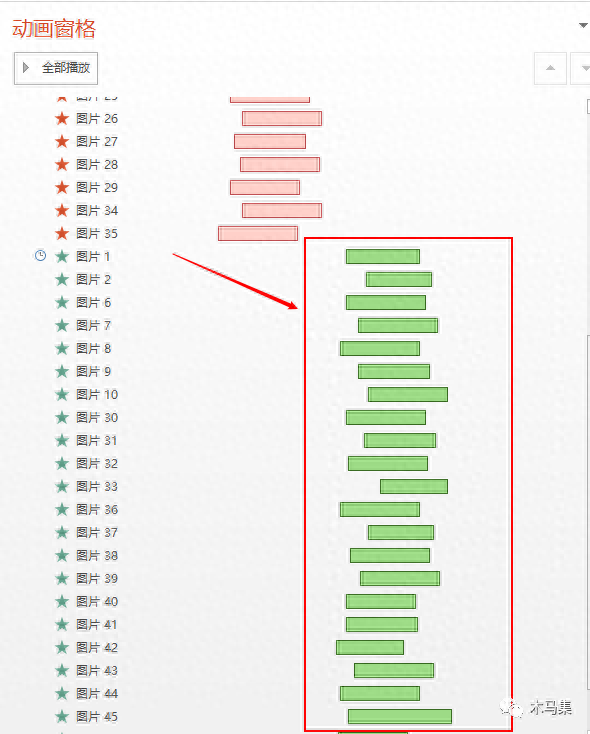
Step 4: Click [Animation Pane]. In the animation pane interface on the right, there will be a bar behind each animation.
The length of the bar indicates the time of the animation, and the front and back of the bar indicate the order in which the animation is played.
We can see that the bars at this time are all of the same length and position, and we need to move them a little staggered.
Move the bar.
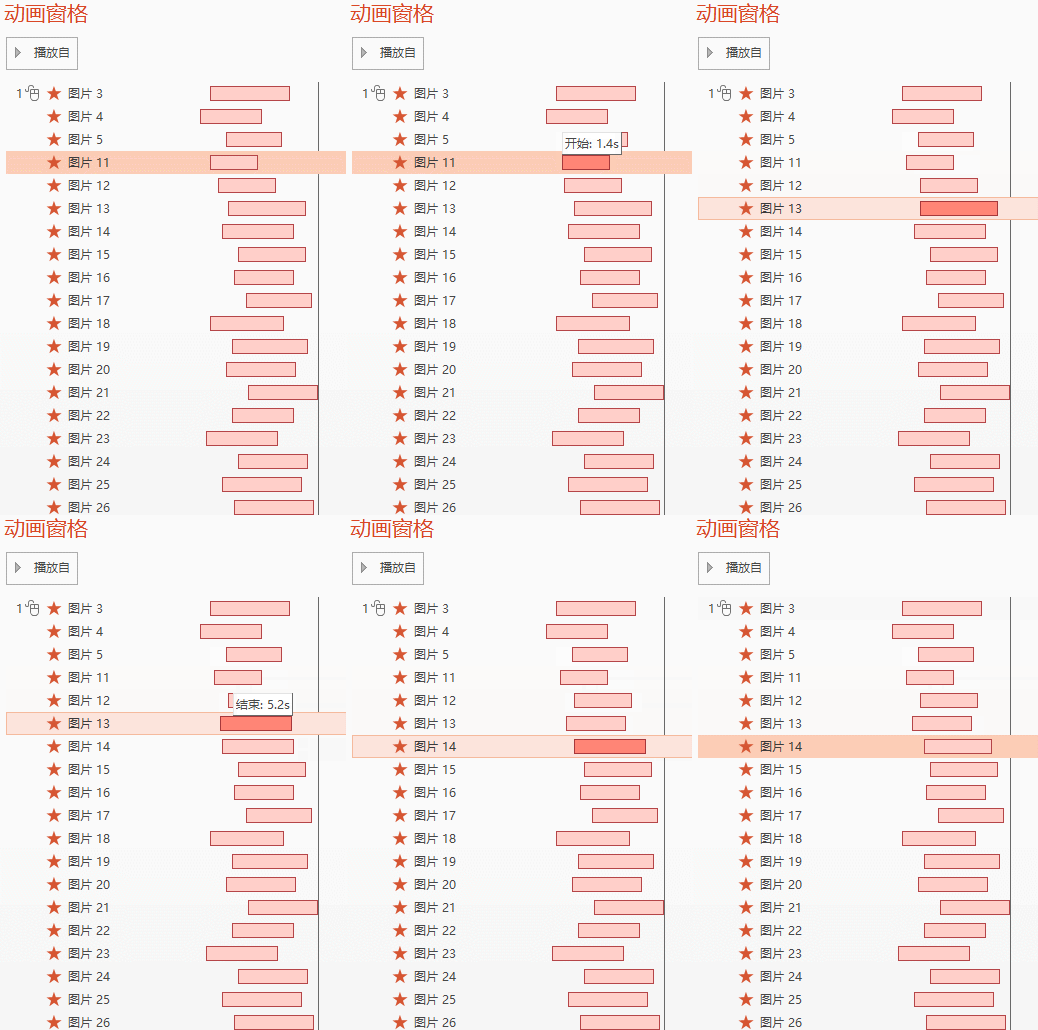
In this way, half of the effect is achieved, doesn’t it feel great?

Next we are going to animate the picture flying out from the center of the screen. The steps are somewhat similar.
Step 1: Import the images to the screen again and arrange them neatly.
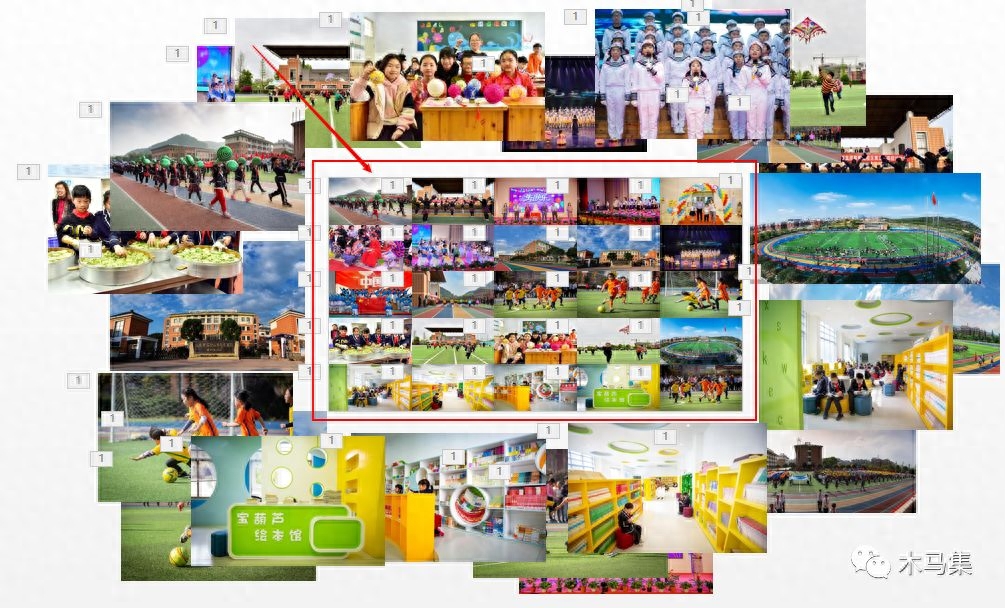
Step 2: Select all pictures on the screen, click [Animation] - [Enter] - [Zoom], select [Slide Center] in [Effect Options], and set the duration to 3-4 seconds.
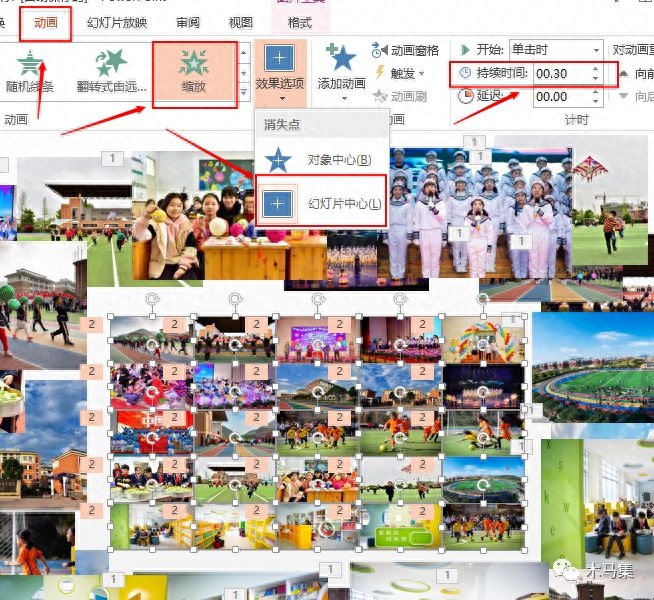
Step 3: Click [Animation Pane], and in the animation pane interface on the right, enter the first animation of the animation and select [Start after the previous item].
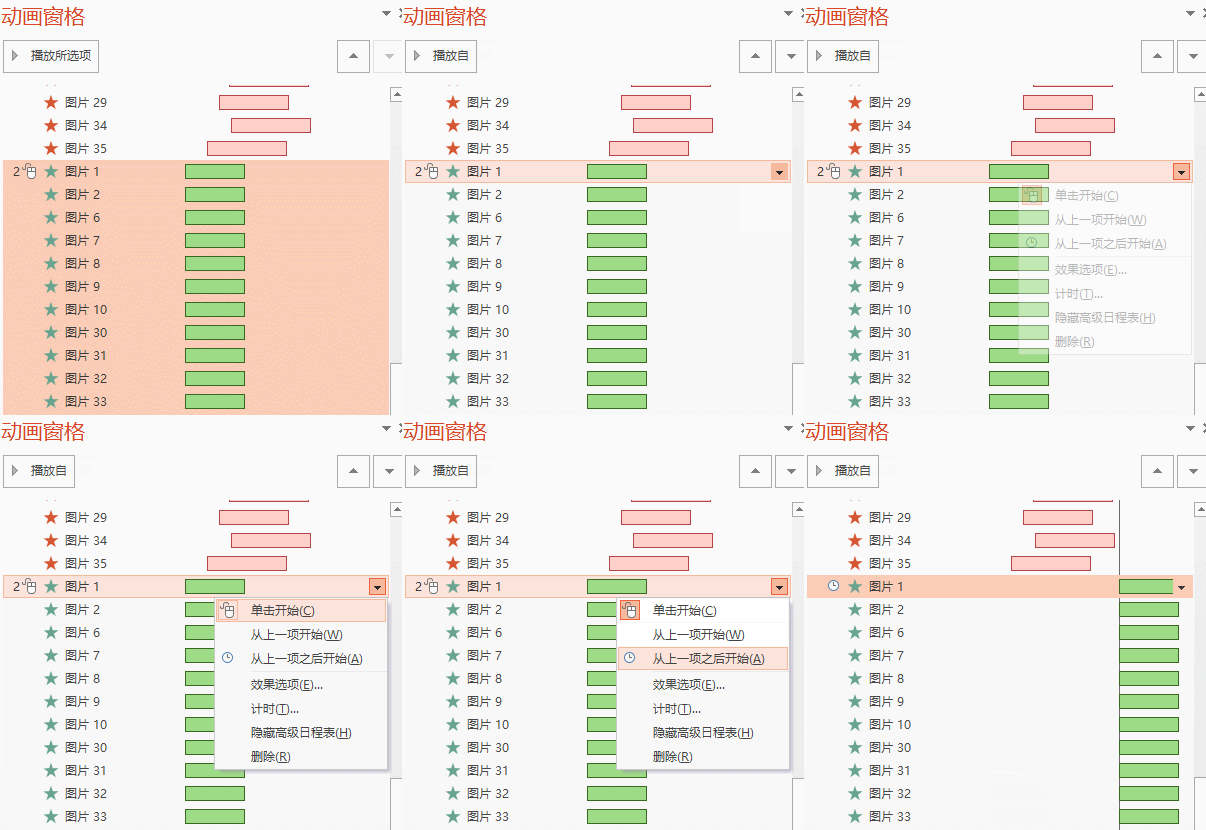
The last step is the same as the previous animation, moving the time bar.
You're done!
We can also combine the cover production effects we shared last time.
Isn’t this animation cool? !
Obtain animation templates: Follow the WeChat public account "Trojan Collection", reply "Animation" to obtain the Baidu Cloud link and transfer it to your own network disk (it is easy to be harmonized, please transfer it as soon as possible).

Articles are uploaded by users and are for non-commercial browsing only. Posted by: Lomu, please indicate the source: https://www.daogebangong.com/en/articles/detail/gei-PPT-lai-yi-ge-xuan-ku-de-jie-wei-ru-he.html

 支付宝扫一扫
评论列表(196条)
测试