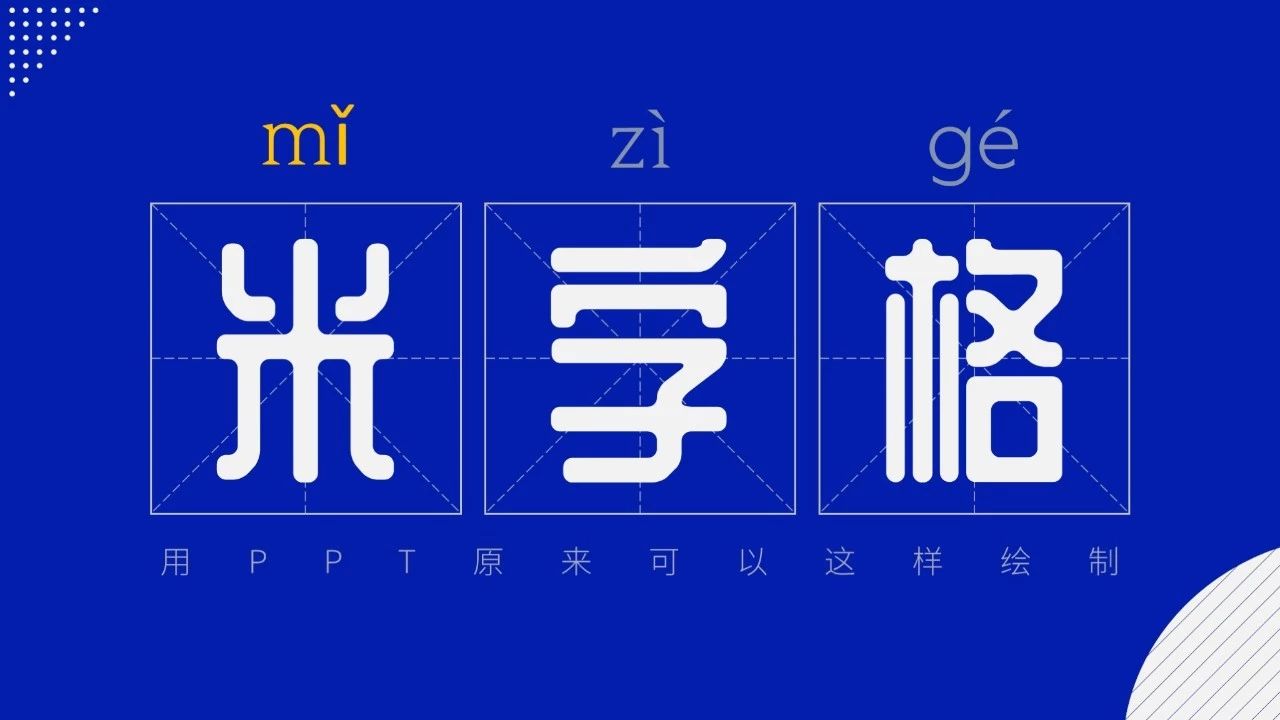
Hello everyone, today I will share with you 3 methods of drawing mzi grid.
The methods are relatively simple, and will be described in detail below.
When modifying the text, you can polish the page by adding a rice grid to the keyword.
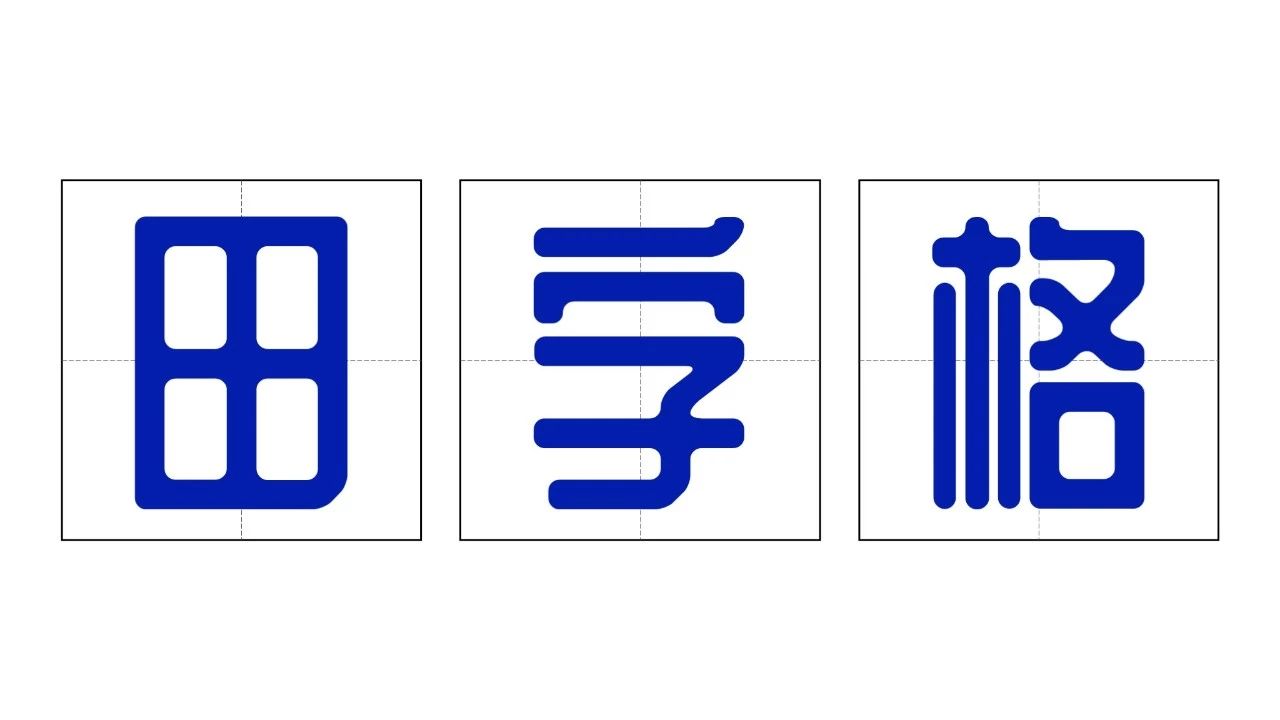
As shown in the picture below, this is a transition page of Baidu Zhizhi APP, and the above text is added with rice characters to emphasize the theme keywords role,

In addition, when introducing fonts, similar processing is occasionally used, such as Alibaba Puhui Ti’s official website promotion map (the picture is not very clear ).

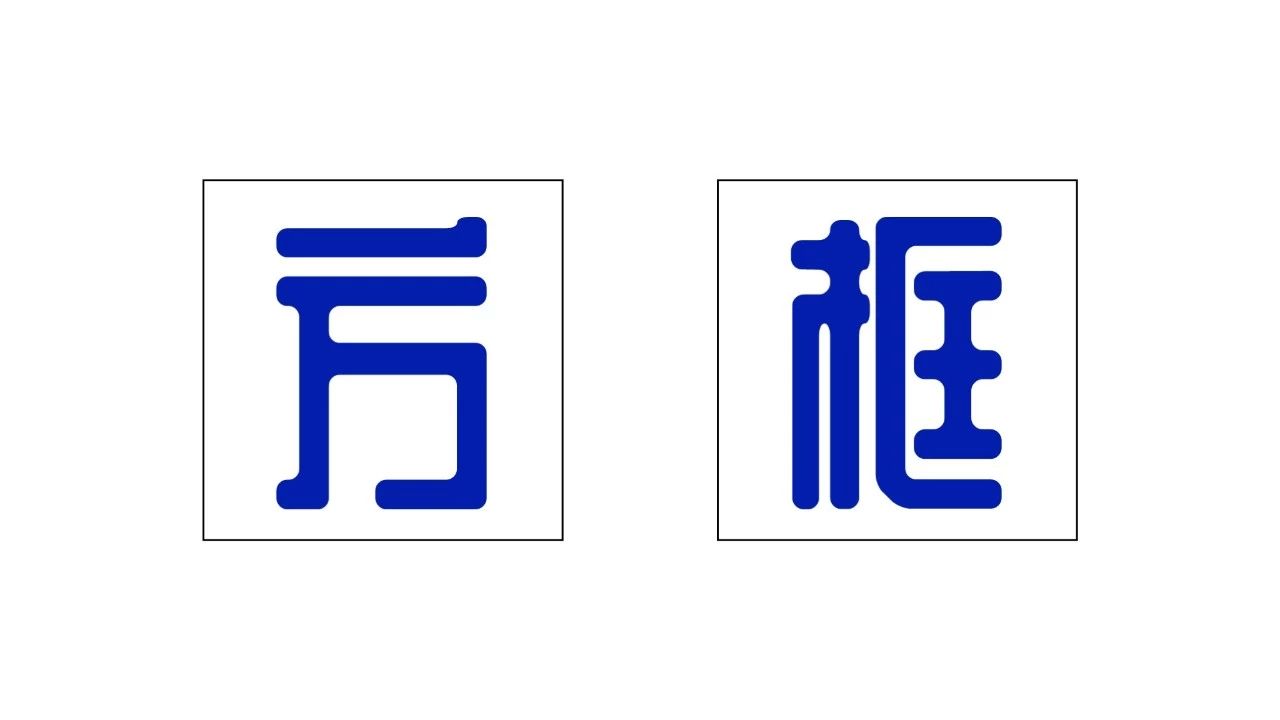
In addition to using rice grids, the grid mentioned above can also be decorated with matts or a square box directly.
Marts and boxes are easy to draw in PPT, the operation is as follows:
① box
1. Start→Draw→Rectangle
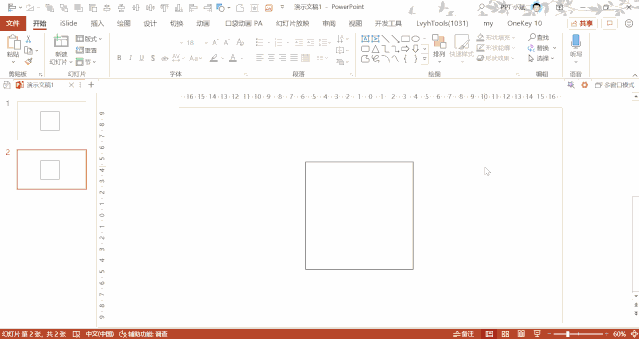
2. Hold down the Shift key and left click on the blank space to draw a square
3. Select Square → Shape Format → Shape Fill → No Fill, cancel the color fill, and get a box
4. Select Box → Shape Format → Shape Outline to modify the fill color and thickness of the outline
② matts
1. Draw a box according to the steps above ①
2. Start→Draw→Straight lines
3. Click the connection point on the left side of the box with the left mouse button, hold down the mouse and drag to the position of the connection point on the right side of the box to get the < strong>horizontal line
4. Click the connecting point on the upper side of the box with the left mouse button, hold down the mouse and drag to the position of the connecting point on the lower side of the box, Get vertical lines
5. Hold down the Ctrl key and click the two straight lines→Shape Format→Shape Outline to modify the fill color, thickness and dash options
Okay, the box and matt are drawn.
But if you pay attention, you will find that it is not convenient to draw mzi grid.
Why?
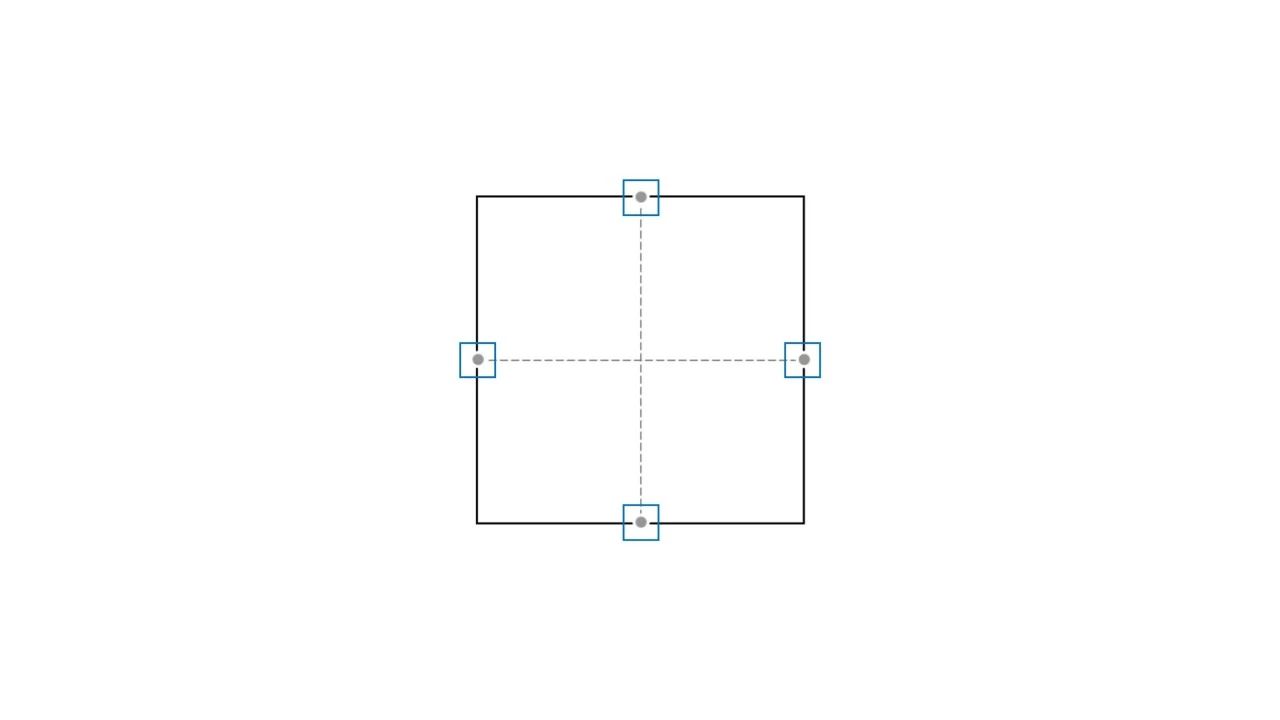
Because only the midpoints of the four sides of the box have connection points, and there are no connection points on the diagonal, so it is not easy to align when drawing diagonal lines.
Since we will continue to talk about join points later, here is a brief introduction.
What are join points?
There are two kinds of connection points, one is on the connection line, and the other is on other shape.
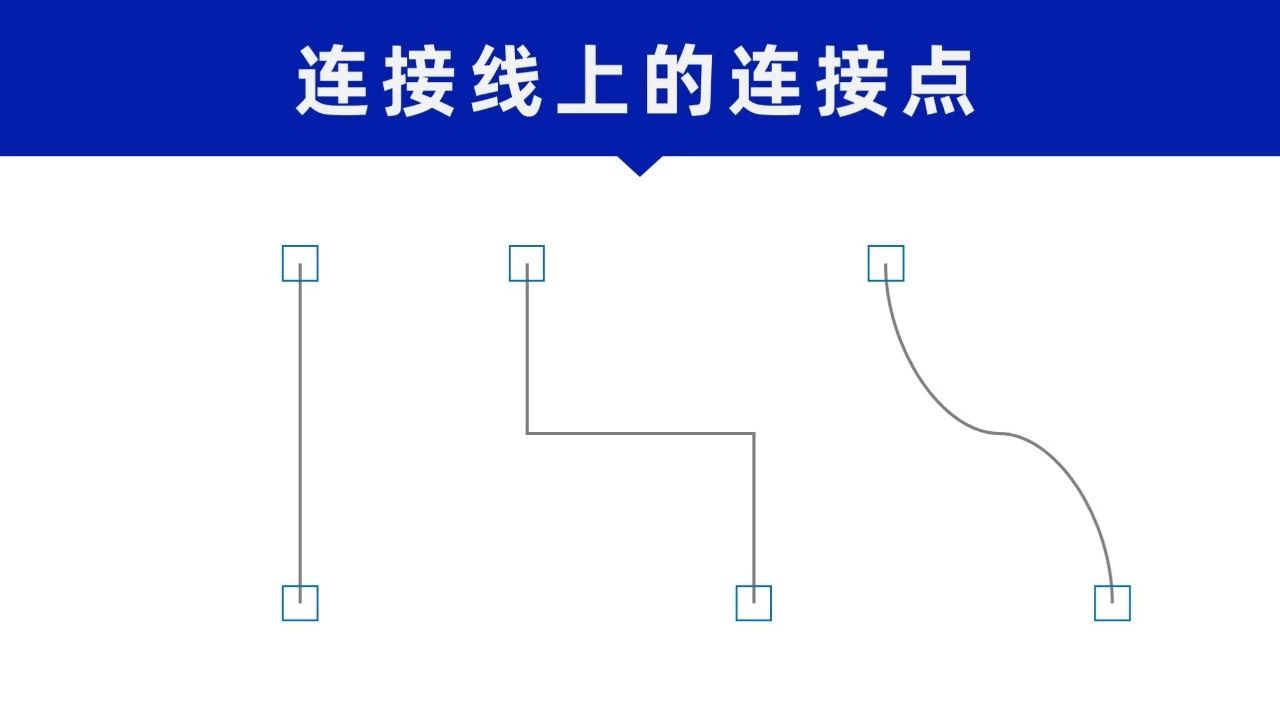
Quantity and position:
- The two endpoints on the connection line are connection points, which can be used to connect to connection points on other shapes; < li class="ql-align-justify">There may be more than one connection point on other shapes. When you drag the end point of the connection line close to the shape, a dot connection point will appear.
Action:
- Follow the movement. After the connection point on the connection line is connected to the connection point of other shapes, the point of the connection line will be attached to the shape; when the position of the shape moves, the end point of the connection line will still be on the shape and move accordingly.
- Snap link. Another advantage is that the connection line can be accurately connected to the connection point on the shape, and when the end point of the connection line is dragged close to the connection point on the shape, it will be automatically absorbed. Using this, you can accurately control the connection position of the connection line (of course, Auto-snap does not happen when you hold down the Alt key to draw a connector).
For example, when drawing a flowchart, it is often connected with the help of connection points.
Since there are no connection points on the diagonal corners of the box, automatic adsorption cannot be performed when adding diagonal lines.
In this case, how to make a Mizi grid? You can refer to the following three methods.
1. Double the number of vertices
2. Combination of rectangle and rhombus
3. Set the line width and height
1. Double the number of vertices
The first method is accomplished with the help of the PPT plug-in Hero Toolbox.
(If you need a plug-in, you can download it from the official website yhtools.cc)
Before introducing the operation, let's take a look
The relationship between connection points and vertices
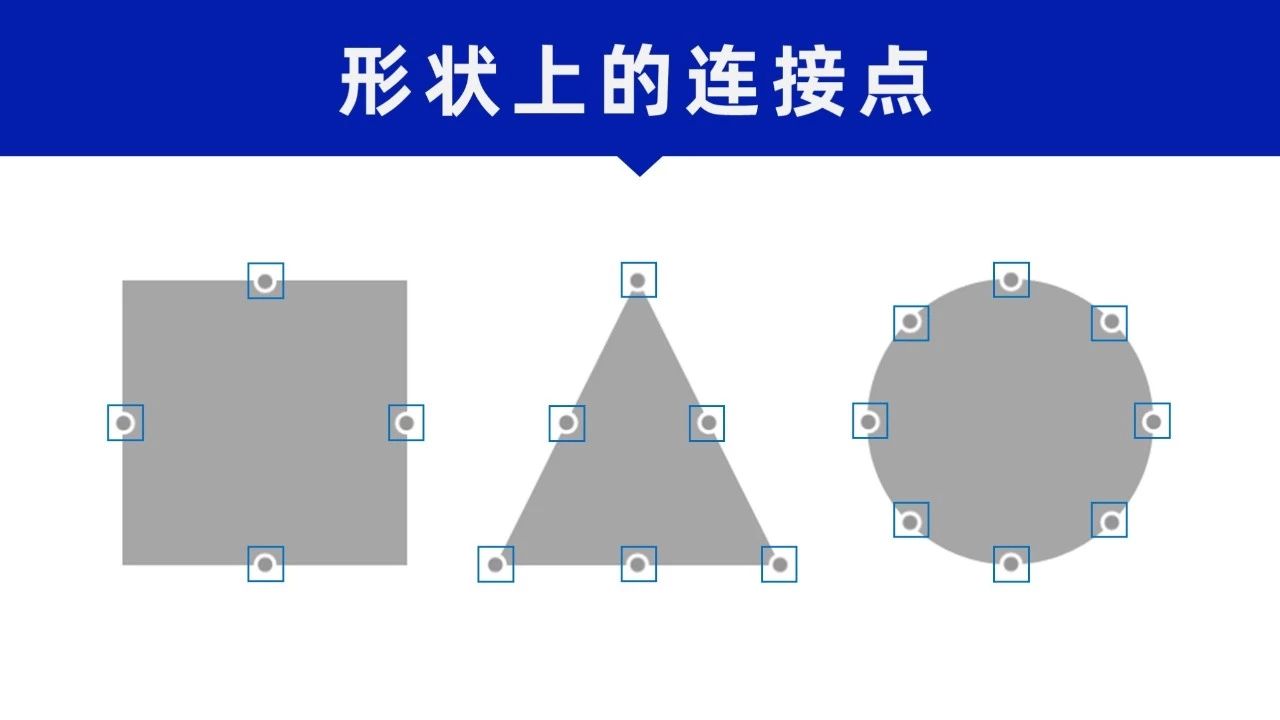
① Among the basic shapes, each shape has a specific connection point,
For example, there are 1 connecting point at the center of the upper, lower, left, and right sides of the rectangle, totaling 4;
A triangle has three vertices and three edge midpoints, a total of 6 connection points;
The ellipse has a total of 8 connection points: up, down, left, right, and left, left, down, right, up, right, down.
(continue to use the image above)
② Each shape has its vertex, right click on the shape→edit vertex, the black square center point is the vertex,
For example, the vertices of a rectangle are points on the four corners;
The vertices on the triangle are the points on the three vertices;
The vertices of the circle are the points where the four positions of up, down, left, and right are located.
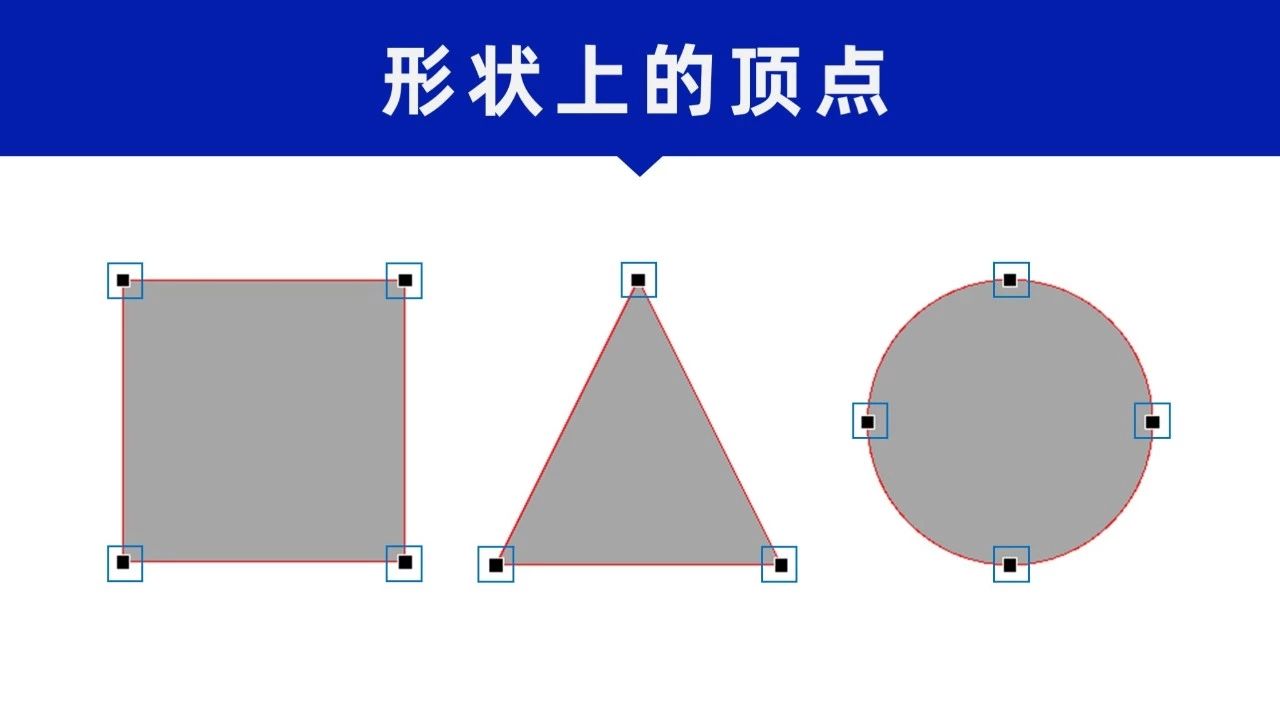
It can be seen that the number and position of connection points and vertices are not exactly the same.
Will the connection point change?
After testing, it is found that if the vertex operation is edited on the shape, the connection point will change;
At this point, the connection point and the shape vertex will become consistent, and the position of the vertex in the shape is also the position of the connection point.
The operation of editing vertices can be adding or deleting vertices, changing vertex types (smooth vertices, straight points, corner vertices), opening paths or changing the shape of line segments (Stretch bow, curve segment).
For a rectangle, if you want to change the position of the connection point by editing the vertex, considering not changing the outline of the original shape, you can add a vertex to the rectangle first, and then delete it;
Or select an edge line, first change it to a curved segment, then straighten the bow and restore the straight segment.
Add and delete vertices

Straighten the curve segment
Back to the production of the Mizi grid, here I use a function of the Hero Toolbox - Double the number of vertices to process the rectangle;
In this way, through processing, the rectangle becomes to have 8 vertices (the points at the four corners and the midpoints on the four edges) shape;
On the surface, the rectangle seems to have no change, but these 8 vertices have become connection points.
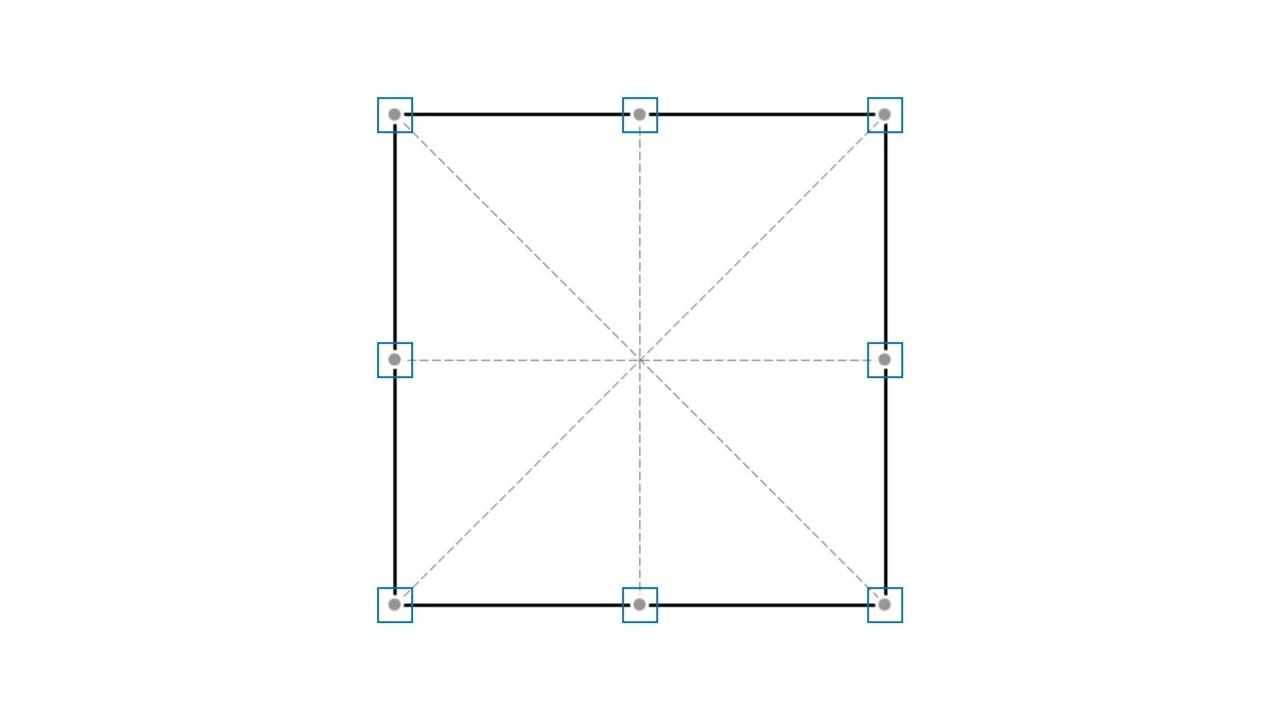
These 8 connection points are just convenient for drawing the Mizi grid.
The operation is as follows:
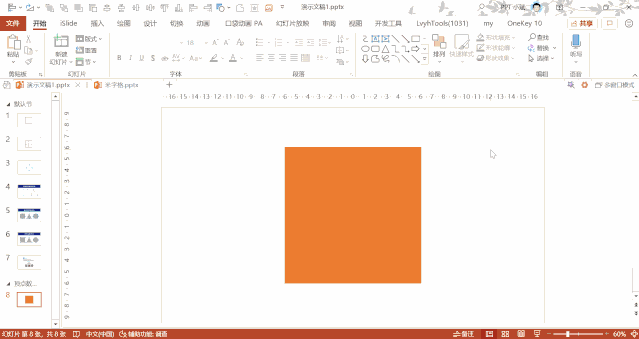
① Add a square
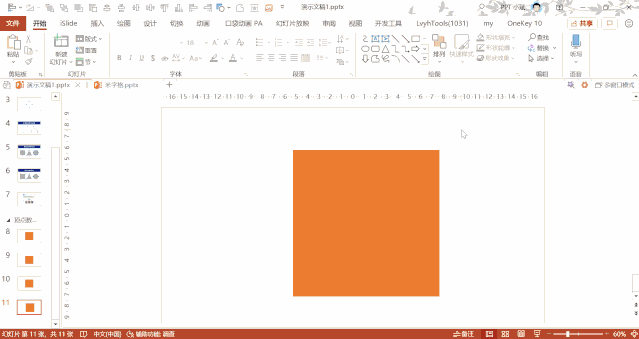
Start→Drawing→Rectangle, click the blank space of the slide;
Or Shift-click and drag to draw a square.
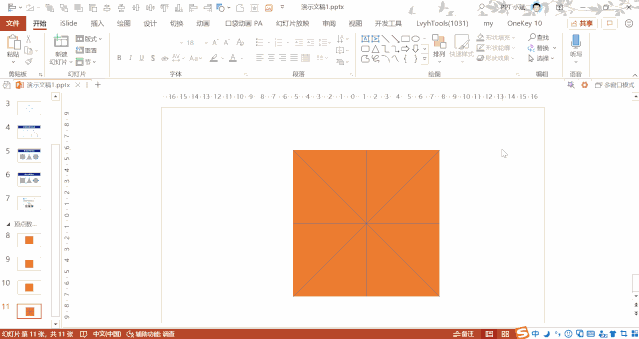
② Double the number of vertices
Click on Square→LvyhTools→Vertex Alignment→Double Number of Vertices to get a square with 8 vertices.

③ Add a straight line
Start→Drawing→Right click on Line→Lock drawing mode;
Next, draw four straight lines (horizontal line, vertical line, two diagonal lines) continuously with the help of the connection points on the square, no need to reselect each time you draw straight line);
Press the Esc key when you are done drawing to exit lock mode.
④ Modify the format
Select square, shape format→shape fill→no fill, get box;
Choose a square, shape format→Shape Outline, choose the appropriate color and thickness;
Hold down the Ctrl key, click on the four straight lines respectively, shape format→shape outline, set to dotted line, modify thickness and appropriate color.
Okay, in this way, the drawing of the Mizi grid is completed by doubling the number of vertices.
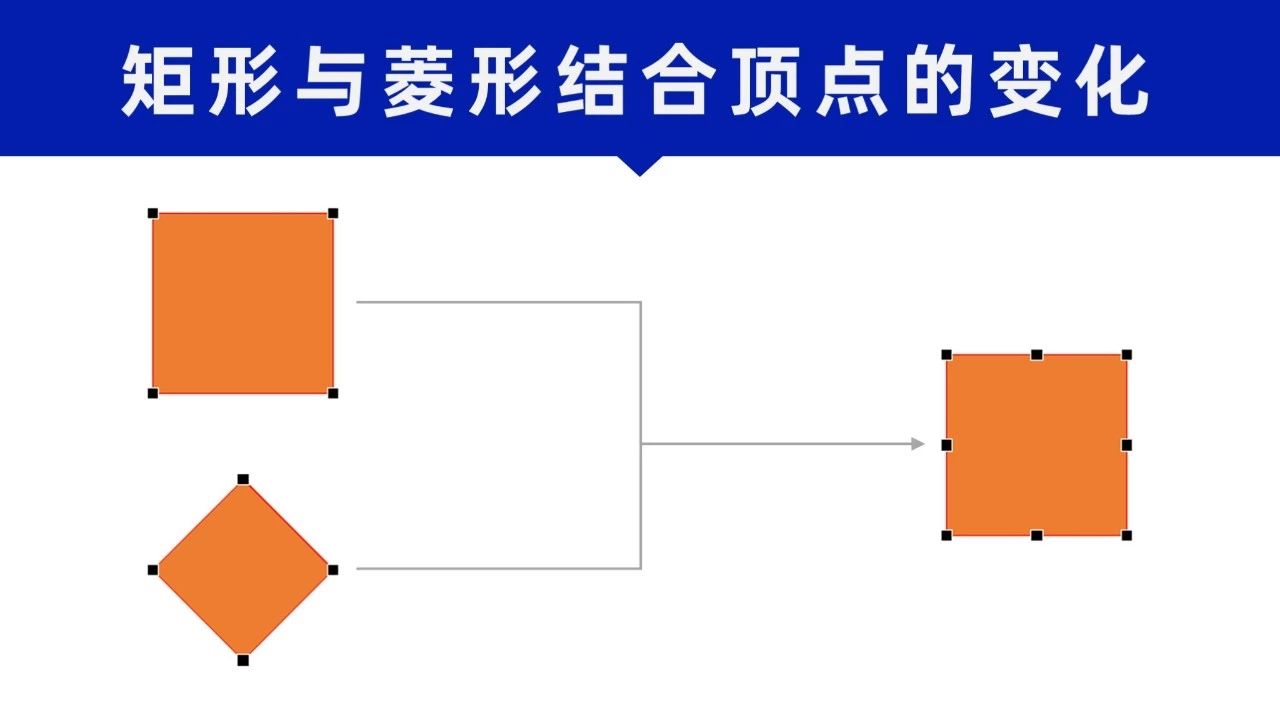
2. Combination of rectangle and rhombus
The second method does not require a plug-in, and can be completed with the merge shape function that comes with the software.
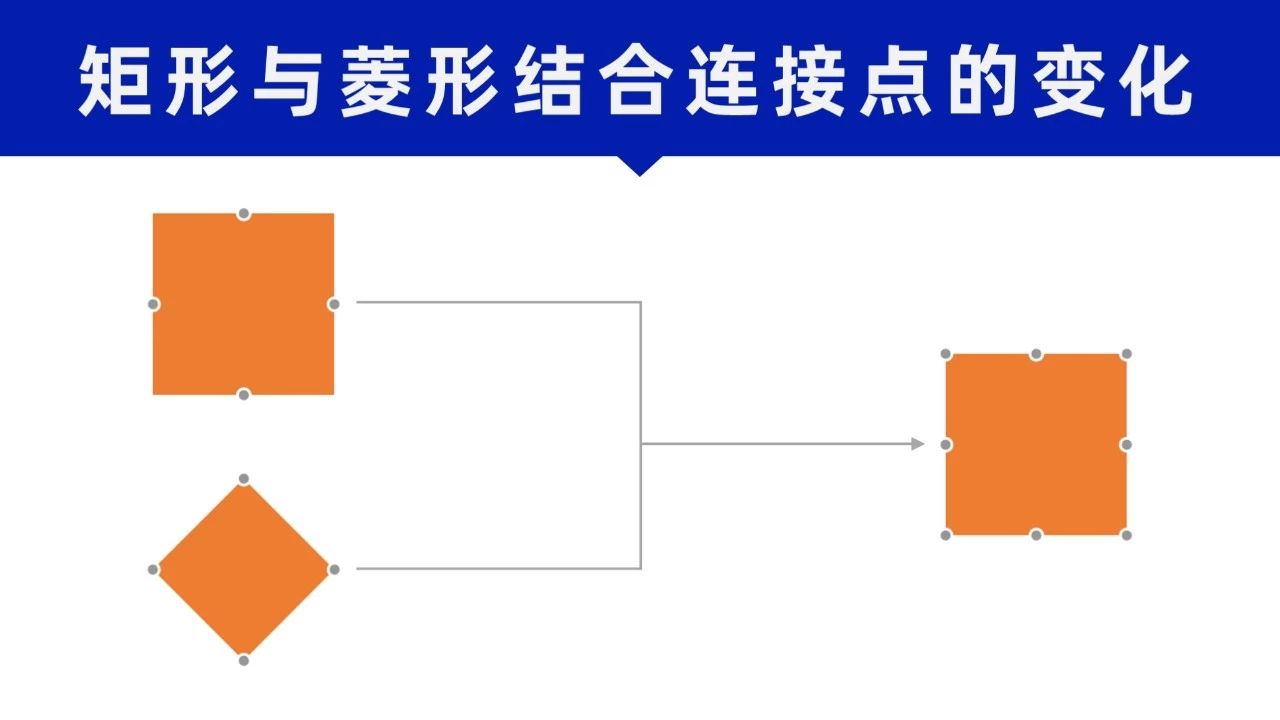
As mentioned in the method, by editing the vertex operation, the connection point will change;
In fact, after the operation of merging shapes, the connection points will also change:
a. The position of the vertex will become the connection point of the new shape,
b. Moreover, vertices may overlap
(What kind of superposition will happen, I won’t go into details here)
After testing, by combining a rectangle with equal width and height with a rhombus, you can just get a rectangle with 8 vertices (that is, the same as method 1 rectangle), and the connection point is also at the position of these 8 vertices (that is, the relationship between the connection point and the vertex is changed on the one hand, and the vertices are superimposed on the other hand).
The operation is as follows:
① Add rectangles and diamonds
Start→Drawing→Rectangle, click the blank space to draw a rectangle with the default size, or hold down the Shift key to draw a rectangle with the required size;
Similarly, draw a diamond.
Start→Drawing→Diamond, click the blank space to draw a rhombus with the default size, or hold down the Shift key to draw a rhombus with the same size as the rectangle.
② Combination of rectangle and rhombus
Ctrl-click on the rectangle and rhombus, Shape Format→Align→Horizontal center and Vertical center to align the two shapes ;
Also select two shapes at the same time, and get a new rectangle (that is, a rectangle with 8 vertices) through shape format→merge shapes→join, Next you can add the lines.
The next steps are consistent with the first method, and the animation can refer to the corresponding animation above.
③ Add a straight line
Start→Drawing→Right click on Line→Lock drawing mode;
Next, draw four straight lines (horizontal line, vertical line, two diagonal lines) continuously with the help of the connection points on the square, no need to reselect each time you draw straight line);
Press Esc when you are done drawing to exit lock mode.
④ Modify the format
Select square, shape format→shape fill→no fill, get box;
Choose a square, shape format→Shape Outline, choose the appropriate color and thickness;
Hold down the Ctrl key, click on the four straight lines respectively, shape format→shape outline, set to dotted line, modify thickness and appropriate color.
Okay, with the help of the combination of rectangle and rhombus, the drawing of the Mizi grid is also completed.
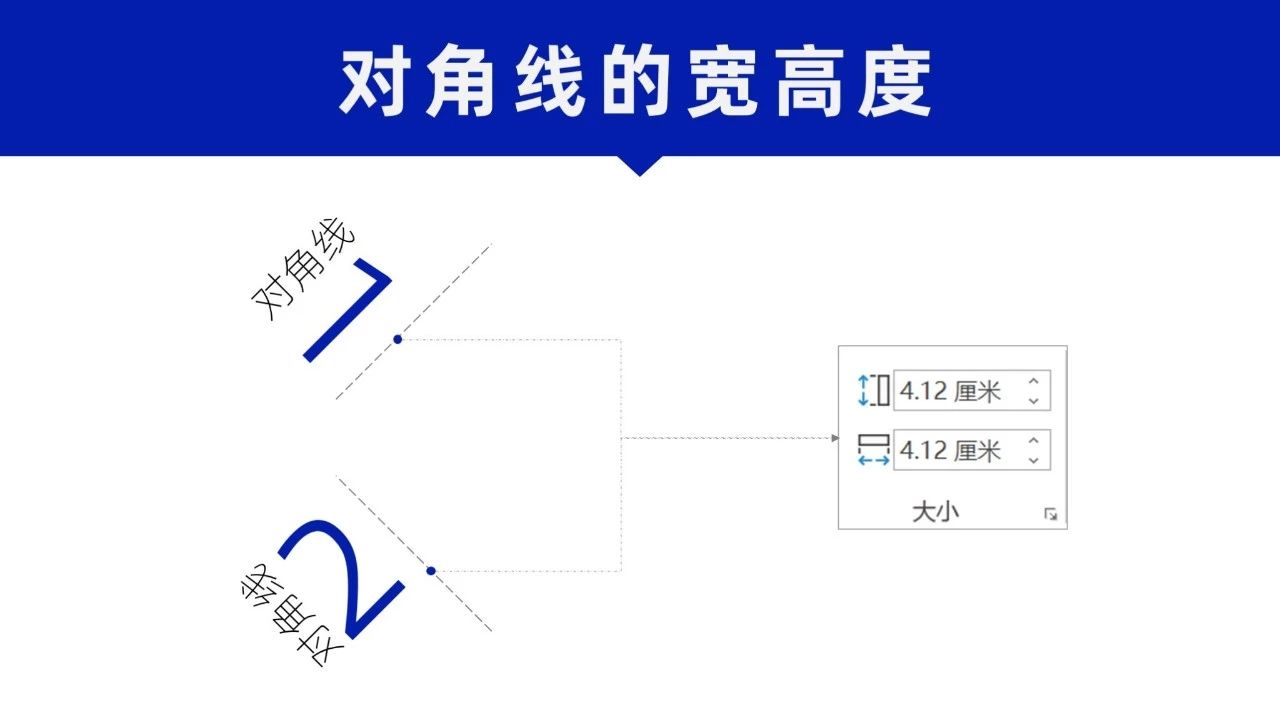
3. Set the line width and height
The method introduced at the end does not use connection points to connect, but by setting the parameters of the width and height of the line, it is also possible to make a rice grid;
This kind of operation can also be implemented in lower versions of PowerPoint (the function of merging shapes (formerly known as Boolean operations) needs to be available in slightly higher versions).
The straight line connecting the diagonals of the rice grid, the width and height are obviously the same, by manually setting the corresponding value, the straight line can also be adjusted to a suitable production The length and angle of the grid.
The operation is as follows:
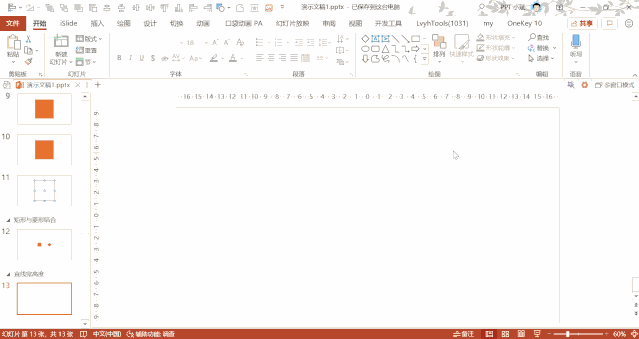
① Add a square
Again, add the square (rectangle) first.
Start→Drawing→Rectangle, click a blank space on the slide, or hold down the Shift key and click the mouse to drag to draw a square.
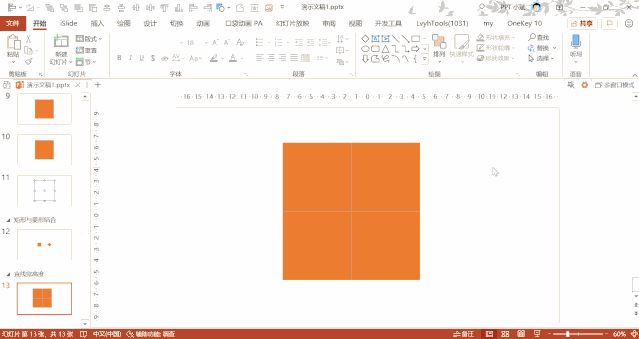
② Draw horizontal and vertical lines
Start→Drawing→Straight lines, draw horizontal and vertical lines through the four connection points on the sides of the rectangle.

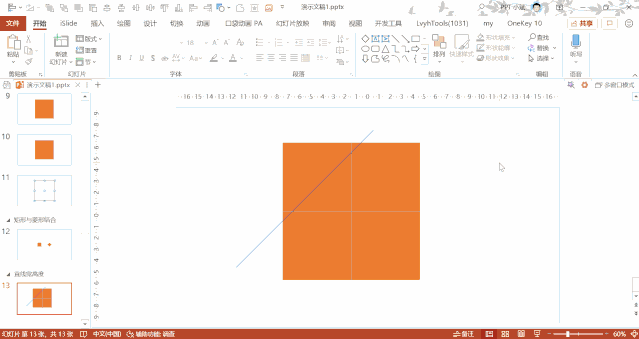
③ Draw diagonal lines
By clicking the square→Shape Format, you can see the corresponding width and height.
Draw a straight line obliquely. In the shape format, modify the width and height to be consistent with the square. In this way, a diagonal line is ready;
(If you draw a straight line, tilt the straight line to the other side, then you can get a diagonal line to the other side after setting the parameters)
Press and hold the Ctrl key and drag the line to copy the same line, keep selecting the new line→Shape Format→Rotate→Rotate 90° to the right, so thatthe other line The diagonal is also ready.
(Or, redraw a straight line that slopes to the other side, and also modify the width and height, and you can also get another diagonal line)
Next, hold down the Ctrl key and click on the square and two diagonal lines respectively, then go to Shape Format→Align→Horizontal Center and Vertical Center to complete the alignment operation.
In this way, the shape of the mzi grid is also completed.

④ Modify the format
The modification of the final format is consistent with the operation of the above two methods.
Select square, shape format→shape fill→no fill, get box;
Choose a square, shape format→Shape Outline, choose the appropriate color and thickness;
Hold down the Ctrl key, click on the four straight lines respectively, shape format→shape outline, set to dotted line, modify thickness and appropriate color.
Okay, through the setting of the straight line parameters, the production of the Mizi grid is also completed.
I would like to mention here that for the grid drawn by setting the straight line parameters, you can choose to select all the objects in the grid at the same time, right click→group→combine< /strong>, after the combination, it is convenient to move and adjust the size of the subsequent Mizi grid.
Finally, a summary.
1. Make rice grid in PPT, the article introduces three methods,
2. The first two methods make drawing easier by changing the connection points, that is, using the ①double the number of vertices function of the plug-in, or the software The built-in function of merging shapes can realize the operation of ② combining rectangle and rhombus;
3. The last method is to control the length and angle of the line by ③Setting the parameters of line width and height instead of connecting points, so that Realize the production effect.
Articles are uploaded by users and are for non-commercial browsing only. Posted by: Lomu, please indicate the source: https://www.daogebangong.com/en/articles/detail/With%20these%203%20small%20methods%20you%20can%20easily%20draw%20a%20grid%20in%20PPT.html
 支付宝扫一扫
评论列表(196条)
测试