Mustang Design Academy
Step 1

Click File > New to open Photoshop and create a new document. Made the file 2000 px with 2000 px (resolution doesn't really matter since you're using pixels). Name the file "Comic Book Text Effect".
Step 2
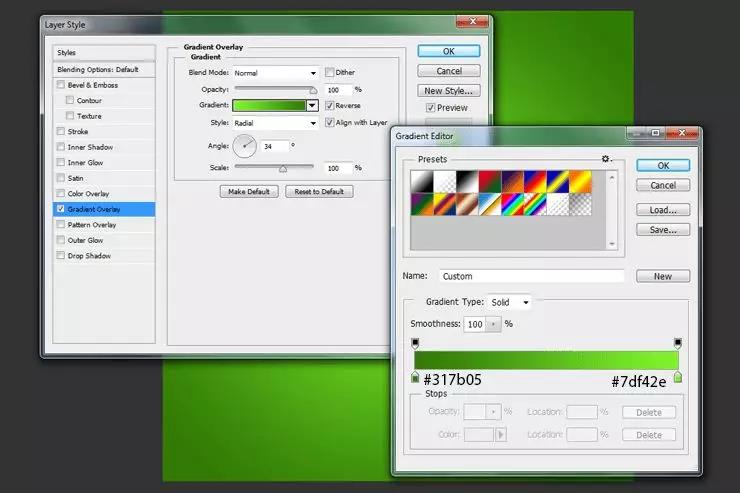
To add a gradient to the background, double-click on the background layer to reveal the Layer Style window and apply this setting.
Step 3
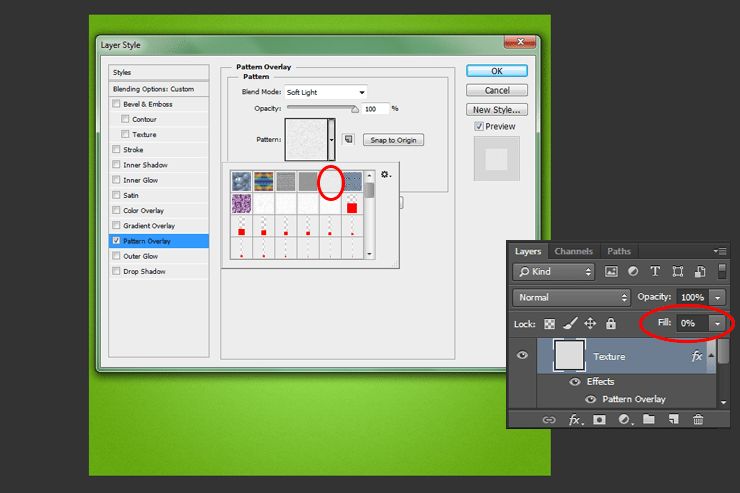
Create a new layer. Fill it with any color and change Fill to 0%. Double-click the layer to bring up the Layer Style window and apply this pattern.
Step 4
Create a new layer. Select the Brush Tool (B) and set the brush size to 1957 px. Any color you want can be used. Now place the halftone in the center of the document. Also, change the fill layer to Luminosity with a fill rate of 16%.
Step Five
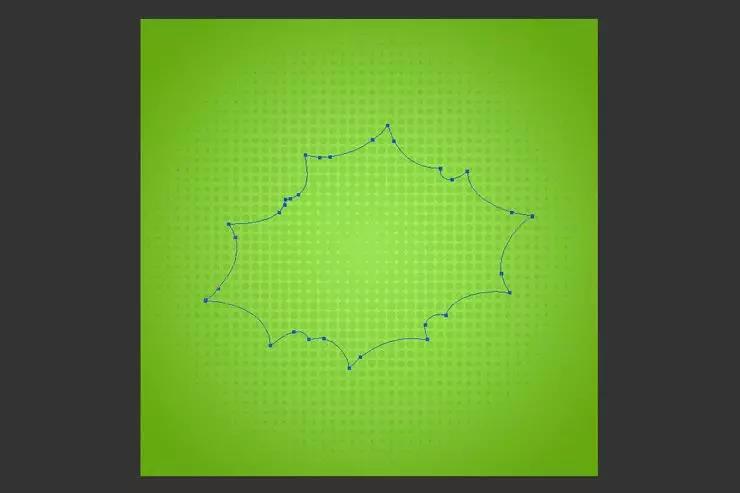
Create a new layer. Grab the Pen Tool (P) and create a shape as shown in the image below.
Step Six
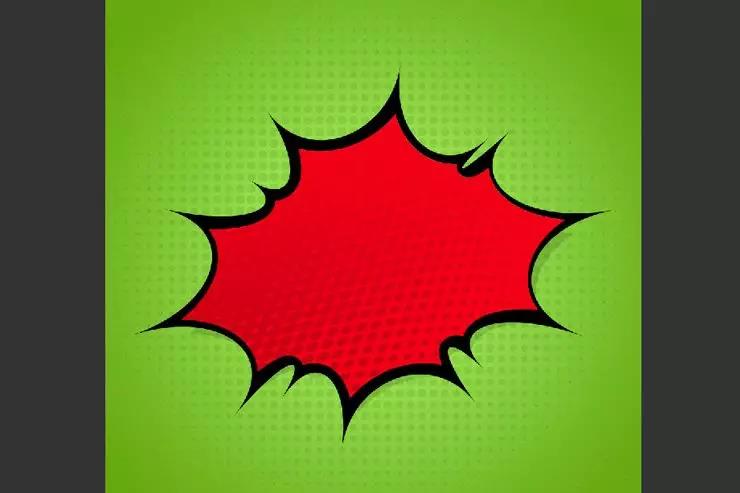
Go to the Paths tab, right click on the path you just created, then click Select and OK.
Step Seven
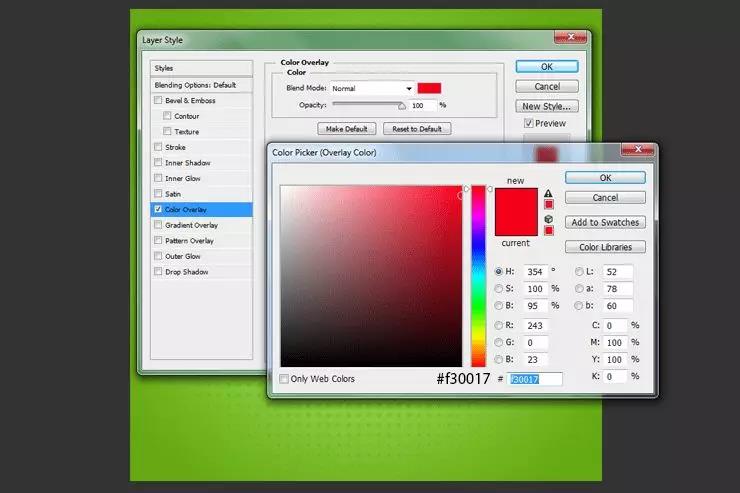
Fill this selection with any color, then double-click the layer to apply Color Overlay and Drop Shadow.
Step Eight
Create a new layer. Select from the previous layer by clicking Ctrl and selecting the thumbnail image. Grab the Brush Tool again and use the Halftone Brush to place it in the document as shown below. Any color can be used.
Step Nine
Double click on this layer and add this Gradient Overlay with 0% Fill.
Step Ten
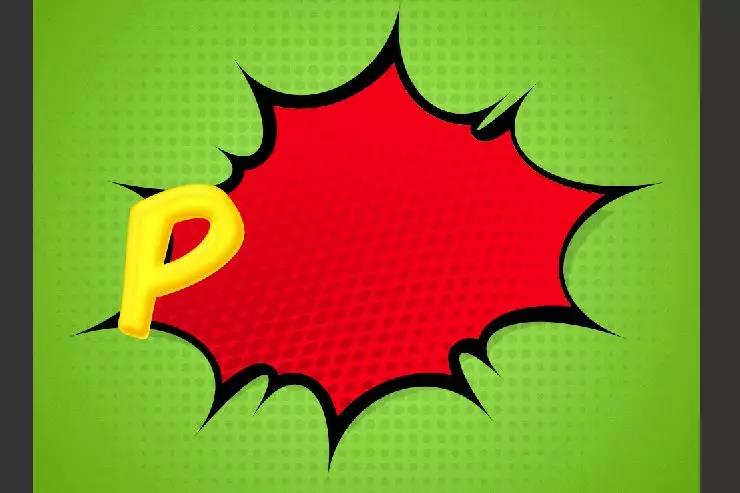
Create a new layer, grab the Pen Tool and create an outline for the created shape. Select from it and fill it with #000000, placing this layer below this shape layer.
Step Eleven
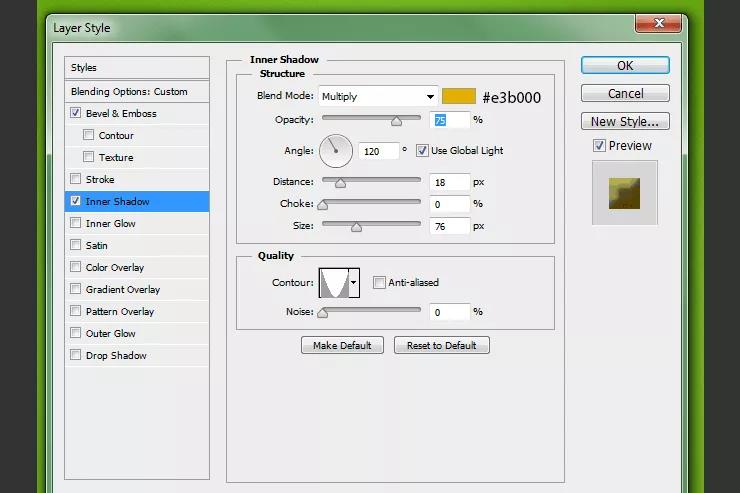
Grab a typing tool and create the word "POW!" in this example.
Step Twelve
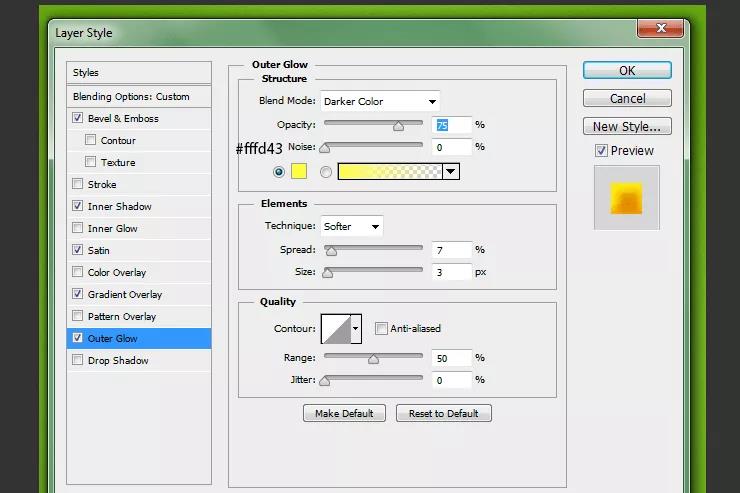
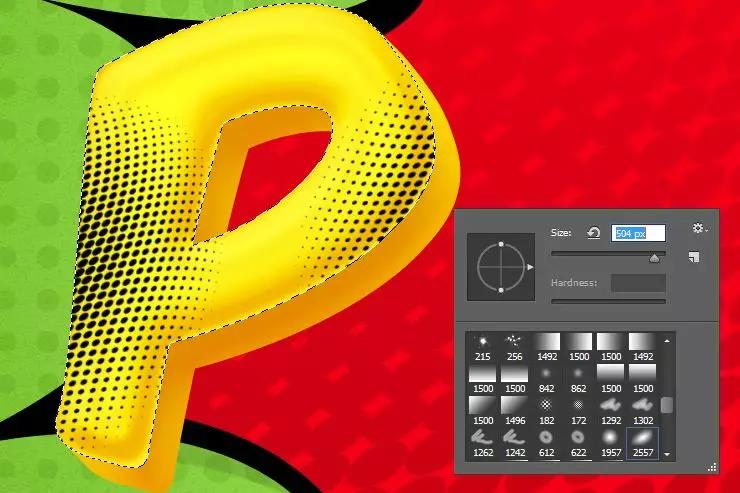
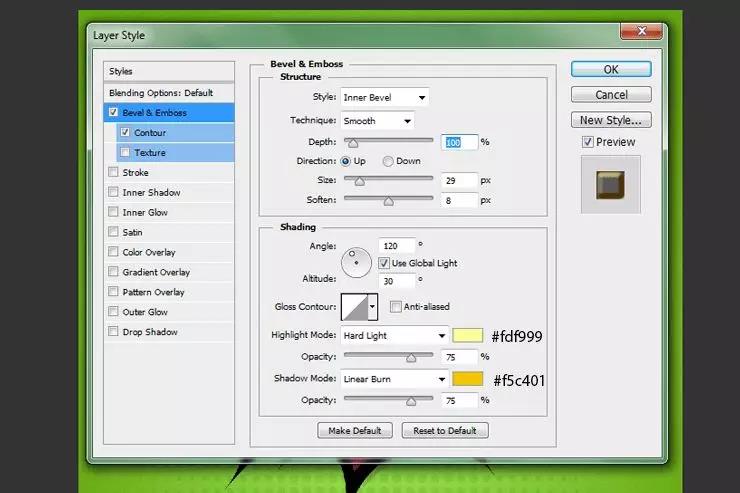
Duplicate this layer and place it under the original "P" layer. Take the original "P" layer and add these layer styles. Add the outline afterwards.
Step Thirteen

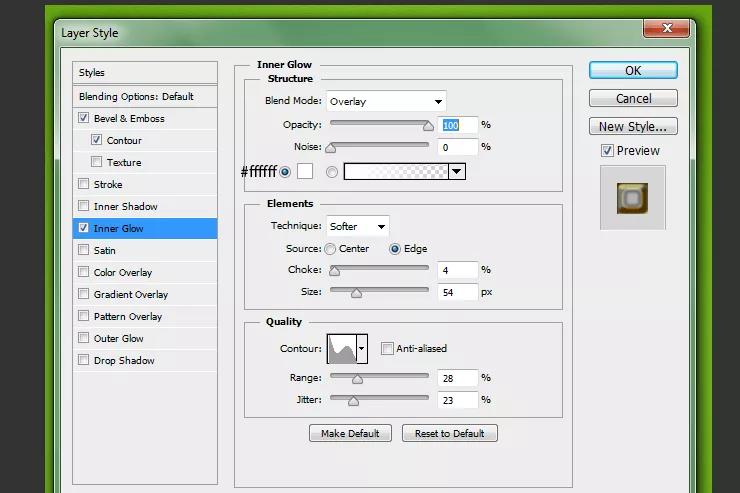
Add Inner Glow

After that "P" should look like this. Remember to duplicate the "P" and select that layer. Use the arrow keys to move this layer five times to the right and five times down. Make sure the Move tool is selected.
Step Fourteen
Take this layer you just moved and duplicate it again (move it five times to the right and five times down). Repeat the same steps described earlier for three more "P" layers. Therefore, there should be 6 "P" layers in total, including the original "P" layer.
Step fifteen

Put 5 duplicate "P" layers in a group and apply these layer styles.
Add inner shadow
Add Outer Glow
Step Sixteen

Add some halftone brushes on the letter "P". Go to the original layer "P" and make a selection from it. Create a new layer and grab the brush tool. Using #000000, place the halftone on the letters.

Change this layer to Overlay. Repeat these same steps for the O, W, and exclamation point.
Step Seventeen

Hide the black background and press Cmd/Ctrl+Shift+Alt/Option+E to merge all transparent layers.
Step Eighteen

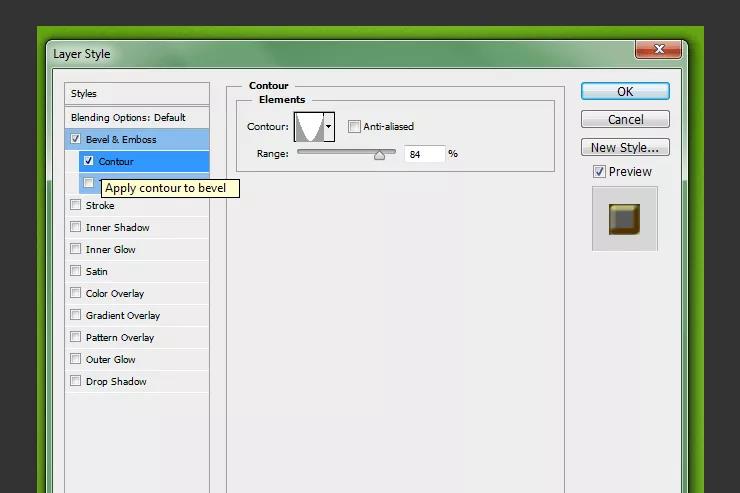
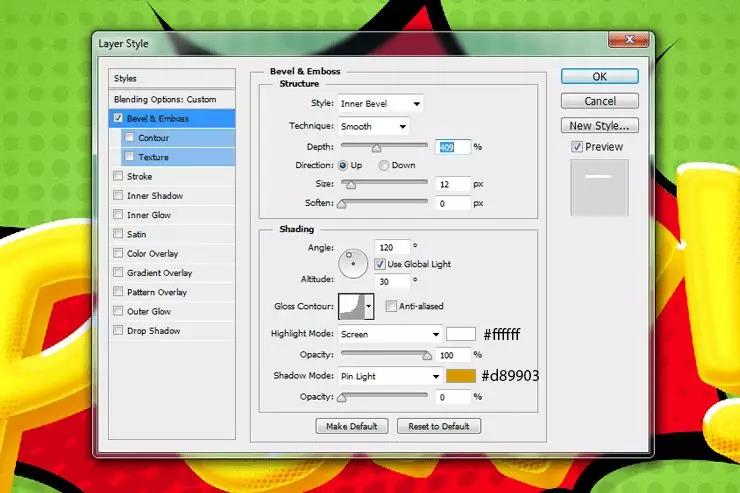
Add a Bevel and Emboss effect to this layer

Fill this layer with 0%.
Step Nineteen

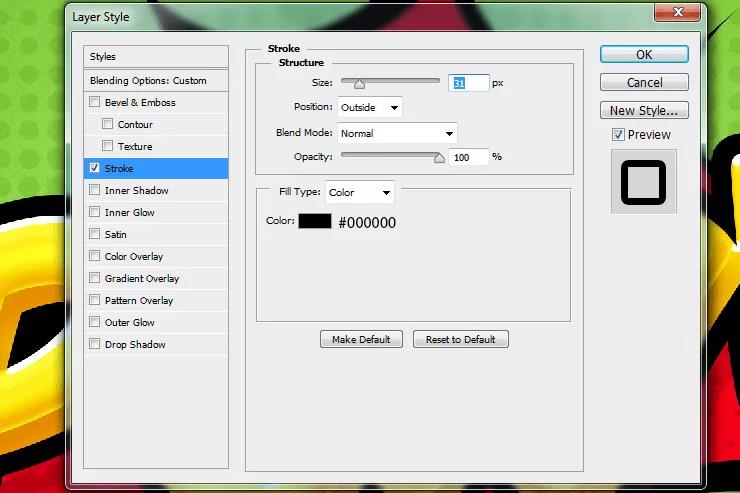
Now repeat the previous step to add strokes. Create a new layer and place it below all text layers. Select from all first and last P, O, W and exclamation point layers by holding down the Ctrl and Shift keys. Fill this layer with black. Add a black stroke to this layer.

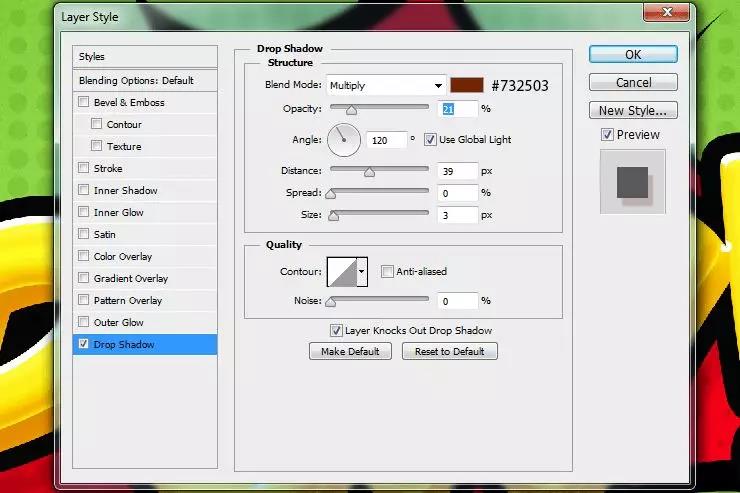
Add a drop shadow by right clicking on the layer and selecting Convert to Smart Object.
You're done!

Articles are uploaded by users and are for non-commercial browsing only. Posted by: Lomu, please indicate the source: https://www.daogebangong.com/en/articles/detail/Wild%20Horse%20Design%20Typography%20Tutorial%20%20How%20to%20Create%20Comic%20Book%20Text%20Effects%20in%20PS.html

 支付宝扫一扫
评论列表(196条)
测试