Mustang Design Academy
How to Create a Game Graphics Style Text Effect in Adobe Illustrator

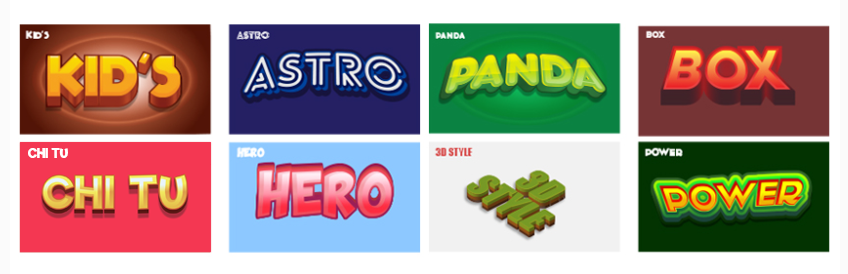
In this tutorial you will learn how to style your game graphics in Adobe Illustrator.
The graphic style we will create is the game graphic style.
what do you need
The following fonts are used in this tutorial:
Riffic Free-Bold
Before you start creating this graphic style, please download and install this font.
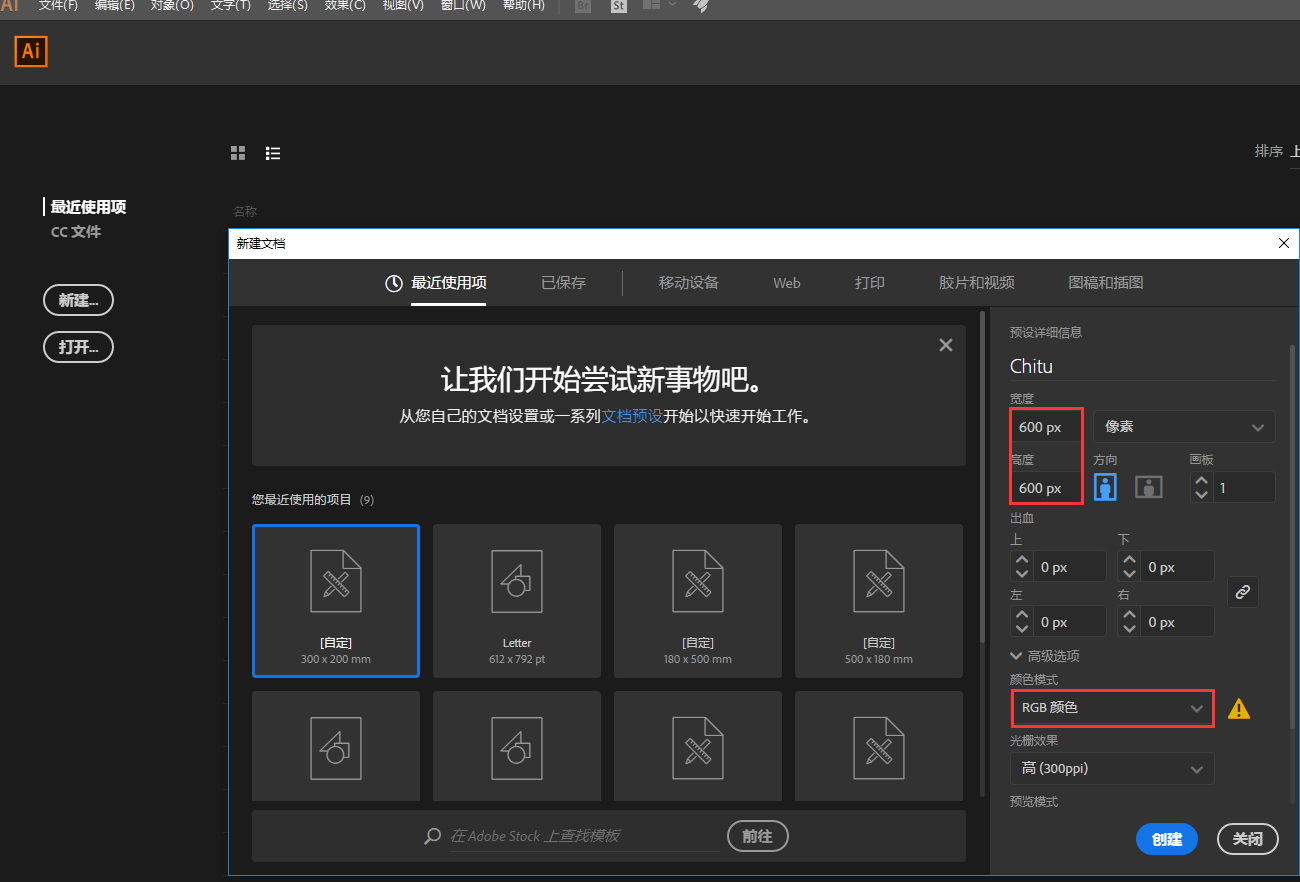
1. How to create a new file
first step
Let's start by creating a new document of 600 x 600 Px size and RGB color mode.
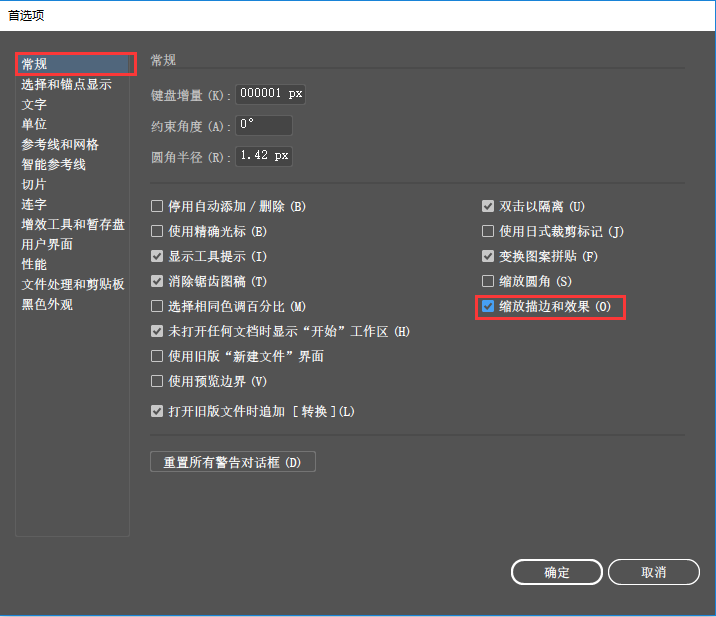
step 2
Now go to Edit > Preferences > General and check the Scale Strokes and Effects option.
Click OK to apply this setting.
2. How to create graphic styles
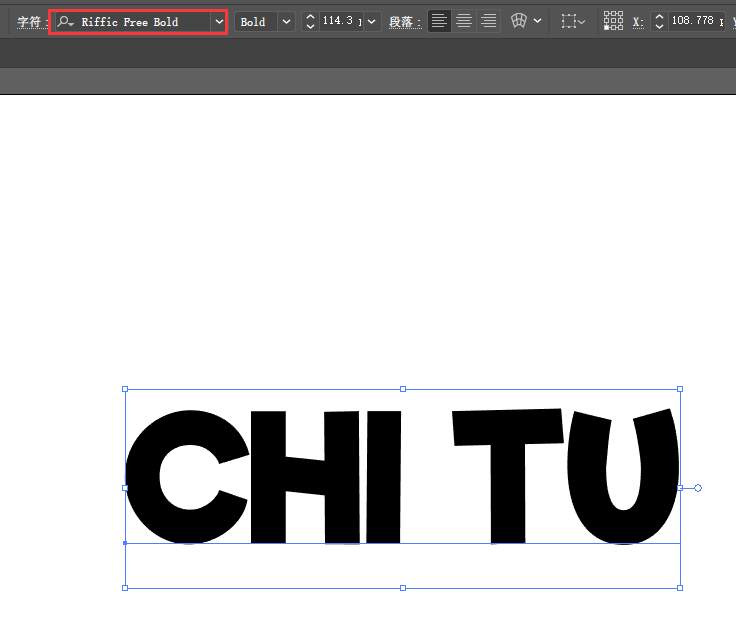
step 1
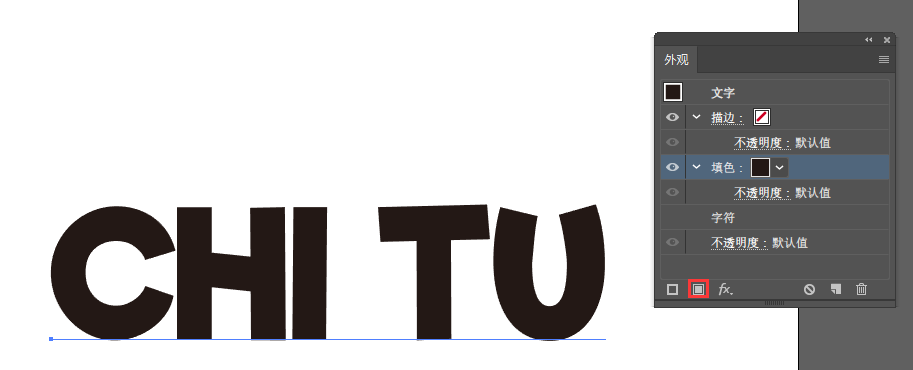
Let's get started with the type tool! Pick the Type Tool (T) and select the "Riffic" font. Set the font size to 100 pt. Write "CHI TU" in capital letters.
step 2
Now we need to apply the first gradient color, so select the text and set the fill color to None.
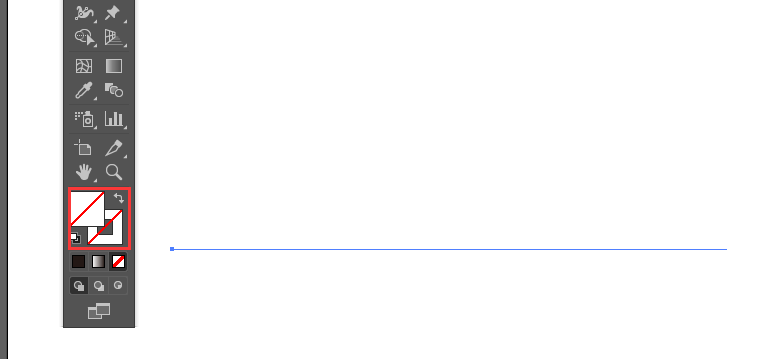
Next, go to the Appearance panel , and click Add New Fill.
Note: If you don't see the Appearance panel, go to Window > Appearance.
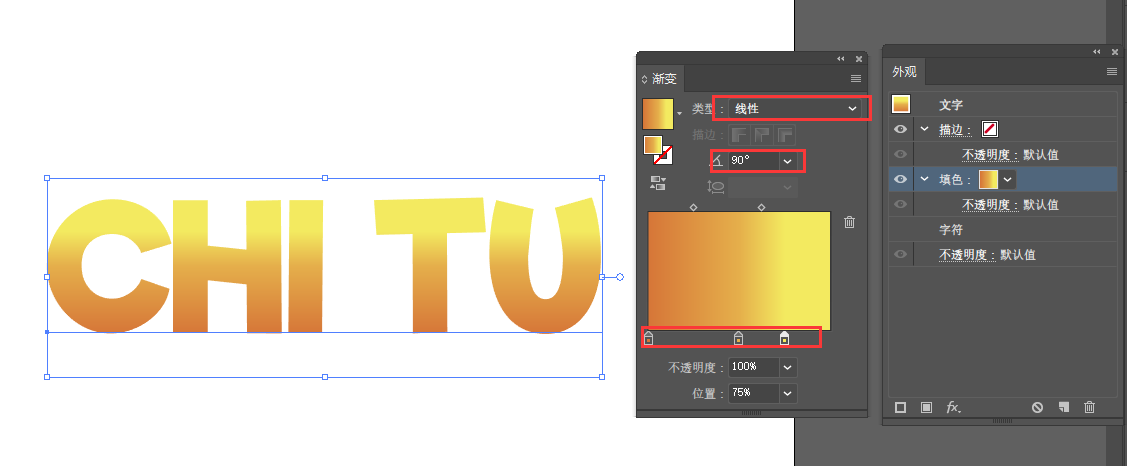
step 3
Select the new fill, go to Window > Gradient, and set the gradient with 3 color stops.
The settings are as follows:
Type: Linear
Angle: 90o
First gradient color stop #d67638 and position 0%
Second gradient color stop #e5af4b and place 50%
3rd gradient color stop #f3ea60 and place 75%
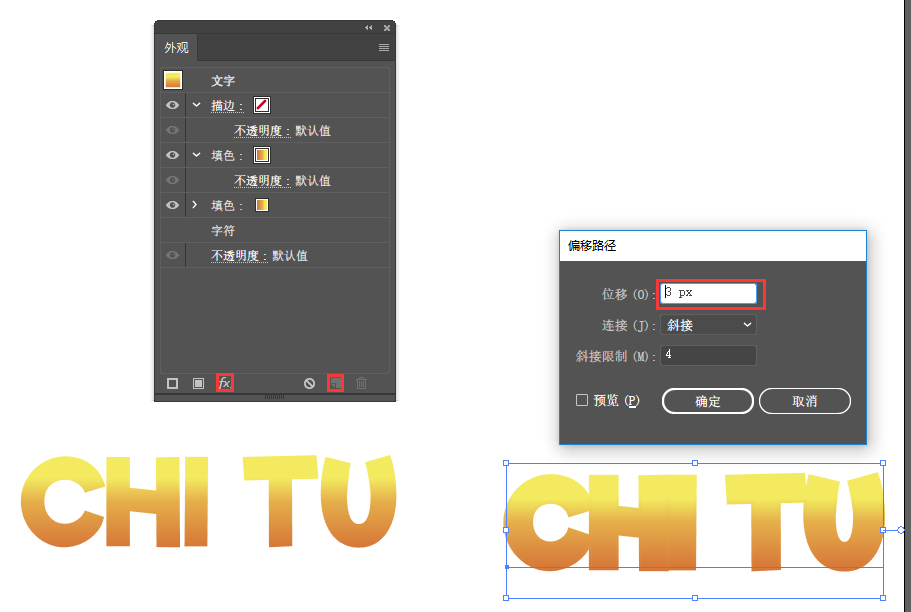
Step 4
Focus on the Appearance panel and make sure both the Text and Fill boxes are checked. Using the same Add New Fill button, add a second fill; when clicked, a new fill box (layer) is created above the existing fill.
Now, select the fill box at the bottom and click Add New Effect (fx). Choose Path > Offset Path.
The settings are as follows:
Offset: 3
Join: Miter
Miter limit: 4
Click OK to apply.
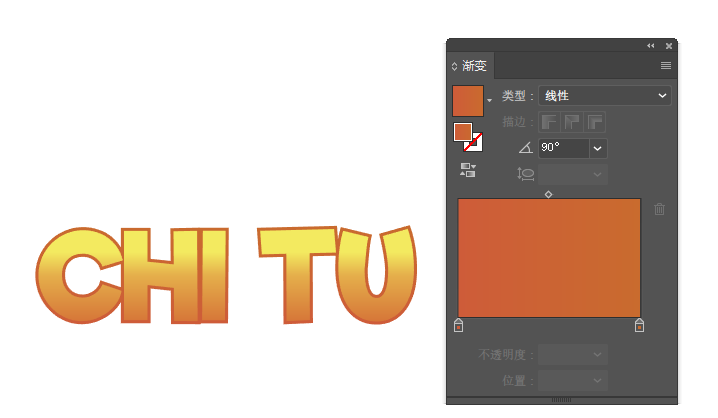
Step 5
Go to the Gradient panel (G) and set up a gradient with 2 Color Stops.
The settings are as follows:
Type: Linear
Angle: 90o
First gradient color stop #ce5c39 and position 0%
Second gradient color stop #c96b2e and position 100%
Tip: To remove any unwanted color stops from the Gradient panel, simply pull them down.
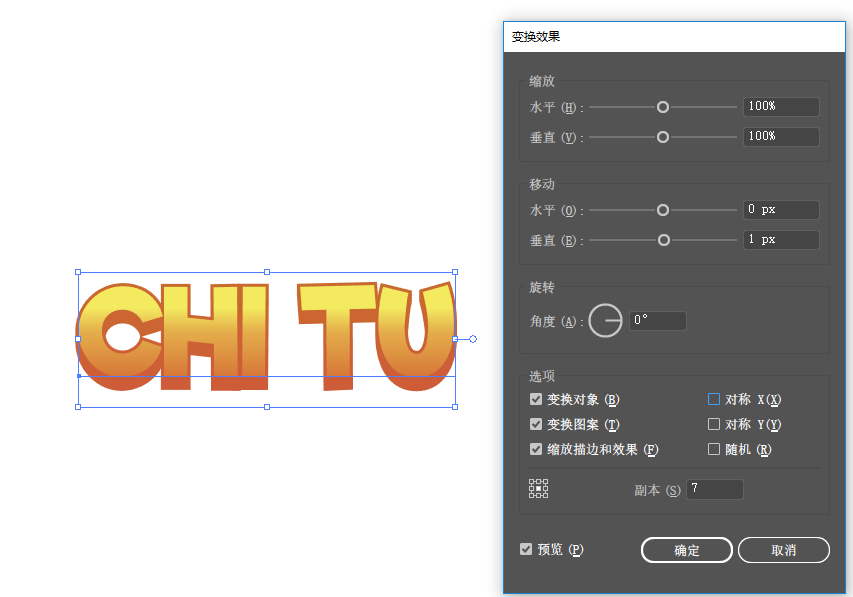
Step 6
Now click Add New Effect (fx) on the Appearance panel and choose Distort & Transform > Transform.
The settings are as follows:
Vertical movement: 1 point
option
transform object
change pattern
Scale strokes and effects
Copies: 7
Click OK to apply.
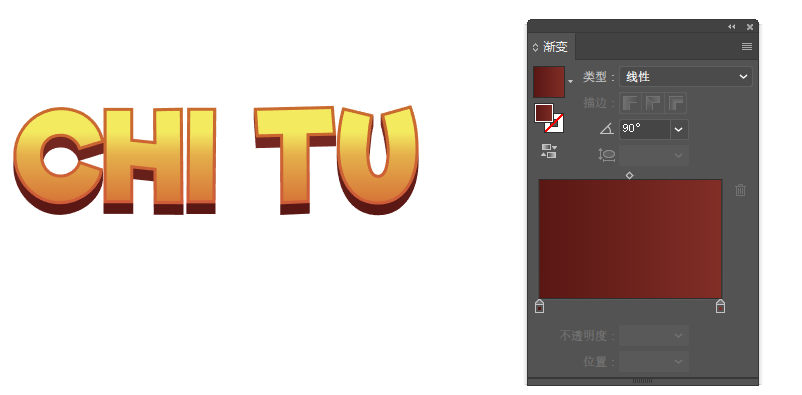
step 7
We're going to change the color of this gradient, so go to the Gradient panel (G). Set the following replacement gradient colors:
Type: Linear
Angle: 90o
First gradient color stop #591714 and position 0%
Second Gradient Color Stop #812e26 and Position 100%
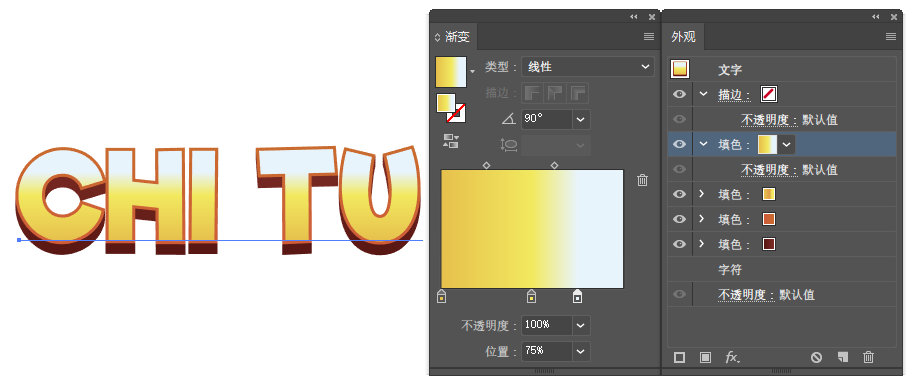
Step 8
Click the fill box above. Make sure both the Text and Upper Fill boxes are checked.
Now click the Duplicate Selected Item button on the Appearance panel.
Using the Gradient panel, replace the gradient colors with the following settings:
Type: Linear
Angle: 90o
First gradient color stop #e6c04c and position 0%
Second gradient color stop #f2e95f and place 35%
Third gradient color stop #e8f4fc and position 100%
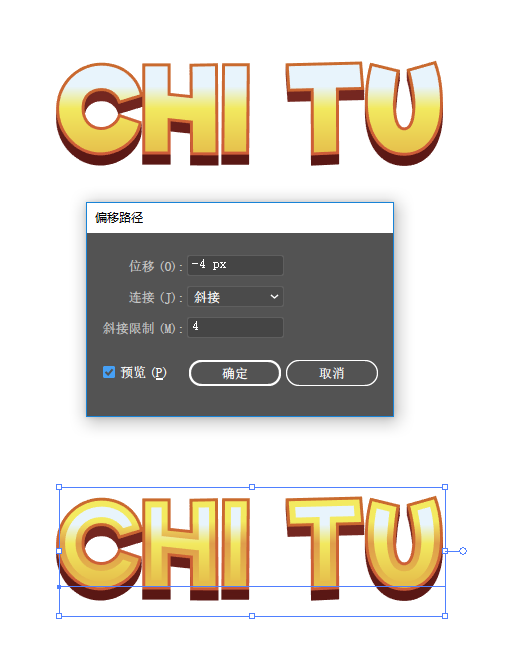
Step 9
Now click the Add New Effect (f x) button on the Appearance panel and choose Path > Offset Path.
The settings are as follows:
Displacement: -4
Join: Miter
Miter limit: 4
Click OK to apply.
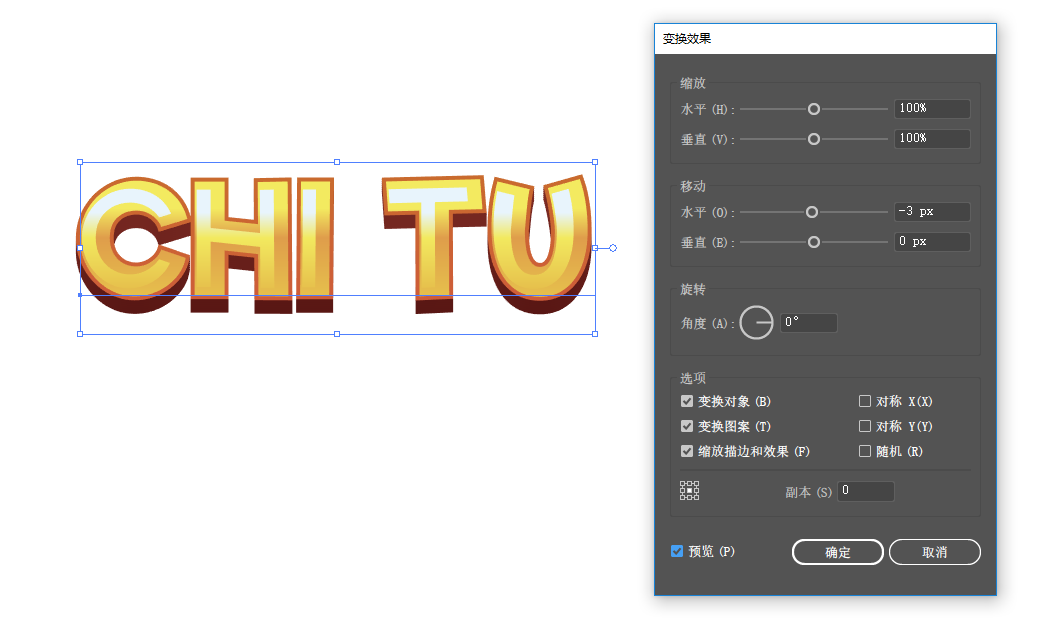
step 10
Make sure both the Text and Upper Fill boxes are checked. Click Add New Effect (fx) and choose Distort & Transform > Warp
The settings are as follows:
Horizontal movement: -3 points
option
transform object
change pattern
Scale strokes and effects
Click "OK" to apply.
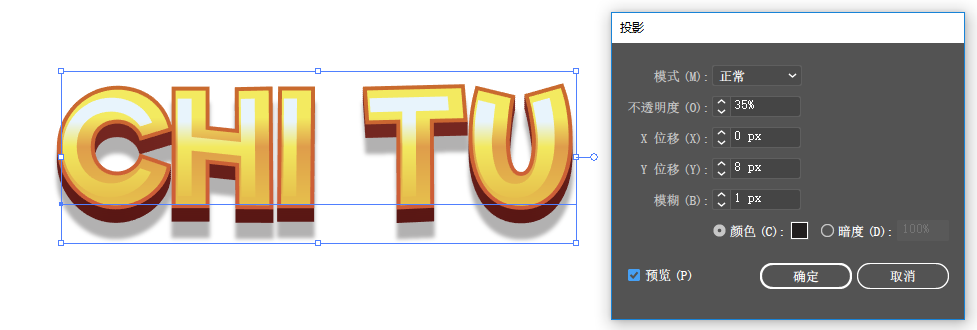
step 11
Now, we will add a shadow behind the text. So select the text and click Type on the Appearance panel.
Now click the Add New Effect button and choose Stylize > Drop Shadow.
The settings are as follows:
Mode: Normal
Opacity: 35%
X Offset: 0
Y Offset: 8pt
Blur: 1 pt
Color: #221f1f
Click OK to apply.
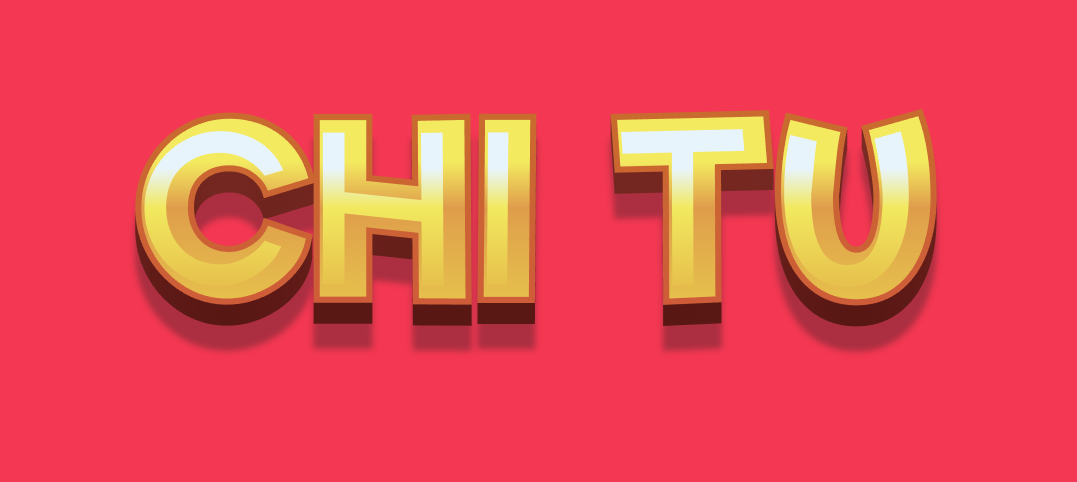
You're done! ! !
Articles are uploaded by users and are for non-commercial browsing only. Posted by: Lomu, please indicate the source: https://www.daogebangong.com/en/articles/detail/Wild%20Horse%20Design%20Font%20Design%20Tutorial%20%20How%20to%20Create%20Game%20Graphic%20Style%20Text%20in%20AI.html
 支付宝扫一扫
评论列表(196条)
测试