- Image and text skills
WPS electronic signature supports multi-terminal operation and can issue contracts anytime and anywhere
Computer portal: https://esign.wps.cn/s/evNRLLmbC; Mobile portal: [WPS electronic signature] WeChat public account
1. Enter the PC WPS electronic signature webpage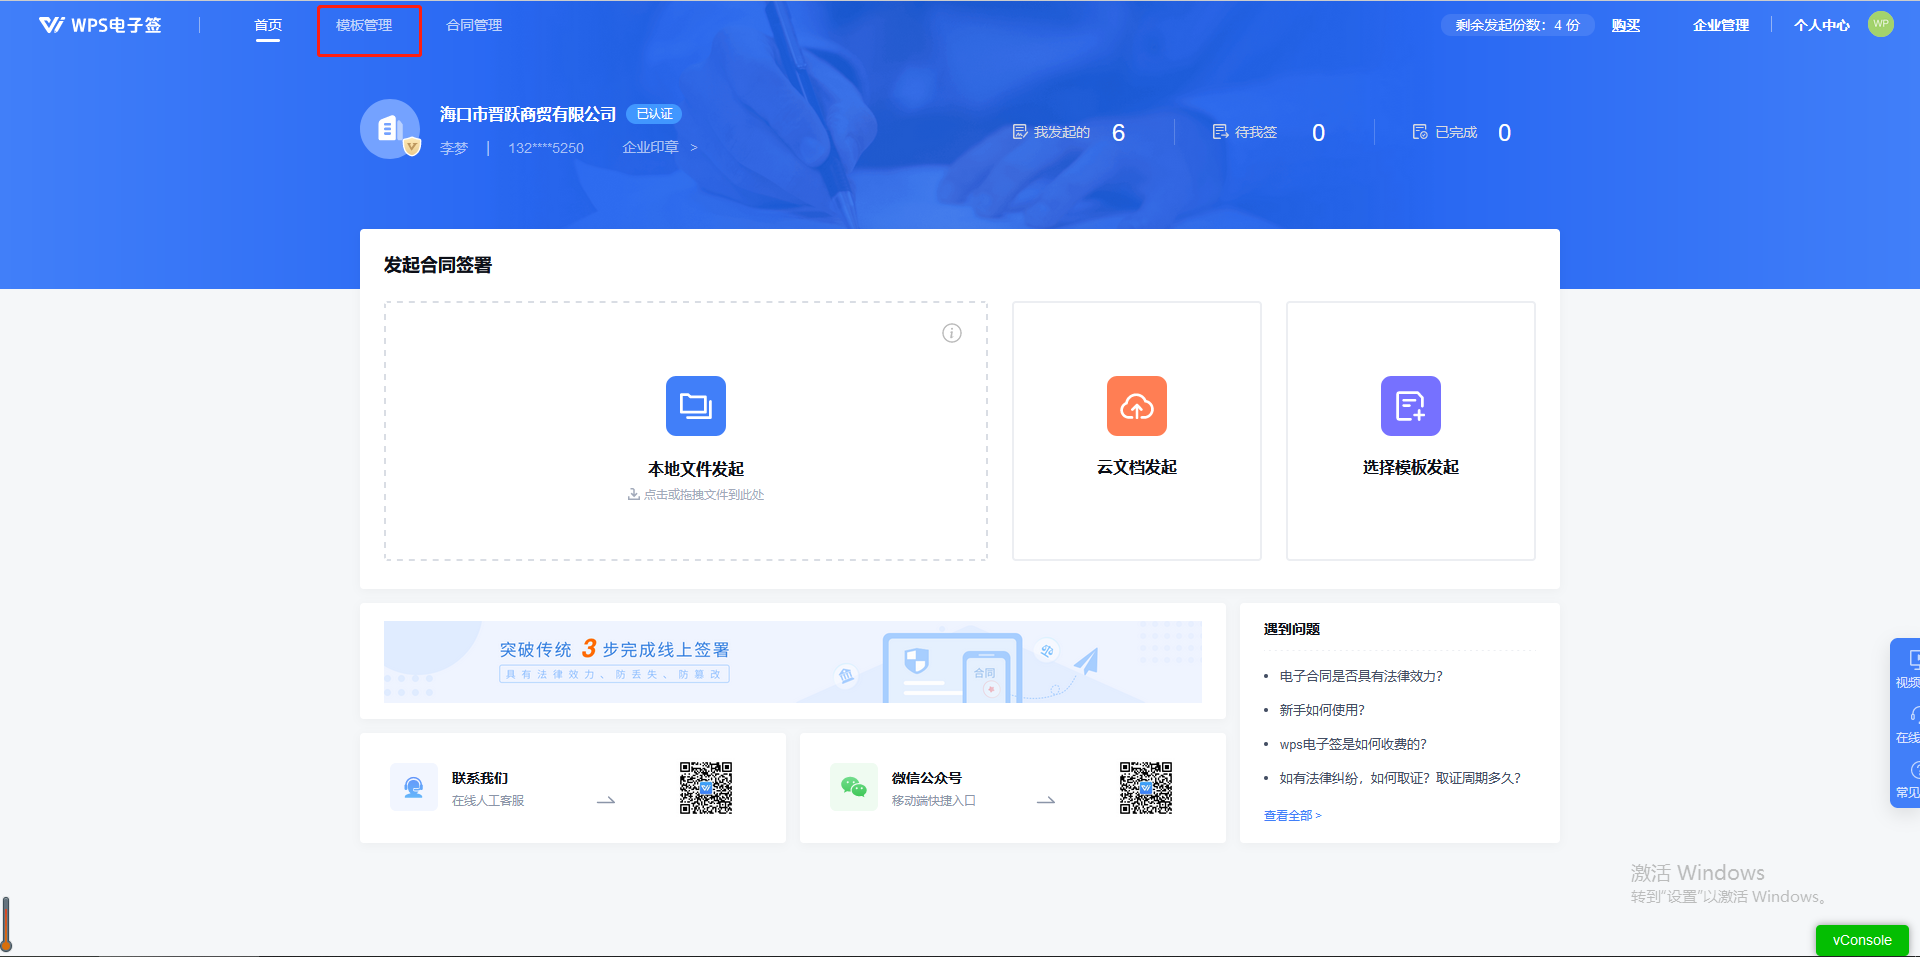
2. Enter the template management_own template page to create a new template (templates can be added through cloud documents/local methods)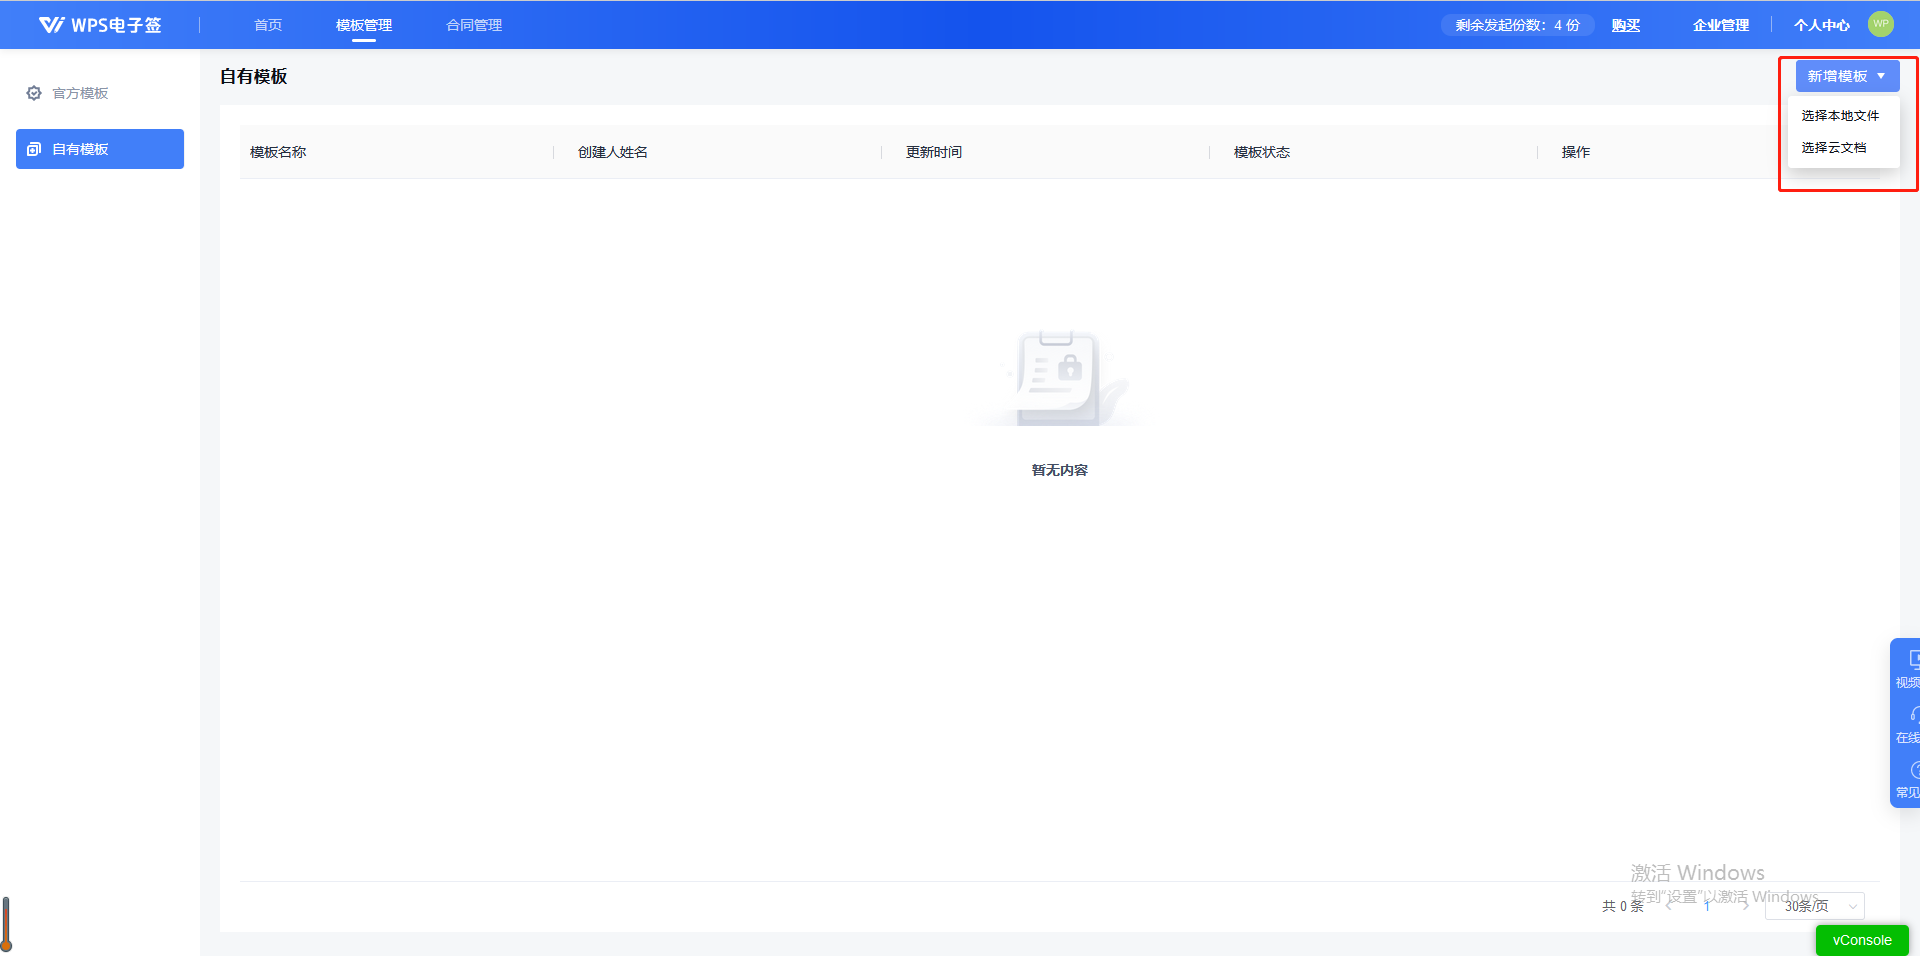
3. Enter the template information setting page and add the contracts required for the template. It supports adding up to 5 signed contracts.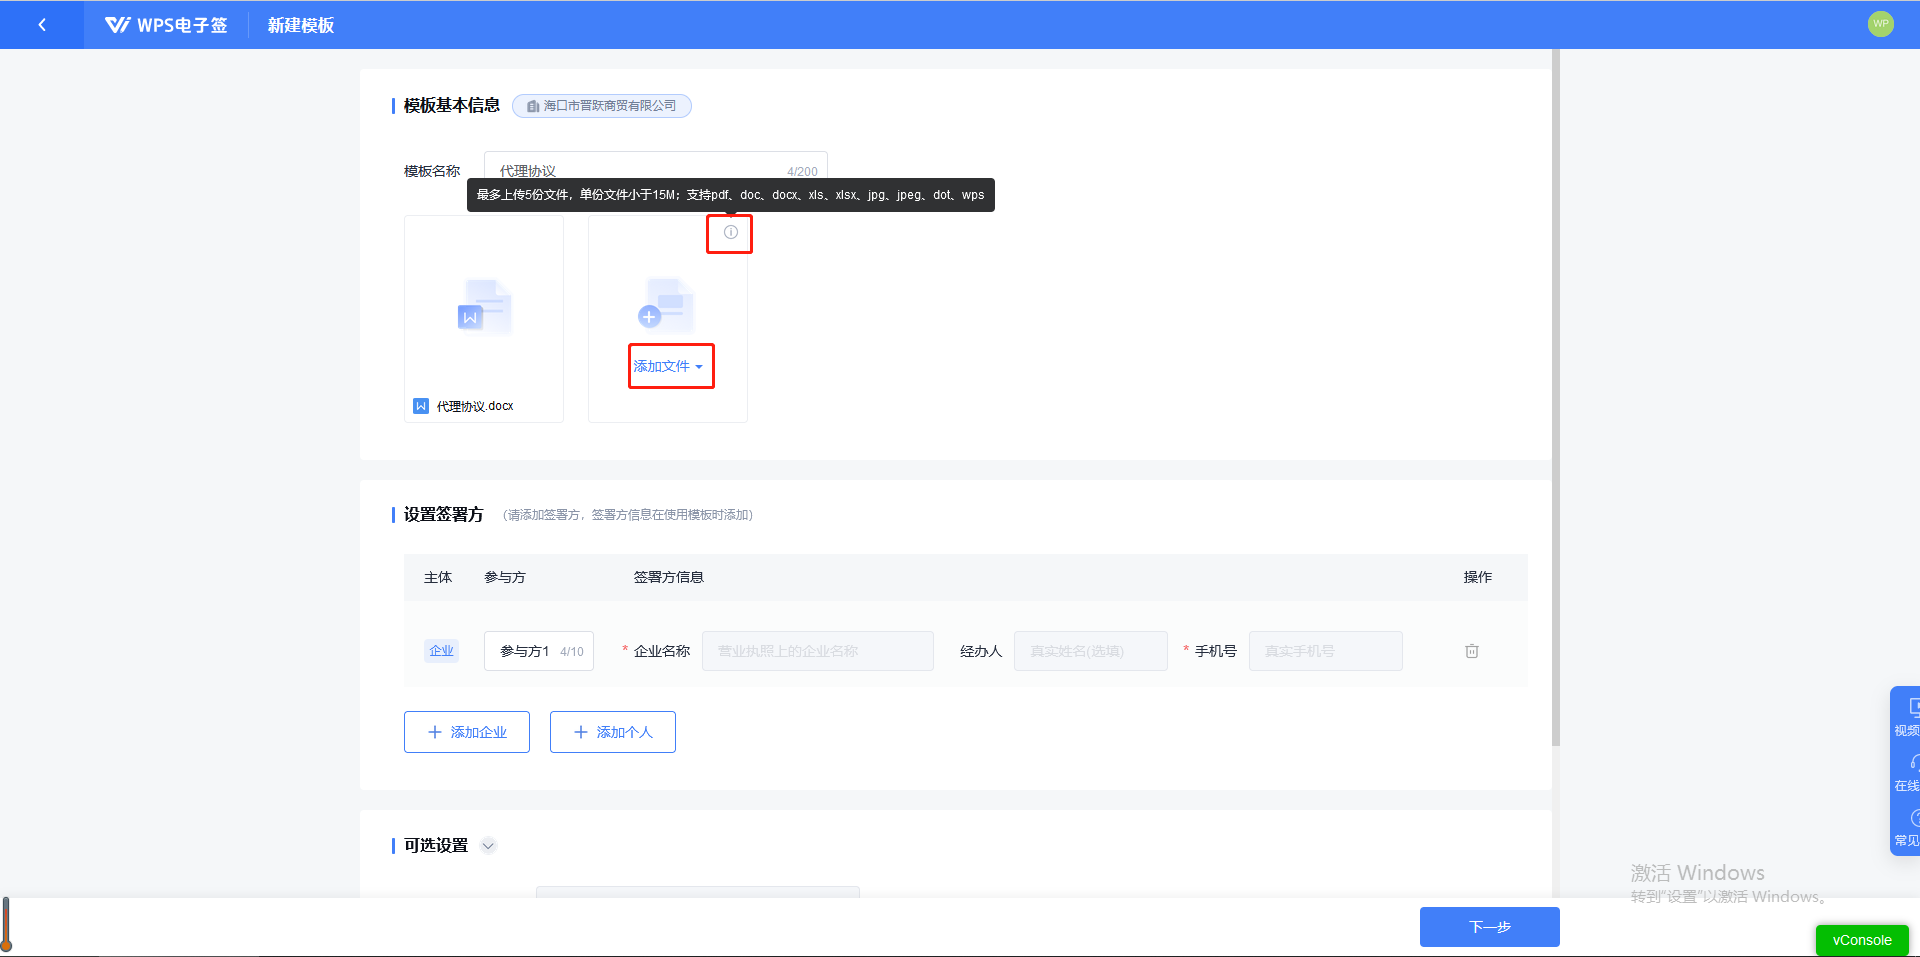
4. After editing the contract content, click [Confirm]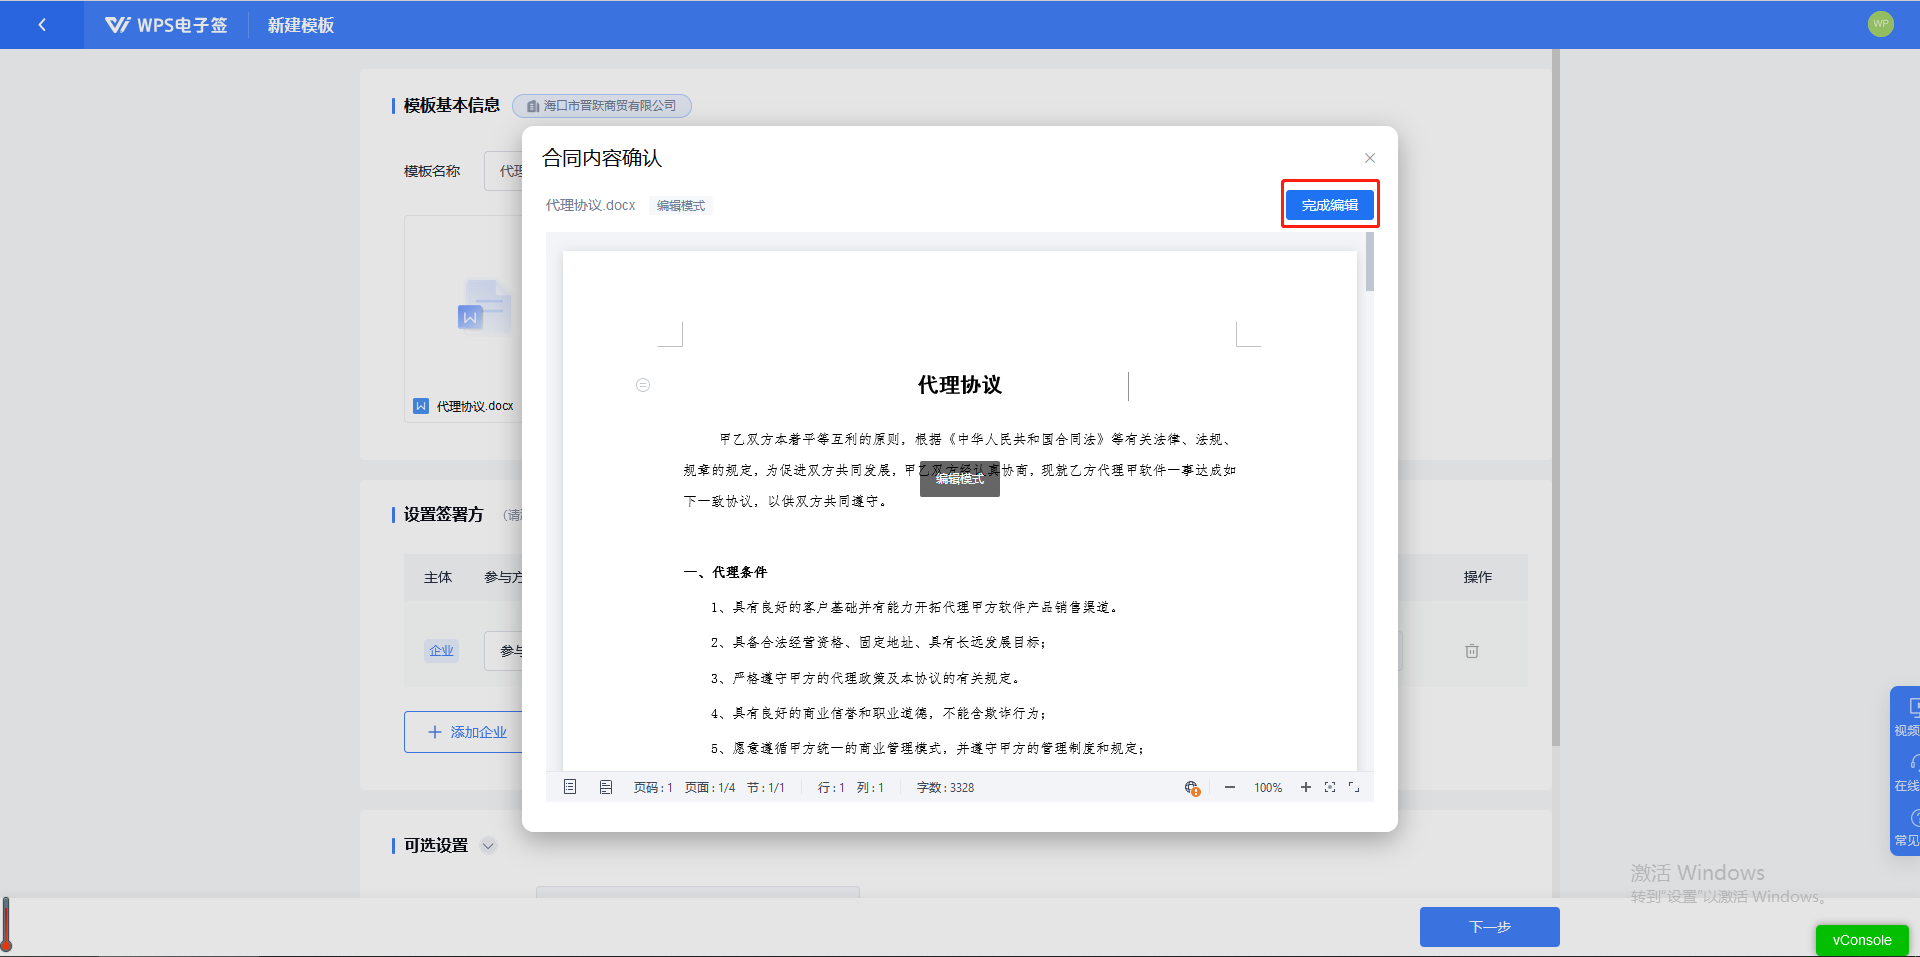
5. Add the signatory information required for the current template and click [Next]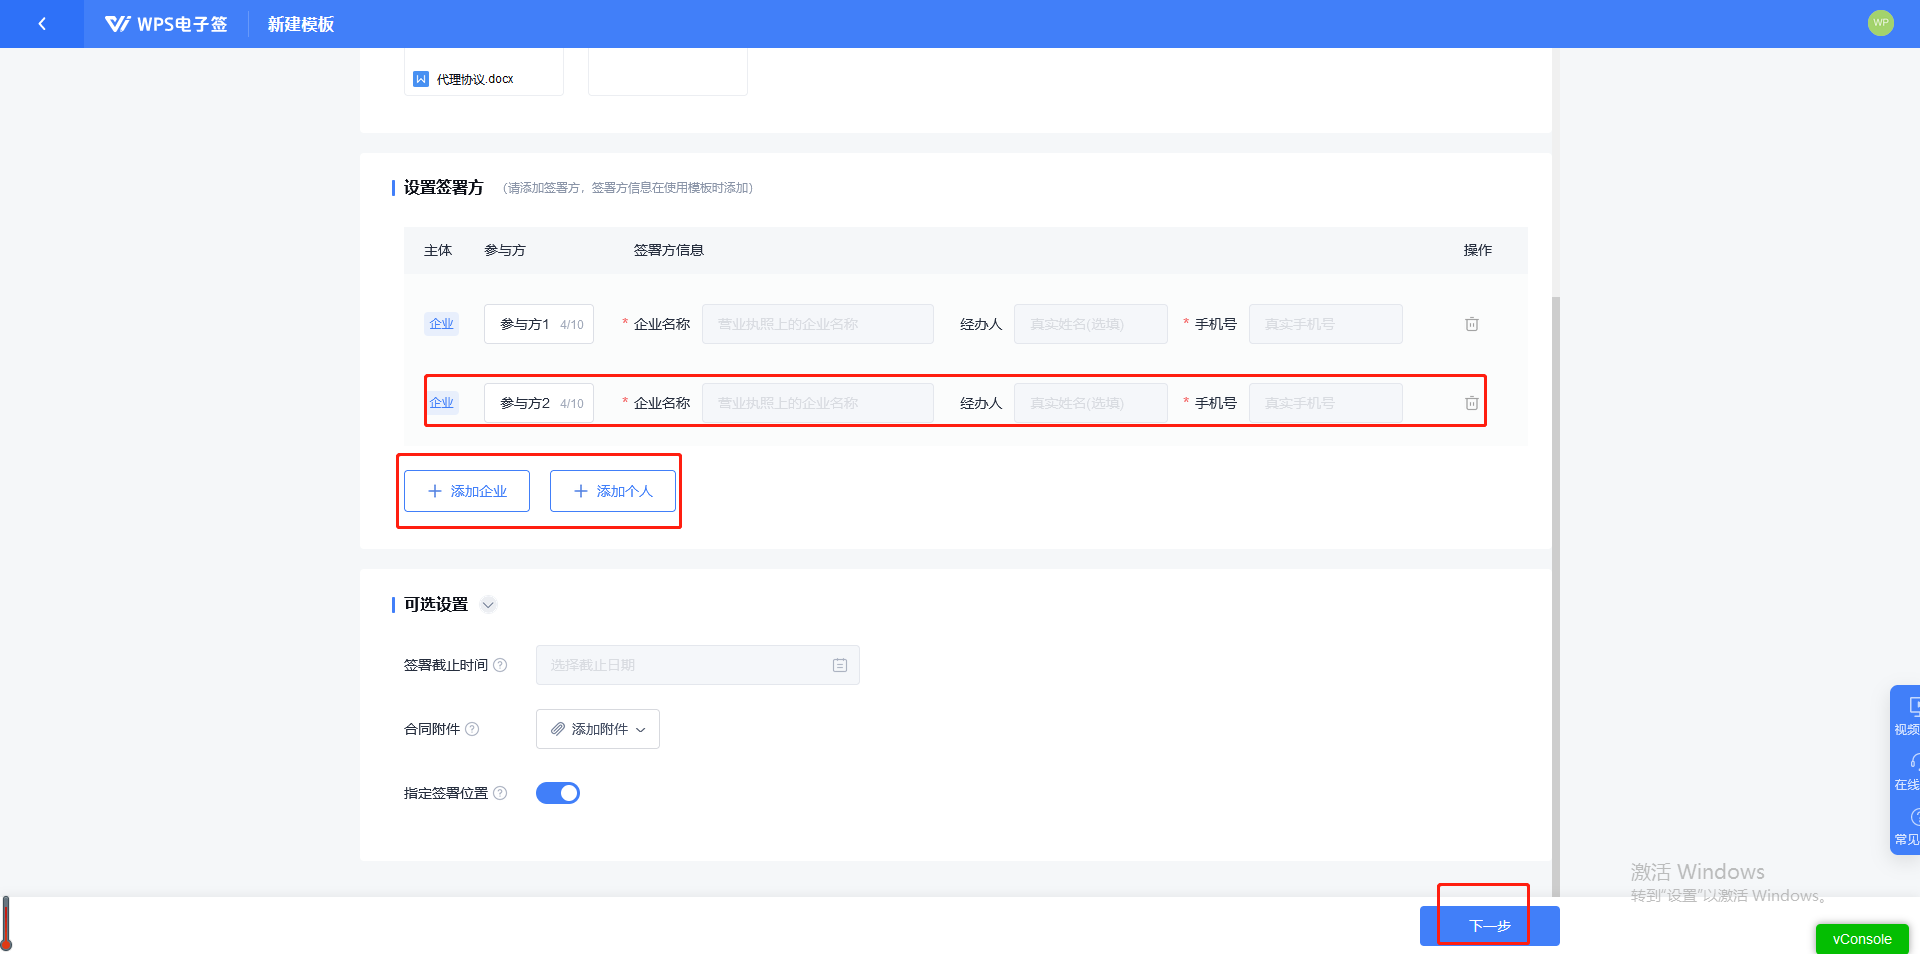
6. After entering the settings page and previewing the contract, pull down the contract to the location that needs to be set. If the contract content needs to be edited, the initiator can set the settings. After initiating, the initiator can fill in the contract content. , select the initiator and drag the text control to the location that needs to be filled in.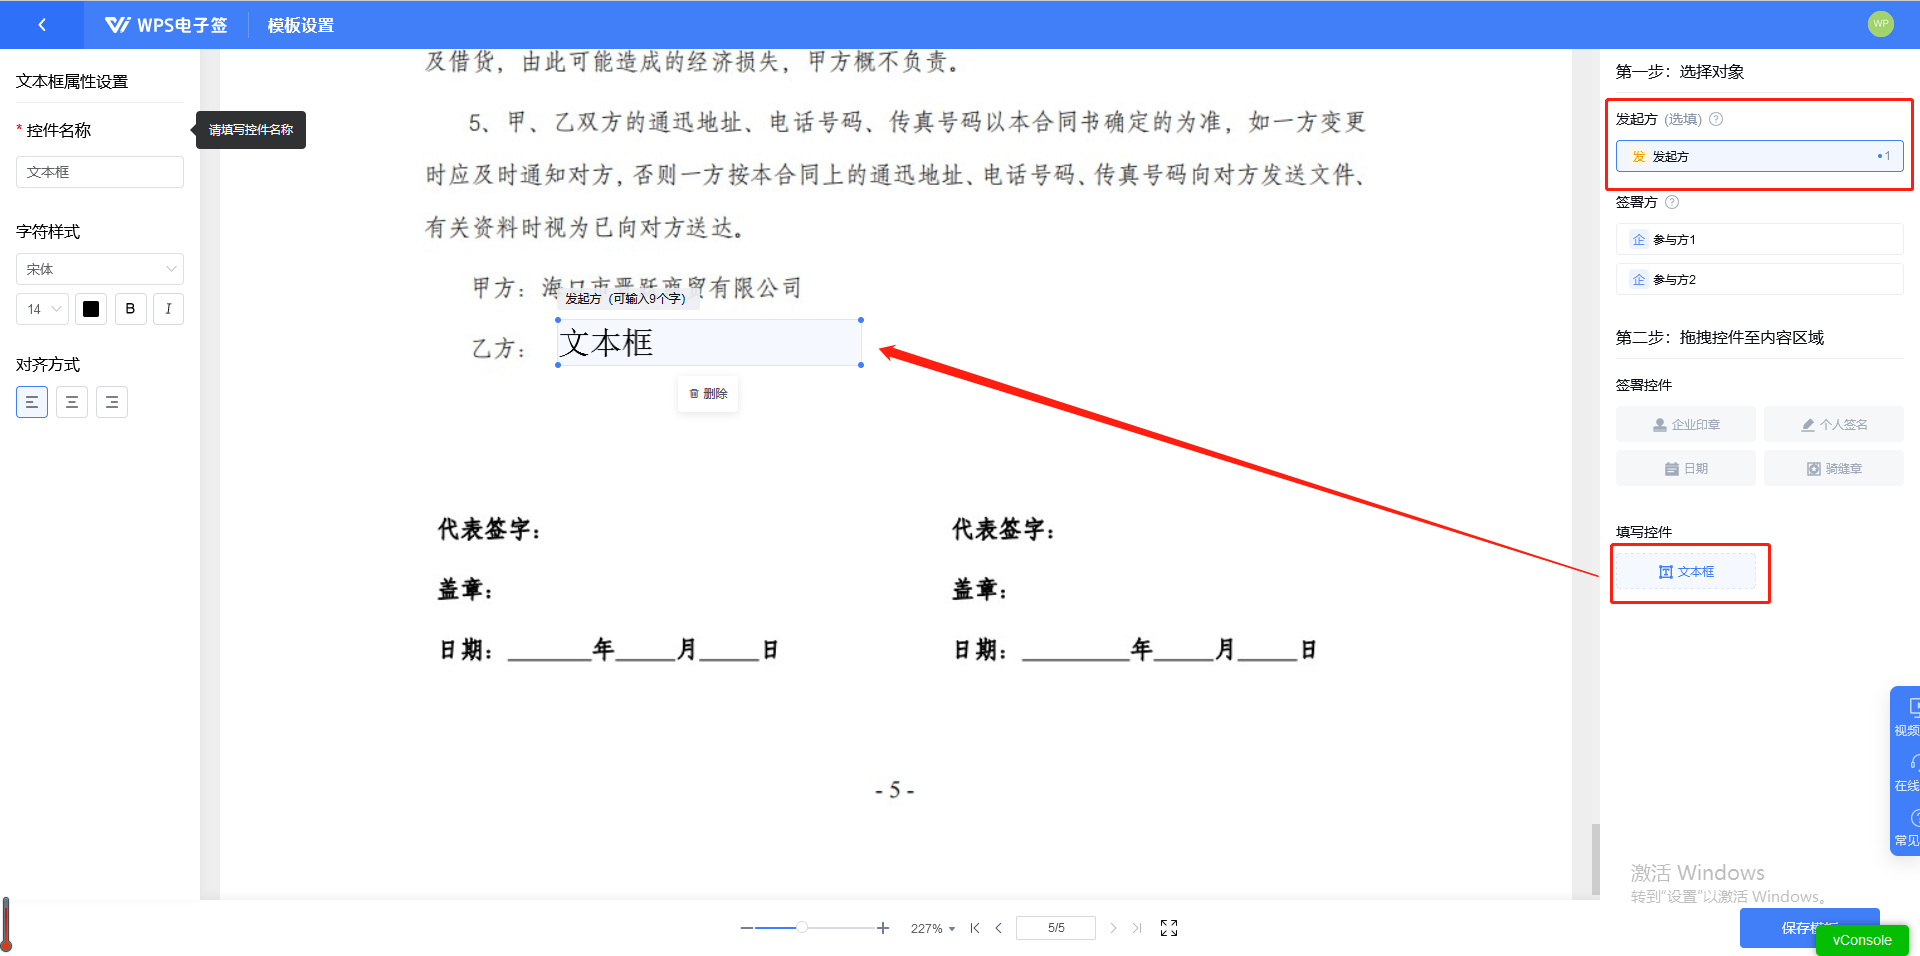
7. If you need to set the text box, you can click on the current control and set the relevant properties of the text box according to the current contract.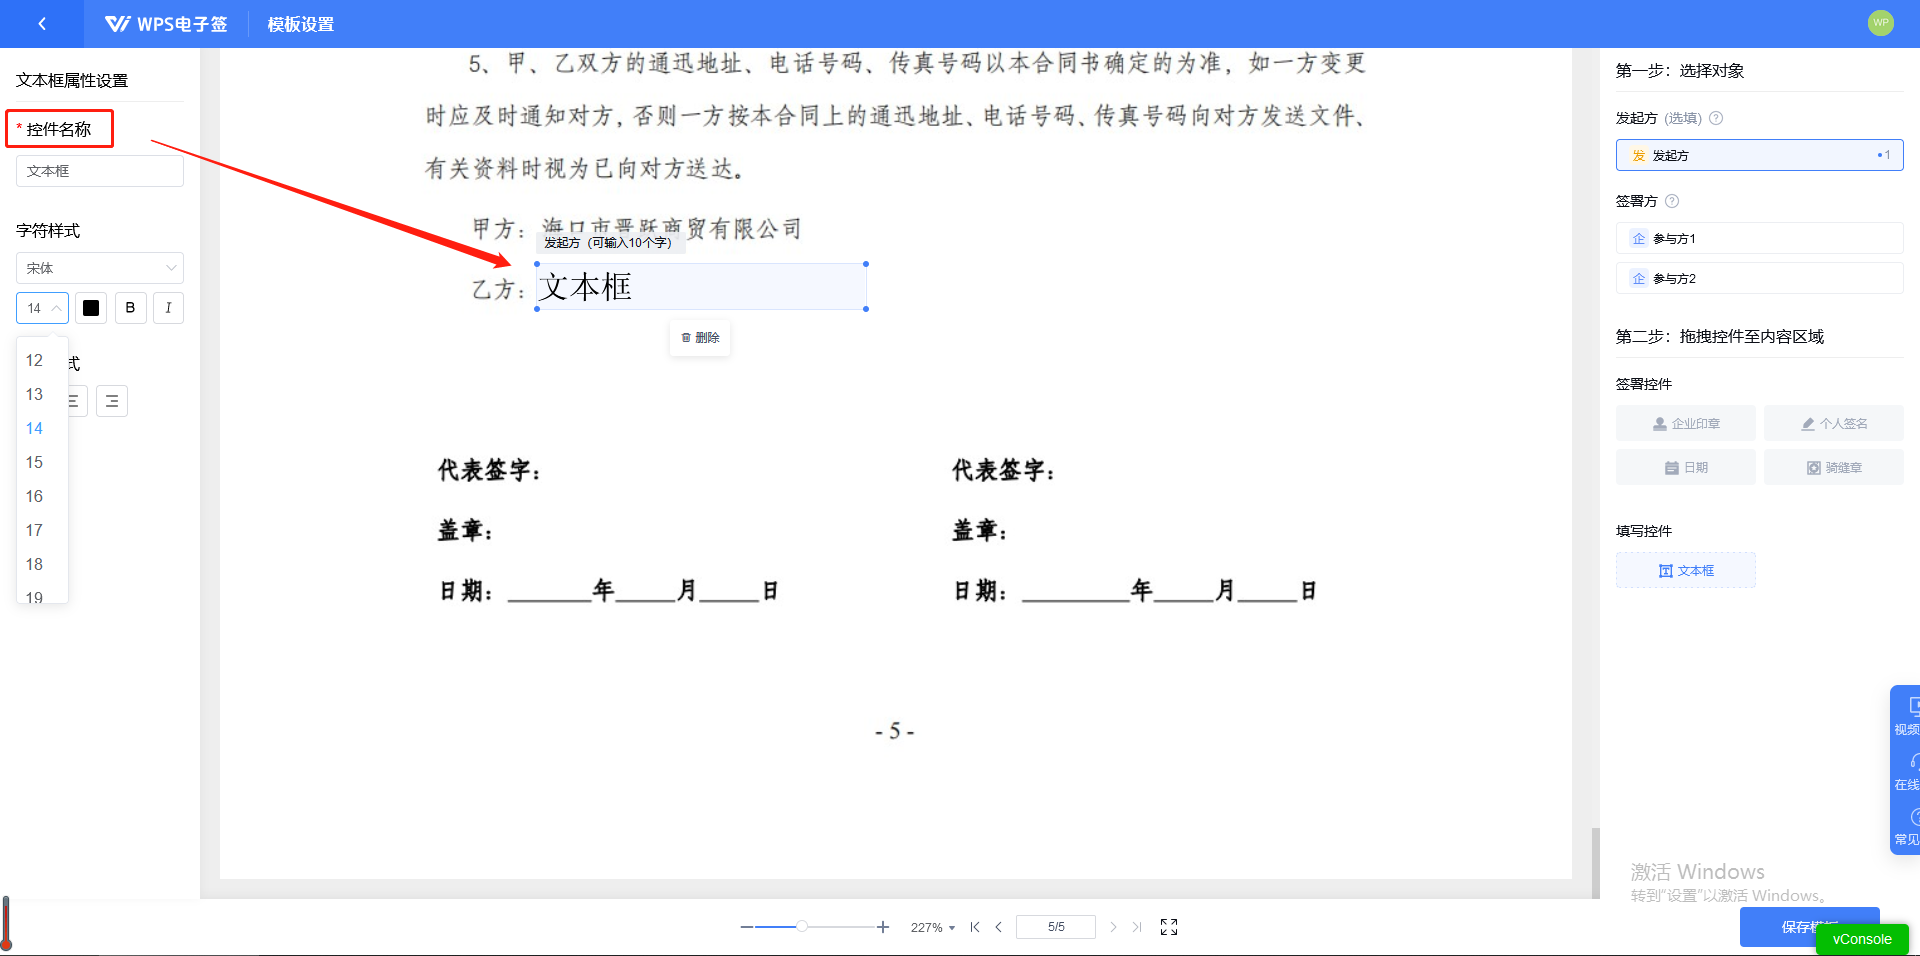
8. Then add the designated signatory and drag the seal signature date control to the corresponding signing area (after setting the relevant information, the initiator can only fill in the contract content in the setting area , the signatory cannot change the content of the contract, the signing position, or add or subtract the corresponding signatory, related seals or dates, and the template settings must prevail)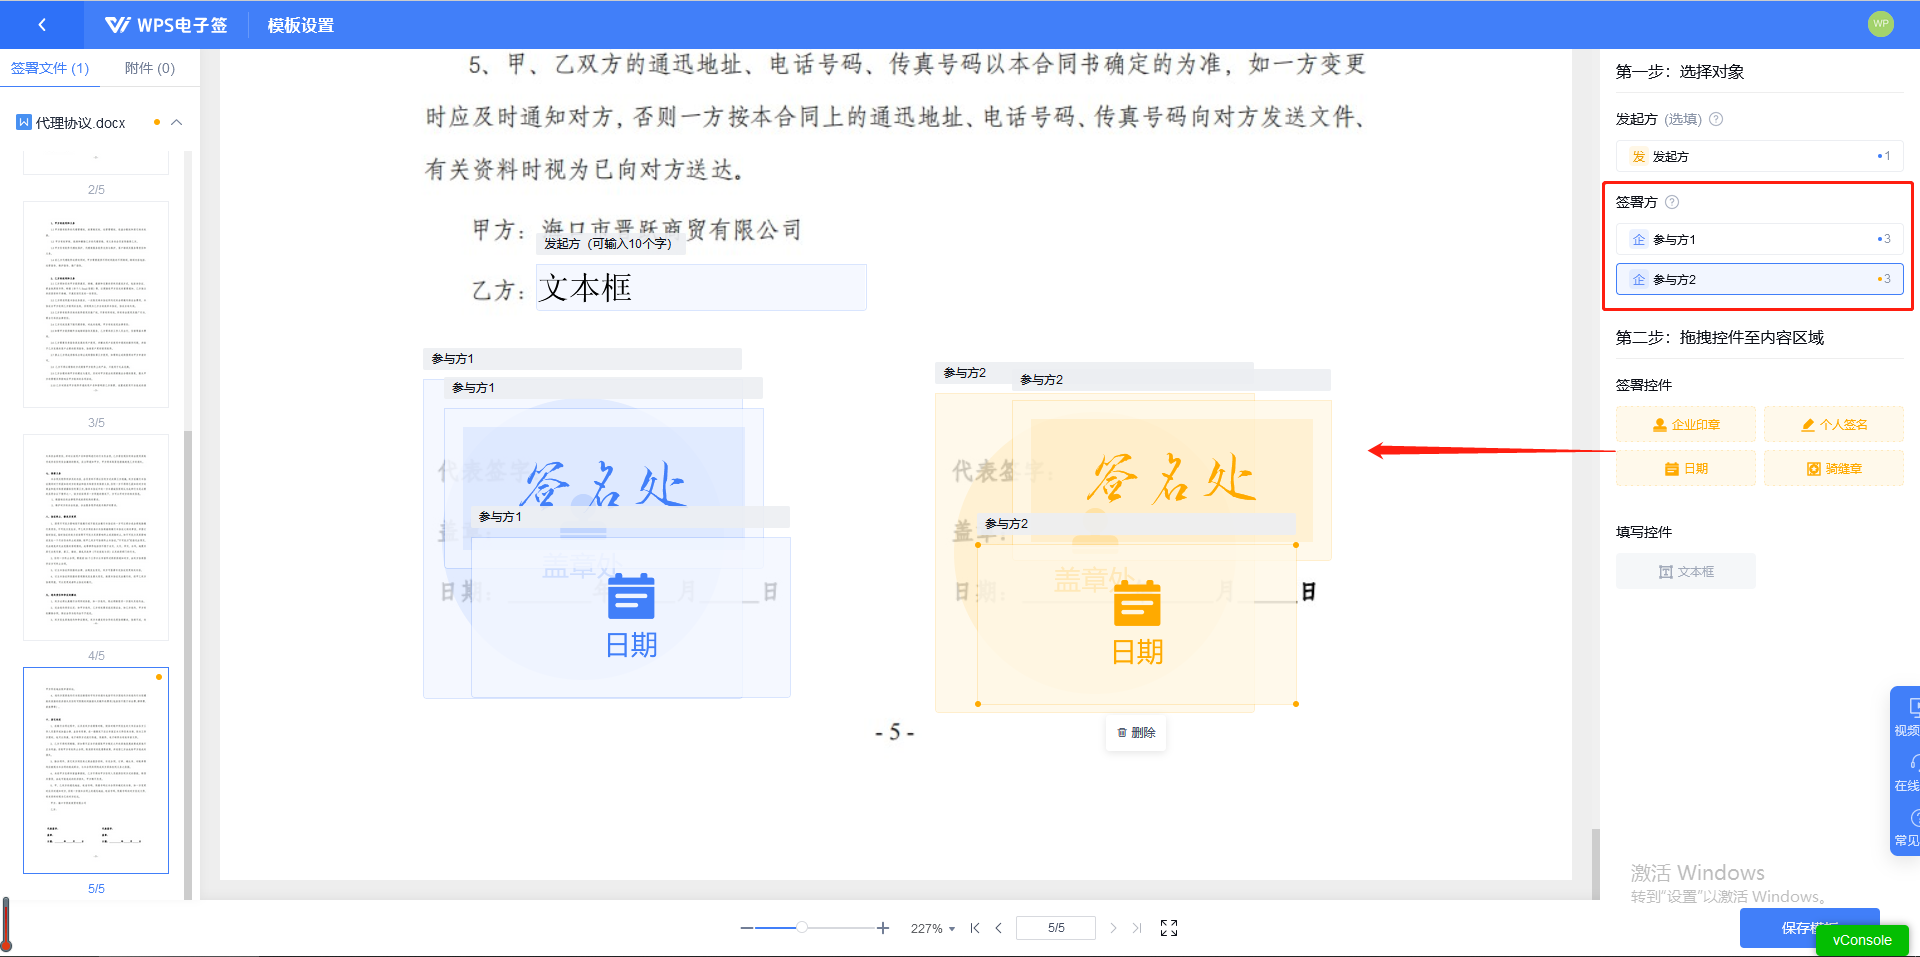
9. Click Save Template to set this template as your own contract template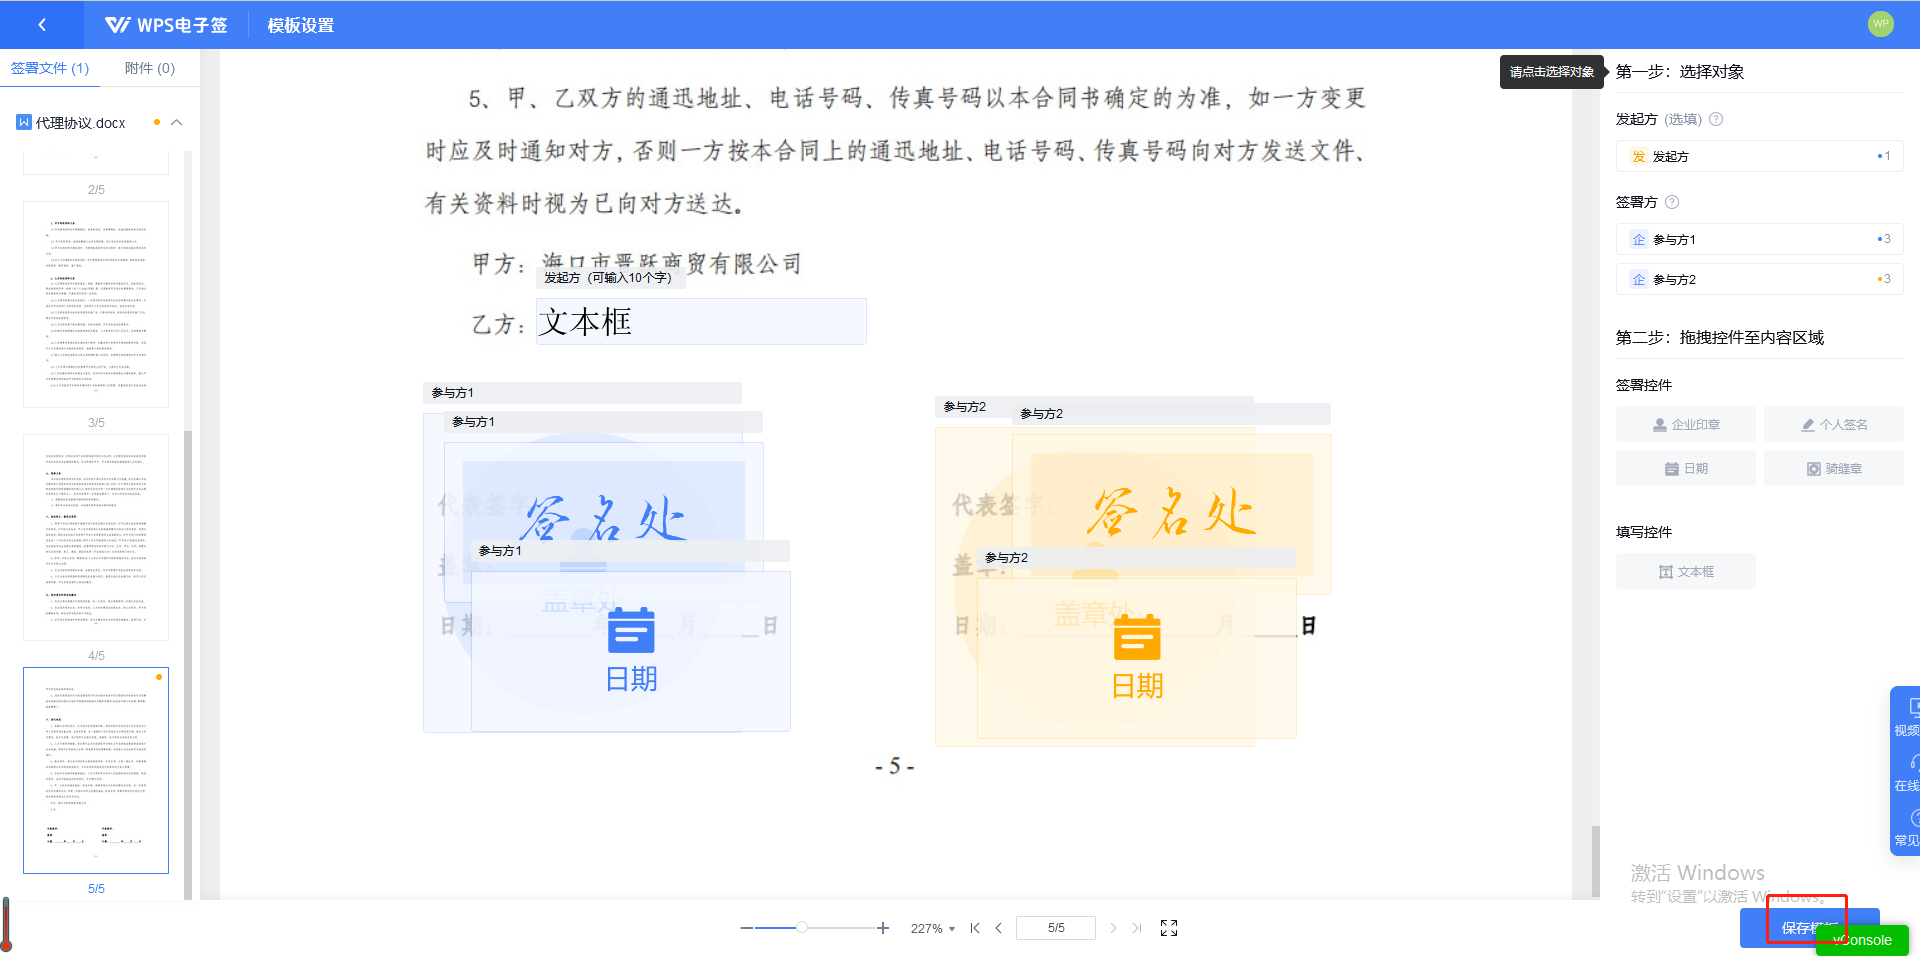
10. Then click [Use]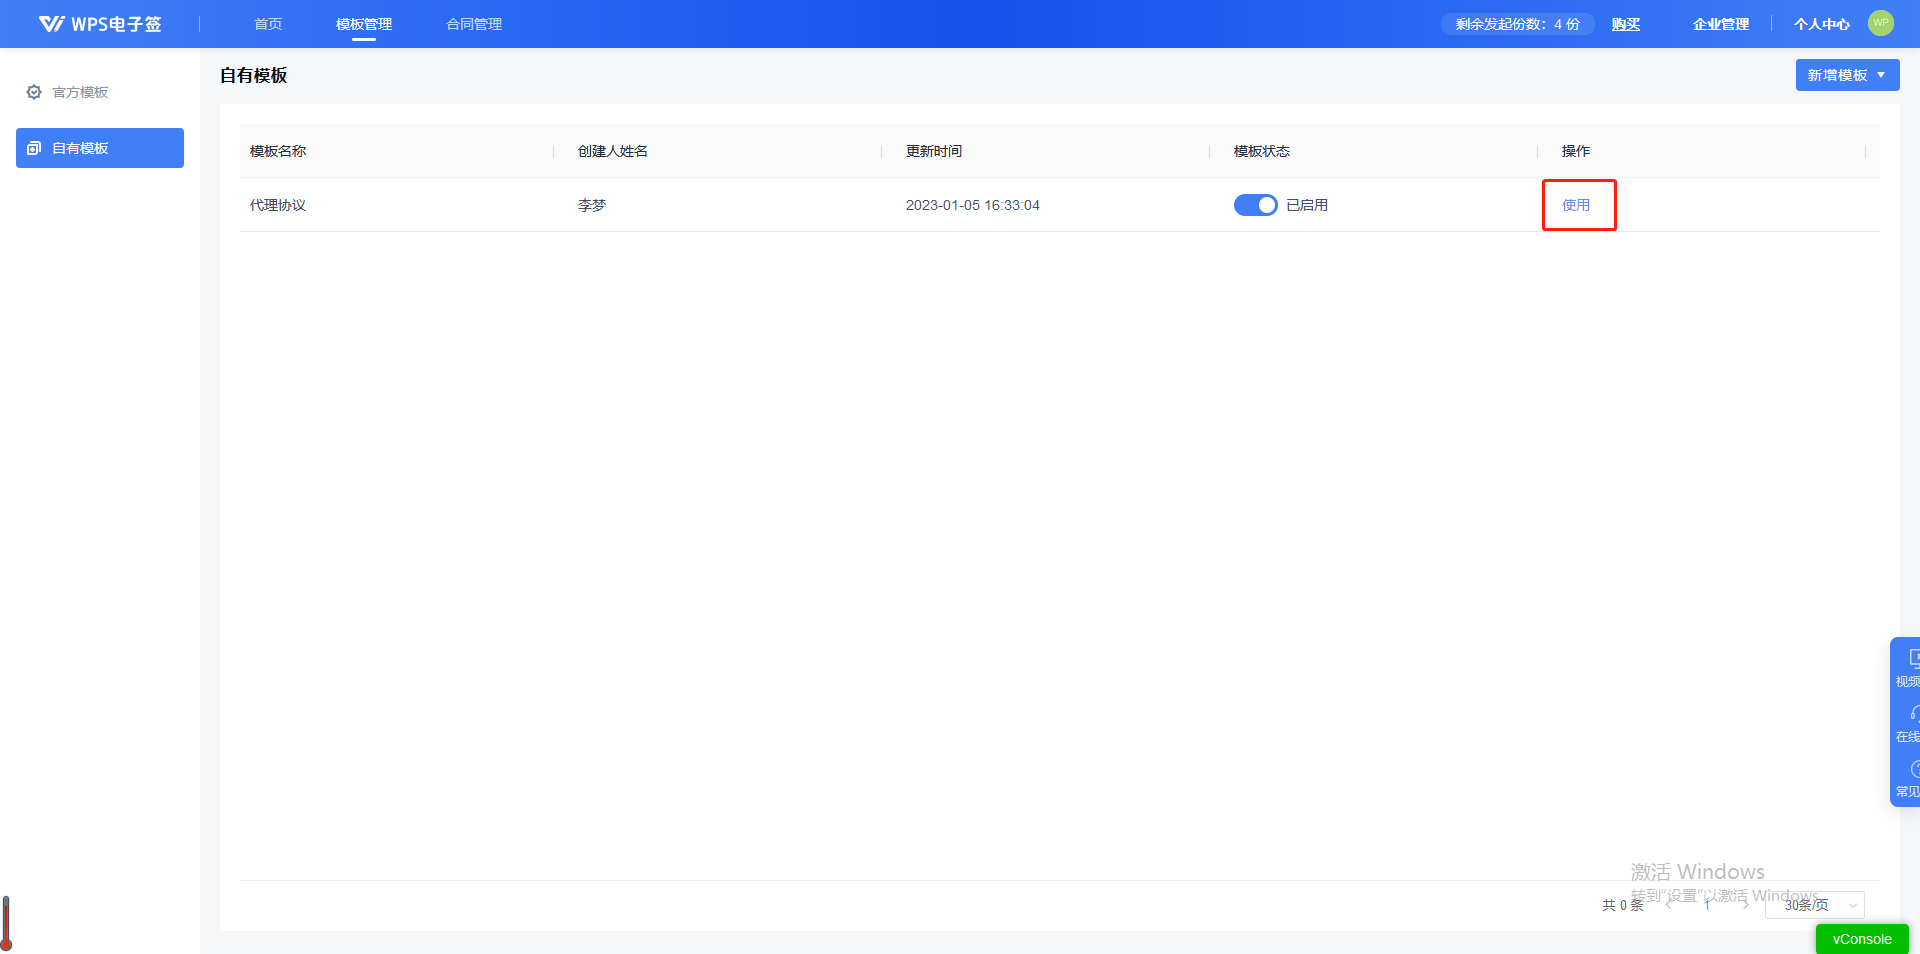
11. Enter the use template page, add the signatory information required for the current template, and then click [Next step]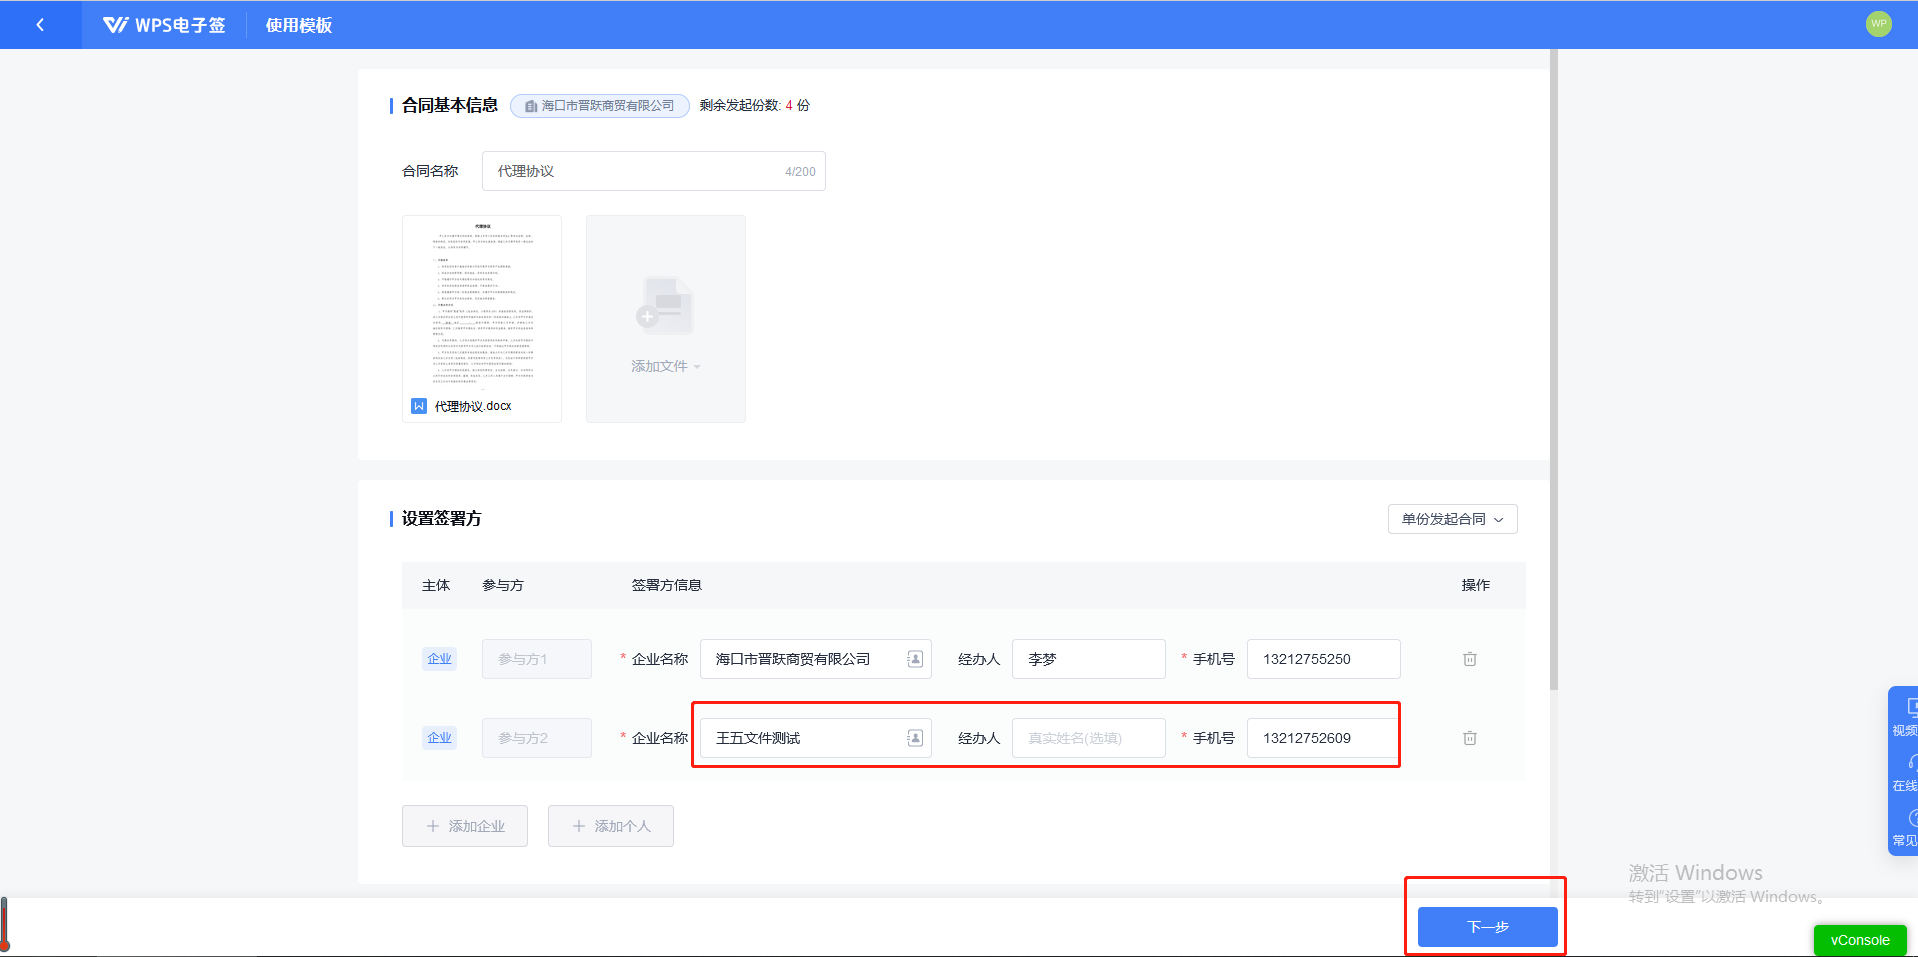
12. Enter the settings page and preview the contract and click [ to initiate signing] and confirm that the message is initiated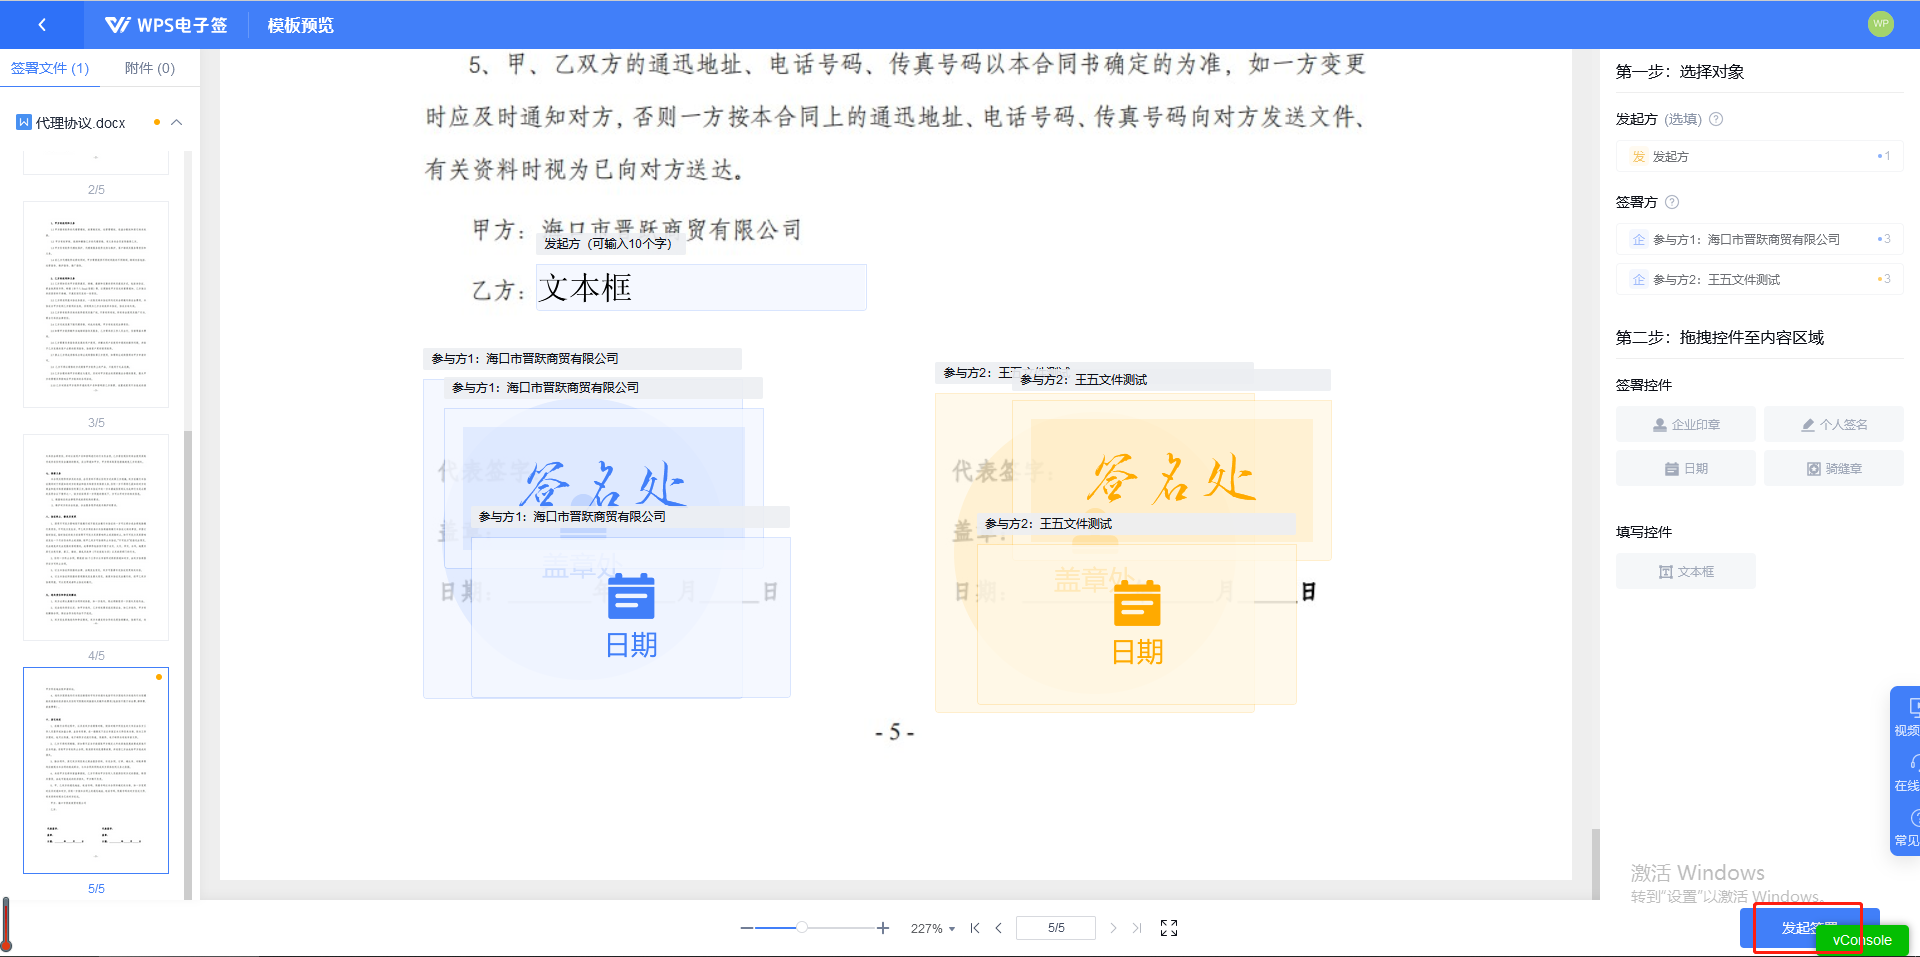
13. The initiator can supplement the contract content, click [ to start filling in] After filling in the required content of the contract, submit and jump to the processing results page, then click [Submit for signature]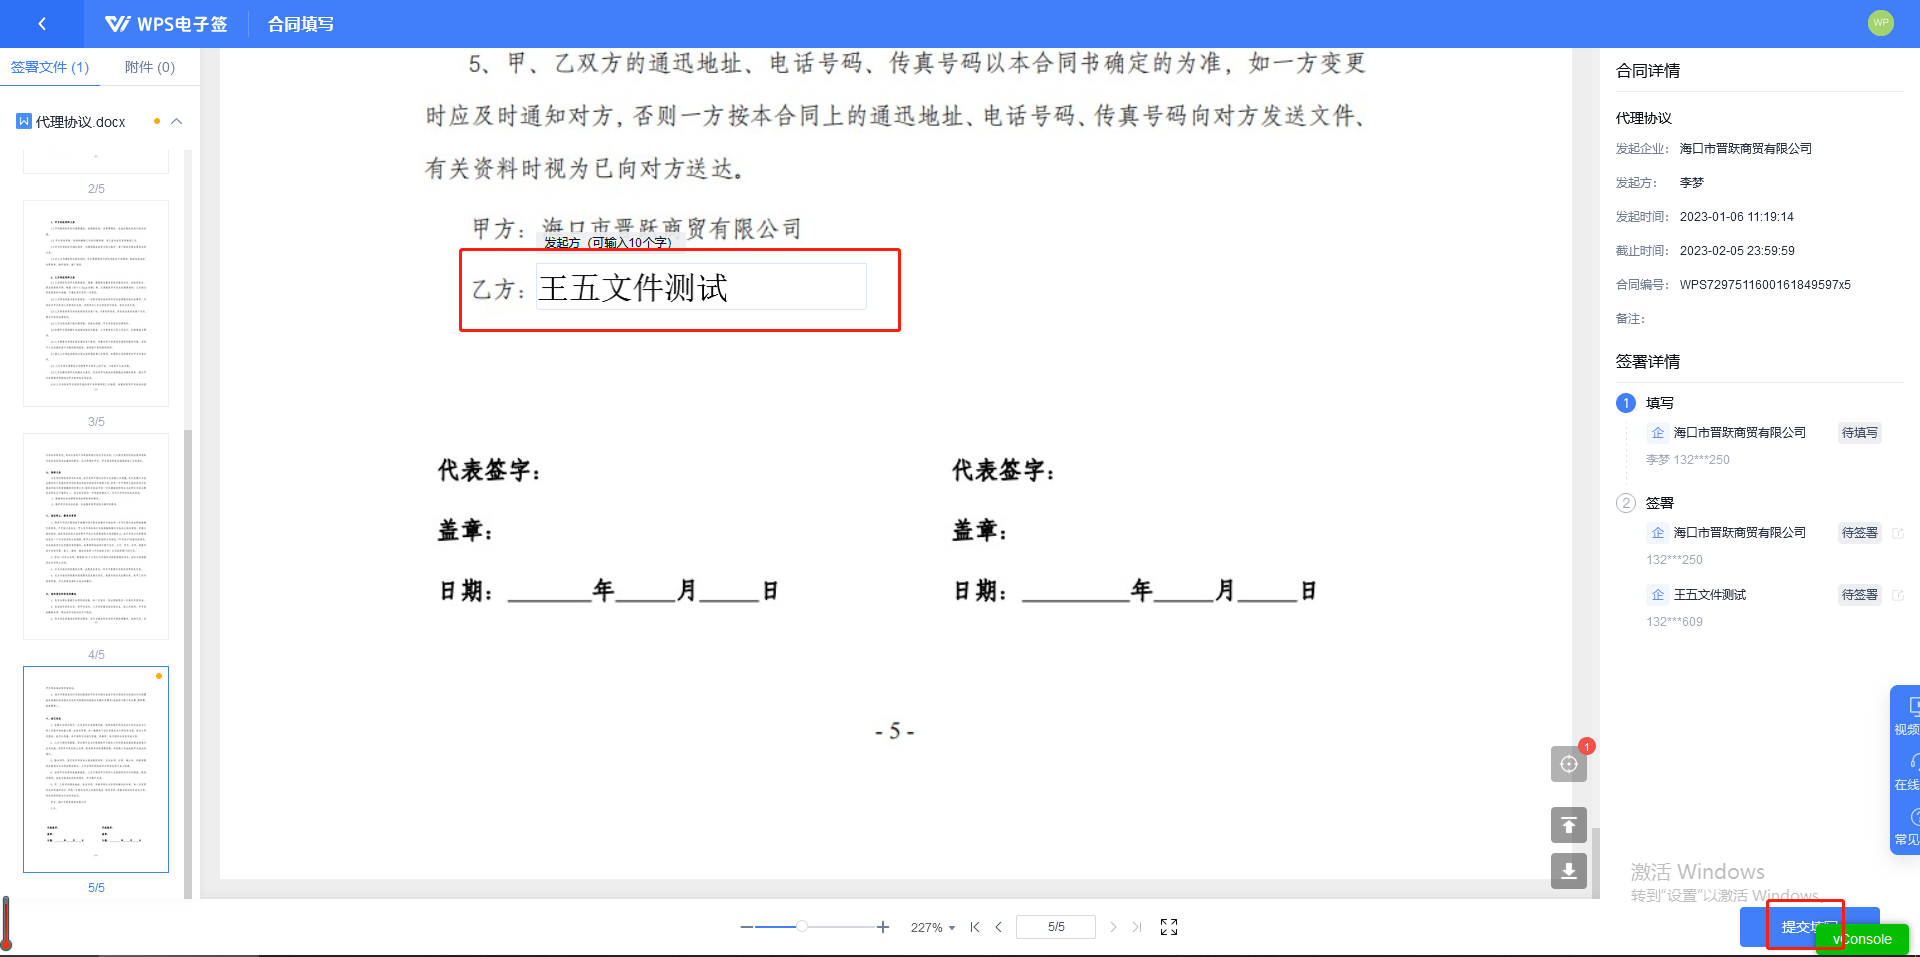
14. Click the [Start Signing] button to sign. The corresponding signer will receive the signing SMS and can sign through the link in the SMS.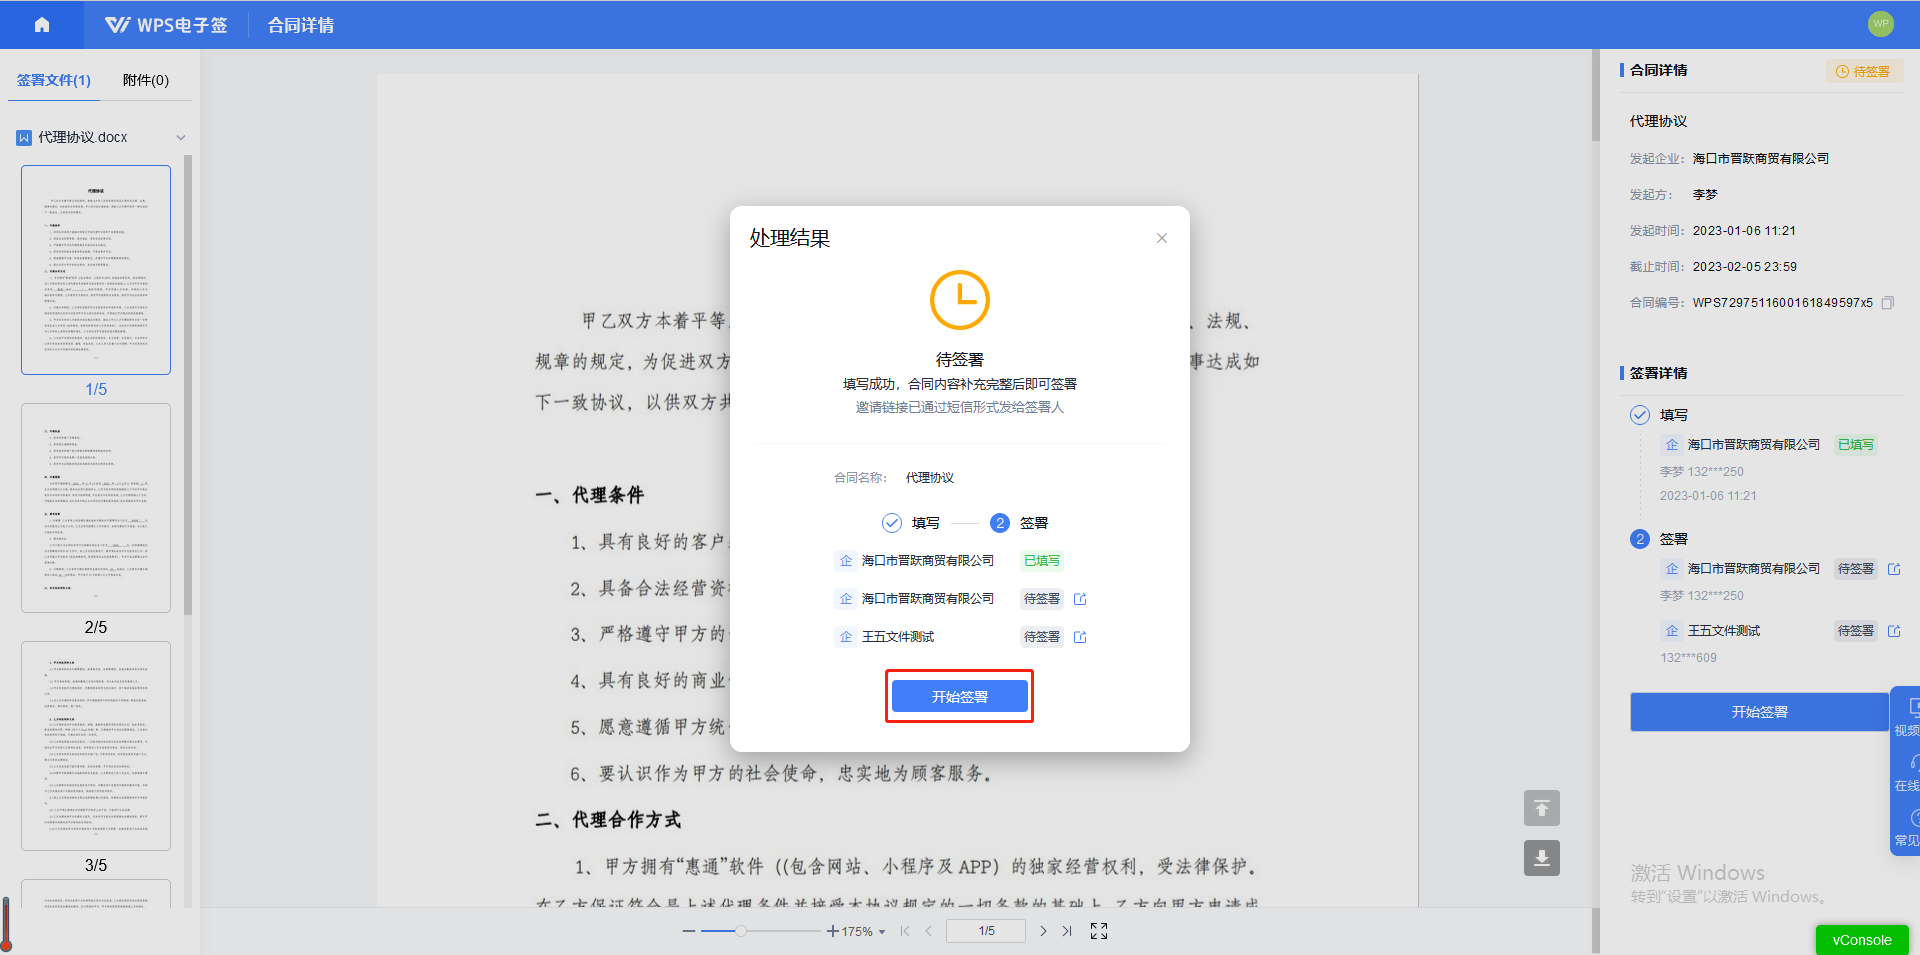
15. Drag the official seal and personal signature to the designated signature area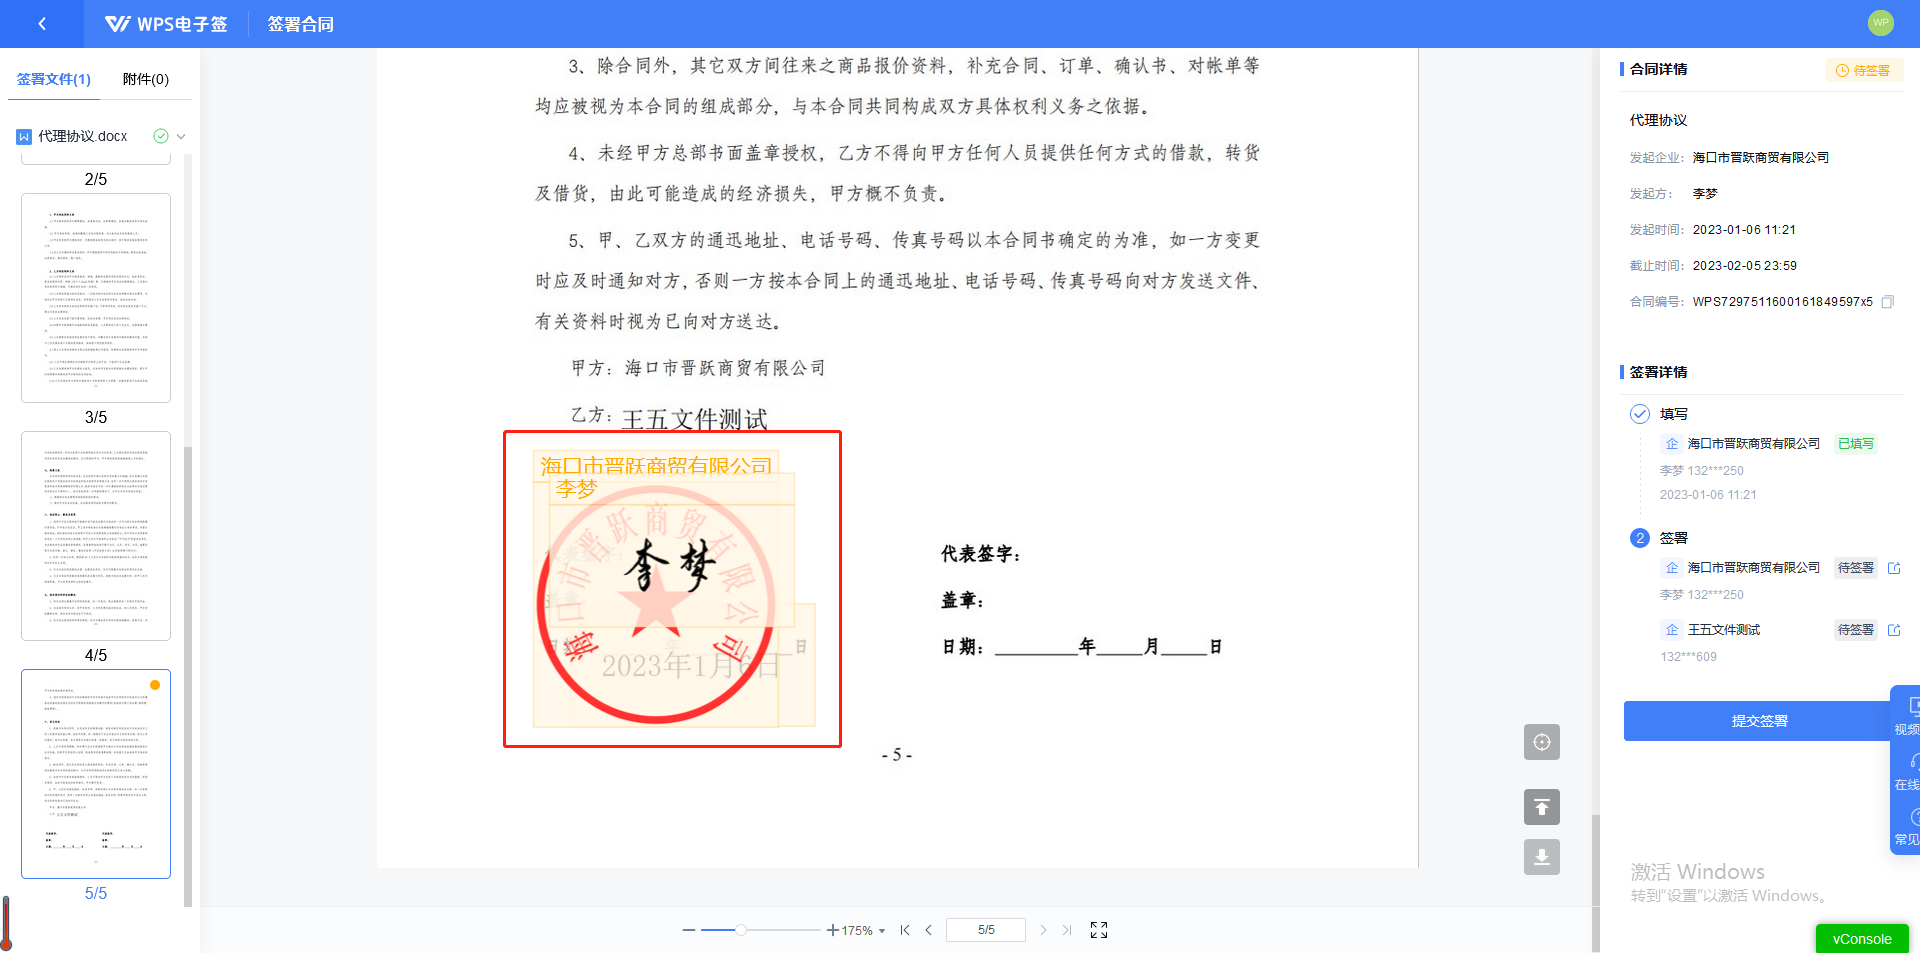
16. Then click [Submit for Signature]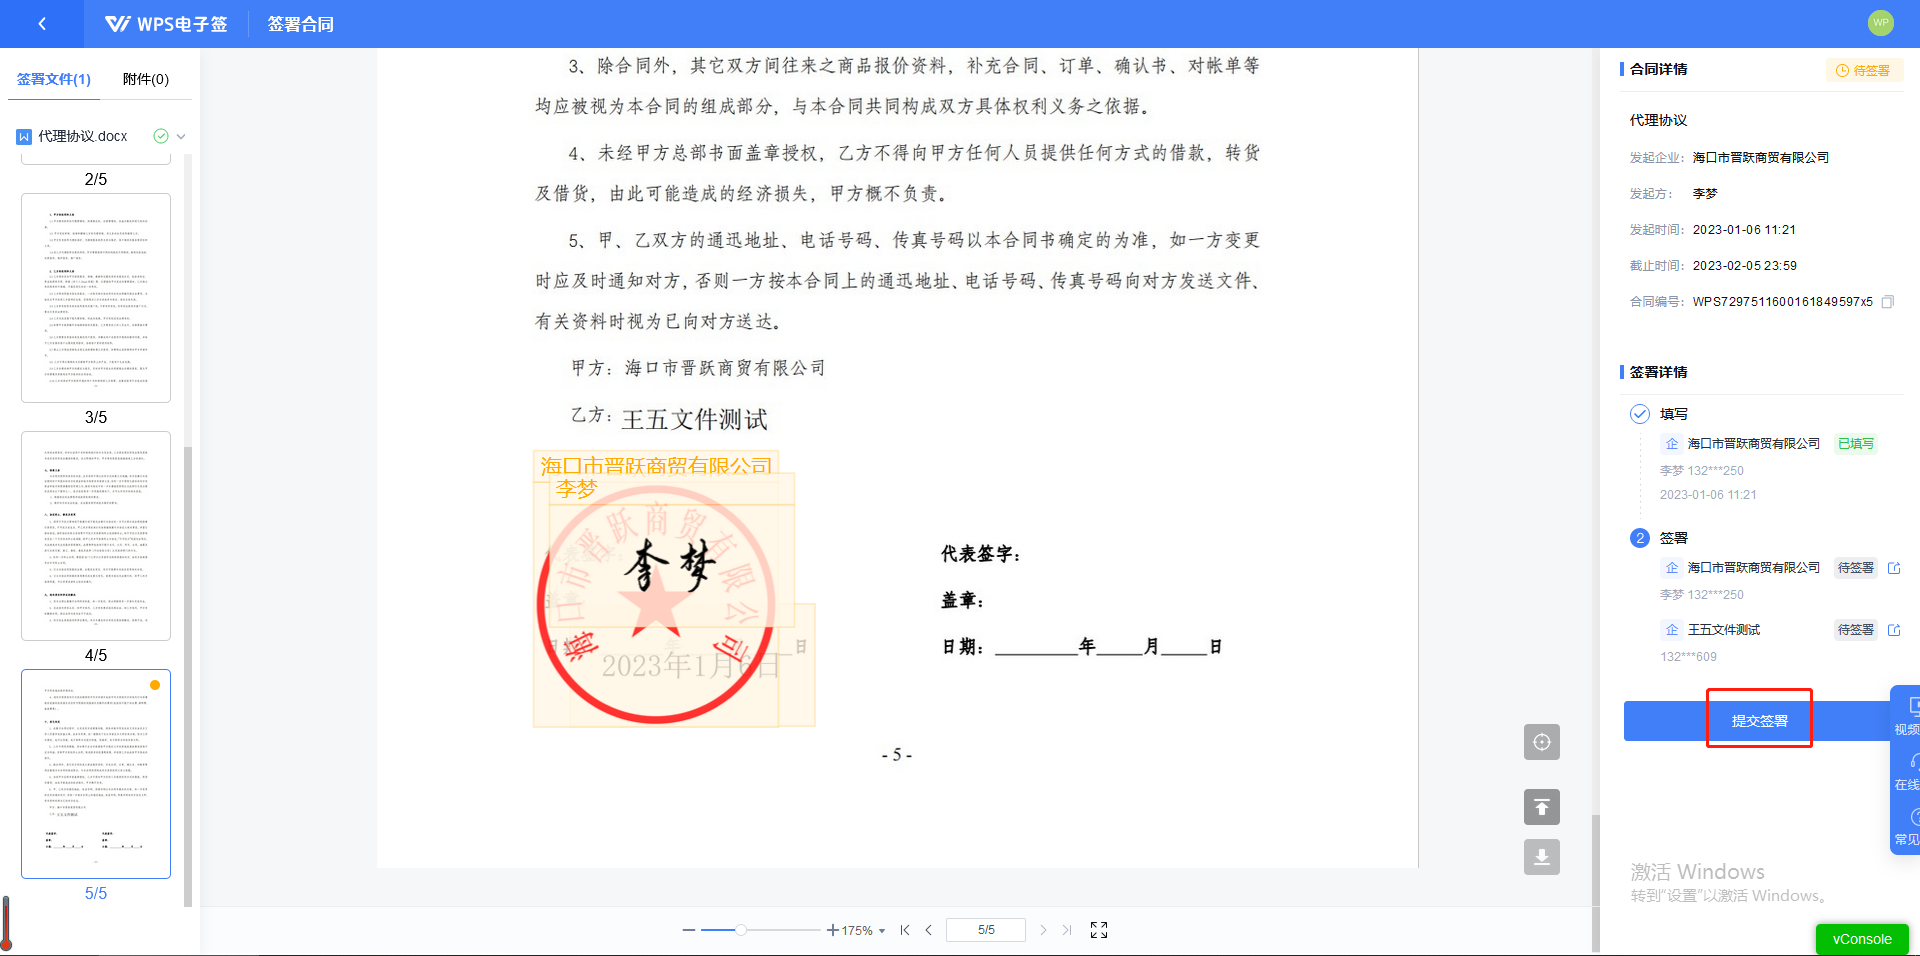
17. It will jump to the personal will verification page, fill in the verification code verification or face verification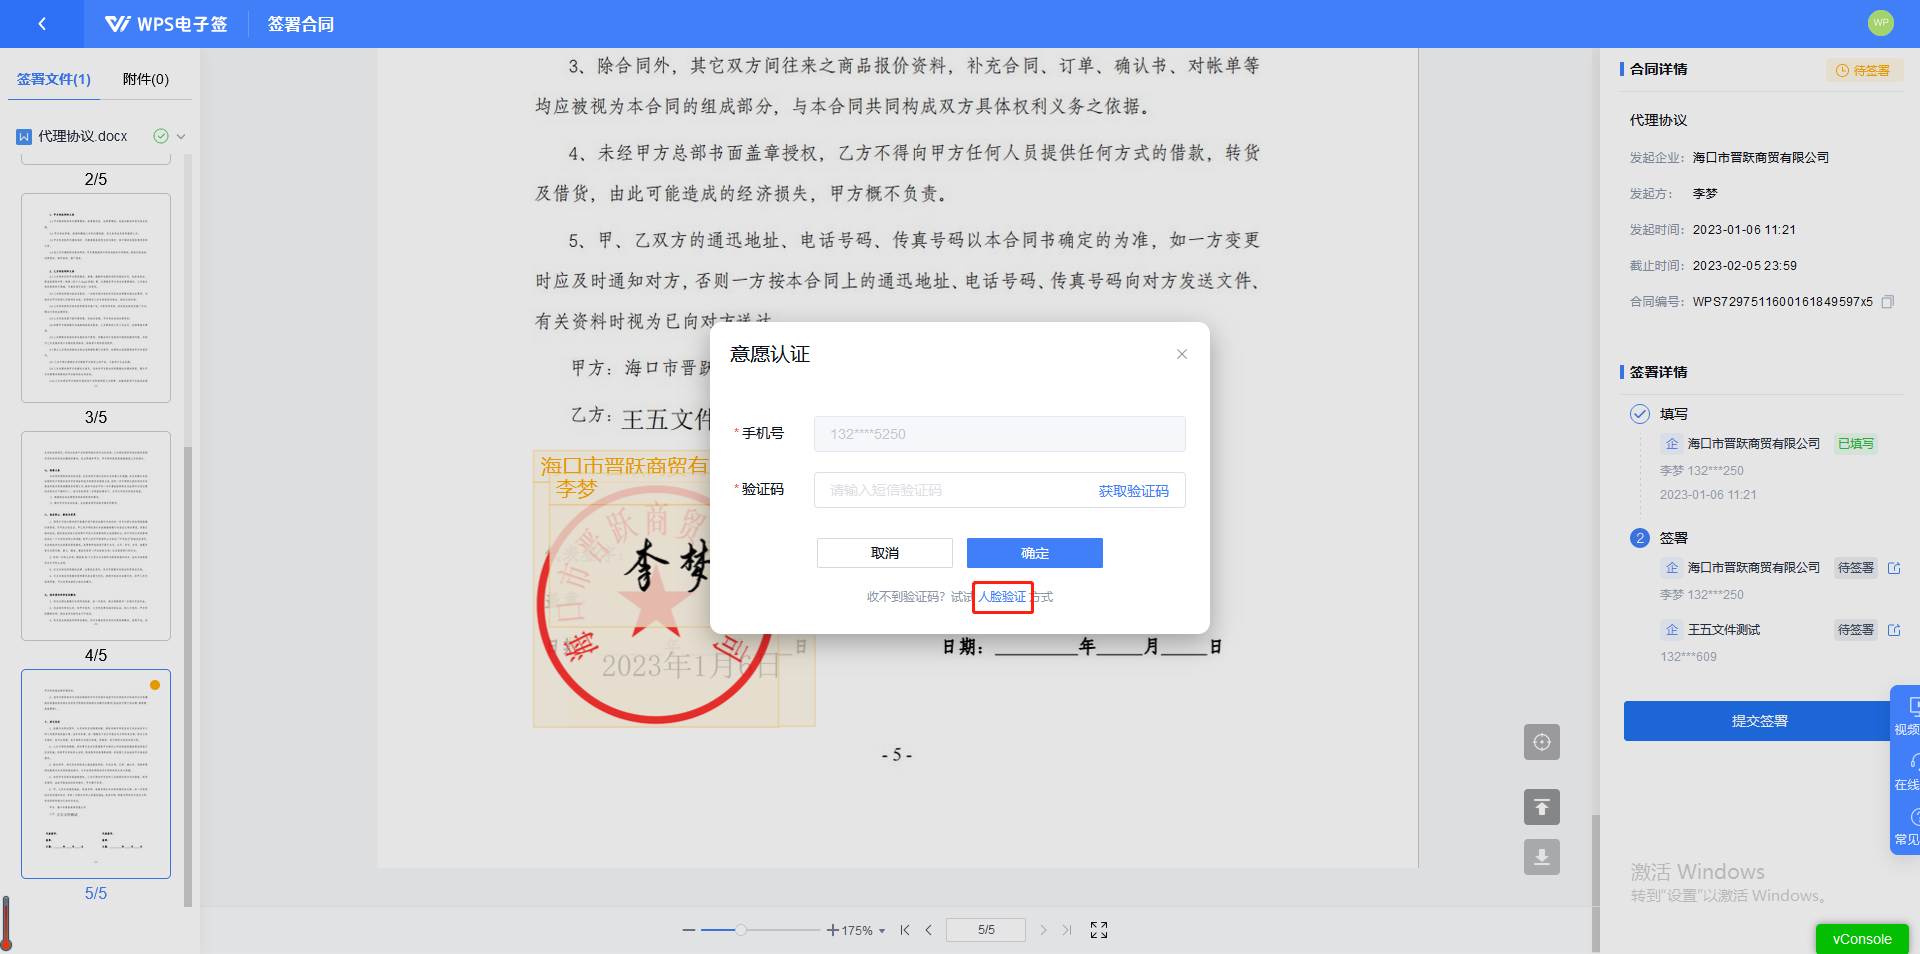
18. Make sure that it is your true intention to sign, then the signing can be completed.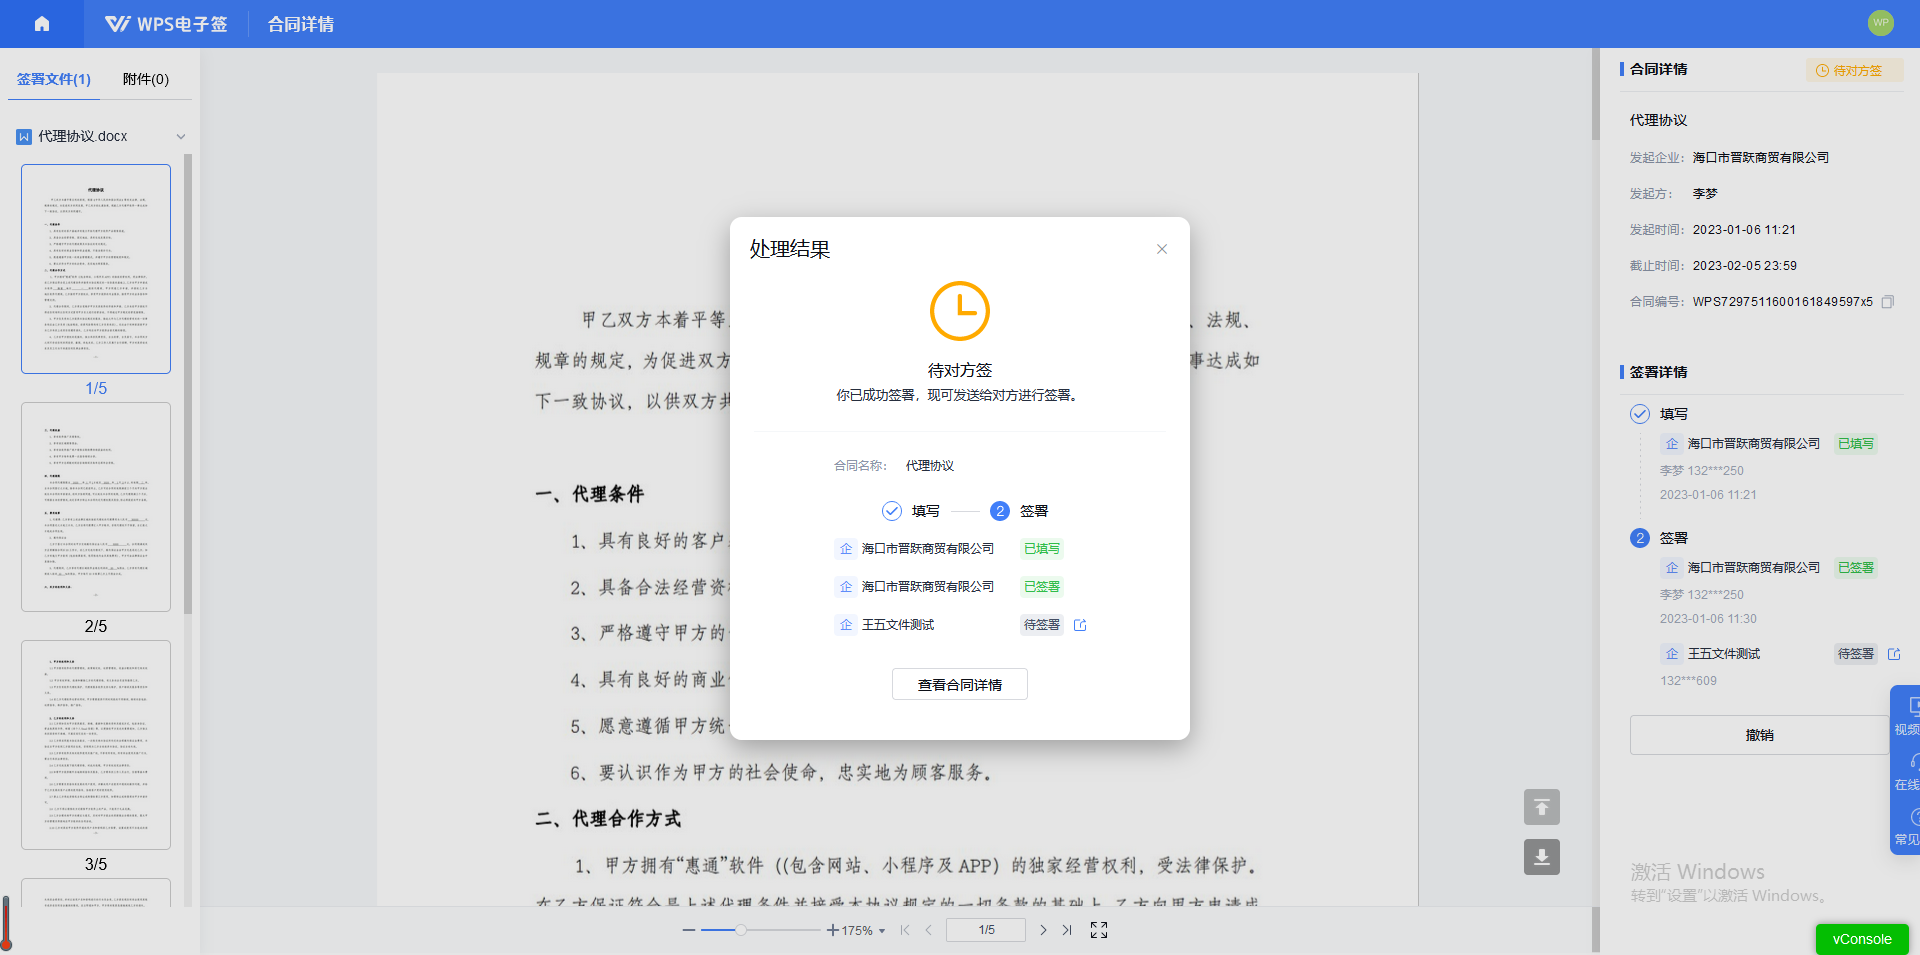
Articles are uploaded by users and are for non-commercial browsing only. Posted by: Lomu, please indicate the source: https://www.daogebangong.com/en/articles/detail/WPS-dian-zi-qian-ying-yong-ke-cheng-qi-ye-zi-you-he-tong-mu-ban-ru-he-tian-jia-nei-rong-kong-jian.html

 支付宝扫一扫
评论列表(196条)
测试