This tutorial will show you how to use a few brightly colored textured images, using Photoshop actions and some smoke and texture overlays, to create a simple, colorful explosion text effect. let's start
first look at the effect

Material preparation: You can download many effects of this kind of colored mozi or colored flowers on the Internet.
Material text: Slugterra
1. How to make background and basic text
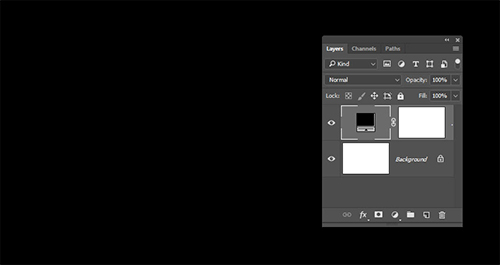
Step 1 Create a new 1500 x 1000 px document, click the Create New Fill or Adjustment Layer icon at the bottom of the Layers panel, choose Solid Color, and set the fill color to Black.
Step 2, enter the three letters of bdm, set the "Size" to 500 pt, and set the "Scale" to 50. If your text doesn't fit, you can increase the canvas size. Here the letter b is not very beautiful, we simply adjust its shape.
2. How to fill text with image texture
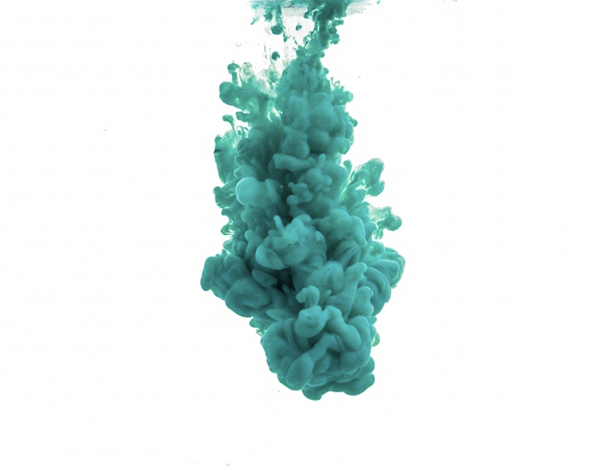
Step 1. Open the blue ink texture, place it on the text layer, right-click - create a paste mask. The pattern is close to the text.
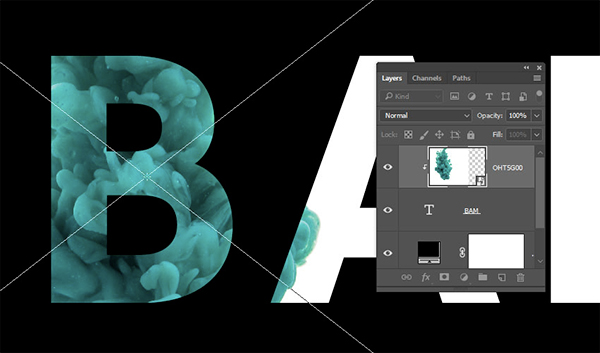
Step 2. Select the letter b to make it a selection area, and reversely delete the redundant patterns.
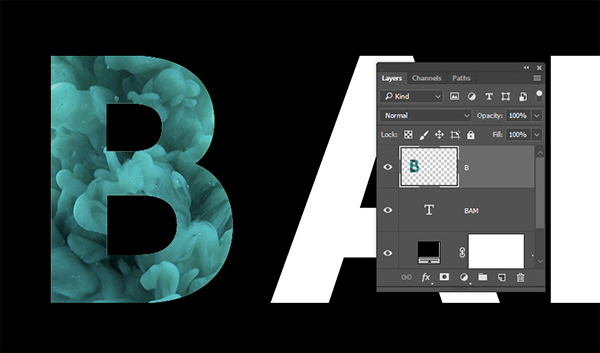
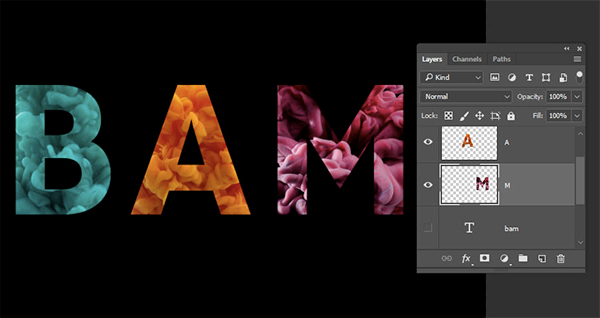
Step 5. Repeat the same steps to add other image textures to the remaining letters. When done, hide the text layer.
3. How to save and load selection
Step 1. Select all layers except the text layer and go to Layer > Merge Layers.
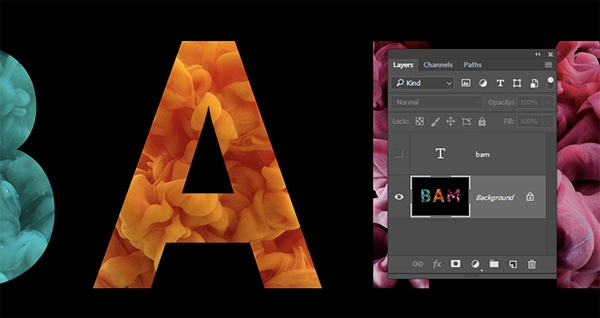
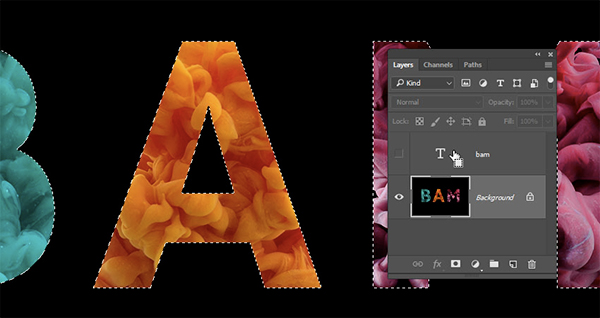
Step 2. Click on the text pattern to make them a selection area.
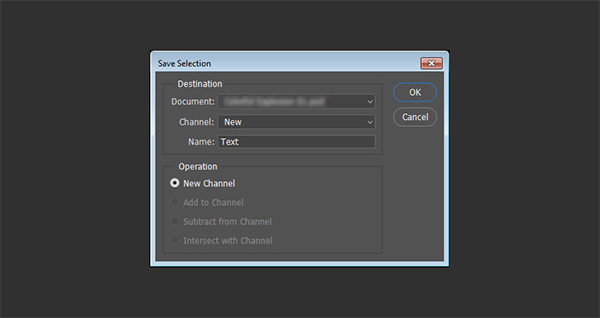
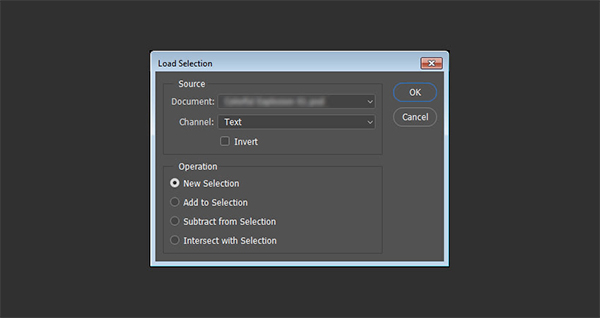
Step 3. Go to Select > Save Selection and type text in the Name field.
Step 4, delete the text layer
We're going to use the selection to draw in the text area, so if at any point you need to select again, you can go directly to Selection > Load Selection and from the Channels menu Select "Text Selection".
4. How to use sandstorm Photoshop action
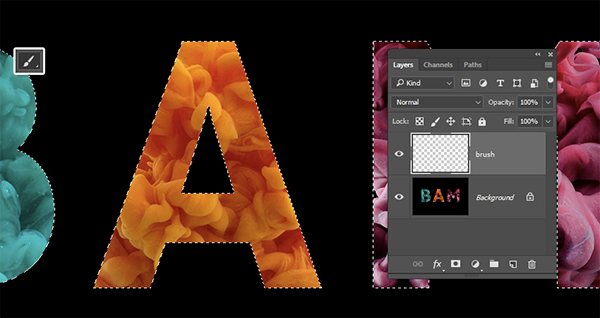
Step 1. Select the brush tool, create a new layer on top of all layers, and name it brush. The name is important, so make sure you spell it correctly.
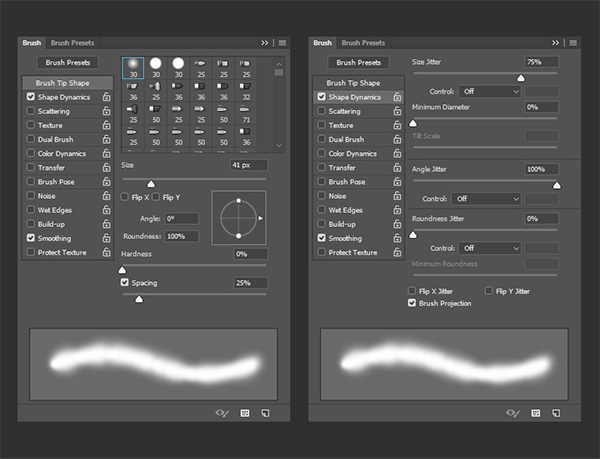
Step 2. This is an optional step, but it helps create a more dynamic result. Open the Brushes panel and use these settings for the Brush Hint Shape and Shape Dynamics tabs.
Step 3. Set the foreground color to any color you like, and start drawing the area you want to segment. Actions come with multiple direction options (left, right, up, down and center). So keep in mind the direction you want the parts to be crushed. Also, be aware that parts will be generated from within the painted area, which means that brush size will also affect the result.

5. How to run an action
Step 1. After finishing painting, press Command-D to deselect. Open the Actions panel, load the action if you haven't already, and choose the desired orientation. Click the Play option icon at the bottom of the Actions panel to run the action, and wait for it to run. This may take several minutes. Click the Play option icon at the bottom of the Actions panel to run the action, and wait for it to run. This may take several minutes.
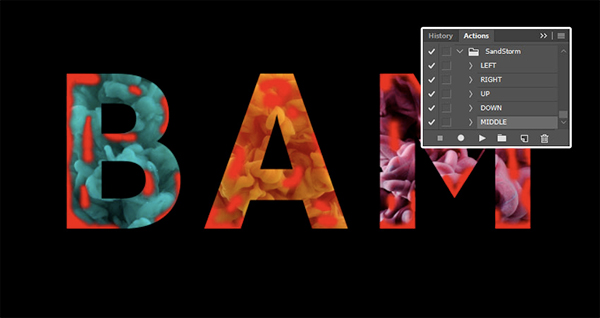
Step 2. After getting the result, you can see that you still have the "Background" and "Brush" layers. If you don't like the result, you can delete the action layer, make some changes to the brush layer, and run the action again.
There is no right or wrong in this process, it's trial and error until you get the result you like.

Step 3. Once you get the desired result, you can view all the action folders and layers and make adjustments to any of them. For example, here I made the "Particle Group" group smaller. You can go ahead and make any other changes, use masks to remove unwanted areas, and experiment with the different options available in the COLOR group.
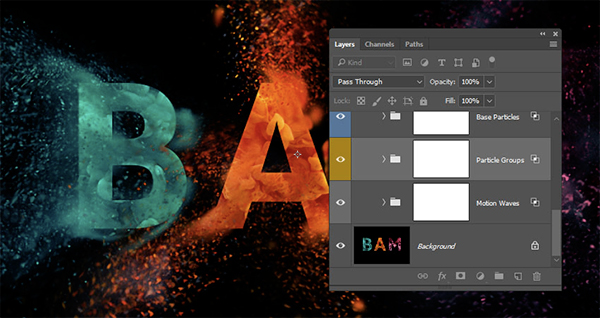
6. How to add smoke and texture overlay
Step 1. Place one of the smoke images in it One letter's top, transform it as needed and change its layer's Blending Mode to Screen.
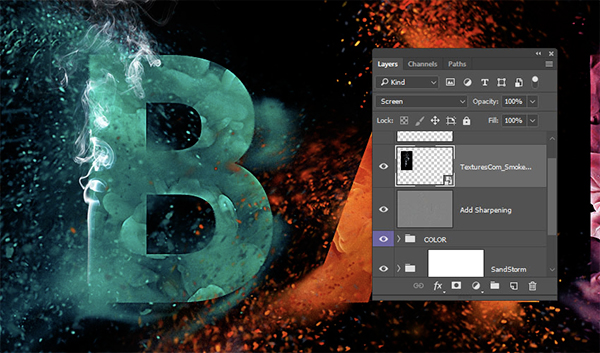
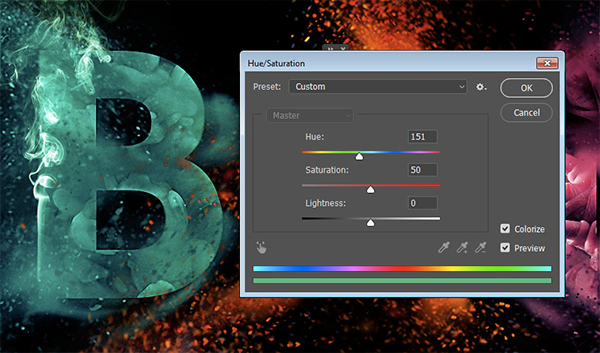
Step 2. Go to Image > Adjustments > Hue/Saturation, check the "Color" box, and change the "Saturation" to 50. Then, drag the Tint slider until you get a color similar to the letter texture color, and click OK.
Step 3. Add a mask to the smoke layer and delete any areas you don't like.
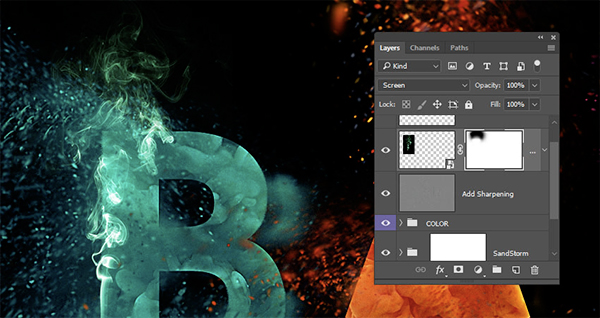
Step 4. Add other smoke images to the other letters you have, with different colors based on the letter texture color. Put all the smoke texture layers in one group and name it Smoke.
Step 5. Place the landscape image on top of all layers, resize it to fill the document, and change its layer's Blending Mode to Soft Light and its Opacity to 50%
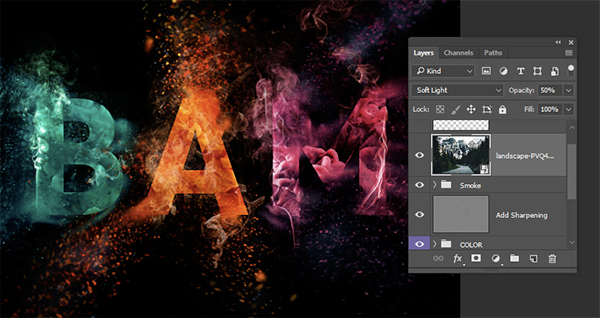
Congratulations, you are done~~
Articles are uploaded by users and are for non-commercial browsing only. Posted by: Lomu, please indicate the source: https://www.daogebangong.com/en/articles/detail/Use%20photoshop%20to%20create%20explosion%20text%20effect.html

 支付宝扫一扫
评论列表(196条)
测试