Materials to prepare
1. Font: Anton
2. Materials
Link: https://pan.baidu.com/s/1CMMBE0fCbmMU51ONcmGeHA
Extraction code: xcjh
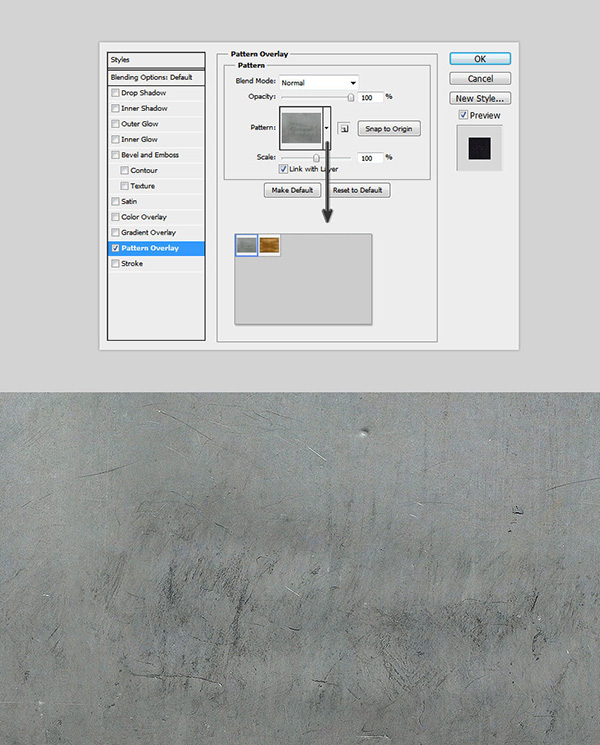
Step 1. Open PS, create a new 850*500 canvas, and then find a metal texture material from the Internet and paste it into the background. These two materials, green onion, are also ready for you. After downloading, click Install, and the material will be directly installed in PS. .
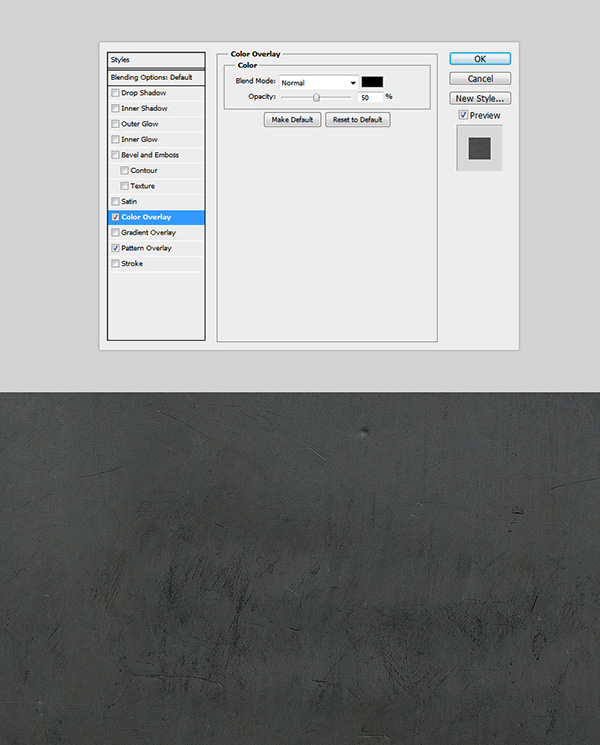
2. To make a dark background to highlight the font, you need to add a black layer with 50% opacity.
Blending Mode: Normal
Color: #000000
Opacity: 50%
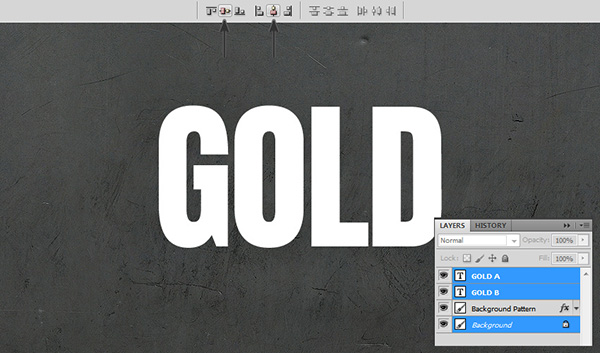
3. Enter the text GOLD, select the font Anton, and click Center Alignment and Vertical Alignment on the menu bar. Duplicate the GOLD text layer and name it "GOLD A" for the top layer and "GOLD B" for the bottom layer. Because these two layers will be used when doing 3D effects later.
Font size: 230px
Word spacing: - 20
Color: #ffffff
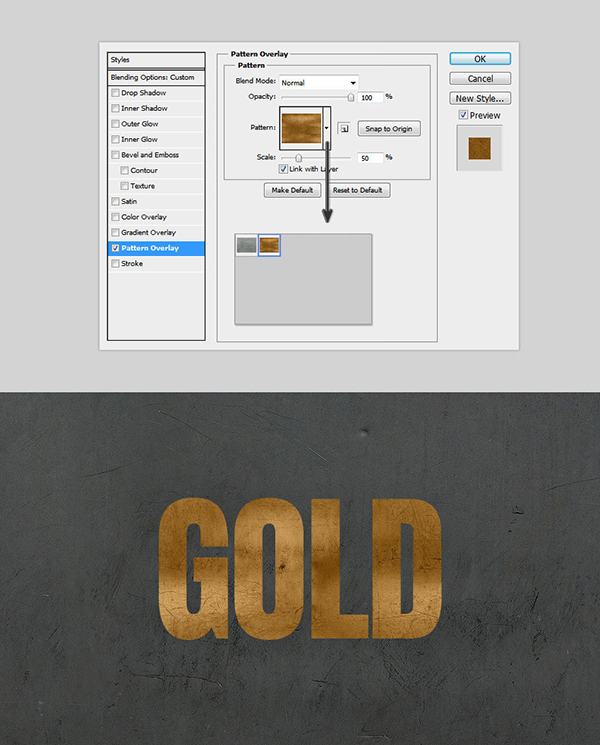
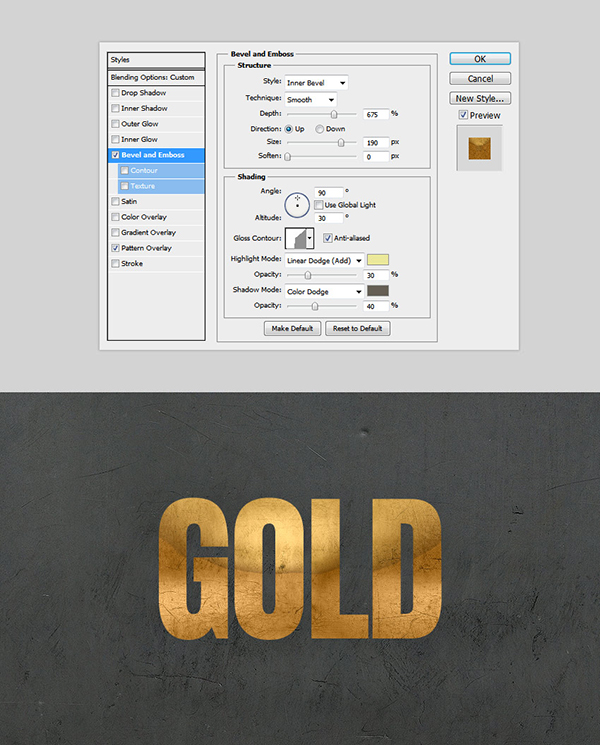
4. To add an effect to the GOLD A layer, choose Layer Style > Pattern Overlay, click on the pattern box, and select Pattern02 from the list. This texture will serve as the base for the metal effect.
5. To create a shiny look, choose Layer Style > Bevel & Emboss and use the following values.
Style: inner bevel
Technology: Smooth
Depth: 675%
Direction: Up
Size: 190px
soften: 0 px
Light source angle: 90º
Light source height: 30º
Now we will add the previously installed "CustomContours.shc" file. Click the Gloss Contour dropdown icon and select the contour named "CustomContour01"
Now we can proceed:
Highlight Mode: Linear Dodge (Add)
Display color: #ebe89b
Opacity: 30%
Shadow Mode: Color Dodge
Shadow Color: #655f54
Opacity: 40%
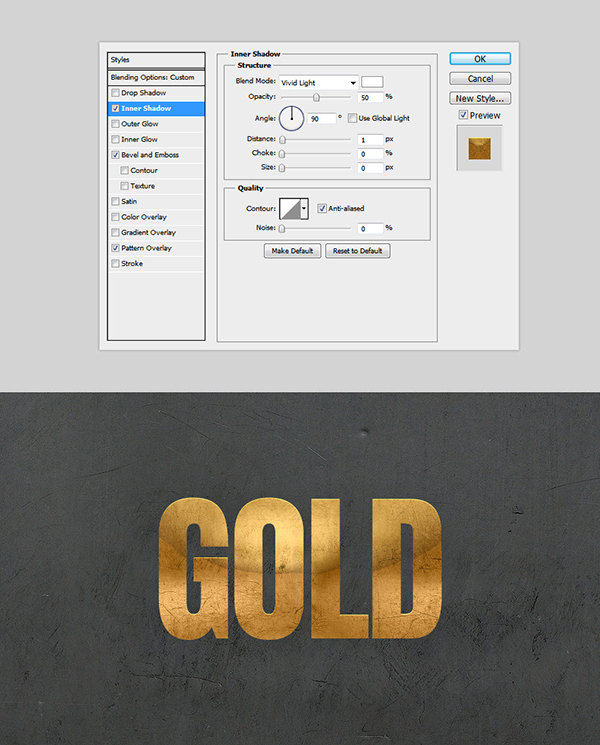
6. Choose Layer Style > Inner Shadow and use the settings shown below to lighten the edges.
Blending Mode: Vivid Light
Opacity: 50%
Color: #ffffff
Angle: 90º
Distance: 1 px
Blocking: 0%
Size: 0 p x
Noise: 0%
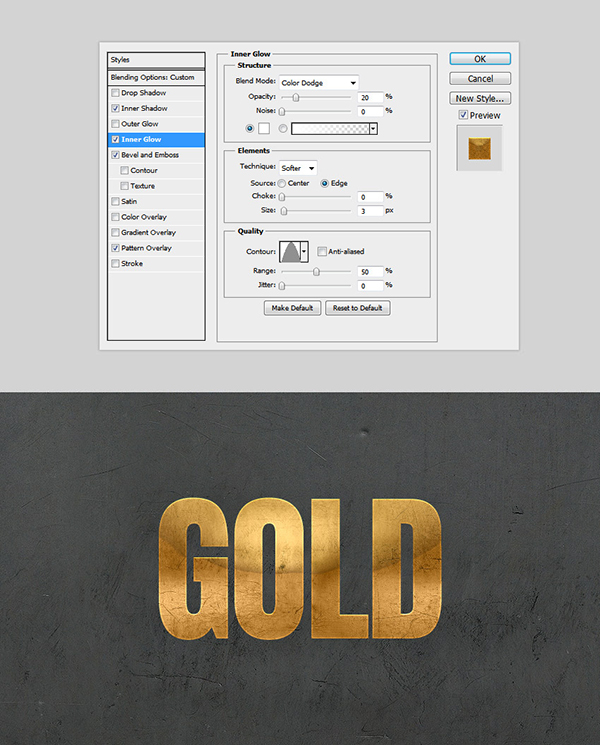
7. Choose Layer Style > Inner Glow, and use the settings shown below to emphasize the brightened edges.
Blending Mode: Color Dodge
Opacity: 20%
Noise: 0%
Color: #ffffff
Method: Soft
Margins: Check
Blocking: 0%
Size: 3px
Now we will add the previously installed "CustomContours.shc" file. Click the Contour dropdown icon and select the contour named "CustomContour02".
Now we can proceed:
Range: 50%
Jitter: 0%
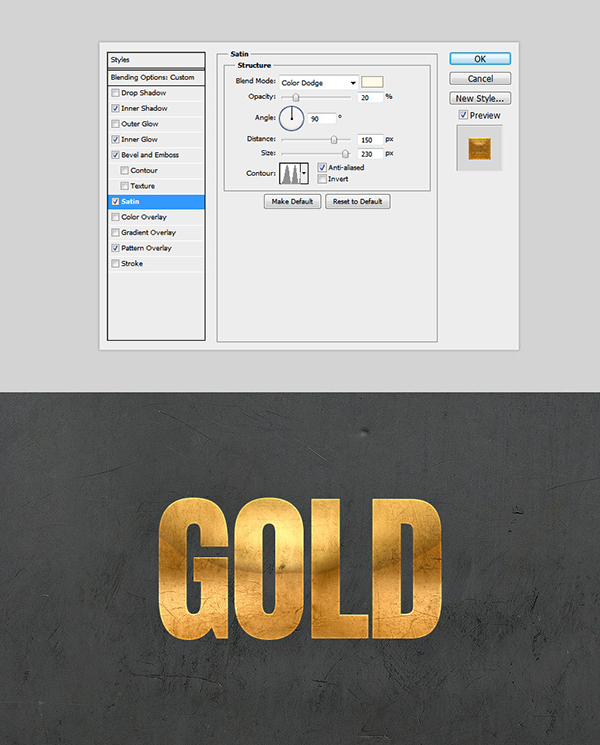
8. Now we will emphasize the highlights to give more realism to the metallic effect. Choose Layer Style > Glossy and use the settings shown below.
Blending Mode: Color Dodge
Color: #fffae6
Opacity: 20%
Angle 90º
Distance: 150px
Size: 230px
Now we will add the previously installed "CustomContours.shc" file. Click the Contour dropdown icon and select the contour named "CustomContour03".
9. Create a Gradient Overlay that will give a softer golden effect. Open the Layer Style again and modify the Gradient Overlay settings to the following values.
Blending Mode: Darken
Opacity: 100%
Style: Linear
Angle 90º
Scale: 100%
Click Gradient Bar and create a gradient with the following settings:
Tip: To create a new point in the gradient, you must click below the gradient bar. Click on each color stop to modify the position and color.
First Stop Color: #8e6617
Top position: 0%
Second station color: #876b2c
Second station position: 25%
The third stop color: #997a35
The third station: 45%
The fourth stop color: #e0b545
The fourth station: 67%
The fifth station color: #947632
Fifth station: 83%
Sixth station color: #886218
Sixth station position: 53%

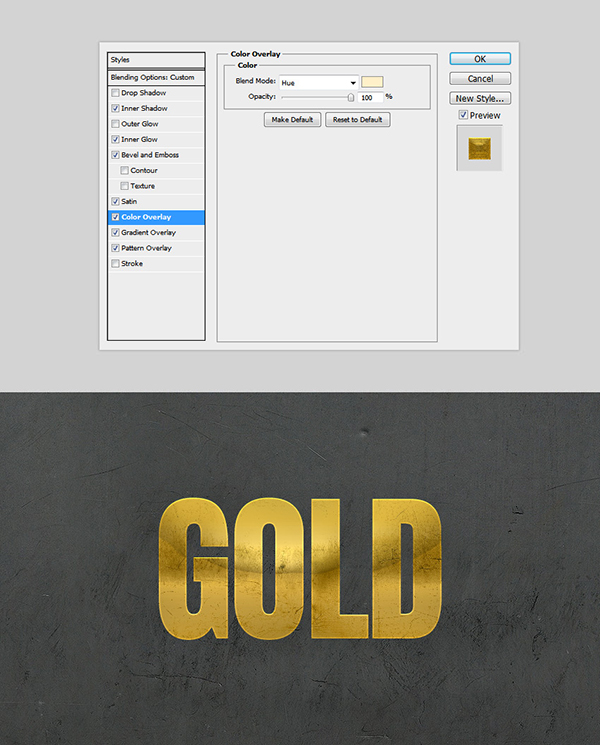
10. In order to make the metal texture more realistic, you need to continue to add layer masking, select Layer Style > Color Overlay and set the following values.
Blending Mode: Hue
Color: #fff0c9
Opacity: 100%
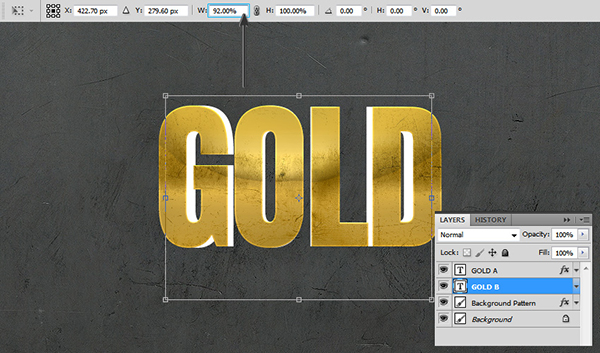
11. In order to make the metal look thick, another layer needs to be styled. Select the GOLD B layer and use Control-T to adjust the width of the font.
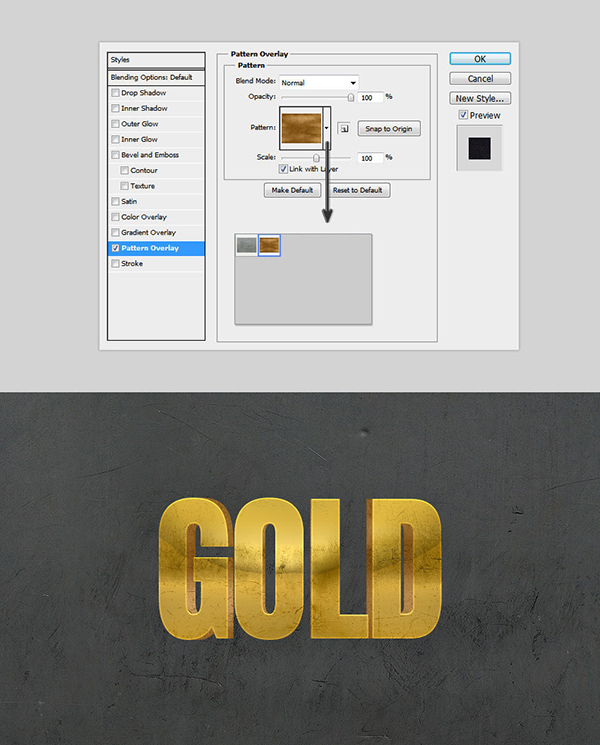
12. Add the same pattern to match the texture and color of the two text layers, go to Layer Style > Pattern Overlay, click on the pattern box and select Pattern02 from the list, this texture will be used as 3D basis of the effect.
Now set the following values:
Blending Mode: Normal
Opacity: 100%
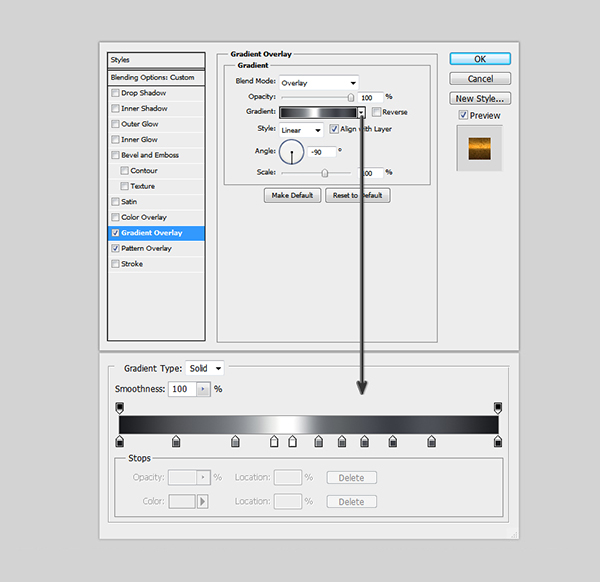
13. Now we will create a gradient overlay that will give a depth 3D effect. Open the Layer Style again and modify the Gradient Overlay settings to the following values:
Blending Mode: Overlay
Opacity: 100%
Style: Linear
Angle 90º
Click Gradient Bar and create a gradient with the following settings:
Remember: To create a new point in the gradient, you must click under the gradient bar. Click on each color stop to modify the position and color.
First Stop Color: #1a1b1e
Top position: 0%
Second station color: #525458
Second station position: 15%
The third stop color: #83878c
The third station: 31%
Fourth station color: #eff0ee
The fourth station: 41%
The fifth stop color: #ffffff
Fifth station: 46%
Sixth station color: #797d82
Sixth station position: 53%
Second station color: #5d6063
Second station position: 59%
The third stop color: #4e5057
The third station: 65%
The fourth stop color: #3c3e45
The fourth station: 72%
The fifth station color: #4e5057
Fifth station: 82%
Sixth station color: #1a1b1e
Sixth station position: 100%
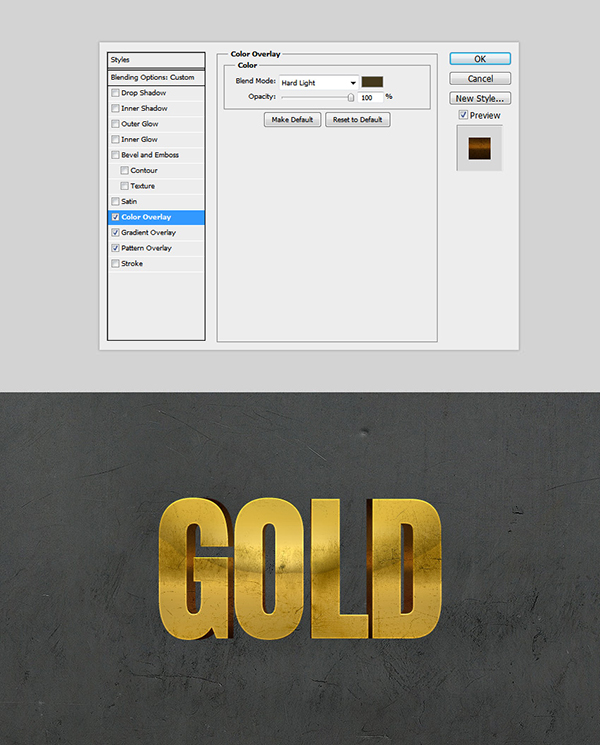
14. Select Layer Style>Color Overlay and set the following values.
Blending Mode: Hard Light
Color: #443a1d
Opacity: 100%
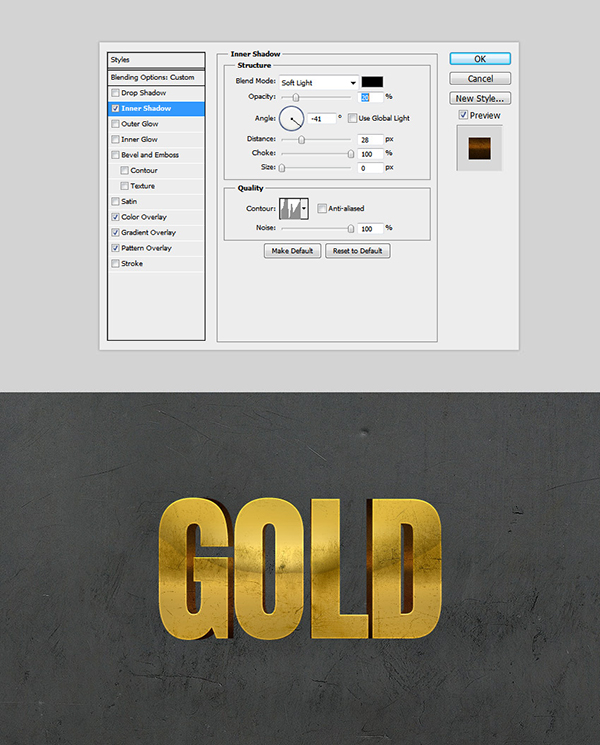
15. We're going to add some "rusty shadows" to the bottom text layer, go to Layer Style > Inner Shadow.
Use the previously installed "CustomContours.shc" file. Click the Contour dropdown icon and select the contour named "CustomContour04".
Complete the inner shadow using the values shown below:
Blending Mode: Soft Light
Color: #000000
Opacity: 2 0%
Angle: -41º
Distance: 28 px
Blocking: 100%
Size: 0px
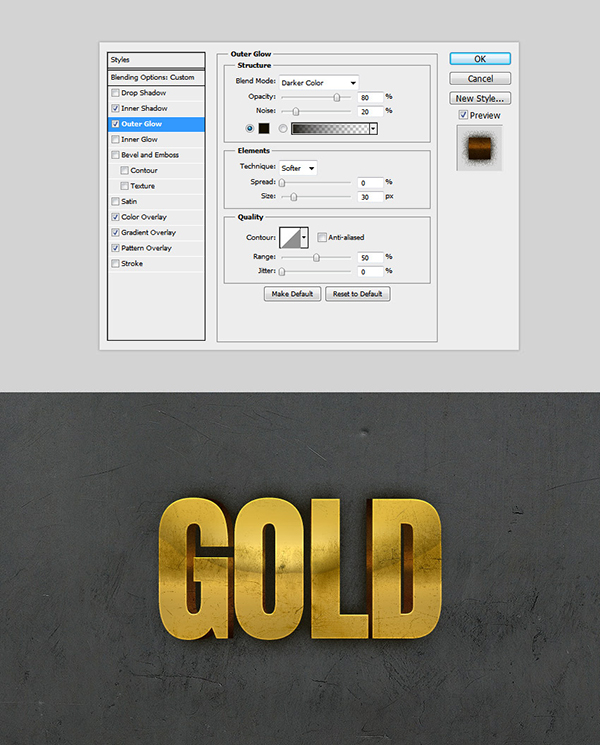
16 Add some shadows to separate the text from the background, layer style > Outer Glow and use the values shown below.
Blending Mode: Darken
Opacity: 80%
Variation: 20%
Color: #000000
Method: soft
Spread: 0%
Size: 30%
Outline: default
Range: 50%
Jitter: 0%
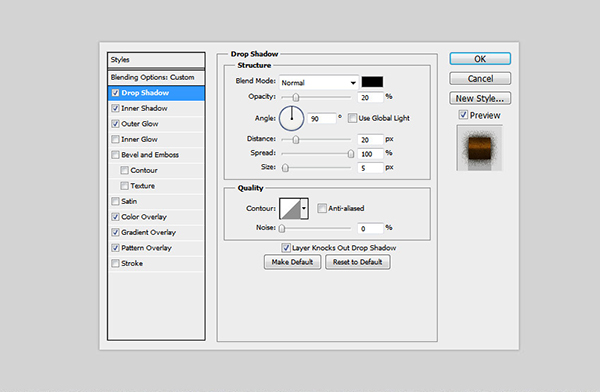
17. This is the last step! We'll add some sharp shadows for a rich lighting look. Choose Layer Style > Drop Shadow and use the values shown in the image below.
Blending Mode: Normal
Color: #010101
Opacity: 20%
Angle: 90º
Distance: 20px
Expansion: 100px
Size: 5px
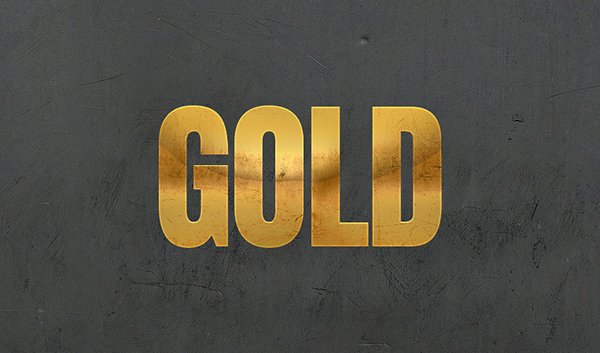
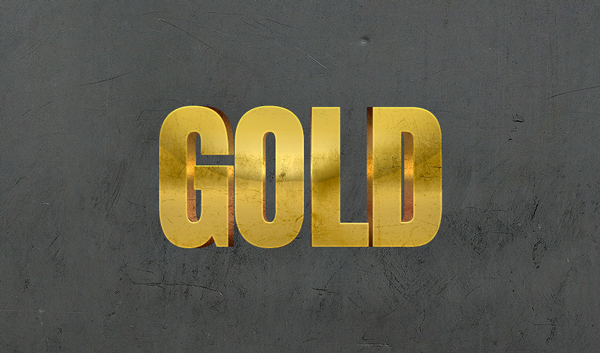
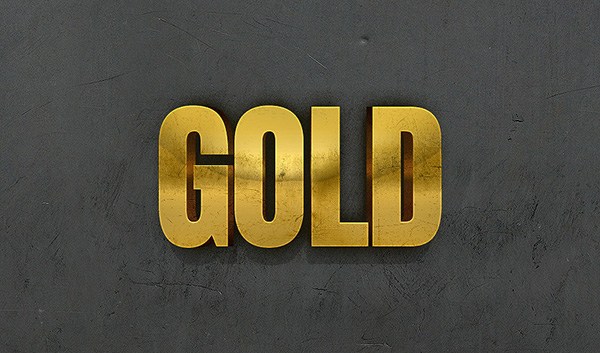
The final effect is as follows:
Articles are uploaded by users and are for non-commercial browsing only. Posted by: Lomu, please indicate the source: https://www.daogebangong.com/en/articles/detail/Use%20Photoshop%20to%20teach%20you%20how%20to%20make%20a%203D%20metal%20text%20effect.html
 支付宝扫一扫
评论列表(196条)
测试