Preface
1
The application of Rain Classroom in online teaching is becoming more and more widespread, but many teachers still have doubts about the technical implementation, such as "What should I do if the animation in the PPT cannot be shared with students in real time during the process display?" "One-page PPT What should I do if multiple animations are used in the video, and the images and texts overlap?” “What should I do if I can’t display other screen information except PPT?” “What if the laser pointer can’t be used?” and so on.
In this post, Han Yue, a Ph.D. student in the Department of Computer Science, Tsinghua University, made a tutorial to help you realize "Use OBS to share the screen in Rain Classroom", and provide you with a possible solution to the above problem for your reference.
CoreIdea:The key point is to convert the screen into a virtual camera input, and then select the virtual camera during the live broadcast of the rain classroom.
Video tutorial:https://cloud.tsinghua.edu.cn/f/20df84b520b24feebfc5/

renderings
renderings
Materials:
The software can also be found in the Tsinghua cloud disk linked below
1. Install OBS first
2. Then install the OBS-virtualCam plug-in, the plug-in should be installed in the same directory as OBS
Configuration:
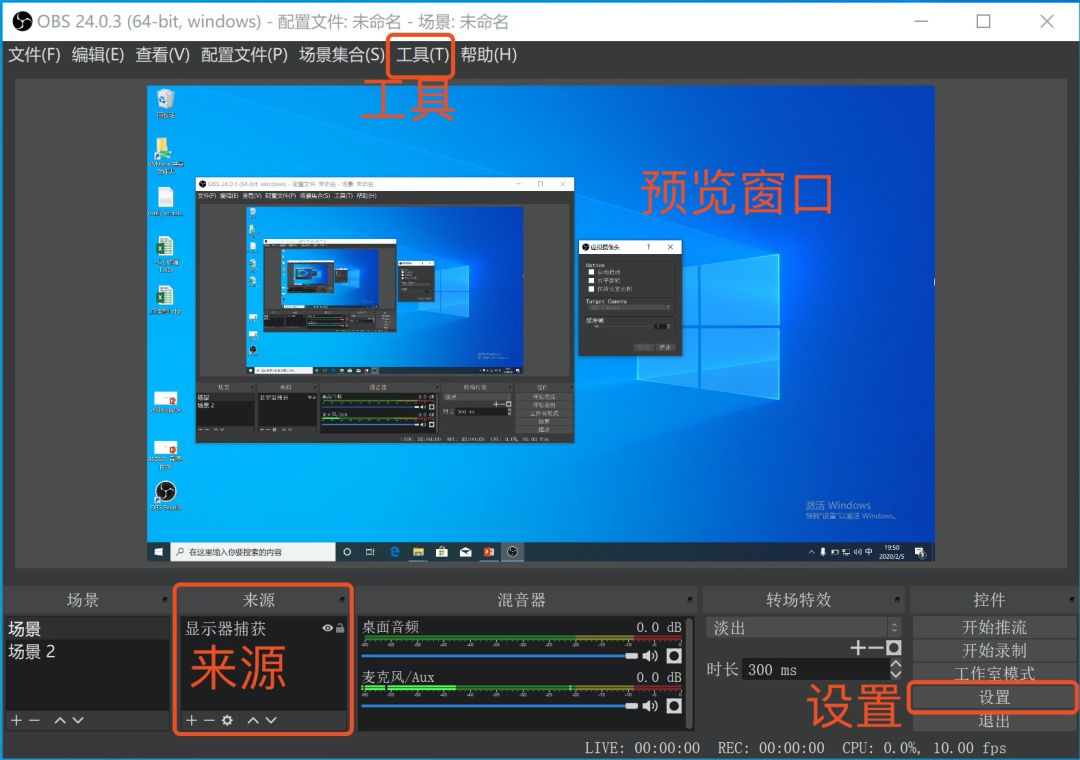
OBS main interface
OBS is configured as follows
Click "Settings", in the "Settings" window:
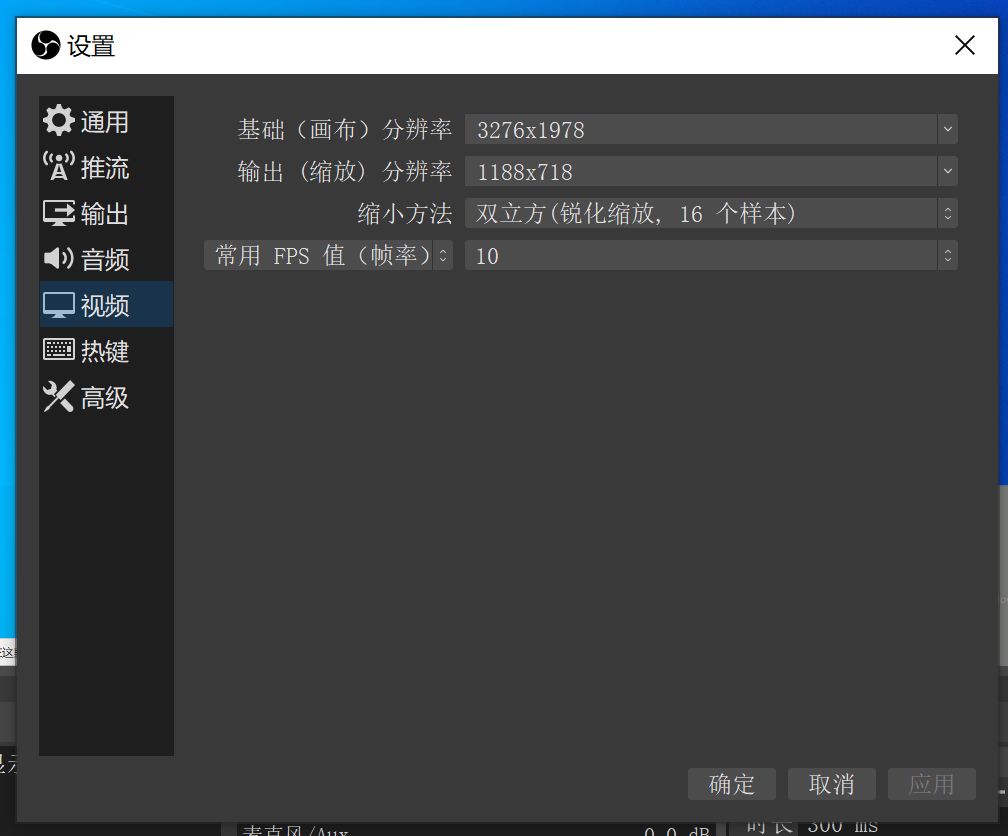
Video tab: The canvas resolution selection is as big as the screen. Considering the network bandwidth limitation, the output resolution can be smaller, and the FPS does not need to be too high. The following is my setting.
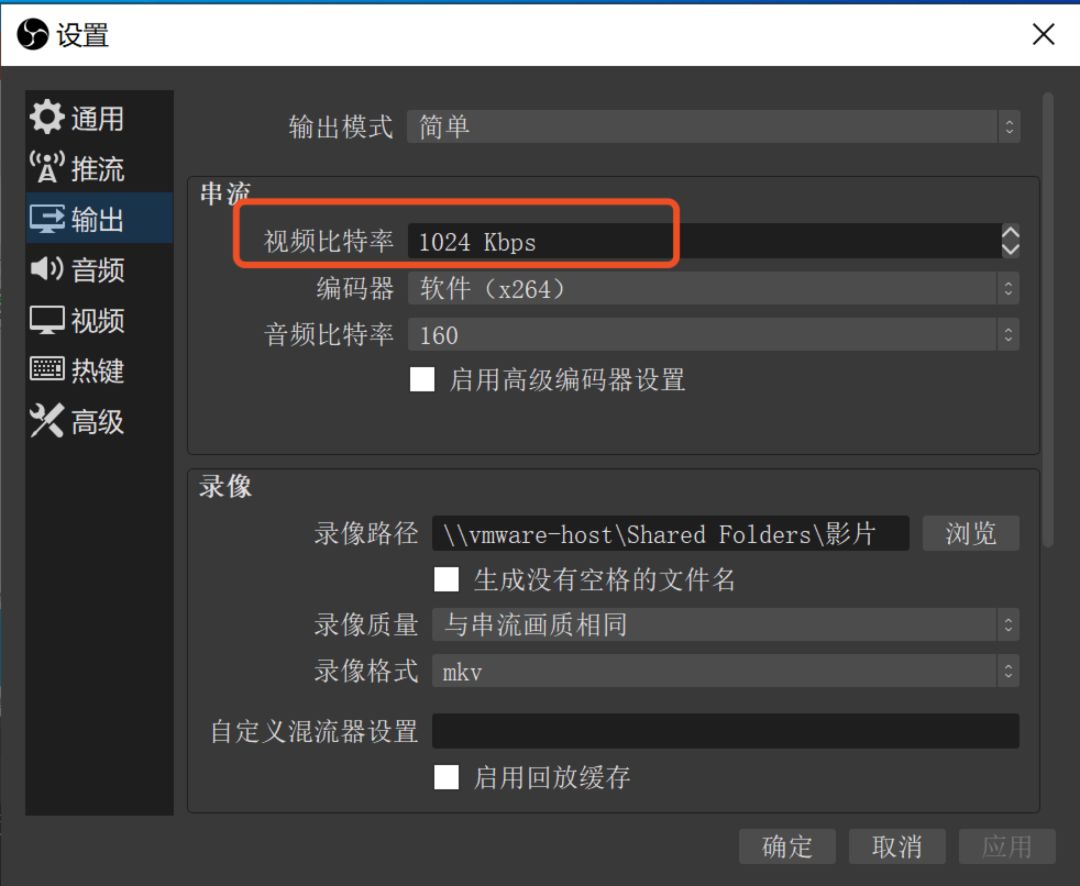
"Output" tab: The streaming bit rate does not need to be too high, according to your own network bandwidth settings, the following are my settings
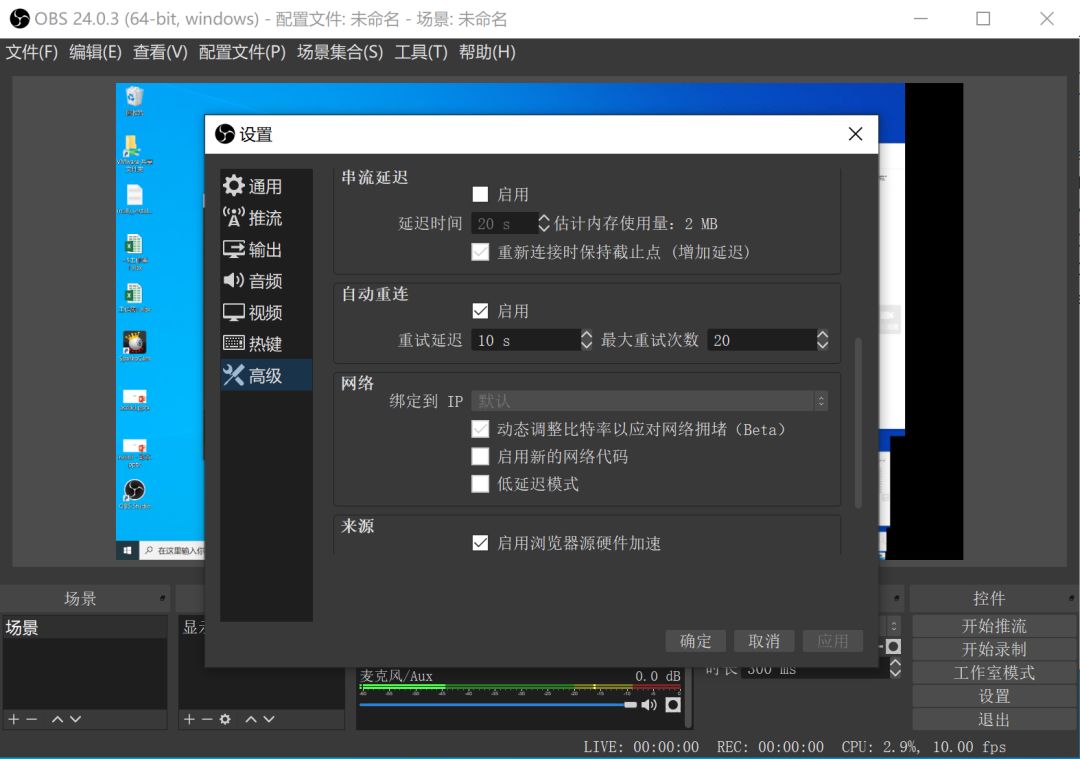
"Advanced" tab: pay attention to check "Dynamic adjust bit rate to cope with network congestion", otherwise the delay may be very high

Add live data sources
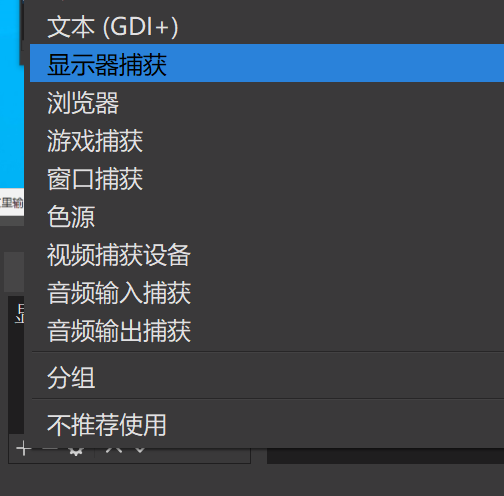
In the "Source" box of the main interface, click the "+" sign to select monitor capture, and set the OBS capture monitor as the data source (as shown in the figure below).
Adjust live broadcast area
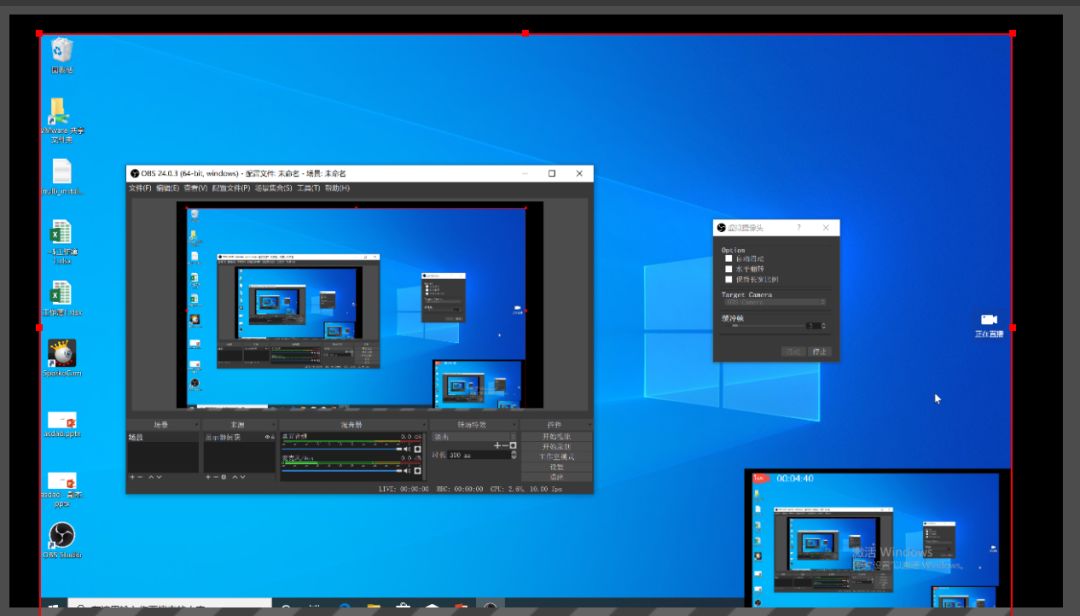
Adjust the position and size of the captured area in the "Preview Window" of the main interface, click the image, the red dots that appear around the image can be dragged and zoomed, and adjust the image until the image completely enters the canvas (as shown below) (black background is the canvas).
Start virtual camera plug-in
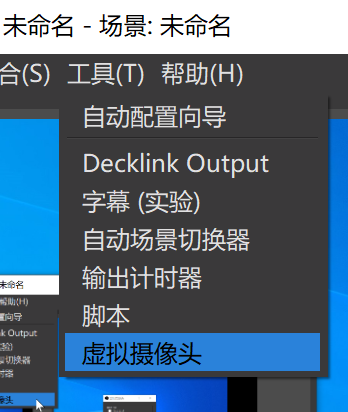
In the menu bar of the main interface - tools, select the virtual camera (as shown below), and the plug-in window will appear (as shown below)
Use:
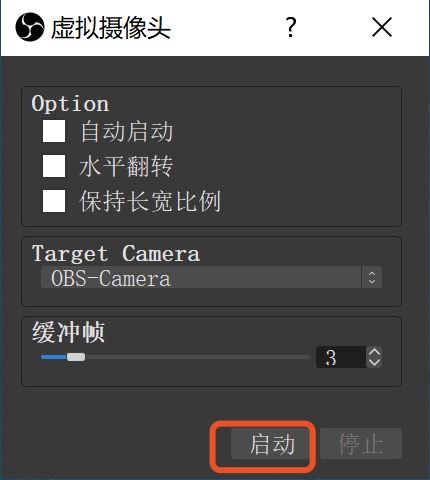
Start virtual camera

Click "Start" for the virtual camera plug-in (you can also "stop" and "start" at any time during the live broadcast)
Open live broadcast
Open Rain Classroom live broadcast, click "Video Live" in the right navigation (as shown below)
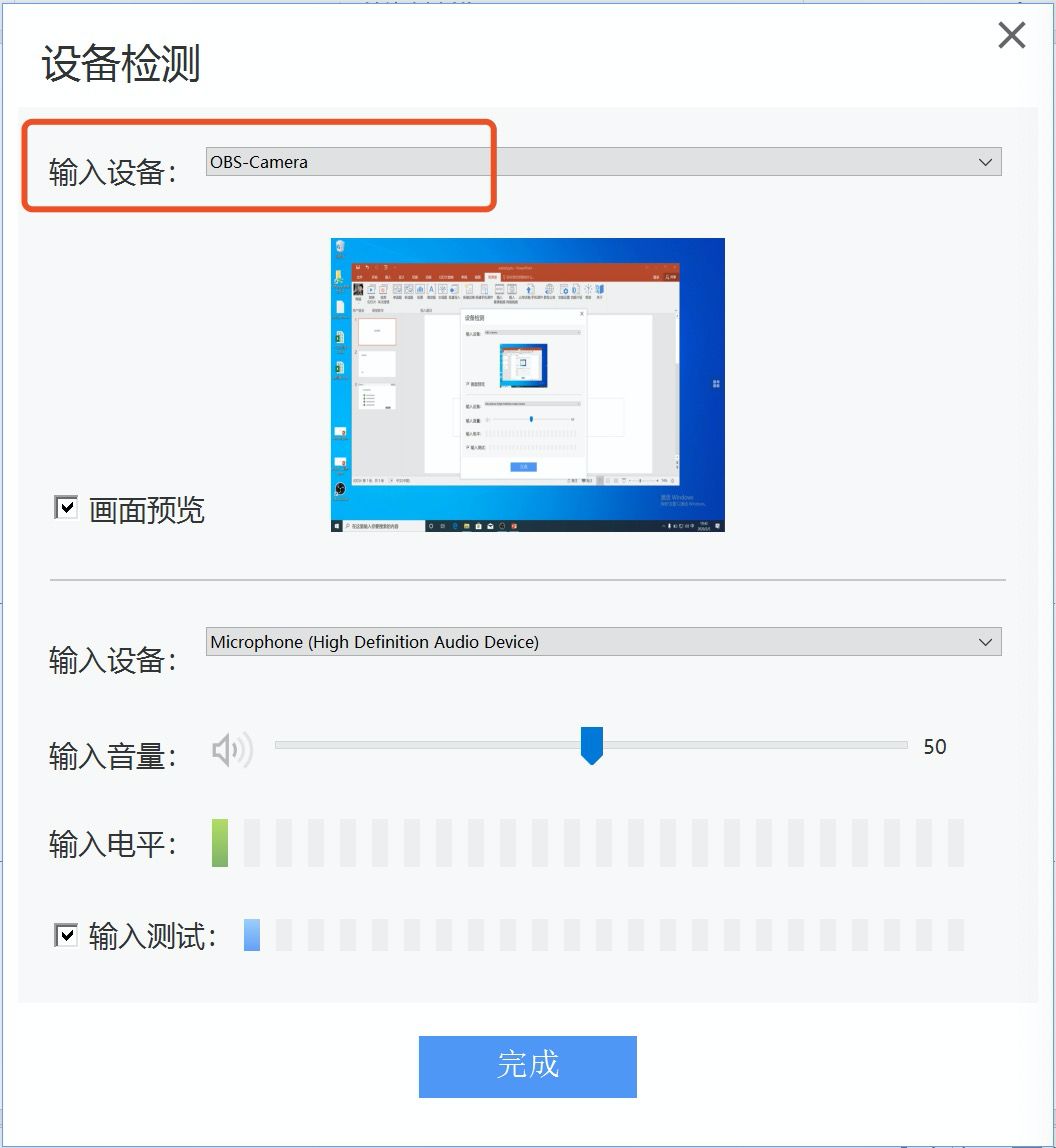
In the pop-up "Device Detection" window, enter the device and select OBS-Camera, and click Finish
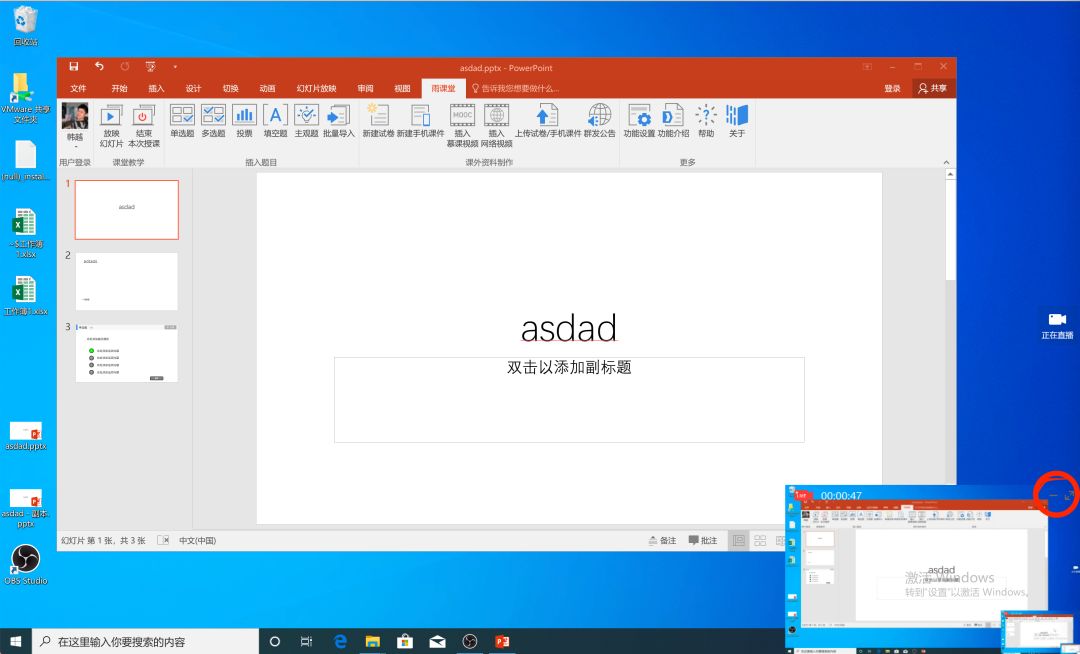
The effect of is as shown in the figure below. If you don’t want to see the live broadcast window, you can click to minimize it in the upper right corner of the live broadcast window.
Effect video:
FAQ:
I tried to install it on both the win10 virtual machine and windows10 system of mac (Rain Classroom+OBS), and basically encountered no problems.
A small problem: under the native Windows 10 system, OBS displays a black screen when opening the display capture.
Solution: In the NVIDIA Control Panel - Manage 3D Settings - Program Settings tab, 1. Select the program to be customized to add OBS, 2. Select the preferred graphics processor for this program to adjust (specifically which one to choose I don't understand either, I just changed one), the OBS black screen has been resolved.
Author | Han Yue, Ph.D. Candidate, Department of Computer Science, Tsinghua University
Articles are uploaded by users and are for non-commercial browsing only. Posted by: Lomu, please indicate the source: https://www.daogebangong.com/en/articles/detail/Tutorial%20%20Is%20it%20not%20enough%20to%20only%20show%20PPT%20in%20online%20teaching%20Lets%20learn%20how%20to%20use%20OBS%20to%20share%20the%20screen%20in%20Rain%20Classroom.html
 支付宝扫一扫
评论列表(196条)
测试