In graphic design, in addition to layout design, font and font effect design are also very important. A good font design can add points to the entire design, improve the quality of the design, and at the same time better highlight the theme and convey information.
There are often designer friends who leave a message in the background or private message me, saying that they have seen a very good font effect, but they don’t know how to achieve it. Don't worry, today I will bring you the first of a series of font design tutorials - calligraphy font design.
Let’s take a look at the finished effect first. It looks pretty good. Next, let’s introduce in detail how the word effect of this calligraphy font is realized.

For the time being, we will only discuss font design here, and a series of articles will be published separately on font design in the future. Recommend to everyone a good website for generating calligraphy fonts online-calligraphy fans. Today, we will use the name of our subscription account "UI Charging Station" to explain the case.
Open the website Calligraphy Fan, enter the three characters "charging station", select the appropriate font to download.

Drag the downloaded font to Ai for simple processing, typesetting according to the font shape and negative space relationship, and add UI (user interface) in English, as shown below:

Open PS, create a new 1000*660 canvas, copy the text in Ai to PS (paste it as a smart object), first simply deal with the background, we directly find a suitable rock material in Baidu pictures, and drag it to PS , and place the layer at the bottom layer, the effect is as follows:

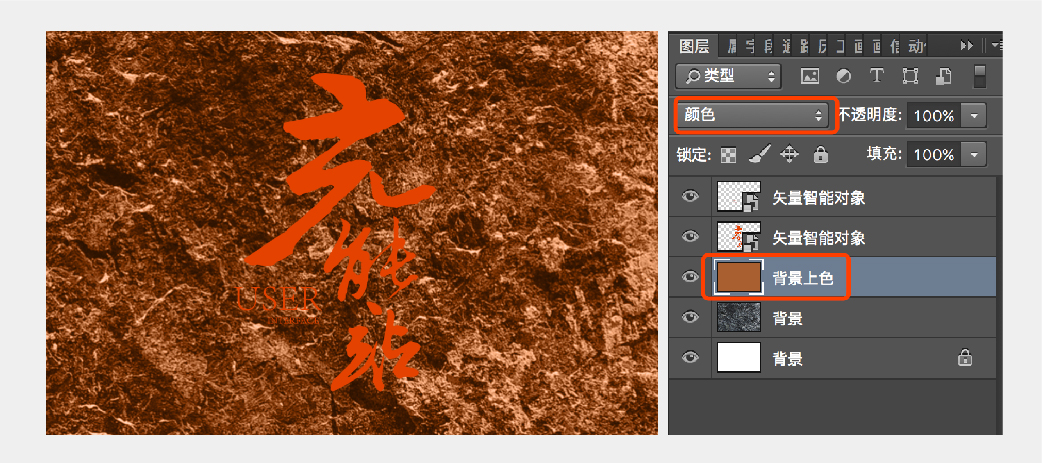
The background is pure black and white, relatively monotonous, let's color the background, create a new layer above the background layer, name it "Background Color", fill it with light brown (color value: #b6632f), and change the blending mode to For "color", the effect is as follows:
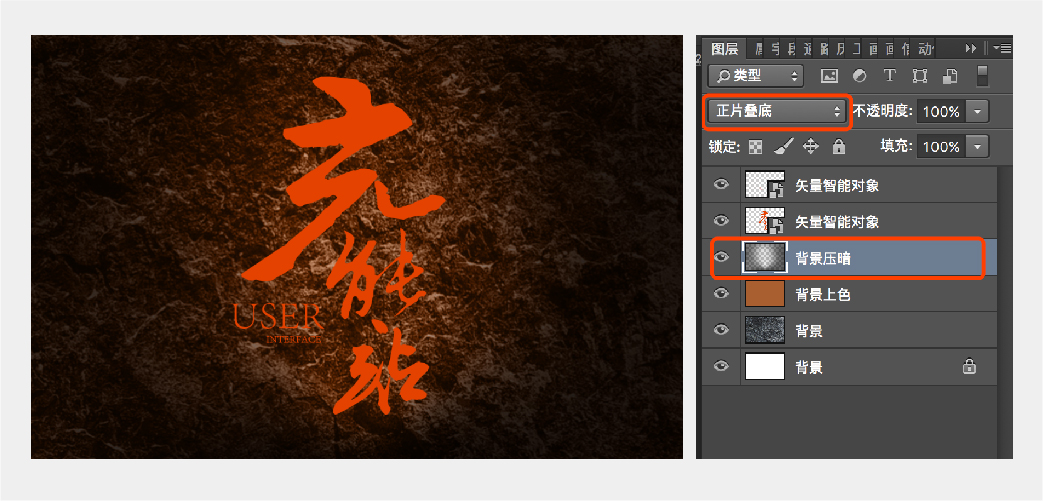
In order to highlight the main body of the text, we will darken the background around the text, create a new layer above the "Background Coloring" layer, name it "Background Darkening", and change the layer blending mode to "Multiply". Choose black as the color, adjust it to a suitable opacity, and use a brush to paint around the background. The effect is as follows:
Now we start to formally process the text layer. First, we change the color of the text, change the text to yellow, create a new layer above the "text" layer, and hold down Ctrl+Alt+G to create a clipping mask, and use the brush tool Change the color to yellow (color value: #efa100), and paint on the text layer, the effect is as follows:
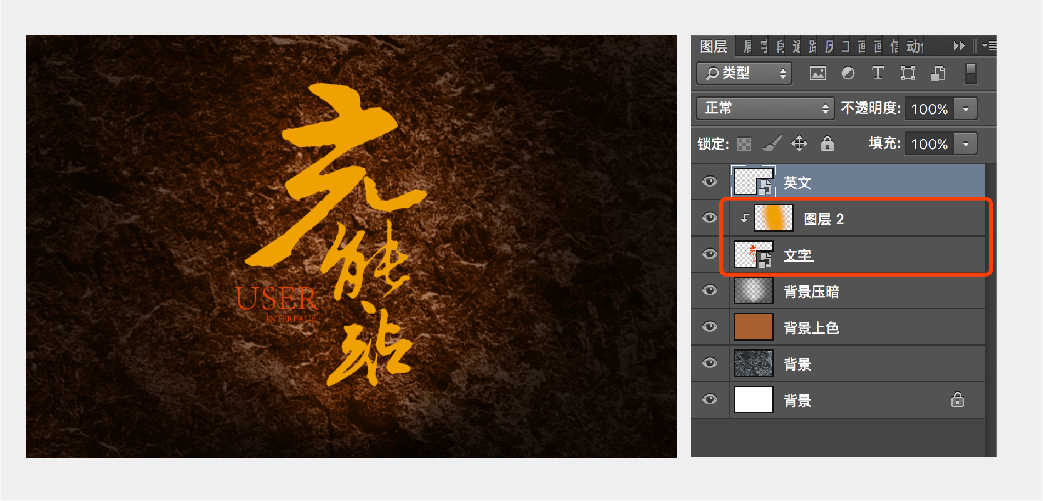
Next, we add thickness to the text layer, select the text layer, hold down the Alt key and press the down arrow key on the keyboard, move and copy the layer, repeat the operation more than 8 times, get the thickness of the text layer, merge the thickness layers and Convert it into a smart object, create a new layer above the text thickness layer, make a clipping mask, paint with a brush, and change the text thickness layer to red, the effect is as follows:
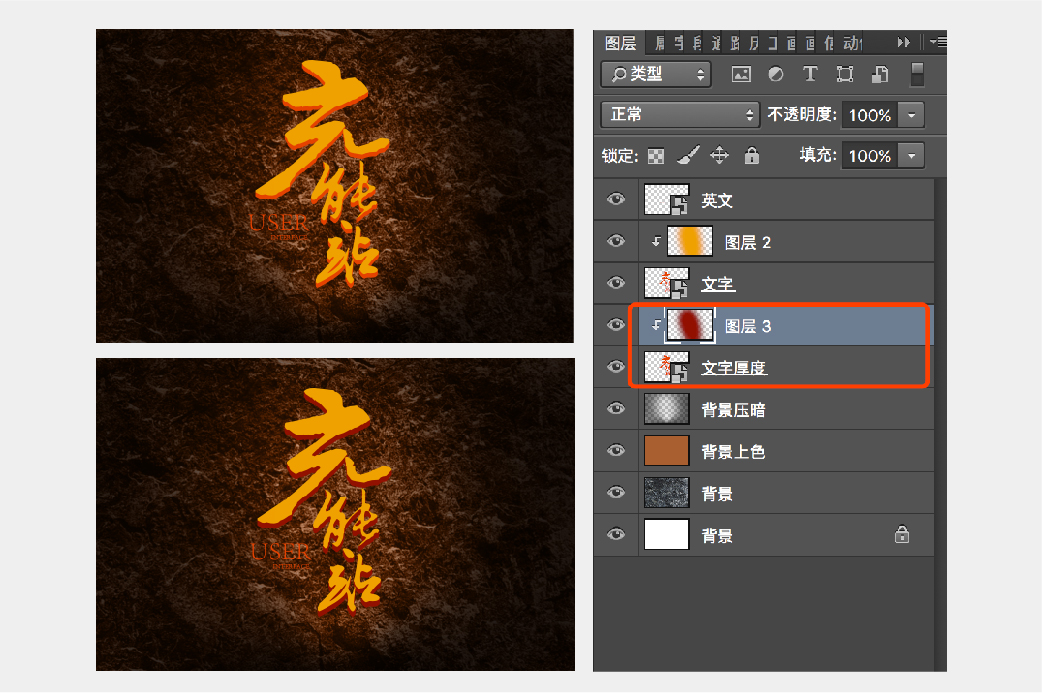
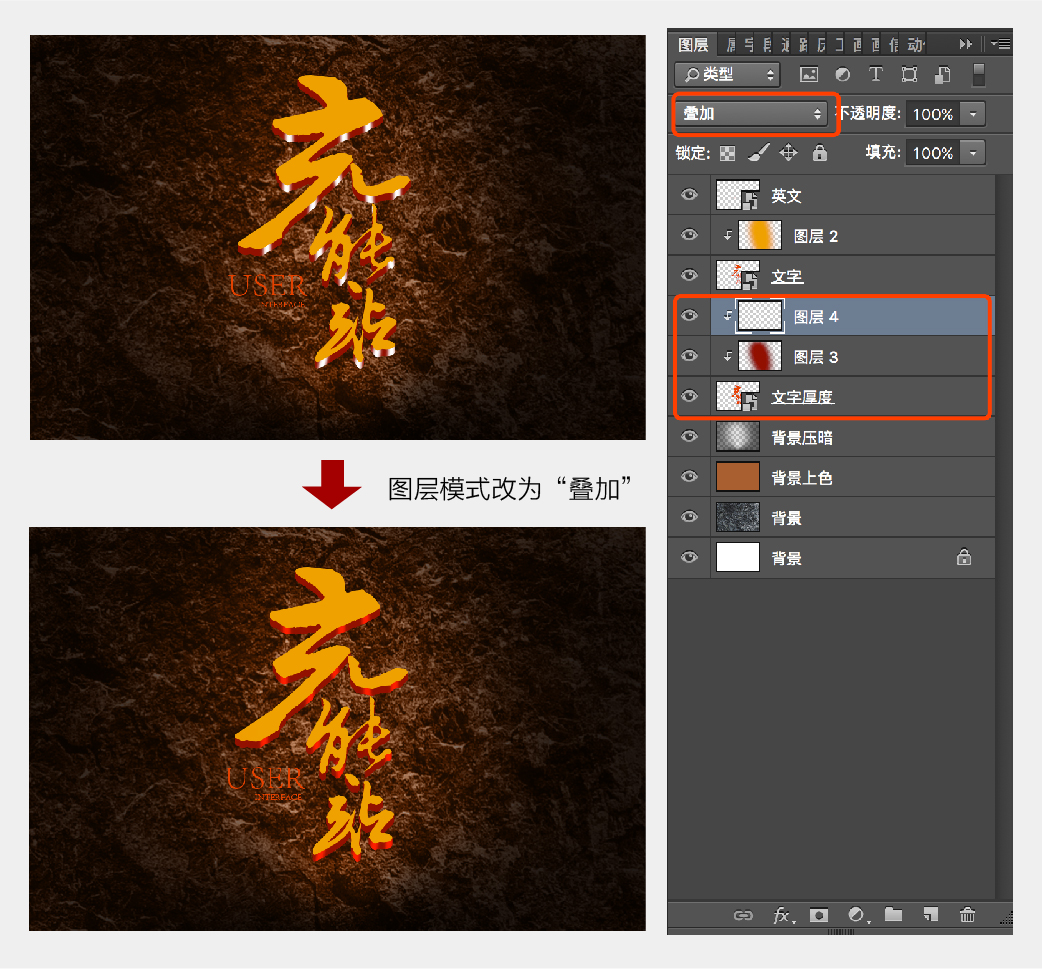
Continue to create a new layer above the text thickness smear layer, and make a clipping mask, adjust the layer mode to "overlay", use a white brush to smear on the corresponding position on the thickness layer, add more details to the text thickness, and achieve an effect as follows:
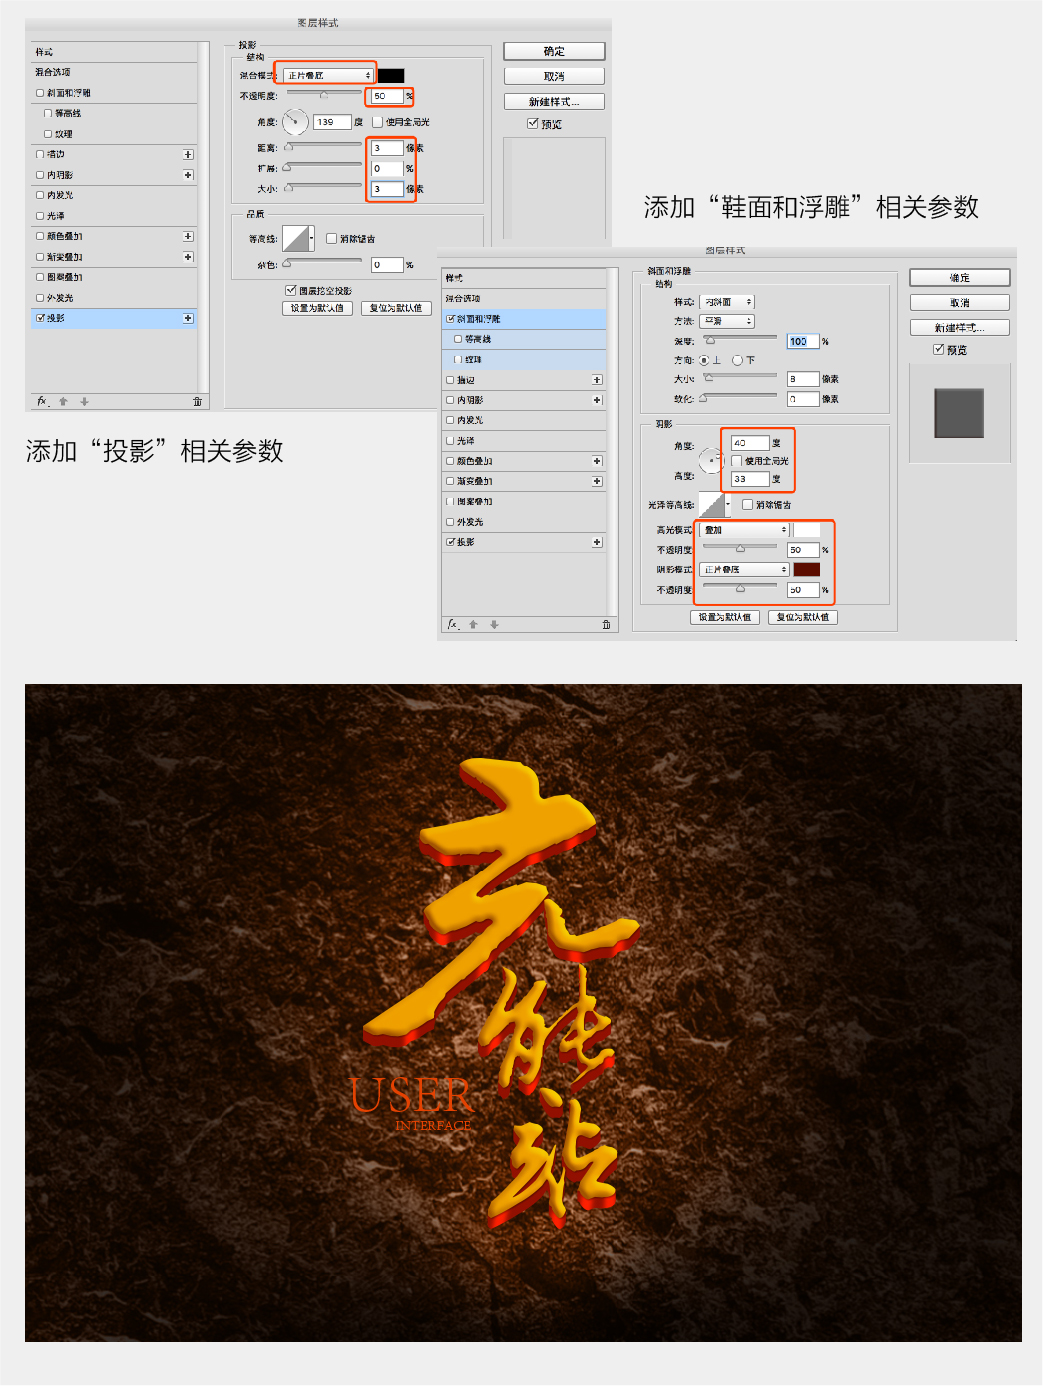
Add a layer style to the "text" layer to make a three-dimensional effect. Double-click on the right side of the text layer to call out the layer style dialog box. First add "Projection", and the related parameters of "Projection" are set as shown in the figure below. Continue to add the layer style "Slope and Emboss" related parameters are set as follows, and the rendering effect is as shown in the figure below:
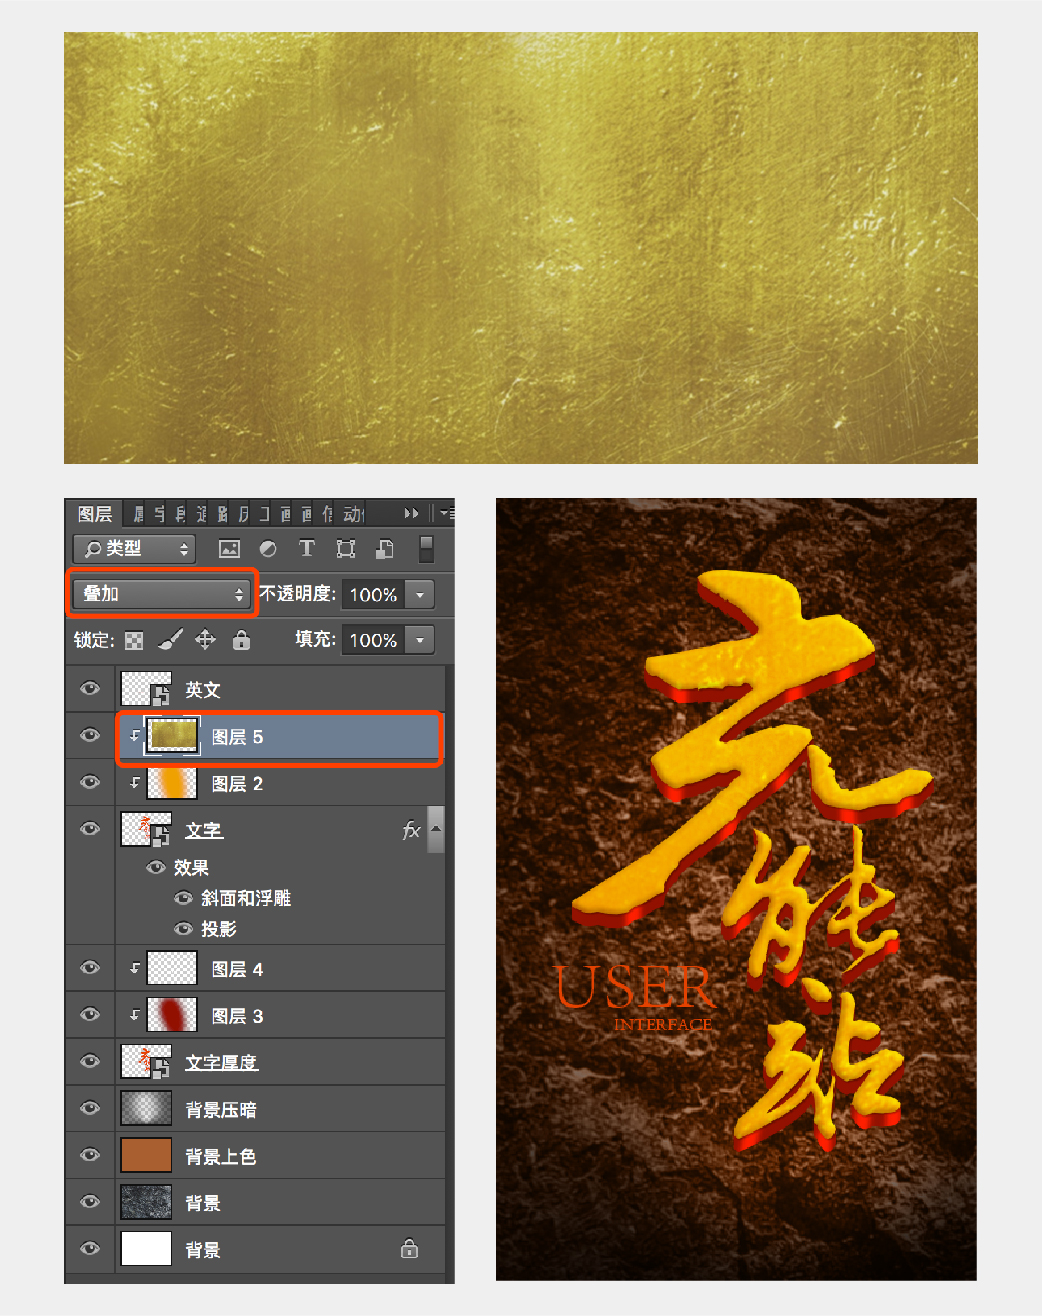
Next, we find a gold foil material on the Internet and superimpose it on the text layer, and change the layer blending mode to "overlay", the effect is as follows:
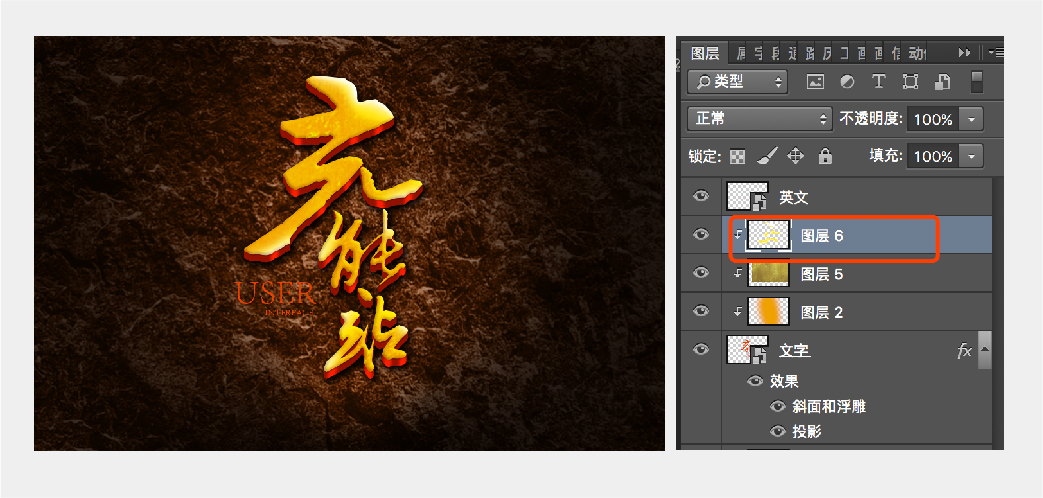
Create a new layer above the text layer, create a clipping mask, and use a white and yellow brush to paint on the edge of the text to create a light effect. The effect is more contrasting, and the effect is as follows:
Next, let's deal with the English font. Use the same method as before to change the English font to yellow, then create a layer mask, use the brush tool (select the brush number 66), change the color to black, and paint on the layer mask. Erase part of the English to create a faint effect, and add a drop shadow to the English layer, the effect is as follows:

Next, we add light effects to the text. Of course, we can find materials from the Internet and add them directly. Here we make one ourselves, create a new layer, draw a rectangle with the marquee tool, fill it with black, and then execute the filter-render- — Lens flare, adjust the appropriate parameters to get the following effects:
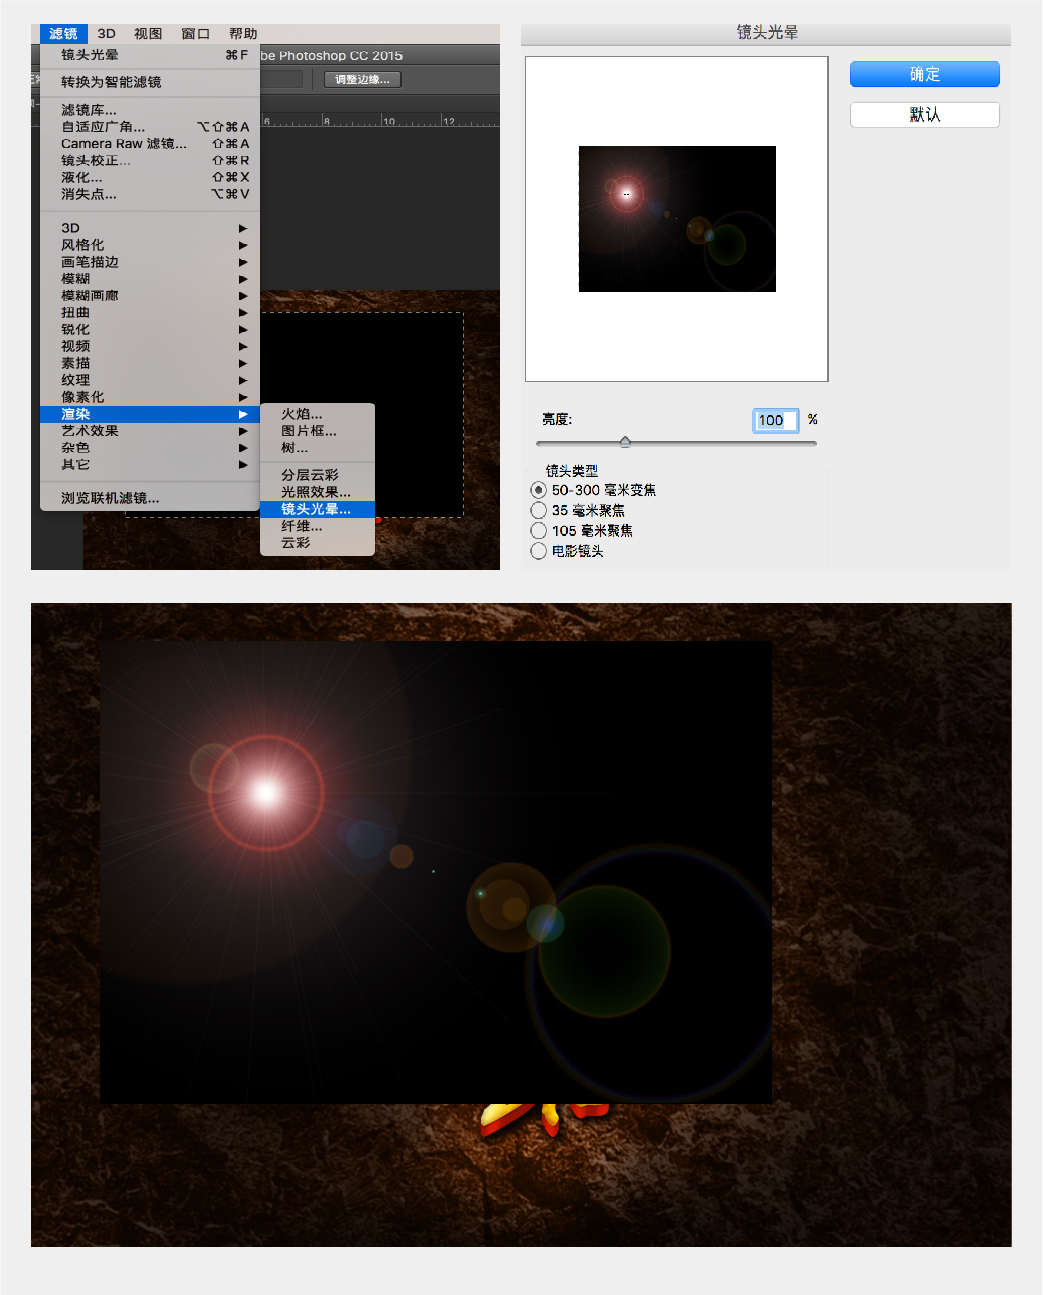
Change the layer blending mode to "screen", and erase the rough edges to make it a smooth transition, and adjust the appropriate position to get the final effect as follows, then we have completed today's case, you have learned ?

Summary
After the above series of steps, we finally completed the design of this calligraphy font. It seems very complicated and there are many steps, but it is actually very simple to sum up.
(1) Create a background. In order to create a three-dimensional effect of light and shadow, we choose to use rock material to create a dark background, with dark surroundings and bright middle to highlight the main body of the text.
(2) Increase the thickness of the text and increase the details of the thickness to create a light and dark light and shadow change and enhance the sense of reality.
(3) Add layer styles such as "Bevel and Emboss" and "Shadow" to the text to create a three-dimensional effect.
(4) Light the text and enhance the contrast between light and dark.
The above is a small tutorial on font design brought to you today. I hope it can help you. Remember, this is only the first in a series of tutorials. Please continue to pay attention and I will update you.
Articles are uploaded by users and are for non-commercial browsing only. Posted by: Lomu, please indicate the source: https://www.daogebangong.com/en/articles/detail/Text%20Effect%20Design%20TutorialCalligraphy%20Typeface%20Font%20Effect%20Design.html
 支付宝扫一扫
评论列表(196条)
测试