I haven't been here for a while, and I took the time to write a tutorial today
This time it is about the Q version of the font. Many people have been unable to make the thickness well. Today I will talk about a simple operation of AI+PS to create a three-dimensional font.
The tutorial is a trial for those who have just entered the industry to communicate and use. Veterans can ignore it. In the past, I watched the tutorials of the seniors along the way, hoping to contribute a little bit of my own strength to help newbies make faster progress.
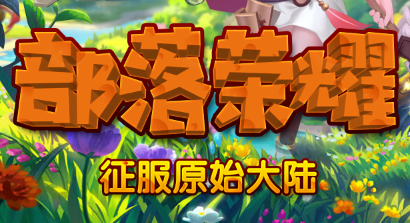
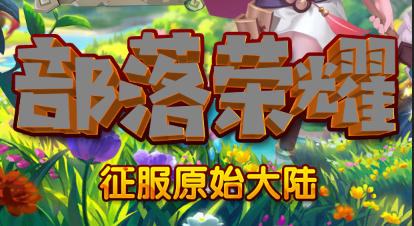
first look at the effect

This is a set of publicity pictures. I won’t talk about how to make pictures this time. I will only talk about the copywriting here
The first step is to open AI to create a canvas and write the font we want to do
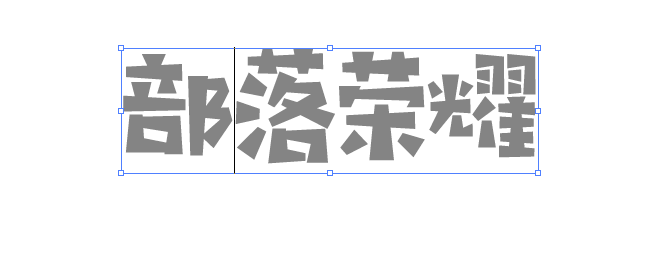
The selected Hanyi cast wooden figure feels more suitable for the overall style. I am used to using gray as the background color.
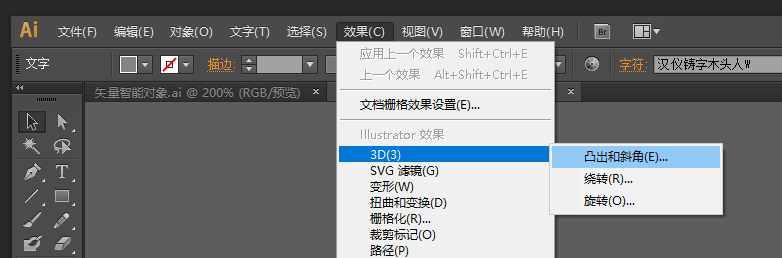
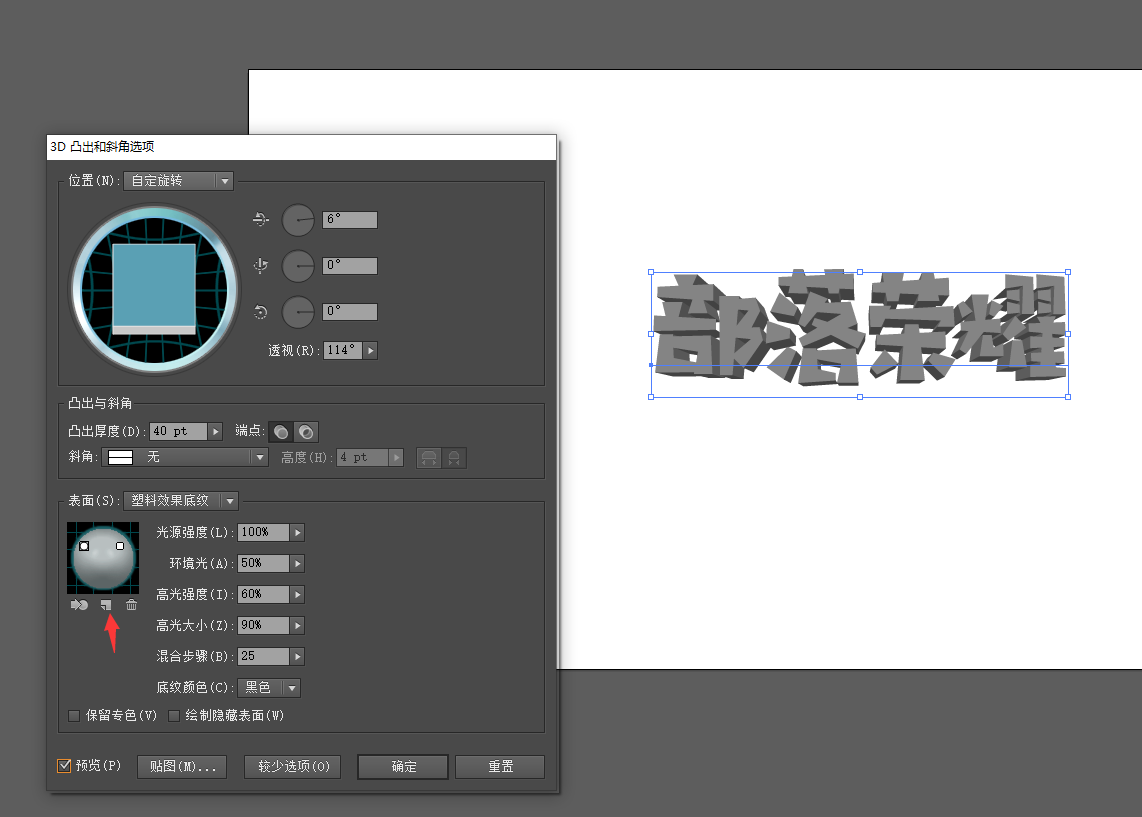
Then go to Effect > 3D > Extrude and Bevel
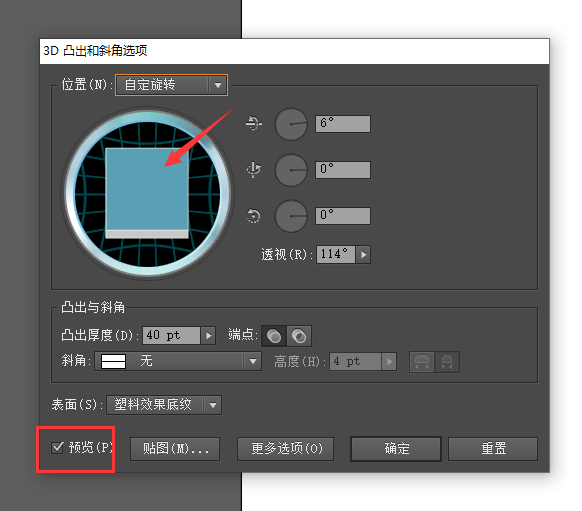
Check the preview option below to see the effect intuitively, adjust the position of the arrow to find a suitable angle
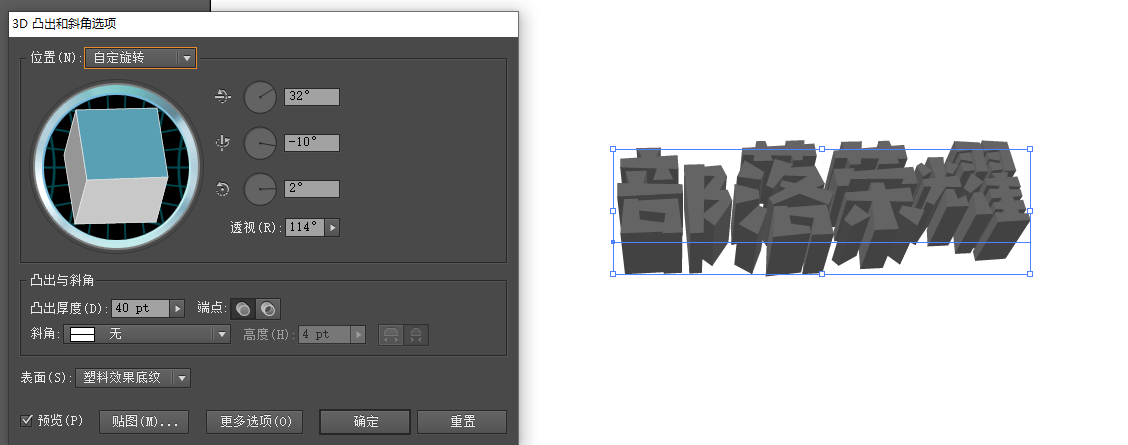
After finding the ideal angle, adjust the perspective. I adjusted it to 114 degrees here. Below is the thickness adjustment. Don’t memorize the numbers and try it out. Next, choose more options to call up the light source, which can make the font details richer.
Let me talk about adding two light sources on the left and right for the light and shadow effect.
Ah, there is one thing I forgot to mention. At the beginning, keep two fonts, one is for adding effects and the other is for flat state, so that it is more convenient to copy them to PS for font effects. After writing here, the font aspect has been completed, and then it will be transferred to PS to make the effect.
I directly paste CTRL+C CTRL+V to be lazy. After copying it, select the smart object so that double-clicking it can return to AI for modification, which is very convenient.

When I first came in, it was gray. The first step was to add the base color.
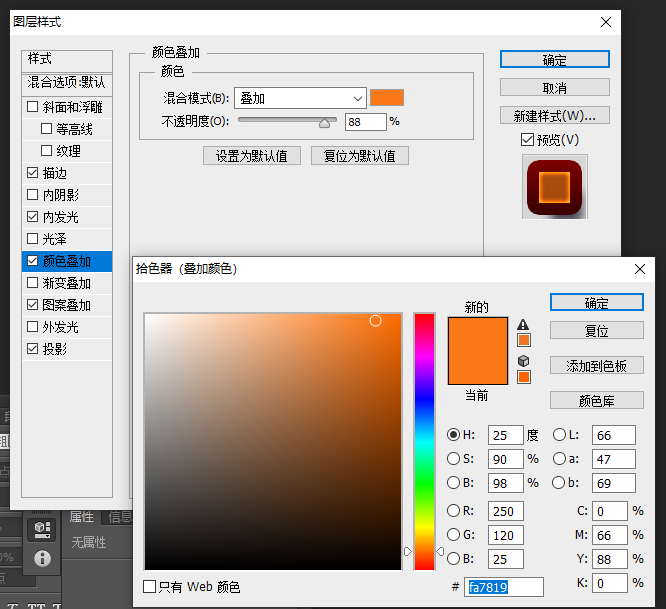
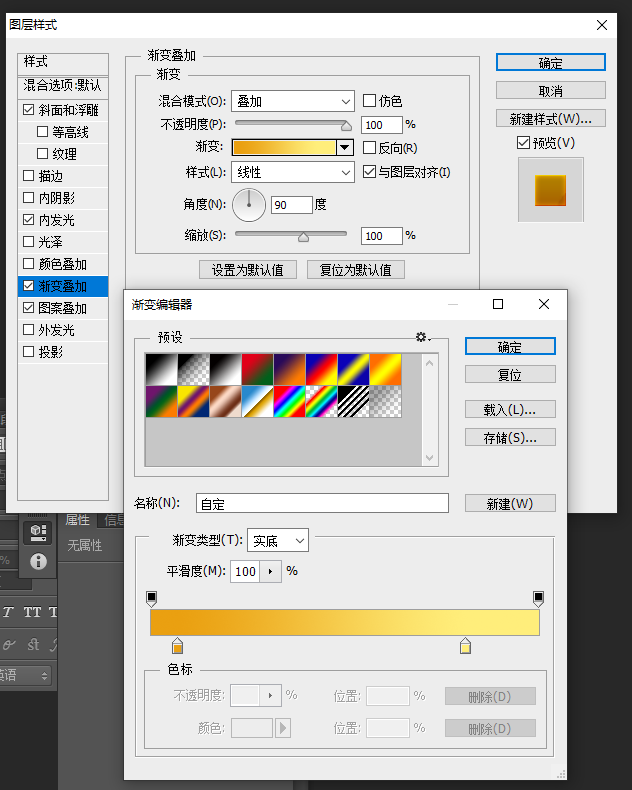
Select Color Overlay - the overlay effect changes the intrinsic color

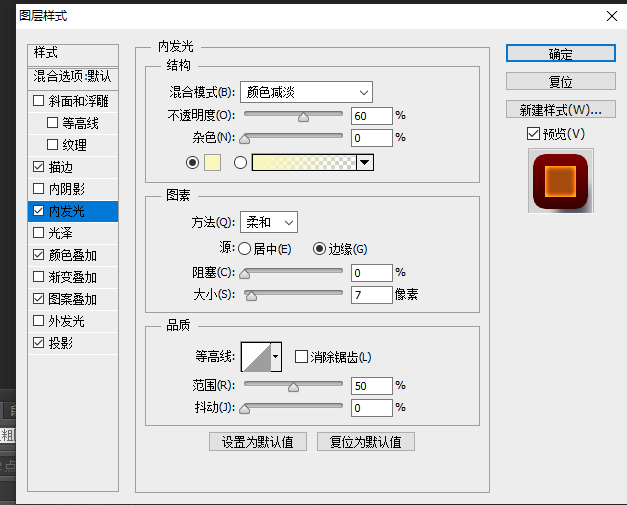
In the second part, add the inner glow and adjust it by yourself. Don’t be too blunt.
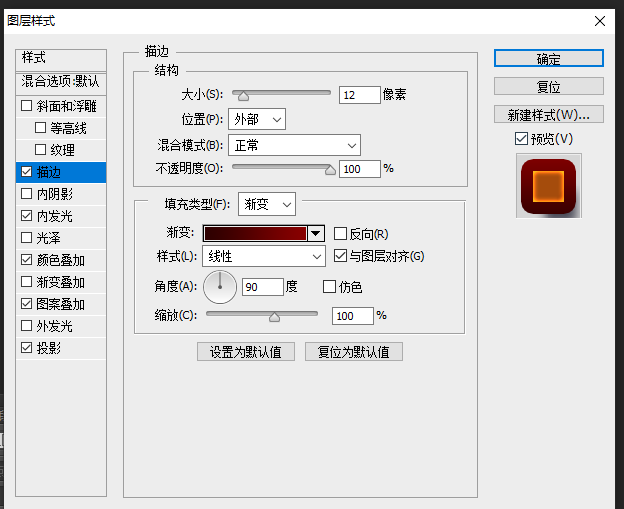
The third part adds strokes and shadows. My picture size is 1242*2208, so the value is relatively large.
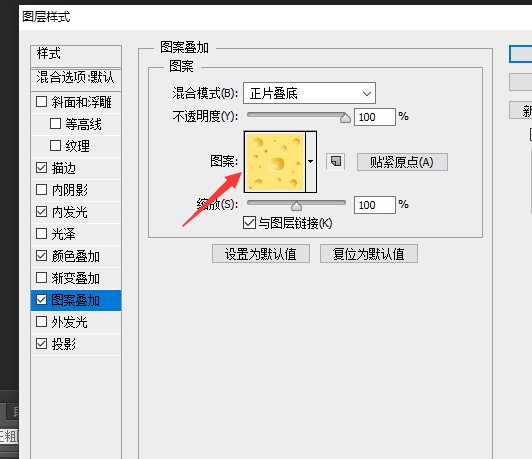
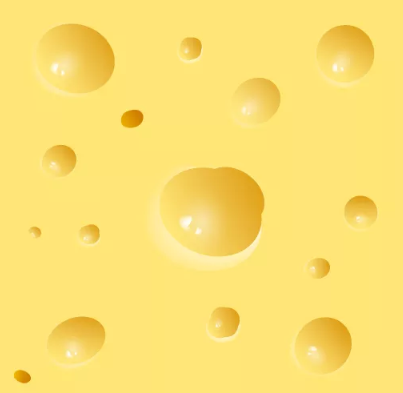
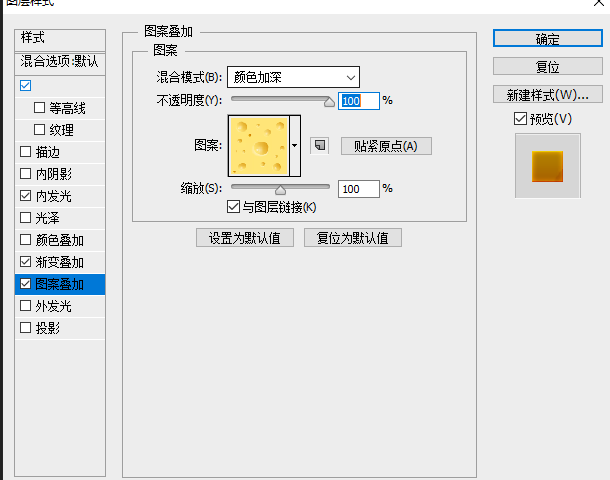
In addition, you can also add some pattern textures. I found a cheese texture from the Internet.
After these steps are completed, the thickness of the background color is completed.
Probably this is the effect, let’s start to make this side, now paste the words that have not been made into three-dimensional effect just now and align them,
The first step is to do the gradient overlay background color
Next, the bevel emboss and inner glow make the font more textured
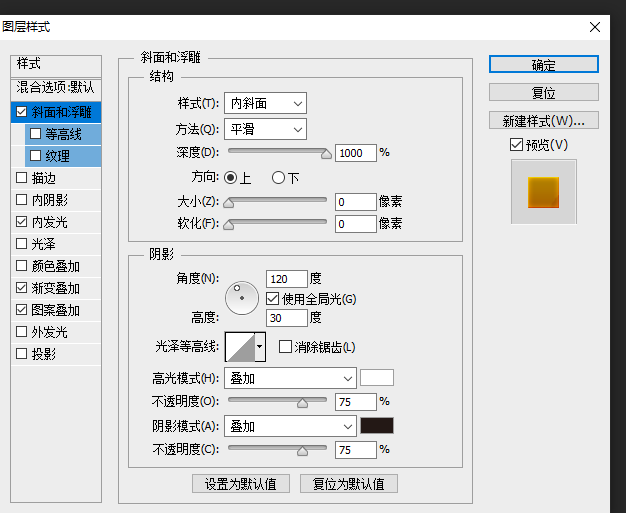
It's better to adjust the color number and number by yourself and don't memorize it by rote. The cheese texture is still selected for the pattern, and the effect is to deepen the color.
In the same way, many three-dimensional characters of e-commerce banners are also completed using this method. It is very simple and fast, so go and try it.
Articles are uploaded by users and are for non-commercial browsing only. Posted by: Lomu, please indicate the source: https://www.daogebangong.com/en/articles/detail/Q%20version%20font%20tutorial%20game%20articles.html
 支付宝扫一扫
评论列表(196条)
测试