Originated from the electrospinning experimental device. 1. First, open PowerPoint and create a new slide. Choose a suitable background color, such as white or light gray. 2. In the toolbar above the slide, select the Insert tab, and then select Shapes. S
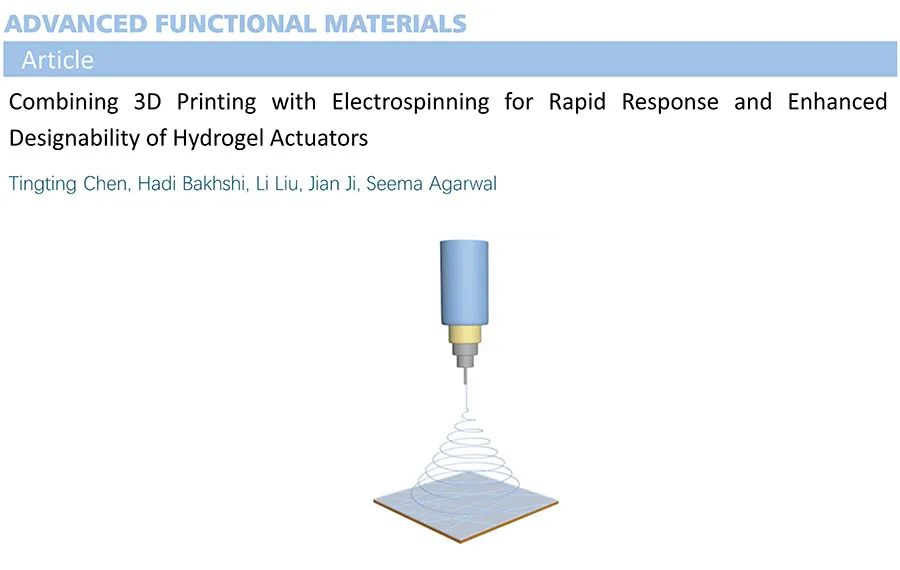
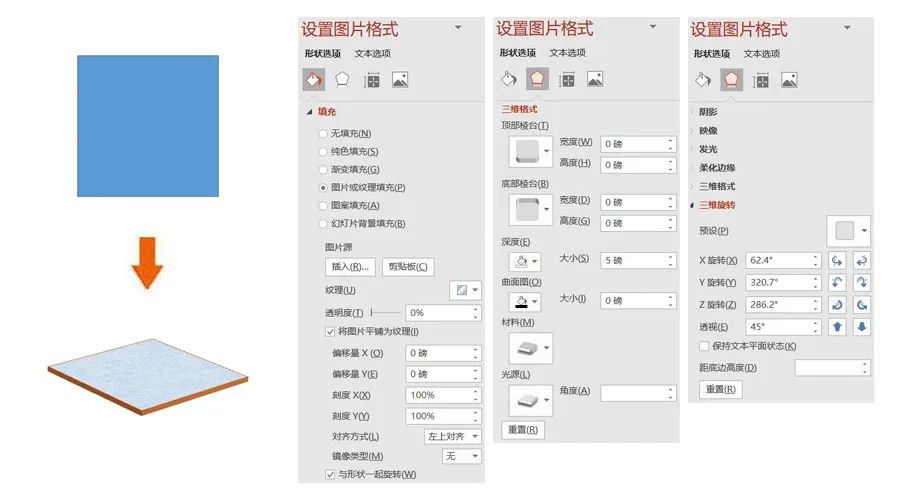
Hello, everyone! Welcome everyone to pay attention to PPT scientific research drawing. Today's small section continuesto update the PPT scientific research drawing tutorial for everyone, I hope everyone will support it! In this tutorial, we use PPT to draw electrospinningschematic diagram, the reference picture comes from Advanced functional materials(Adv. Funct. Mater., 2018, 1800514). Let’s start the sixteenth PPT scientific research drawing practical tutorial:Draw Fiber Layer . Insert 1 rectangle, set size: height 5 cm, width 5 cm; Fill-Image or Texture-Fill-Blue Kleenex;line-solid line-dark orange, width-1 pt;3D Format: depth-automatic, material-warm-rough, light source-balanced, see the figure below for specific parameters; 3D rotation: X Rotation -62.4°, Y Rotation -320.7°, Z Rotation -286.2°, Perspective -45°.
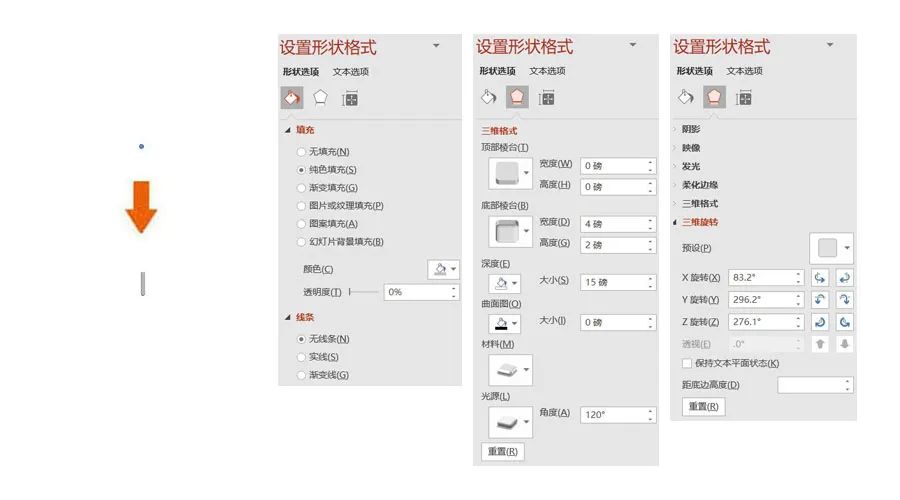
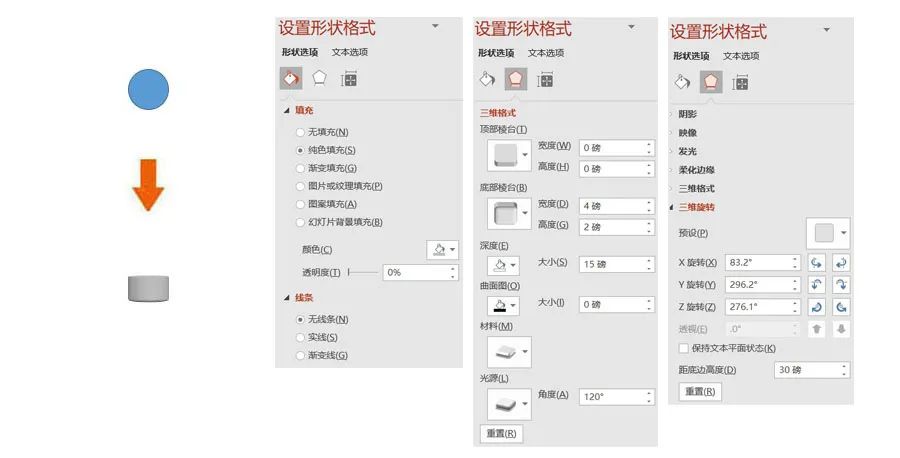
Draws the needle outlet. Insert 1 ellipse, set size: height 0.1 cm, width 0.1 cm ;Fill-solid-color-fill-gray ;3D format : Bottom Bezel-Round, Depth-Auto, Material-Plastic Effect, Light Source-Soft, see the figure below for specific parameters;3D Rotation: X rotation -83.2°, Y rotation -296.2°, Z rotation -276.1°.
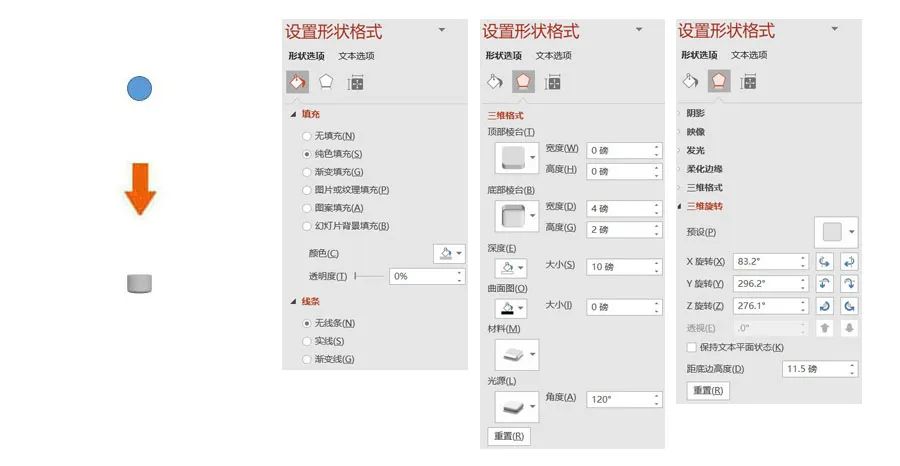
Draw Needle 1. Insert 1 ellipse, setsize: height 0.6 cm , width 0.6 cm; fill< span> - solid color fill - gray; 3D Format: Bottom Bezel-Round, Depth-Automatic, Material-Plastic Effect, Light Source-Soft, see the figure below for specific parameters;3D Rotation: X rotation -83.2°, Y rotation -296.2°, Z rotation -276.1°.
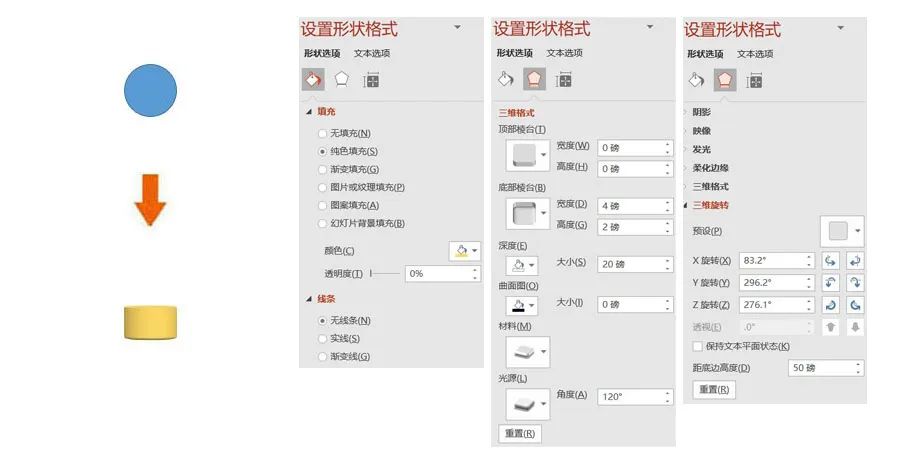
Draw Needle 2. Insert 1 ellipse, setsize: height 1 cm , width 1 cm; Fill-solid-color-fill-gray ;3D format : Bottom Bezel-Round, Depth-Auto, Material-Plastic Effect, Light Source-Soft, see the figure below for specific parameters;3D Rotation: X rotation -83.2°, Y rotation -296.2°, Z rotation -276.1°.
Draw Socket 1. Insert 1 ellipse, setsize: height 1.3 cm , width 1.3 cm; Fill< span> - solid color fill - yellow; 3D Format: Bottom Bezel-Round, Depth-Automatic, Material-Plastic Effect, Light Source-Soft, see the figure below for specific parameters;3D Rotation: X rotation -83.2°, Y rotation -296.2°, Z rotation -276.1°.
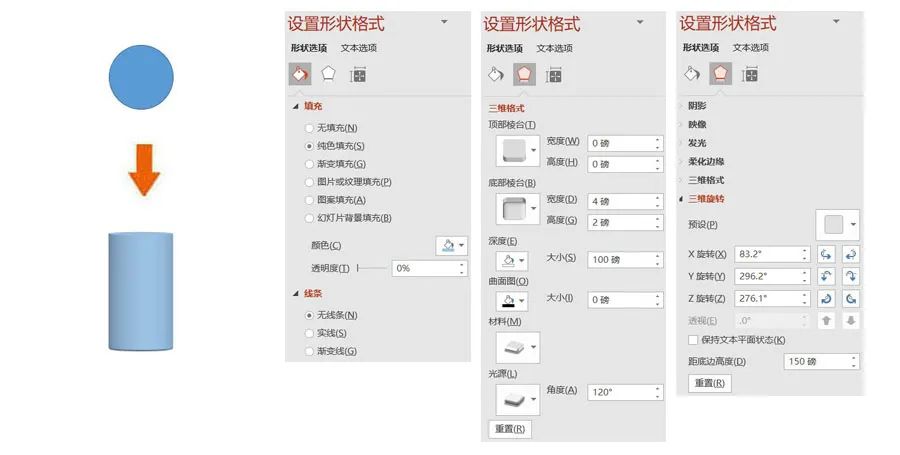
Draw Seed Socket 2. Insert 1 ellipse, setsize: height 2 cm , width 2 cm; fill-solid color fill-blue color;3D format: Bottom Bezel-Round, Depth-Auto, Material-Plastic Effect, Light Source-Soft, see the figure below for specific parameters;3D Rotation< span>: X rotation -83.2°, Y rotation -296.2°, Z rotation -276.1°.
Combine the above components and adjust the position appropriately, and finally use curveto draw a silk thread, and it is complete span>Schematic drawing of electrospinning. This is the end of today's sharing, thank you for watching! let me know you're watching
Articles are uploaded by users and are for non-commercial browsing only. Posted by: Lomu, please indicate the source: https://www.daogebangong.com/en/articles/detail/Practical%20tutorial%20PPT%20scientific%20research%20drawing%20tutorial%20016%20%20schematic%20diagram%20of%20electrospinning.html


 支付宝扫一扫
评论列表(196条)
测试