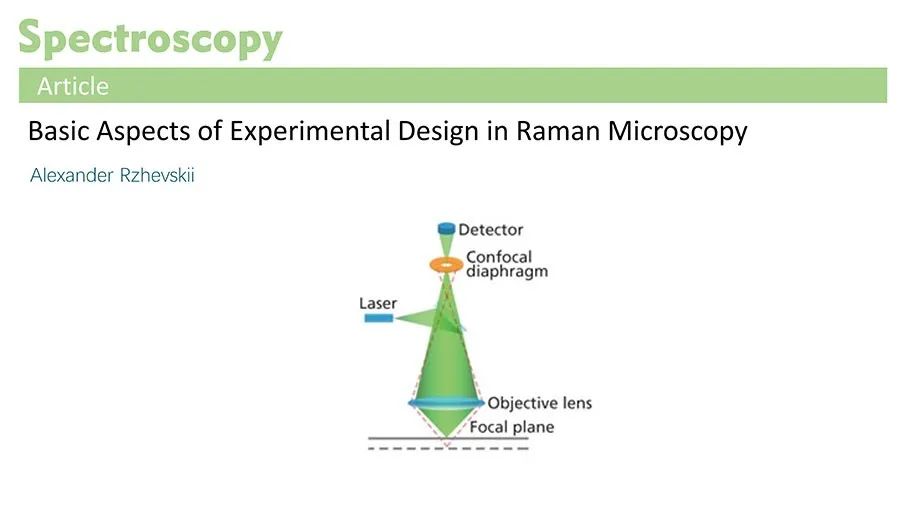
Hello, everyone! Welcome everyone to pay attention to PPT scientific research drawing. Today, I will continue to update the PPT scientific research drawing tutorial for you in this short section. I hope you will support me a lot!
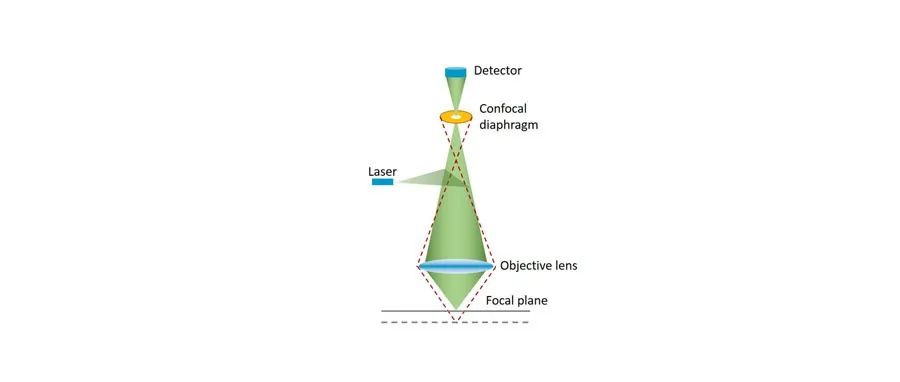
In this tutorial, we use PPT to draw the schematic diagram of the optical path principle. spectroscopy. 2016,>).
Let’s startThe eighth periodPPT scientific research drawingPractical tutorial:
Step 1
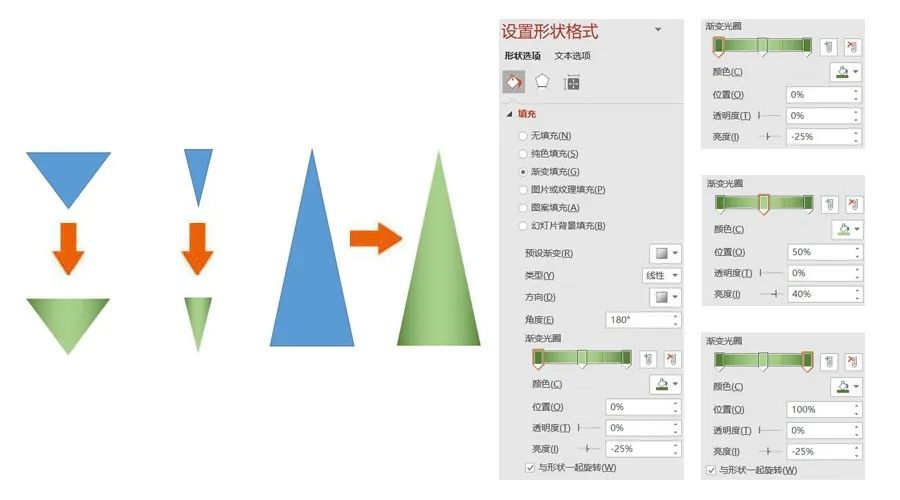
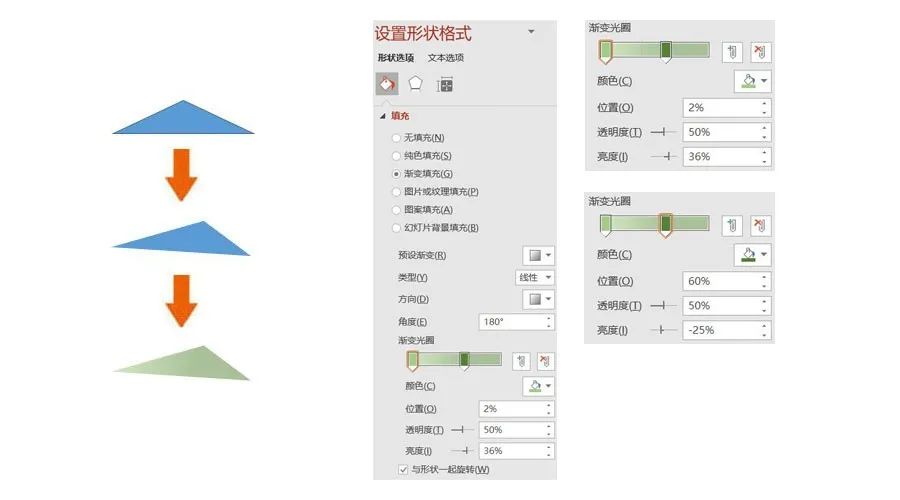
Draws a Light. Insert 3 isoscelestriangles, set size< span>:IsoscelesTriangleShape 1: height 2 cm, width 3 cm; isoscelestriangular< /span>Shape 2: height 2 cm, width 1 cm; isoscelestriangularShape 3:Height 7 cm, Width 3 cm;
Format the shape:
Fill-Gradient fill, type-linear, direction-linear left, see the figure below for detailed parameters;
Lines - No lines.
Step 2
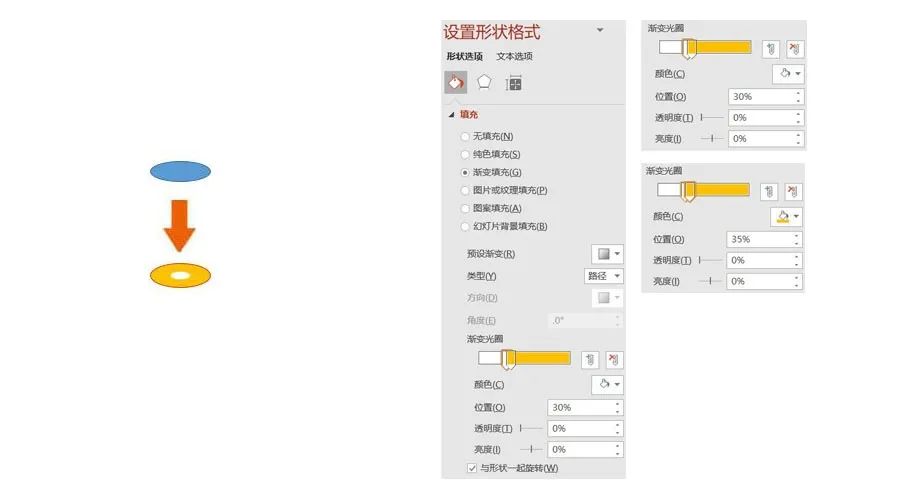
Draw Confocal diaphragm. Insert 1 ellipse, set size: height 0.6cm, width 1.5cm;
Format the shape:
Fill-gradient fill, type-path,See the figure below for detailed parameters;
Lines - Solid - Brown, Width - 1 pt.

Step 3
Draw Detector and Laser. Insert 1 cylinder, set size: height 0.5 cm, width 1 cm; after that, insert 1 rectangle, setsize: height 0.3 cm , width 1 cm;
Format the shape:
Fill-Solid color fill-blue;
Lines - No lines.
Step 4
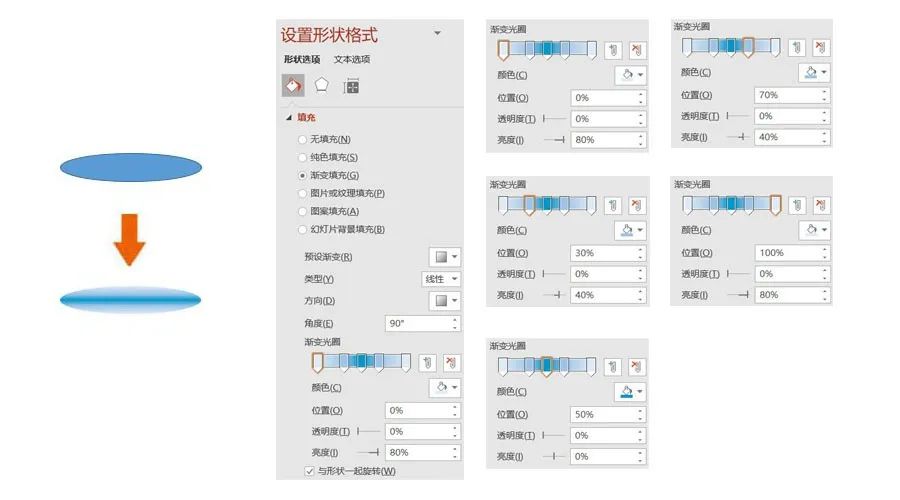
Draw Objectivelens. Insert 1 ellipse, set size: height 0.7cm, width 3.5cm;
Format the shape:
Fill-Gradient Fill, Type-Linear,Direction-Linear Down< span>, see the figure below for other detailed parameters;
Lines - No lines.
Step 5
Draw Sidelight. Insert 1 isosceles triangle, set size: height 0.8 cm, width 3.5 cm; after that, adjust appropriately Upper apex position and rotate 185°.
Format the shape:
Fill-Gradient Fill, Type-Linear,Direction-Linear Left< span>, see the figure below for other detailed parameters;
Lines - No lines.


Let me know you're watching
Articles are uploaded by users and are for non-commercial browsing only. Posted by: Lomu, please indicate the source: https://www.daogebangong.com/en/articles/detail/Practical%20tutorial%20PPT%20scientific%20research%20drawing%20tutorial%20008%20%20Schematic%20diagram%20of%20optical%20path%20principle.html

 支付宝扫一扫
评论列表(196条)
测试