Ok, let's start this PPT scientific drawing tutorial and draw a schematic diagram of a solar cell. Here are the steps: 1. Open the PPT software, select a blank presentation, and set the size and background color of the presentation. 2. Choose Shape from t
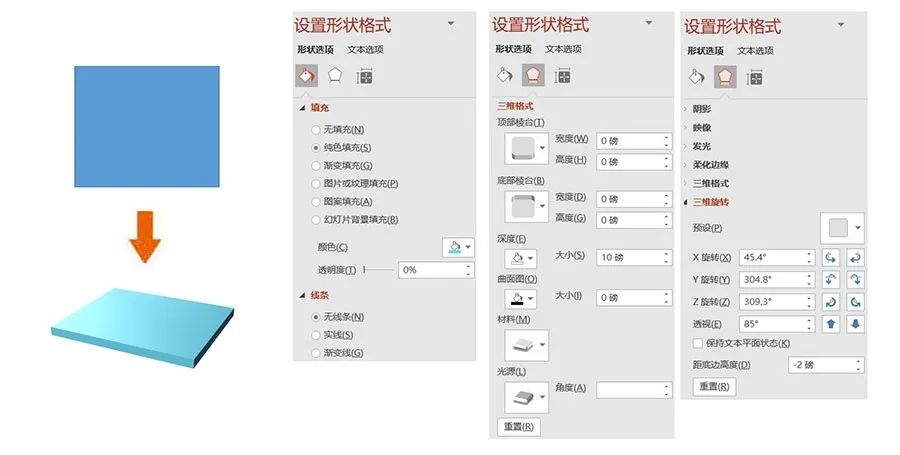
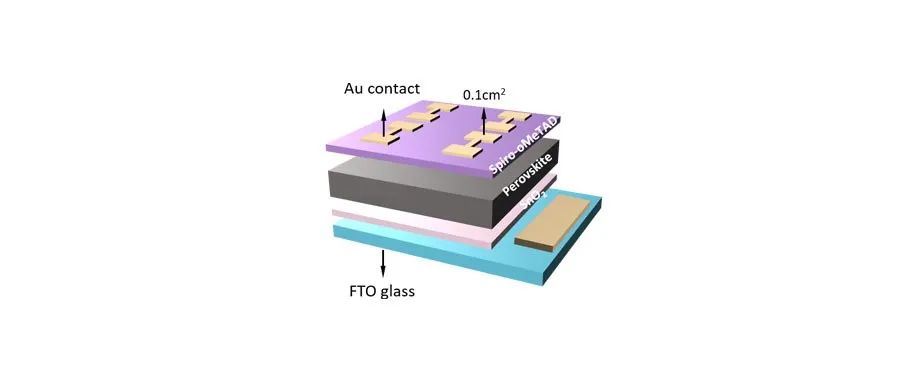
Hello, everyone! Welcome everyone to pay attention to PPT scientific research drawing. Today's small section continuesto update the PPT scientific research drawing tutorial for everyone, I hope everyone will support it! In this tutorial, we use PPT to draw solar battery diagram, the reference picture is from Advancedmaterials(Advanced materials, 2020, aavailableonlineavailableonline span>). Let’s start the thirteenth PPT scientific research drawing practical tutorial:Draw FTO>. Insert 1 rectangle, set size: height 5 cm, width 6 cm; Fill-solid-color-fill-light-blue; 3D format:depth-auto, Material-plastic effect, light source-rough, see the figure below for specific parameters; 3D rotation: X rotation -45.4°, Y rotation -304.8 °, Z rotation -309.3°, perspective -85°.
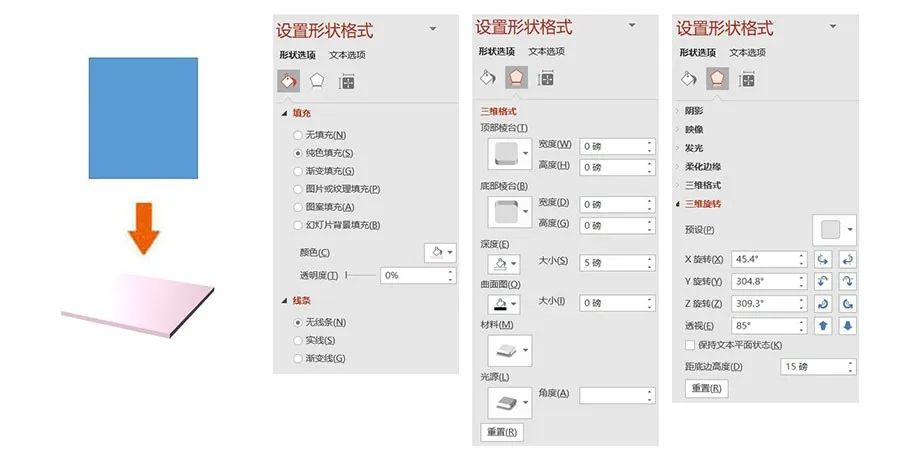
Draw SnO2. Insert 1 rectangle, set size: height 5 cm, width 4.5 cm; Fill-solid-color-fill-light pink;< /section>3D Format:depth-auto,material -Plastic effect, light source-rough, see the figure below for specific parameters; 3D rotation: X rotation -45.4°, Y rotation -304.8° , Z rotation -309.3°, perspective -85°.
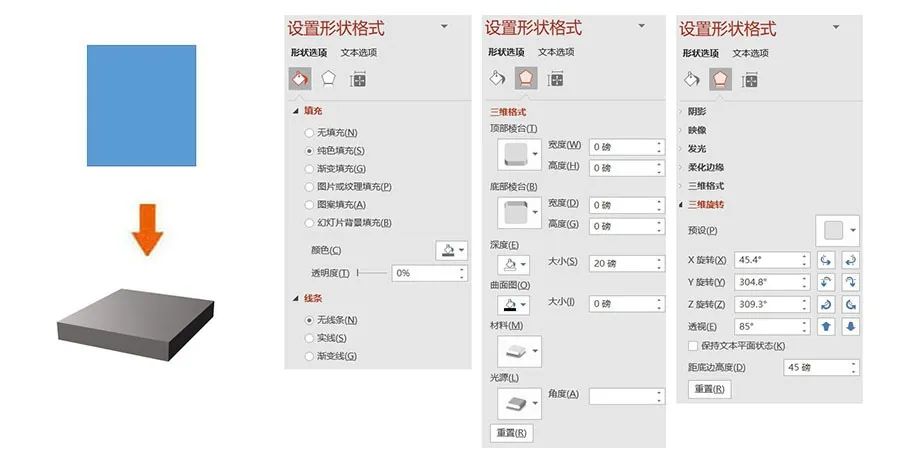
Draw Perovskite. Insert 1 rectangle, set size: height 5 cm, width 4.5 cm; Fill-Solid Color Fill-Dark Gray;< /section>3D Format:depth-auto,material -Plastic effect, light source-rough, see the figure below for specific parameters; 3D rotation: X rotation -45.4°, Y rotation -304.8° , Z rotation -309.3°, perspective -85°.
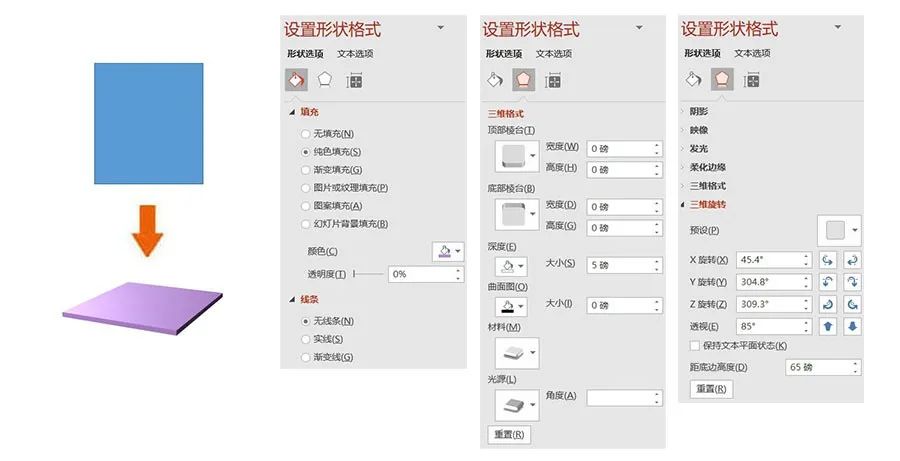
Draw Spiro-oMeTAD. Insert 1 rectangle, set size: height 5 cm, width 4.5 cm; Fill-solid-color-fill-lavender;< section>Lines-no lines;3D format: depth-automatic, material-plastic-effect, Light source - rough, see the figure below for specific parameters; 3D rotation: X rotation -45.4°, Y rotation -304.8°, Z rotation - 309.3°, perspective -85°.
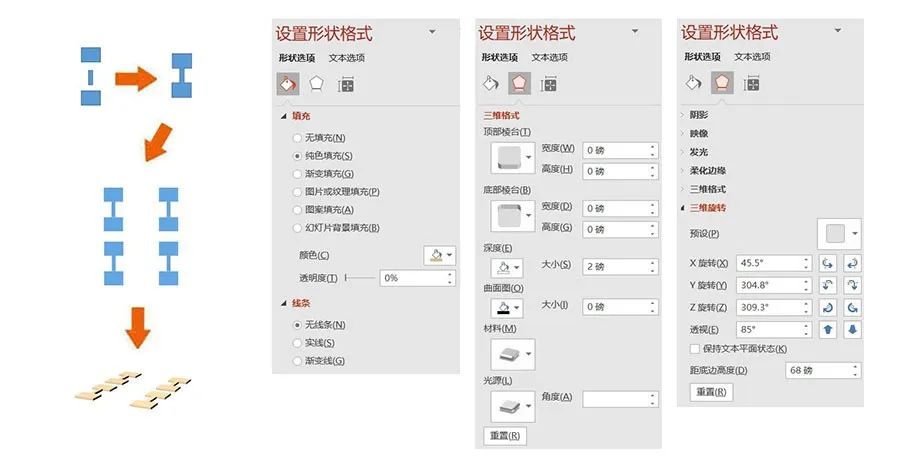
Draw Au>. Insert 3 rectangles, respectively set size: rectangle 1 : height 0.6 cm, width 0.8 cm; rectangle 2: height 0.6 cm, width 0.18 cm; rectangle 3: height 0.6 cm, width 0.8 cm; AdjustThe position of the rectangle and perform Boolean operationsCombine ,to form a singleelectrode. Copy 3 electrodes and adjust to the appropriate position, then select all electrodes and perform Boolean operations combination ,compositionAuelectrode;fill-solid color fill-brown color;3D Format: Depth-Auto, Material-Warm Rough, Light Source-Three Points, See the figure below for specific parameters; Three-dimensional rotation: X rotation -45.5°, Y rotation -304.8°, Z rotation -309.3°, perspective -85°.
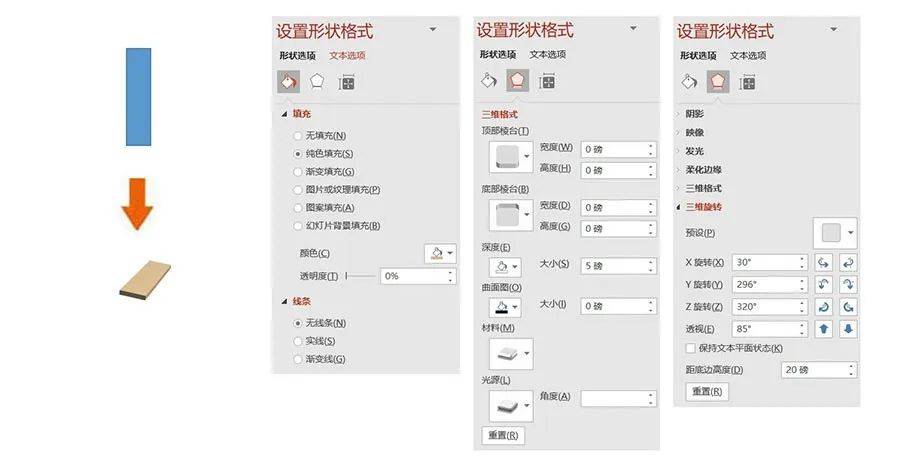
Draw Auelectrode . Insert 1 rectangle, set size: height 4 cm, width 1 cm; Fill-solid color fill-tan color;3D format: depth-auto, material- Plastic effect, light source - soft, see the figure below for specific parameters; 3D rotation: X rotation -30°, Y rotation -296°, Z rotation -320°, perspective -85°.
Combine the above components and adjust the position appropriately, and finally add lines and text< span>, that is to complete the drawing of the solar cell diagram. This is the end of today's sharing, thank you for watching! let me know you're watching
Articles are uploaded by users and are for non-commercial browsing only. Posted by: Lomu, please indicate the source: https://www.daogebangong.com/en/articles/detail/Practical%20Tutorial%20PPT%20Scientific%20Drawing%20Tutorial%20013%20%20Schematic%20Diagram%20of%20Solar%20Cell.html


 支付宝扫一扫
评论列表(196条)
测试