Cute cartoons have grown up with us, so that when we grow up, the round cartoon fonts still give us the taste of childhood. So, how to use PS to create your own cartoon fonts? Let us follow the steps of the master to learn~

One breath directory:
-
Loading background
-
Create a text layer and transform it
-
Configure different effect settings to achieve the final effect
The following is the effect picture:

The materials used in the tutorial have been packaged (including background, fonts, and red dot patterns). The official account’s backend reply: Cartoon fonts, You can get the material download link.
01. Load file background
Click File-Open, select "starbackground.jpg", this is an 850*600px image file, we will use it as our background image.
02. Create and transform text
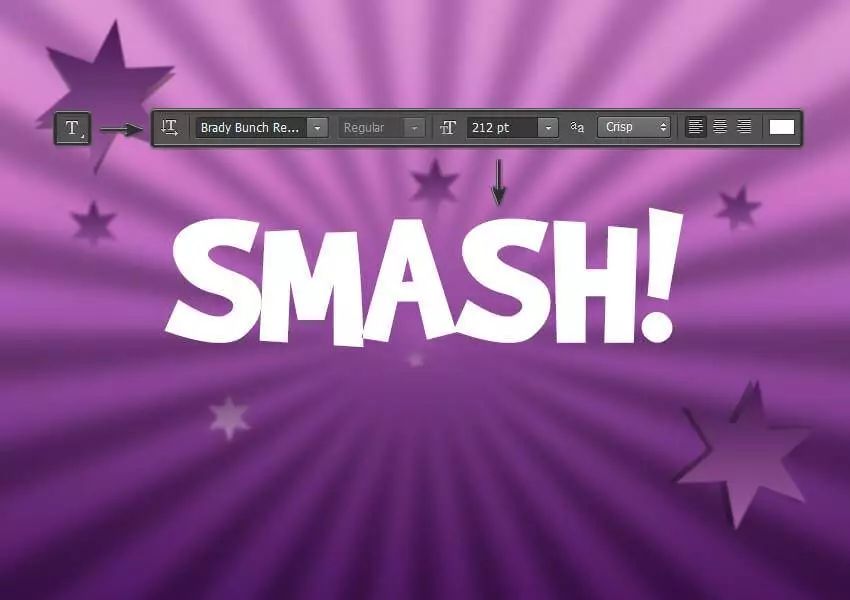
Step 1
Select the text tool and select the BrandyBunchRemastered font and set the font size to around 212pt< /span>, write "SMASH!" in uppercase letters of any color.
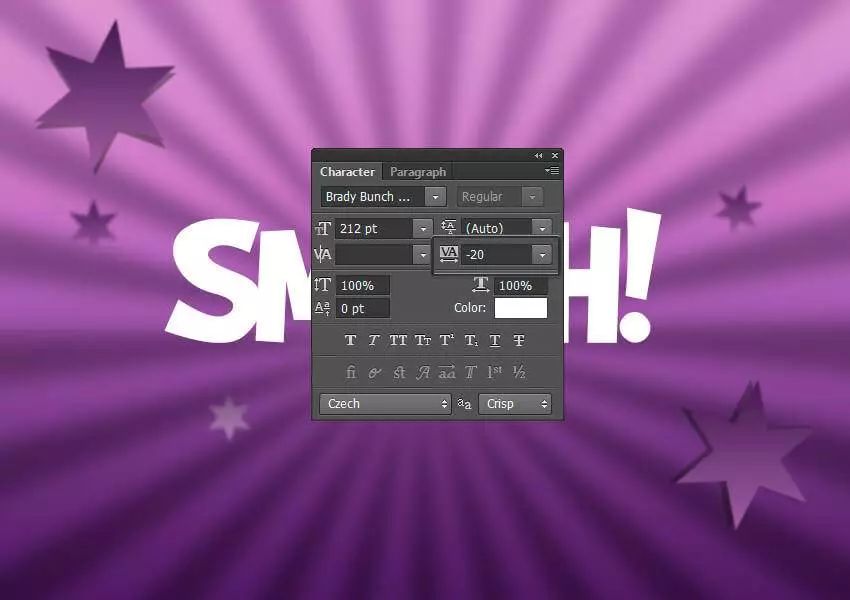
Step 2
Now we need to change the spacing between letters. Select the text layer, click Text-Panel-CharacterPanel, and change the spacing to -20 in the pop-up Character Panel.
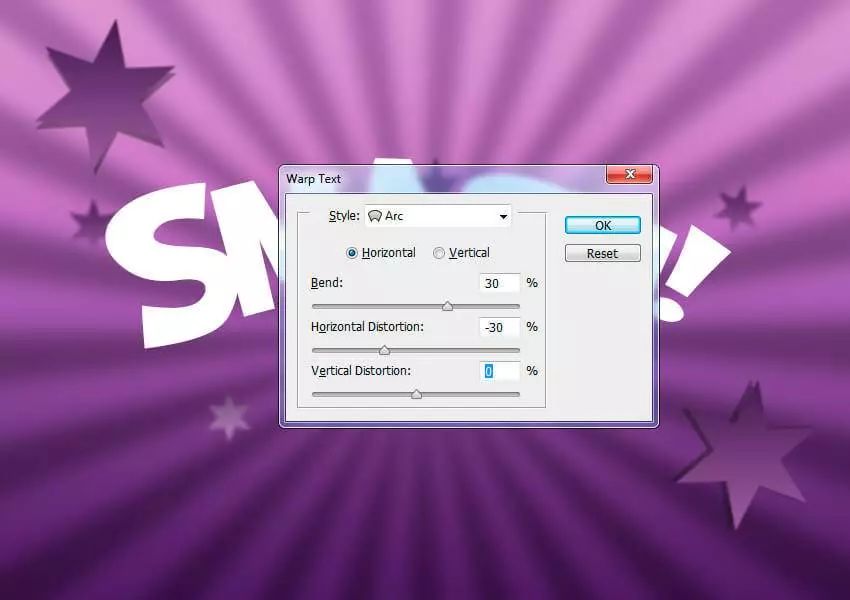
Step Three
The last step before we apply layer styles is to transform our text. Right-click the Text layer, select Text Transform, set the style to Sector, select Horizontal, and set the Bend to 30% and the Horizontal Distortion is set to -30%. Click OK to apply these transformations.
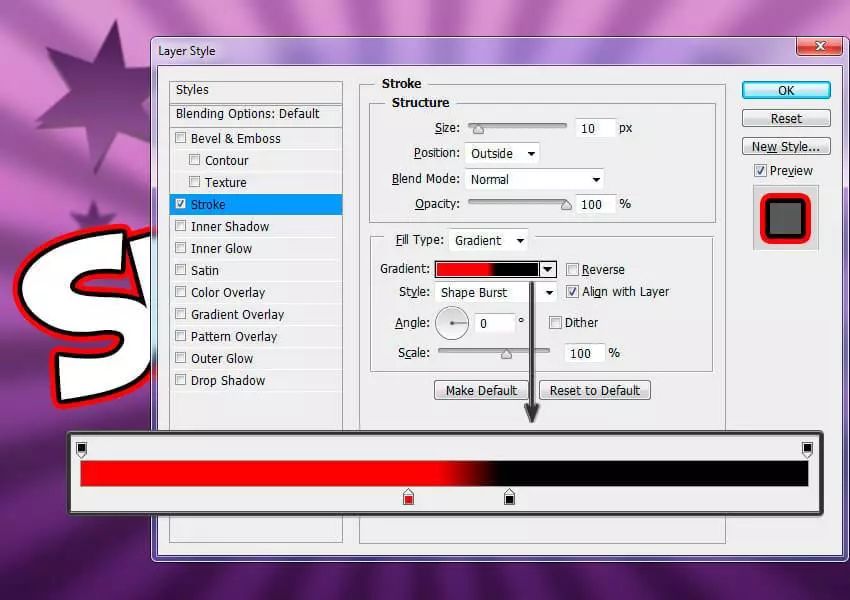
03. Create cartoon text effects
Step 1
Select the layer containing "SMASH!" anddouble-clickthe layer to apply the following layer style:
Add a stroke with the following settings:
Size: 10px
Articles are uploaded by users and are for non-commercial browsing only. Posted by: Lomu, please indicate the source: https://www.daogebangong.com/en/articles/detail/Photoshop-jiao-cheng-chuang-zao-ge-xing-ka-tong-zi-ti-de-bu-zhou.html
 支付宝扫一扫

评论列表(196条)
测试