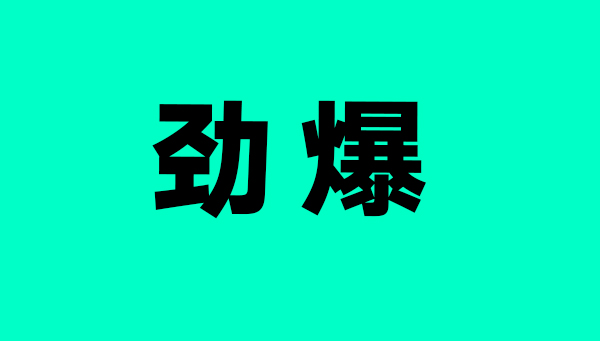
With the rise of the flat style, print ads are gradually becoming flat. This article will share with you how to easily create a melting text effect.
Step 1. Create a new document and enter the text. Here I use ordinary bold bold
Step 2. Rotate the font 90 degrees clockwise, draw a slender rounded rectangle, fill it with black, and then draw a smaller rounded rectangle filled with color and The background color is consistent to create a melting effect. The reason for the 90-degree rotation is to better draw the rounded rectangle and let the rounded rectangle blend into the font.
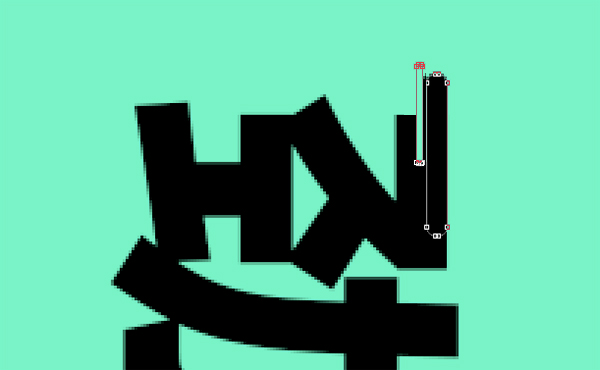
Step 3. Perform the same operation on other strokes, change the size of the rounded rectangle to make changes, and then draw some short rounded rectangles to form melting points.

Step 4, we rotate the finished graphics, the effect is as follows:

Step 5, we can add a long projection to the text, the effect is as shown in the figure:

Finally, because you can use this font in your own theme advertisement banner, is it more vivid and interesting than a separate font.
Articles are uploaded by users and are for non-commercial browsing only. Posted by: Lomu, please indicate the source: https://www.daogebangong.com/en/articles/detail/Photoshop%20easy%20steps%20to%20create%20melting%20text%20effect.html
 支付宝扫一扫
评论列表(196条)
测试