PS is a very practical design software for computers, knowledge It is extensive and powerful. Not to mention the plug-in function, a defined pattern in PS can create many works. What it is best at is making special effect words. There are many types of special effect words, so what I will share with you today is to use the defined pattern in PS to make green neon tube effect words. Let’s start.
Step 1
First create a new document with a canvas width of (1200) and height of (600) pixels, set the resolution to (72), and click OK.
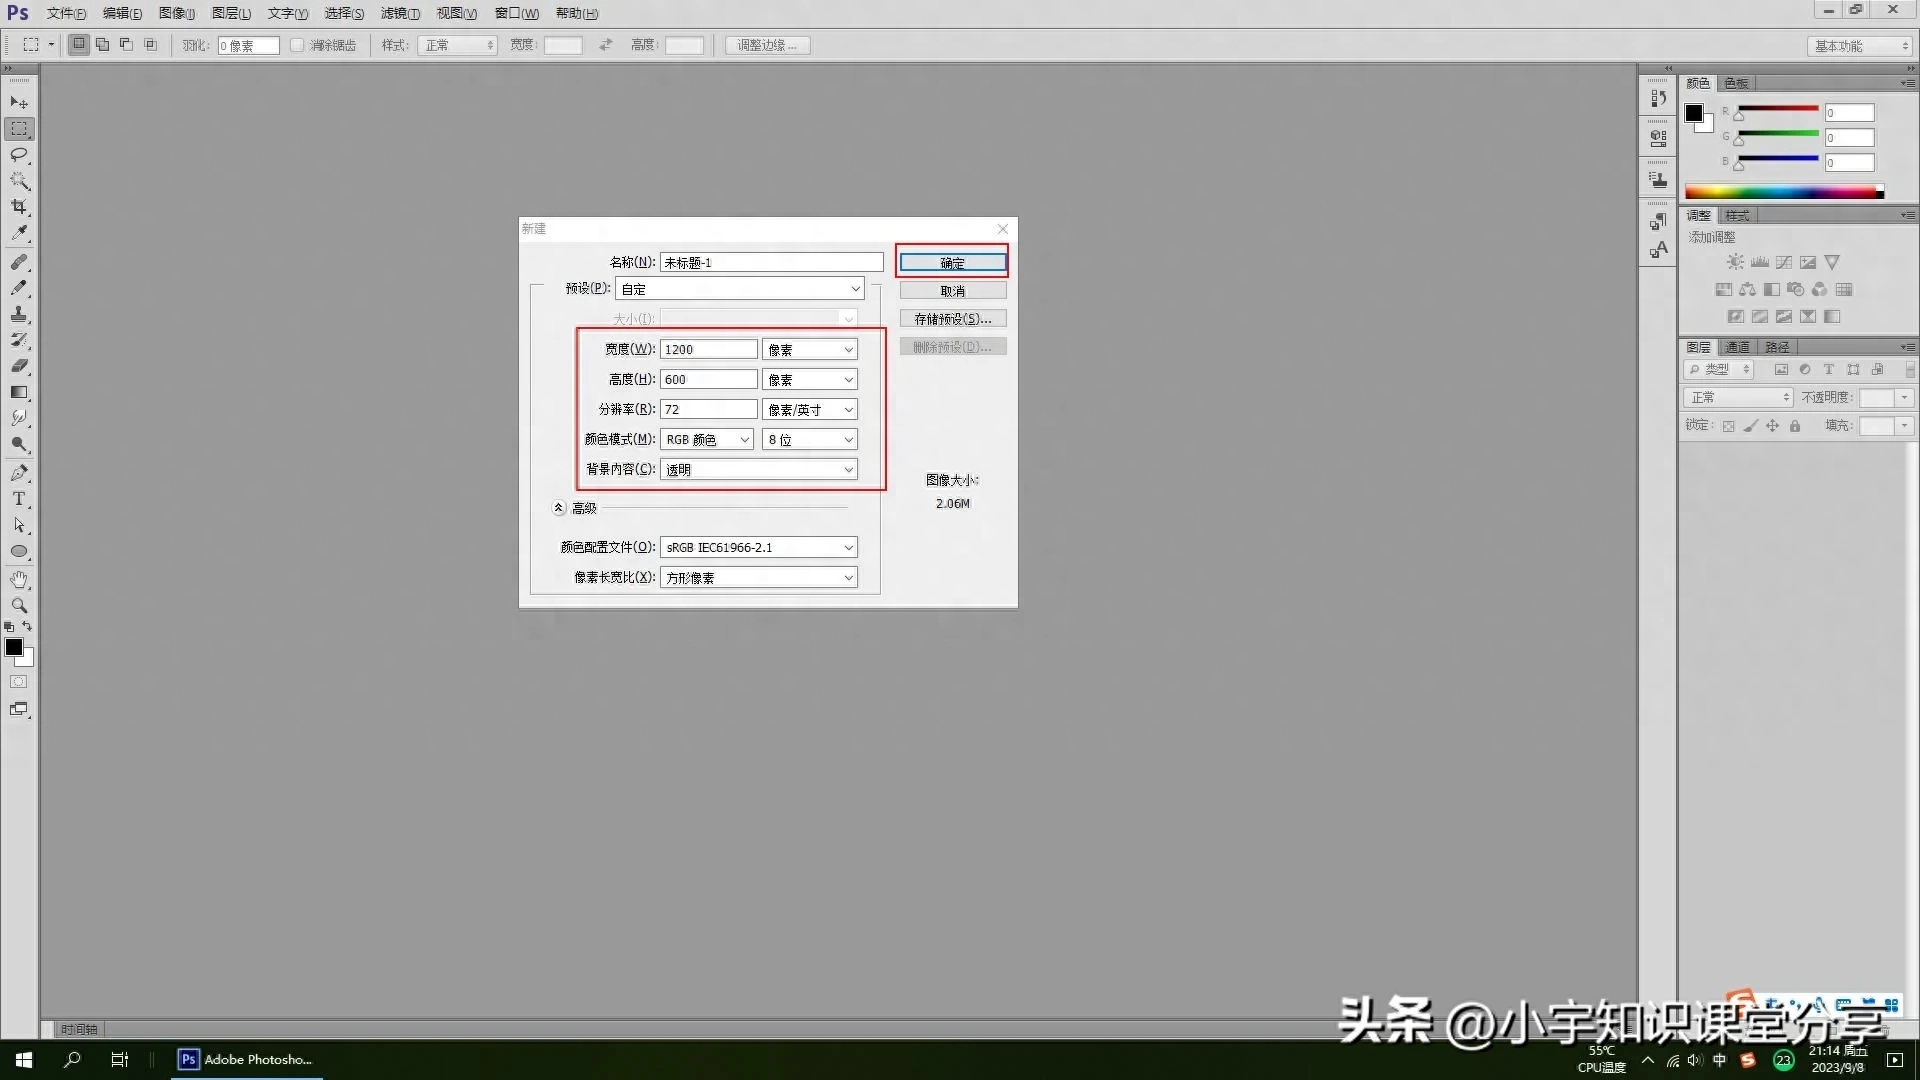
Figure 1
Step 2
Fill the transparent canvas with white, prepare a brick wall material picture, and place the brick wall material picture in the middle of the canvas. You can press the Ctrl+t shortcut key and follow the corners. There are four points. Stretch and deform the brick wall material picture appropriately, adjust the size and position, and click OK.
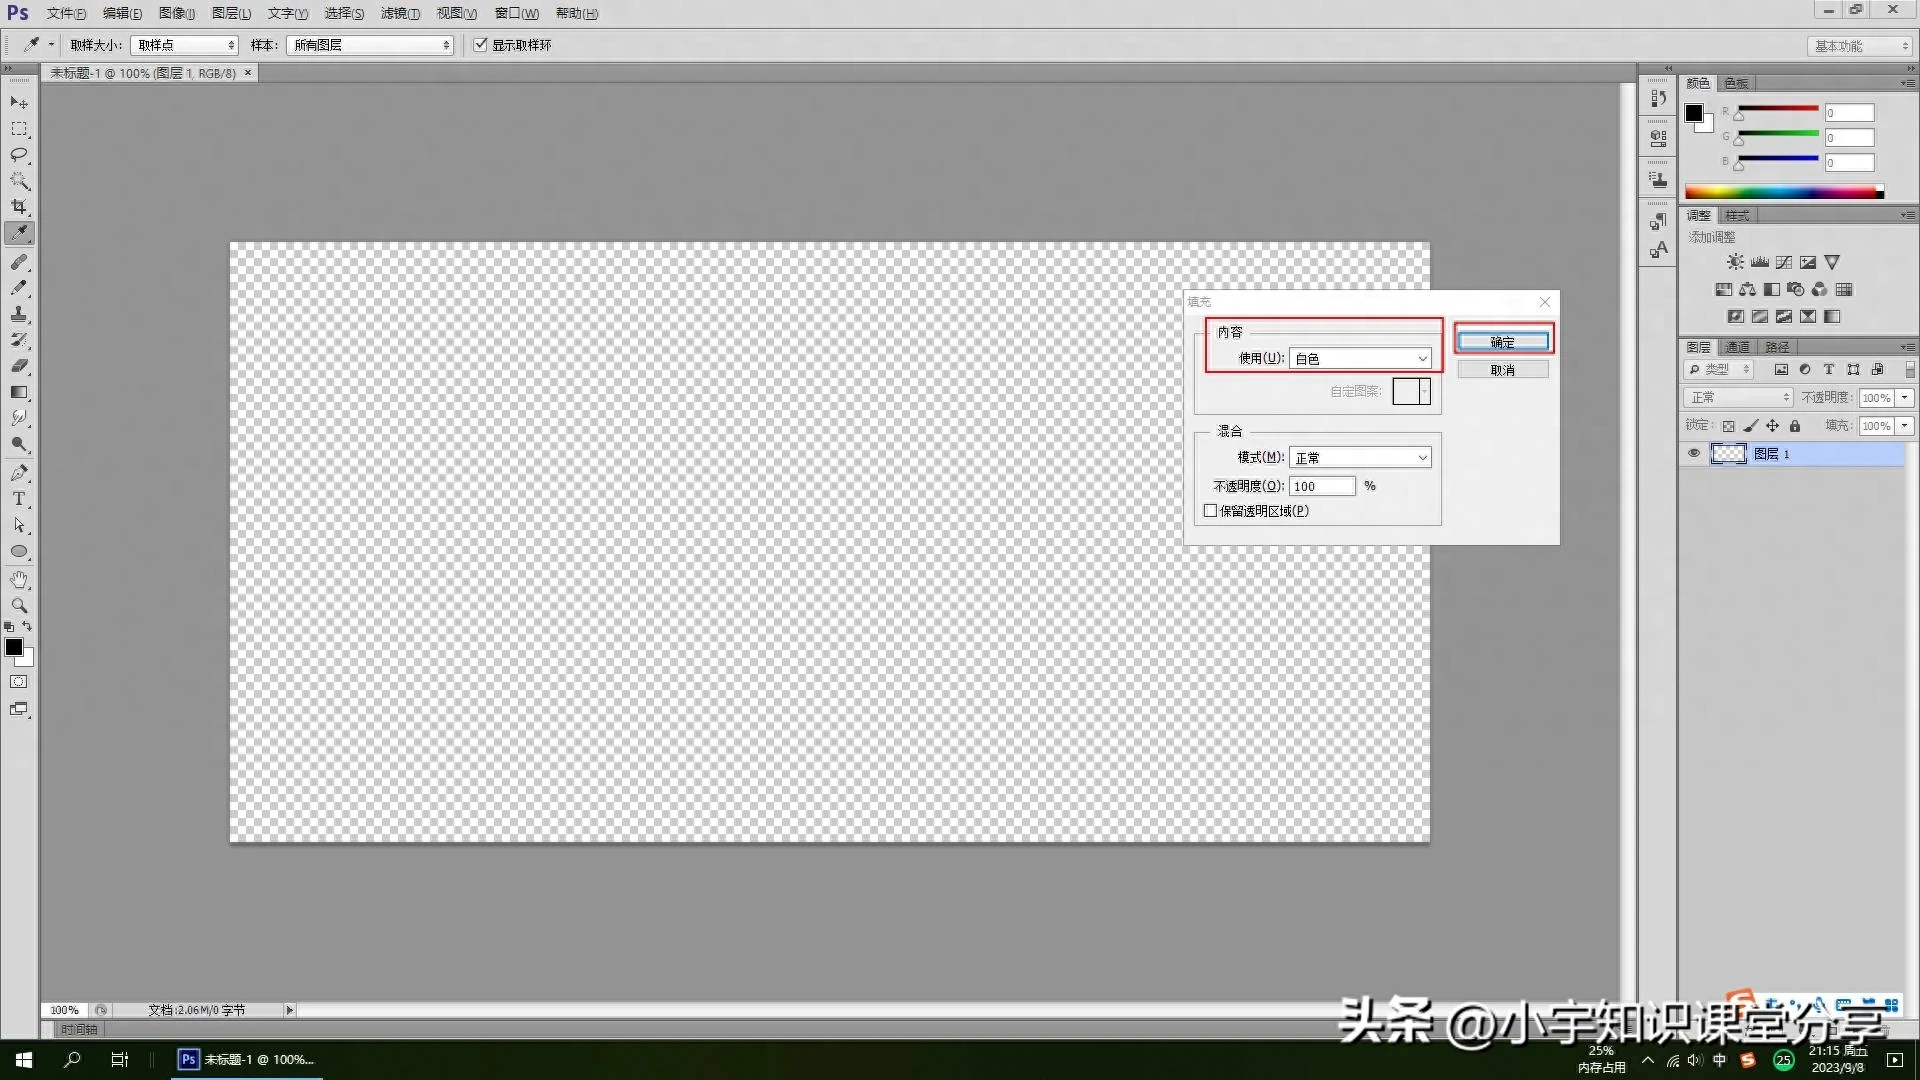
Figure 2
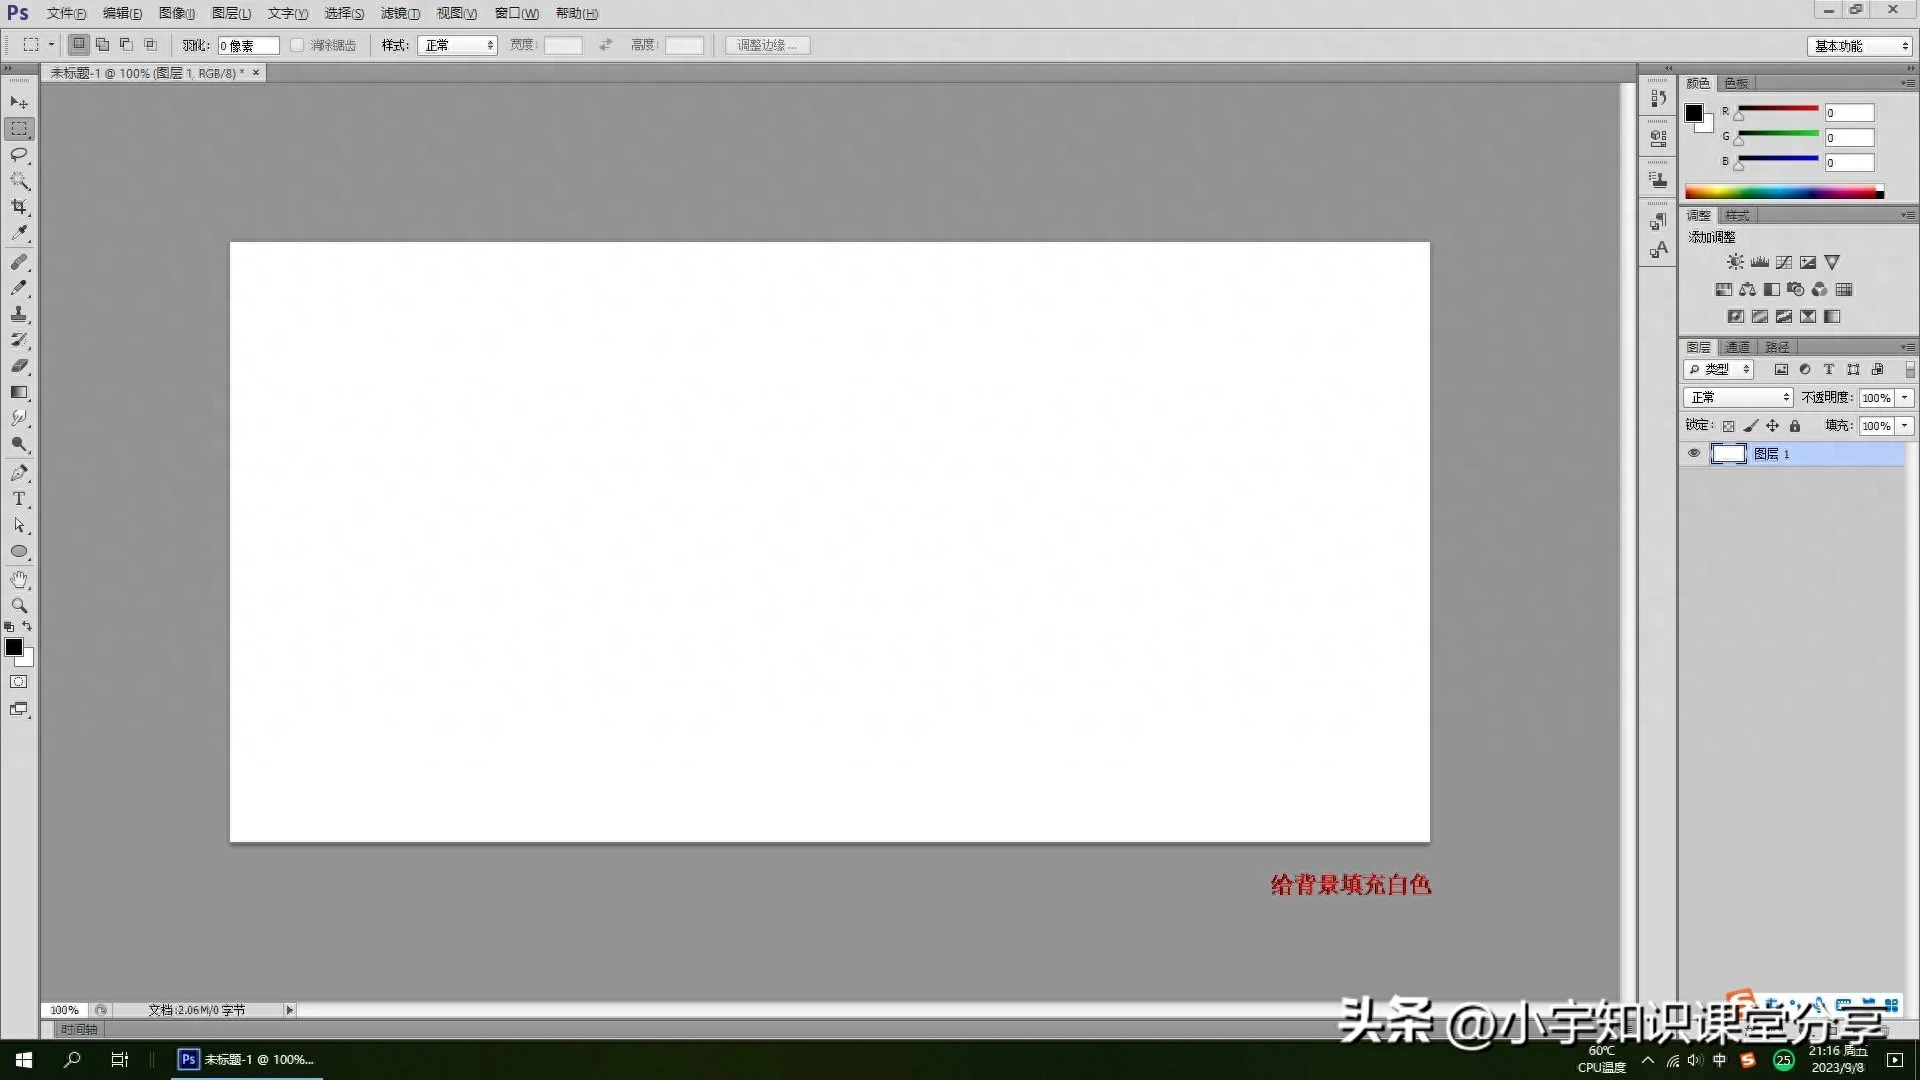
Figure 3
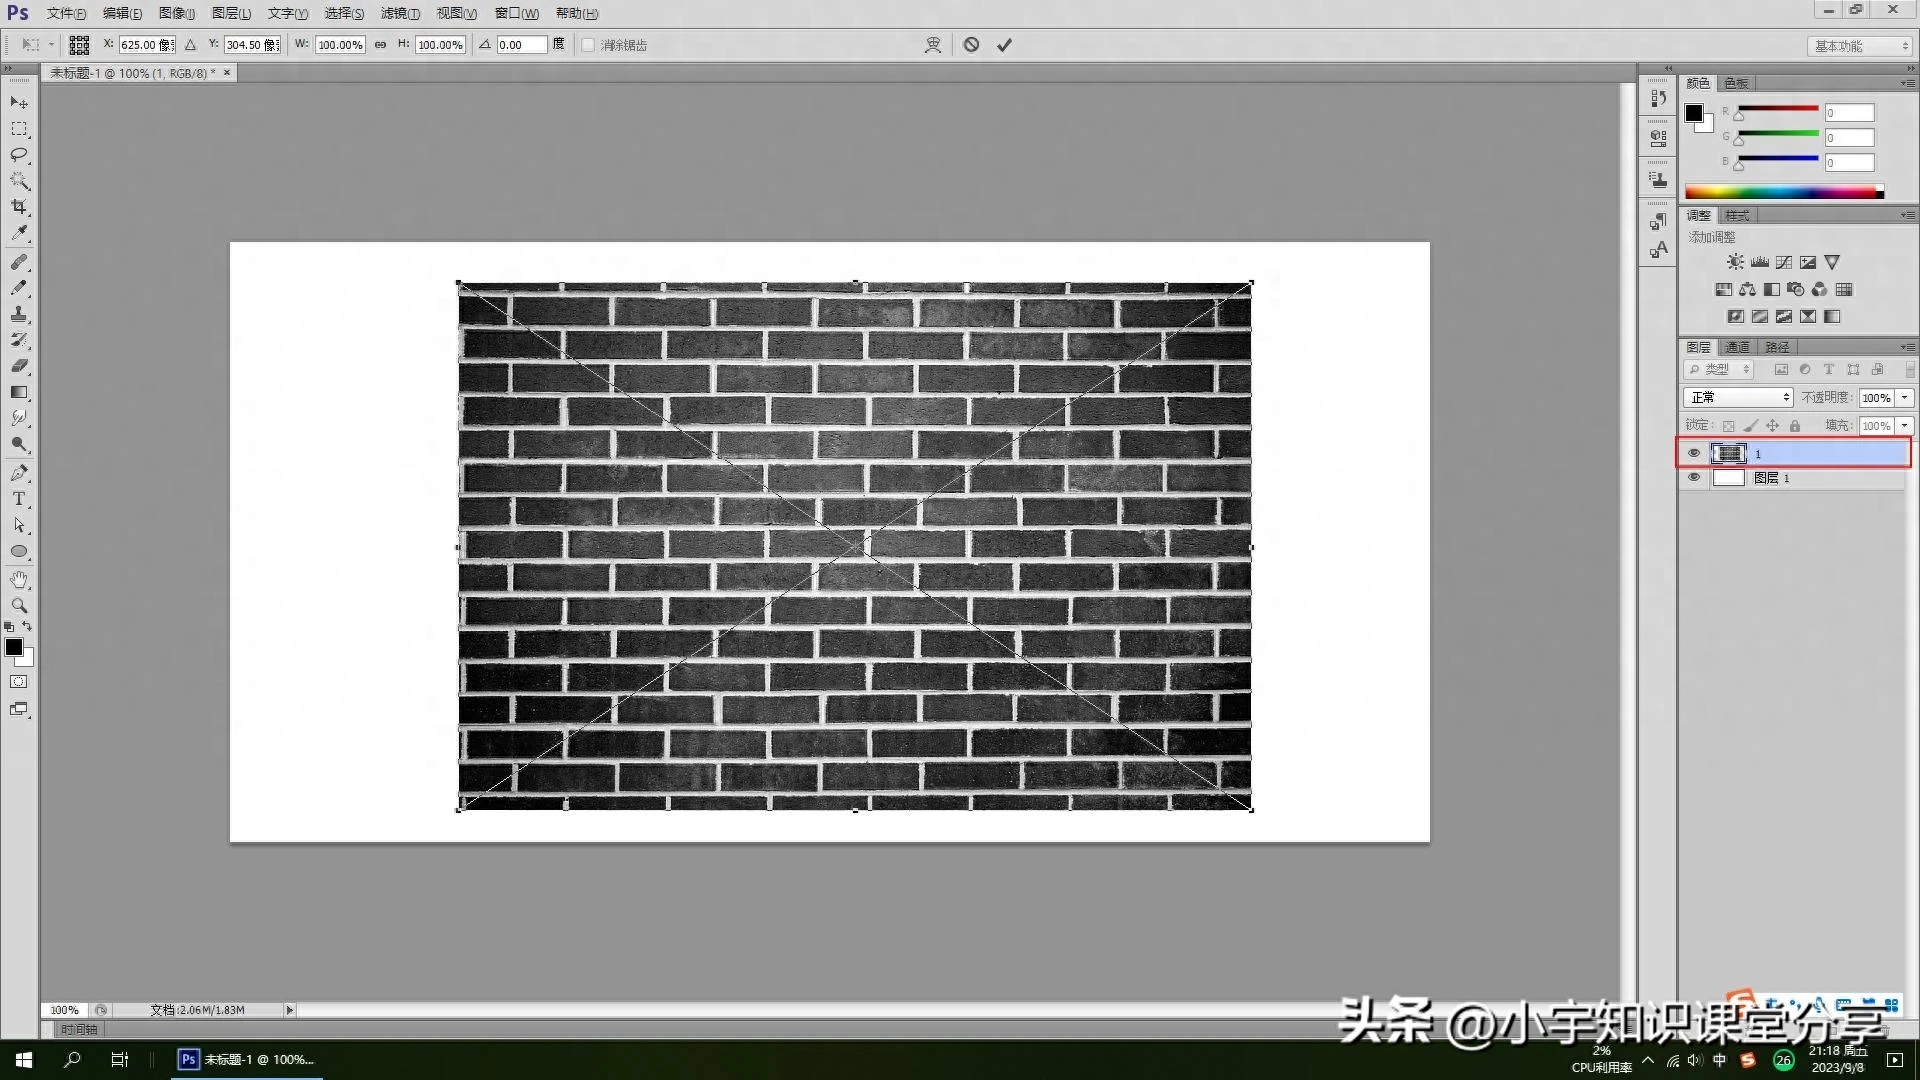
Figure 4
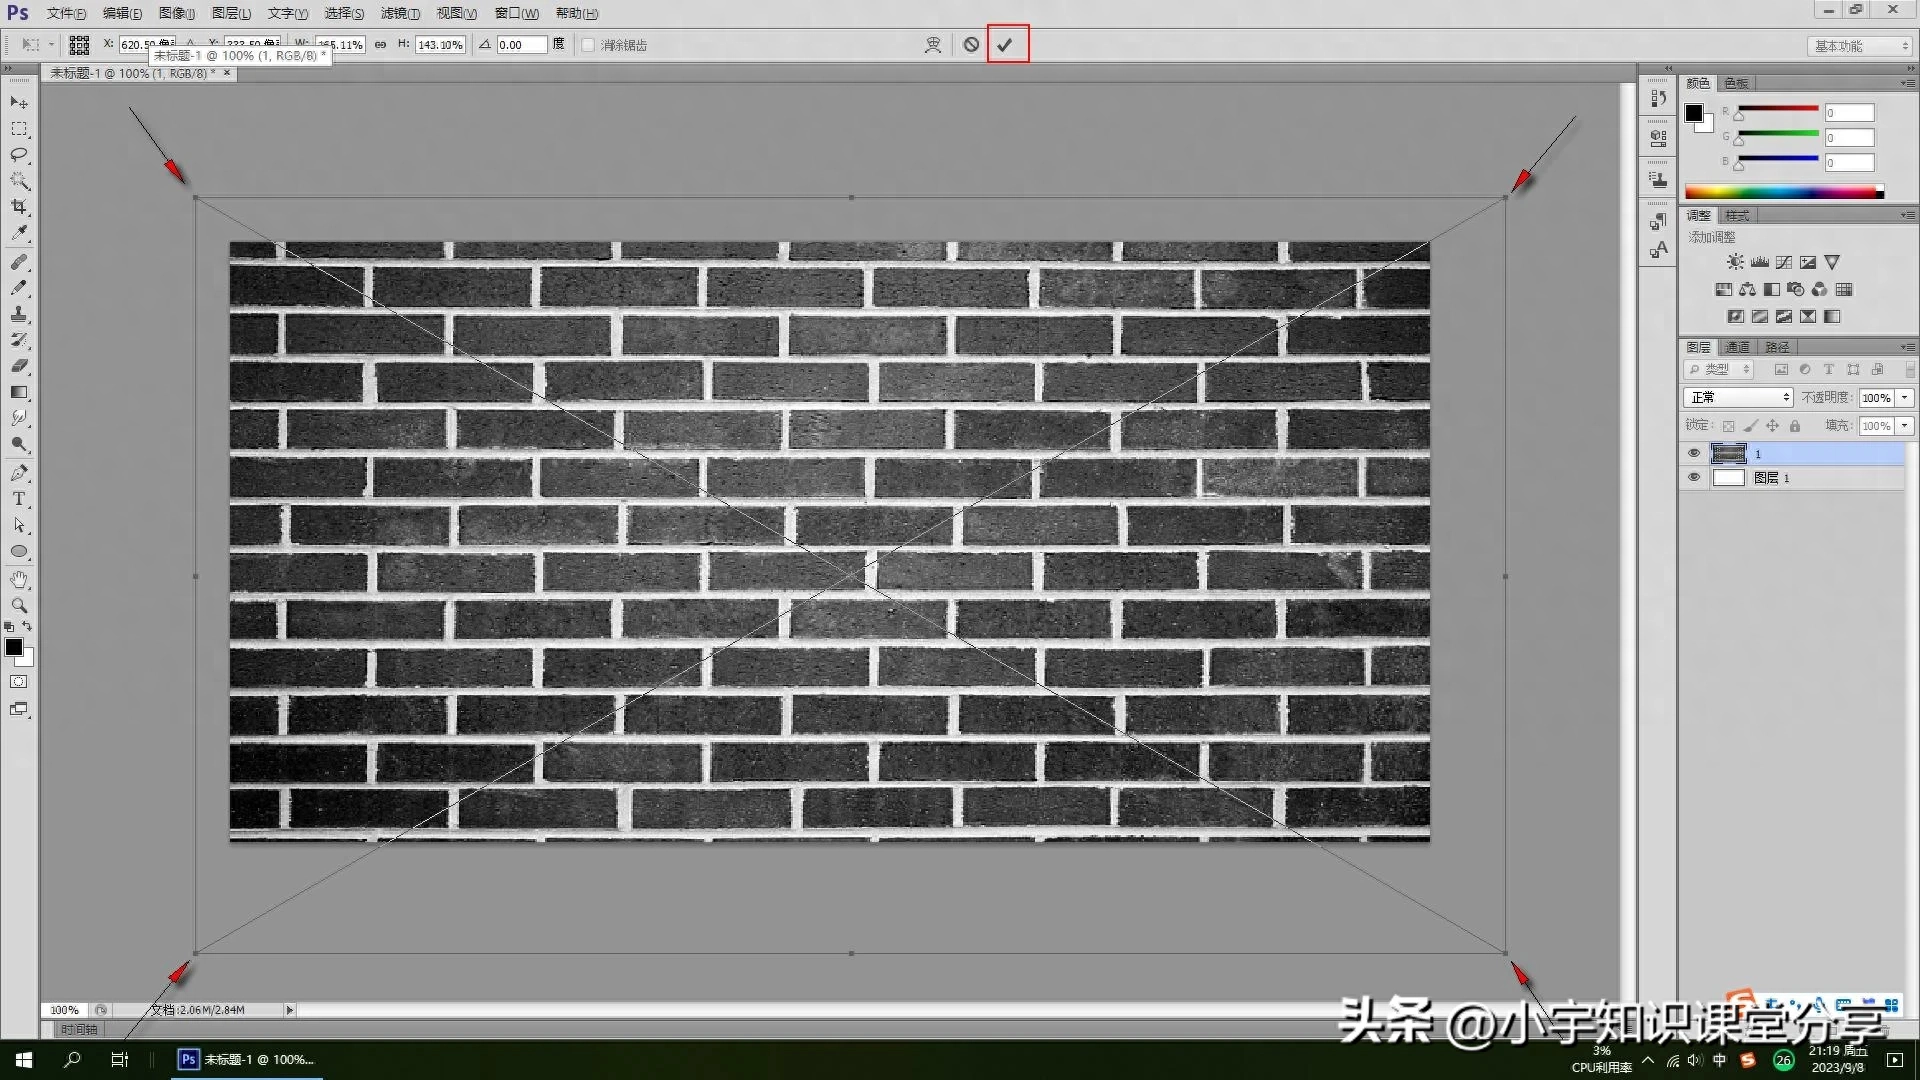
Figure 5
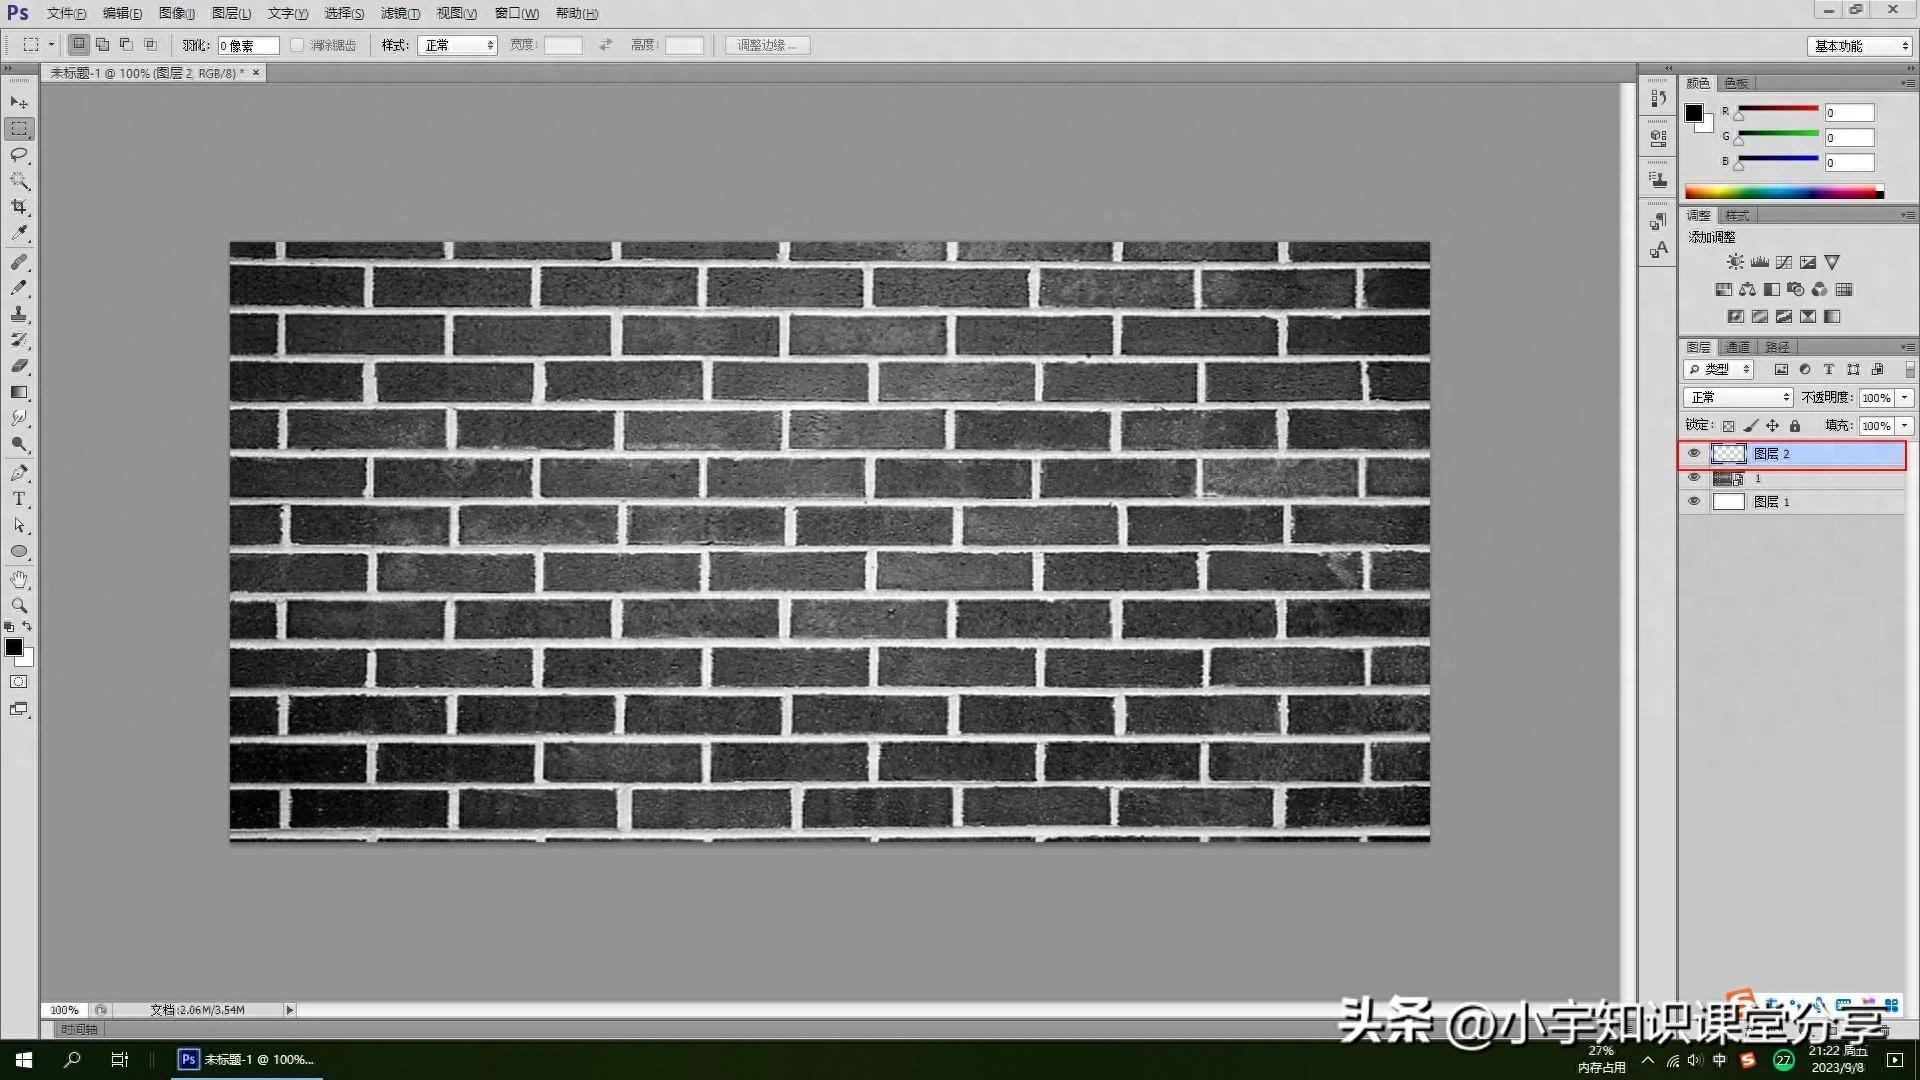
Figure 6
Step 3
Next, you need to process the color of the brick wall material picture. Create a new blank layer, use the gradient tool, select the black to white gradient, and select the radial style. We need to drag a gradient back from the center point. At this time we will find that the white area is in the middle, and then adjust the layer's blending mode and set it to Multiply.
Figure 7
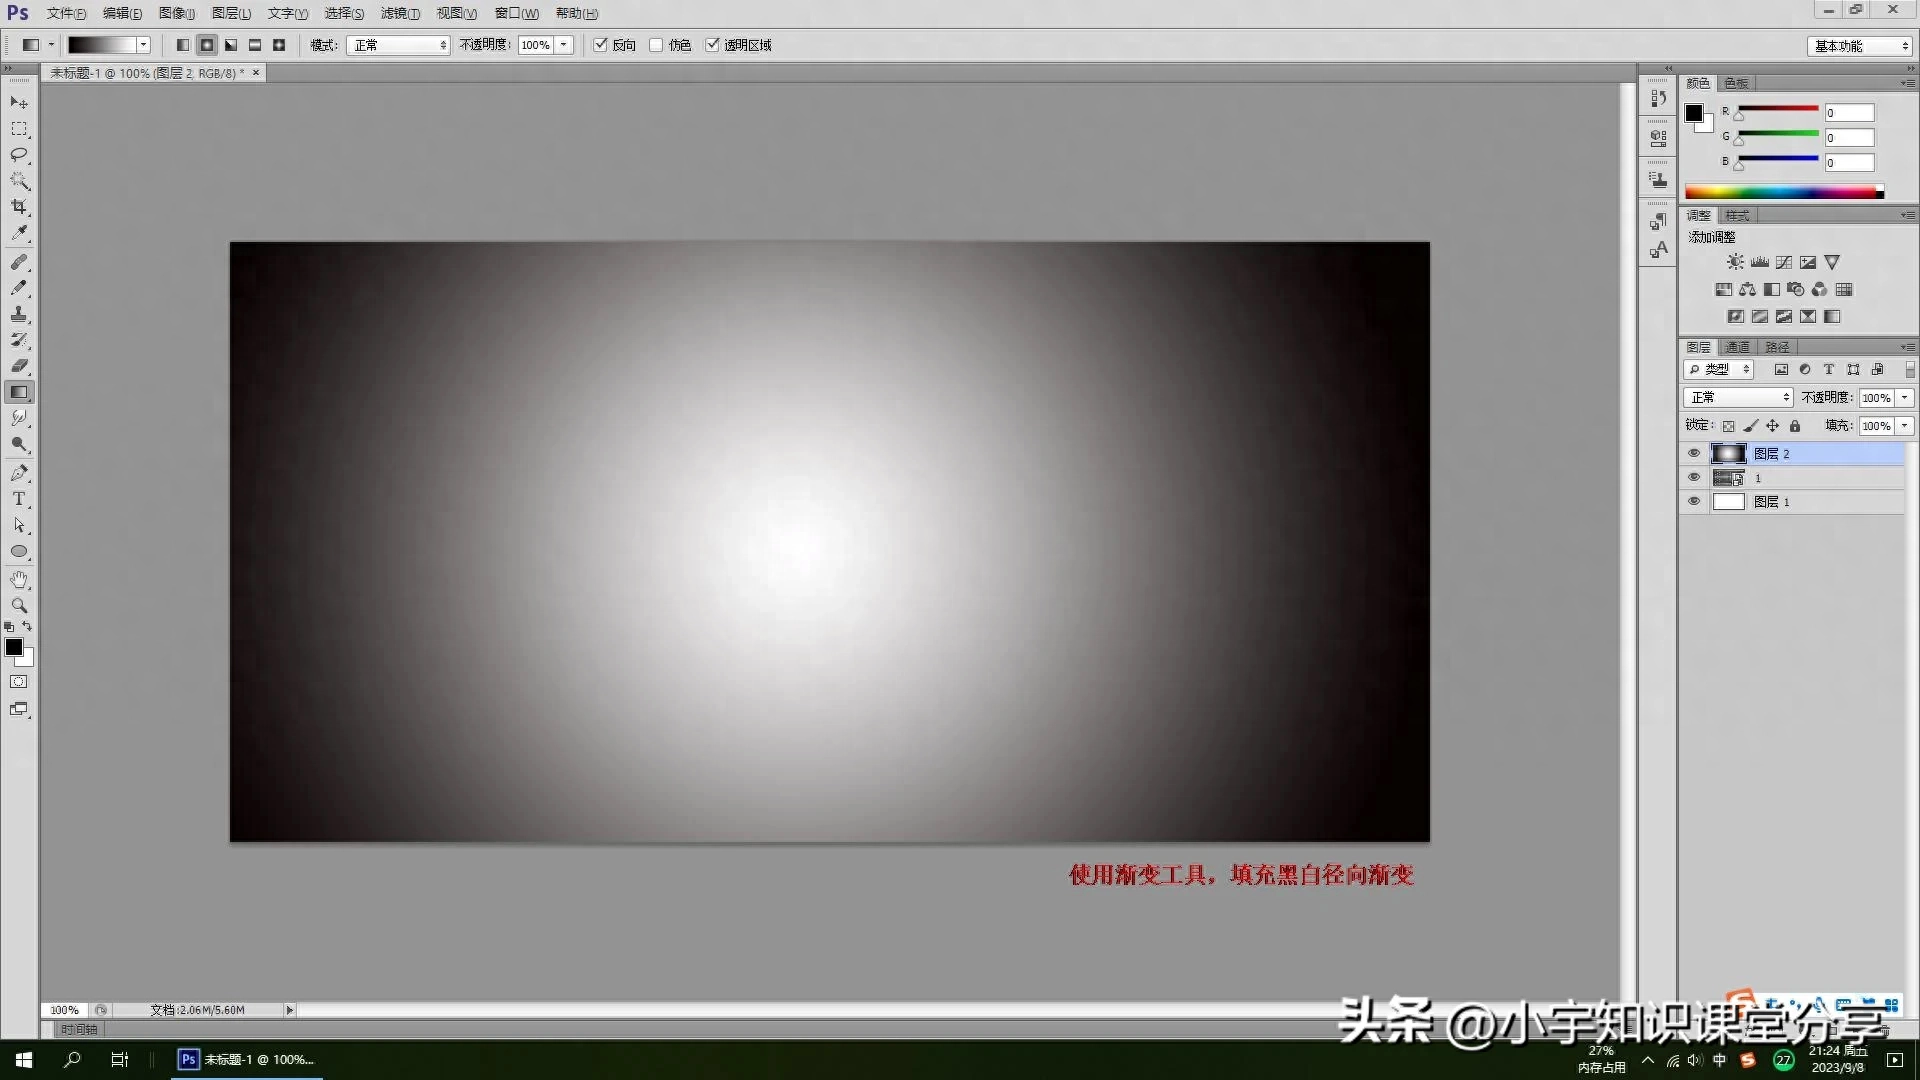
Figure 8
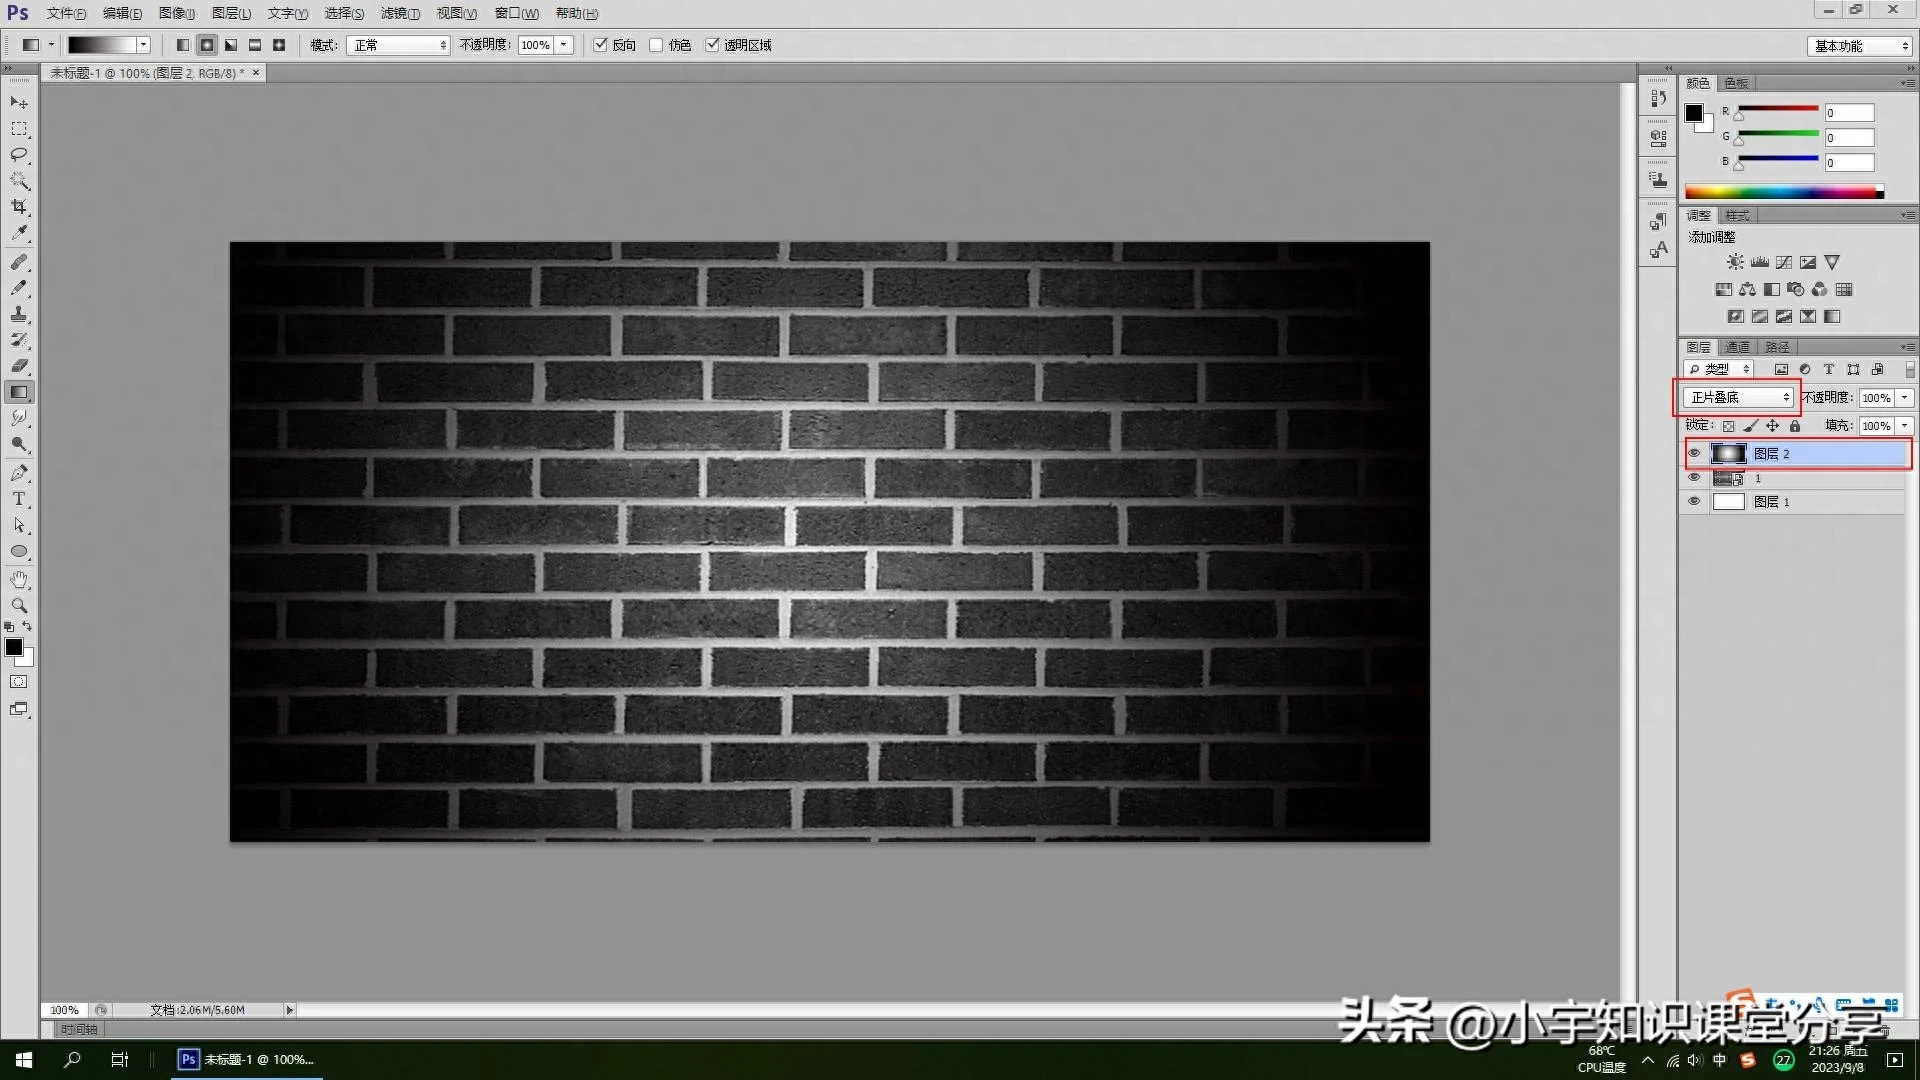
Figure 9
Step 4
Adjust the curve to make the gradient color darker. Use the mouse to drag down slightly to make the middle position slightly brighter. Be careful not to make it too dark, otherwise you will not be able to see it clearly, which will affect the effect of the text.
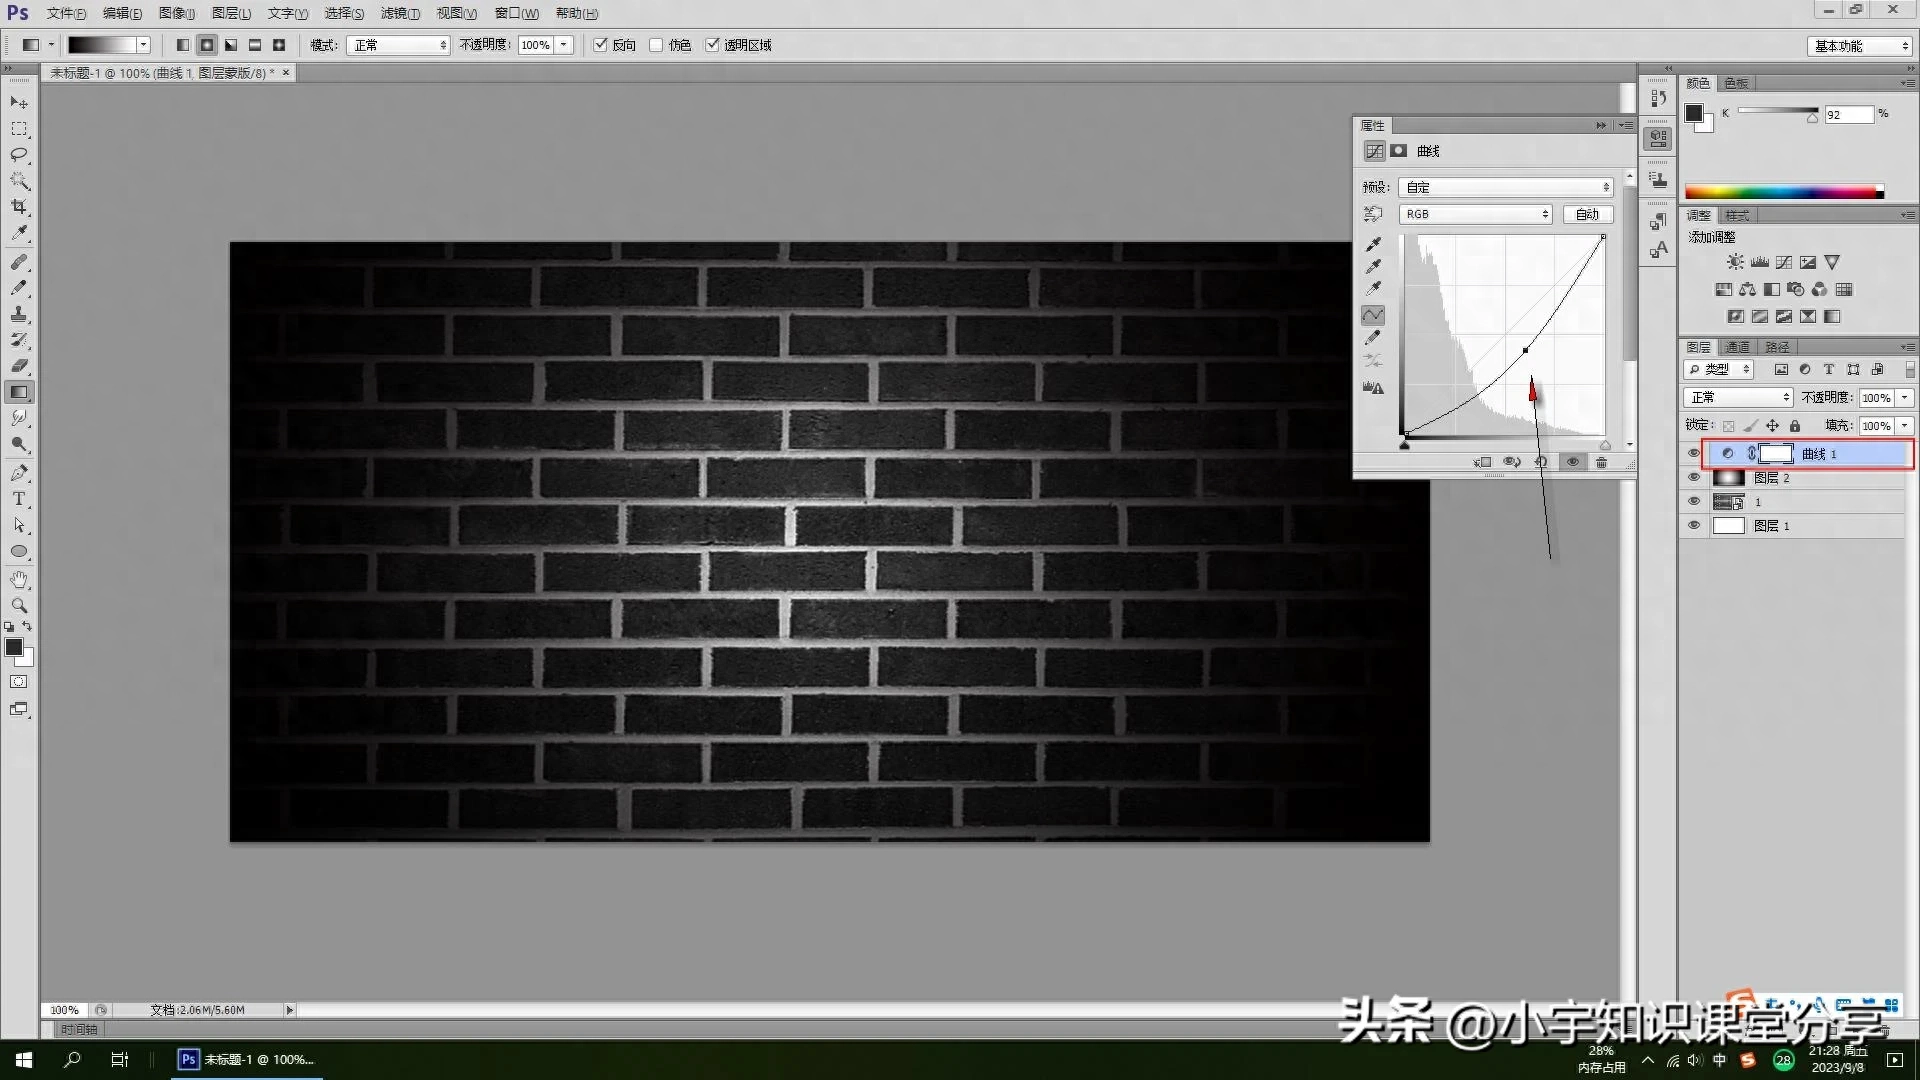
Figure 10
Step 5
After some adjustments, let’s start creating text. Use the text tool and select the horizontal text tool. The font is better to be normal, but don’t choose too thin text. It is better to choose a bolder font. As for the text color choose light gray. Enter the text, move the text to the middle position, press the Ctrl+t shortcut key, adjust the size of the text, stretch and deform it on both sides, and finally click the check mark above to confirm.
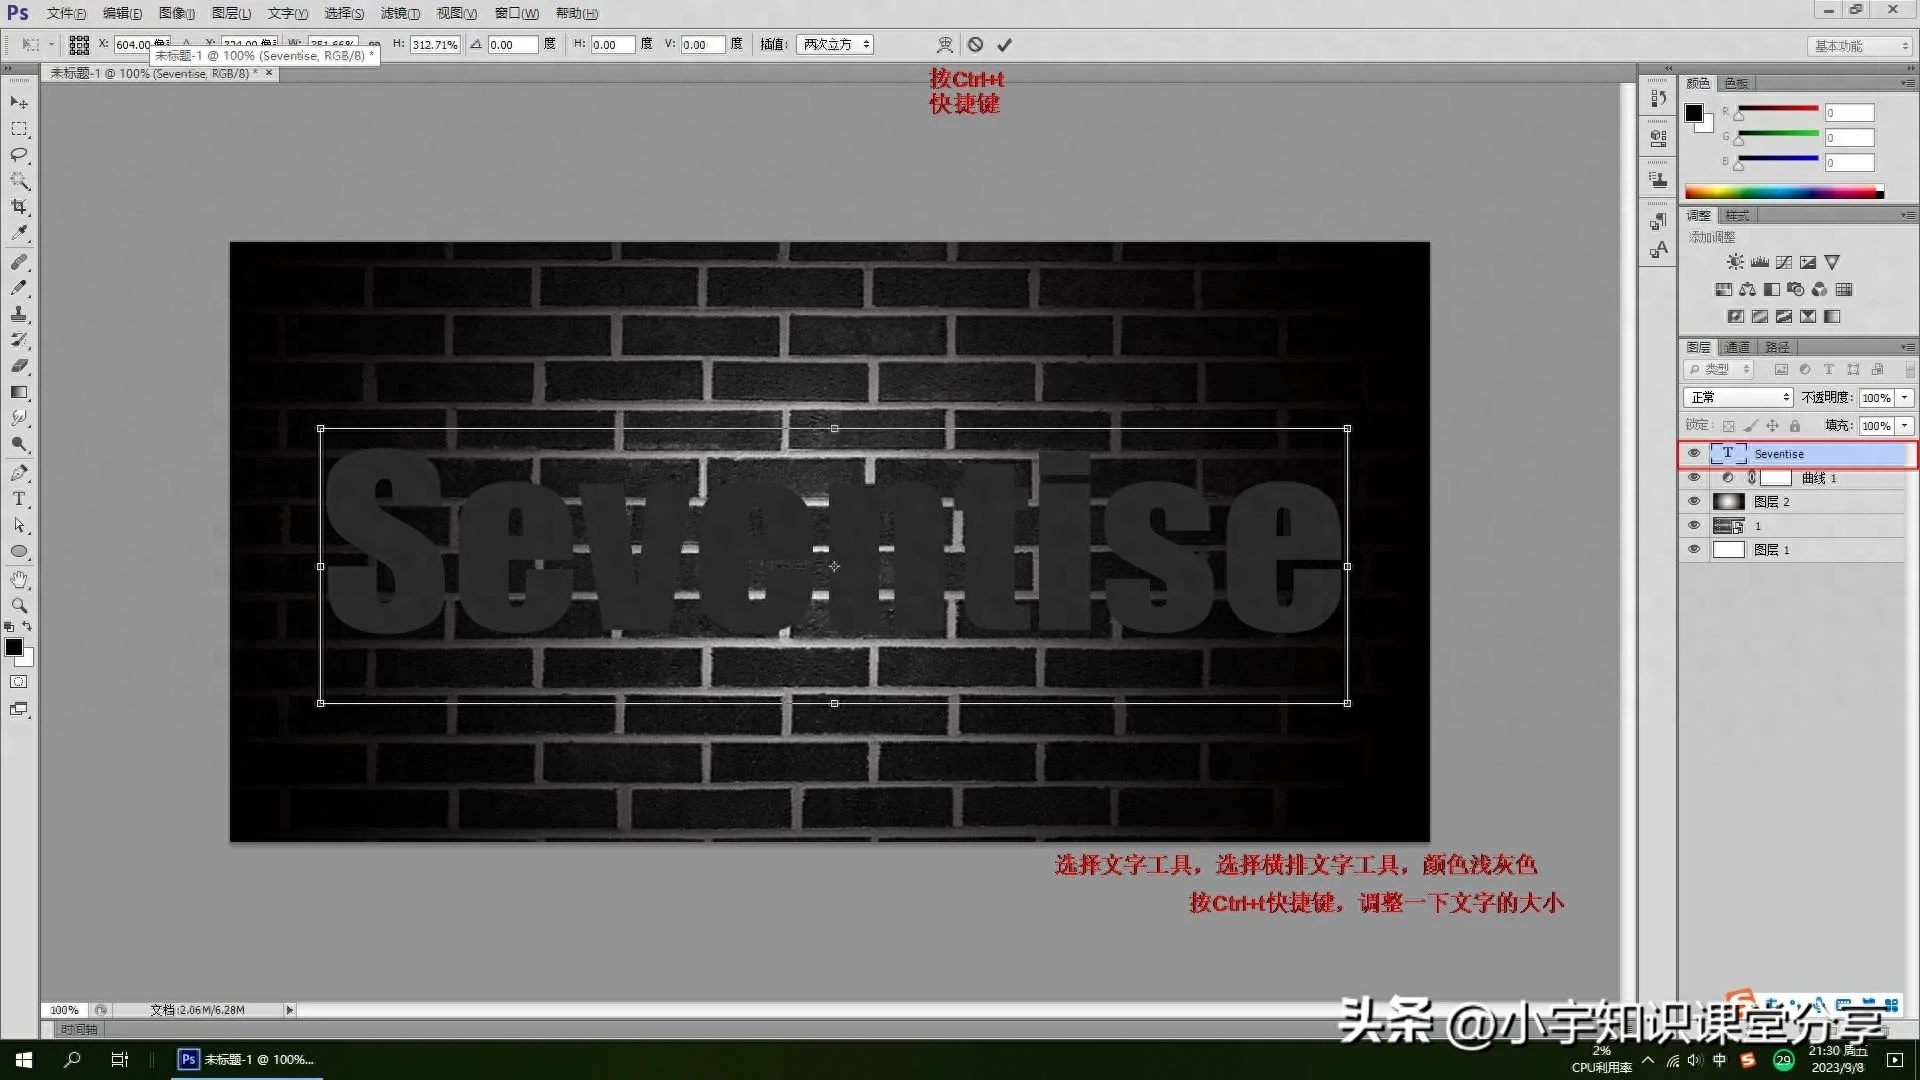
Figure 11
Step 6
After the text is adjusted, double-click the text layer and the layer style will pop up to add a three-dimensional effect to the text. First add a shadow and set the distance to (15) pixels. Expand is set to (55)% and Size is set to (24) pixels. Next, add an outer glow, set the blending mode to (Overlay), set the opacity to (80)%, set the noise to (10)%, set the color to (4bfb05) light green, and finally add a stroke, setting the size to (18) ) pixels, the position is (outside), click OK.
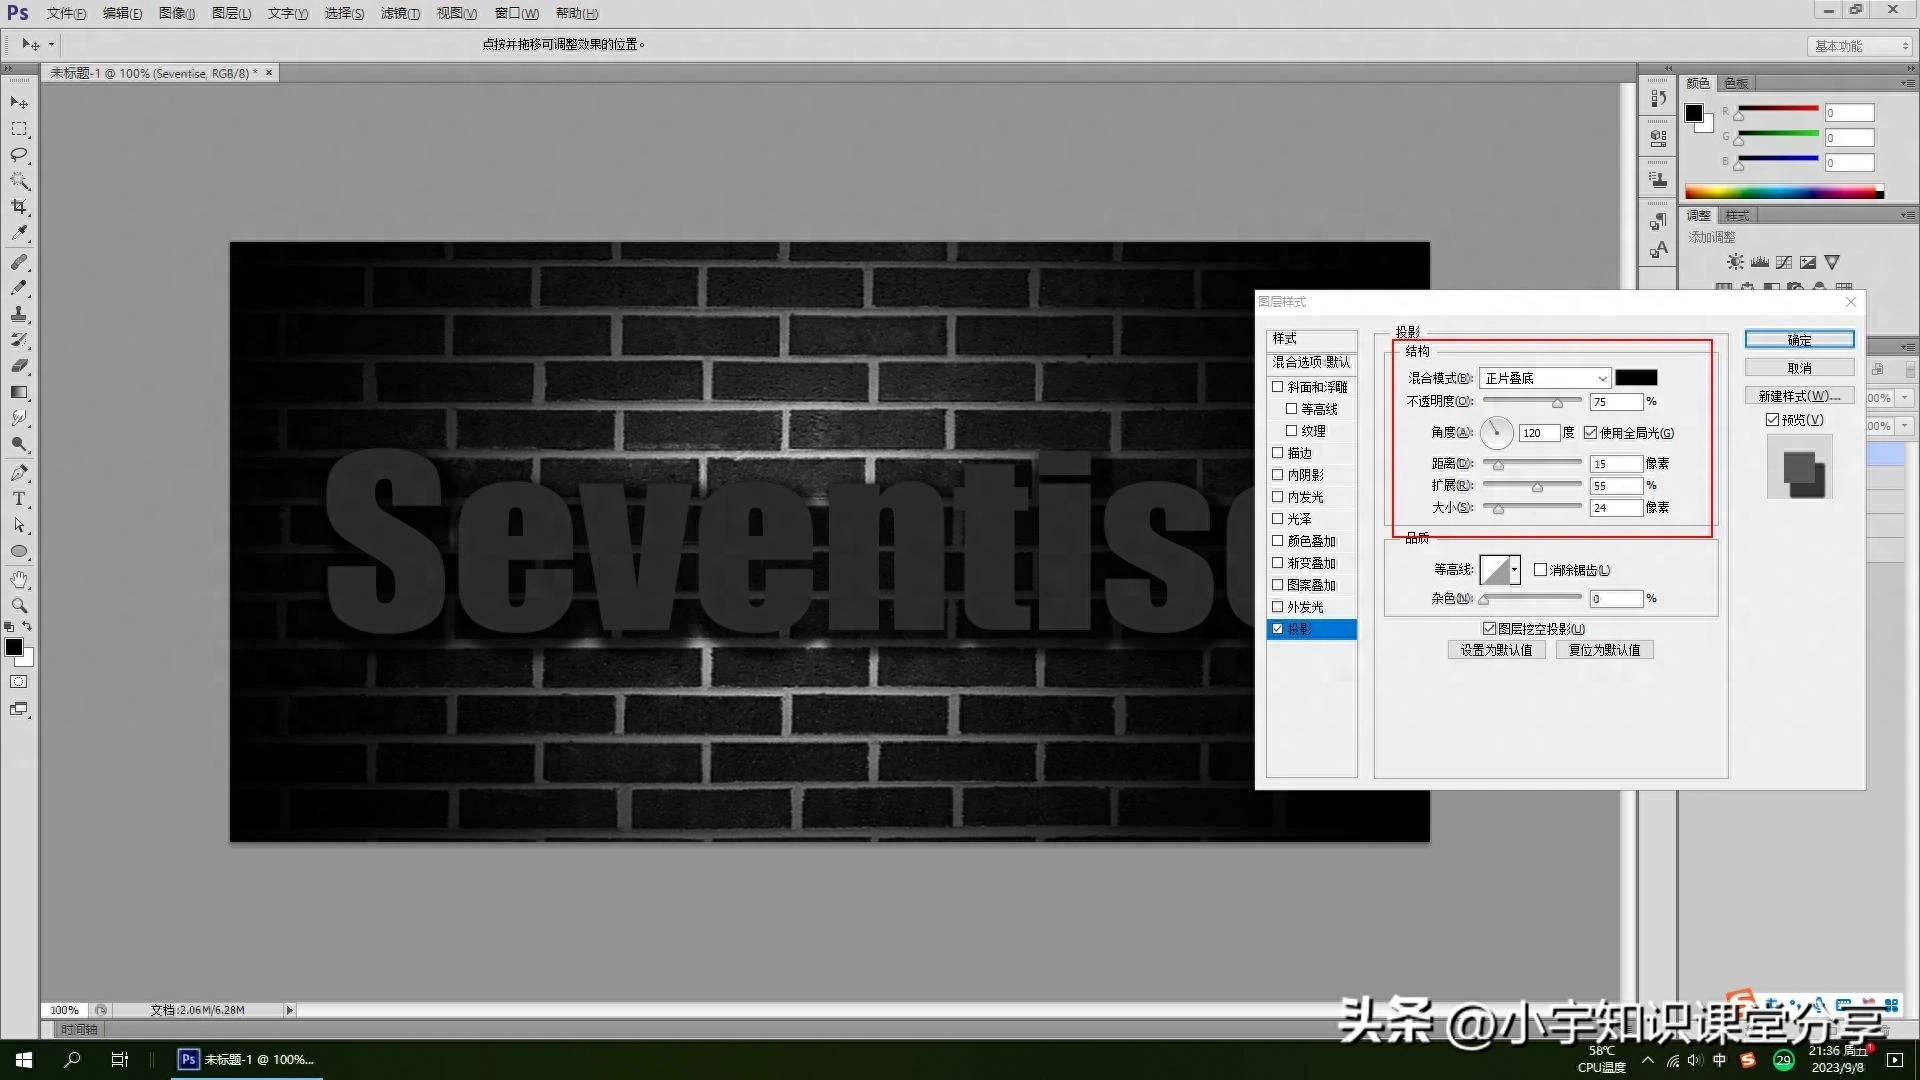
Figure 12
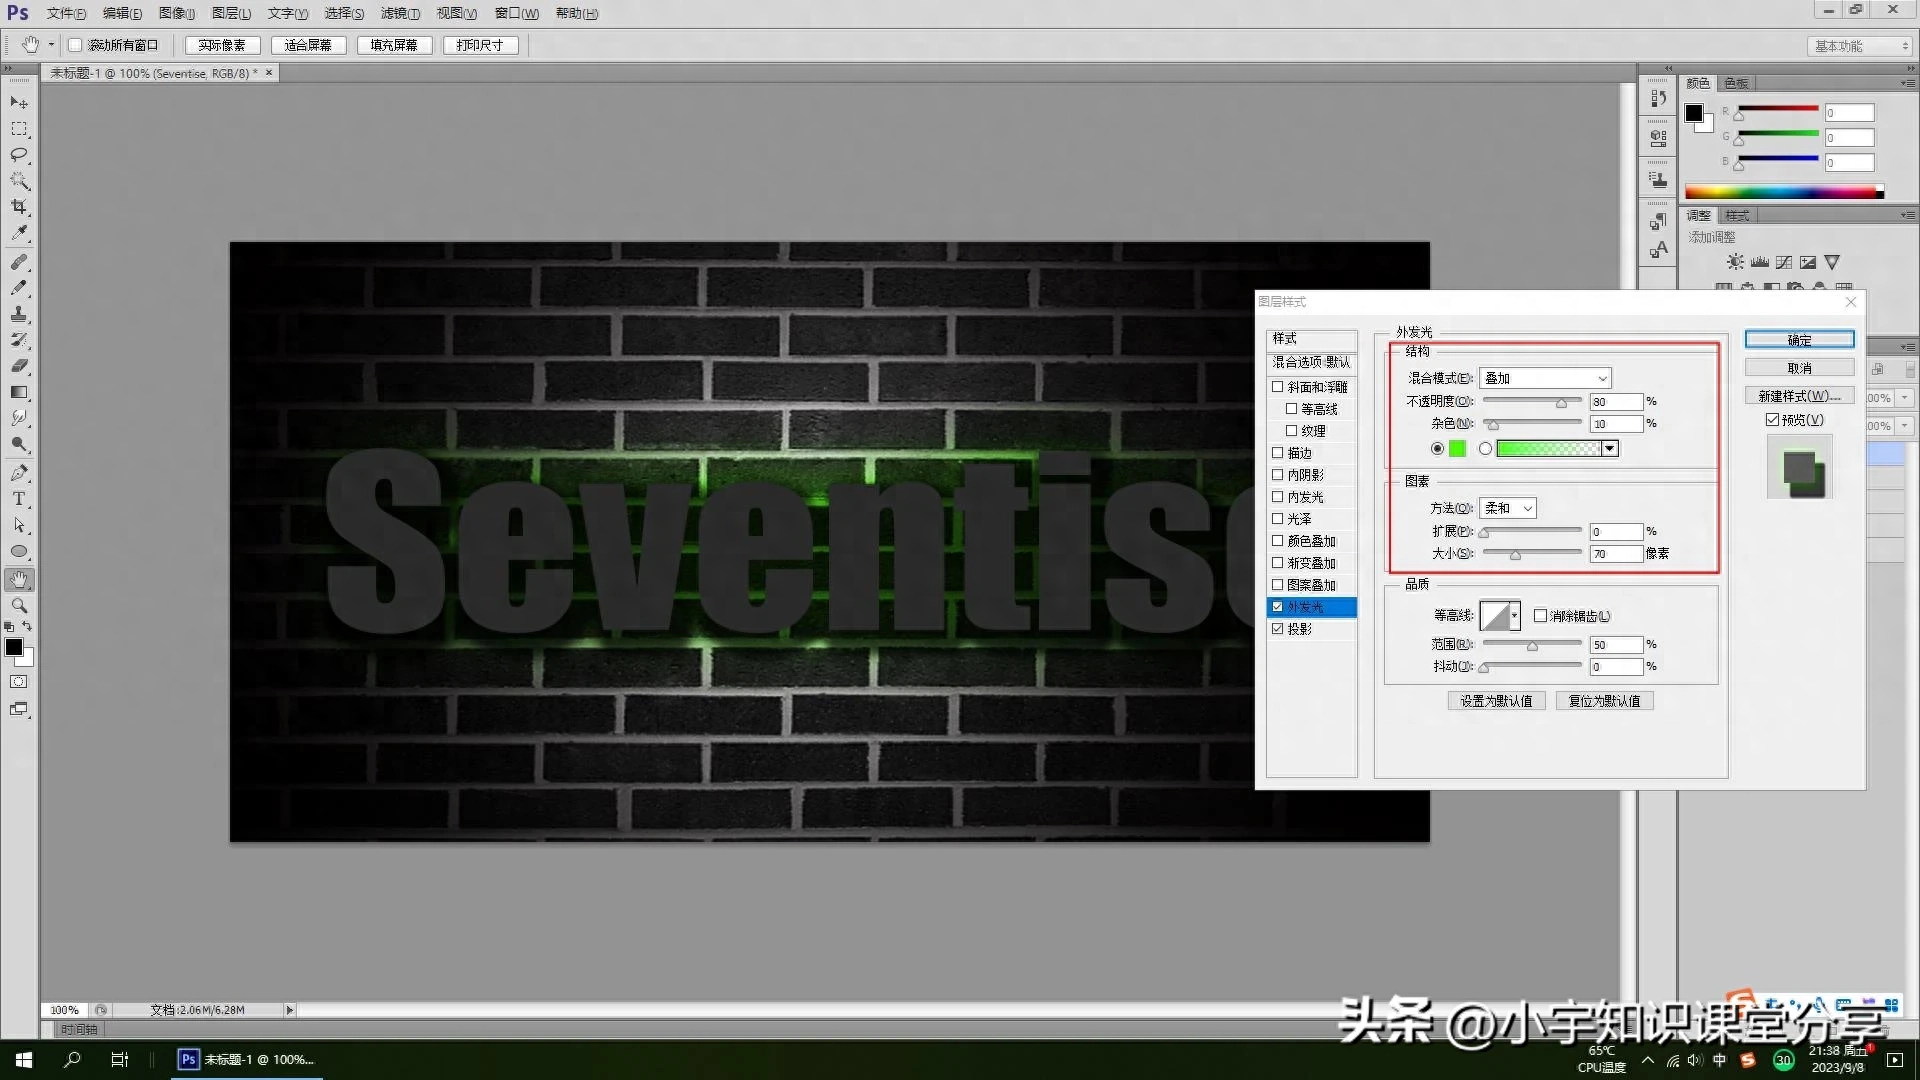
Figure 13
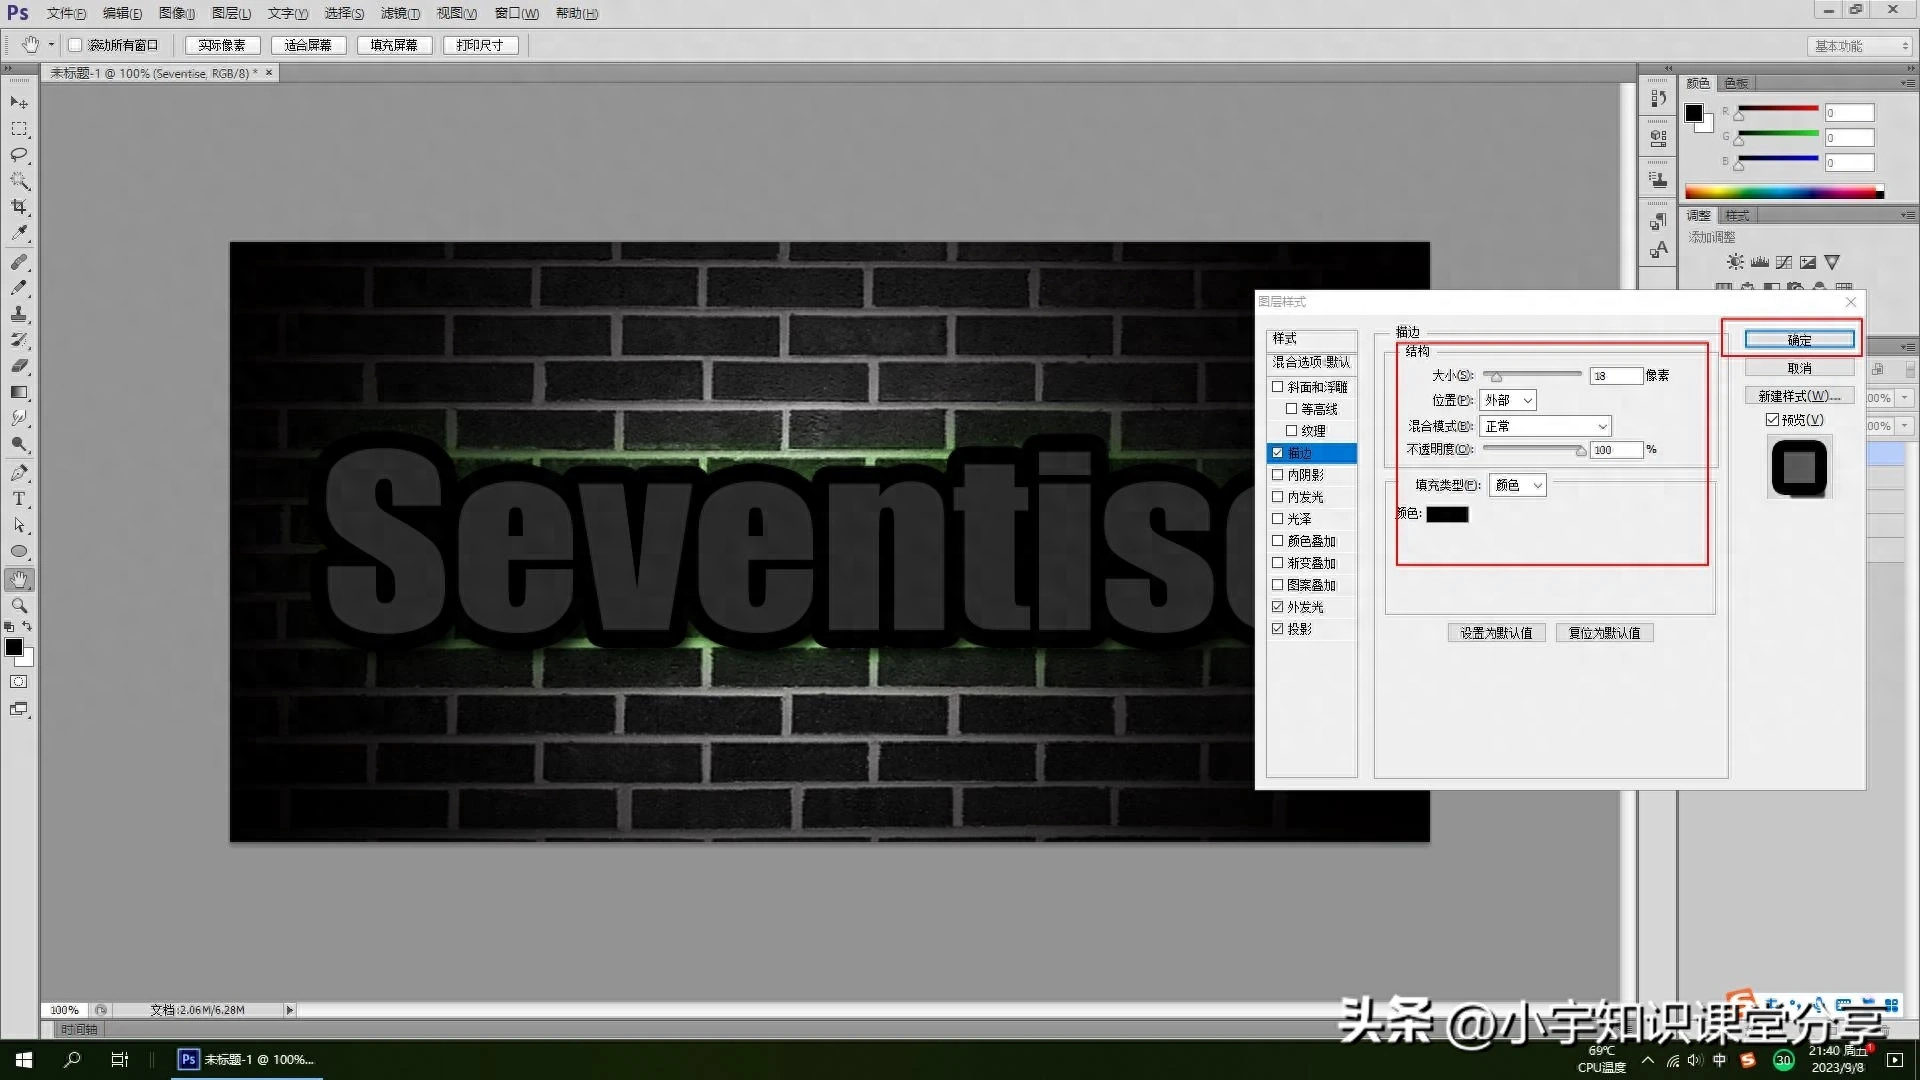
Figure 14
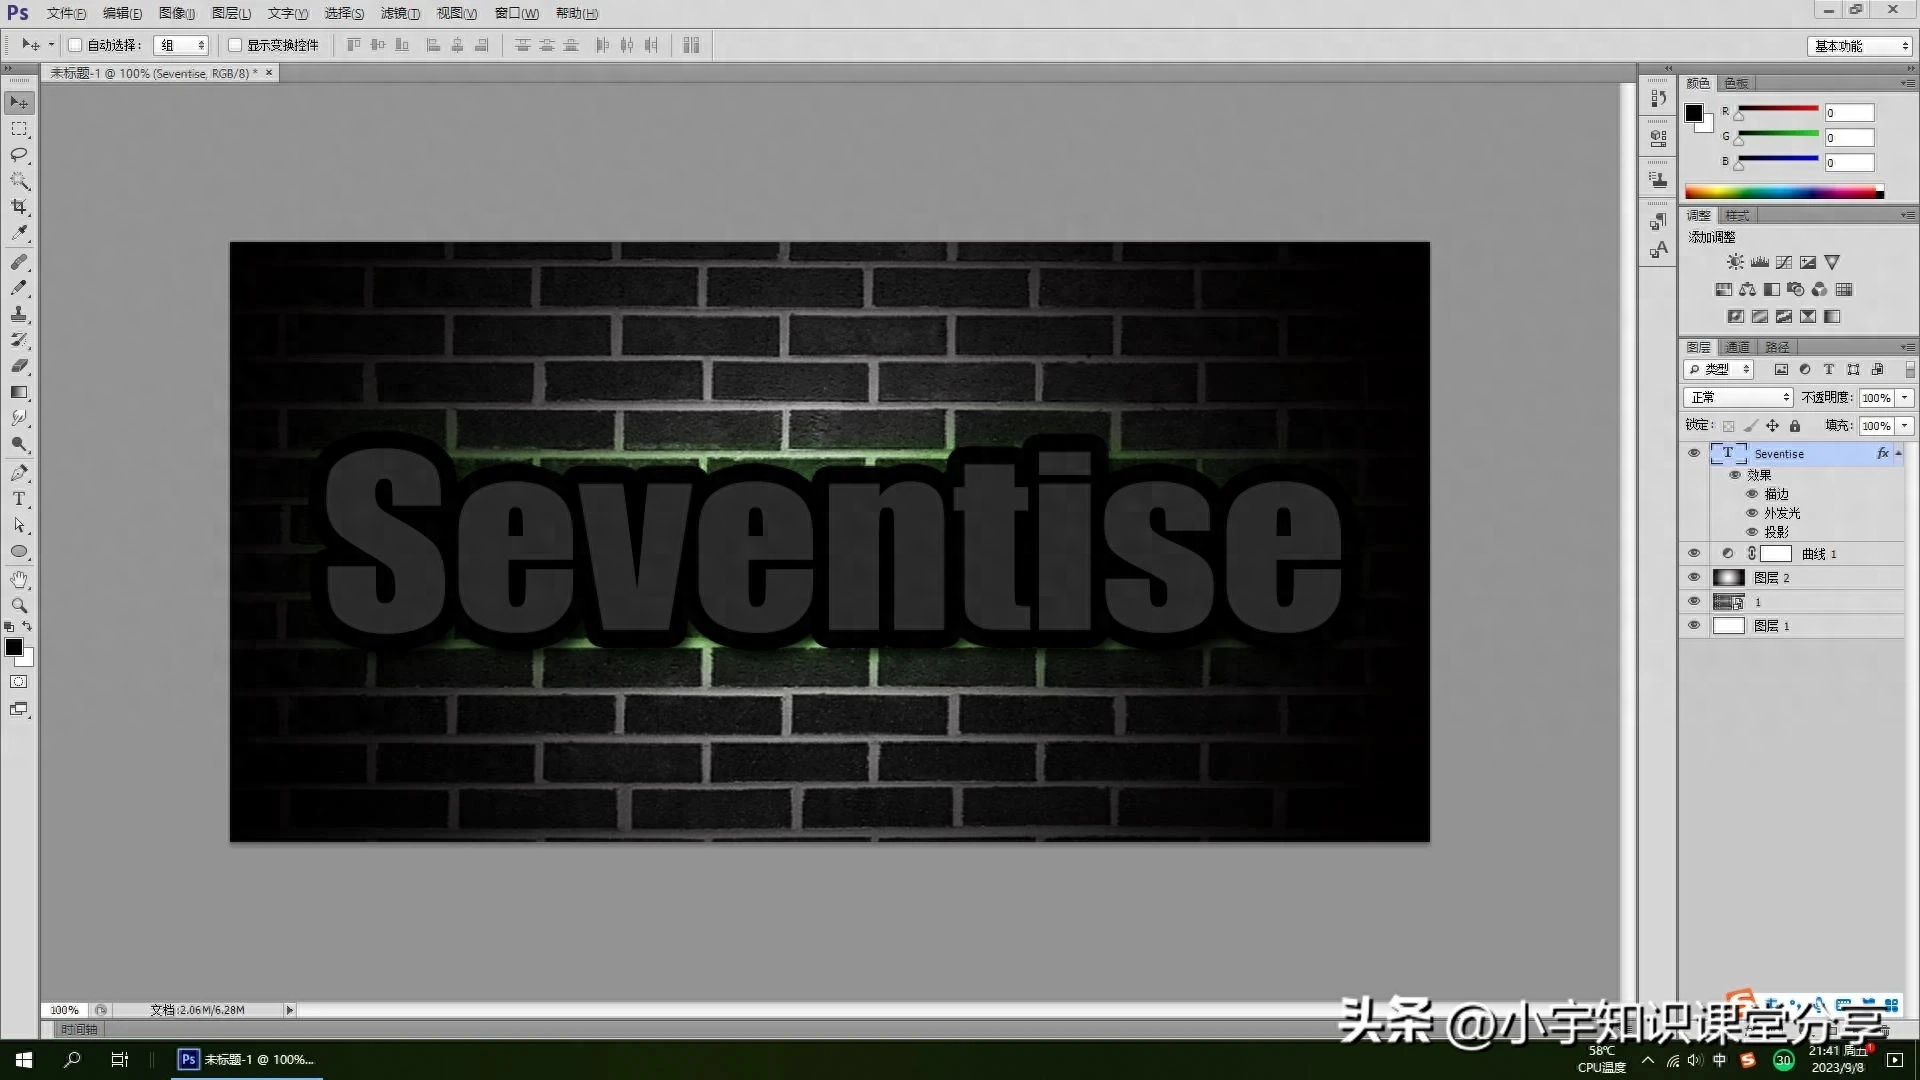
Figure 15
Step 7
The first text layer has been added with good effects. Next, draw the texture pattern of the text and create a new canvas with the width and height set to (10) pixels. The background Content is transparent by default. Select the Zoom tool in the toolbar, adjust the canvas to the maximum size so you can see it clearly, then use the Pencil tool to draw the pattern, set the pencil size to (1) pixel, and draw a small black square. After drawing, execute Edit-Define Pattern, save the pattern you just drew, and then return to the text layer.
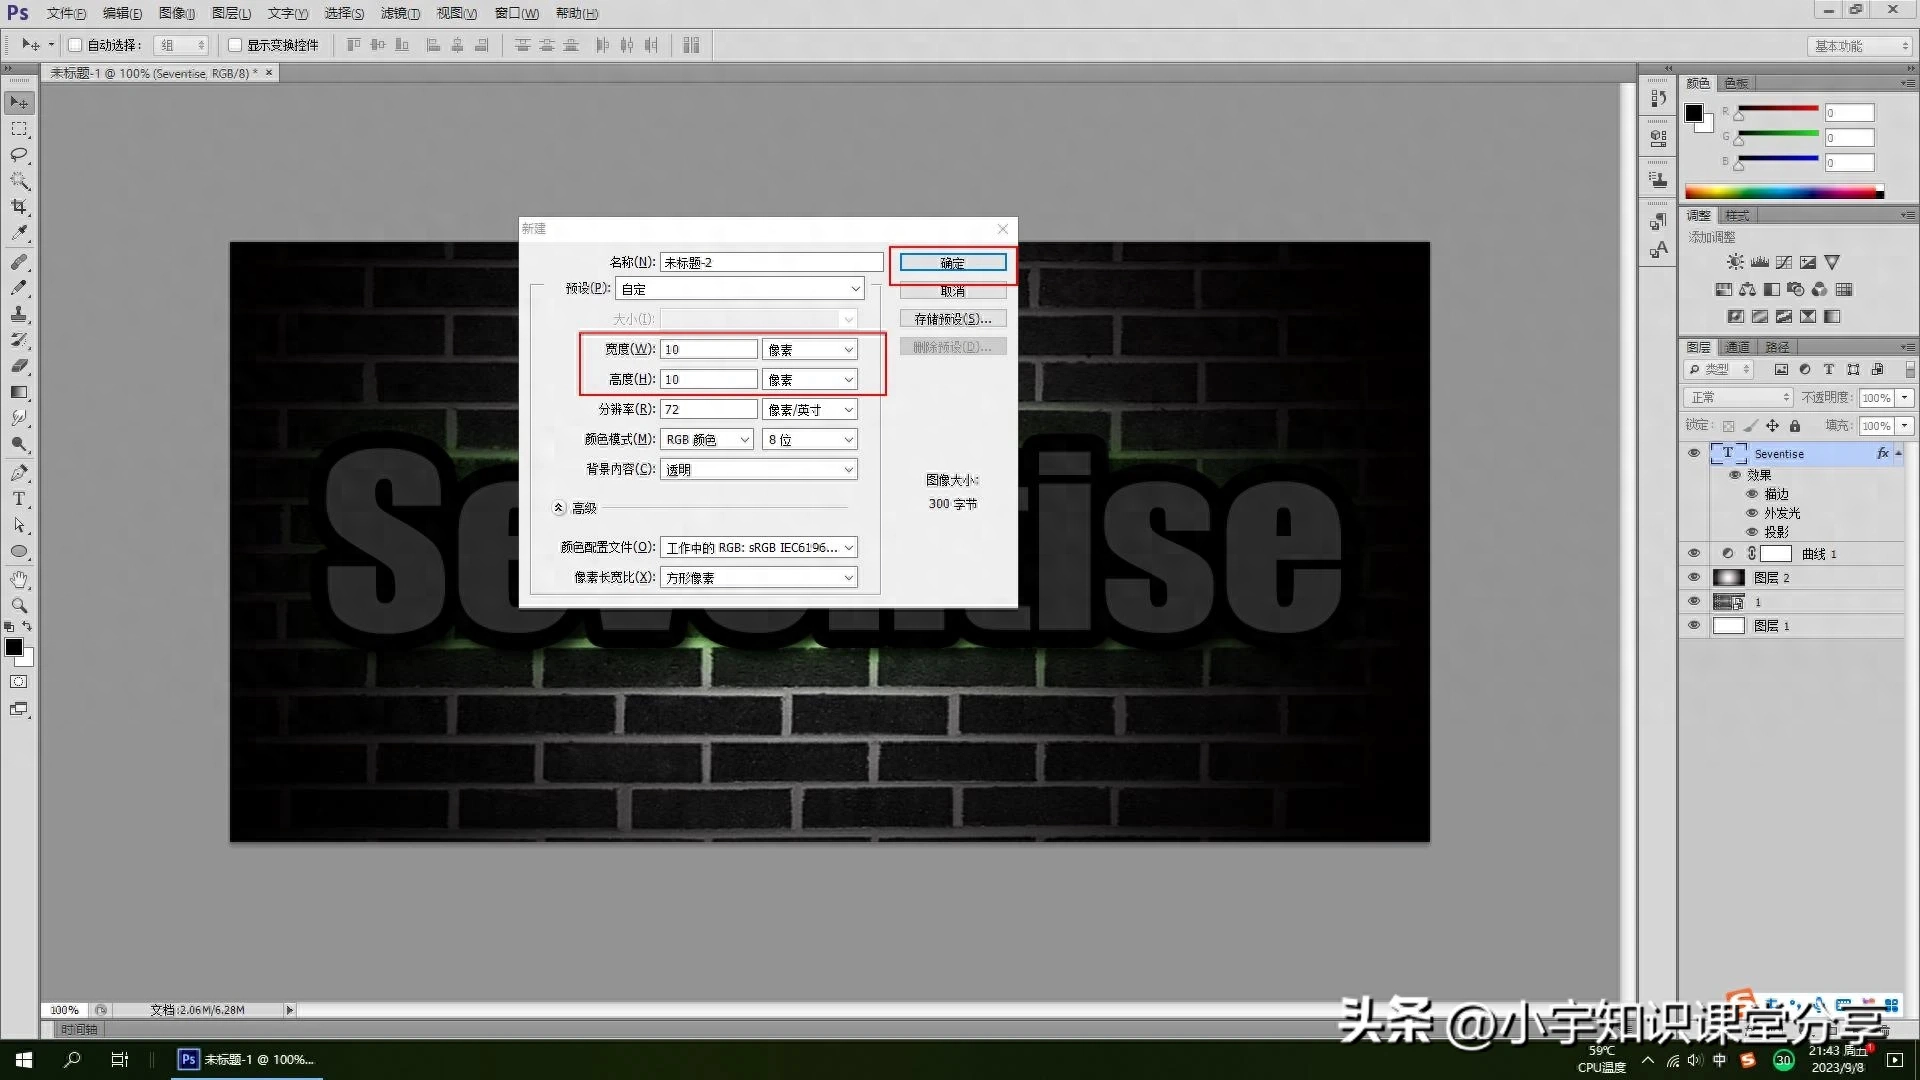
Figure 16
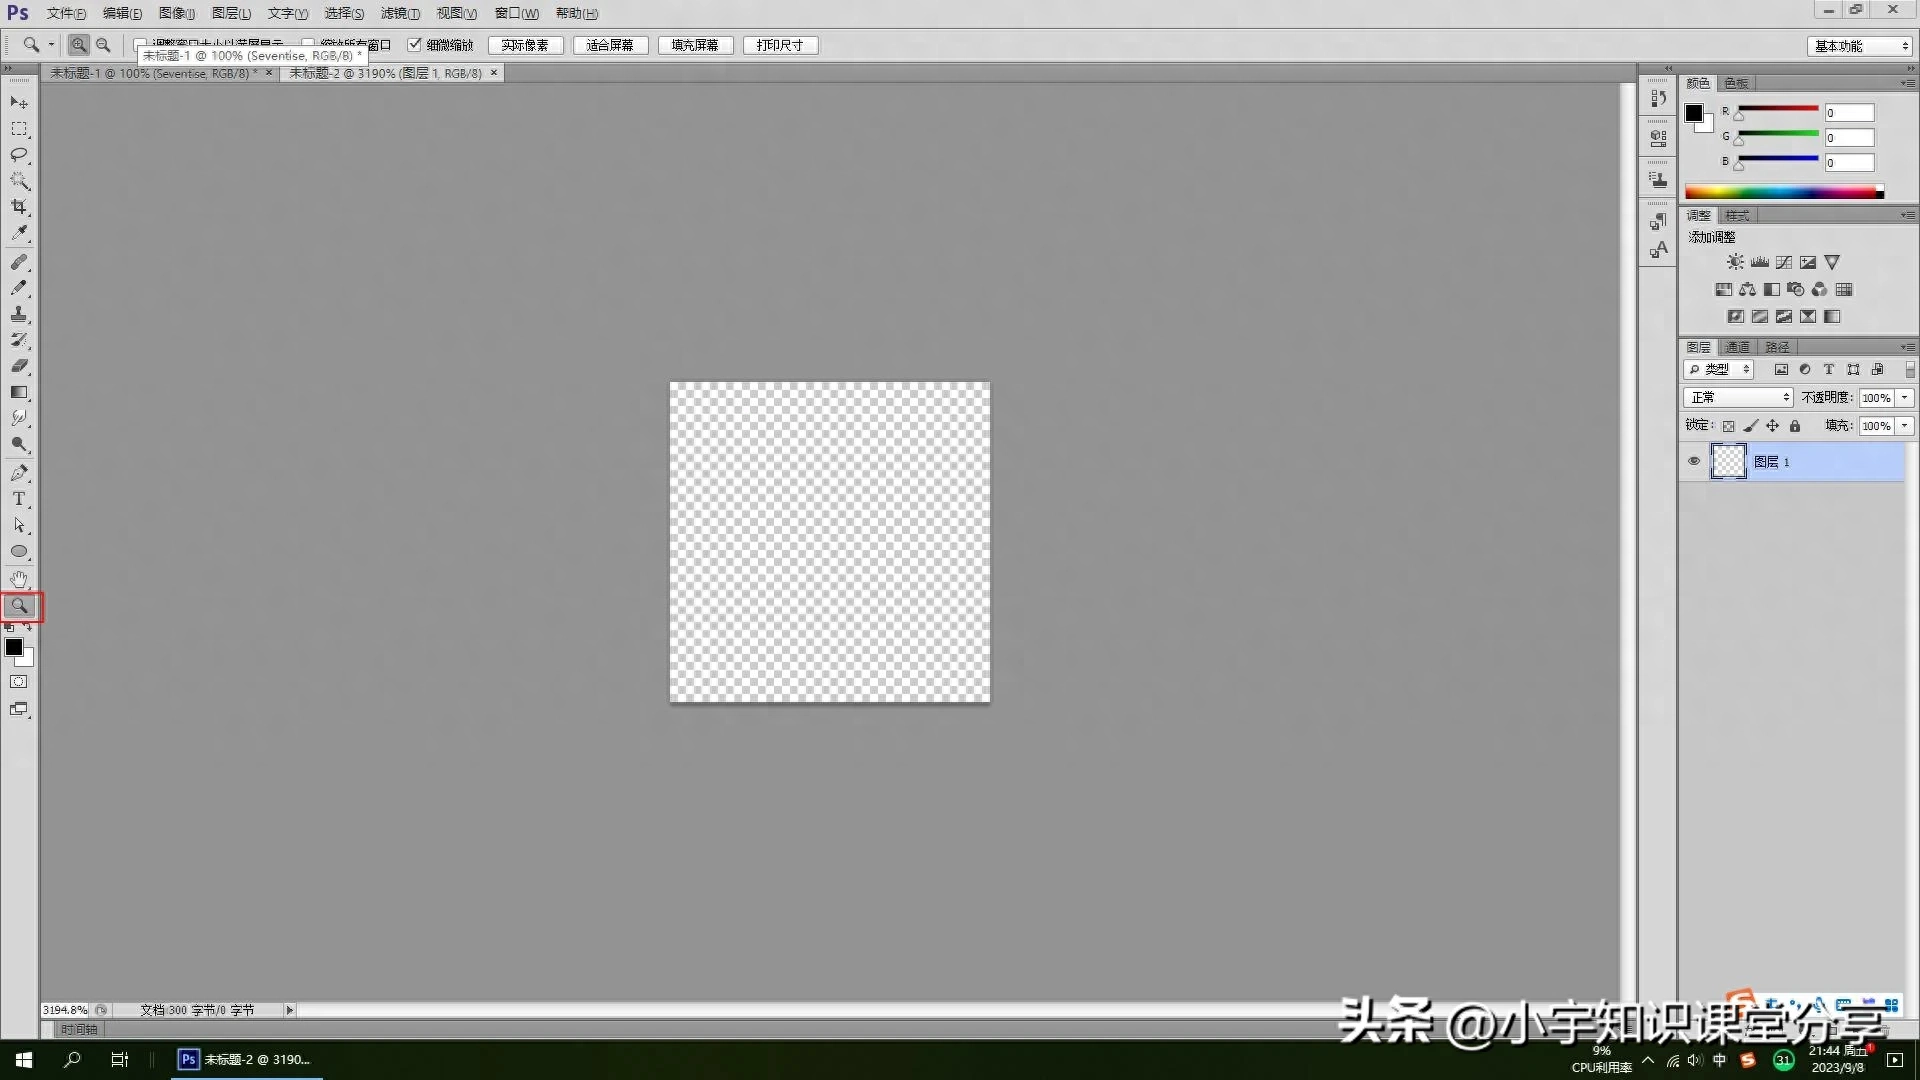
Figure 17
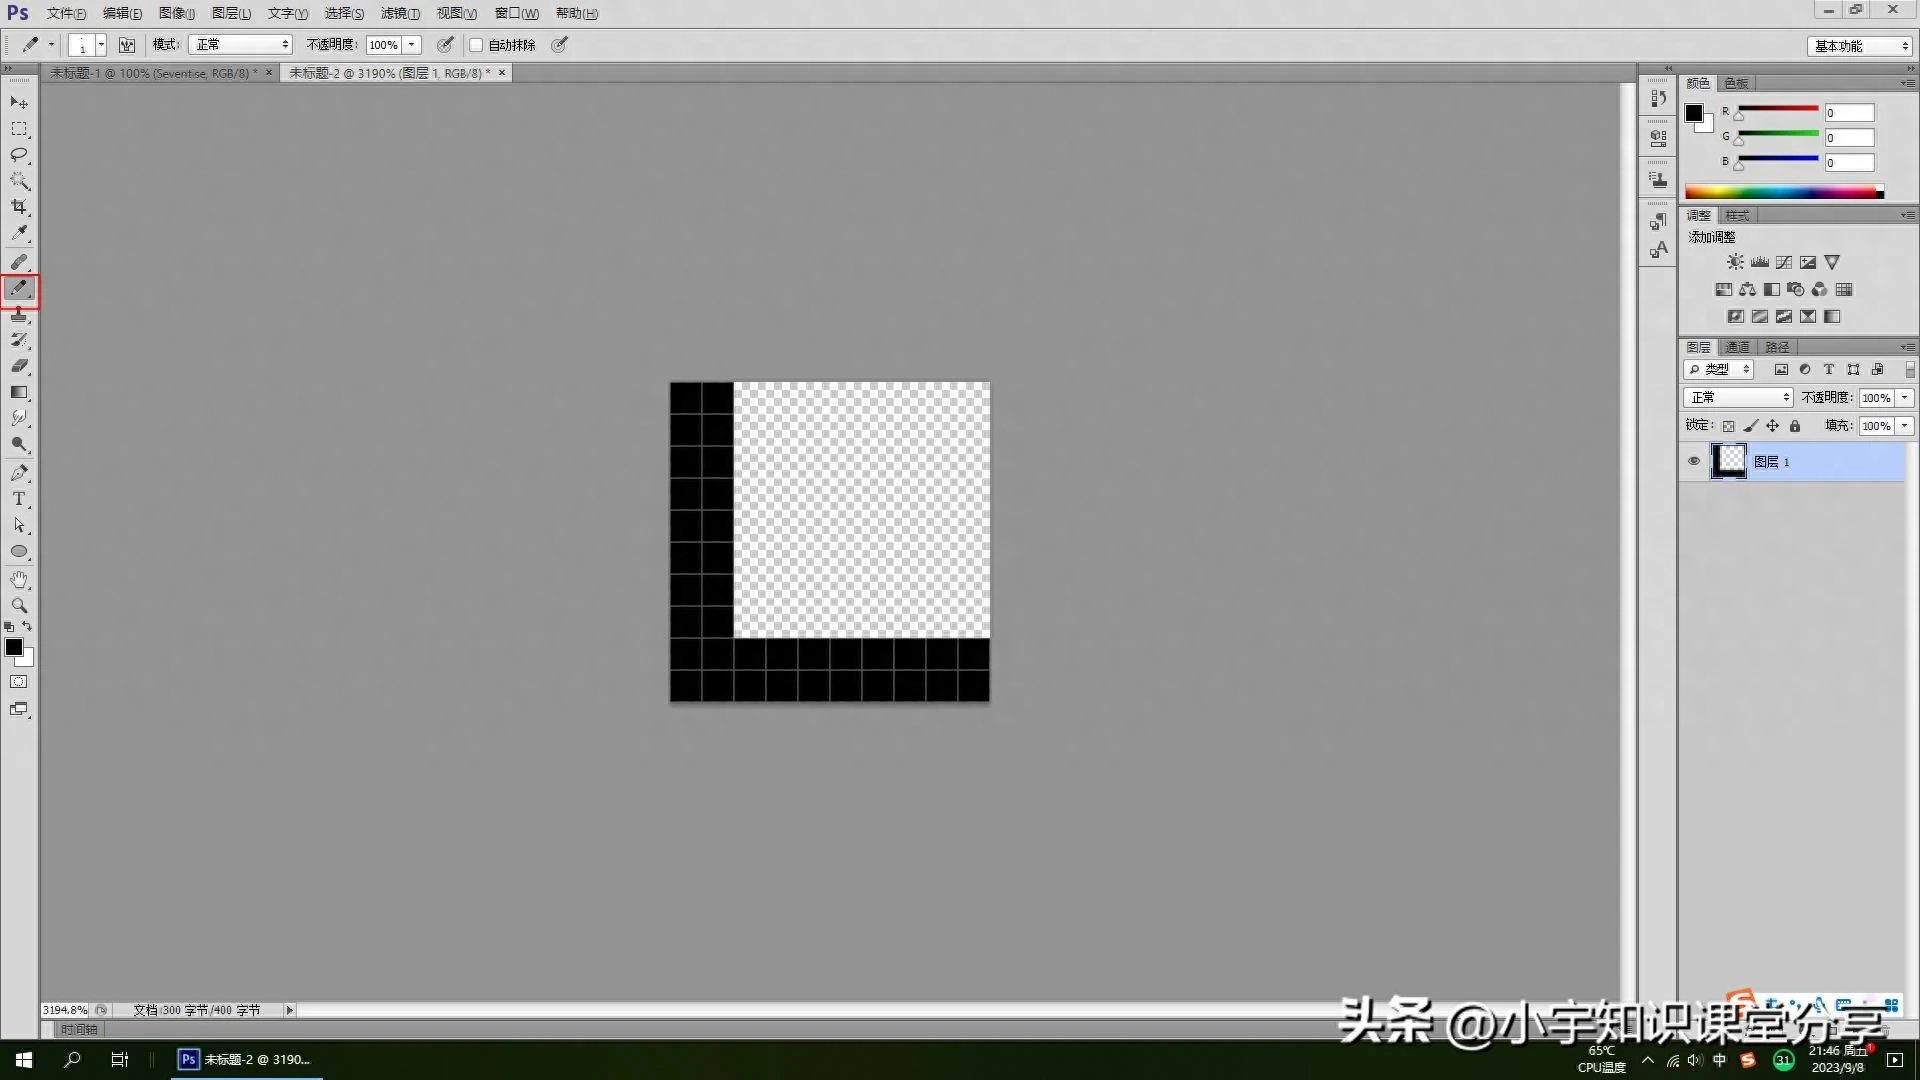
Figure 18
Step 8
The pattern has been saved, but how to add it? First, copy the text layer you just created, and then right-click the mouse to clear the layer. Style, note that it is not a rasterized layer. Still need to repeat the operation, double-click the layer, pop up the layer style function, add bevel and embossing effects, set the size to (5), set the highlight mode to (40)%, set the shadow mode to (60)%, the most important thing Select the texture, set the pattern you just created, and set the depth to (15)%. The stroke size is set to (18)%, the color is set to (2a2a2a), and finally a color overlay is added, the color is set to (182115), and the color is darker.
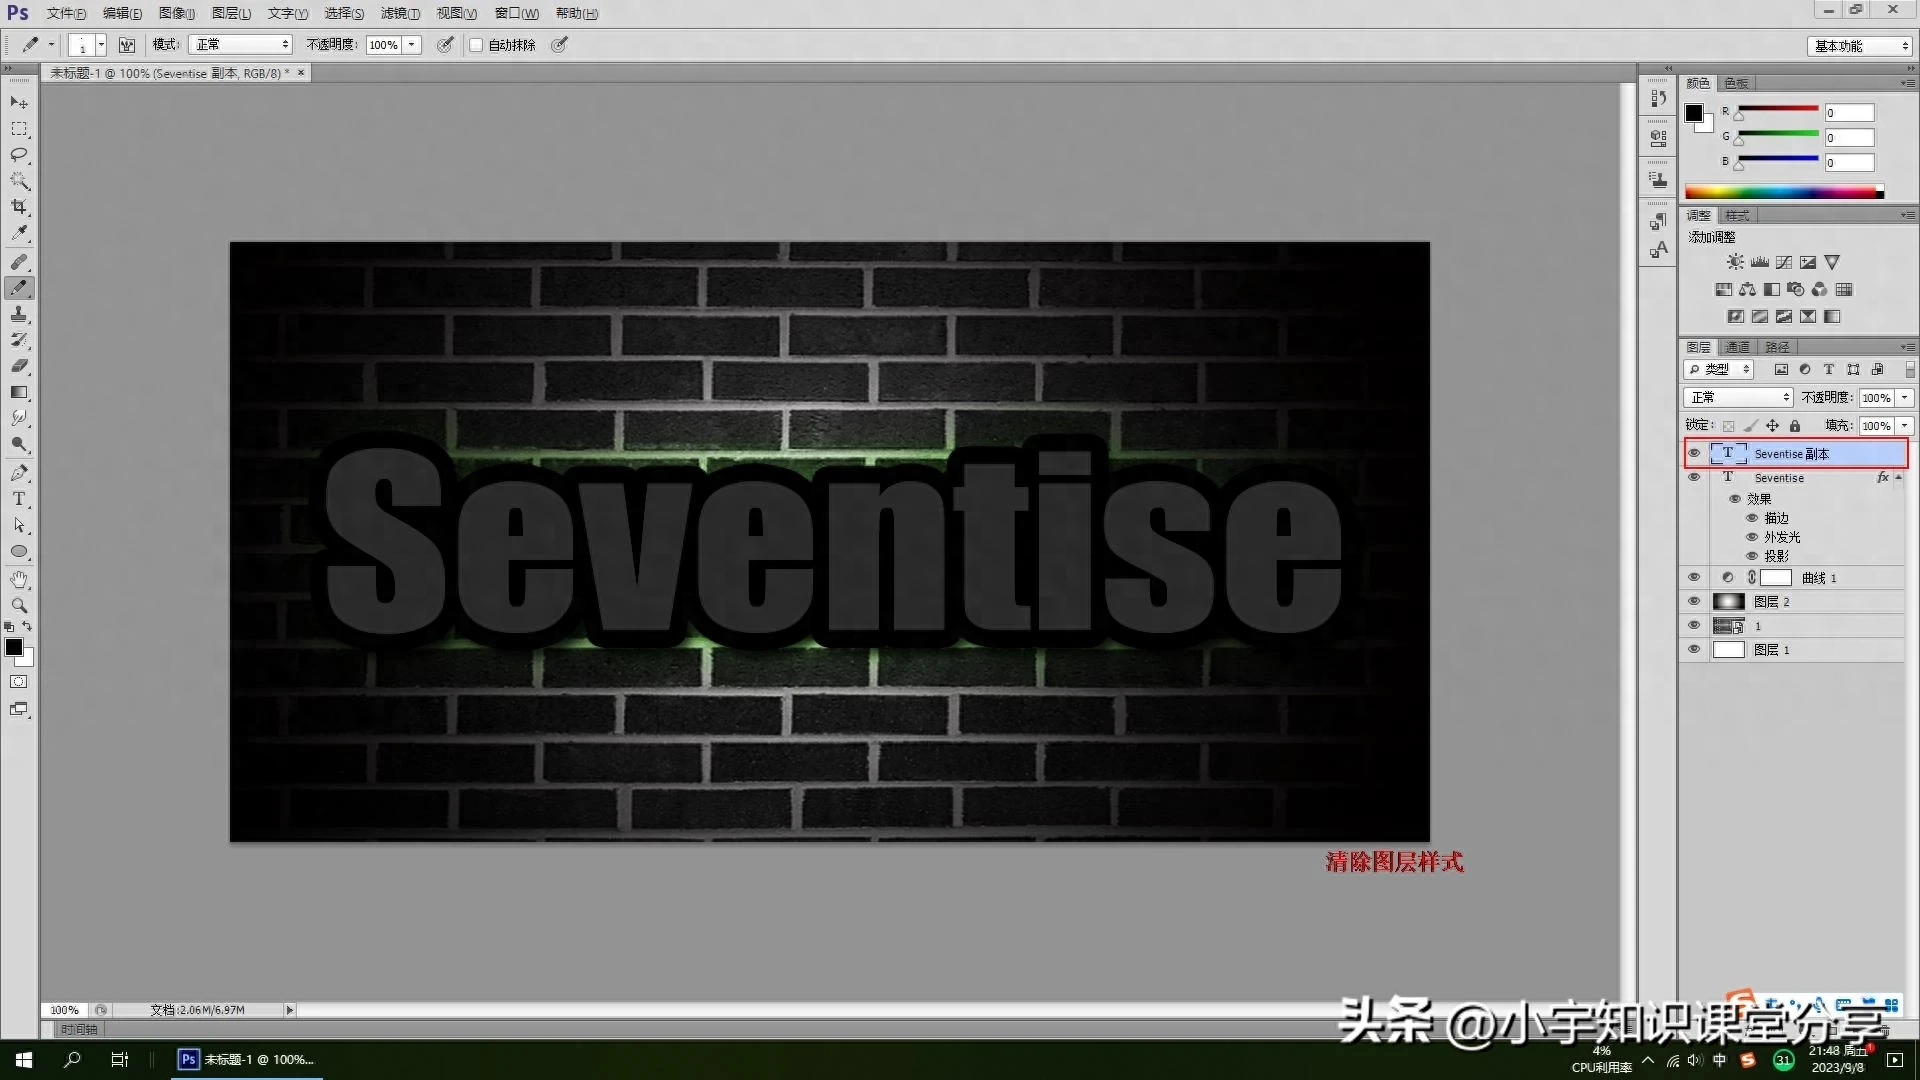
Figure 19
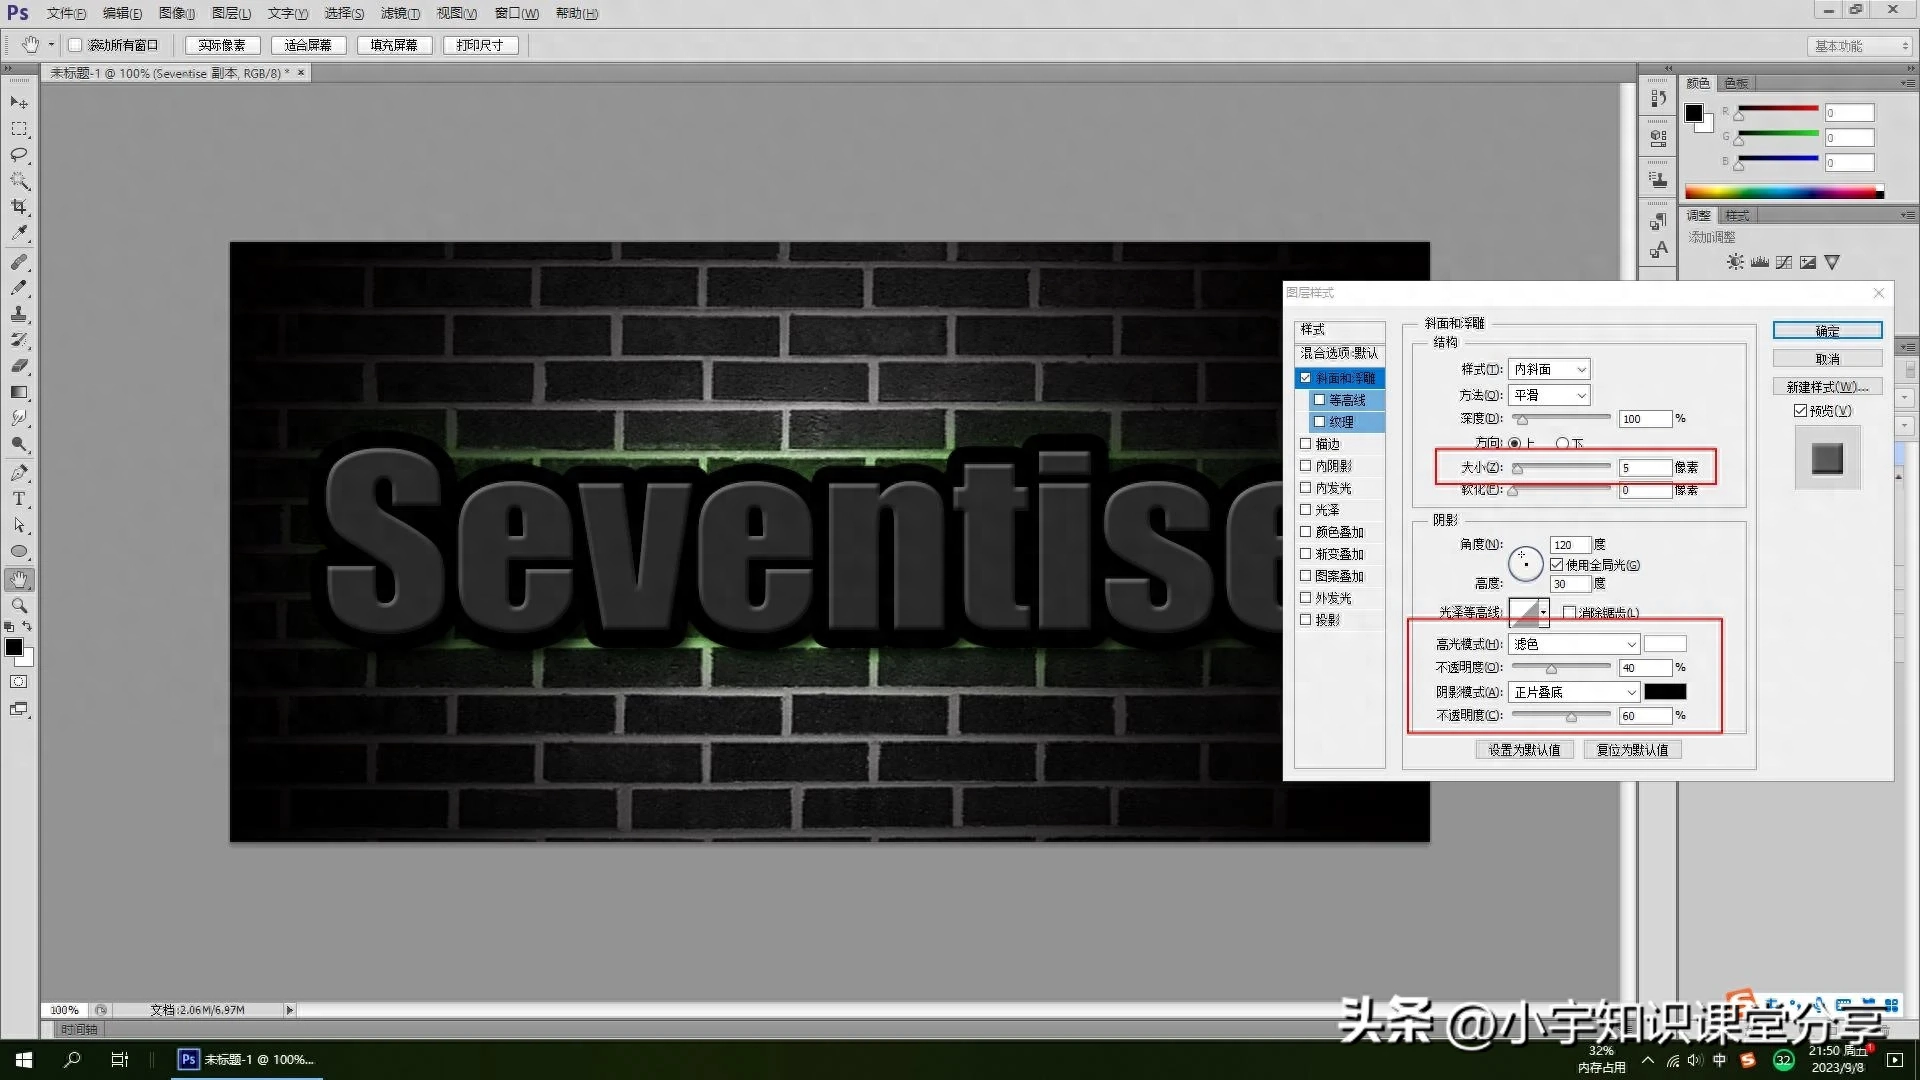
Figure 20
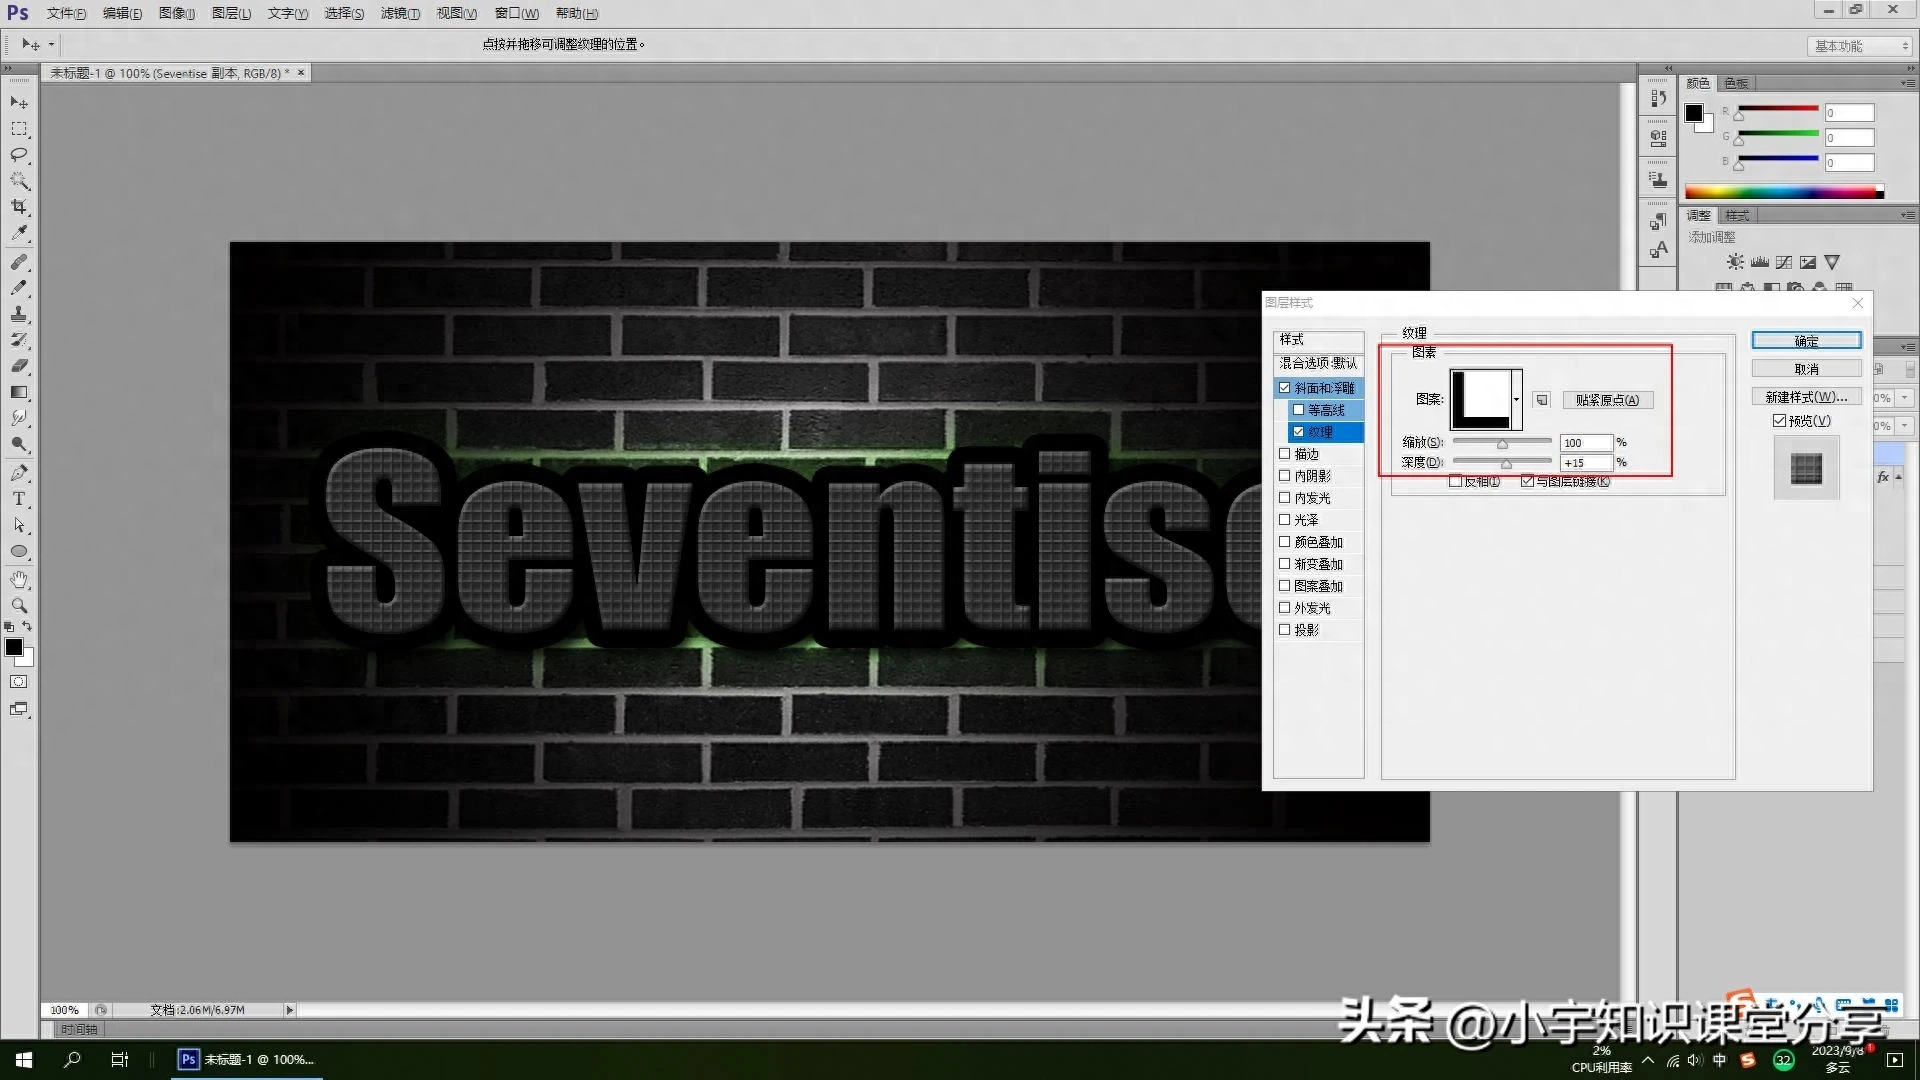
Figure 21
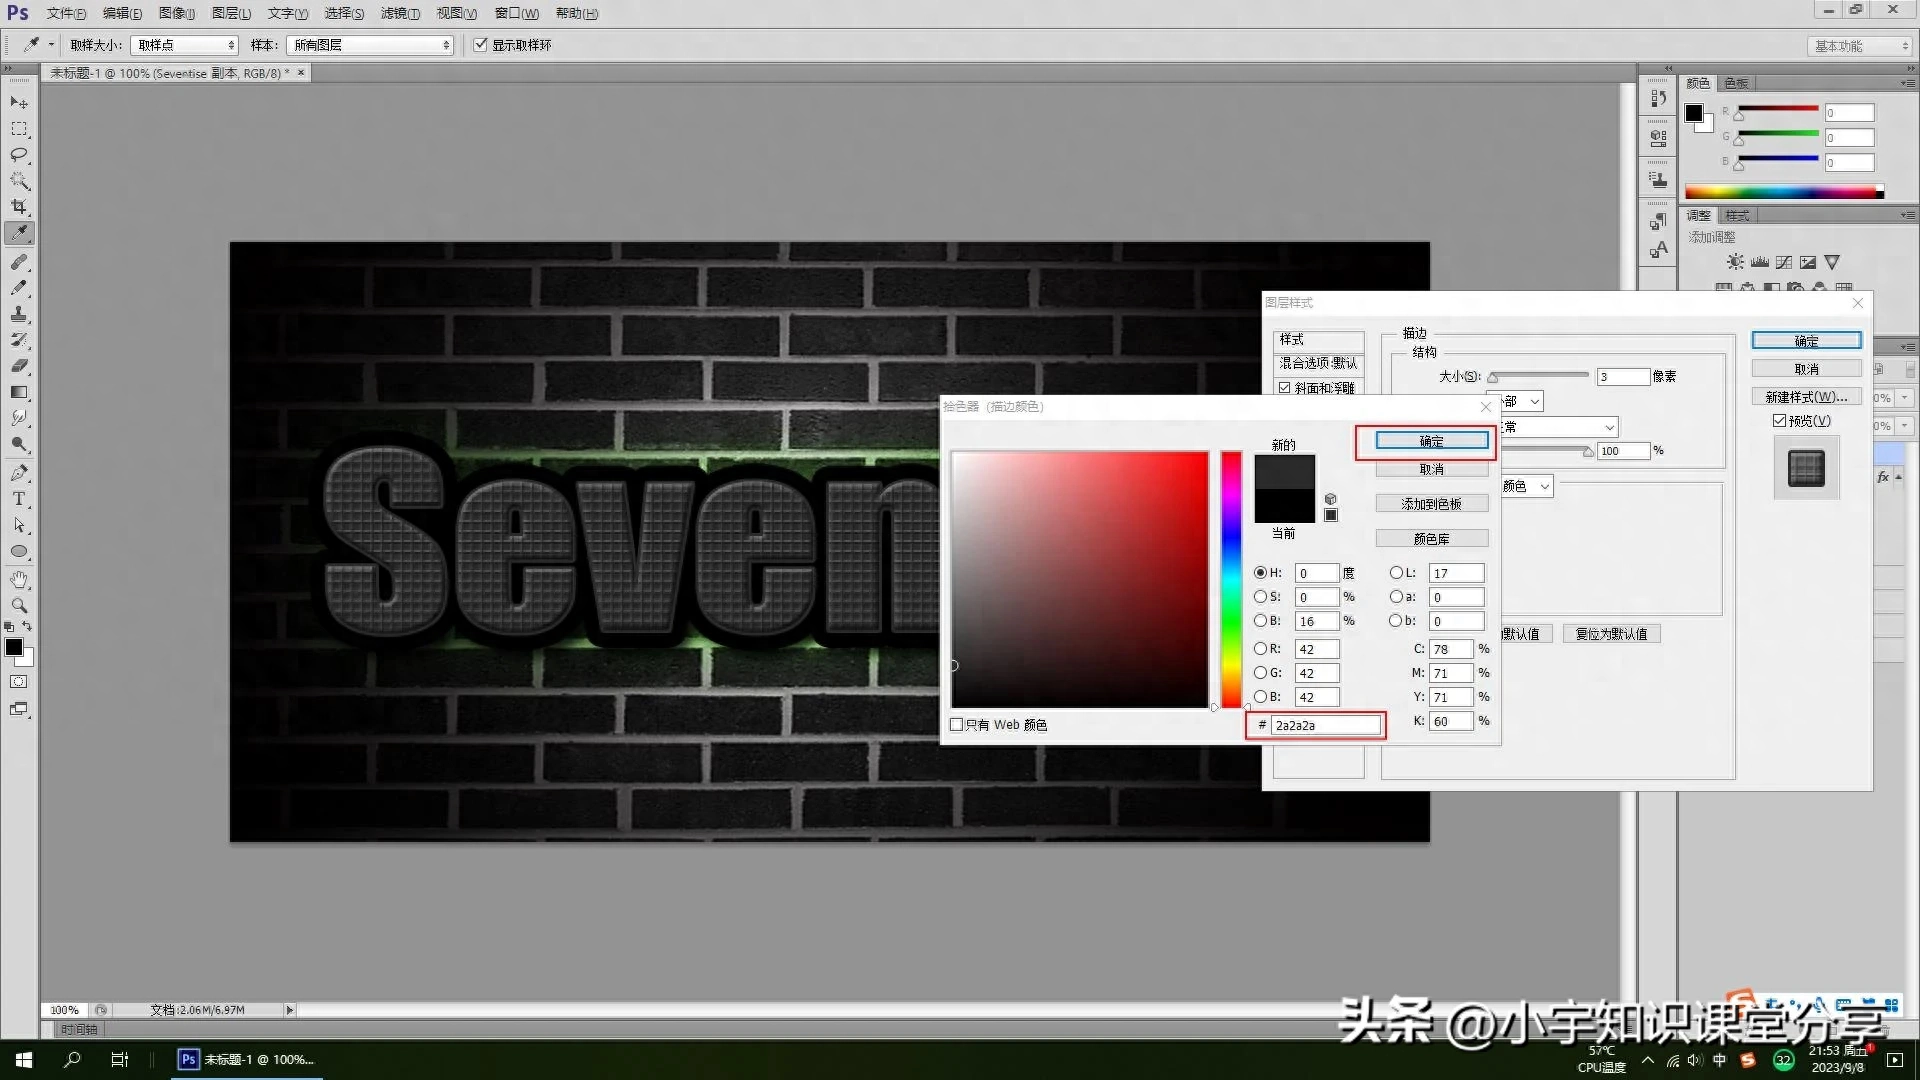
Figure 22
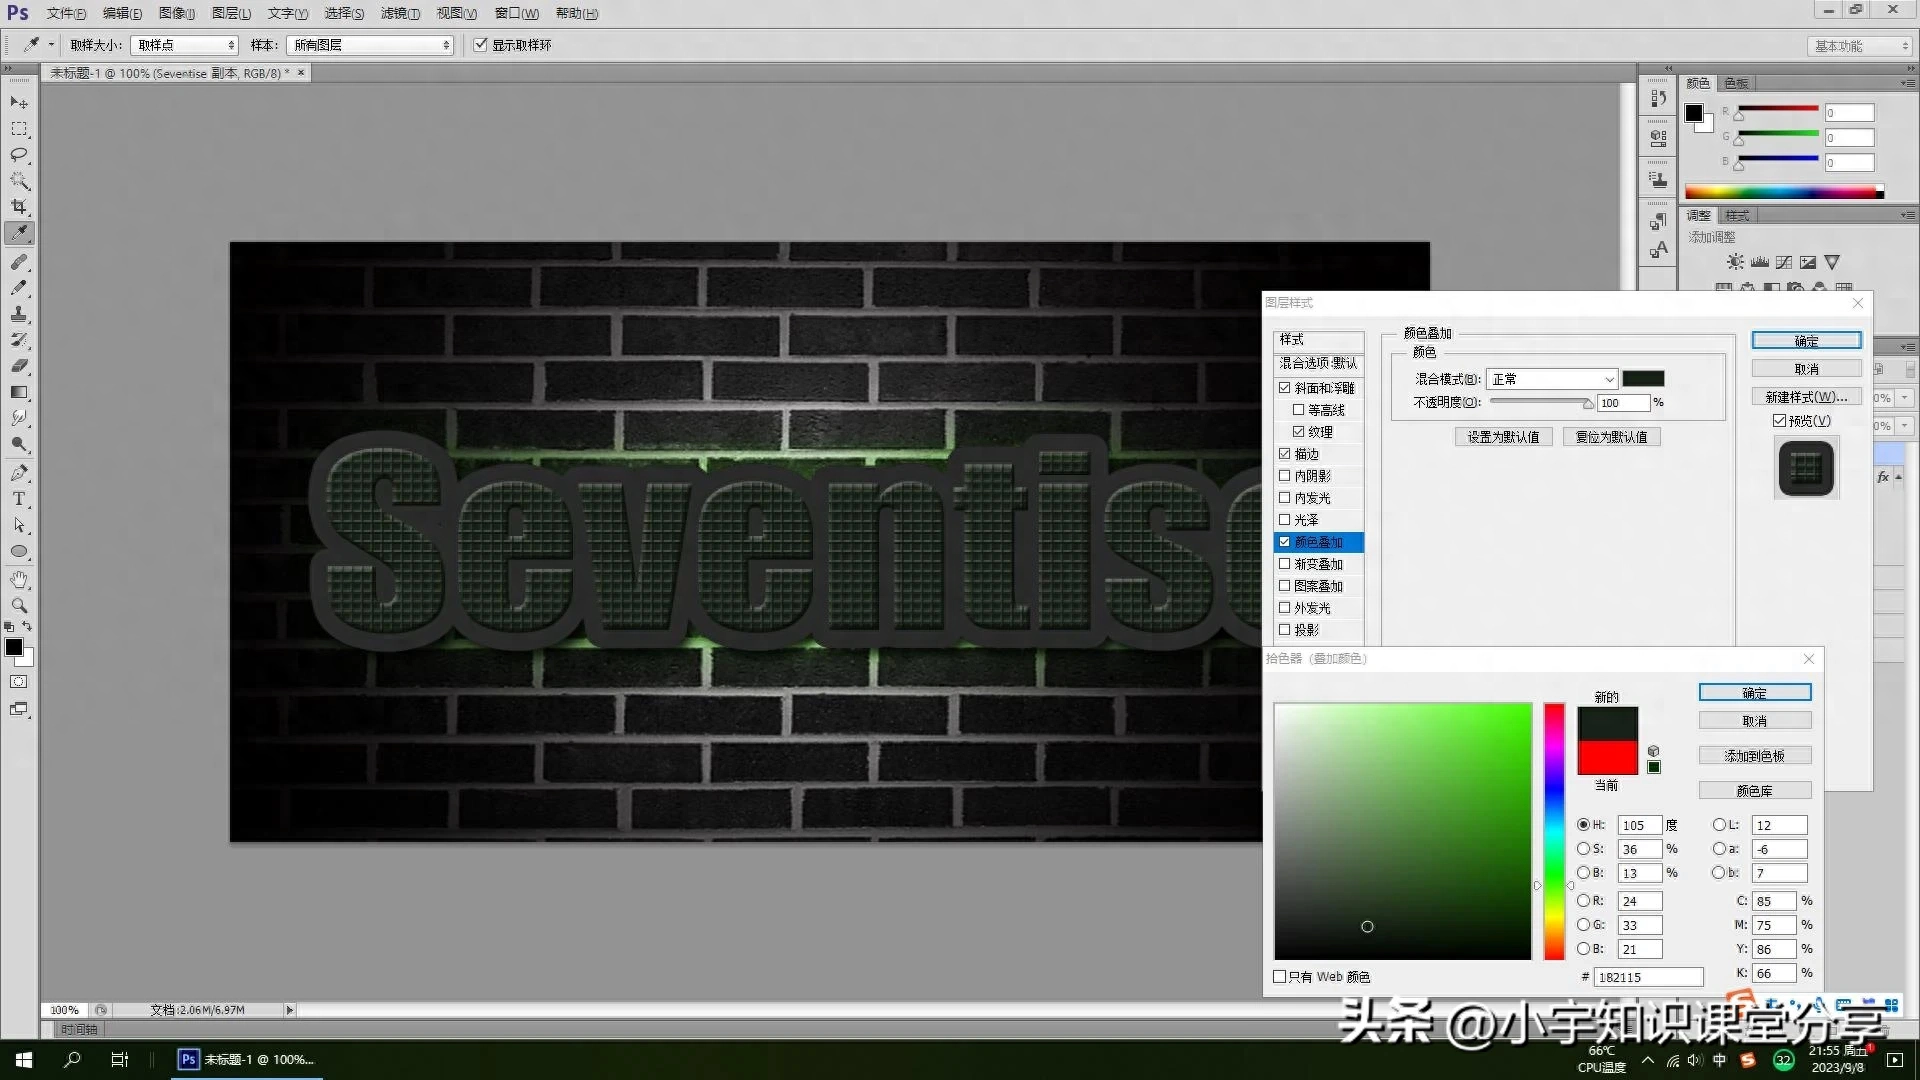
Figure 23
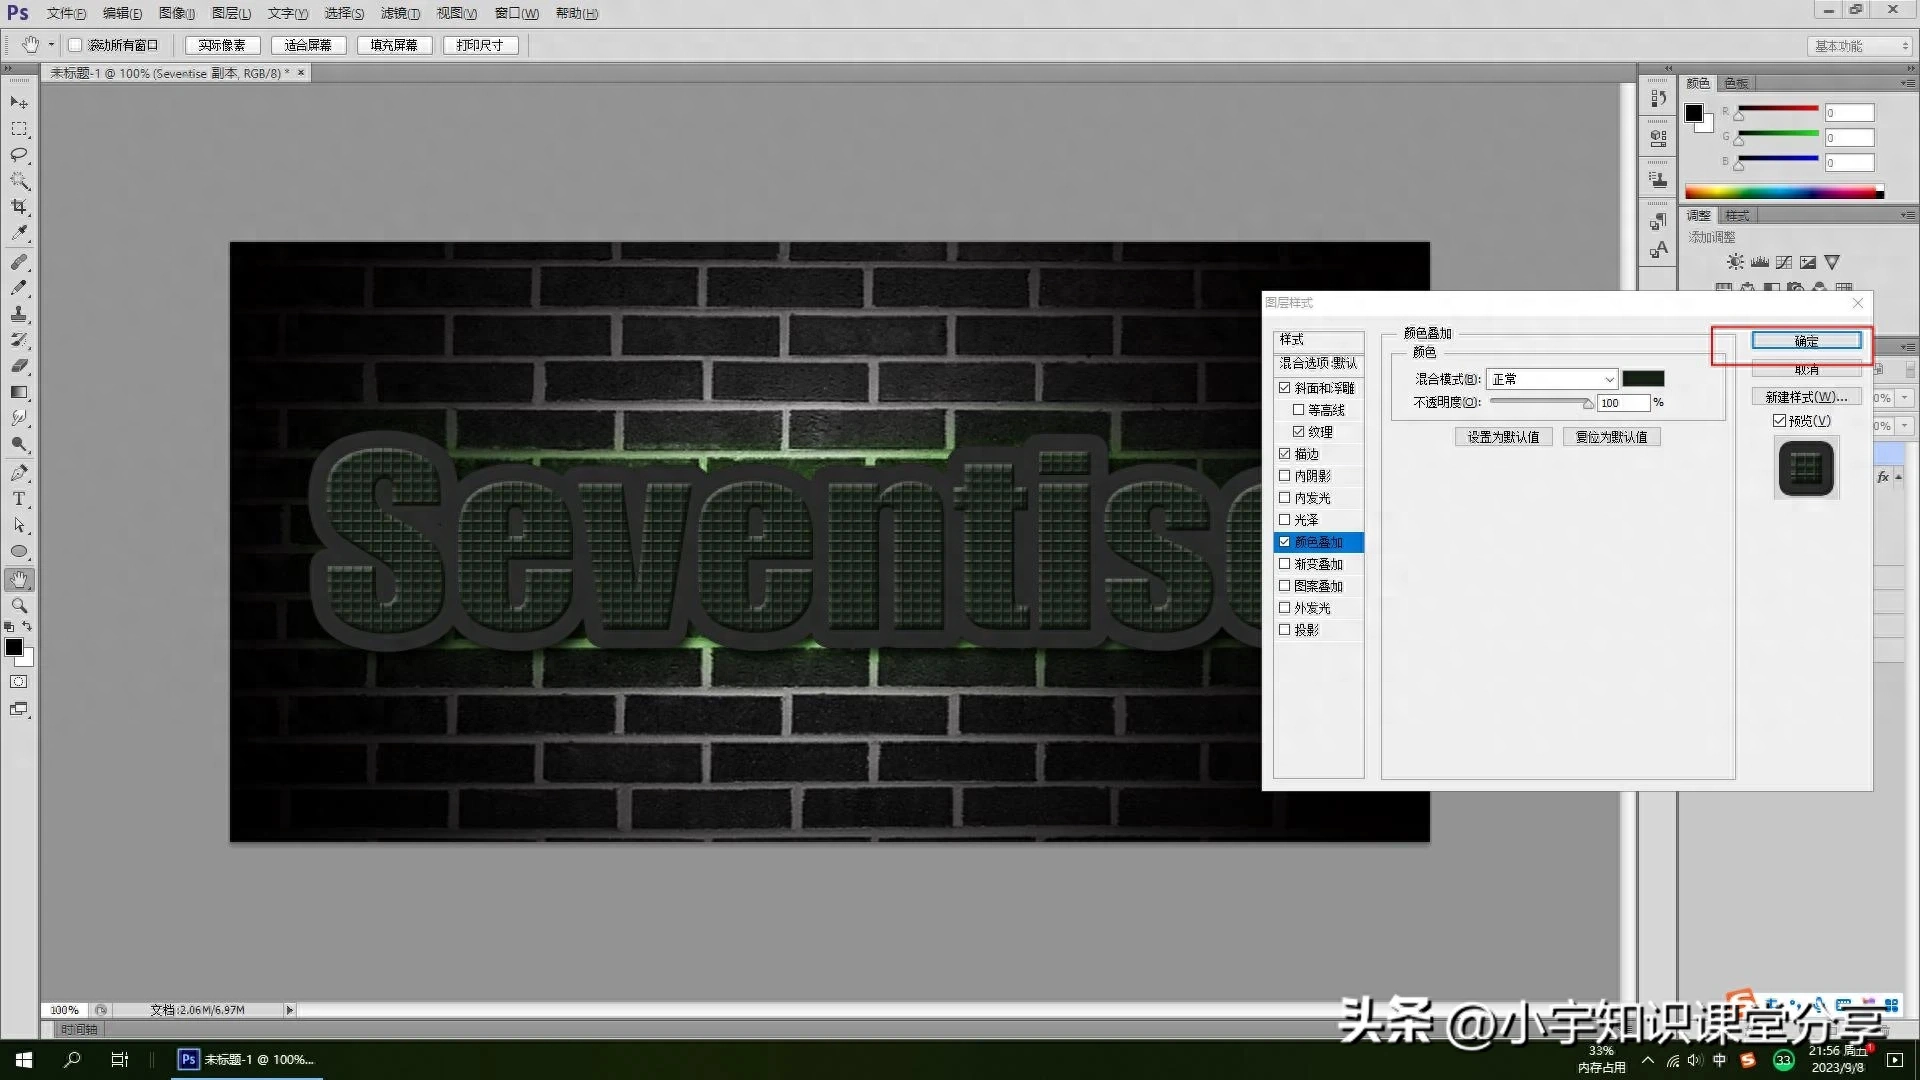
Figure 24
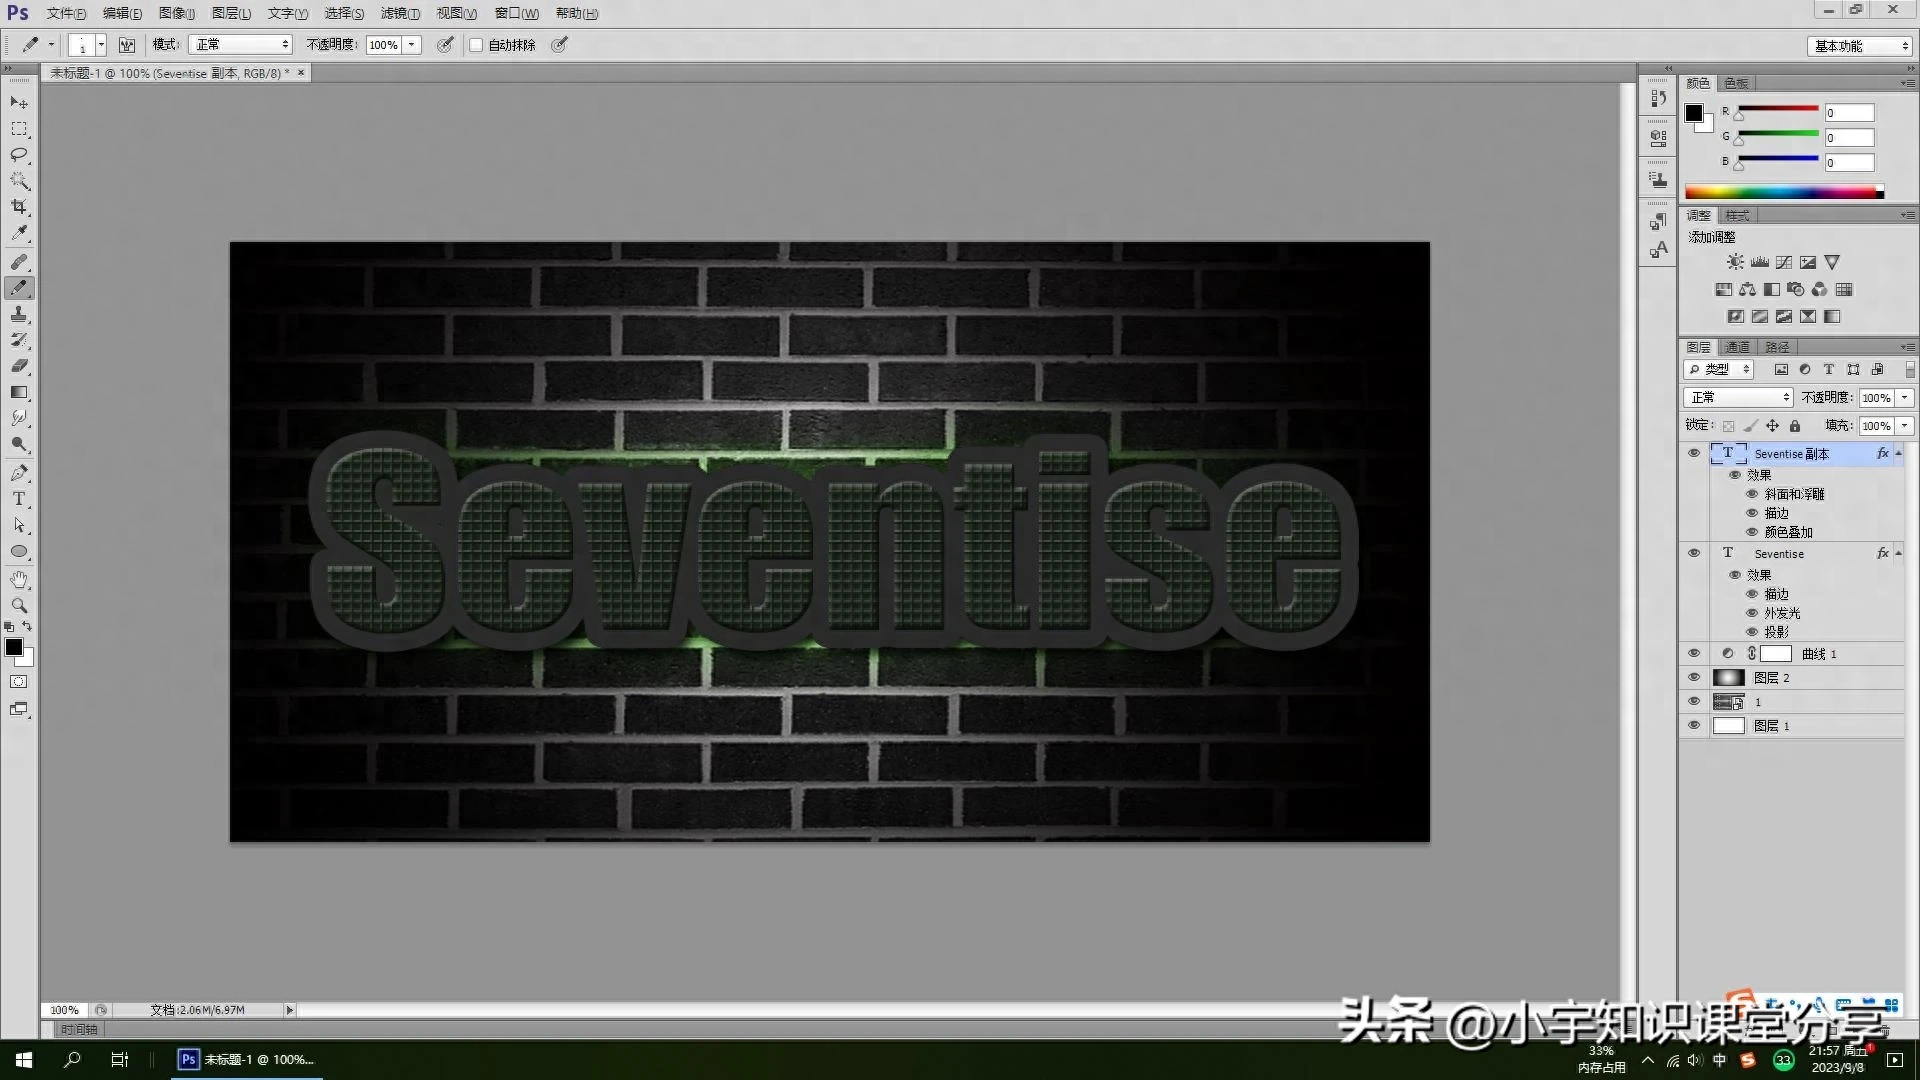
Figure 25
Step 9
Now that the texture is created, let’s make the light tube. Copy a text layer, and then clear the layer style. Double-click the layer to bring up the layer style, add a stroke, set the size to (10), and set the position to (center).
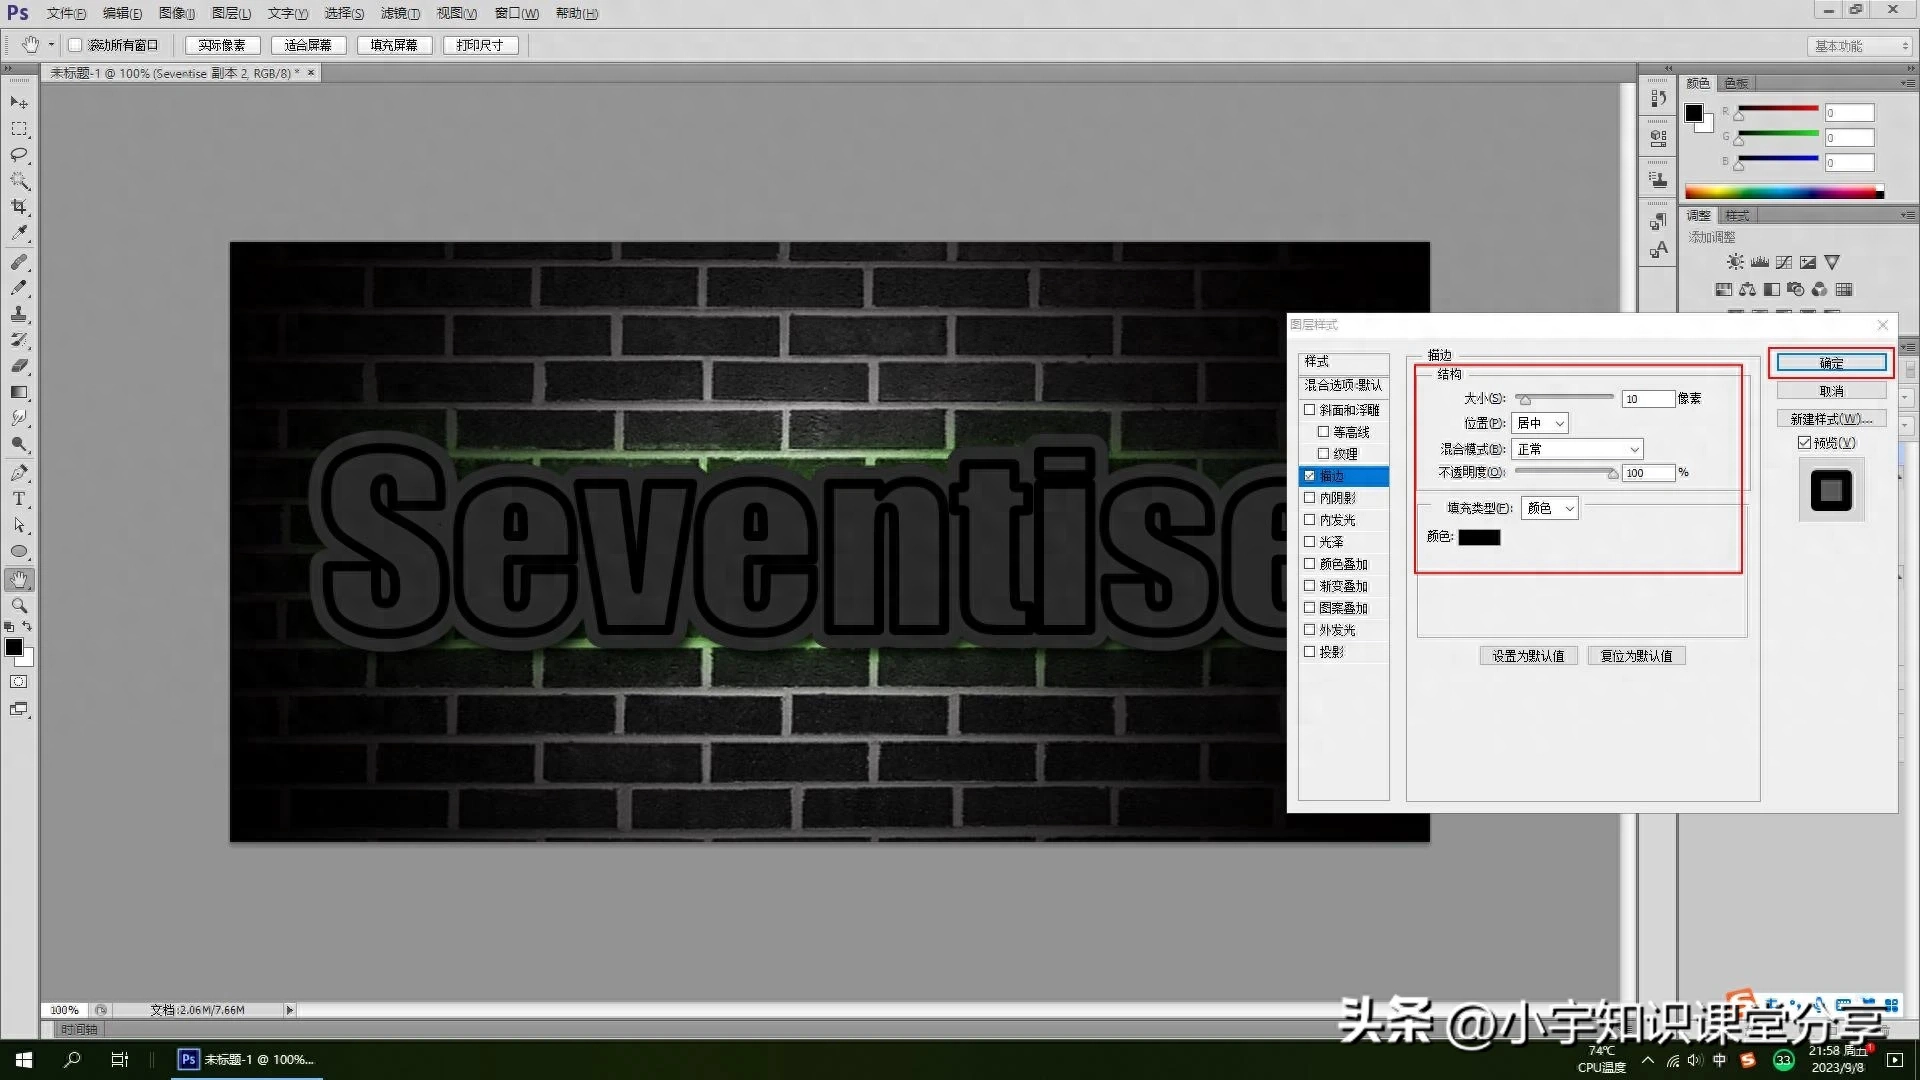
Figure 26
Step 10
Next, you need to master some skills. Press the right button of the mouse and choose to create a new layer. At this time, an unrestricted layer will appear, and then stroke the Delete the layer and keep the new layer for later use.
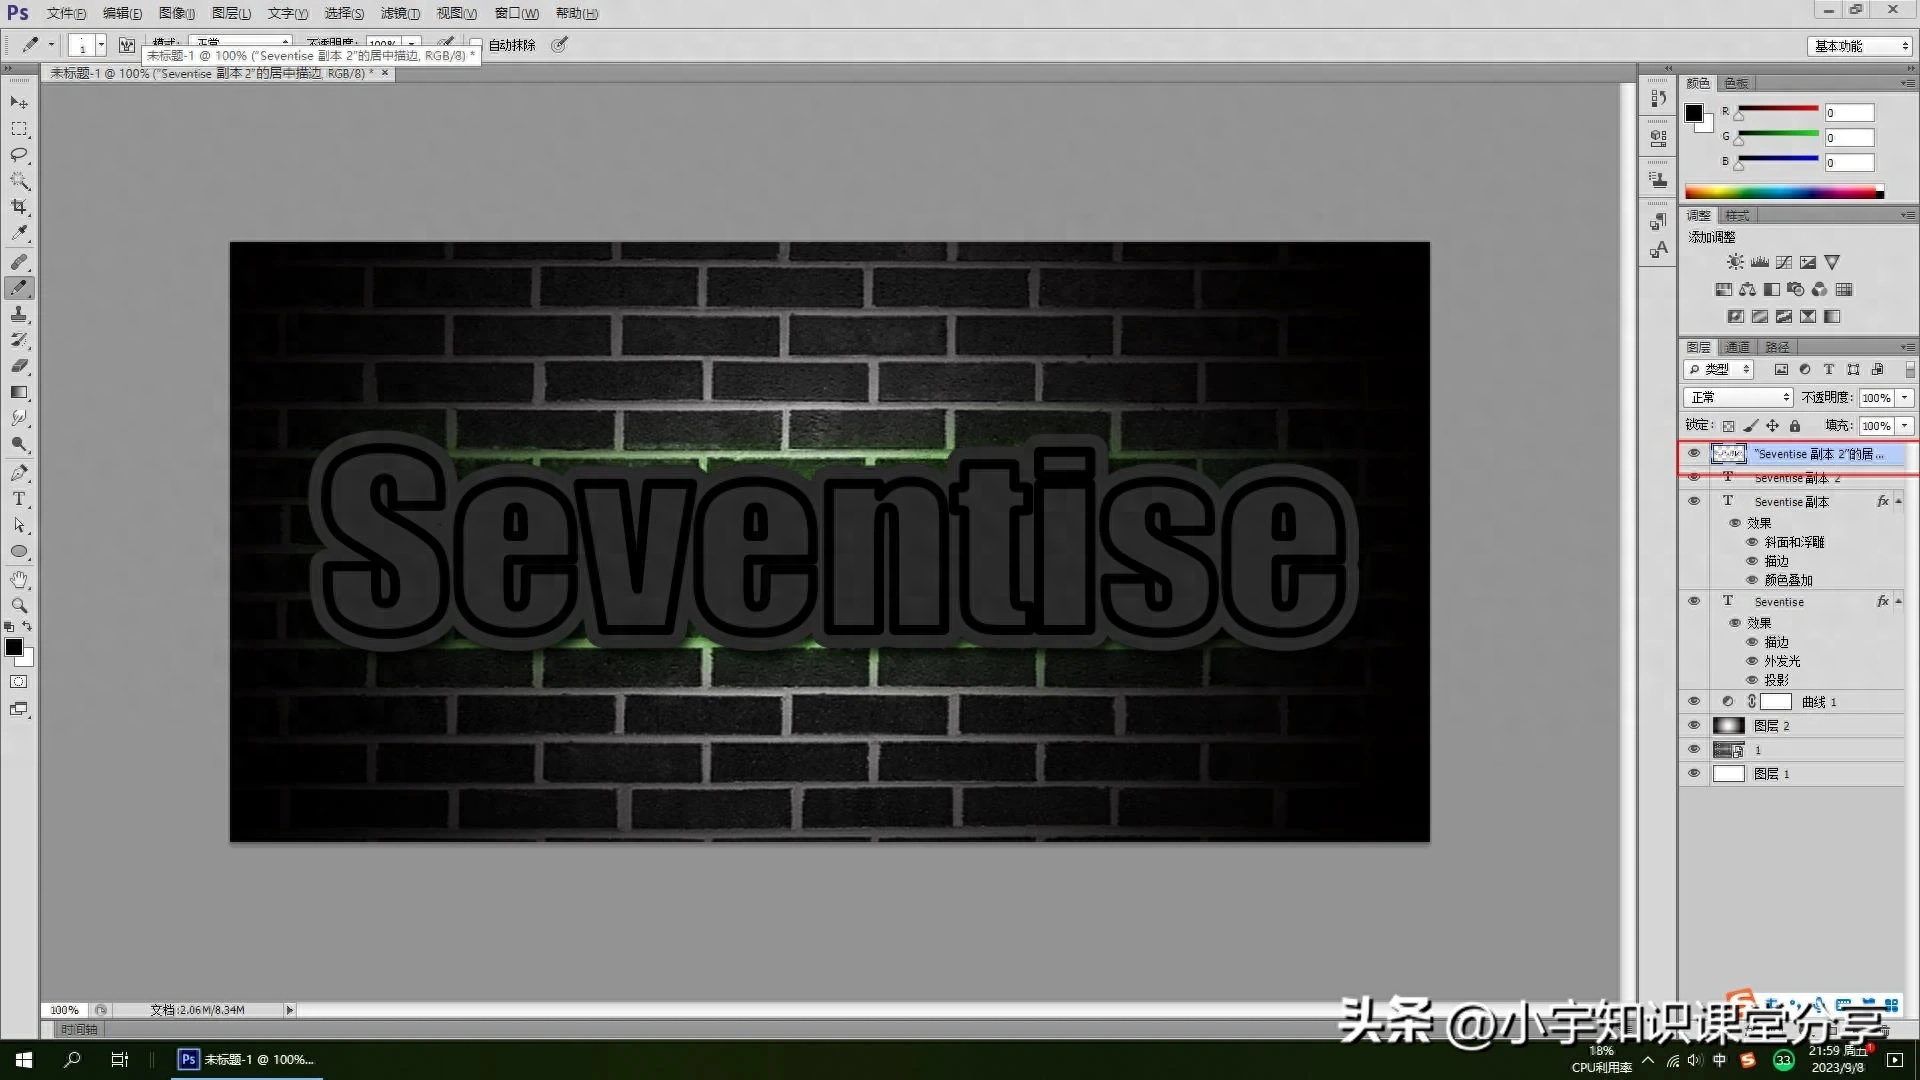
Figure 27
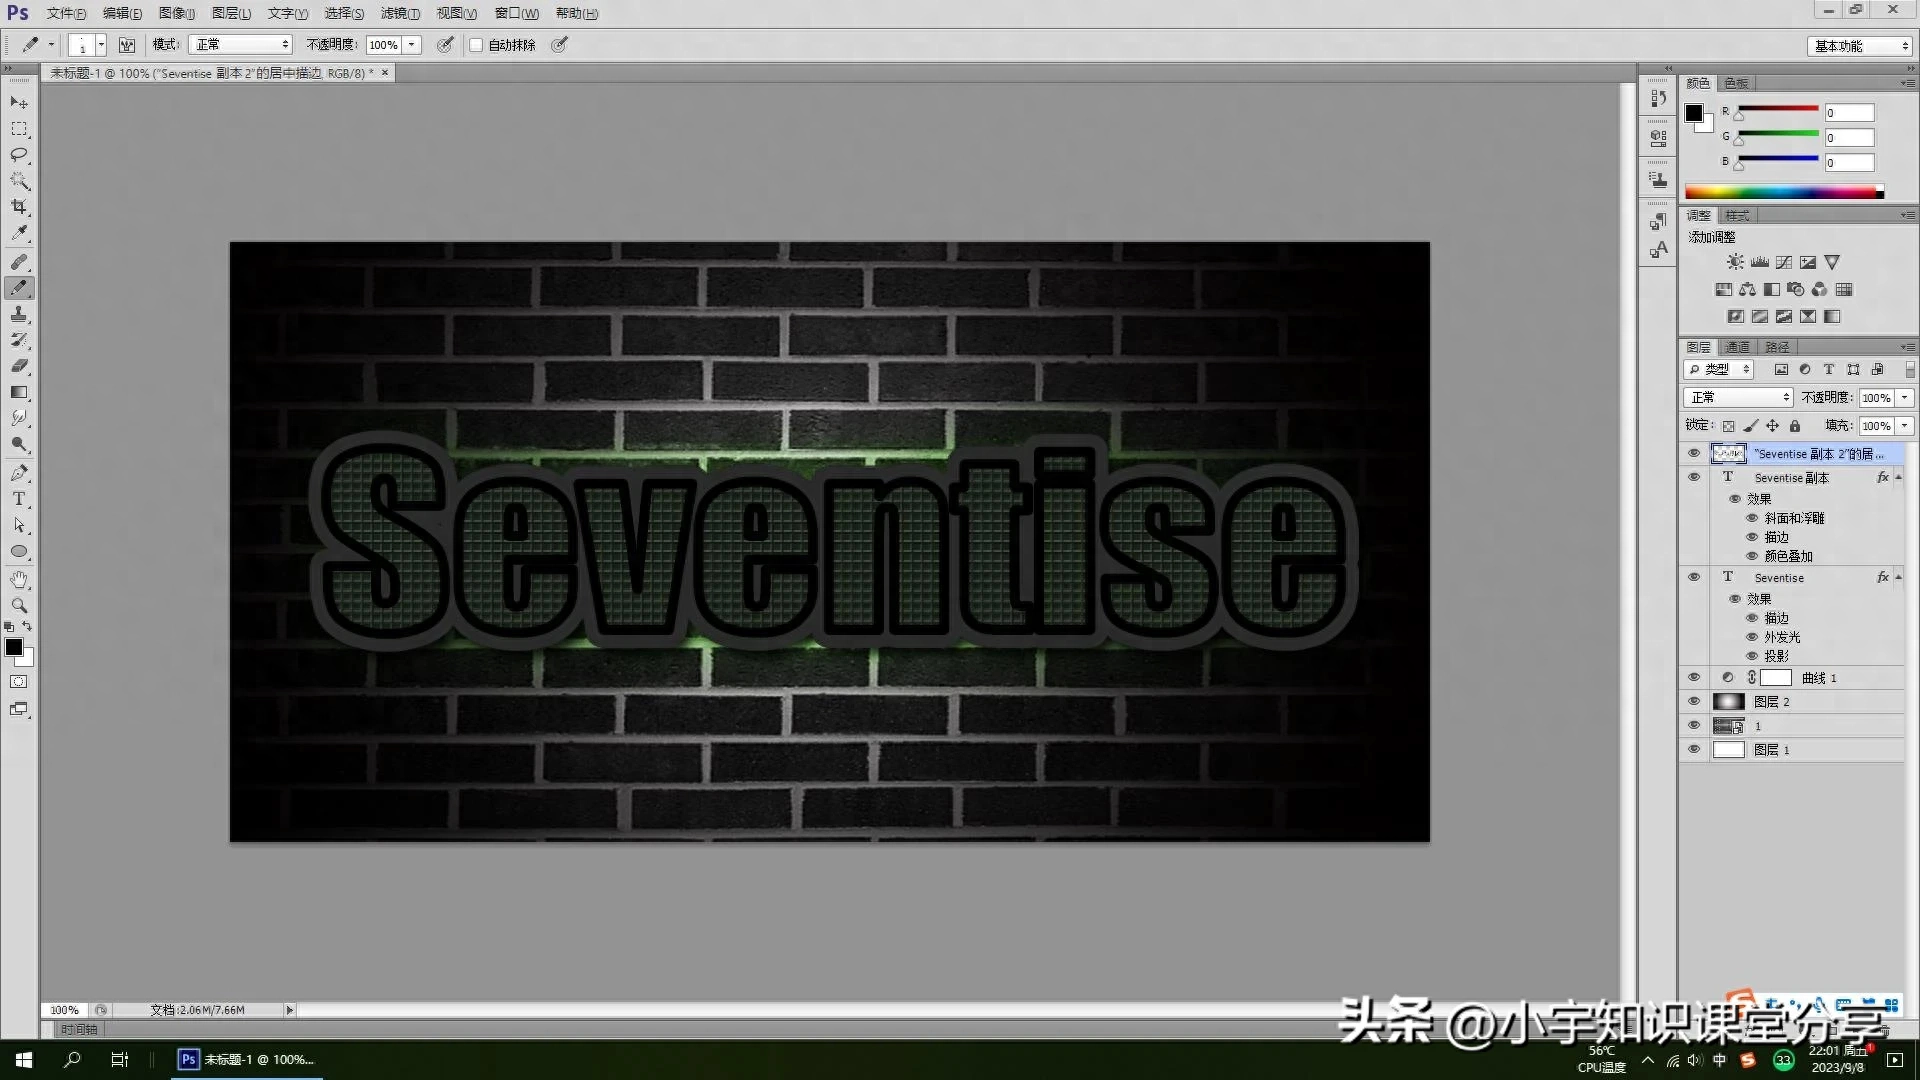
Figure 28
Step 11
Finally, add a glowing texture effect to the stroke. Repeat the operation. Double-click the layer to pop up the layer style, add bevel and embossing effects, and set the size to (9) pixels. Others Without any adjustments, add an inner glow, set the layer blending mode to "Linear Dodge" (Add), Opacity (20)%, color to white, size to (5) and the contours below set to (circular). ). Add Gloss, set the Blending Mode to (Color Dodge), set the Color to White, set the Opacity to (45)%, set the Distance to (5) and set the Size to (6). Next, add Color Overlay and set the Color to (46fb06) Light green, adjust it, and set the opacity to (65)%. Then add an outer glow, set the blending mode to Linear Dodge (Add), the opacity to (50)%, the noise to (3)%, and the size to (15) pixels. Finally, adjust the projection appropriately, setting the distance to (12) pixels and the size to (9) pixels.
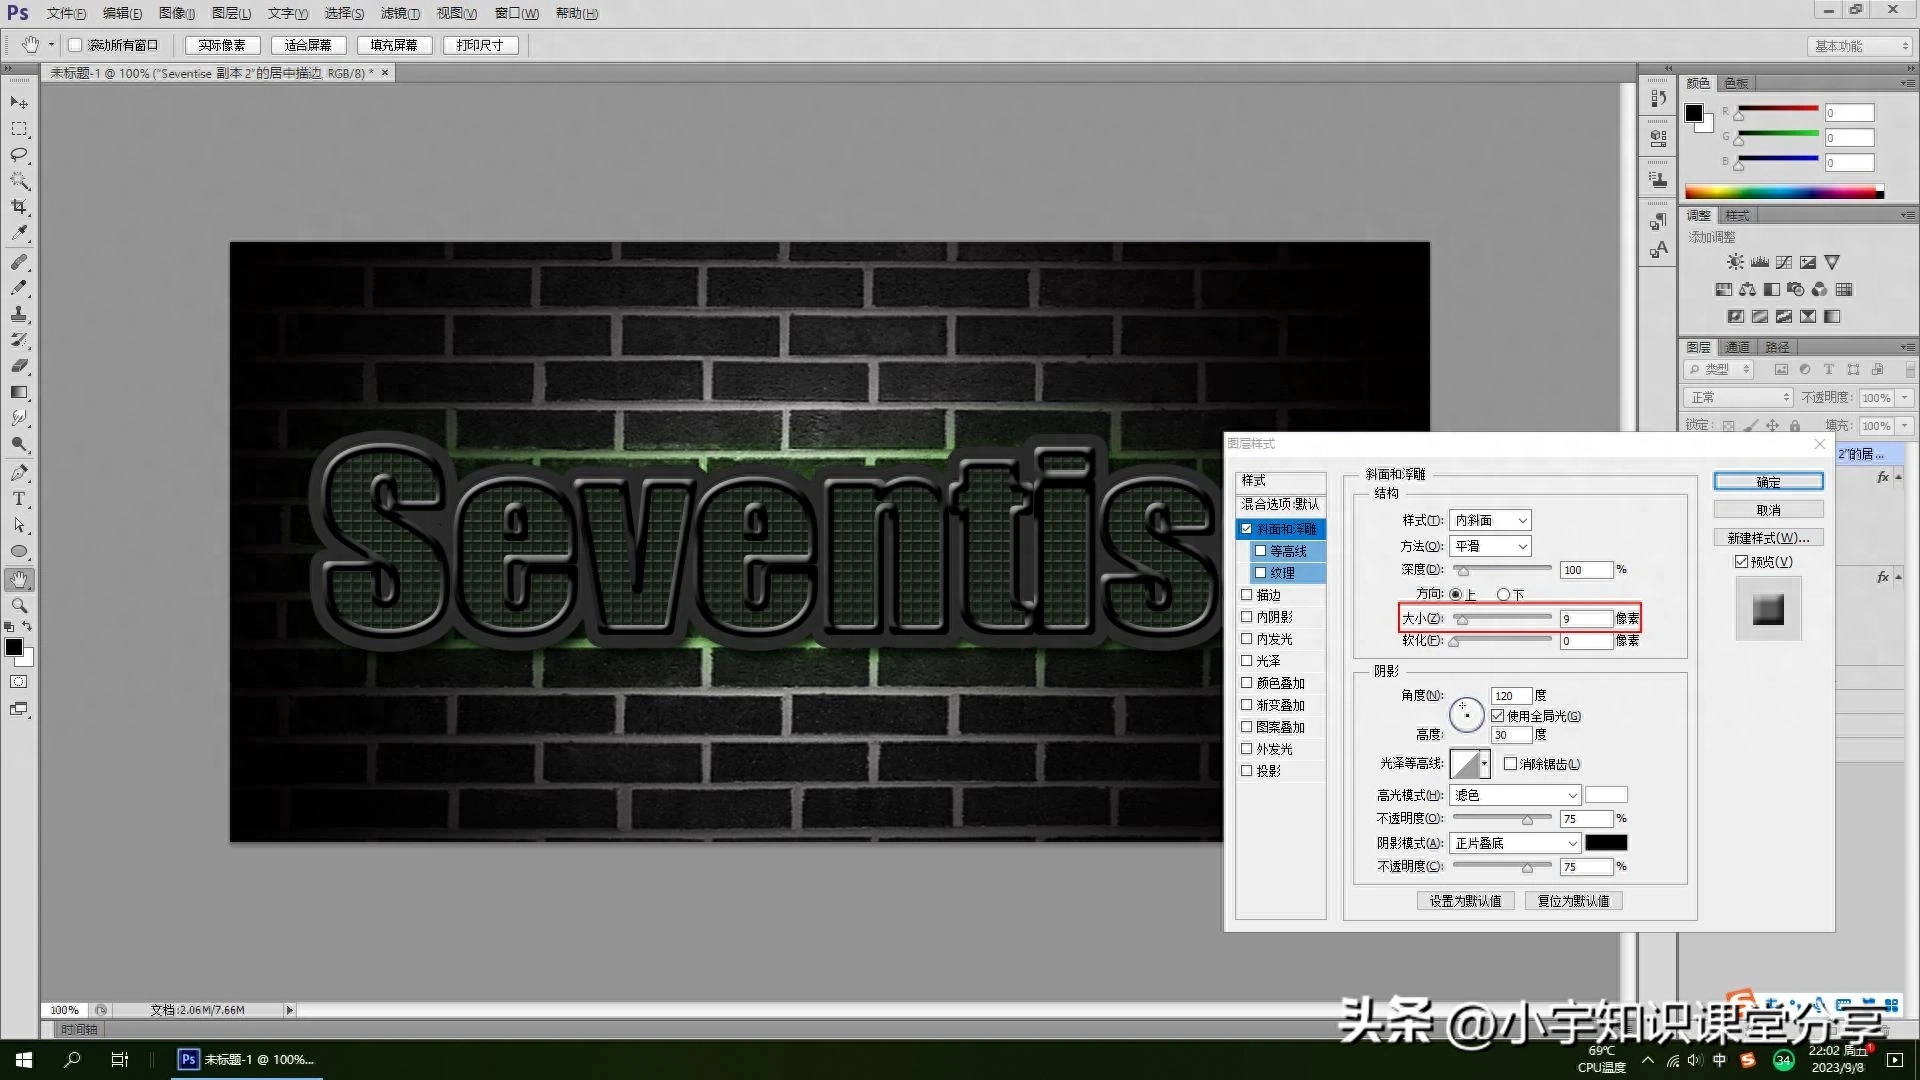
Figure 29
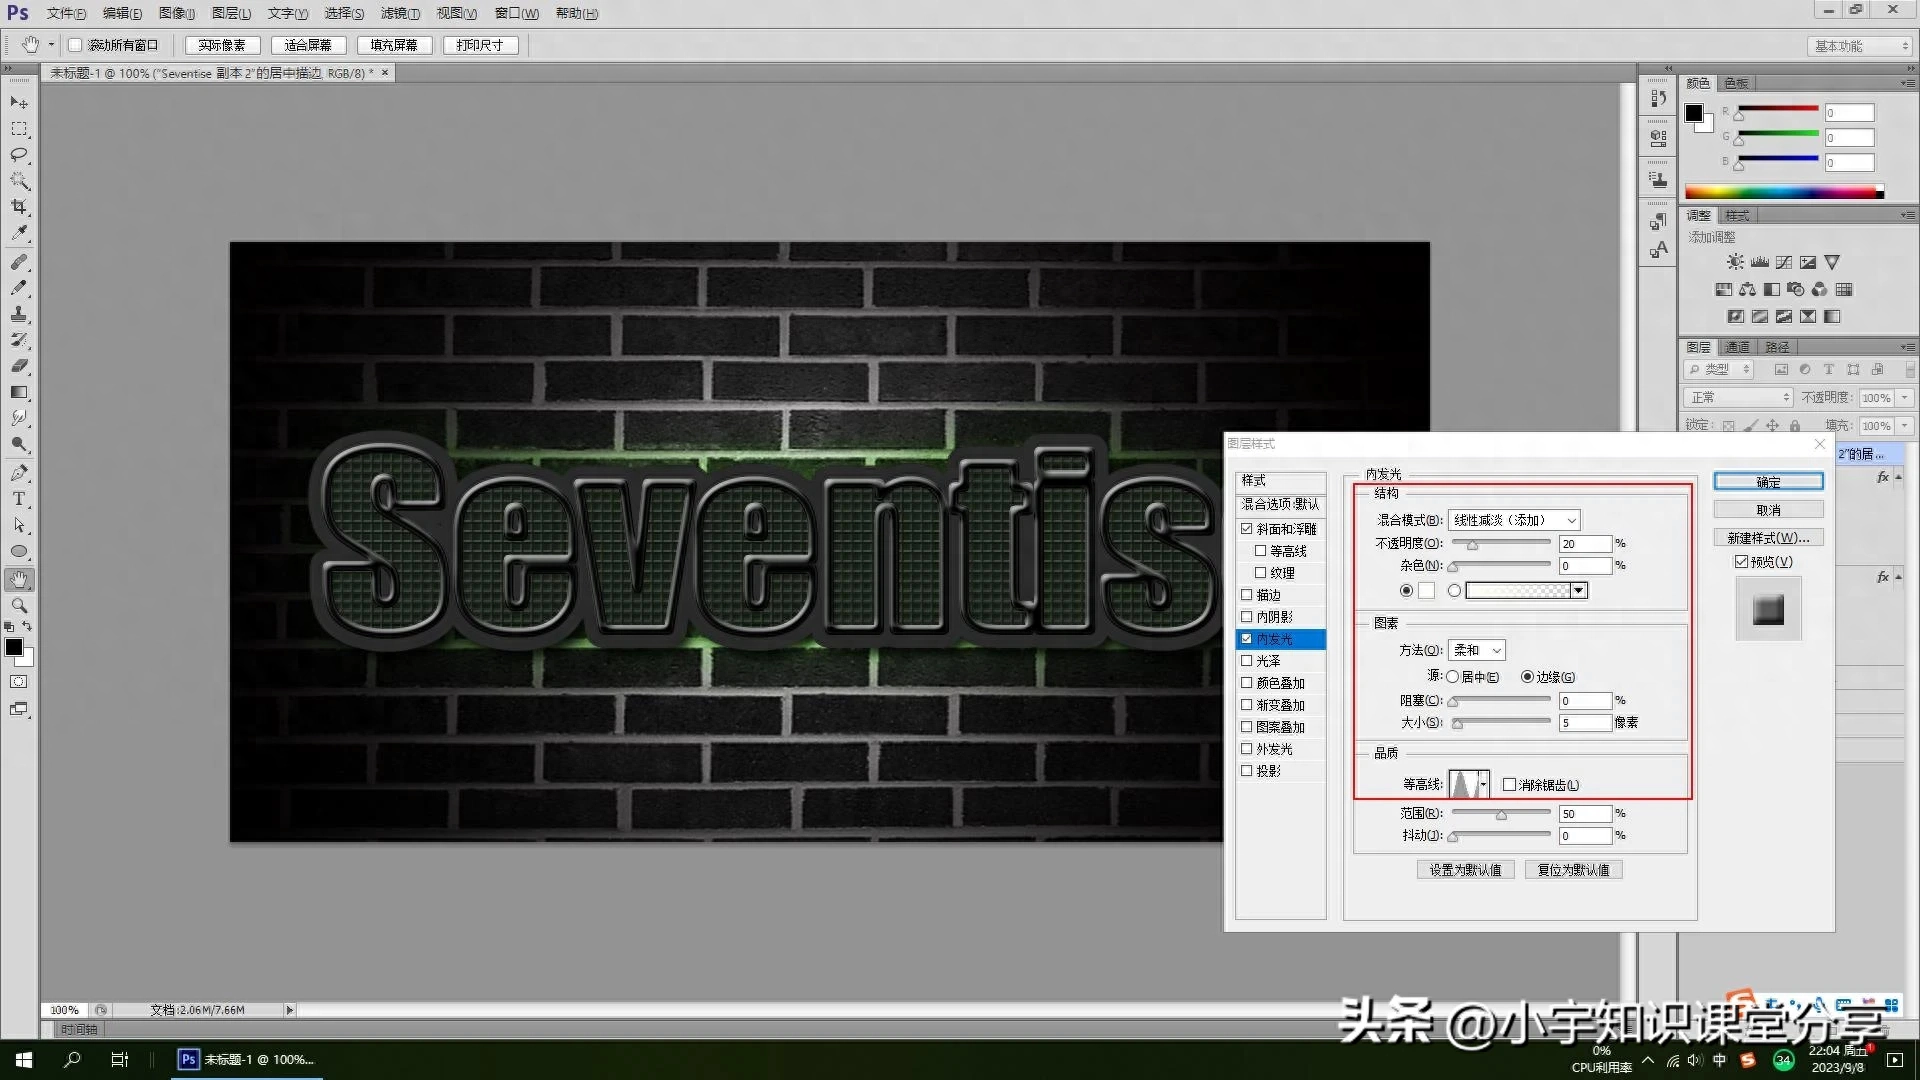
Figure 30
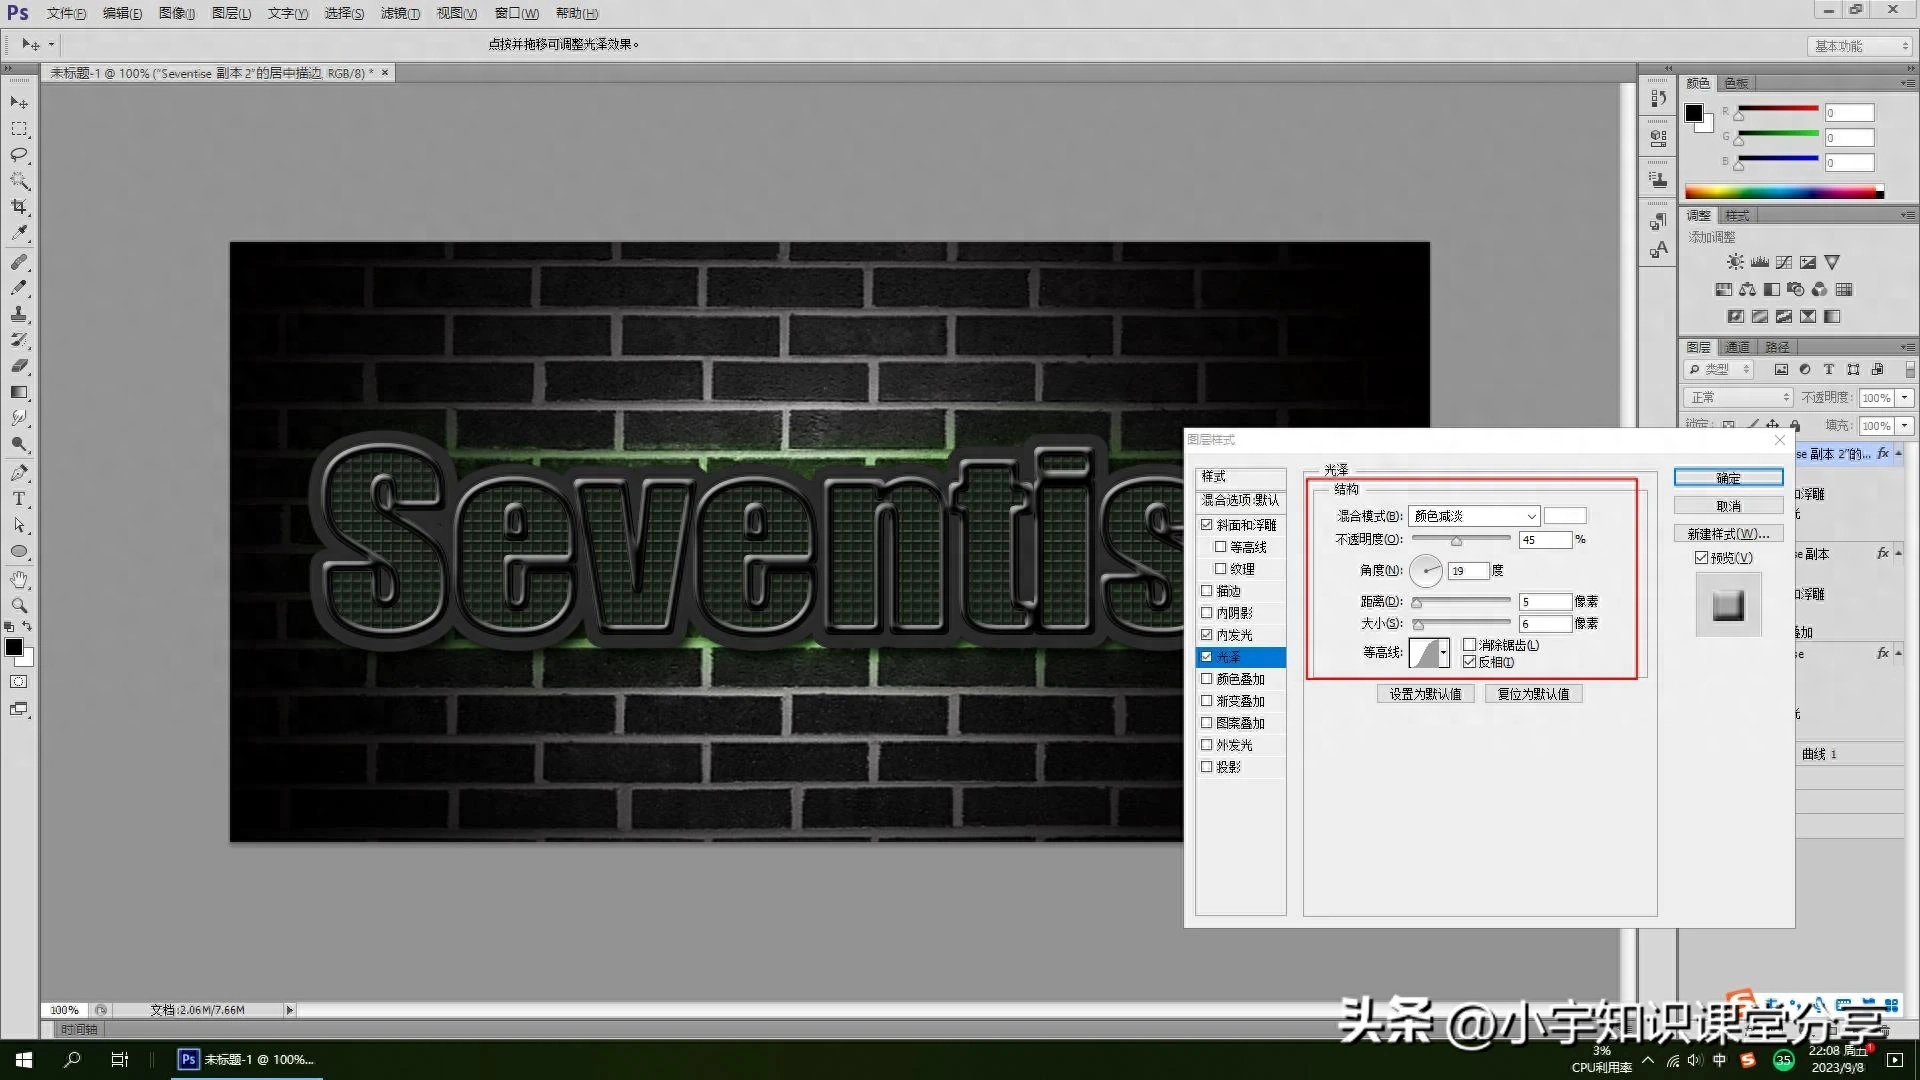
Figure 31
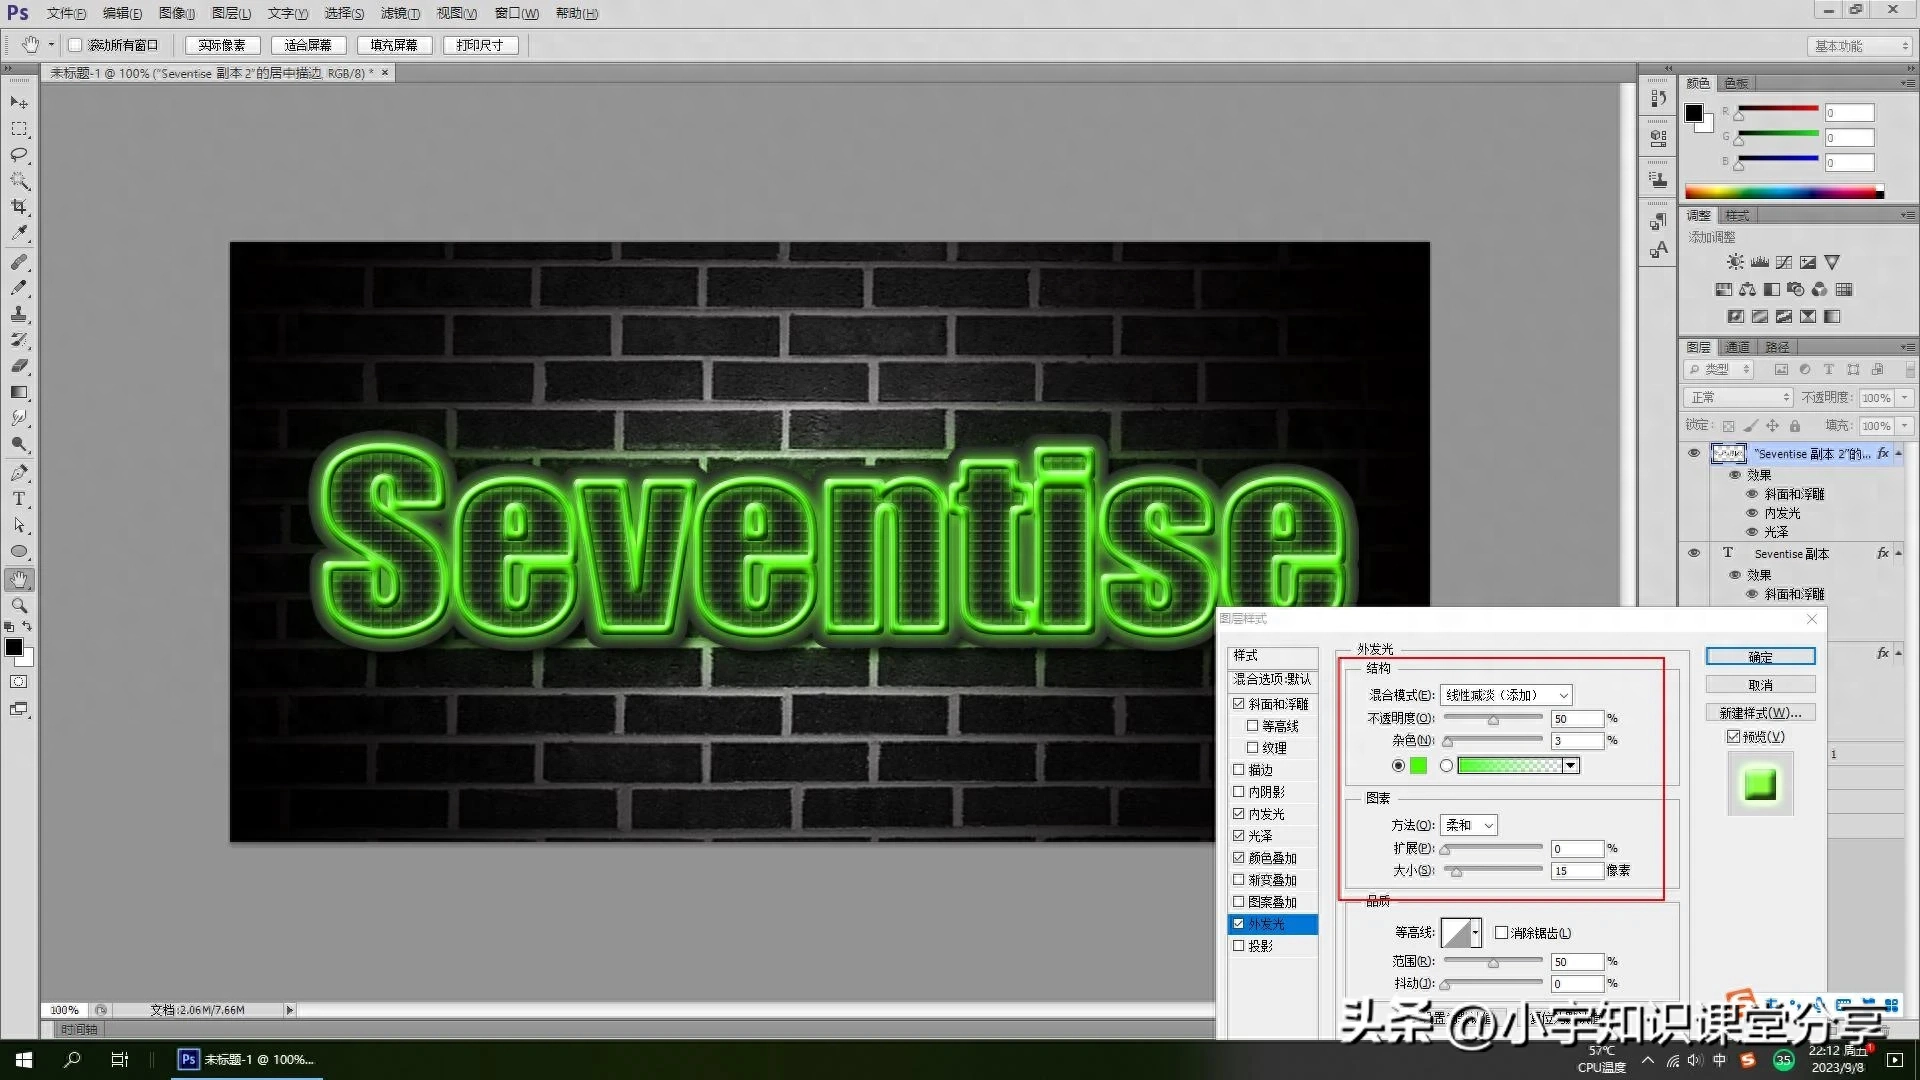
Figure 32
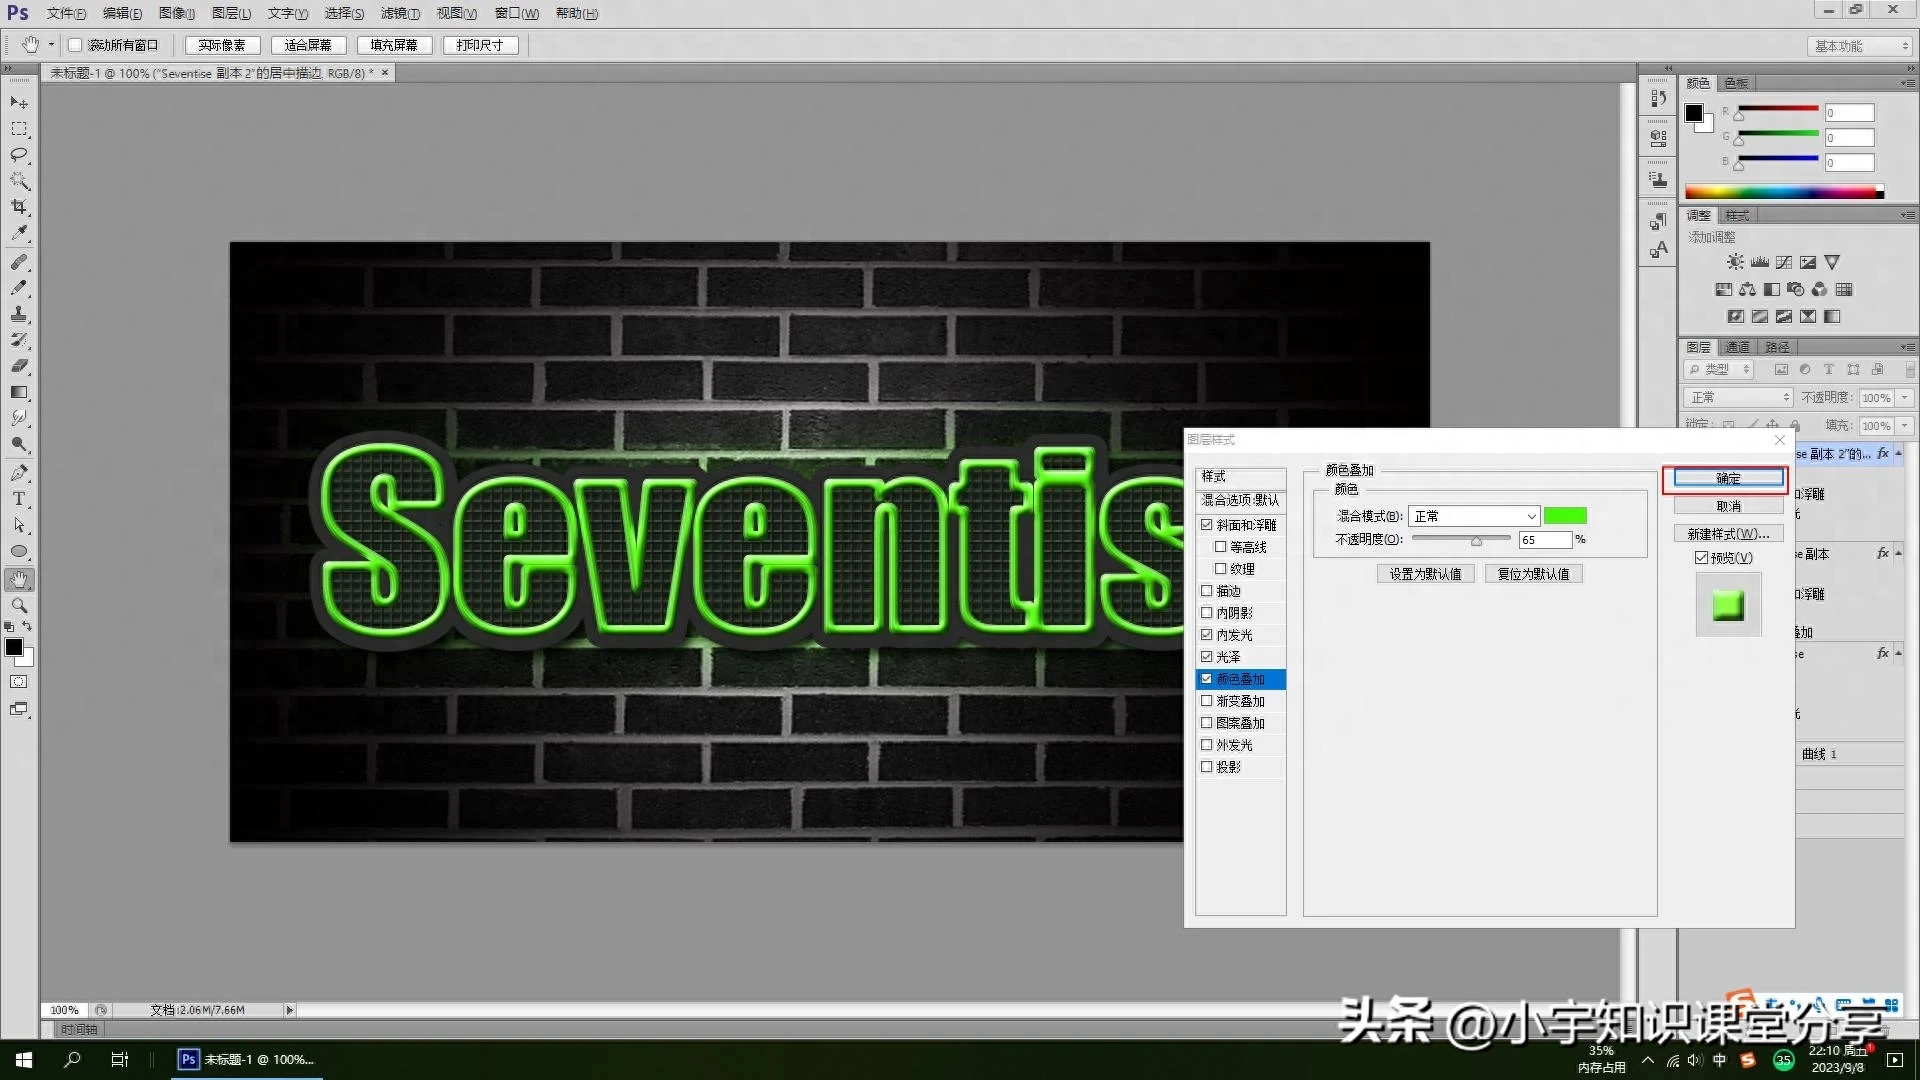
Figure 33
Figure 34
Step 12
Such a beautiful green neon tube effect word is ready. In order to make it more realistic, you can use the eraser tool to draw the gap of the light tube and simulate it to make the text More real.
Figure 35
Although it is a bit difficult, mastering the basic knowledge is the basic path to learning. Some people say that this text can be replaced with a colored background. I think it is better to have a darker background. This will highlight the bright and bright effect of the text. There are many methods for making neon tube effect words. You can refer to the final renderings.
Final renderings
If you like my articles or my works, don’t forget to like and follow to support me. Thank you !
Articles are uploaded by users and are for non-commercial browsing only. Posted by: Lomu, please indicate the source: https://www.daogebangong.com/en/articles/detail/PS-ding-yi-tu-an-zhi-zuo-lyu-se-ni-hong-deng-guan-xiao-guo-zi.html
 支付宝扫一扫
评论列表(196条)
测试