Today I will teach you how to make a card with a hollowed-out font. The overall texture of the card is very strong. The focus is not only on making the hollowed-out font, but also on the texture of the small rectangular card in the picture and the making of lines. Of course, there is more than one way to make hollow fonts. If you are interested, you can also try other methods. Here I will talk about using shape layers to make hollow ladders.
First on the renderings!

Step1
Install fonts and add pattern styles first.
Step2
Create a canvas with a size of 909*620px, place Cardboard> on the background layer
Step>
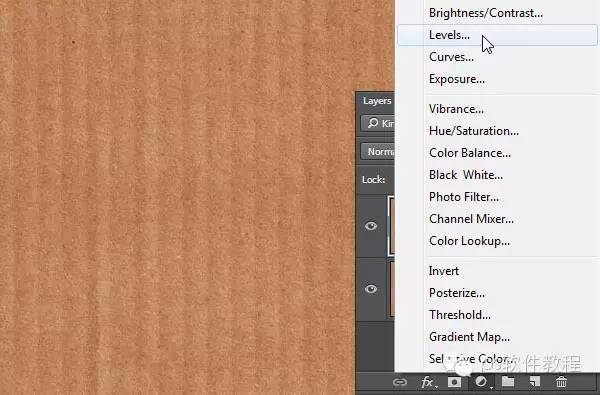
Create an adjustment layer and choose Levels.
Step>
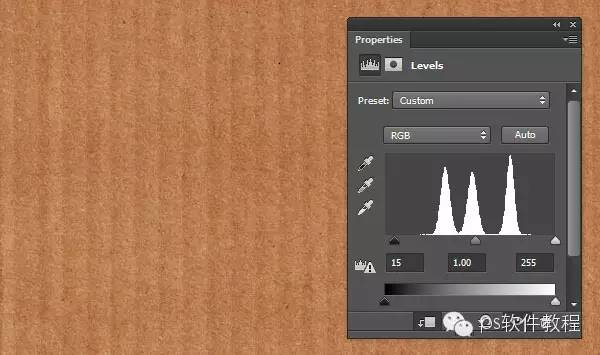
Alt-click the Levels adjustment layer to create a clipping mask. Adjust the value of the dark part in the color scale to 15.
Step>
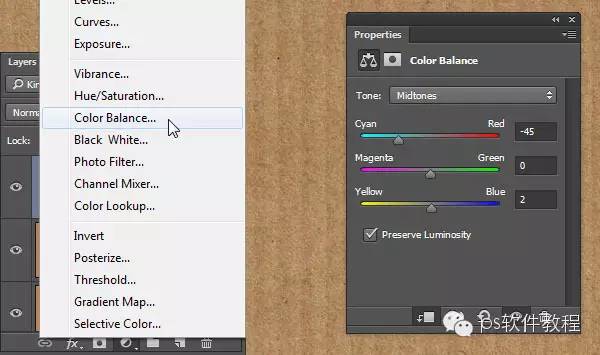
Create another adjustment layer and select Color Balance. Also hold down the Alt key to create a clipping mask. Adjust the middle tone, the values are -45, 0, 2.

Step>
Choose the rectangle tool, create a rectangle with a size of 140*200px, and fill it with #edebdf

Step>
Select the ellipse tool, click "Minus top shape" in the property bar, and then click the icon with similar settings on the property bar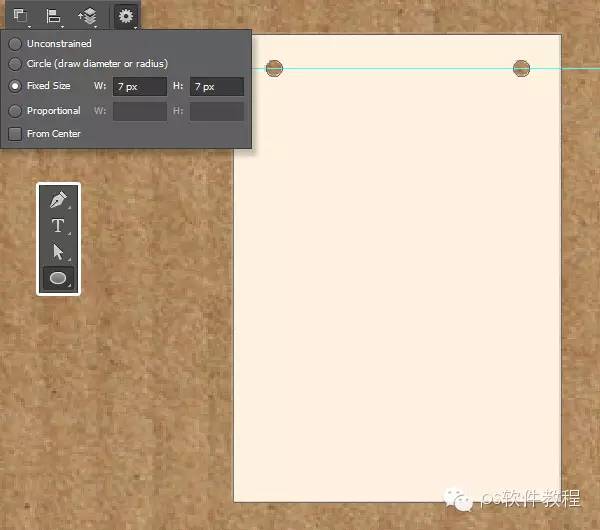 , choose a fixed size, and the width and height are 7. (You can draw a reference line to determine the position of the circle)
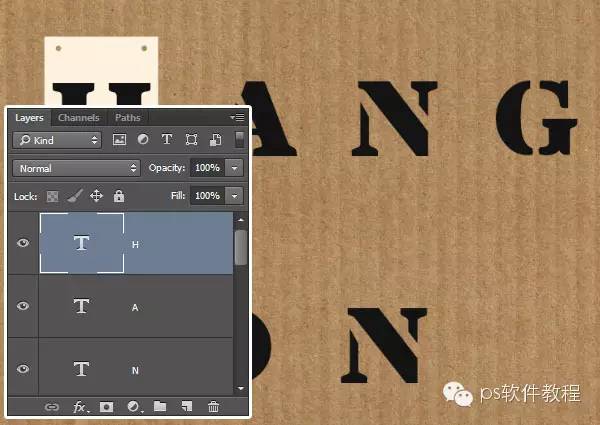
Step>
Select the font tool, set it to uppercase, and select the previously installed Lintsec>
Step>
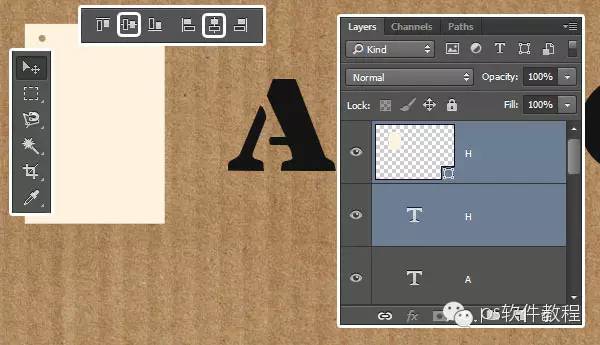
Copy the previously drawn rectangular cards, the number is the same as the number of letters you wrote, place a letter layer under each rectangular card layer, and the rectangular card layers are named after the letters below to avoid confusion. Take the H letter as an example, select the H letter layer and the H card layer above it at the same time, click center alignment and horizontal alignment in the property bar. Make sure the letter is in the center of the card. Other letters and so on.
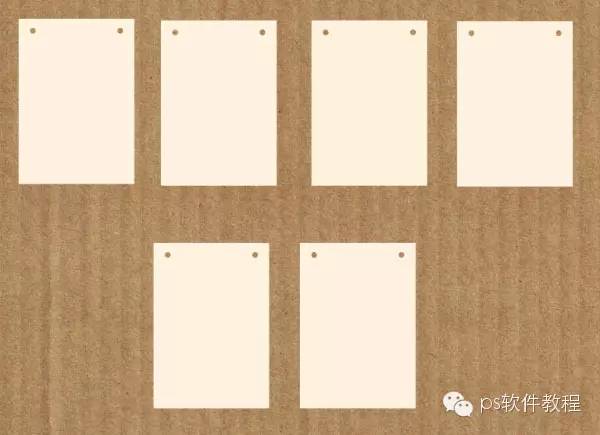
The effect after finishing is like this: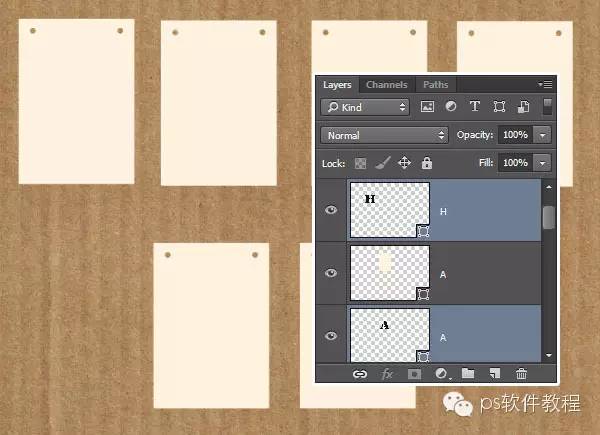
Step10
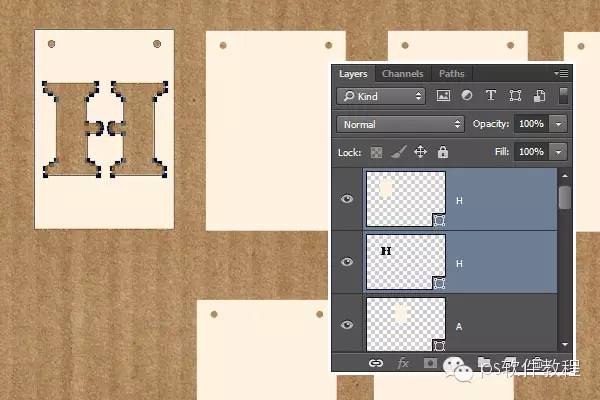
Hold down the ctrl key, select all letter layers, right-click, and select "Convert to Shapes"
Step11
Take H as an example, select the H letter layer and the H card layer at the same time, click "Layer-Merge Shapes-Minus Overlapping Shapes". In this way, a hollowed-out character effect is obtained. The same method for other letters.
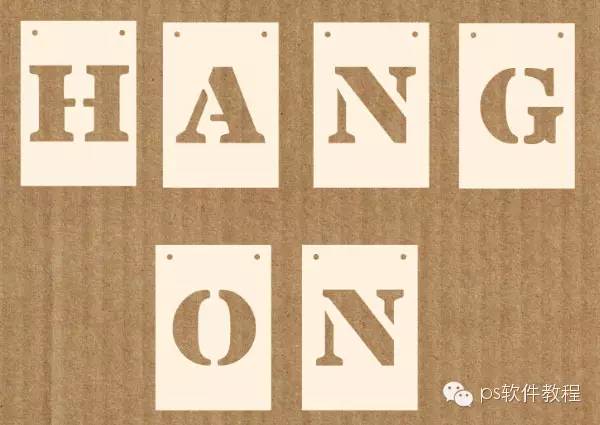
The effect after finishing is like this:
Step12
Let's start to make the projection of the card, also take H as an example, copy the H hollow layer made earlier, and put it under the original layer. Double click on the duplicate layer and change its color to #afaba3. Do the same for other letters, then select all layers, right click: "Convert to Smart Object"
Step13
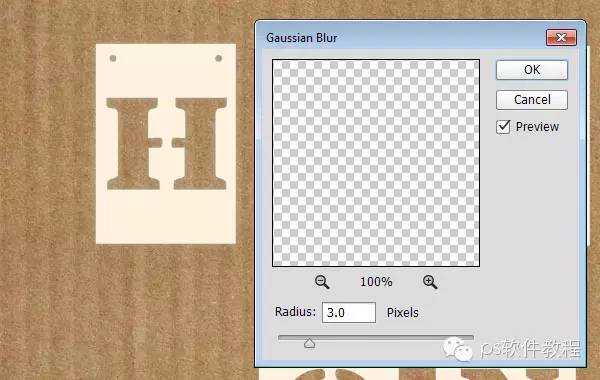
Select all the copied layers, select Filter - Blur - Gaussian Blur, and adjust the value to 3
Step14
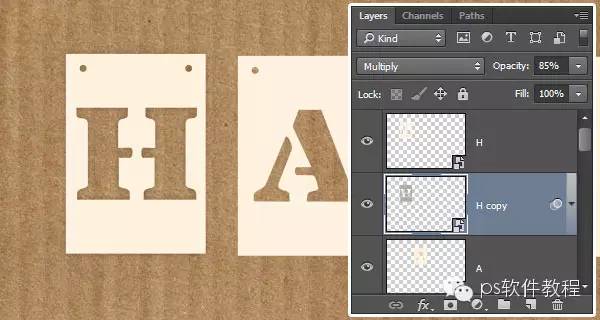
After adjusting the Gaussian blur of all duplicated layers, set the layer blending mode to Multiply and the opacity to 85%.
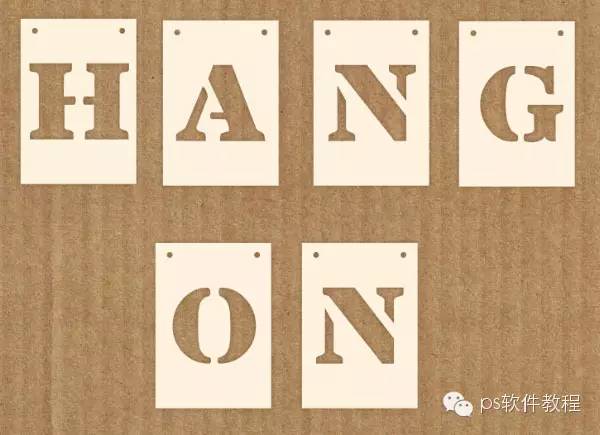
The effect after finishing is like this:
Step15
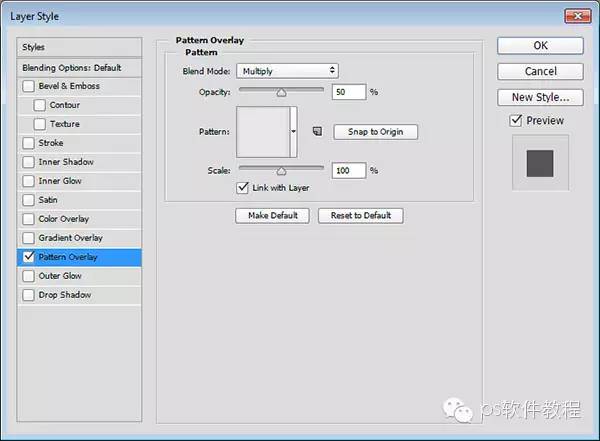
Next add styles to the cutout font card layers and their drop shadow layers. First select a hollow font card layer, double-click, select pattern overlay, select the pattern SoftWallpaper preset in the previous step, the blending mode is Multiply, and the opacity is 50%
Step16
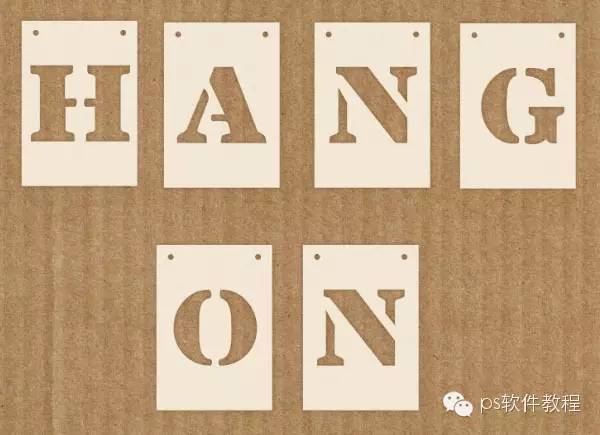
Right-click, copy the layer style, then select the remaining hollow letter card layers, right-click, and paste the layer style. The final effect is as follows:
Step17
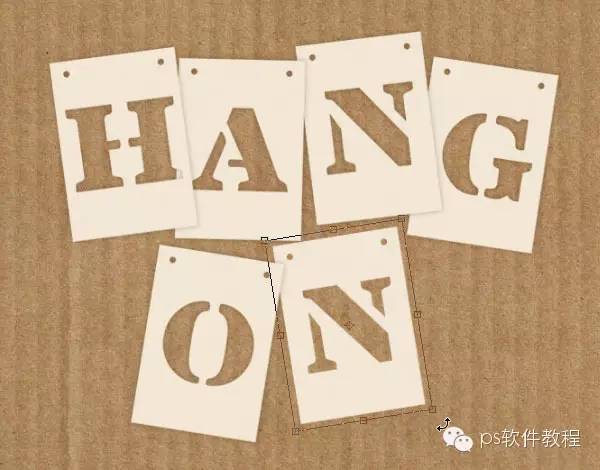
At the same time, select a hollow letter card layer and the corresponding projection layer, ctrl+T, freely transform the angle, position, etc. Others are adjusted in the same way. Arrange in the shape you want.
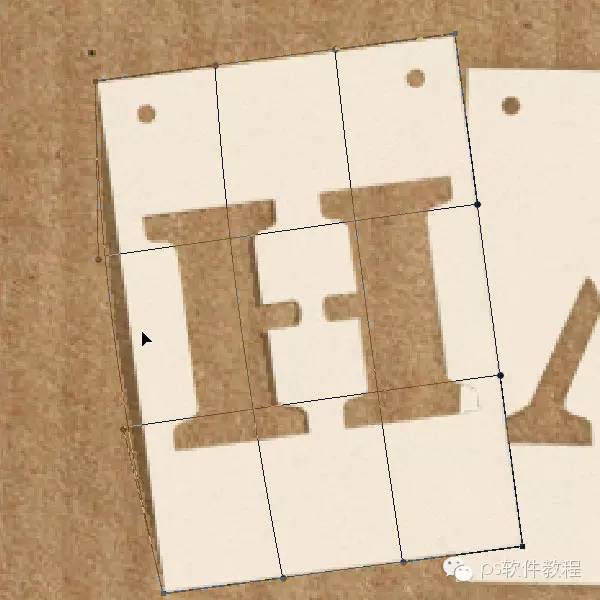
Step18
Select each projection layer in turn, click "Edit - Transform - Transform", and adjust the shape of the projection according to the effect you want.
Step19
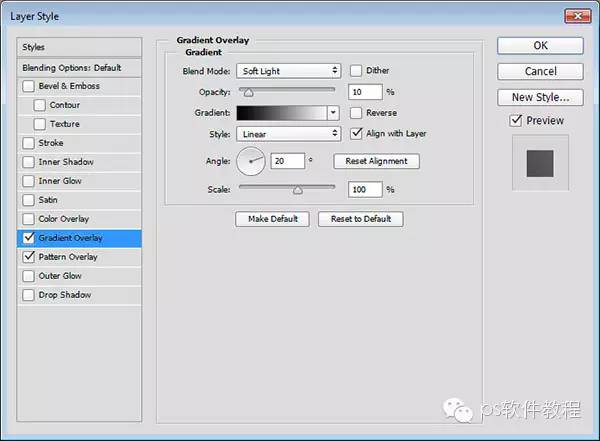
Double-click a hollow letter card layer, add a gradient overlay layer, from black to white gradient, blending mode is soft light, opacity is 10%, angle is 20 (the angle here should be determined according to the direction of the light) other pictures Layers are handled in the same way.
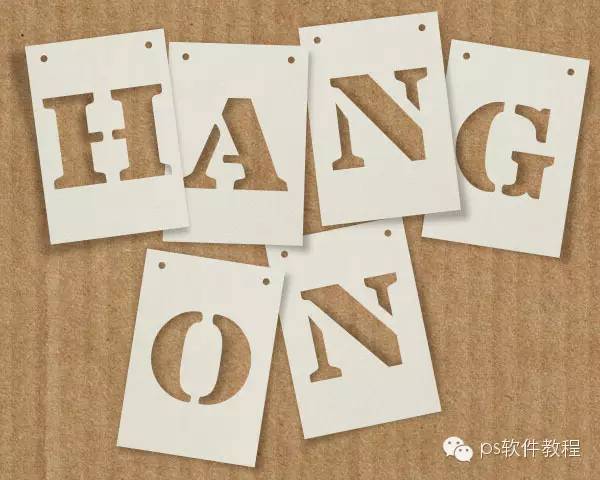
After finishing, the effect is as follows:

Step20
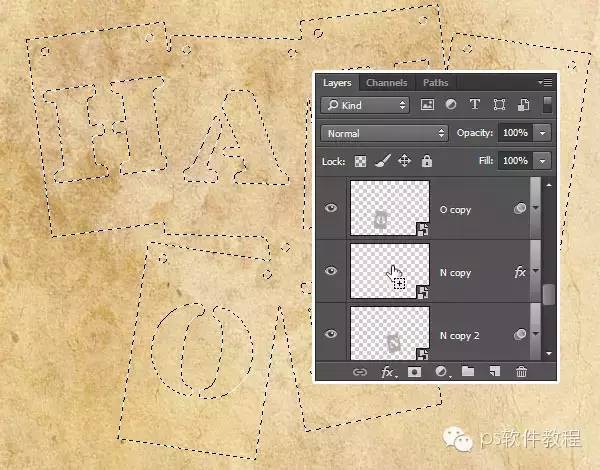
Create a new layer at the top, place the UnrestrictedNeutralgrunge> picture, and adjust it to a suitable size
Step21
Hold down the shift+command (ctrl) key and select all the hollow font card layers to create a selection
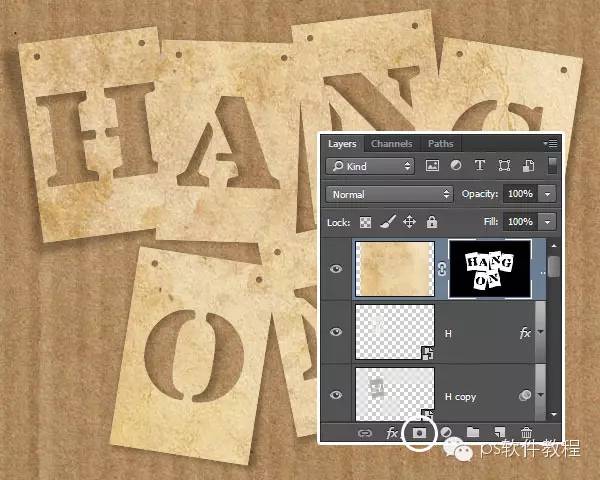
Step22
Click the Create Mask button
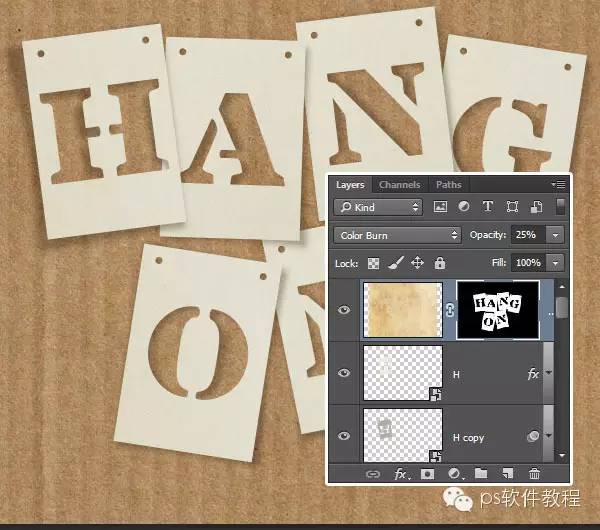
Step23
Change the blending mode of the layer to Color Burn and the opacity to 25%.
Step24
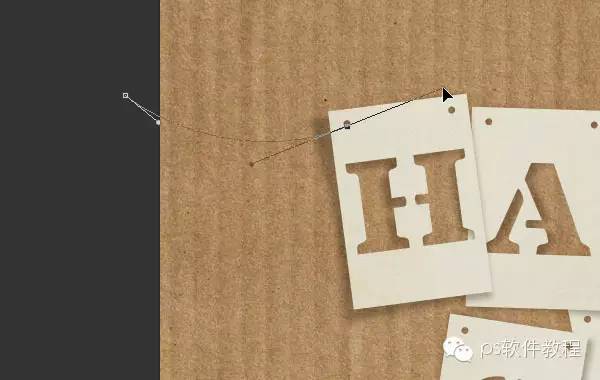
Create a new layer to design the string, select the pen tool, create a path, and hold down the Command key after drawing a section of the path to start drawing the next section from the beginning, and use the direct selection tool to adjust the shape of the path
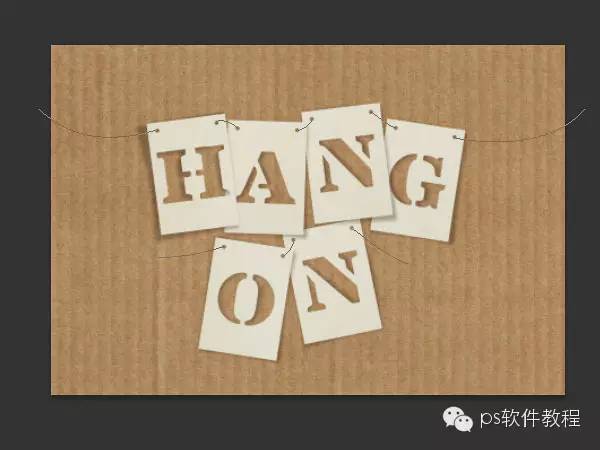
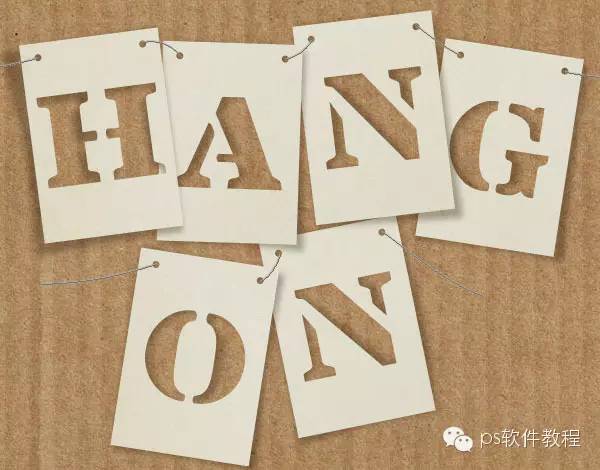
The effect after finishing:
Step25
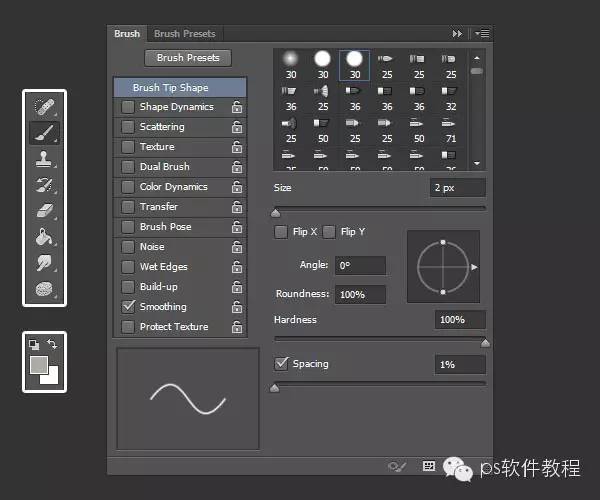
Set the foreground color to #afaba2, select the brush tool, and set the following settings on the brush tool panel:
Step26
Create a new layer, then select the path drawn with a pen, right click, stroke the path
Step2>
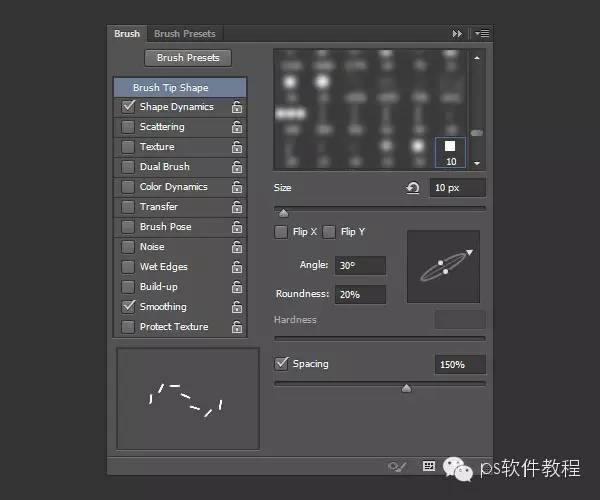
Select the brush tool, select the square brush, and also set the following settings on the panel
Step>
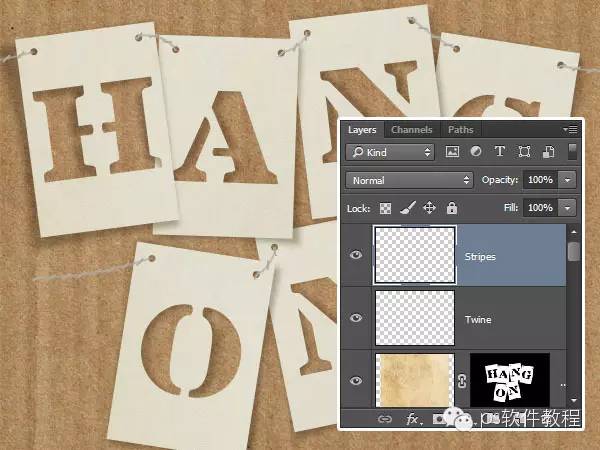
Create a new stripe layer on top of the string layer, and use a brush to draw along the path. Then select the direct selection tool, press and hold the del key to delete the pen path
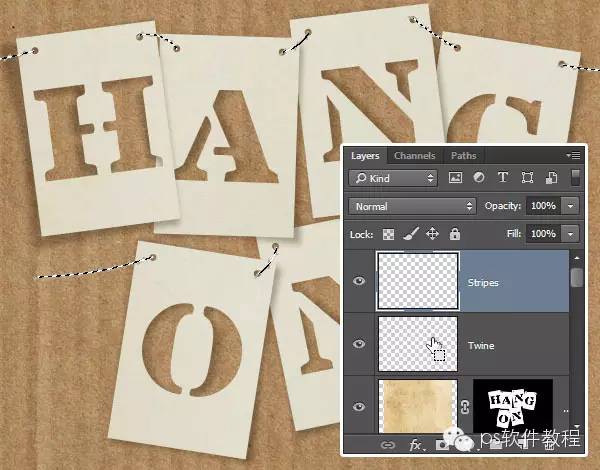
Step2>
Hold down the Command key and click on the string layer to create a selection, then select the previous stripe layer, press command+J to get a new layer, use this layer as a stripe layer, and put the previous stripes The layer is deleted.
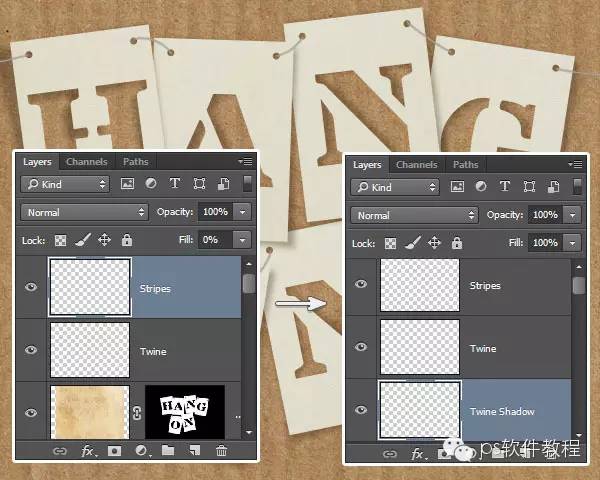
Step>
Set the fill of the stripe layer to 0, copy the string layer as the string projection layer
Step>
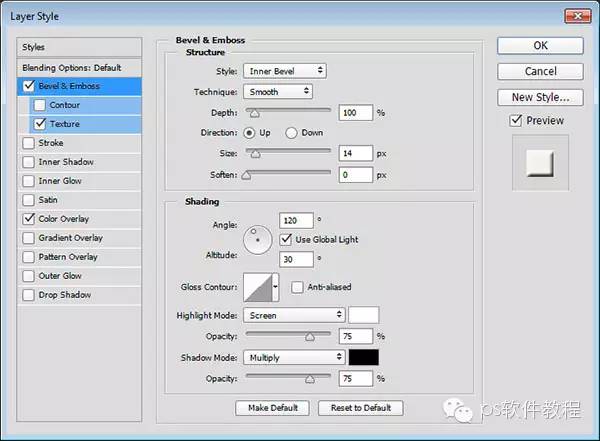
Double-click the string layer, add a layer style, first bevel and emboss, and change the size to 14
Step>
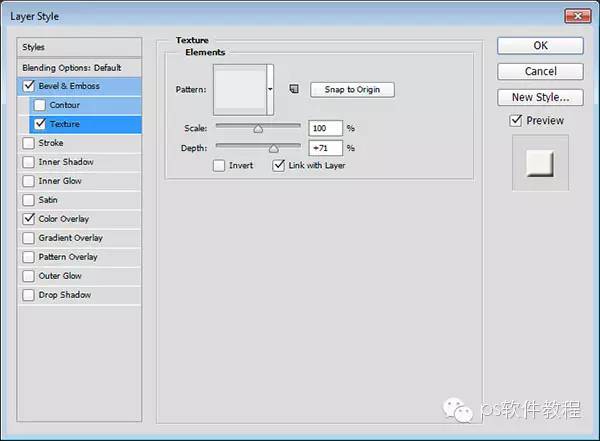
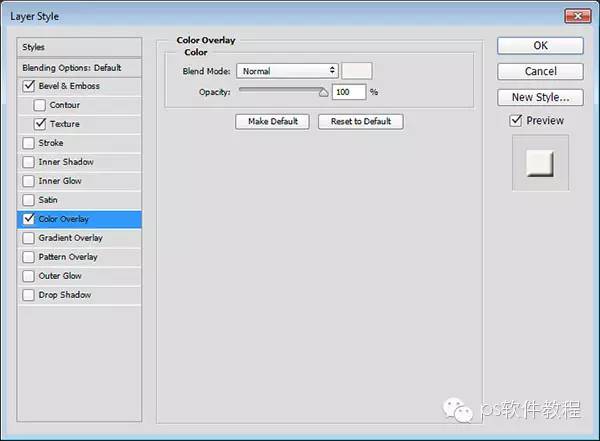
Then the texture, select the texture pattern Concrete preset in the first step>
Step3>
Next is the color overlay, choose any color you like, here is #f5f2ed
Step3>
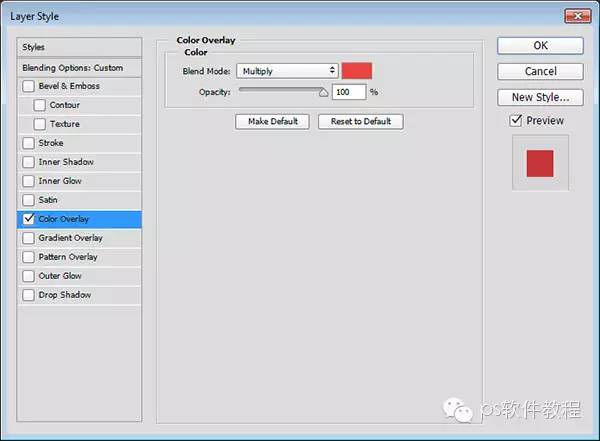
Double-click the stripe layer, add a layer style, select Color Overlay, use #ea4342 color, and change the blending mode to Multiply
Step3>
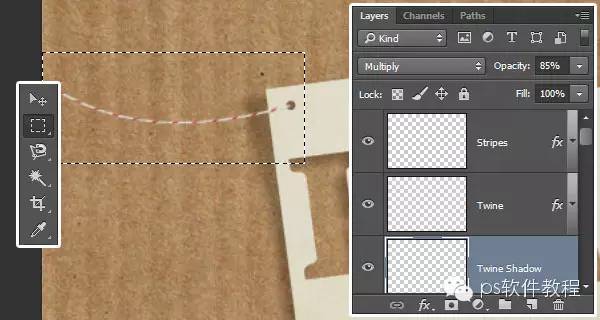
Select the thin rope projection layer, use the rectangular marquee tool (I use the lasso tool) to select a certain section of thin rope, click Edit - Transform - Transform, and adjust the thinness
Position of the shadow of the rope
Step3>
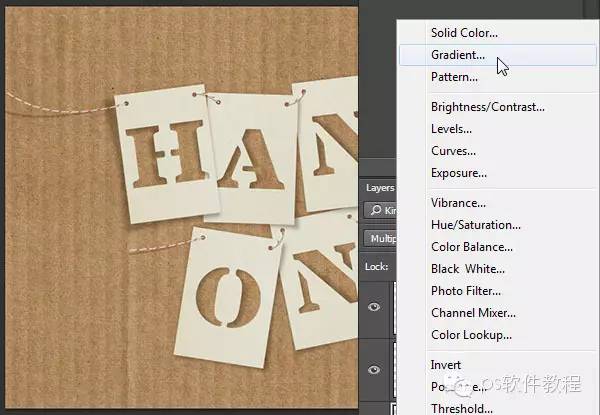
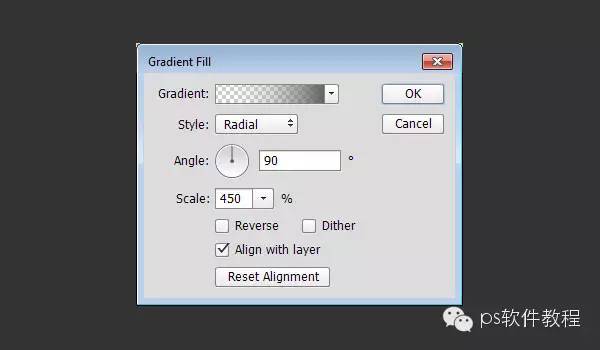
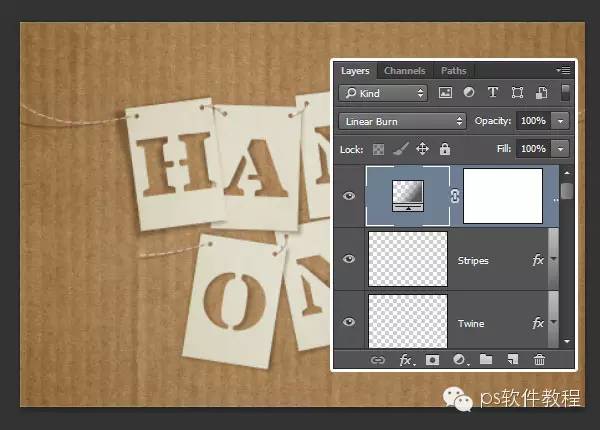
Create a new adjustment layer, select the gradient, and set it
Step3>
Finally, change the layer blending mode to Linear Light
Articles are uploaded by users and are for non-commercial browsing only. Posted by: Lomu, please indicate the source: https://www.daogebangong.com/en/articles/detail/PS%20making%20card%20hollow%20font%20tutorial.html

 支付宝扫一扫
评论列表(196条)
测试