hello! Ivy Batty!
Dragon Boat Festival Ankang!
Before the festival, Yelang received a hand-painted board from @丁天杨 in the group!
Well~ A public account once said:
Keep Curiosity Keep Learning/Continuous Curiosity Keep Learning
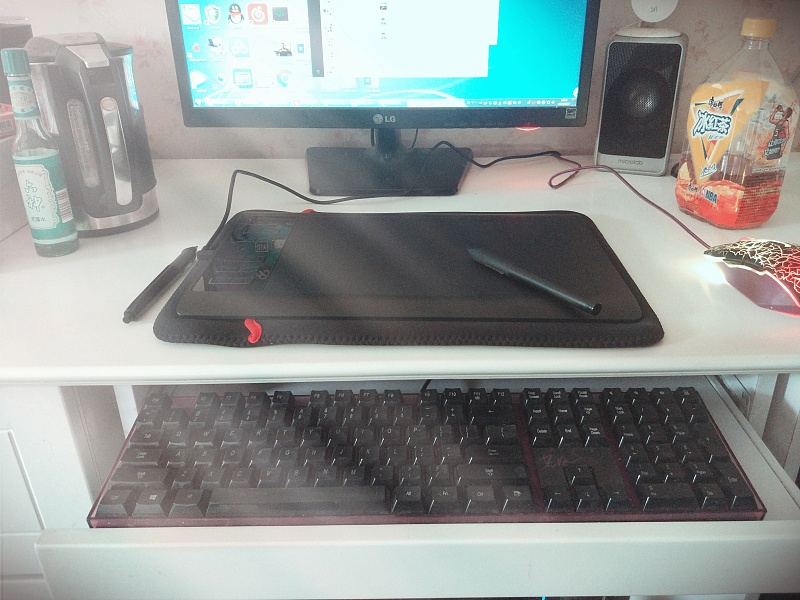
Although I am a handicapped party with no painting skills, I can study and study hand-painting at home during the Dragon Boat Festival! Thanks to Tian Yang for changing hands at a low price! Post a picture:

PS: Please ignore the second bottle of half-price iced tea and six gods (六神)!

Received a question from a child shoe:

I heard from the children's shoes that they have been chasing after me from Weibo to my WeChat, ahhh! It seems that it is impossible to be lazy during the Dragon Boat Festival. Let's zoom in on the picture:

It's so pretty, all right! Today, Ye Lang tried to make a simple paper-cut font poster like this!

Open ps and create a new canvas of 540*720:

Create a new solid color fill layer above the background and fill it with gray:

The next step is to enter the text on it. If you want the effect of each letter to be random, then use a layer for each letter and create a group after you are done.
If you want to be lazy, just make it a layer:

If you are one layer per letter like me, you need to do a text layout distribution here.
I have left a set of Learing for you to demonstrate, view-new reference line panel, the parameters are as follows:

First rely on the reference line to place the letters in the proper position, and then select all the letter layers.
Click Bottom Align and Horizontal Center in the small red box above, so that the position and spacing between each letter are aligned:

Then select all four groups, click Left Align and Vertical Center in the small red box above, so that the positions and spacing of the four groups are also aligned:

Add four more groups as the same group, rename it as the first layer, and use the move tool to move the overall position:

Copy the first layer group to two more layers, place them under the first layer respectively, rename one layer as paper-cutting, and one layer as projection, and then we will operate separately:

In order to see the effect, I hide the first layer group, and then add layer style, bevel and emboss, and inner shadow to the paper-cut group. The parameters are up to you:

Display the first layer group, and then lightly move the paper-cut group to make a ghost effect:

Drag the prepared newspaper material above the paper-cut group:

Right mouse button, create clipping mask:

The effect you get now is roughly like this:

The next steps are rather boring. In order to make the white text look more three-dimensional, first select all the letters on the first layer and convert them into shapes:

I use one of the letters as an example, first hide the projection group, so as not to see the effect, ctrl+t free transformation, use perspective, oblique cutting, etc. to make fine-tuning, to make a little page-turning feeling:

Make it roughly like this:

The adjustment degree of each letter can be different, so I won’t repeat it here, and the final result is roughly like this:

Then adjust the position of some letters in the paper-cut group to make it look more harmonious as a whole:

Then reduce the filling degree of the paper-cut group:

In this way, the big effect is basically out, and some shadows need to be added, and the previously hidden shadow group is displayed and dragged to the top.
At the same time, hide all layers except the shadow group, then ctrl+alt+shift+e stamp all visible layers:

After hiding the shadow group again, ctrl click on the imprint layer to load the selection, fill it with black and move it to a suitable position:

After converting the layer to a smart object, execute Filter-Blur-Gaussian Blur, the parameters are up to you:

Then execute Filter-Blur-Motion Blur, I think the distance is 40:

Lower the Fill of the Stamp layer while using a black brush on the filter mask to erase unwanted shadows:

Pull a curve to enhance the contrast between light and dark:

After imprinting another layer, perform filter-render-lens flare on it:

Finally, check again and find that the alphabetical order of learning is wrong. Adjust it again, add a concise inscription and time, and export the picture to see the effect:

Ahhh! Looks like I need to practice my sense of space!
See the time below, yes!
It's 3am again, so I'm going to break it!
Interested children's shoes backstage Tick me to get materials and psd files to practice!
Remember to hand in your homework!
This article was published by "Wild Deer"
Please contact the author "Red Deer Yelang" before reprinting
private transfer must be investigated

Keep Curiosity Keep Learning
Public account ID: yeluzhi666
WeChat ID: maluyelang666
Articles are uploaded by users and are for non-commercial browsing only. Posted by: Lomu, please indicate the source: https://www.daogebangong.com/en/articles/detail/PS%20Wild%20Tutorial%20Make%20a%20minimalist%20papercut%20font%20poster.html

 支付宝扫一扫
评论列表(196条)
测试