Cute cartoons accompany us to grow up, so that when we grow up, the chubby cartoon fonts will give us the taste of childhood. So, how to use PS to make our own cartoon fonts? Let us follow the steps of the great god to learn~

Directory at one go:
Loading Background
Create a text layer and transform it
Make different effect settings to achieve the final effect
Here is the rendering:

The materials used in the tutorial have been packaged (including background, font, red dot pattern), the official account background reply: cartoon font, You can get the material download link.
01. Load document background
Click File-Open, select "starbackground.jpg", this is a 850*600px image file, we will use it as our background image.
02. Create and transform text
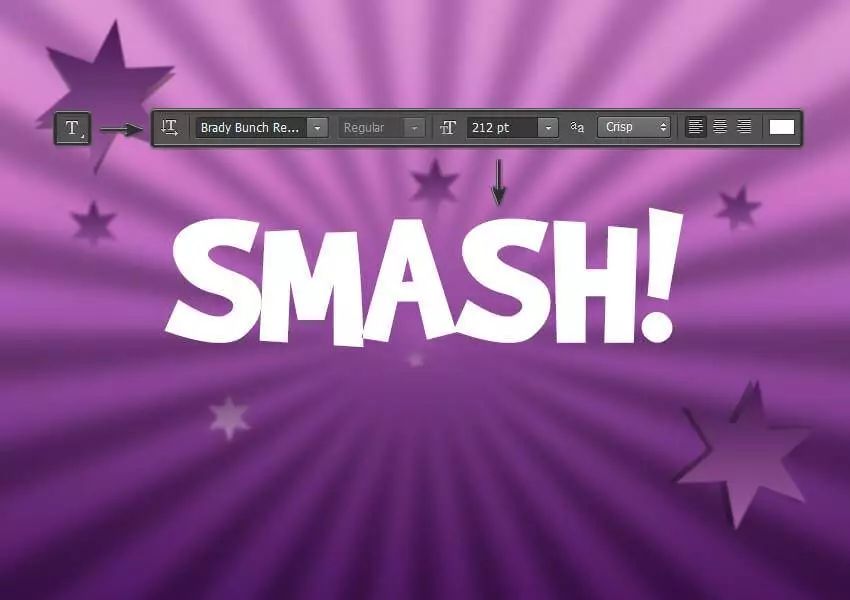
First step
Select the text tool and selectBrandyBunchRemastered font, set the font size to about 212pt< /span>, write "SMASH!" in capital letters of any color.
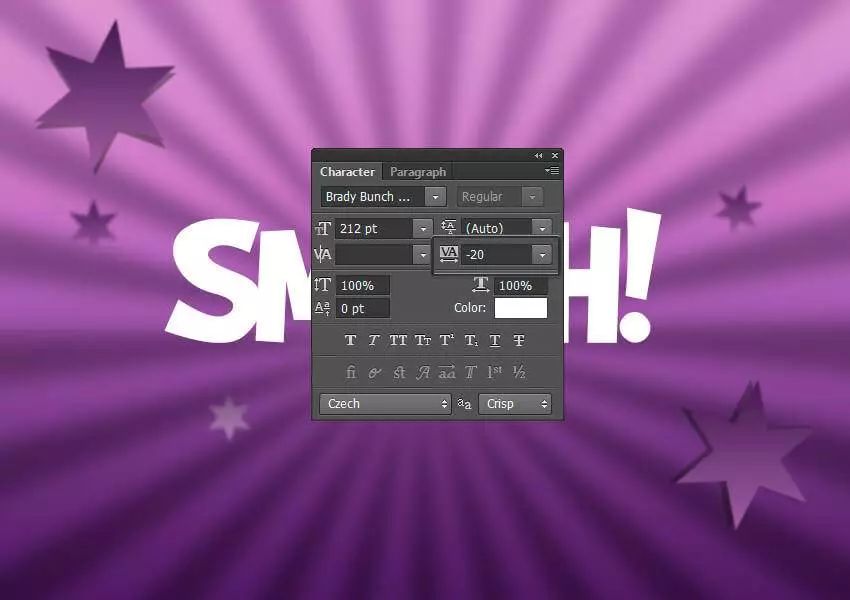
Second step
Now we need to change the letter spacing. Select the text layer, click Text-Panel-Characterpanel, and change the spacing to -20 in the pop-up Character panel.
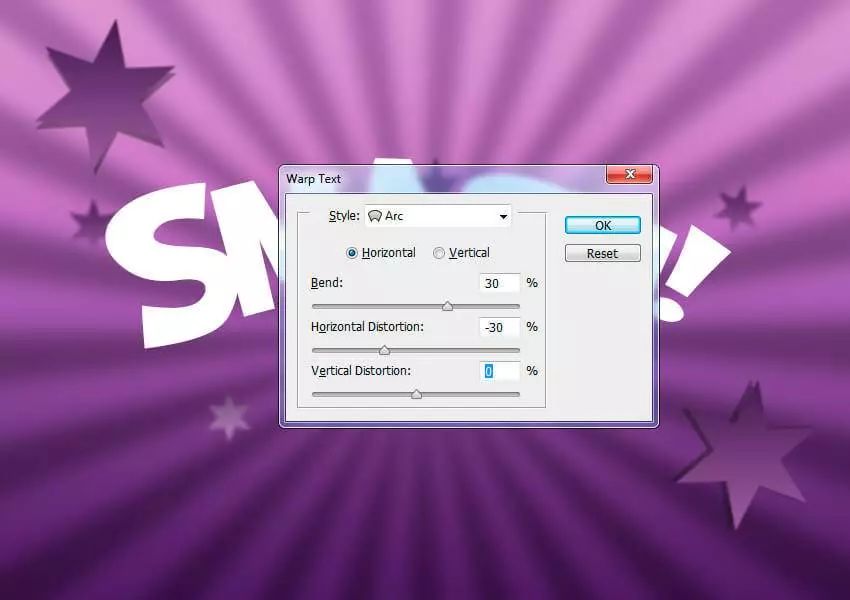
Step 3
The last step before we apply layer styles is to deform our text. Right-click on the text layer, select Text Warp, set the style to fan, select horizontal, and set the warp to 30%, and the horizontal Distortion is set to -30%. Click OK to apply these transformations.
03. Create cartoon text effects
First step
Select the layer where "SMASH!" is located, and double-click this layer to apply the following layer style:
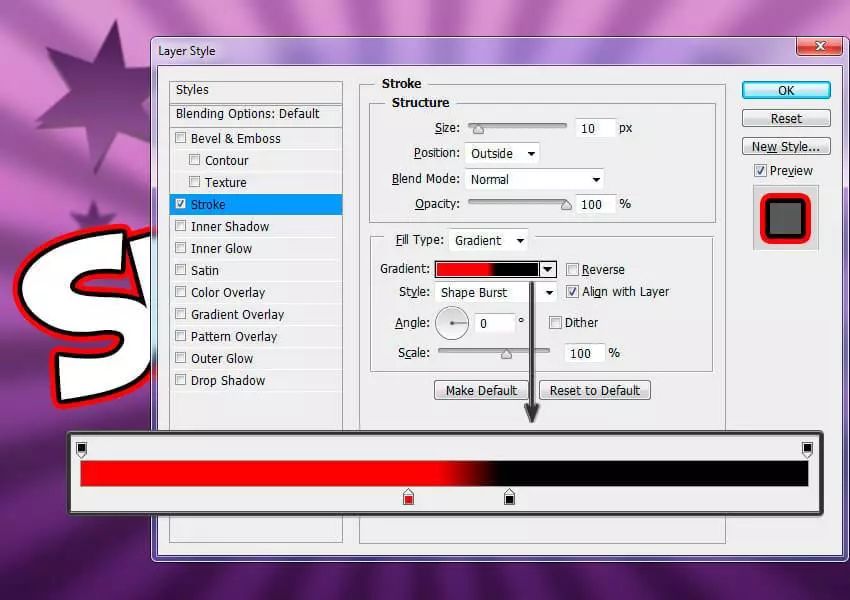
Add a stroke, set as follows:
l size: 10px
l Position: Outside
l Blend Mode: Normal
l Opacity: 100%
l Fill Type: Gradient
l Style: Burst
l Angle: 0
l Check Dither
l Set two color stops
The first color is #f80000 and the position is 45%
The second color is #000000, the position is 59%
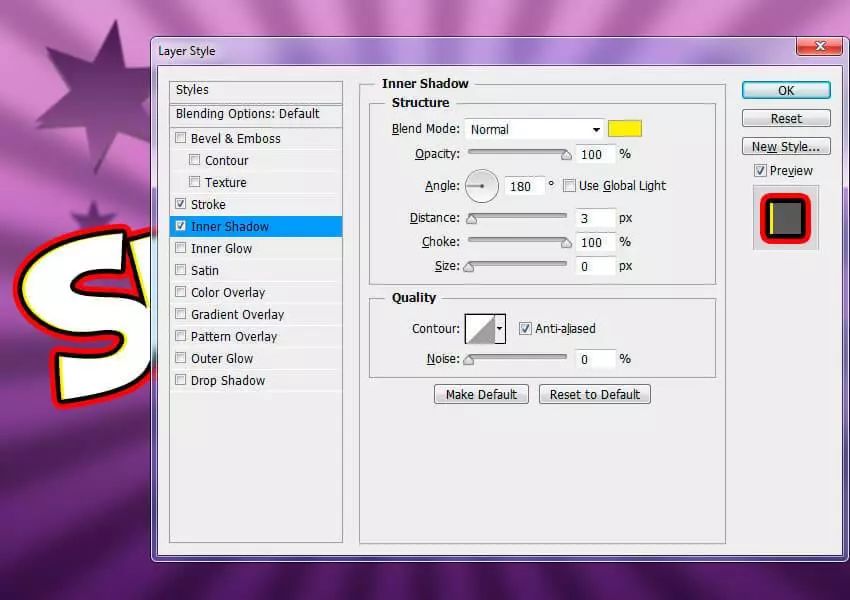
Second step
l Add an inner shadow with the following settings:
l Blend Mode: Normal, color is #fff000
l Opacity: 100%
l Uncheck "Use Global Illumination" and set the angle to 180
l distance: 3px
l Blocking: 100%
l size: 0px
l Check "Anti-aliasing"
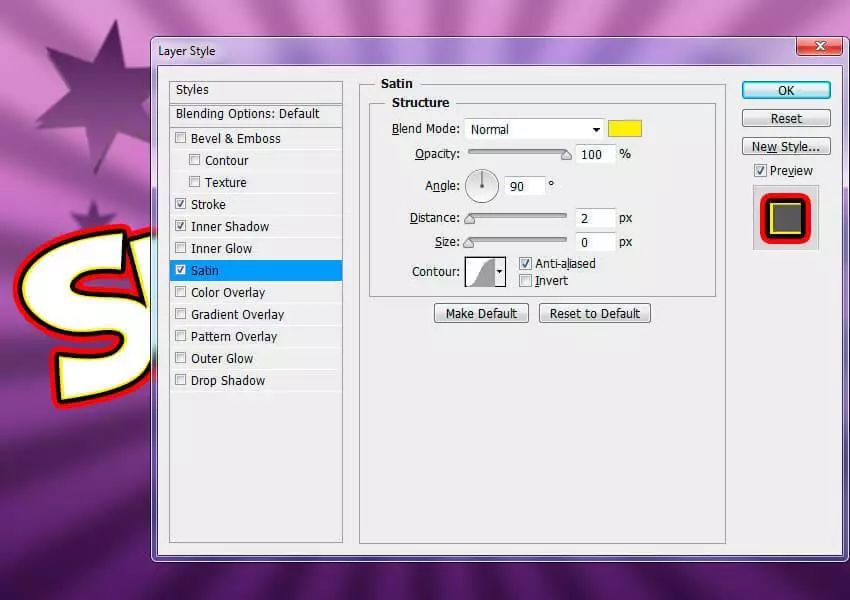
The third step
Add a gloss effect, set as follows:
l Blend Mode: Normal, Color #fff000
l Opacity: 100%
l Angle: 90
l distance 2px
l size 0px
l Check "Anti-aliasing"
l Uncheck "Reverse"
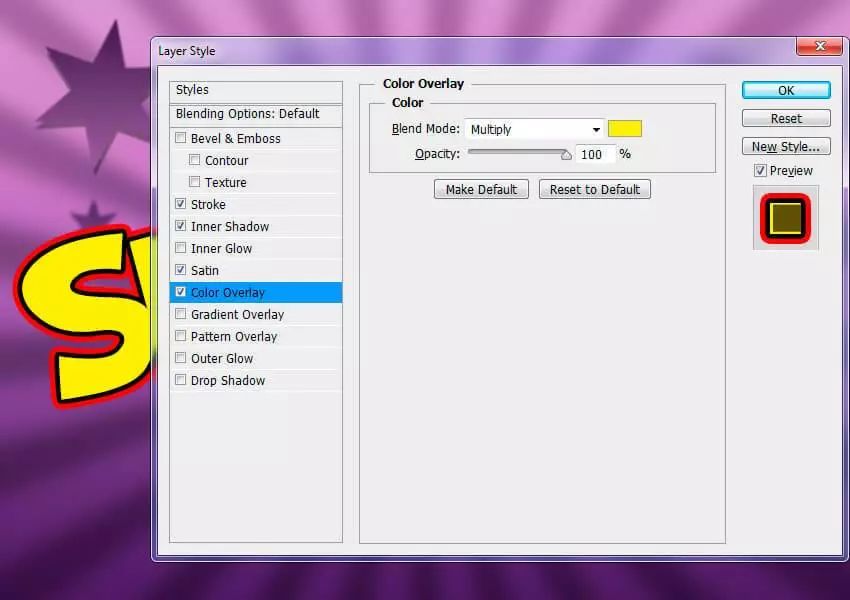
Step 4
Add a color overlay, set as follows:
l Blend Mode: Multiply, color #fff000
l Opacity: 100%
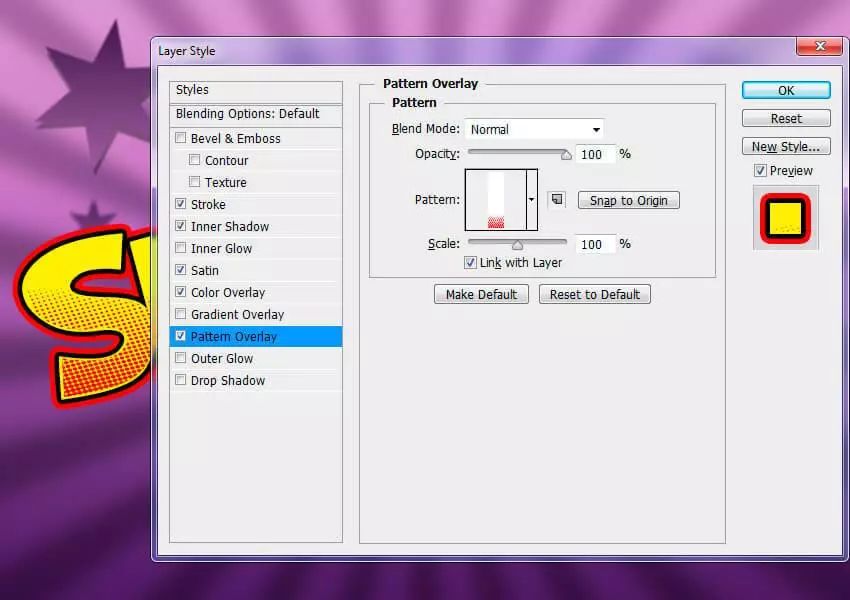
Step 5
Add a pattern overlay, set as follows:
l Click the pattern drop-down menu and select the red dot pattern
l Opacity: 100%
l Zoom: 100%
Click and drag the text in the file to change the position of the pattern
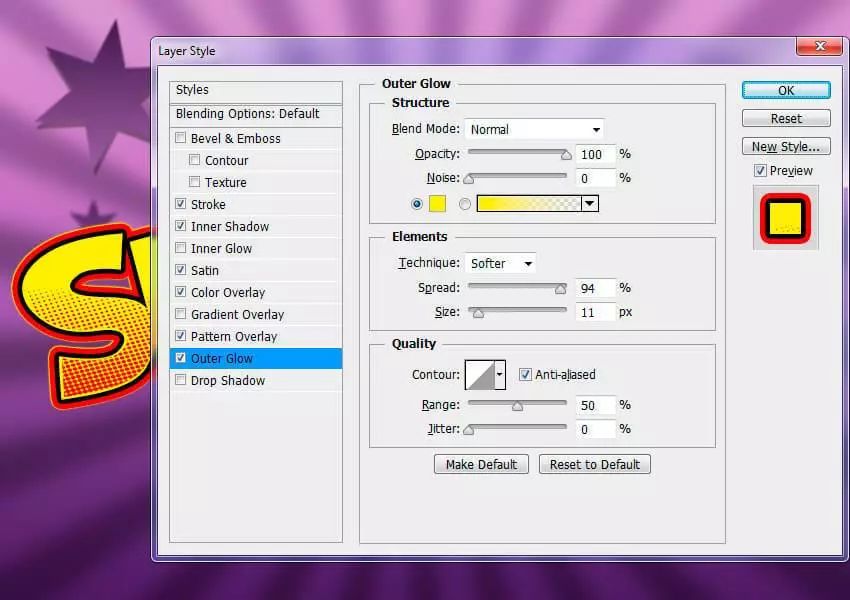
Step 6
Add Outer Glow, set as follows:
l Blend Mode: Normal
l Opacity: 100%
l Glow color: #fff000
l Method: Soft
l Expansion: 94%
l size: 11px
l Check anti-aliasing
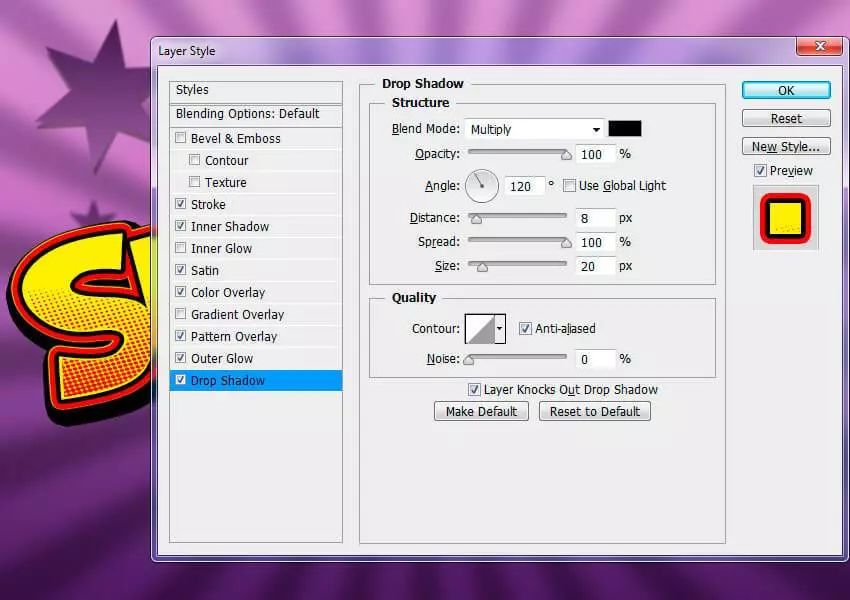
Step Seven
Add a projection, set as follows:
Blending Mode: Multiply, Color #000000
Opacity: 100%
Uncheck Use global light, set the angle to 120
Distance: 8px
Expansion: 20px
Uncheck Anti-aliasing
Click OK to apply the style.
Congratulations! Since we operate on the text in one layer, we can save it as a new style for later use, go and apply this lovely font!


Click 「Watching」You look good again▽
Articles are uploaded by users and are for non-commercial browsing only. Posted by: Lomu, please indicate the source: https://www.daogebangong.com/en/articles/detail/PS%20Tutorial%20How%20to%20use%20PS%20to%20make%20cartoon%20fonts.html
 支付宝扫一扫
评论列表(196条)
测试