
What I share today is to use this method to make text effects. The production method mainly uses layer styles, filters and layer masks to create. The method is very simple and can be used for the theme text of horror movies, which is very practical.
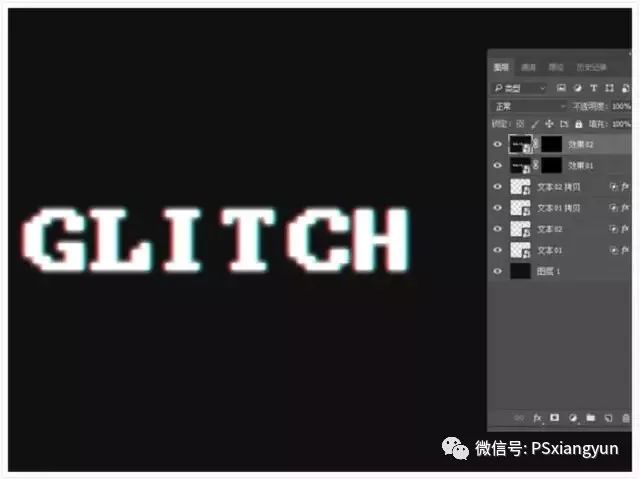
First look at the effect:

STEP1: Create background and text layers
(1) Create a new document 800*600px, the color mode is RGB, and the resolution is 72ppi. Background color value #{{101010:0}}.

(2) Use the font Terminal to create text, set the size to 160px, and align the background horizontally and vertically to the center.

(3) Rename the text layer to Text 01, right click on it, and select Convert to Smart Object;

STEP2: How to apply layer styles
(1) Double-click the "Text 01" layer to apply the following layer styles:
Uncheck the G and B channels in the Advanced Blending section of the Blending Options, and select the "Outer Glow" style (Screen, Opacity 50%, Color #ffffff, Size 10%).

(2) Duplicate Text 01, change the name to "Text 02", double-click the layer to cancel the R channel in the advanced blending of the blending options.

STEP3: How to create glitch effect
(1) Select the move tool, fine-tune the text 01 and text 02 layers to display red and blue colors in opposite directions, and get the result you like (this article selects text 02 and moves 5px to the right).

(2) Duplicate the Text 01 and Text 02 layers; create a new layer, name it "Effect 01", and press ctrl-alt-shift-E (Mac: Option-Command-Shift-E) to create Stamps for all layers, right mouse button converted to smart objects.
(3) Select the "Effect 01" layer, hold down the alt key, and click "Add Vector Mask" at the bottom of the layer; duplicate the "Effect 01" layer and rename it "Effect 02".

(4) Pick the Rectangular Marquee Tool, create some random selections that include parts of the text, and make sure to extend the selection beyond the left and right sides of the text. Keep enough vertical space between the selections, we will create more selections between them; select the thumbnail of the Effect 01 layer mask and fill it with white, pressing Ctrl-D (Command-D) to deselect the selection.

(5) Hold down the alt key and click the effect 01 mask thumbnail to display a white color block; use the rectangular marquee tool again to create narrower lines between the owned lines, but also keep some unselected areas. Hold down the Alt key and click the thumbnail of the mask in effect 01 to restore the original effect, select the thumbnail of the mask in effect 02 to fill it with white, and press ctrl-D (Command-D) to cancel the selection.

(6) Select the "Effect 01" layer, "Filter" > "Pixelization" > "Copper Engraving", and then set the "Type" to "Short Stroke".

(7) Select the effect 02 layer,
"Filter" > "Distortion" > "Wave", here you can try different values until you get the result you like (this article uses the following data, which can be referred to);
"Filter" > "Pixelate" > "Copper Engraving", and then set the "Type" to "Long Stroke";
"Filter" > "Stylize" > "Wind", set the method to wind, and the direction to from the right.

(8) Select the thumbnail of the layer mask, use the brush tool, set the foreground color to black, and paint on the unwanted areas.

STEP4: How to add scan lines
(1) Click the Create New Fill or Adjustment Layer icon at the bottom of the Layers panel and choose Color Lookup. Select the FUJIFILM ETERNA250D FUJI 3510 (by Adobe) .cube sheet from the 3DLUT File menu.

(2) Create a new layer, name it Scanline, color #ffffff, and convert it to a Smart Object. Make sure the foreground and background colors are set to black and white.

(3) "Filter" > "Filter Library" > "Sketch" > "Halftone Pattern", the setting parameters are: size 1, contrast 5, group type is straight line;
Change the Scanline layer's Blending Mode to Soft Light and drop the Opacity to 50%.

(4) Click the "Create New Fill or Adjustment Layer" icon at the bottom of the Layers panel, choose "Pattern", and use "Pattern 1 Fill" from the basic scanline pattern pack.
Change the Opacity of the layer to 25%.

STEP5: Create noise overlay
(1) Create a new layer, name it Noise, fill it with #000000, and convert it to a Smart Object.
"Filter" > "Filter Library" > "Texture" > "Grain", grain parameters: intensity 40, contrast 50, type is stippling.

(2) Use "Filter" > "Filter Library" > "Texture" > "Grain" again, the particle parameters are the same;
Click the new effect layer icon in the lower right corner, go to "Sketch" > "Charcoal Pen", charcoal pen parameters: both the foreground and background color levels are 7, the texture is canvas, the zoom ratio is 100%, the highlight is 4, and the light is For the top. Change the Blending Mode of the "Noise" layer to Linear Dodge (Add) and the Opacity to 20%.

(3) Use the Rectangular Marquee Tool to create random selections on the document, but try to avoid creating large selections on text.
Press Ctrl-J (Command-J) to duplicate the selection on a new layer, rename it Noise Row, and change the Blending Mode to Color Dodge.
Congratulations! you are done

If you want to learn more about PS graphic design learning knowledge, please long press or scan the QR code to follow us! The latest learning information will continue to be updated every day.
Articles are uploaded by users and are for non-commercial browsing only. Posted by: Lomu, please indicate the source: https://www.daogebangong.com/en/articles/detail/PS%20Tutorial%20Design%20Glitch%20Effect%20Font%20Tutorial.html
 支付宝扫一扫
评论列表(196条)
测试