
Today I will bring you a glow effect font tutorial. By using different layer styles for multiple text layers, you can easily and quickly get the desired font effect. Today's tutorial will show you how to achieve a simple, editable glowing font effect using Smart Objects and Layer Styles.
1. Create background
Step 1:
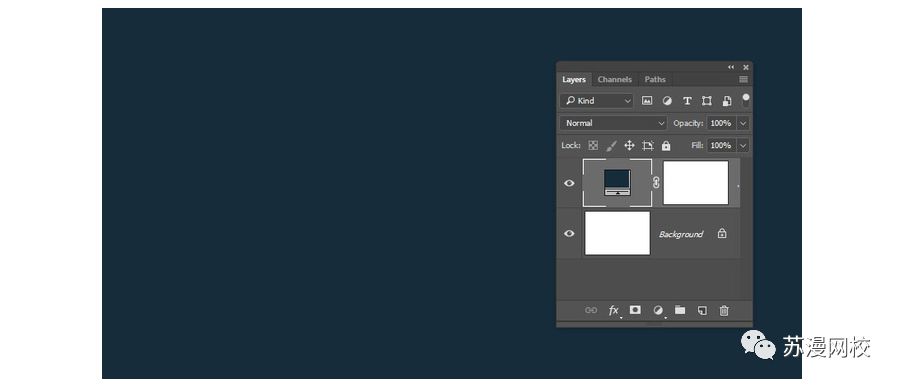
Create a new canvas of size 1200px by 800px, then click the Create New Fill or Adjustment Layer icon at the bottom of the Layers panel and choose Solid Color.
Step 2:
Color the Solid Color adjustment layer to #162c3a.
Step 3:
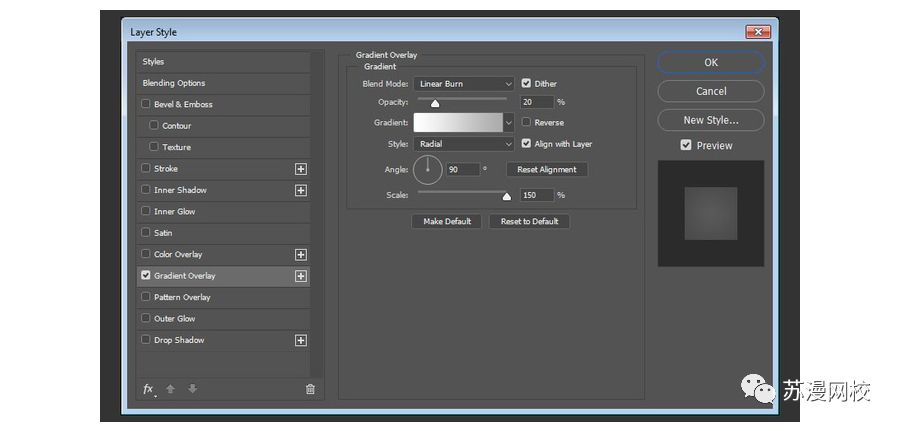
Double-click the Solid Color Fill layer to add a Gradient Overlay with the following parameters Blend Mode: Linear Burn; Opacity: 20%; Style: Radial Gradient, Angle 90 degrees Scale: 150% Gradient Left to Right: #ffffff to #ababab
2. Create text
Step 1:
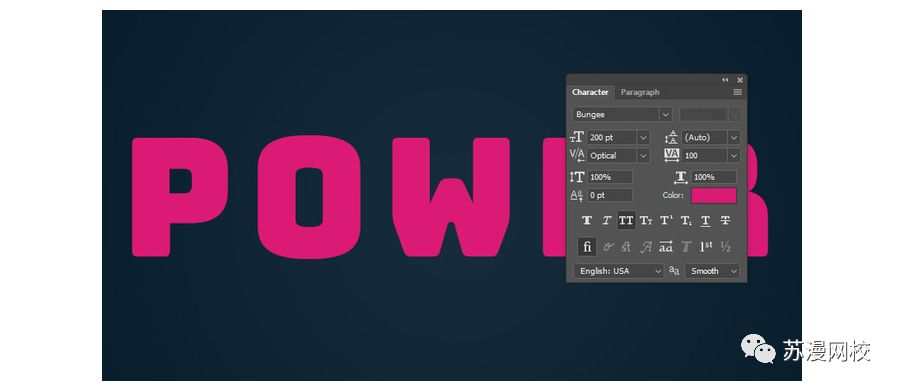
Create POWER, uppercase, font Bungee, font size 200pt, kerning 100pt, font color #da1a75.
Step 2:
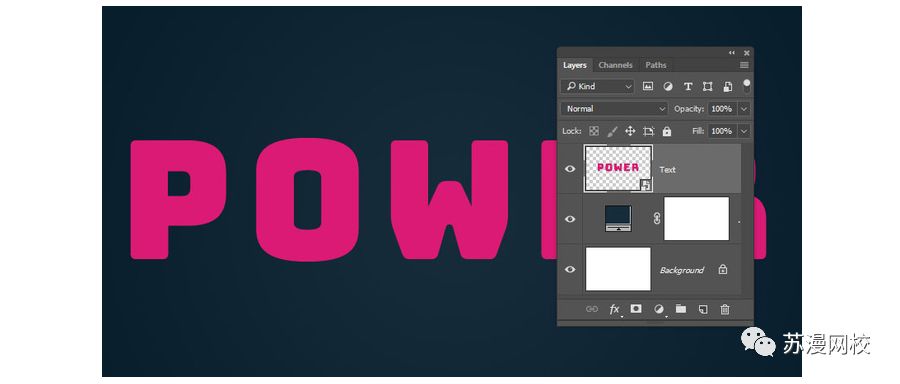
Rename the text layer to "Text", right click on it, convert to smart object. This is an optional step that makes it easier to change the text after the effect is created.
Step 3:
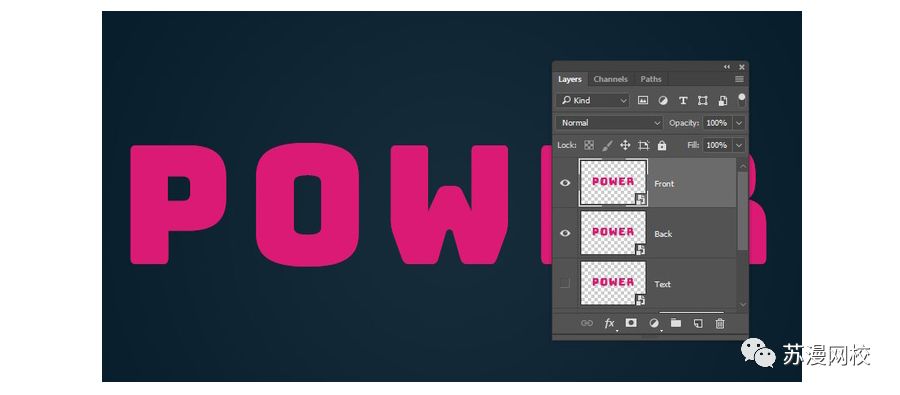
Duplicate the "Text" layer twice, with the first "Text" text hidden. Rename the first copy "Back" and the second "Front".
Step 4:
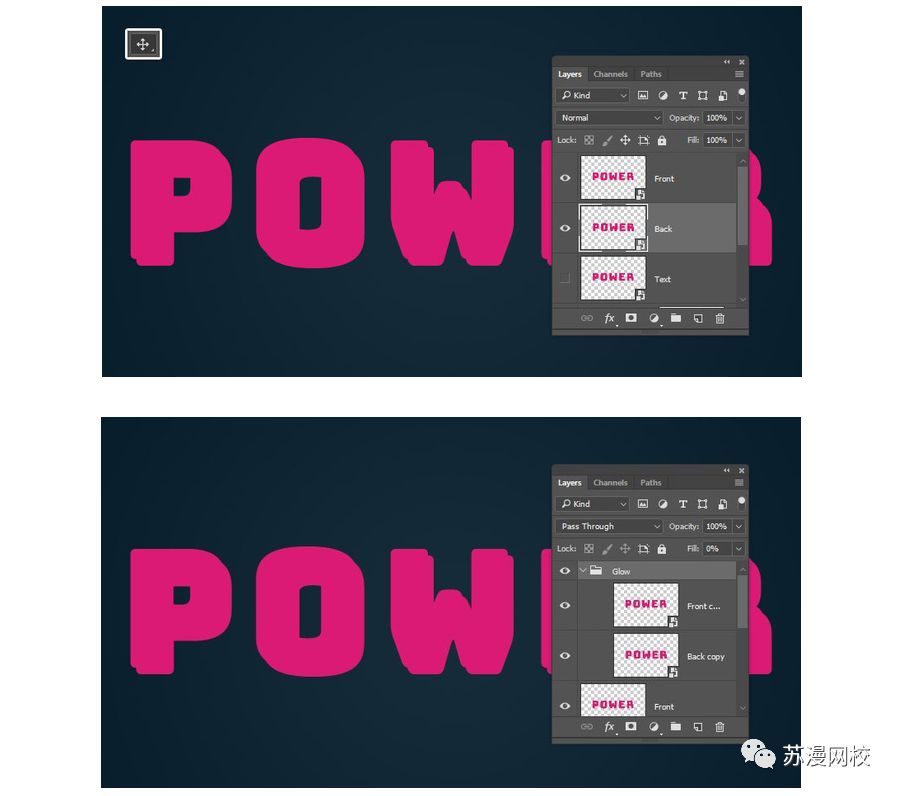
Move the "Back" text down and to the right a little; duplicate the "Front" and "Back" layers, group the duplicated layers, and name the group Glow.
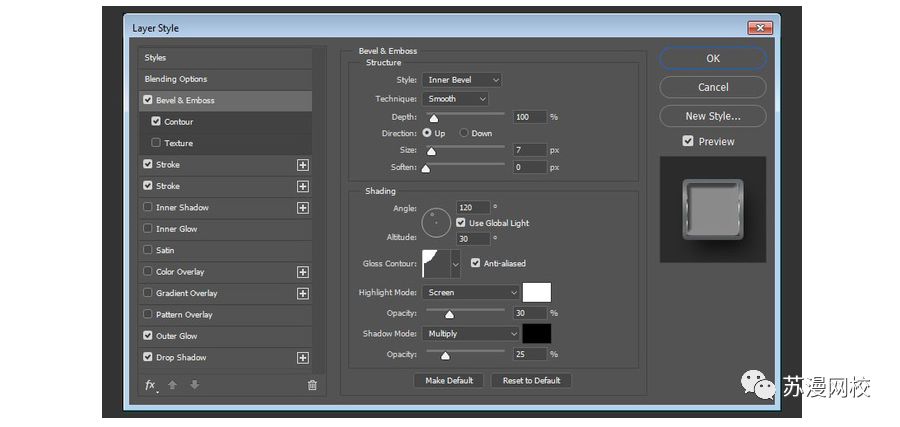
1. Add a layer style to the "Back" layer
Step 1: Add bevel relief
Gloss Contours: Cove - Light, Antialiasing checked, Highlight Mode - Opacity: 30%, Shadow Mode - Opacity: 25%
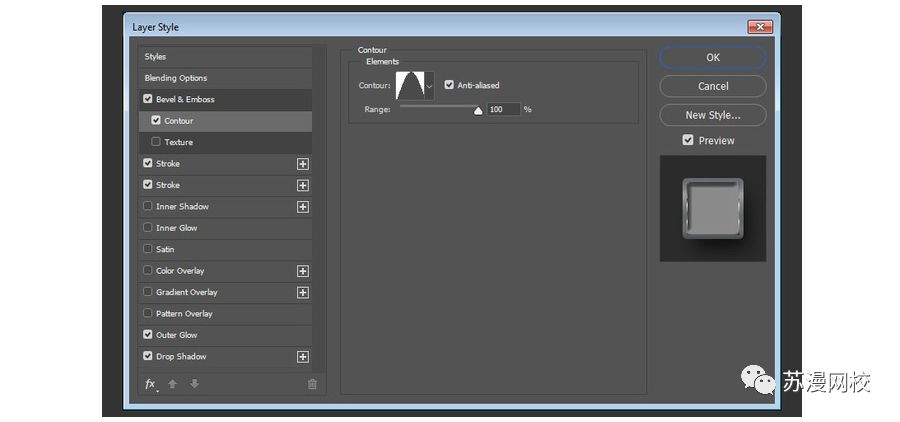
Step 2: Add contour lines
Contour mode is Conical, anti-aliasing is checked, and the range is 100%.
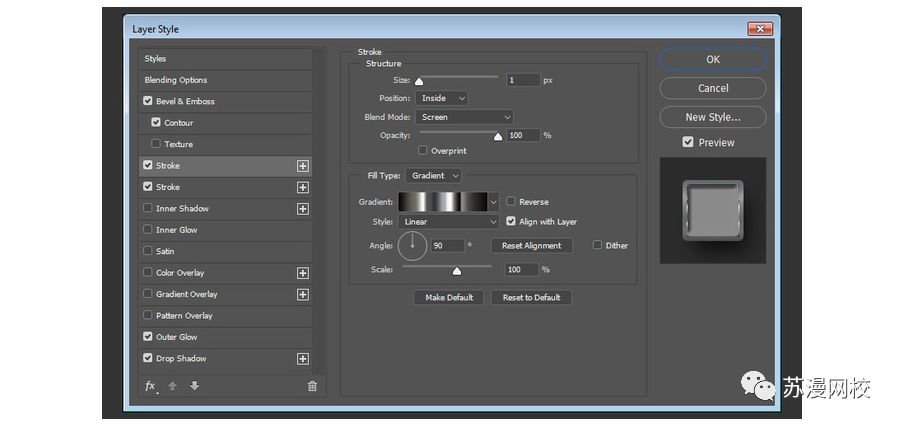
Step 3: Add a stroke
Inner stroke, size 1px, blending mode is screen, opacity 100%, use faucet70 gradient fill (in the compressed package, a gradient named aucet70 can be found in the gradient file named: Chrome), and the style is symmetrical , the angle is 90 degrees.
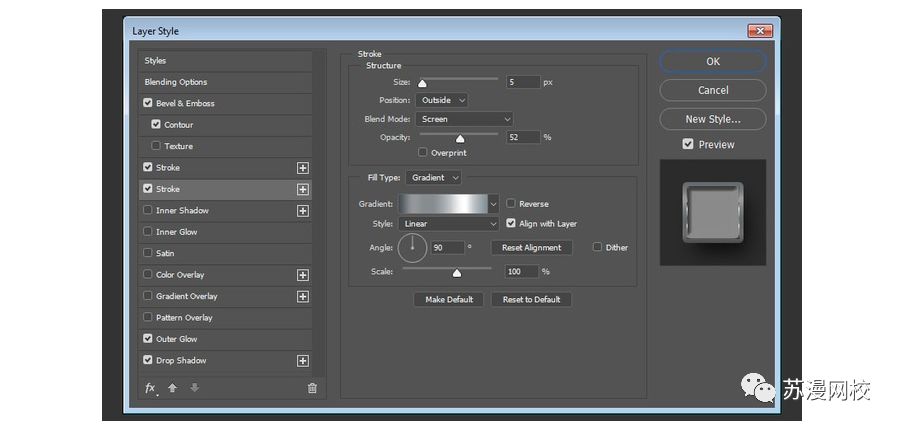
Step 4: Add a second stroke
Outer stroke, size 5px, fill type is gradient, style: symmetrical, opacity 52%, angle 90 degrees, blending mode is screen, use gradient fill with stovepipe10 (put in the compressed package, named: Gradient file for Chrome A gradient named stovepipe10 can be found in ).
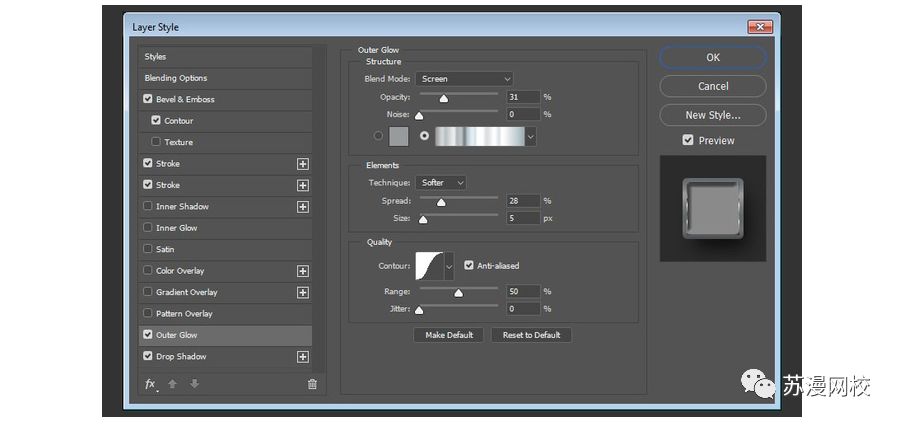
Step 5: Add Outer Glow
Opacity 31%, use aluminum70 (found in the compressed package Chrome file) gradient fill:, size 5px, expansion 28%, method: soft, contour line selection Gaussian, check anti-aliasing.
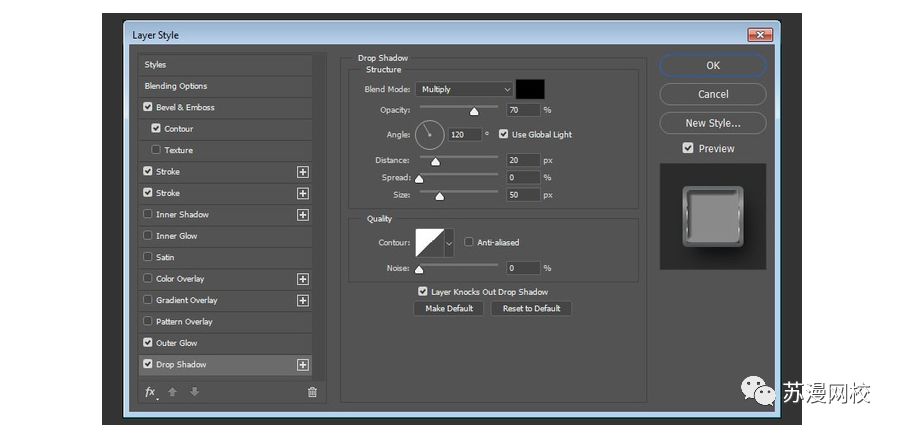
Step 6: Add a drop shadow
The size is 50px, the distance is 20px, the opacity is 70%, the blending mode is Multiply, and the angle is 120 degrees.

Step 7: Duplicate layer style
Copy the "Back" layer style and paste it to the "Front" layer
Fourth, add a layer style to the "Front" layer
Step 1:
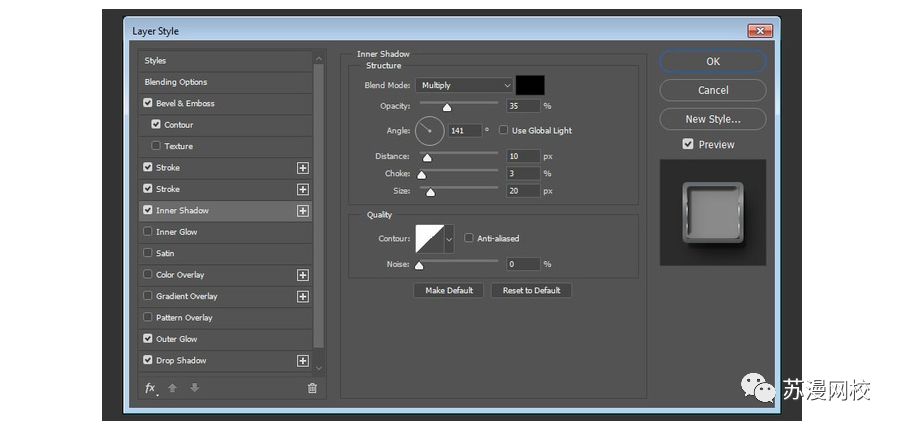
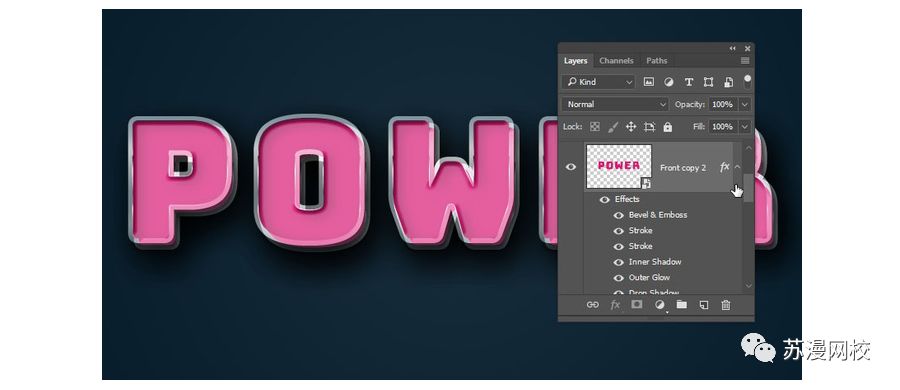
Duplicate the "Front" layer and add an inner shadow with the following parameters: size 20px, distance 10px, blocking 3%, angle 141 degrees, blending mode Multiply, opacity 35%.

La la la, the font effect of the "Front" layer is complete
5. Create the middle layer
Step 1:
Duplicate both the "Back" and "Front" layers
Step 2:
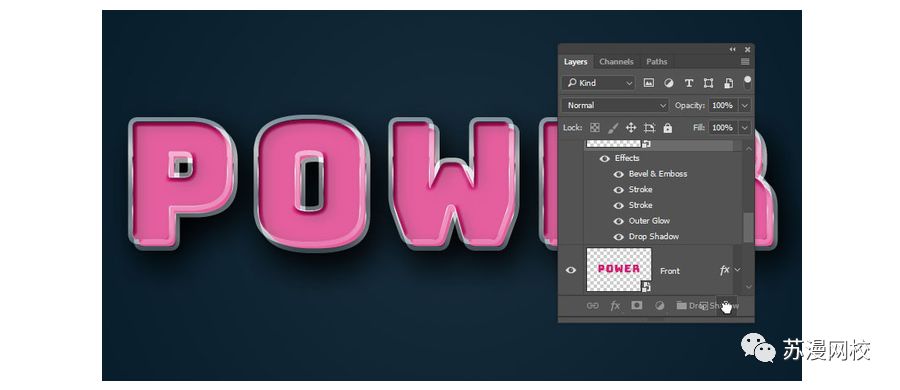
Remove the Drop Shadow layer style for the two duplicated layers by dragging to the "Delete" button in the Layers panel to delete it.
Step 3:
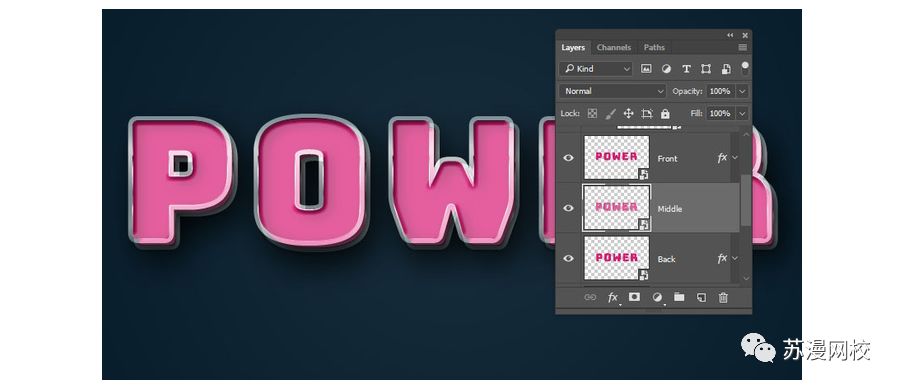
Select the two copied layers at the same time, convert them into smart objects, name them "Middle", and place them between the two layers of "Front" and "Back".
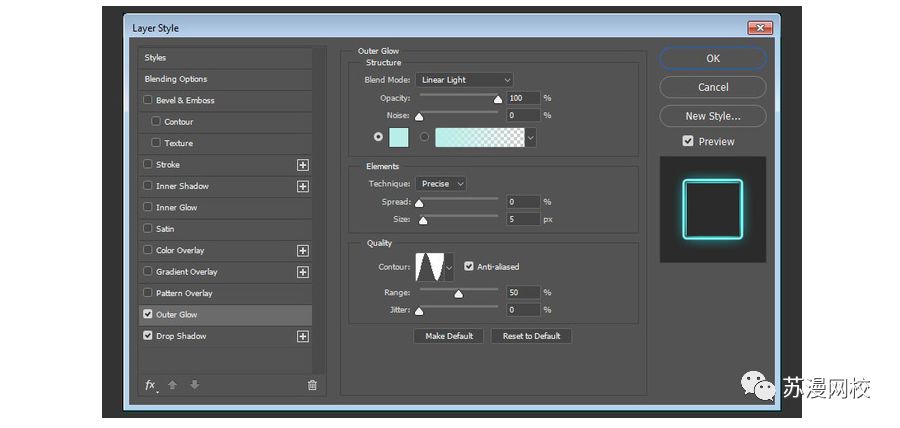
6. Add a layer style to the "Middle" layer
Step 1: Inner Glow
Color, #b9eee8, size 5px, method: precise, blend mode linear light, opacity 100%, contour ring, check anti-aliasing.
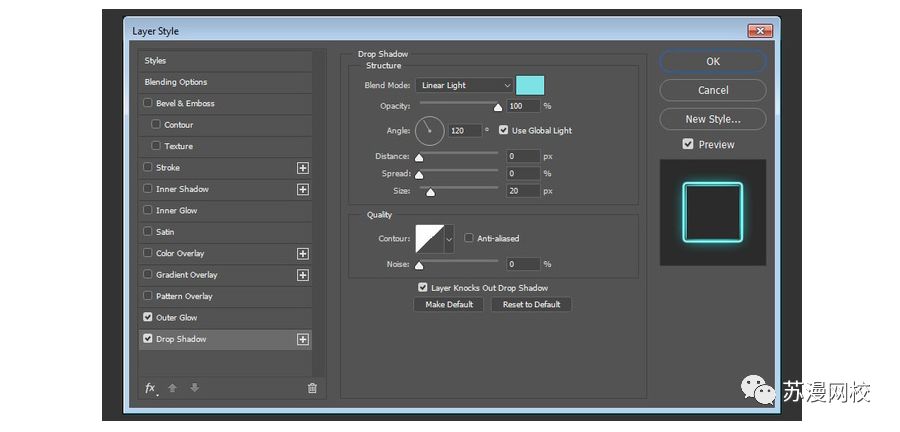
Step 2: Projection
Add a drop shadow with the color #b9eee8, the Blend Mode is Linear Light, the Opacity is 100%, the Size is 20px, the Distance is 0, and the Angle is 120 degrees.
In this way, the "Middle" part of the effect is ready
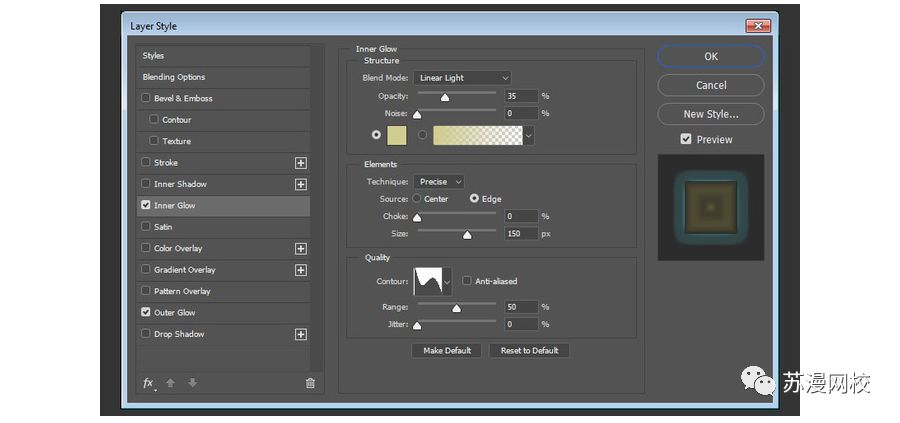
7. Add a layer style to the "Glow" layer
Step 1: Inner Shadow
Blend Mode Linear Light, Opacity 35%, Color #d1cc90, Size 150px, Method: Accurate, Contours as Rolling Slopes.
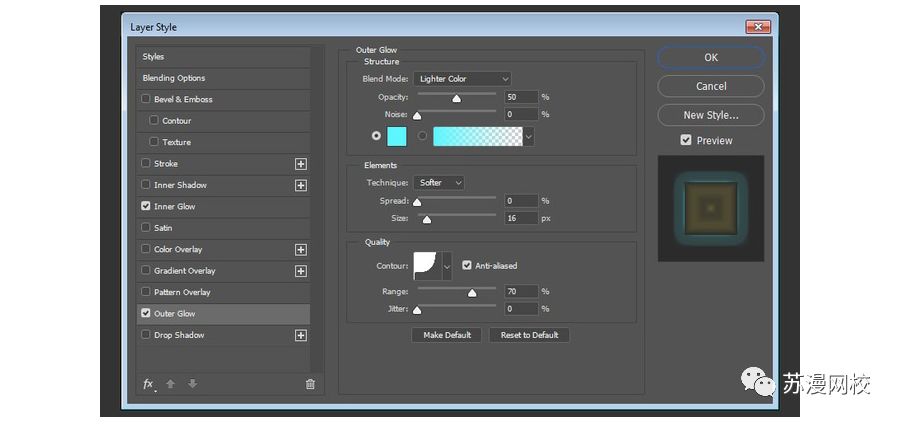
Step 2: Outer Glow
Add an Outer Glow with color ##5df5ff , Blend Mode Light, Opacity 50%, Size 16px, Distance 0, Contours Cove-Dark.

This will add more light effects to the font.
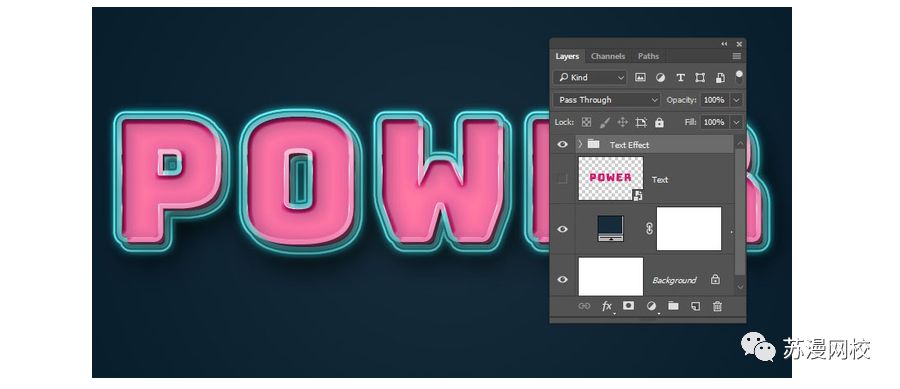
7. Add outer glow
Step 1:
Group all visible layers and name it "TextEffect"
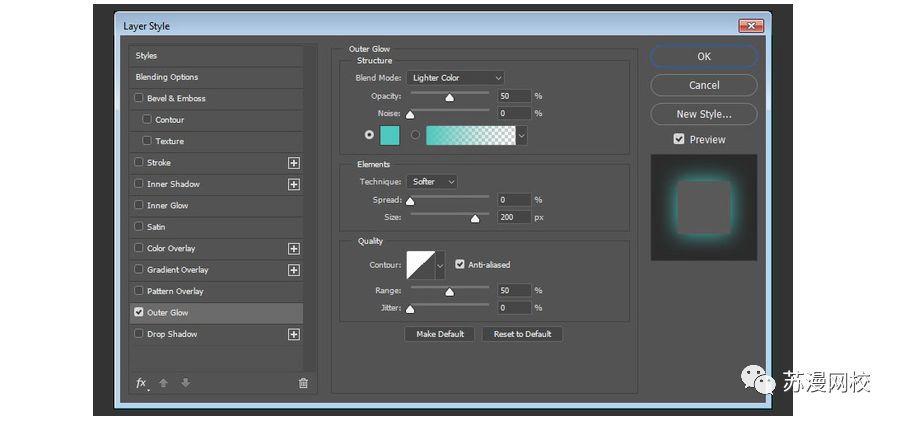
Step 2:
Add an Outer Glow to the "TEXTEFFECT" layer group with the following parameters: Color #4ec8be, Size 200px, Layer Blending Mode to Light, Opacity 50%.
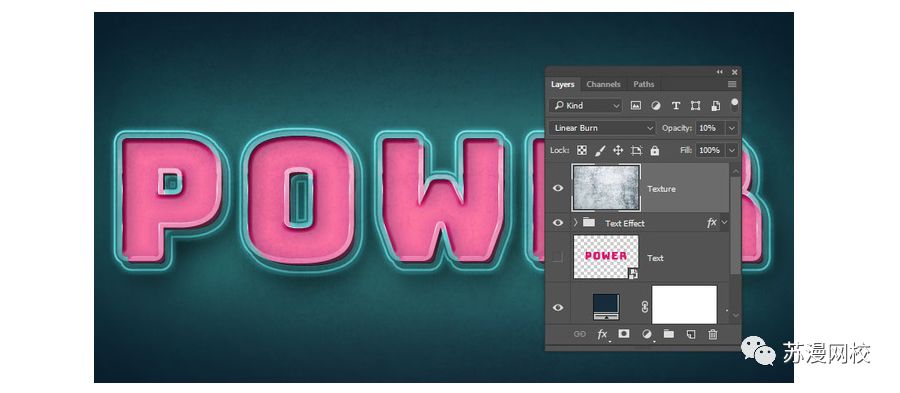
6. Add texture effects to the text
Step 1:
Place the Digital Grunge Texture 14 image (included in the zip pack) on top of all layers and rename it Texture. Go to Edit > Transform > Rotate 90° counterclockwise, change the texture layer's Blending Mode to Linear Burn and its Opacity to 10%. Resize the texture as needed to get the result you like

Well, this simple, bright, and glowing text effect is complete. The final rendering is as follows. Isn’t it very simple, let’s do it quickly!

Articles are uploaded by users and are for non-commercial browsing only. Posted by: Lomu, please indicate the source: https://www.daogebangong.com/en/articles/detail/PS%20Luminous%20Font%20Tutorial.html

 支付宝扫一扫
评论列表(196条)
测试