Click on the blue word

Follow us
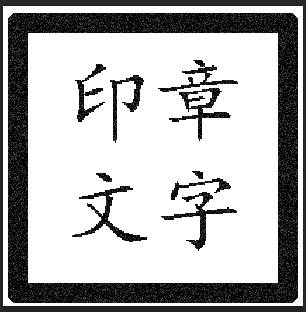
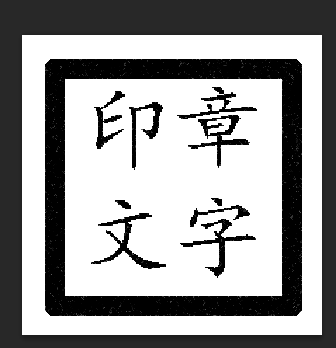
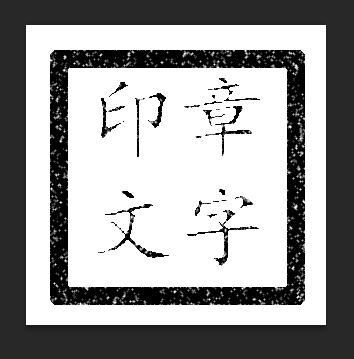
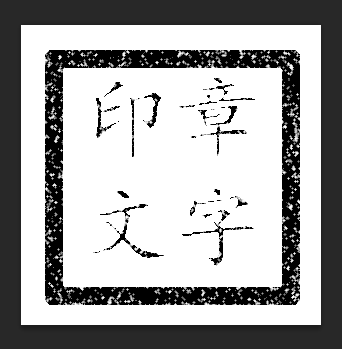
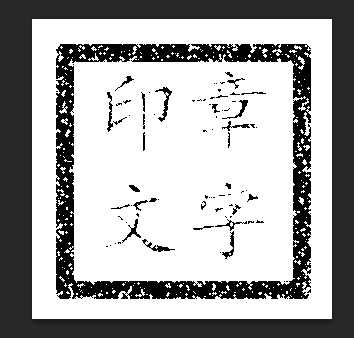
Stamp text
This This tutorial makes text with stamp effect.
< span >Operating Steps
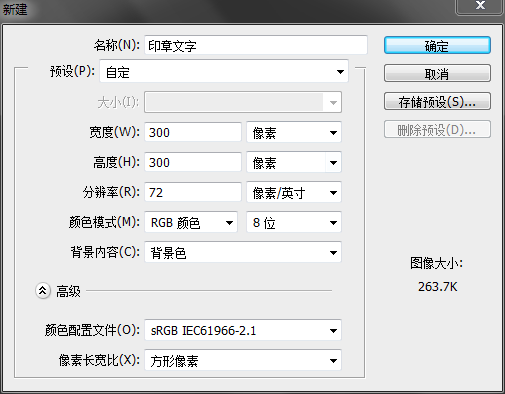
1. Select【File】→【New】command, and the "New" dialog box will appear. Set the "Width" of the new canvas to 300 pixels, and the "Height" to 300 pixels, and name the canvas "Stamp Text". After setting, click “OK” and the defined canvas will appear.
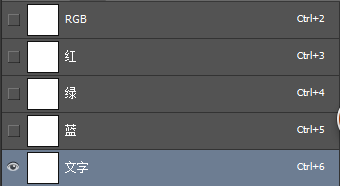
2 , Open the "Channel" panel, create a new channel, and name the new channel "Text", set the foreground color to black, and the background color to white, fill the "Text" channel with white.
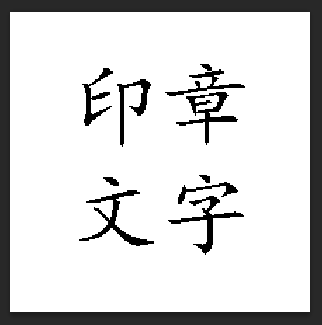
3. Select "Text Tool" in the toolbox, select [Window] → [Character] command, open the "Character" panel, set the font to "regular script" and the size to 90 points, enter Make the text for the stamp and place it in place, then press Ctrl+D to deselect it.

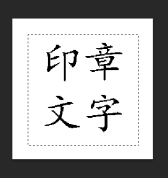
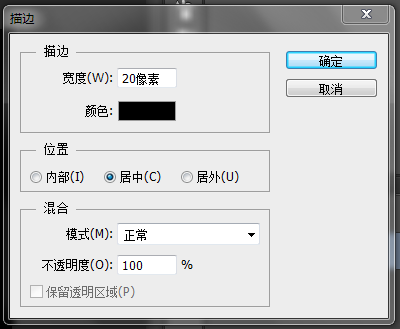
4 , Select "Rectangular Marquee Tool" in the toolbox, hold down Shift, create a square selection around the text, and then select 【Edit】→【Stroke】command, in the "Stroke" In the dialog box, set the "Width" to 20 pixels, and use the default settings for other parameters. After setting, click "OK" and press Ctrl+D to cancel the selection.

5. Press and hold Ctrl to select the "Text" channel to create a selection area, press Shift+Ctrl+I to invert the selection area, and then select the 【Filter】→【Noise】→【Add Noise】 command to add In the Noise dialog box, set the Amount value to 9%, set the Distribution to Gaussian distribution, select the Monochrome check box, click OK, and press Ctrl+D to cancel the selection .
6 , Select the 【Filter】→【Stylize】→【Diffusion】 command, in the "Diffusion" dialog box, set the "Mode" to "Darkness Priority" , after setting, click OK. Then press Ctrl+F to apply the Diffuse filter again.
7 , Select【Filter】→【Blur】command.
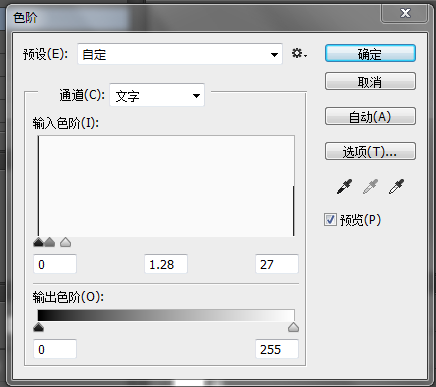
8. Select【Image】→【Adjustment】→【Color Scale】command, in the "Color Scale" dialog box, set "Input Color Scale" to 0, 1.28, 27, set "Output Color Scale" ” is set to 0, 255.
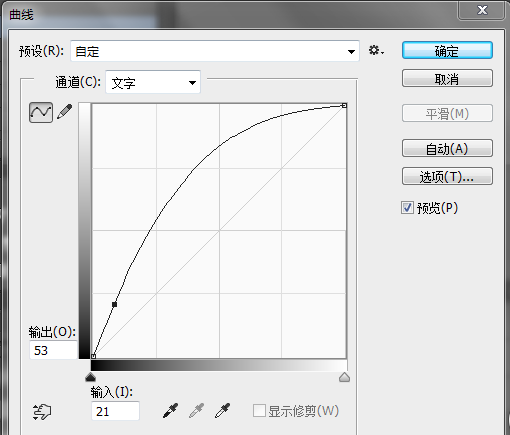
9. Select【Image】→【Adjustment】→【Curve】command, in the "Curve" dialog box, set the parameter value by dragging the curve, set the "Input" to 21, and set the "Output" to 53.
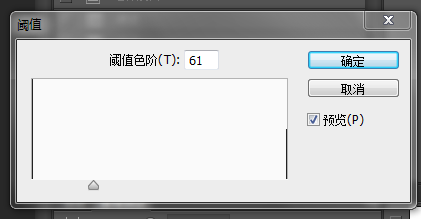
10. Select【Image】→【Adjustment】→【Threshold】command, set the “Threshold Level” to 61.
11 , The "text" channel is processed, and then fill the color for the stamp, hold down Ctrl and click the "text" channel to load the selection, then press Shift+Ctrl+I to invert the selection, and switch to the RGB channel.
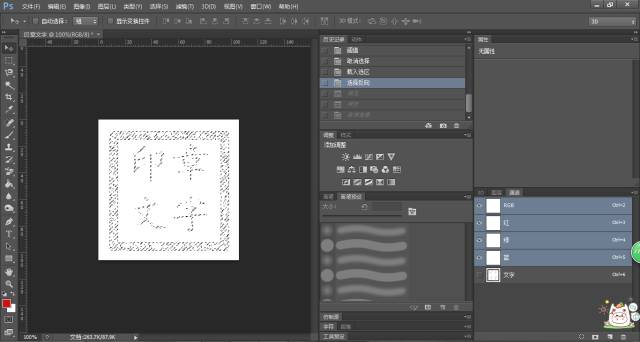
12. Set the foreground color to red, then press Alt+Delete to fill the selected area with the foreground color.
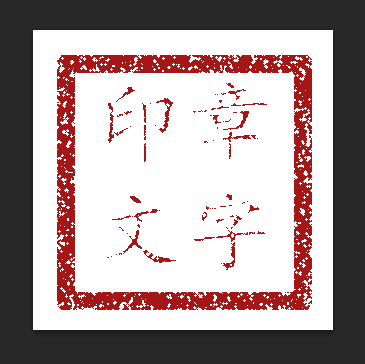
Tutorial That's all for now, the sample pictures in the tutorial are not beautiful enough, you can modify some parameters and fill colors according to your own feeling when making it to achieve the effect you want.
Photoshop The operating environment is the 2015 version of CS6
< strong >·END·
Practice vision
A group of people who record their lives with video
empty ·
Articles are uploaded by users and are for non-commercial browsing only. Posted by: Lomu, please indicate the source: https://www.daogebangong.com/en/articles/detail/PS%20Image%20Effects%20%20Stamp%20Text%20in%20Fonts.html
 支付宝扫一扫
评论列表(196条)
测试