Preface
Yesterday, a short video made from PPT was released. Many friends were very interested and asked how to make it. This article completely explains the five-step method of making a short video in an electronic photo album using PPT.
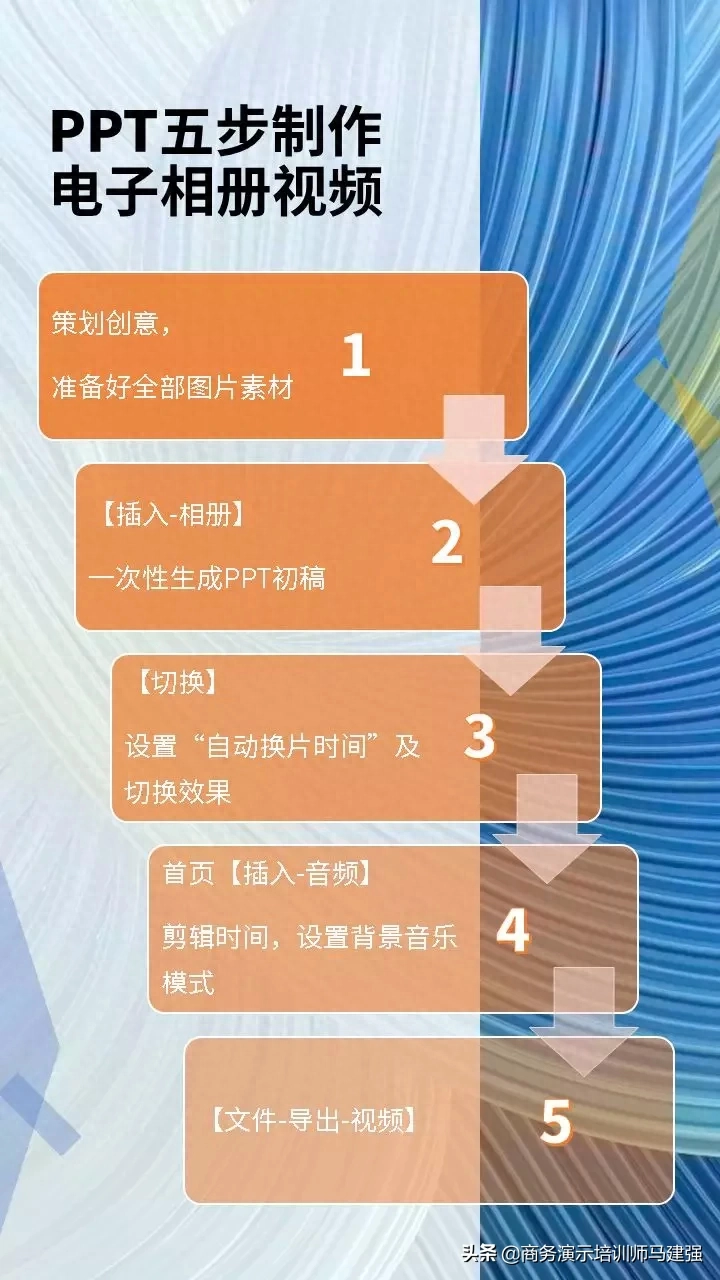
- The first step: plan the creativity and prepare all the pictures;
- The second step: [Insert-Album] form the first draft of the picture;
- Step 3: [Switch] Set up automatic show;
- Step 4: [Insert - Audio] set background music;
- Step 5: [File - Export -video】.
Please read this article for details, or watch the demonstration video at the end of this article.
Detailed explanation:
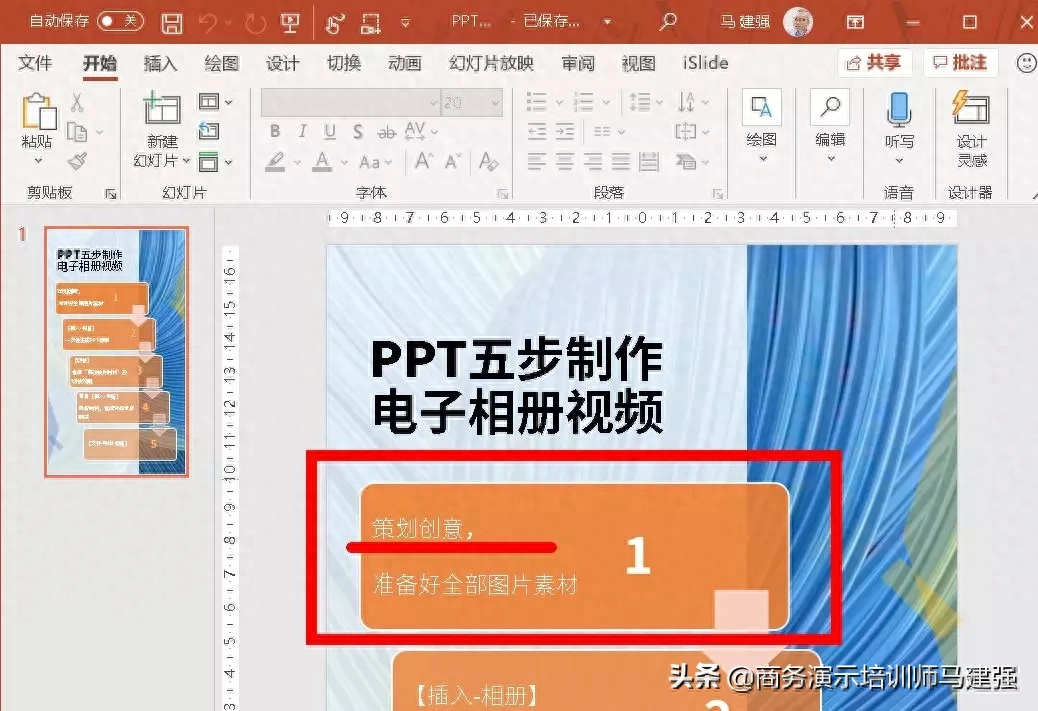
Step 1: Plan ideas and prepare all pictures
This is the most important link. You must first conceive the theme and content to be expressed, and supplement it with good creativity before you can design and produce good works.
Step 2: [Insert-Album]
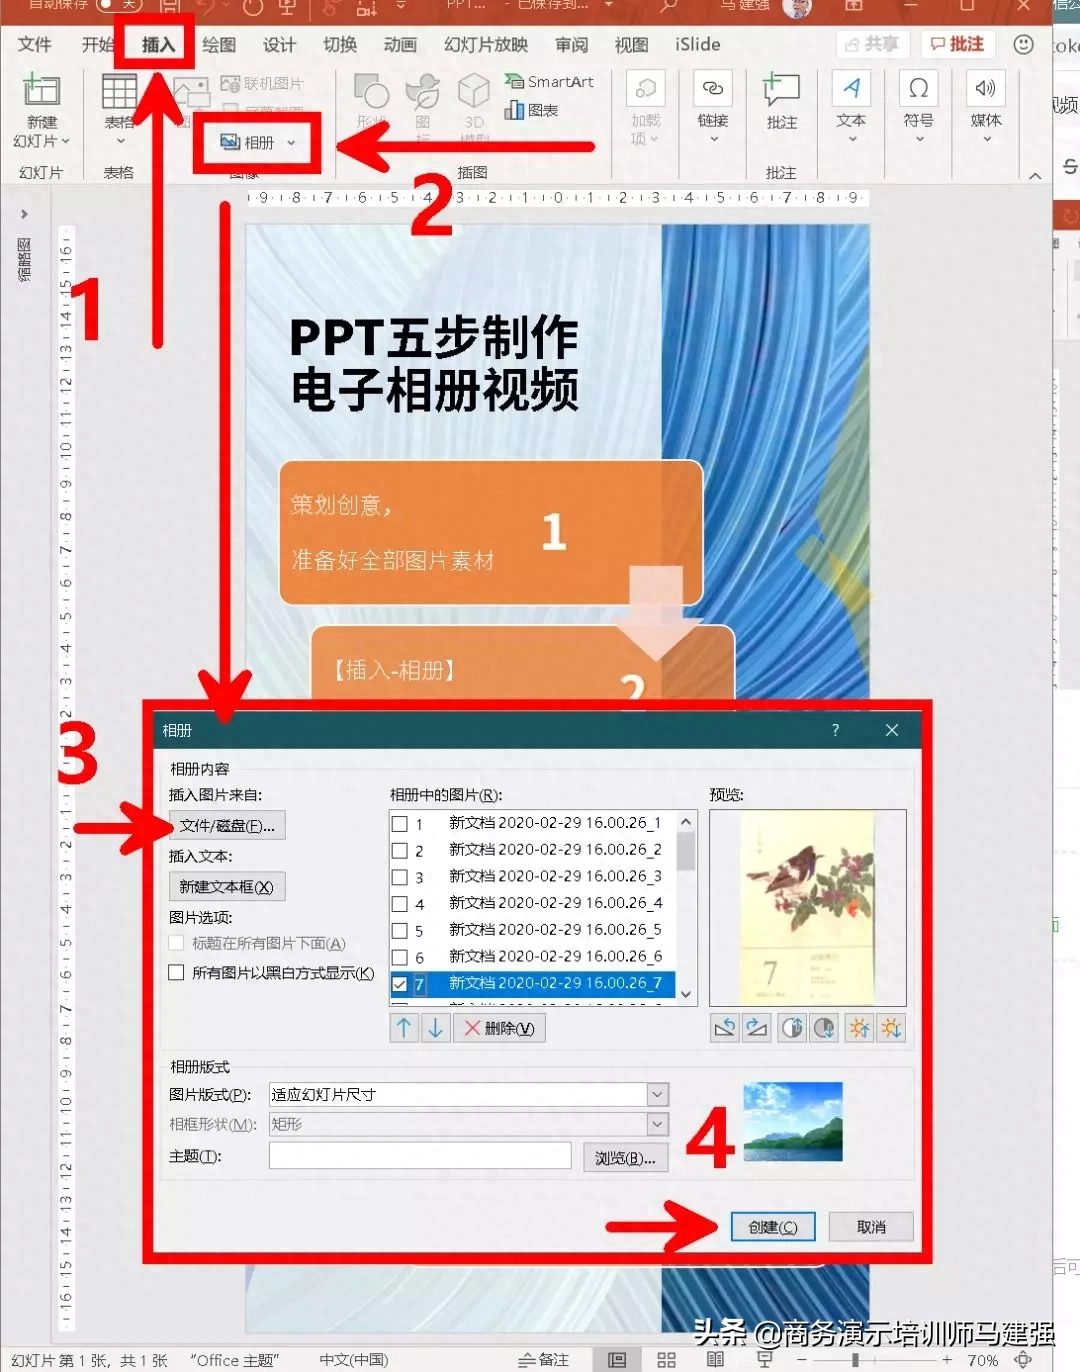
1. In the [Insert] toolbar, click [Album], and click [File/Disk] in the pop-up window;
2. Find the required picture in the pop-up folder, click [Insert], and the required photo will appear in the list below;
3. You can adjust the order, direction, brightness, etc. of the photos as needed. After the adjustments are completed, click [Create].
A new PPT file will then be formed, with one picture per page.
You can adjust it to vertical version in [Design-Slide Size (or Page Settings)] to adapt to the needs of vertical screen viewing when publishing on mobile phones.
Step 3: [Switch] Settings
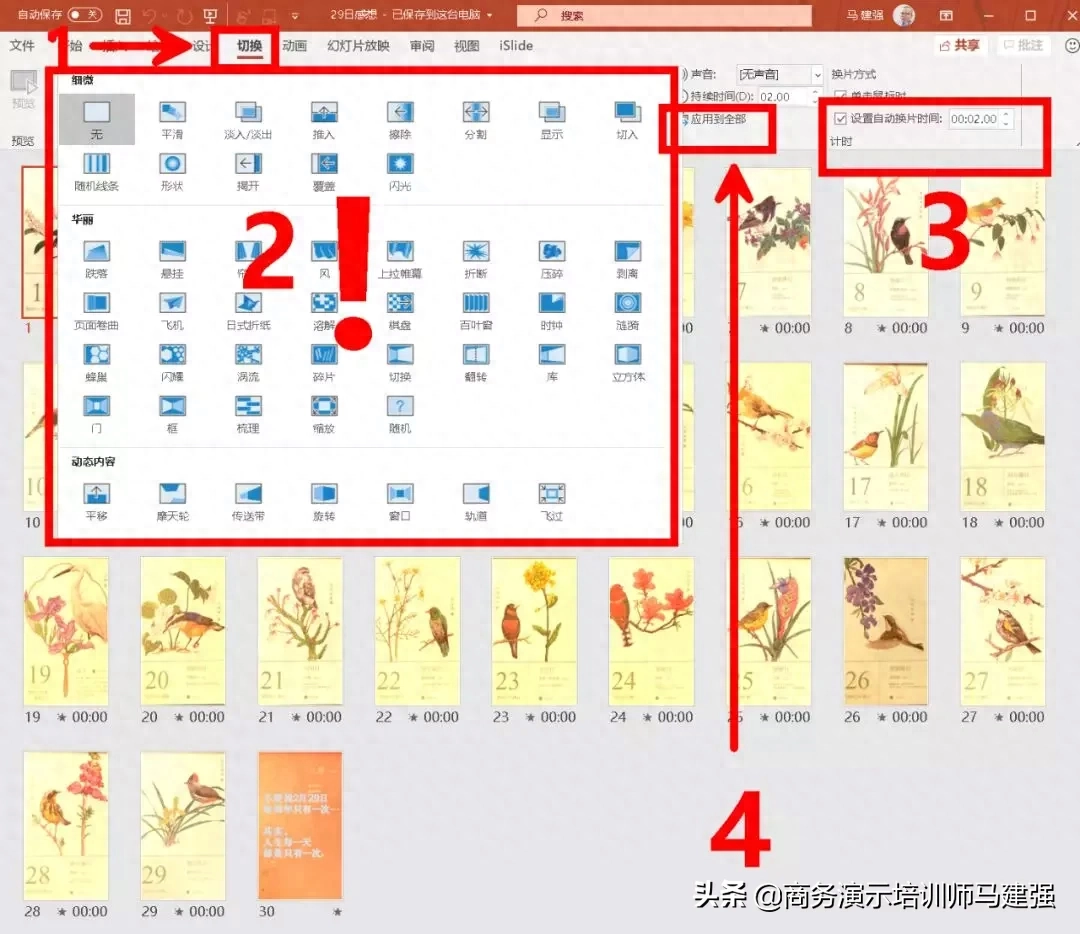
Set the page turning effect of each page in the [Switching] toolbar, that is, the dynamic change method from the previous page to this one, and the [Auto Changing Time] (current page). You can set them individually or [Apply all] at once.
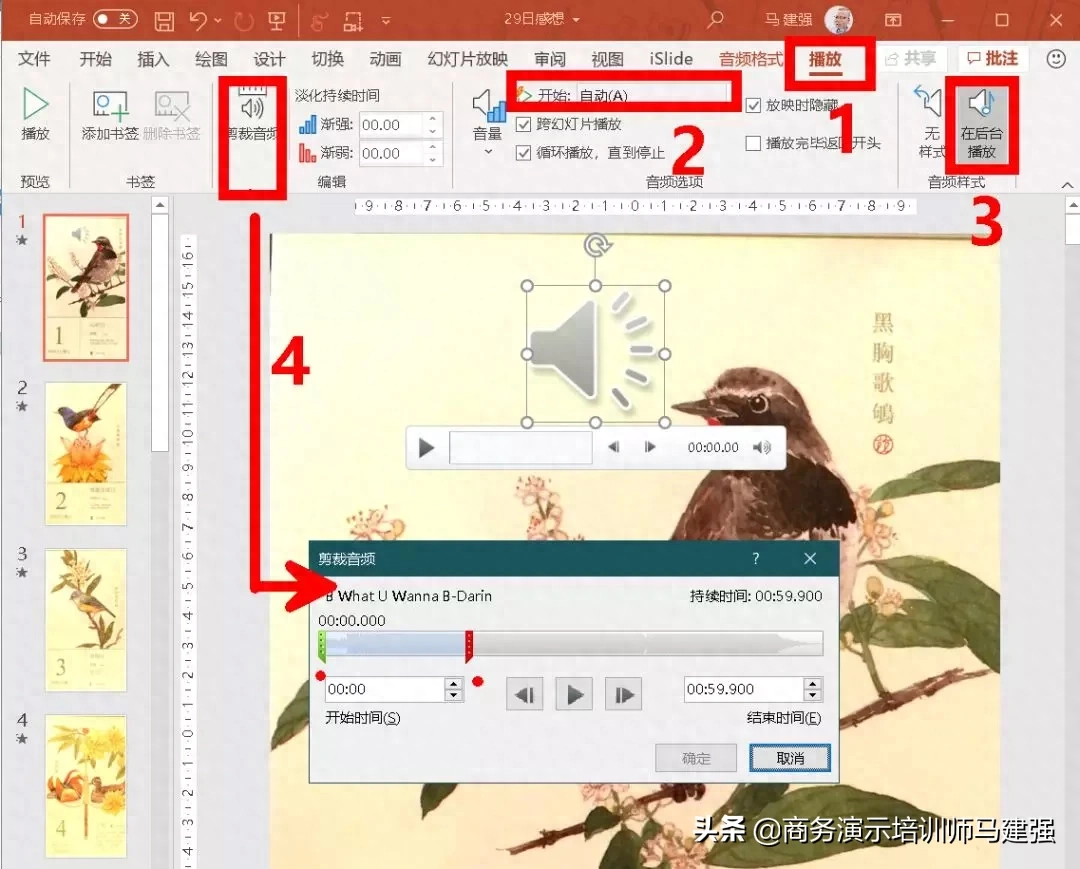
Step 4: [Insert-Audio] Configure background music
1. In the first slide, go to [Insert], find [Audio] [Audio from Computer], and insert the required music;
2. Select the small speaker icon representing the music, go to the [Play] toolbar, and set [Start-Auto] so that the slideshow plays while the music sounds;
3. Set [Play in the background] to become the background music (otherwise only this page has music). If the lower version does not have this option, select [Play across slides];
4. [Trim audio] is the total slide play duration.
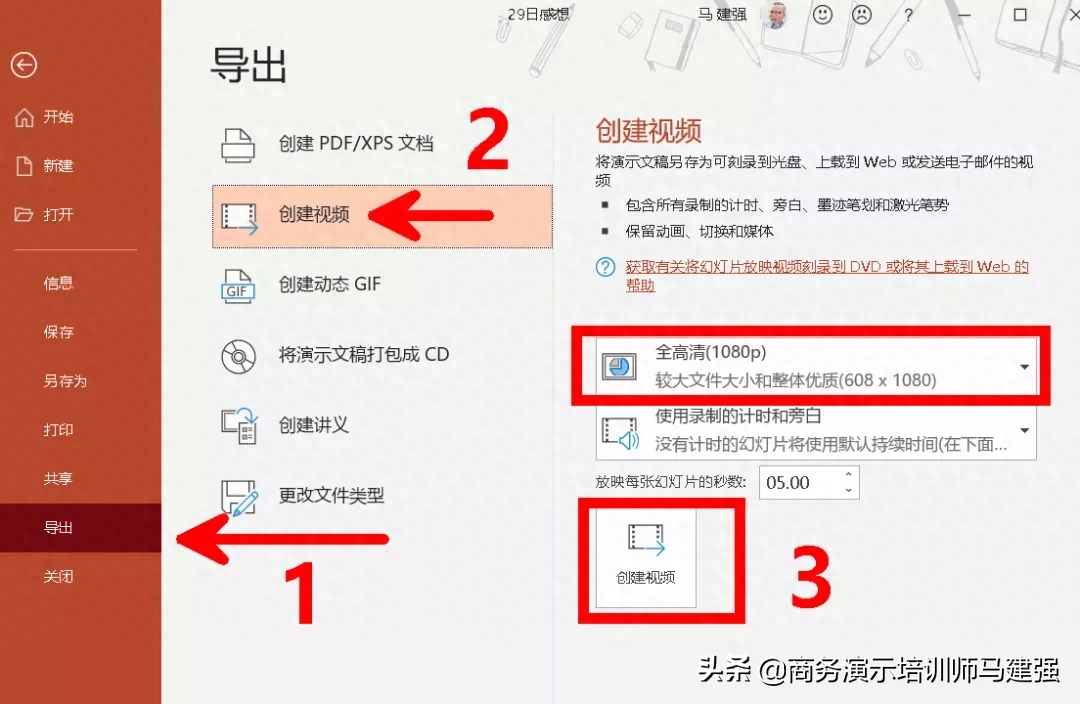
Step 5: [File-Export-Video]
1. Click [File], export the video according to the following prompts, and select the resolution of the output video;
2. Click [Create Video], select the folder, name it, and then start generating the video.
Special reminder: if there are many pictures, the file is large, and the computer performance is weak, it may take a long time.
You can watch the following demonstration video tutorial and practice while watching.
Articles are uploaded by users and are for non-commercial browsing only. Posted by: Lomu, please indicate the source: https://www.daogebangong.com/en/articles/detail/PPT-wu-bu-zhi-zuo-dian-zi-xiang-ce-duan-shi-pin.html

 支付宝扫一扫
评论列表(196条)
测试