
Today I will share with you a "lazy" tip - "Placeholder". I believe some people have heard of it, but none of them actually use it.
First we need to know what a "placeholder" is,
In layman's terms, when you open a PPT, two "dotted boxes" will appear. These two "dotted boxes" are "placeholders".
At first glance, this guy looks the same as "Text Box", but the difference is actually quite big.
The simplest difference is that the "text box" can only hold text, while the "placeholder" can hold "pictures", "charts", "tables", "smartart", and "videos"

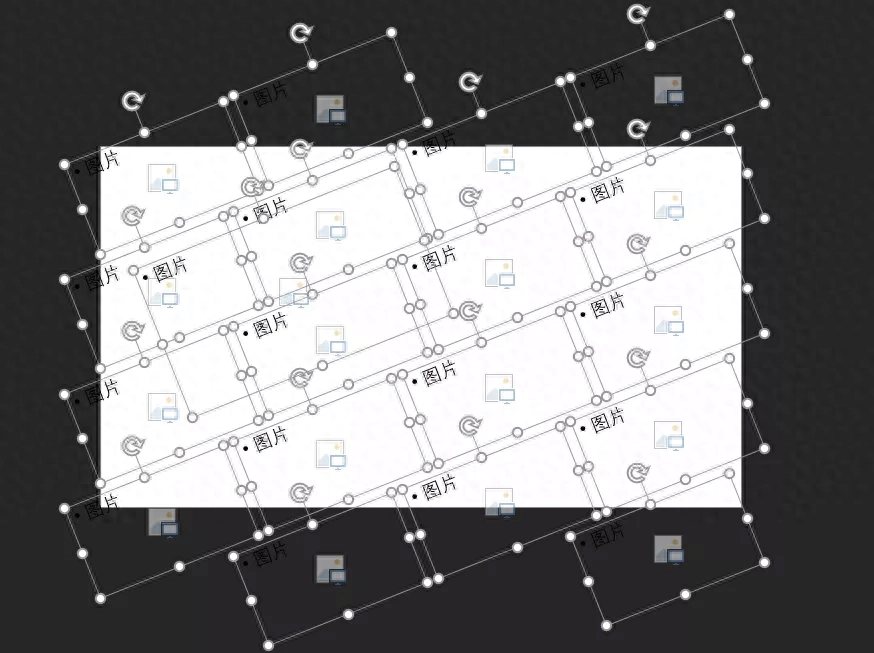
The many "icons" on this picture are all "placeholders", and each of them uses a different function.
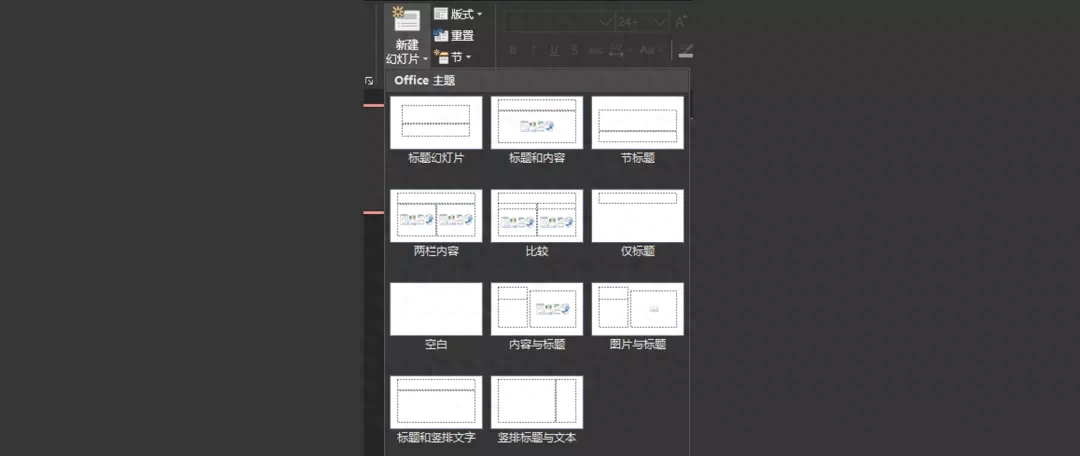
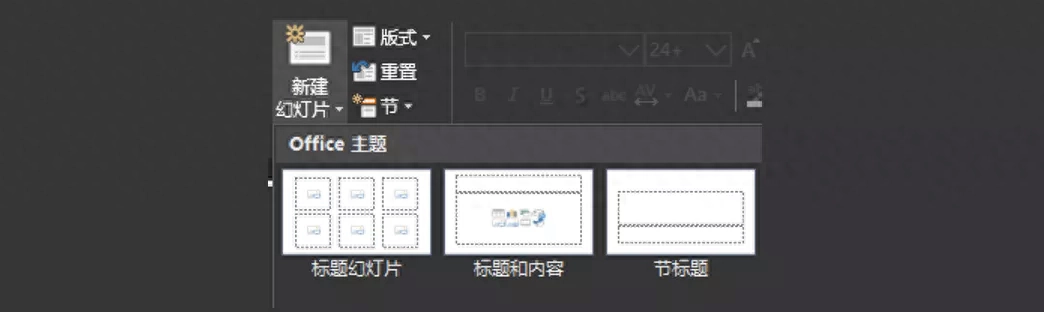
This is the PPT that comes with 11 placeholder layouts.
However, because the default "Placeholder"Layout here is neither good-looking nor practical, when making PPT, everyone will first delete the default "Placeholder" character", and then start designing the PPT.
What can we do with placeholders?
In fact, placeholders are really powerful, and image layout can be done in one second.
If you don’t believe it, let’s take a look at a GIF animation to briefly understand the power of this placeholder.
When formatting pictures, directly select the image, drag it into the PPT, and it can be formatted in one second.
This is a PPT mockup that I often use. It can be created in just one second using "Placeholder". Isn't it very convenient?
How to design and make placeholders?
"Placeholder" needs to be designed in "Slide Master", click "Slideshow" under the "View" tab "Master".

After opening the Slide Master you will see the Insert Placeholder.

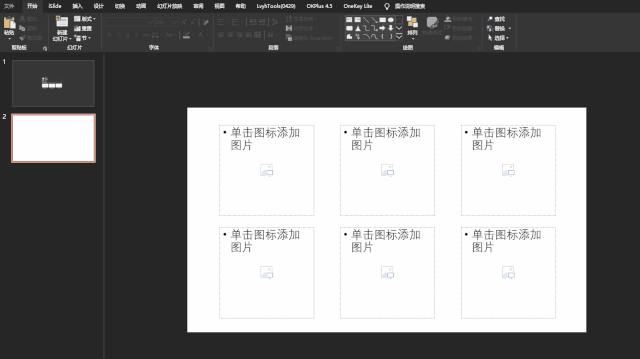
We randomly insert a "Placeholder" in the "Slide Master", and I insert six "Image Placeholders" .
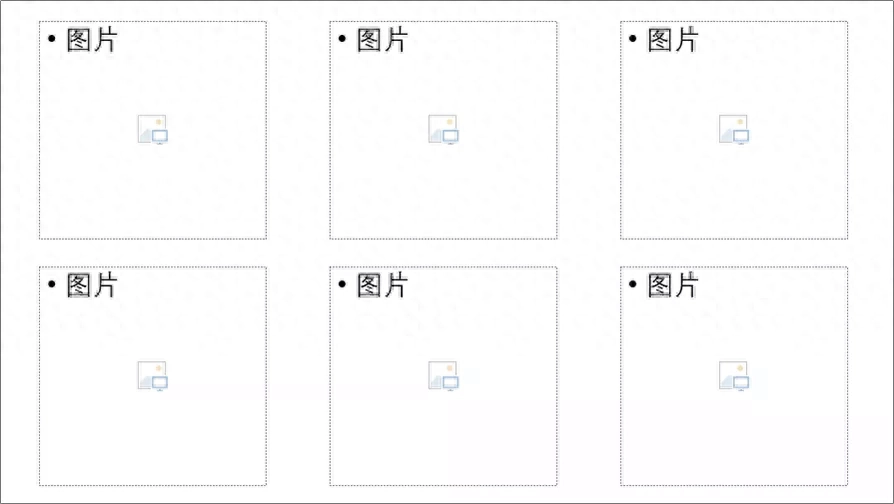
When we close the master, the same "Placeholder Layout" will appear in the new slide.
Click these Placeholders to insert images directly.
Once we learn the operation, we can create our own "Placeholder Layout"
Placeholder layout practical case
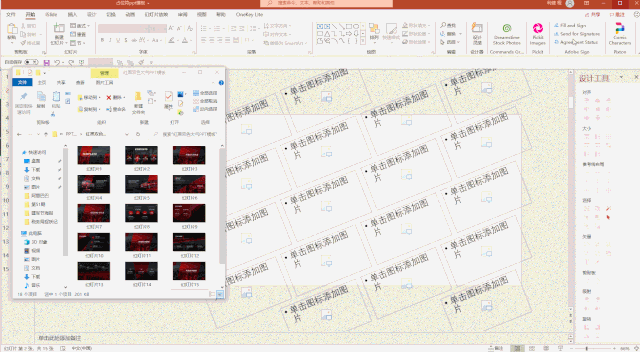
1. Placeholder mockup
This is very simple and is not much different from ordinary prototype production.
First insert multiple 16:9"Image Placeholders".
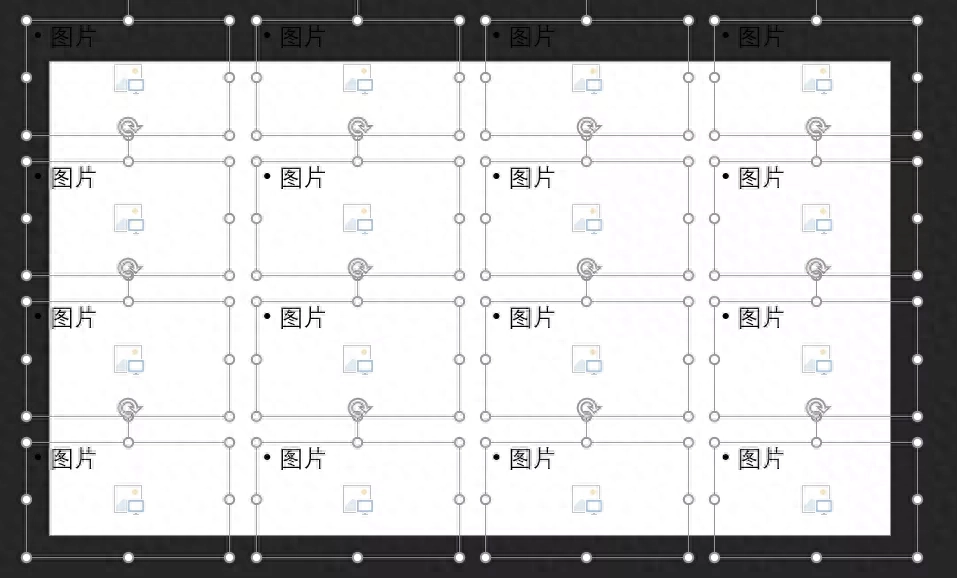
Just rotate the "Image Placeholder" according to the needs of the prototype.
With so many "image placeholders", it is inefficient to fill in images one by one.
Let me teach you a quick method: Select all the pictures you want to fill in and drag them into the PPT.
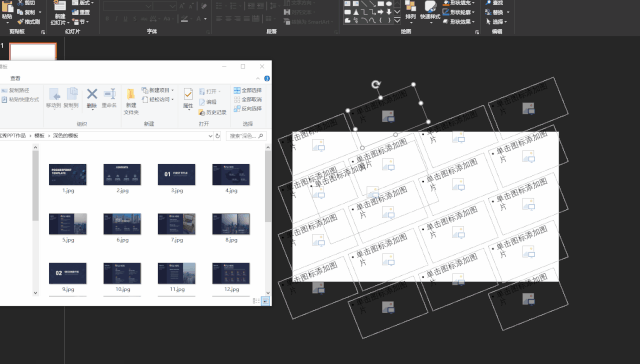
This will allow you to create a quick-filling Image Placeholder.
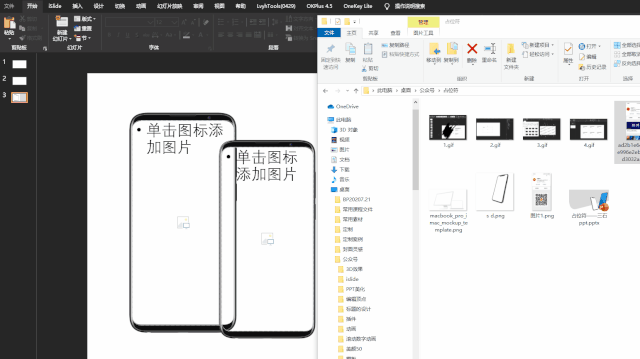
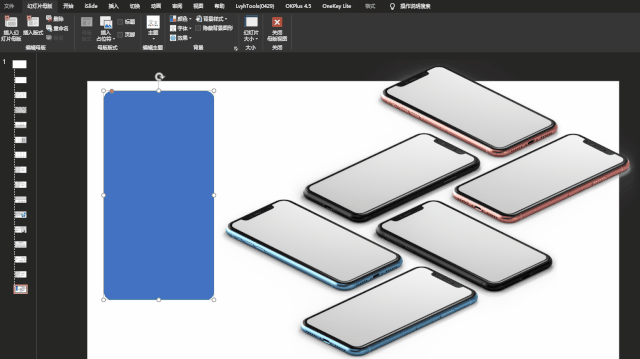
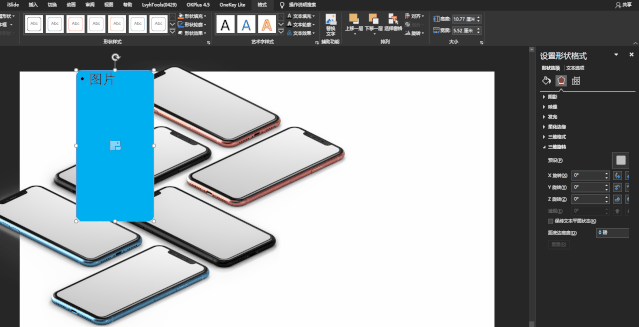
2. Mobile phone and computer mockup placeholders
When processing some screenshots, we often use mobile phone and computer mockups.

However, every time you fill a screenshot or photo into the sample machine, you need to resize the screenshot repeatedly.
We can make a "image placeholder" that is as big as the mobile phone screen so that the image can be directly dragged into the sample machine.
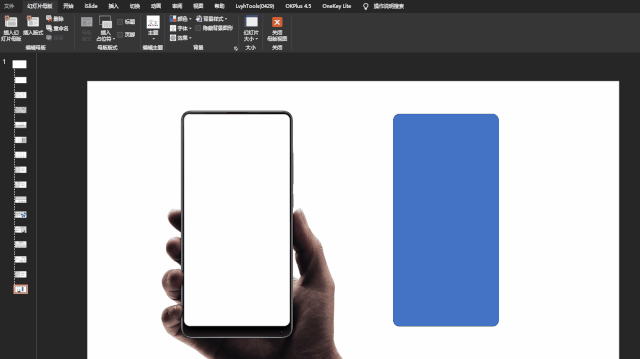
Preparation method:
Place a mobile phone mockup in the "Slide Master", and insert a "Rounded Rectangle" the same size as the mobile phone screen, and combine it with the "Image placeholder" "Character" to perform "Boolean operations"
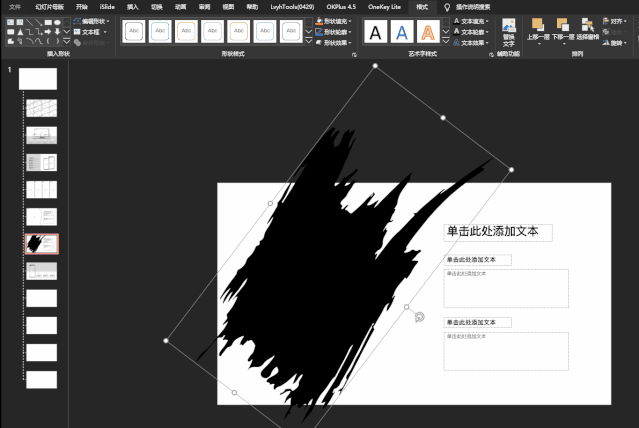
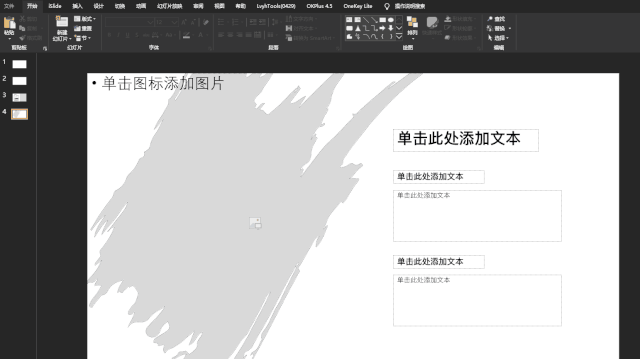
3. Creation of brush placeholders

Since "image placeholder" can perform "Boolean operations", we can use "Boolean operations" to create any shape Image placeholder.
We can use "Brush" and "Image Placeholder" to perform "Boolean operations" to create "Brush Occupier" symbol".
I also created a few pages of "Image Placeholders"masters, and there are ways to get them at the end of the article.
4. 3D mobile phone and computer mockup placeholders
Mobile phone prototypes can also be 3D, which can also be achieved through "Picture Placeholder".


Preparation method:
Place a three-dimensional mobile phone mockup in the "Slide Master" and insert a "Rounded Rectangle"
Perform "Boolean operation" - "Intersect" between the "picture placeholder" and this "rounded rectangle" in order to obtain a rounded "picture placeholder".
Perform three-dimensional rotation settings on this "Image Placeholder". You need to try the angle value of the three-dimensional rotation yourself.
If the three-dimensional selection does not match perfectly, we can fine-tune it through "Edit Vertices".
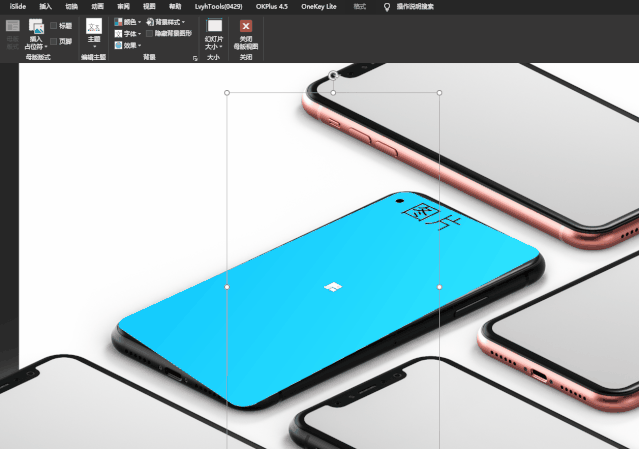
The disadvantage is that the shape will be deformed after fine-tuning, which cannot be avoided in PPT.

Finally, fill in the picture.
By the way, I’ll give you a final bonus: I’ll give you a prototype placeholder template.
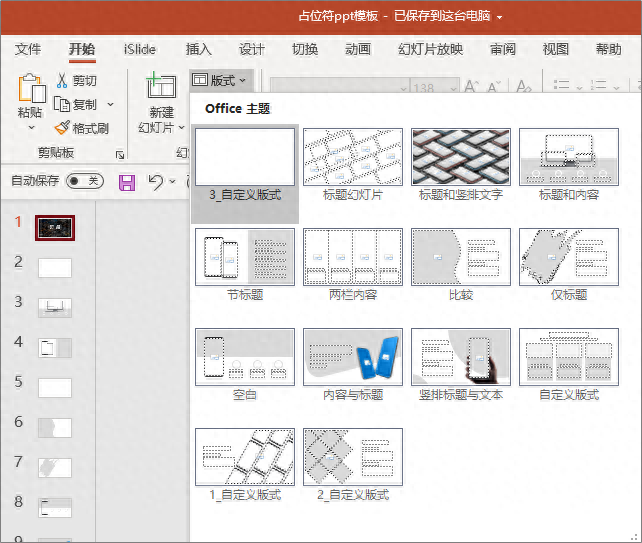
We open PPT and click New Slide. You can see many PPT placeholder layouts in the layout. You can use them with just one click.

To learn more PPT tips, you can follow my headline column.
Articles are uploaded by users and are for non-commercial browsing only. Posted by: Lomu, please indicate the source: https://www.daogebangong.com/en/articles/detail/PPT-tu-pian-pai-ban-zhen-de-zhe-me-jian-dan.html
 支付宝扫一扫
评论列表(196条)
测试