PPT document is A commonly used document format that can combine text, pictures, videos, etc. to visualize complex things. It can express our ideas more intuitively. Sometimes we need to record the content of PPT. Do you know how to record PPT?
It is very easy to record PPT. The editor below will teach you how to record PPT documents. Come and learn!
Tool for recording PPT
Many friends don’t know that PPT has its own screen recording function. How to record PPT ? The screen recording that comes with PPT can record video and picture-in-picture for PPT. However, PPT screen recording has limitations. It cannot record videos in multiple formats. When performing picture-in-picture recording, the camera position cannot be dragged at will. If we want to better record PPT documents, we can use professional screen recording software - Datafrog Screen Recording Software for recording.
Datafrog screen recording software In addition to supporting video recording and picture-in-picture mode recording, it also supports a variety of (game recording, audio recording, camera recording, etc.) Recording mode, when using it for picture-in-picture recording, you can: 1) Move the camera position as you like; 2)Record videos without watermark; 3) strong>Shield the privacy window and set unnecessary processes to be transparent and non-logging;4)After the recording is completed, you can also perform advanced editing and other post-processing on the file.
2. How to record PPT
The above introduces the PPT that comes with it After discussing the differences between screen recording and professional screen recording tools, the editor below uses Datafrog screen recording software to teach you how to record PPT:
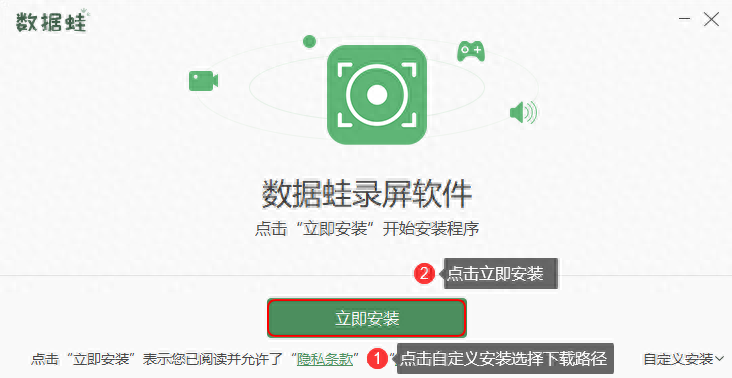
Step 1. Find the Data Frog screen recording software on the Data Frog official website and download it. After the software, proceed to software installation. When installing the software, you can install it on the D drive, which can save space on the C drive.
Perform software installation
Step 2. If it is your first time to download and install this software, a [Newbie Guide] will pop up when you open the software, through which you can quickly learn about the software. Each recording mode will have 2-3 icons to briefly explain how to operate it.

Newbie guide interface
Step 3. Click [Video Recording] on the left side of the main interface of the software to enter the [Video Recording] page. If you only want to record PPT content, perform video recording. That’s it; if you need to record PPT content and record faces at the same time, you need to turn on the camera (i.e. picture-in-picture recording).
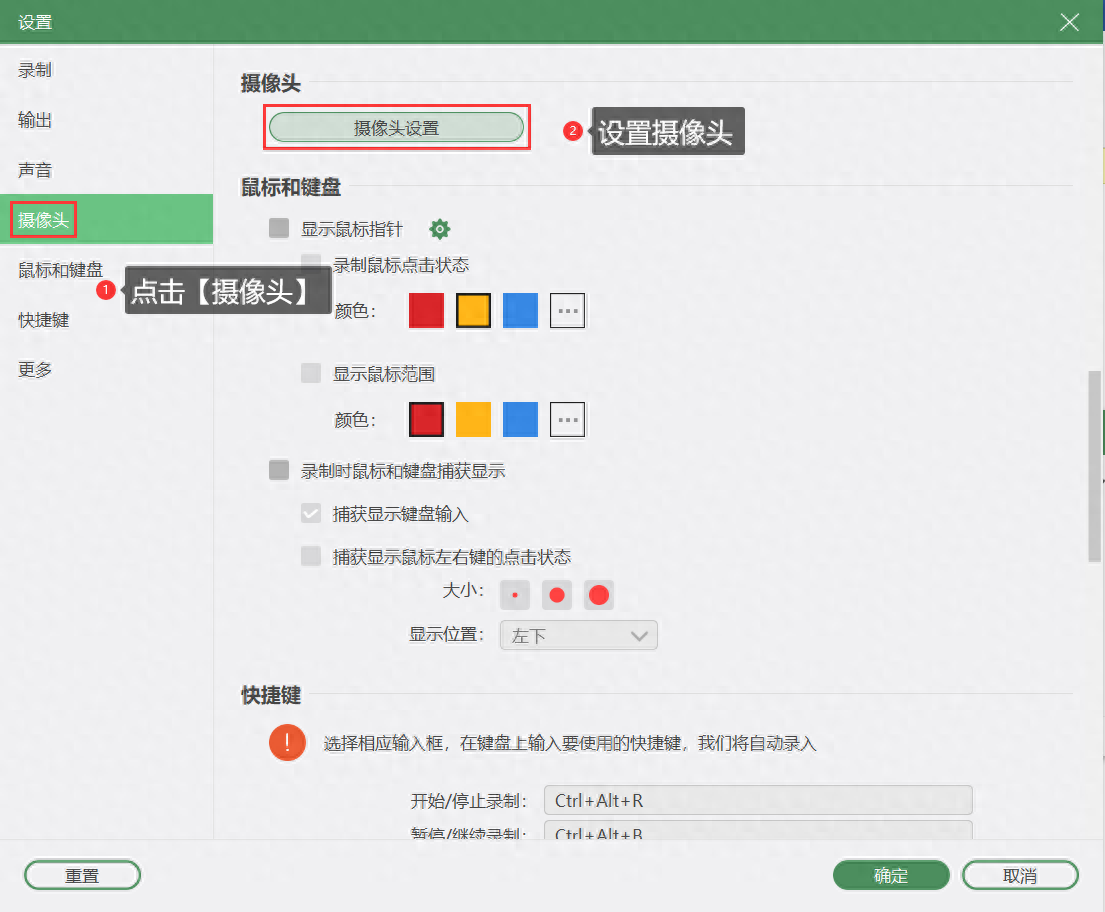
In order to make the recording effect better, when recording in picture-in-picture, you can click [Recording Settings] in the upper right corner of the page to enter the [Settings] page, click [Camera] on the left, Perform noise reduction on the camera. Then select the PPT range that needs to be recorded and click the [REC] button to record.

Datafrog screen recording software video recording page
Video recording setting interface
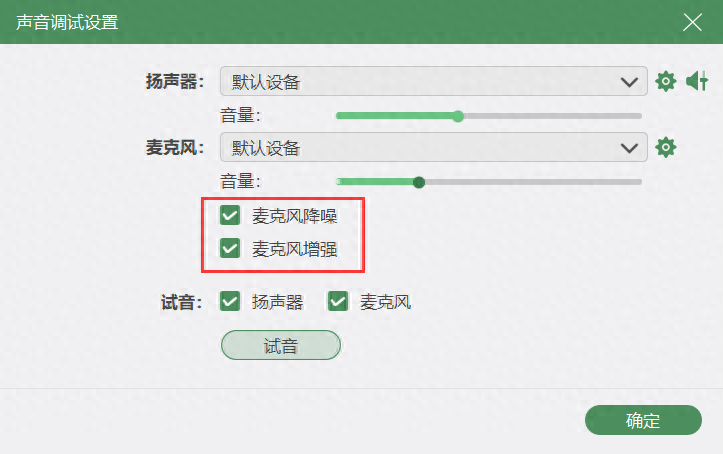
Note: How to record PPT screen recording with sound? If you need to record your own description of the PPT (external sound), you can turn on the microphone; when recording the sound in the PPT (system sound), you can turn on the speaker. When using a microphone, you can click the [Sound Settings] button in the upper right corner of the [Video Recording] page to enhance and reduce noise on the microphone, which can improve the clarity of the recorded voice.

Adjust the recording sound source
Debug sound source interface
Note: How to record PPT screen recordings in different formats? The default screen recording format is MP4. You can click [Output Settings] in the upper right corner of the [Video Recording] page to modify the video format on the [Settings] page, such as changing it to WMV, MOV and other formats.

Video recording output setting button
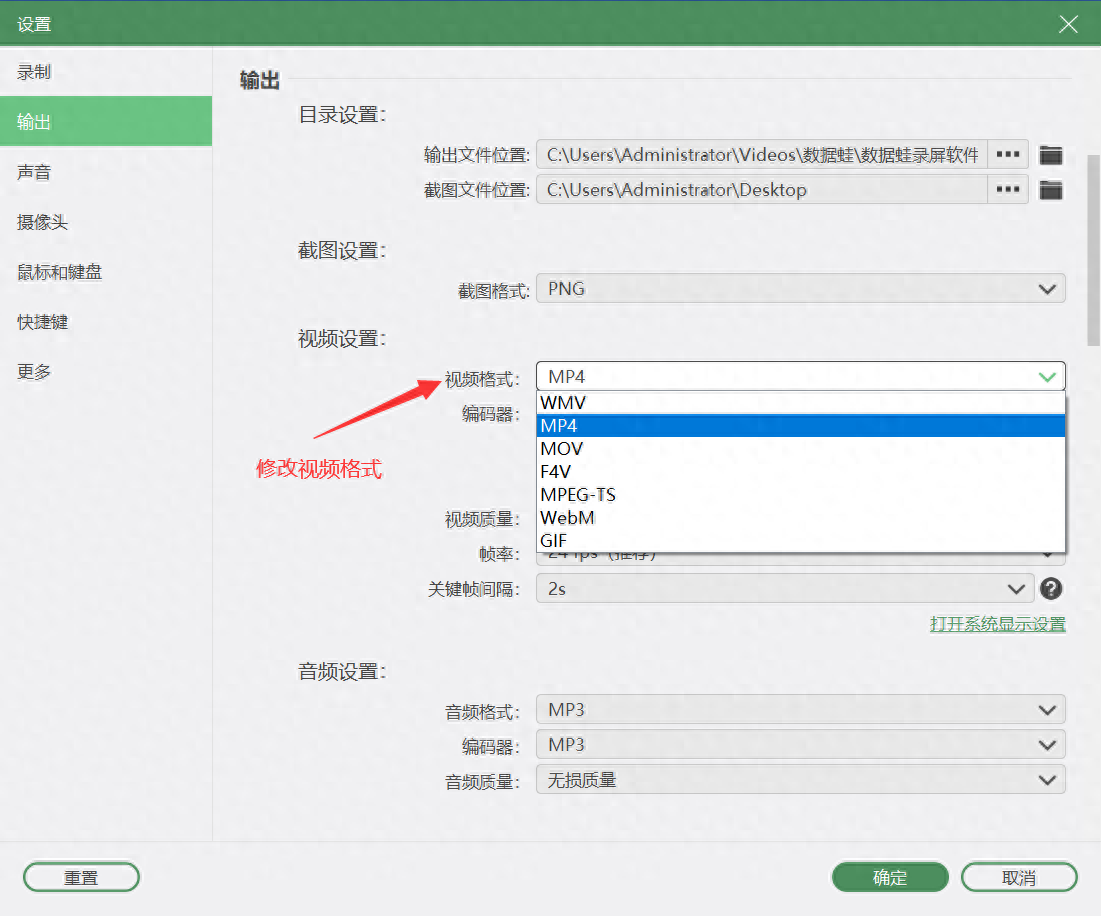
Video format modification interface
Step 4. During the recording process, you can use tools such as brushes and focusers to annotate the PPT content. After recording, click the [Finish] button to enter the [Recording History] page, where you can use [Media Tools] to perform post-processing (compression, conversion, merging) and other post-processing on the screen recording files.
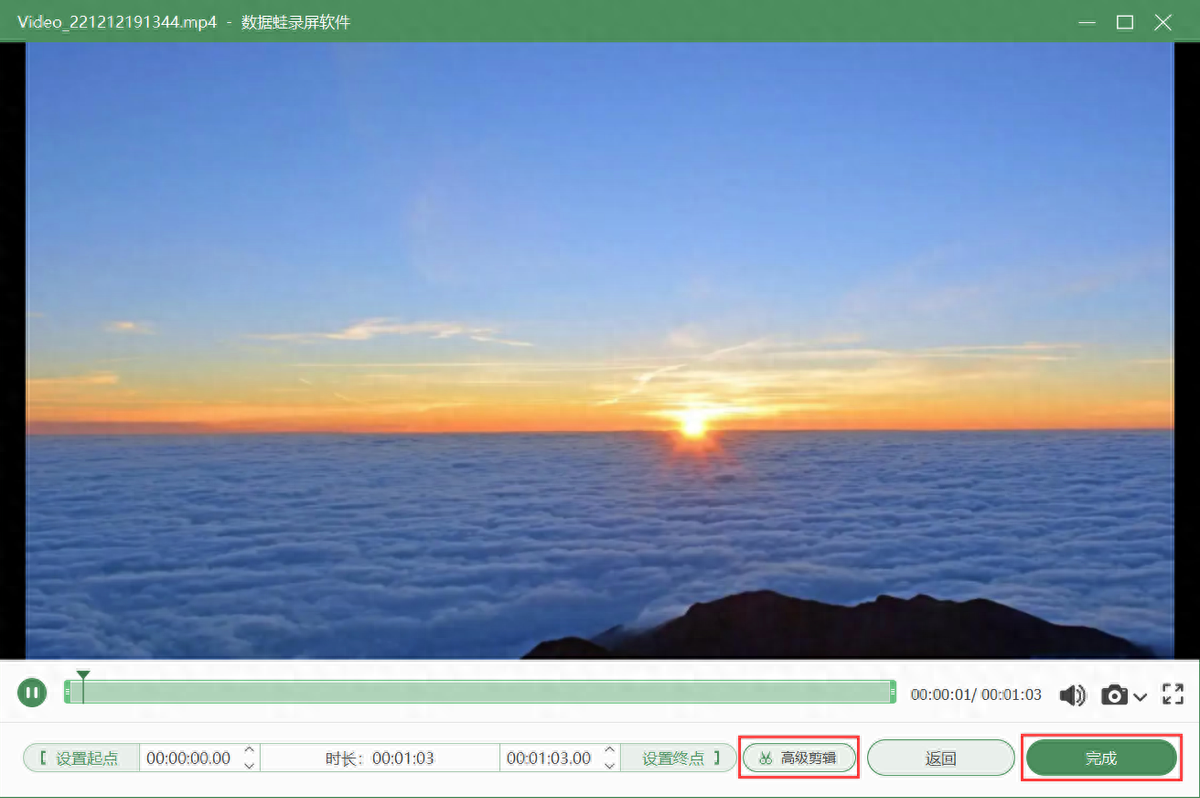
Preview window saving interface
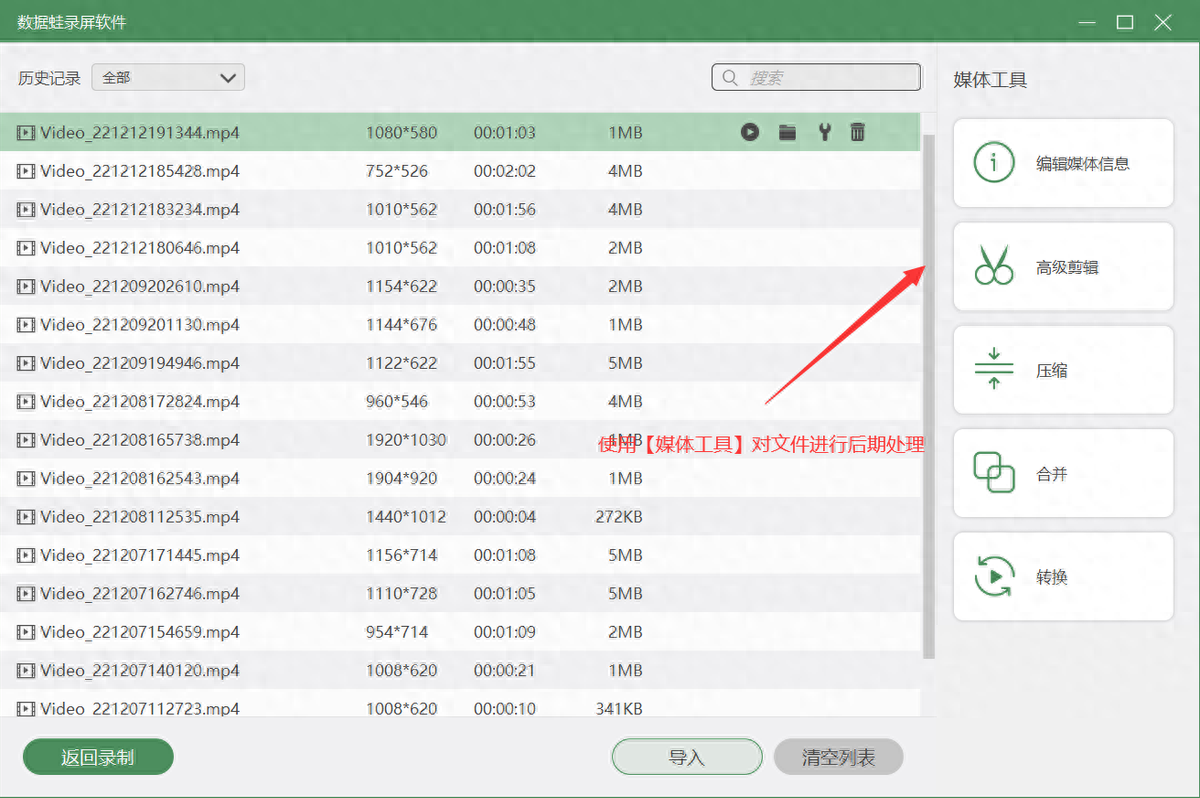
Recording history page
The editor of the above article demonstrated to you the steps on how to record PPT using the Data Frog Screen Recording Software. Have you learned it? In fact, in addition to recording videos, Datafrog Screen Recording Software can also be used as a screenshot (can take screenshots, long screenshots, menu screenshots), if you also need one like this You can download the software and try it out.
Articles are uploaded by users and are for non-commercial browsing only. Posted by: Lomu, please indicate the source: https://www.daogebangong.com/en/articles/detail/PPT-ru-he-lu-zhi-jiao-ni-PPT-lu-zhi-de-ji-qiao.html

 支付宝扫一扫
评论列表(196条)
测试