Hello, everyone, I am Brother Li~
Recently, a group of new readers have come to the public account, and they have not seen many of the skills and knowledge points I mentioned before.
So don't know how to do it?


Considering the needs of some newcomers, today I will give you a list of techniques that look very cool but are very simple to make.
1. Black theme setting.
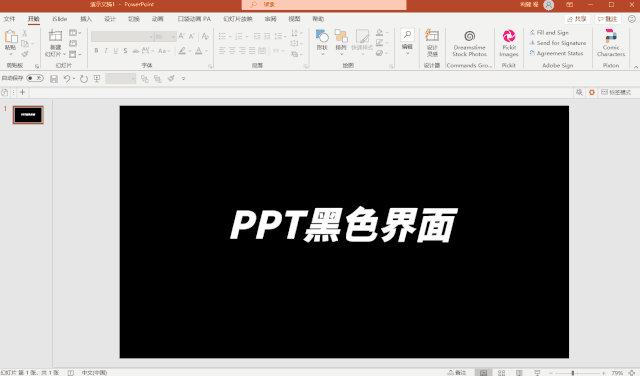
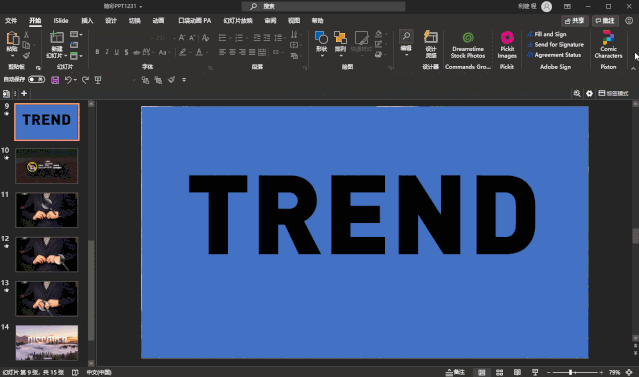
Many friends, when they saw my PPT interface, their first reaction was that I opened PS. Because this black interface is different from the PPT they opened.
When I told it that this was a PPT, I suddenly felt so cool.
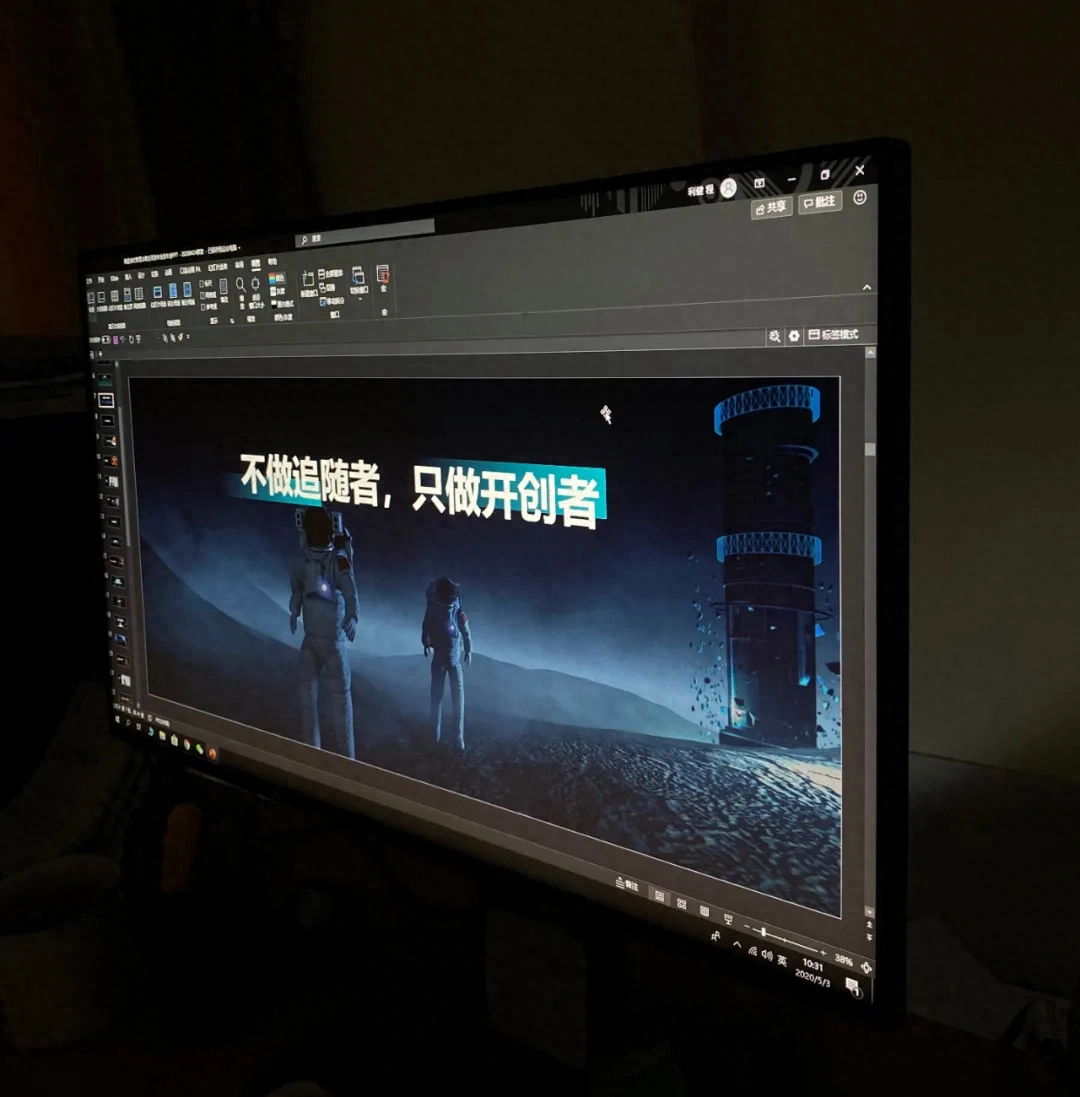
Brother Li’s PPT interface
In fact, this production is very simple, you only need to set the PowerPoint theme.
Specific steps: File—Options—General—Theme
2. PPT intelligent cutout
Many friends don't know that PPT can also be cut out, and it's very easy to use and very smart.
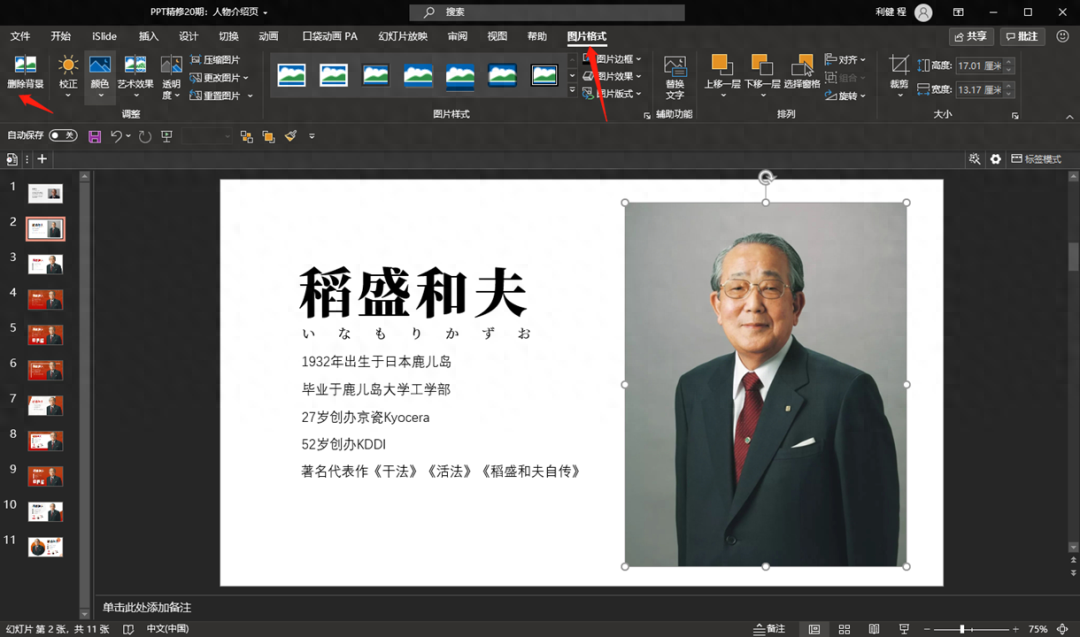
For example, if we create a character introduction page, we need to cut out the photos.
The operation is very simple. When we select a photo of a person, the [Picture Format] option will appear in the menu bar above. Under the picture format, there is an option to delete the background.
This function is used to cut out pictures.
After clicking Delete Background, two functions will appear, one is to mark the area to be retained, and the other is to mark the area to be deleted.
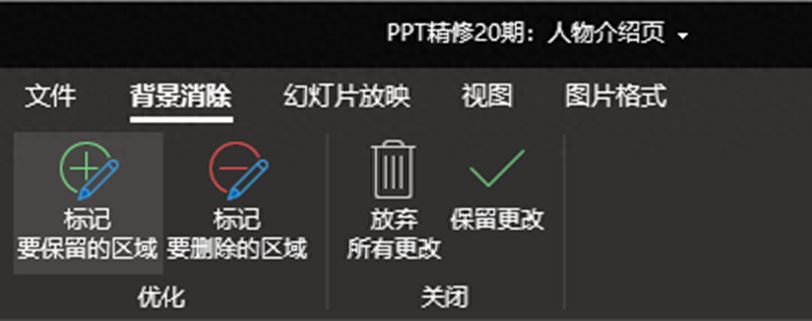
Then, we canclick on the picture with a pen or smudge, which is very convenient.
The purple area indicates the area to be deleted.
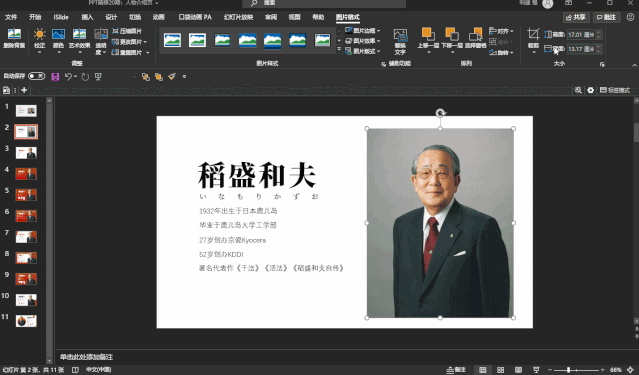
After cutting out the image, we can operate it very well.


3. Boolean operations (Merge Shape Tool)
If you want to say that the most useful tool in PPT, or the tool that is most like PS, then this function is Boolean operations.

Boolean operations actually refer to the merge shape tool in PPT, which includes five functions: joint combination, splitting, intersecting, and pruning. These five functions are collectively referred to as Boolean operations.
We insert two shapes. After selecting them all, the format menu will appear in the menu bar, and the merge shape tool will be below it.
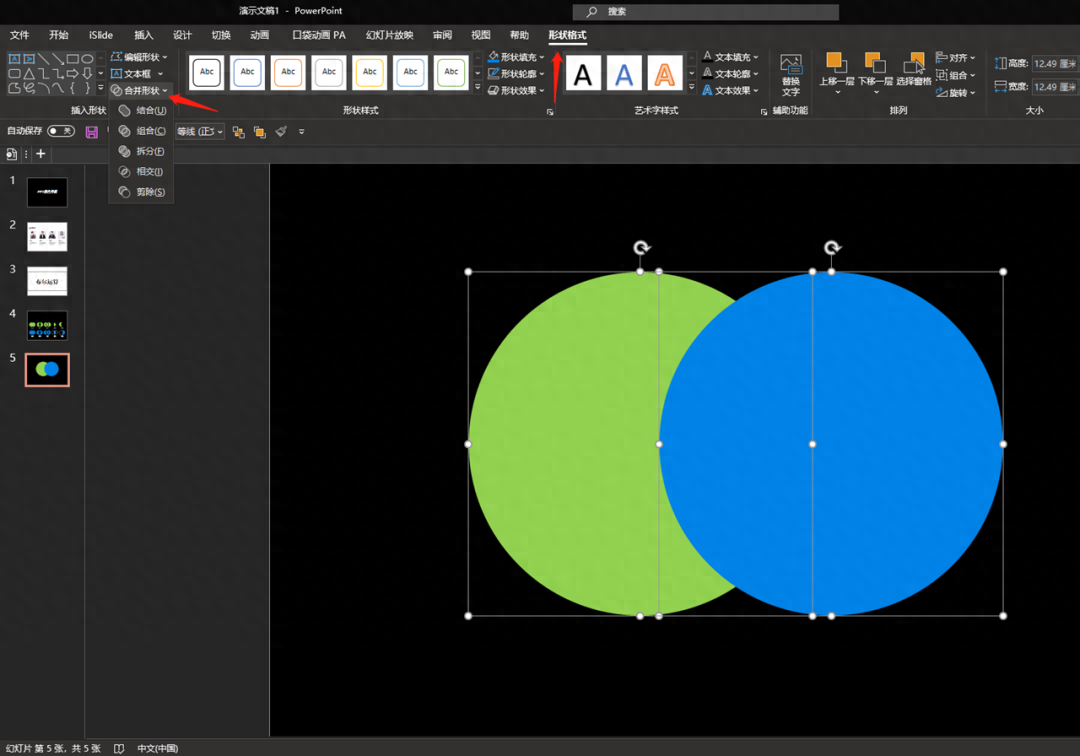
Take the green and blue shapes above.
When we first select the green circle, then hold down the ctrl key while selecting the blue circle. Clicking on different functions in the merge shape tool will produce different results.

The order of selection is also important. Suppose we select the blue first, then hold down the ctrl key while selecting the green circle. Then the results after the operation will be blue.

Through Boolean operations, we can create very cool design effects.
For example, through the combination operation in Boolean operations, we can get the hollow word effect as shown below.

The specific operation is very simple. Insert a text box, insert a shape, then select the shape and text box at the same time, and click the combination in the Merge Shape tool.
Similarly, there is an effect like the picture below.

For example, through the Split operation in Boolean operations, we can get the following PPT cover.


The specific operation is very simple, just use the split operation.
For example, through the intersection operation in Boolean operations, we can get textured text effects.
You can try the specific operation~

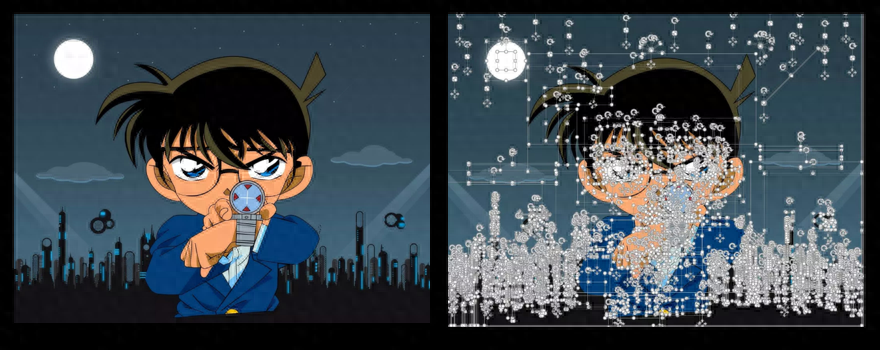
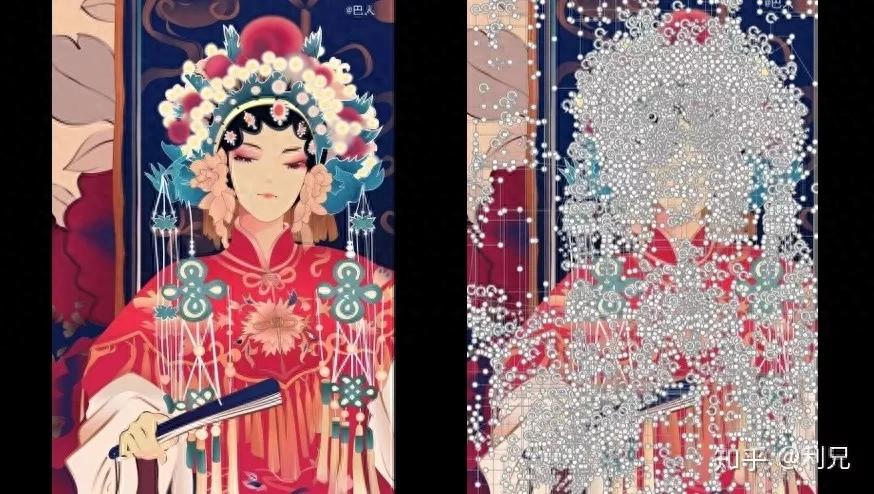
4. PPT mouse painting
If you use PPT software well, you can also use it to draw. We call it PPT mouse drawing to draw some interesting illustrations.
This is the Doraemon I drew with PPT before.

We can take a look at the PPT source files. In fact, they can all be edited.
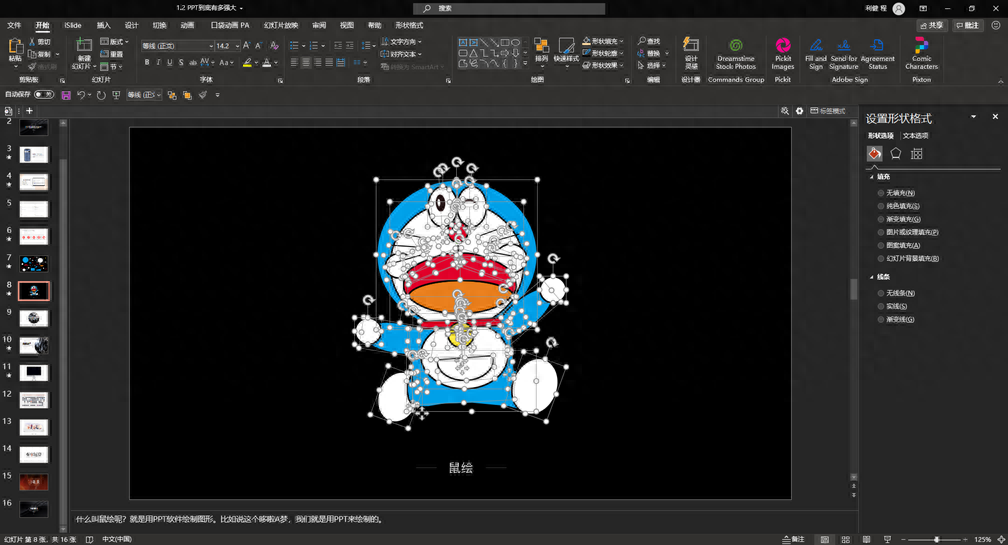
To master PPT mouse drawing, you need to master two small tools, one is the Curve Tool and the other is Arbitrary Polygon: Shape.
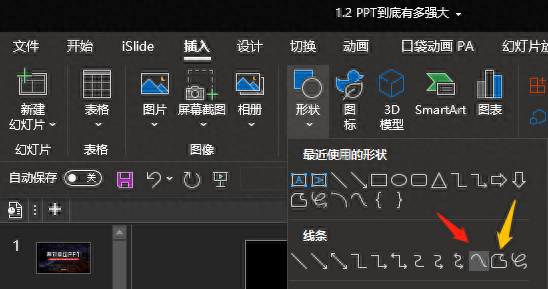
After finding it, how to draw it?
We select the curve tool and click once in the layout. The point clicked is the starting point.
Then we drag the curve, click at different positions, and press the ESC key on the keyboard to end the drawing, so that we can get a curve.

Ifwhen we draw a curve, we return the mouse to the starting point to form a closure, we will get a shape, a special shape.
Let’s take a look at the GIF.
Arbitrary polygon: The shape is made in the same way, but the result is a straight line.
After drawing the shape, if adjustments are needed, we can adjust the curve by editing the vertices.
After selecting the curve, right-click and click Edit Vertex, then you can drag the position of the vertex, or click the vertex to adjust the editing bars on both sides.

Once you master this tool, you can draw some very beautiful illustrations.
This requires you to have enough patience.
That’s it for today, I hope you all like it.
Articles are uploaded by users and are for non-commercial browsing only. Posted by: Lomu, please indicate the source: https://www.daogebangong.com/en/articles/detail/PPT-dao-di-you-duo-li-hai-zhe-xie-gong-neng-kan-bi-PS.html
 支付宝扫一扫
评论列表(196条)
测试