WeChat scan code to watch a full set of Excel, Word, PPT videos


When designing a PPT, the selected picture material will be processed according to specific needs, such as cutout. When it comes to cutouts, the first thing we think of is PS tools.
However, not everyone knows how to cut out images in PS, so I recommend two other cutout tools: PPT cutout and draft design online cutout.
Learn to use the built-in function of PPT to cut out images and draft design online cutouts, which is more time-saving and labor-saving than using PS cutouts. If you don’t believe me, take a look!
1. PPT comes with function cutout
PPT has its own function cutout, there are three main techniques:setting Transparent color, modify slide background, delete background. The three techniques are applicable to three different situations, and we will introduce them in detail below.
(1) Set transparent color
Setting the transparent color refers to setting the background color of the image to be transparent, which is mainly used for image cutout with a solid color background.
The following picture is an example:
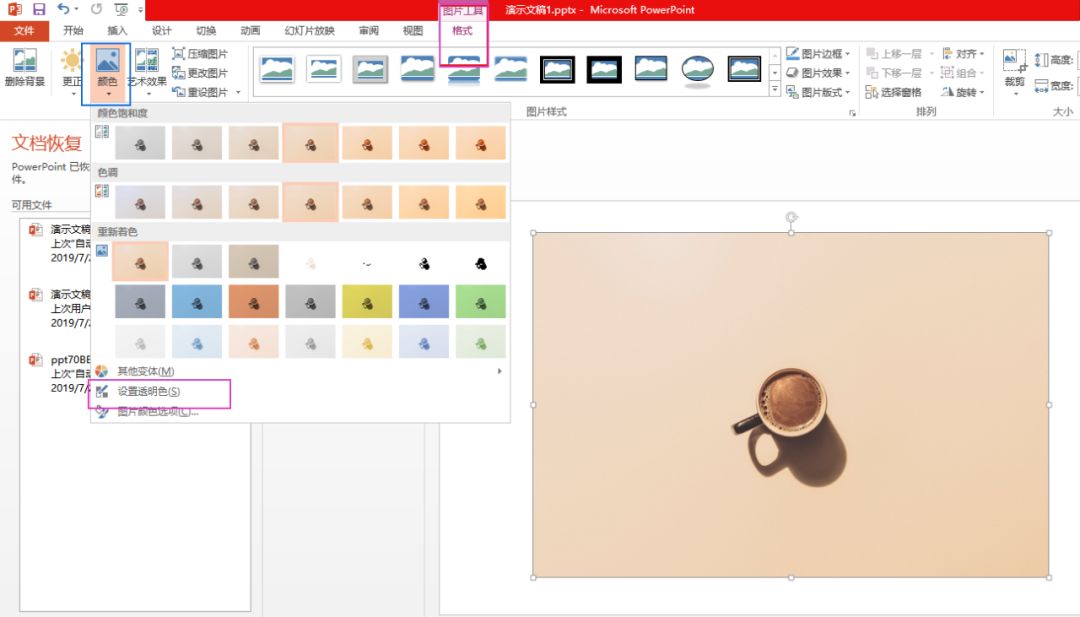
How to quickly remove the background of the image above by setting the transparent color? The specific operation is as follows:
First, select the picture, click "Picture Tool Format" /"Color< /strong>"/"Set transparent color", as shown in the picture:

Then place the mouse on the background of the picture and click the left button of the mouse to remove the background of the picture.

(2) Modify the background color of the slideshow
Modify the background color of the slideshow for cases where the background color of the picture is just right for the background color of the slideshow.
The following picture is an example:
 The black background of the picture is just suitable for the background color of the slideshow. How to set the black background color of the picture as the background color of the slideshow?
The specific operation is as follows:
①Click the right mouse button on the slide page, and the menu command "Set Background Format" will appear;
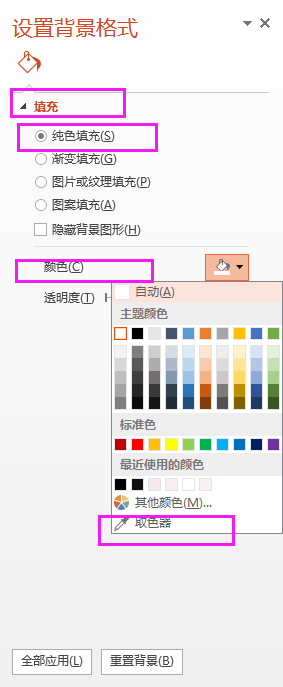
②Click "Set Background Format", select "Fill< /span>"/"solid color fill"/"color "/"Color Absorber", click on the picture part to pick the color;

In this way, the background of the slideshow is consistent with the background of the picture, and they can be perfectly integrated.
 (3) Delete background
Delete background is a built-in function of PowerPoint, which is often used to delete pictures with complex backgrounds.
When the background color of the picture is complex, if you use the method of setting the transparent color, the edges of the picture will be blurred and the background will not be completely cleaned; if you use the method of modifying the background color of the slide, the picture and the slide page will appear It never came together.
So, for complex background pictures, use PowerPoint’s built-in function “Delete Background” to remove it picture background.
The following picture is an example:
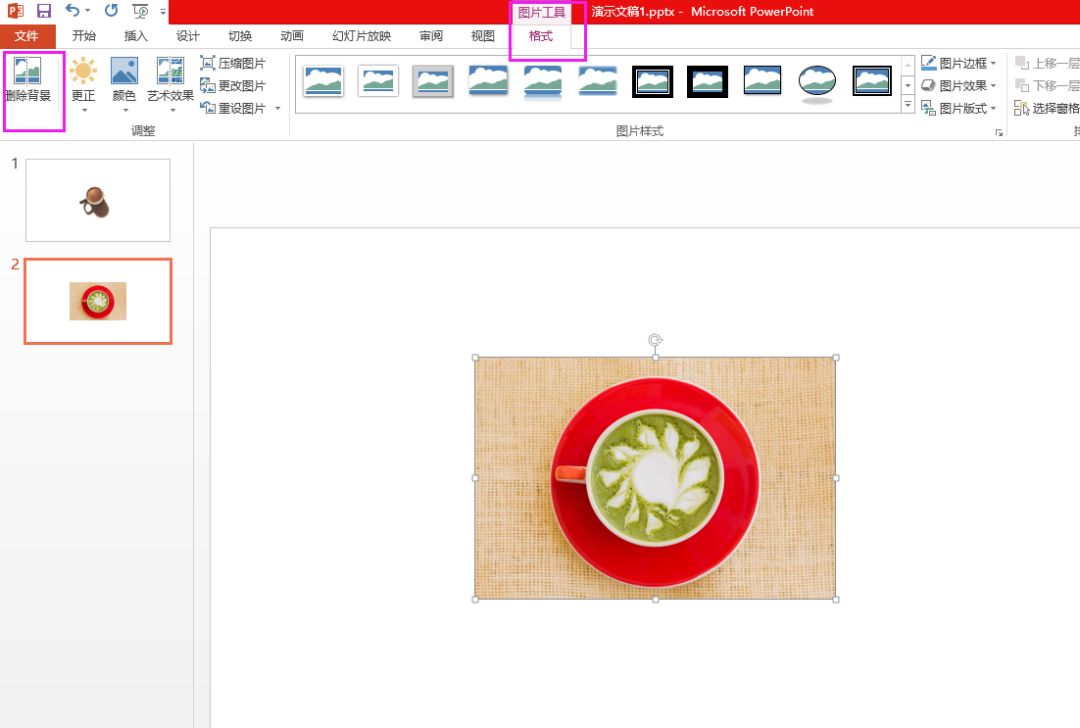
If you want to remove the complex background in the picture above, how do you use the "Remove Background" function?
A brief operation:
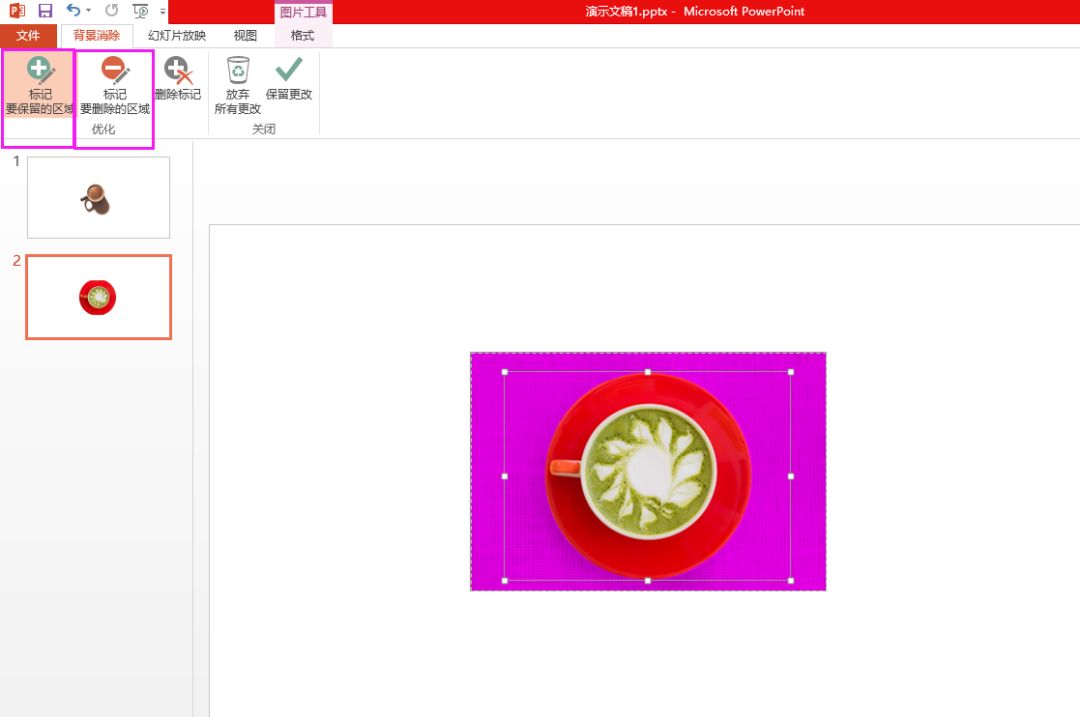
②After the setting panel appears, according to the specific needs, click "mark the area to be kept" and "mark the area to be deleted Optimize", mark the operation object;

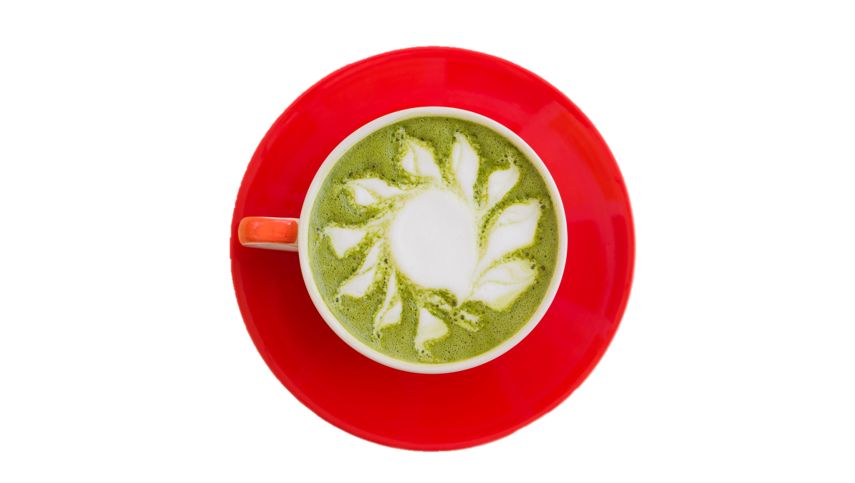
This removes the complex background.

2. Online matting of finalized design
Draft Design is an online tool for image processing and video editing.
URL: https://www.gaoding.com/
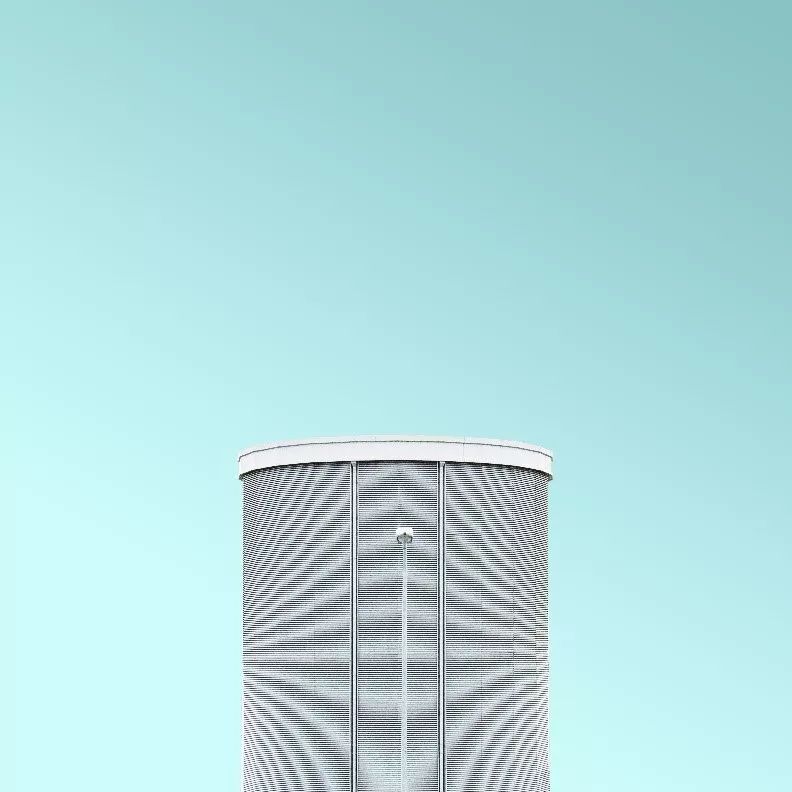
How to cut out pictures in the draft design website? The following picture is an example:

If you want to remove the sky blue background in the picture, how should we deal with it? The specific operation is as follows:
①According to the URL, enter the official website of the draft design, and click "Smart Cutout";
②Click the "Upload picture" option to upload the picture to be processed;

③Click "Keep" to paint the reserved part, click "Remove" to paint the removed part part, the system will automatically remove the background;

④Click the "Download" option, and select "PNG" or "< span>jpg" format to download the picture.

If the one-time cutout is not successful, you can also do the second cutout, the third cutout...until the cutout effect reaches the best.
Okay, today's sharing is over here, I hope it can help you!
PPT tutorial article recommendation
Want to make PPT more advanced? Teach you a skill that even a novice can learn, make PPT your big! Change! So~
After finishing 3000 PPTs, I learned 6 "cheating" techniques to make PPT change! Refined! To!
5 magical functions of double-clicking the mouse in PPT, so fast that you will be addicted, don’t say you don’t know any of them!
Goodbye Ctrl+C! It only takes three steps to convert a super long word document into a PPT, and it can be done quickly!
Click "Read the original text" for more information!
Articles are uploaded by users and are for non-commercial browsing only. Posted by: Lomu, please indicate the source: https://www.daogebangong.com/en/articles/detail/PPT%20tutorial%20Kneel%20down%20I%20have%20used%20PS%20to%20cut%20pictures%20for%205%20years%20and%20now%20I%20found%20these%202%20cutout%20artifacts.html
 支付宝扫一扫
评论列表(196条)
测试