The following article comes from the ppt excellent tutorial, author P Xiaobai

Share PPT graphic tutorials, video tutorials and other efficient office software tutorials every day.
WeChat scan code to watch a full set of Excel, Word, PPT videos


Editor's note:

Many people know how to use pictures for graphic typesetting and how to align them, but over time they gradually touch the ceiling: how to better use pictures? How to use image processing skills to make practical and beautiful pages?
Xiaobai will explain the common techniques of image processing in 5 aspects, namely: adding a mask, cropping properly, copying and flipping, out of frame, and inverting the logo.
01
Add Mask
Mask, as the most practical and common PPT technique, plays a very important role in PPT image processing. Usually, when the background is fancy and complex, using a mask is the best choice.

Adjust the transparency of the solid color mask to about 60% (according to personal preference and actual situation) and set the line to no line.

The gradient mask generally selects a linear gradient, starting from the upper left corner. When encountering a part of the picture that needs to be highlighted, you can consider using a gradient mask and adding text to the mask to highlight the key points.
To summarize:
(1) The principle of the mask is to add a layer of filter to the picture, and the filter can be adjusted through the attribute of transparency;
(2) The function of the mask is to cover the color of the background picture, thereby setting off the text and highlighting the key point (theme).
02
Crop properly
Who doesn't know how to crop, it still needs to be taught?
Many people have heard that "a picture is worth a thousand words". Of course, this sentence is true, but a picture also has a position. When you crop a picture, if the position is wrong, there will be embarrassing scenes , For example, if the head of a donkey is written but the ass of a donkey appears in the picture, it is easy to make a joke.
Many noobs are used to find a picture and insert it directly into the PPT, but it is often the details that determine success.

Xiaobai found a picture of Mount Fuji in pexels. Of course, this picture is very beautiful and fits the text, but what about other texts?

From the top of the mountain to the bottom of the mountain, use cropping to capture the details of the picture.

Similarly, if the focus is on the top of the mountain, the content of the page will be different again. So if you want to better convey your point of view, you need to crop the picture to a suitable position.
To summarize:
(1) The correspondence between the text and the picture needs to carefully consider whether the picture is in the right place;
(2) A picture is worth a thousand words, and the success of a page often lies in the details.
03
Copy Flip
I don’t know if some friends have encountered a situation where the picture is very good, but there is not enough space to present the text information?
If you only typesetting, you will feel that the text is not well placed, but if you don't want to miss this picture, you can consider using picture copy and flip.
The same picture can be copied and flipped horizontally to seamlessly collage together, add a solid color mask, add text and decoration at the same time, and complete the page production.

The same way to copy a picture and flip it horizontally, the visual impact brought by this time is different.
To summarize:
(1) If you encounter a trendy or directional picture, you can consider the method of copying and flipping;
(2) Compared with a single picture, the copy flip is more symmetrical and has a stronger visual impact.
04
out of frame

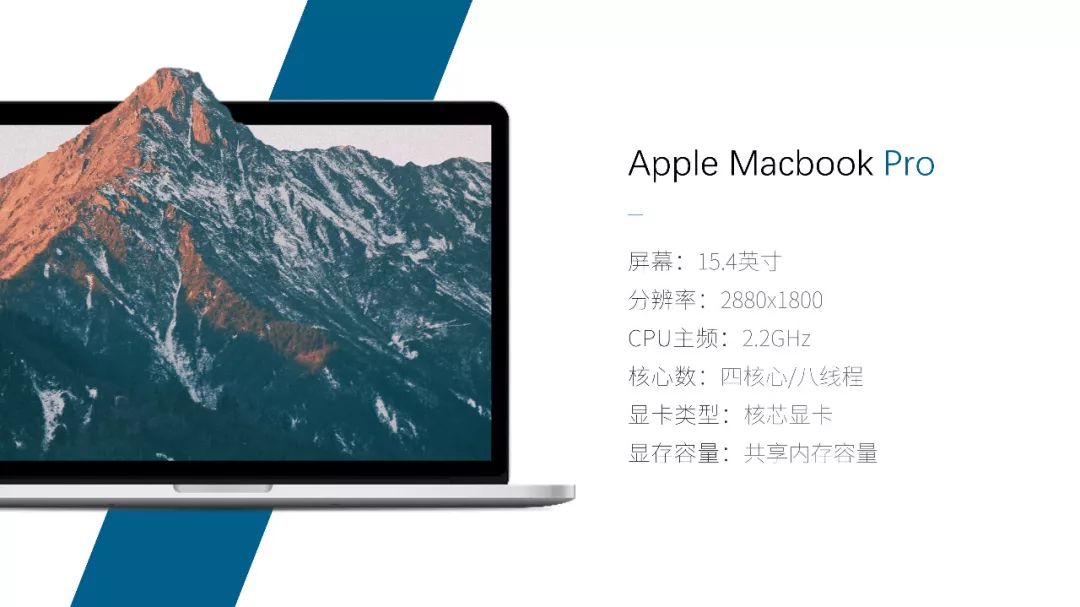
There are some pictures in the mockup, just like the pictures you usually browse, but one corner or part of them is out of the screen and out of the frame. In essence, this method is to superimpose two pictures, one as the bottom Cut it to the size of the prototype, delete the background and keep the part outside the frame, and superimpose the two to form this effect, which is the same as the previous wireframe interspersed principle.

In addition to the prototype, the shape can also have a similar effect, and the effect of getting out of the frame can be achieved by cropping the picture.
To summarize:
(1) The frame-out effect is superimposed. The bottom layer is the original image, the middle layer is the mockup or shape, and the top layer is the out-of-frame part after deleting the background, which are superimposed to form a frame-out effect;
(2) The out-of-frame effect makes the characters more three-dimensional and the page more layered.
05
logoanti-white
When making a logo wall, because the colors of each logo are different, it is difficult to form a unified page. At this time, you can consider using the method of reverse white.
Click the icon to set the image format, and set the brightness to 100% or -100% in the image correction property bar. At this time, the logo will become pure black or pure white, which is convenient for the overall unity.

A more advanced office can also adjust the transparency of the picture as a bottom layer decoration to improve the overall aesthetics of the page.
To summarize:
(1) The requirement for logo reverse white is that the logo should be in png format that has already been cut out (delete the background if it is not a picture);
(2) Anti-white is often used in the logo wall, which can create a sense of integrity.
Instance operation:
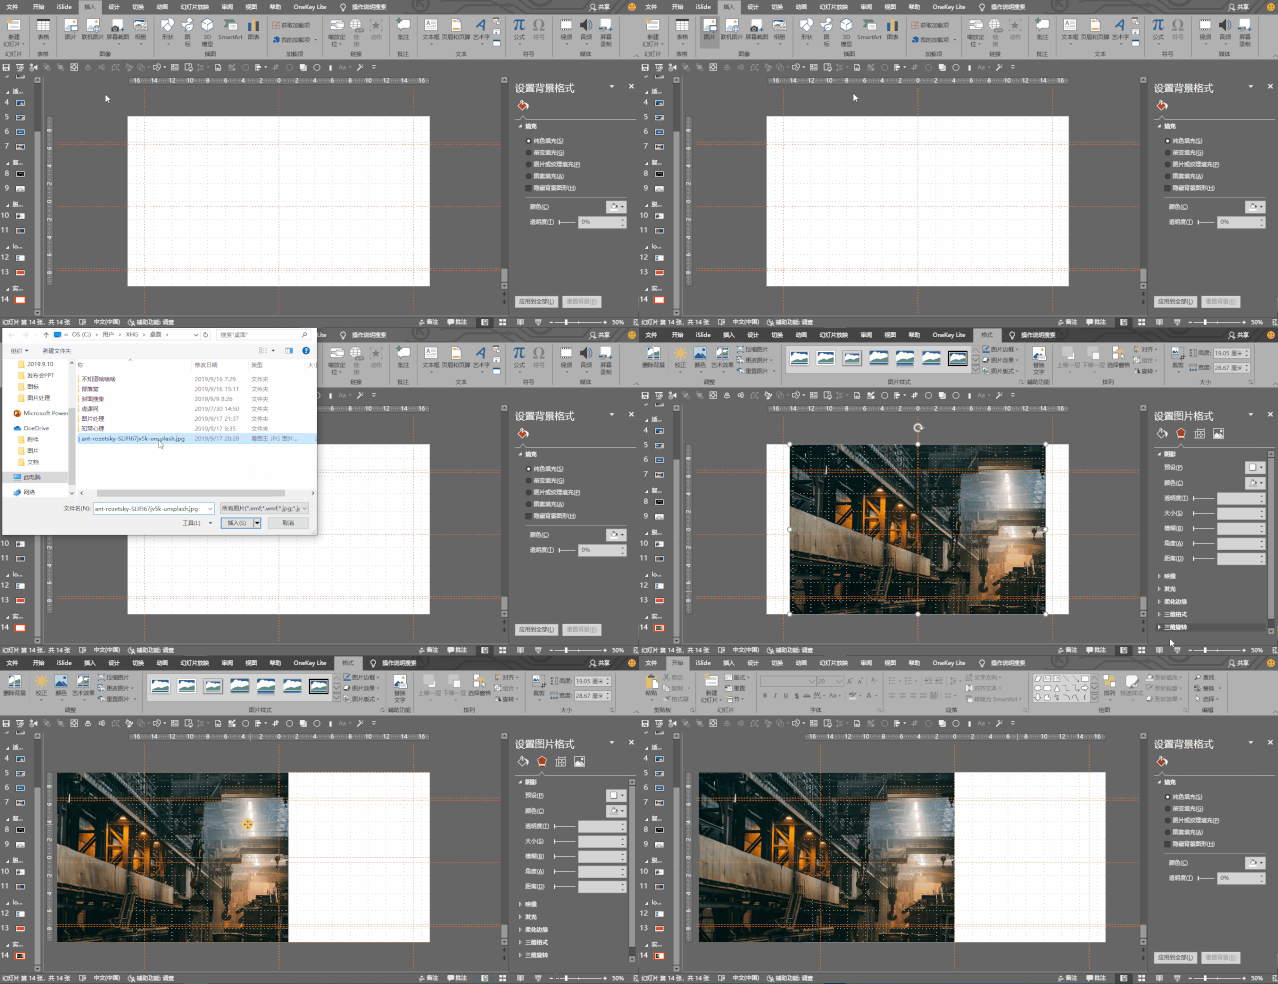
Having said so much, let's do it in practice. Let's start with the simplest copy and flip:
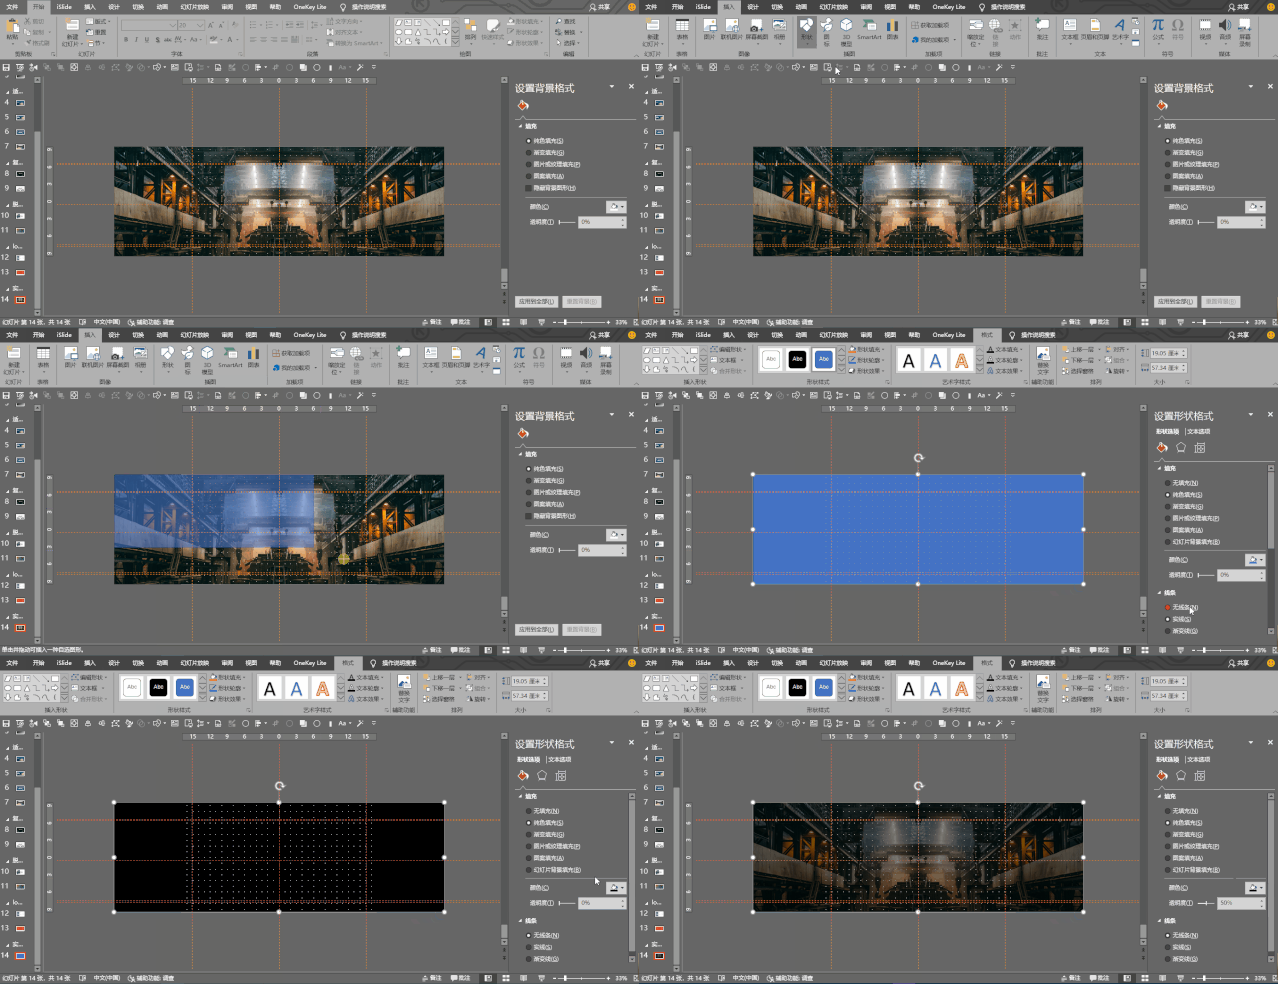
①After inserting a picture (picture found on the official website of unsplash) in the Insert tab, click the left mouse button to align the right part with the center of the page (the shortcut key Alt+F9 can be used to call up the reference line for easy alignment);
②Press and hold ctrl+shift, move the image with the left mouse button and copy an identical image to the right, select horizontal flip in the format tab, align with the center line;

③Add a solid color mask to cover the whole picture, set the transparency of the mask to about 50%, and cover the color;

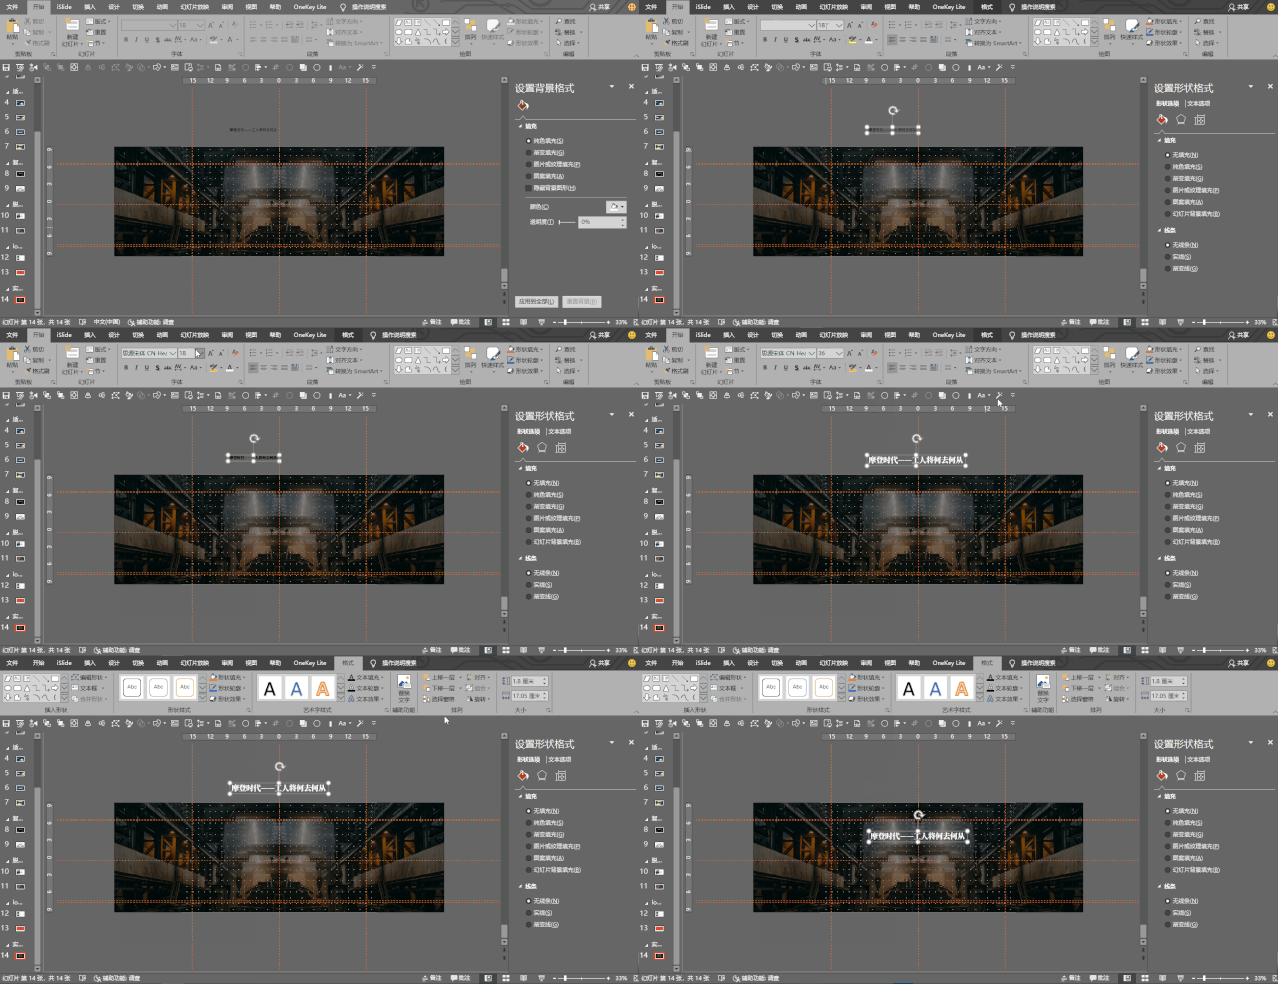
④Add text, change the color of the text to white, and select the appropriate text type, text size, etc., disperse and align, and finally align with the page;
⑤Finally add text and decoration to complete the production of the entire page.
Okay, this tutorial is over here, see you next time~
PPT tutorial article recommendation
Amazing, my PPT form is actually a typesetting tool, Highly recommend to everyone!
Must! Shall! look! 76 classic cases of graphic layout! Teach you how to advance to the master of PPT!
No ideas for picture layout in PPT? Break the rules and follow these 9 universal layouts to absolutely do it! (PPT Tutorial)
F1~F12, 12 magical shortcut keys that are ignored by people, have these uses in PPT!
Click "Read the original text" to get more exciting content!
Articles are uploaded by users and are for non-commercial browsing only. Posted by: Lomu, please indicate the source: https://www.daogebangong.com/en/articles/detail/PPT%20tutorial%205%20PPT%20image%20processing%20skills%20you%20must%20know.html

 支付宝扫一扫
评论列表(196条)
测试