How to set the direction marked by the red cross arrow in PPT? Today I will share with you the tutorial of making a red cross arrow mark the direction in PPT.
ppt template article recommendation:
How to do ppt 25 point one stroke animation effect< /span>
How to set the border of PPT three lines
How to set the ppt column display
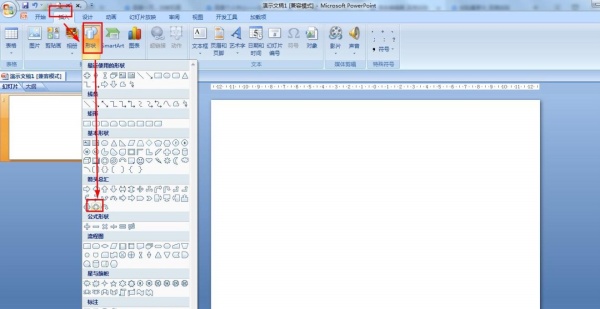
1. Click Insert - Shape - select Cross Arrow Callout or Cross Arrow Shape in Arrow Summary.
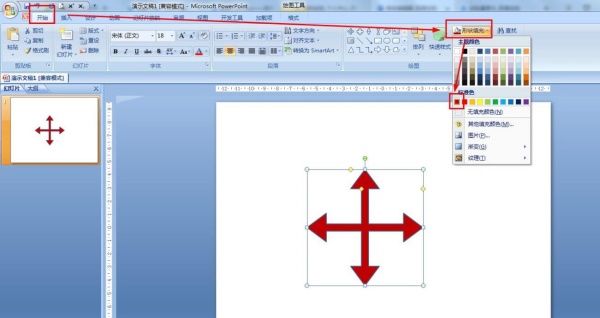
2. Press and hold the three small yellow dots of the arrow respectively - adjust the size and distance of the arrow or rectangle.

3. Select the shape - click Start - Shape Fill - select red.
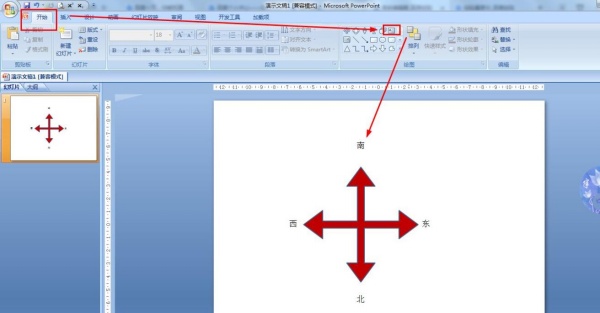
4. Click Home - Select Text Box in Drawing - Insert Text Box to Arrowhead and enter Direction.
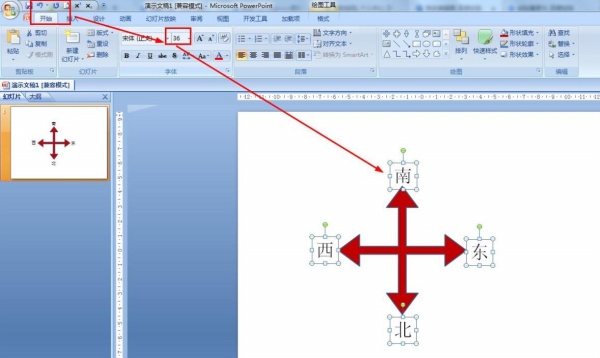
5. Adjust the alignment text box - select all text boxes - start - set the font size of all text boxes to 36.
Articles are uploaded by users and are for non-commercial browsing only. Posted by: Lomu, please indicate the source: https://www.daogebangong.com/en/articles/detail/PPT%20red%20cross%20arrow%20indicates%20how%20to%20set%20the%20direction.html
 支付宝扫一扫
评论列表(196条)
测试