The following article comes from the ppt excellent tutorial, author P Xiaobai

Share PPT graphic tutorials, video tutorials and other efficient office software tutorials every day.
WeChat scan code to watch a full set of Excel, Word, PPT videos

Crop, who can't? But do you really understand the advanced gameplay of cutting?

Not all pictures are suitable for PPT, and the images represented by different areas of the picture will be different, so it is very necessary to understand and learn to use the cropping function that comes with PPT.
In the actual operation of PPT, there are many ways of cutting. Here Xiaobai briefly introduces 5 cutting methods, which are:Cut up, down, left, and right, split and cut , Extend Crop, Separate Crop, Shape Crop.
Each cropping application occasion is different, so without further ado, let's get straight to the point.
01
Crop up, down, left, and right
Let's start with the simplest cutting method. Up, down, left, and right cutting is the most common way in PPT, because the way of graphic layout basically runs through a formula:Left and right structure , up and down structure.
The images cropped up, down, left, and right are all rectangles, which are often used in flat business style. This kind of rectangular image is relatively calm but will lose the liveliness of the page, which is quite satisfactory.

The typical typesetting method of the left picture and the right text, the left picture is cut into a rectangle, which is relatively calm, and the line of sight is from left to right, which conforms to the law of human eyesight.

Crop up and down, the same as the method of cropping left and right, crop the picture up and down to the center area, in line with the human eye's line of sight from top to bottom.
To summarize:
(1) Up, down, left, and right are more suitable for business style and flat style, this kind of cutting style is more stable;
(2) The cropped picture can follow the left, right, left, and right structures, etc., and the text can also be highlighted with a color block background.
02
Split and crop
Separation and cropping is more interesting. If there are elements in the picture that affect the viewer's vision and are in the center of the picture, but this picture has to be used, you can divide the picture into two parts, and then divide the two parts of the picture Partially zoom in and place the text in the center area.
For example:

For example, this pig wants to make a summer effect, but the central area does not match the main body. At this time, you can use split cropping to copy the picture in one layer, and crop the left part of the center of the page in one layer. Area, crop the right half of the center of the page in one layer, and finally just align the picture to the left and right of the page.

After cropping and aligning, the entire page will be empty. At this time, you can consider adding color blocks or placing text directly to highlight the main body.

In the same way, the right area is relatively small, so you can copy a layer, crop a part of the right area, align it to the right along the page, and then move a part of the left picture to the left until there is a space.

You can place color blocks in this space, and then add text to highlight the main body. Along the direction of surfing, this kind of vision will feel very wide, but in fact this picture is still the one provided before.
To summarize:
(1) When there is a subject in the center that does not fit the content but this picture has to be used, you can use splitting and cropping to cut out the central area, and then add text to highlight the subject;
(2) When the entire page needs to highlight a small space, you can cut the picture into two parts by splitting and cropping, and add a color block or text between the two parts to highlight the main body.
03
Extended Crop
Extended cropping is also subtle and interesting. Simply inserting pictures into PPT will be a bit boring, but using extended cropping can make the page full of vitality.
Extended cropping can also be called a hard-edged crop, but part of the image can be blocked during the cropping process, allowing it to go outside the frame.
For example:

This naked Erha picture does not seem to have any characteristics.
What if the Erha exceeds the frame?

Like a bridge and a connector, Erha’s head is connected to the color block. This natural shape will soften the rectangular color block. When using extended cropping, you need to pay attention to occlusion.

In the same way, the running character's hand is connected to the color block, making the character jump up. The principle of the hand is to superimpose two layers. The method is to copy a layer of pictures and cut and delete the background, and finally superimpose on the original picture .
04
Separate Crop
This is similar to extended cropping, but the difference is that the image clears all the background. The advantage of this cropping is that the image can be placed anywhere on the page, and there can be complex intersections between the color block and the image.
For example:

A single image, the background is relatively complex, it is difficult to highlight the characters.
Using separate cropping, remove all the background of the characters, and only keep the individual characters (that is, png), so that the characters are more prominent, and the rectangular frame is broken, which is creative.

Furniture can also use this method to create a connection through the intersection of the color block substrate and the picture.
To summarize:
(1) To remove the character background, you can directly use the remove.bg website, one-click removal;
(2) The principle of separation and cropping is to clear all the background of the picture, leaving only the main body, and the intersection of the color block and the picture to form a connection.
05
Shape cropping
As the name implies, various shapes are used to create an overall unified atmosphere. The shape is not limited to rectangles, but can be circles, quadrilaterals, etc.
Give me a chestnut:

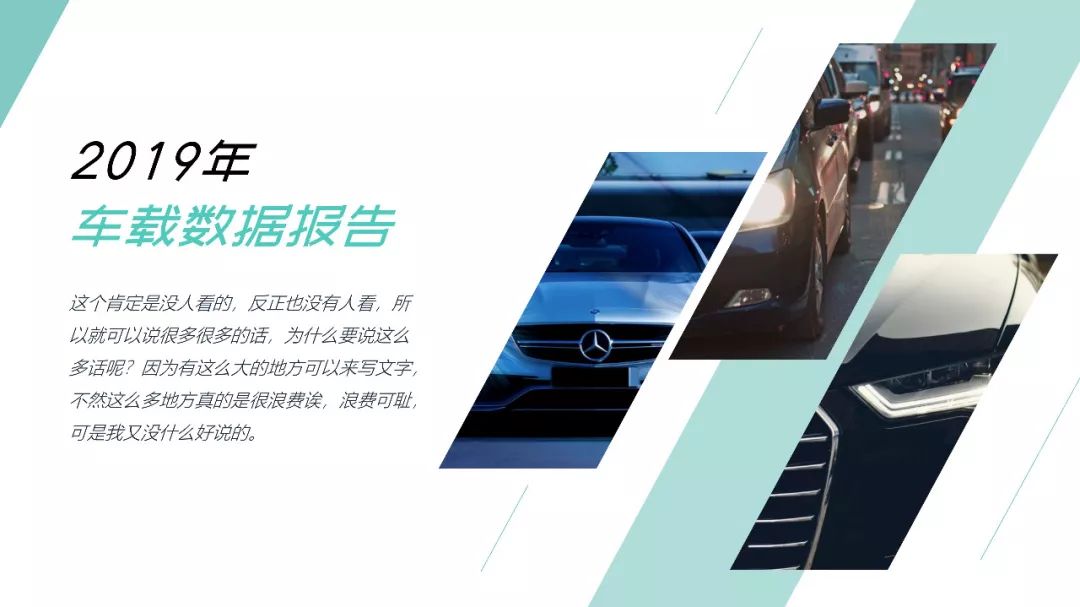
The parallelogram image and its substrate give the entire page a sense of inclination. Although it also follows the left-right structure, this method has a more sense of trend than a single rectangular image.
Squares of the same size are rotated 45°, with consistent spacing, and the entire page is uniform.
To summarize:
(1) Shape clipping can be any shape, not just a rectangle;
(2) Shape clipping breaks away from the shackles of a single rectangle, and has more room to play.
Having said so much, let's take a practical example~
This time the exercise is splitting and cropping.

Step 1: Find a suitable model picture (you can go to pexels, unplash and other websites to download high-definition copyright-free pictures), and then remove the picture with one click on the remove.bg website, and download it directly.

Step 2: Open the PPT, select "Picture" in the "Insert" tab, insert the picture that has just been cut out, hold down the shift key, and move the left key of the picture horizontally to a suitable position on the right.

Step 3: Select "Shape" - "Rectangle" in the "Insert" tab, insert a rectangle of appropriate size on the page, and then in the Format tab, select the rectangle to be centered vertically with the page and move down layer.

Step 4: First, select "Rectangle", click the right mouse button to display the "Format Shape" menu command; then, in the "Format Shape" property bar, set the basic properties of the rectangle, and modify the "Fill Color" to r242,g242.b,242; finally, change the color of the line to black and the point size to 5 points.
Step 5: Add text, left-aligned and placed above the color block. That's all you need to do~
Okay, this tutorial is over here, see you next time~
PPT tutorial article recommendation
Only write "thank you" at the end of the PPT? Break the routine and write copywriting according to these 6 techniques, absolutely stunning the audience!
It took me 3 hours to help Douyin modify a press conference PPT, the effect is so good that it explodes!
Why does the PPT template look so good, but it is terrible when I use it?
The newly recruited employees actually used PPT to create a dynamic "OPPO" official website.
Articles are uploaded by users and are for non-commercial browsing only. Posted by: Lomu, please indicate the source: https://www.daogebangong.com/en/articles/detail/PPT%20Tutorial%20Only%20after%20finishing%203000%20PPT%20cases%20did%20I%20discover%20this%20trump%20card%20to%20become%20a%20PPT%20master.html
 支付宝扫一扫
评论列表(196条)
测试