There are many questions in the background "Can PPT draw slightly more complicated pictures such as beakers, reactors, mice, rabbits, DNA, etc.", we need special It is pointed out that for true three-dimensional graphics, PPT is more suitable for regular and orderly structures, and for these slightly more complex graphics, it will involve the pseudo three-dimensional of PPT (use Arbitrary polygons, editing vertices, shape union, splitting, clipping, intersecting and other tools can draw any two-dimensional graphics, and then combine the near, large and far small, light and shadow angle and direction, color filling, etc., to realize the creation of any pseudo-3D graphics Drawing), but these require a certain accumulation of drawing, experience and three-dimensional thinking. Is there an easier way? Here is one kind, that is, the use of AI materials, editing and modification on this basis, in order to further expand the scope of drawing< span>, here we take mice and beakers as examples to explain, and at the same time point out the use method and precautions. Due to limited knowledge, it is for reference only, learn from each other, hope it will be useful! ! !
Through this method, we can use PPT to draw infinitely many editable pseudo-3D graphics ( It is equivalent to having an extra large material library), use it well, and the function is very powerful! ! ! ! ! !
{AI mouse material and beaker and other vector materials refer to the following (content in dry goods express), others please download by yourself}}
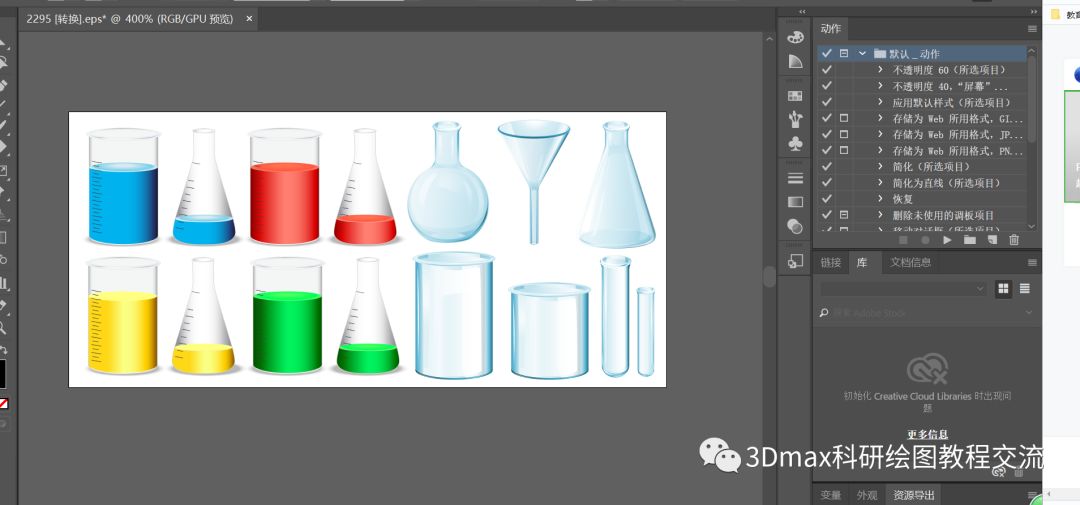
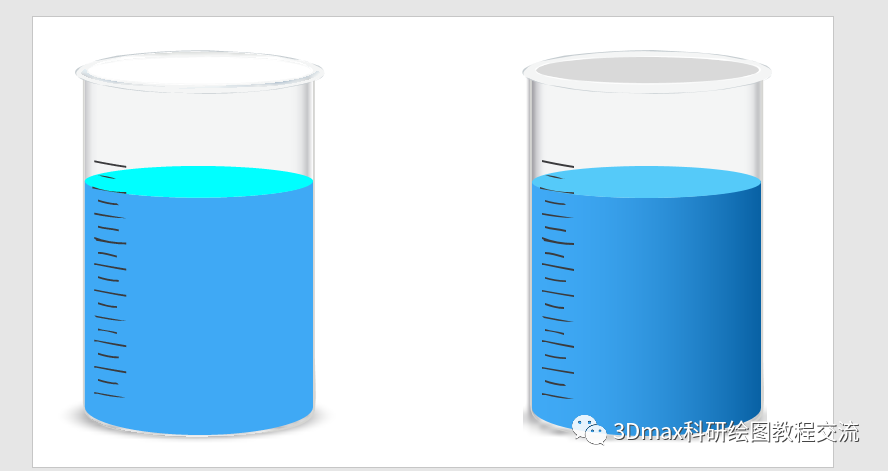
Final result:
Text:
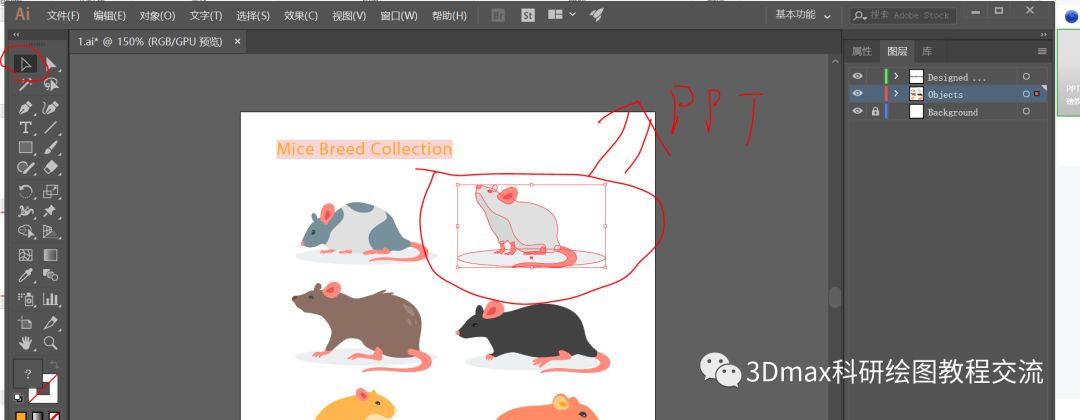
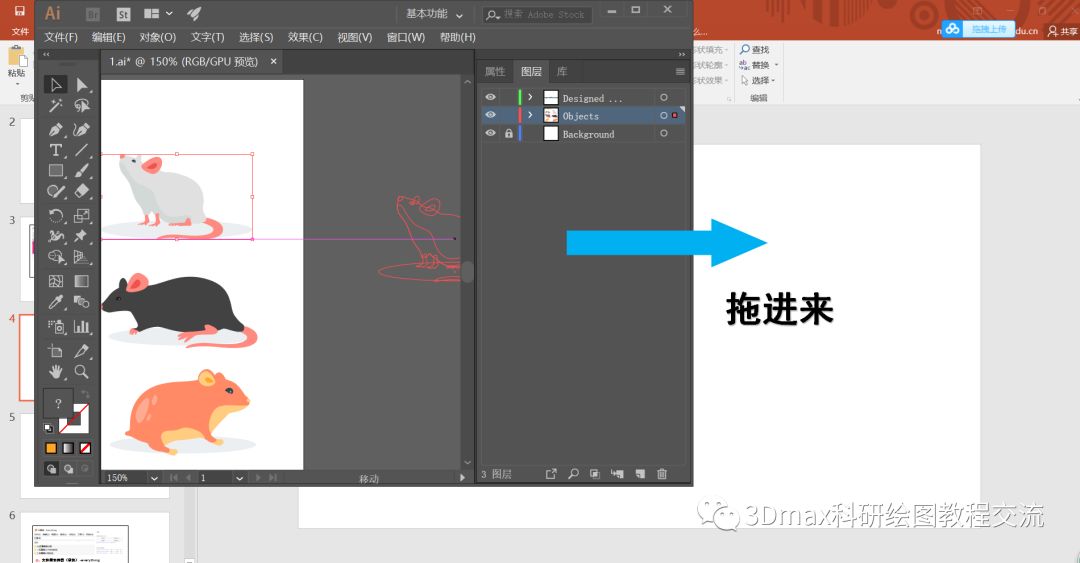
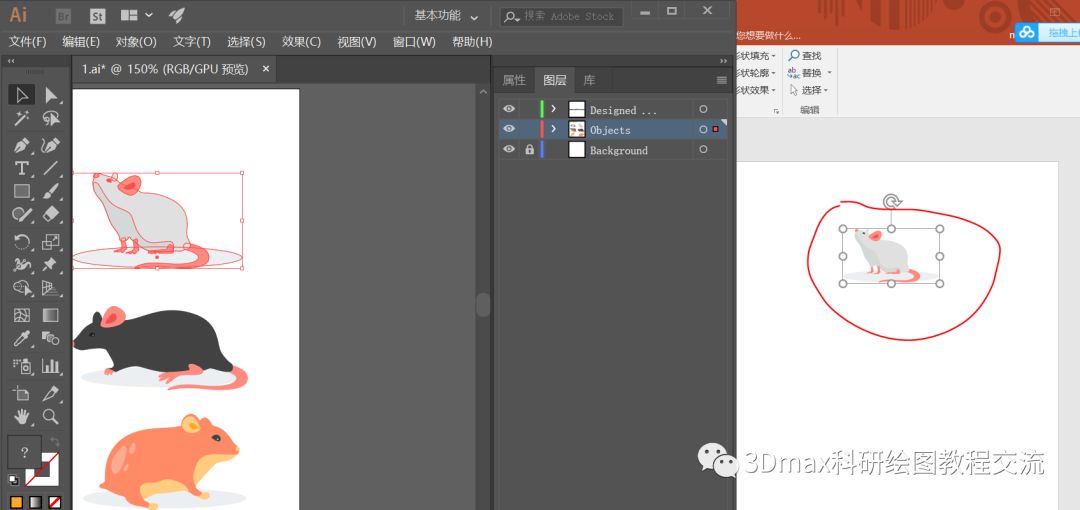
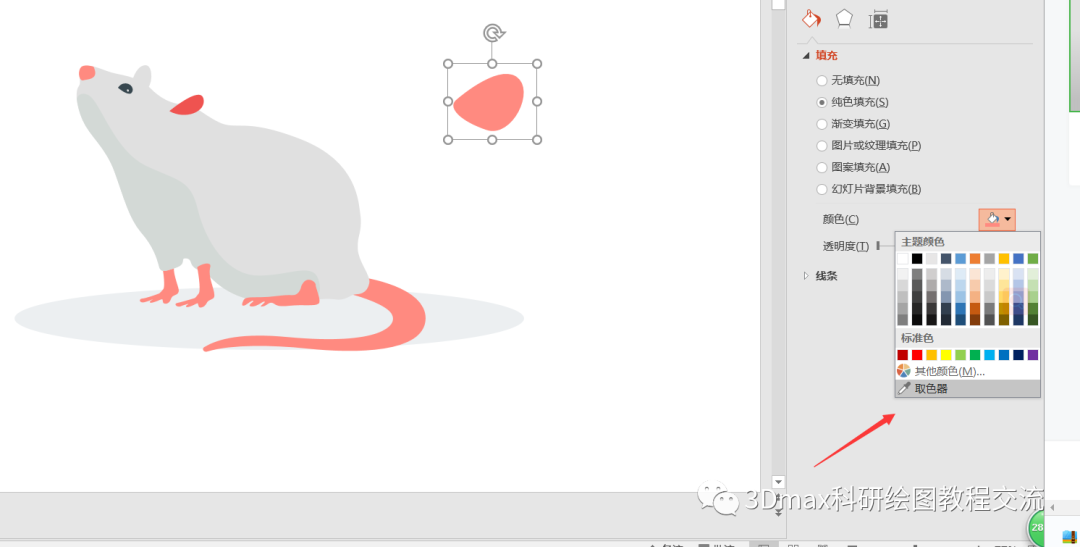
1. Use AI to open the mouse vector material (I want the one in the upper right corner), select the target mouse, drag it directly into the PPT, and the target mouse will enter the PPT page
【Select mouse "ctrl+C" in AI, copy, open PPT, right-click to copy and select "Picture", or directly in AI "File" - "Export "-"Export As"-"Enhanced Metafile" (emf format file), and then copy it to PPT.]
Note: AI version should not be too low, please use CS6 and above~
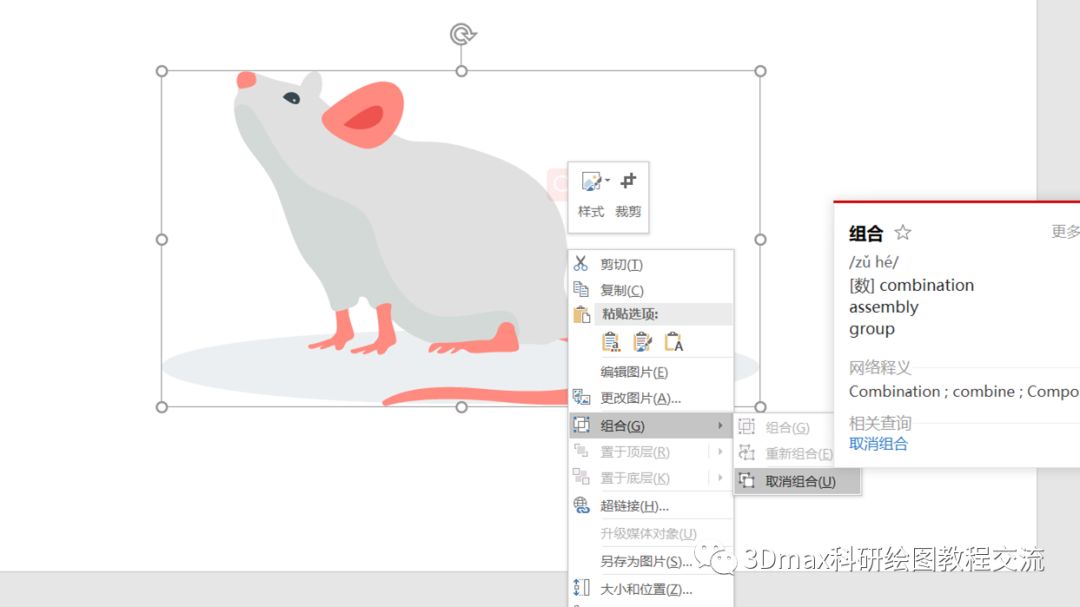
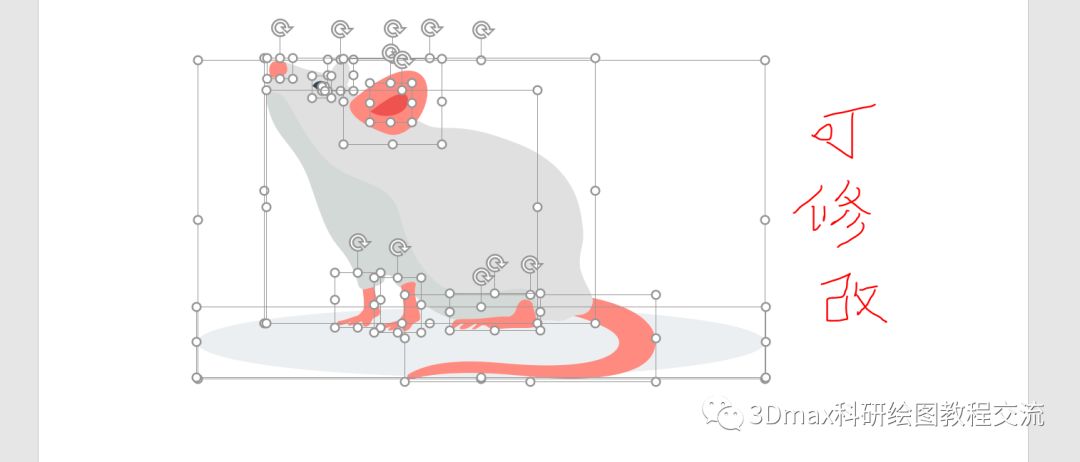
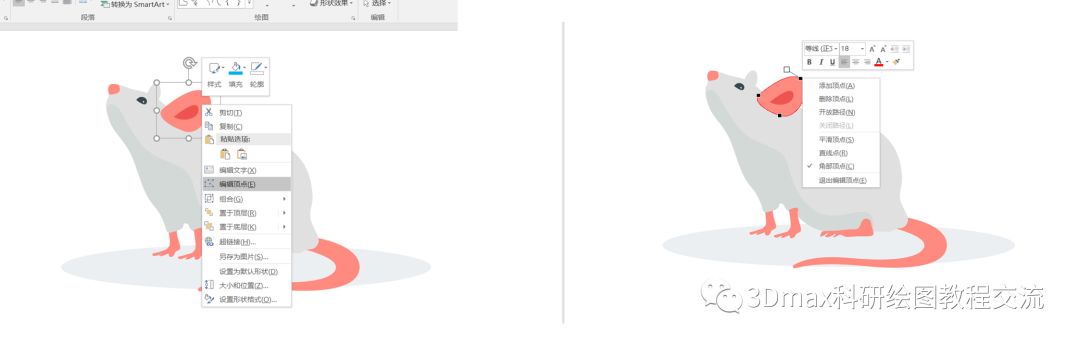
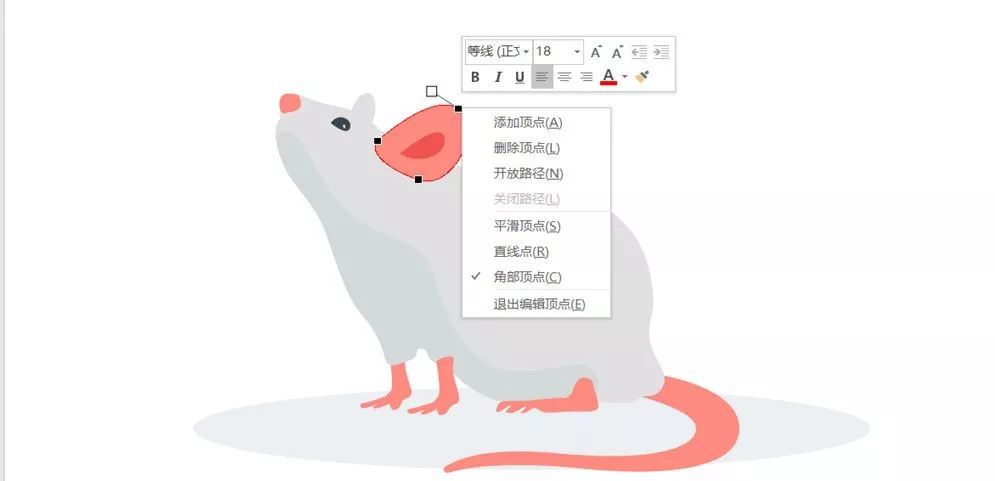
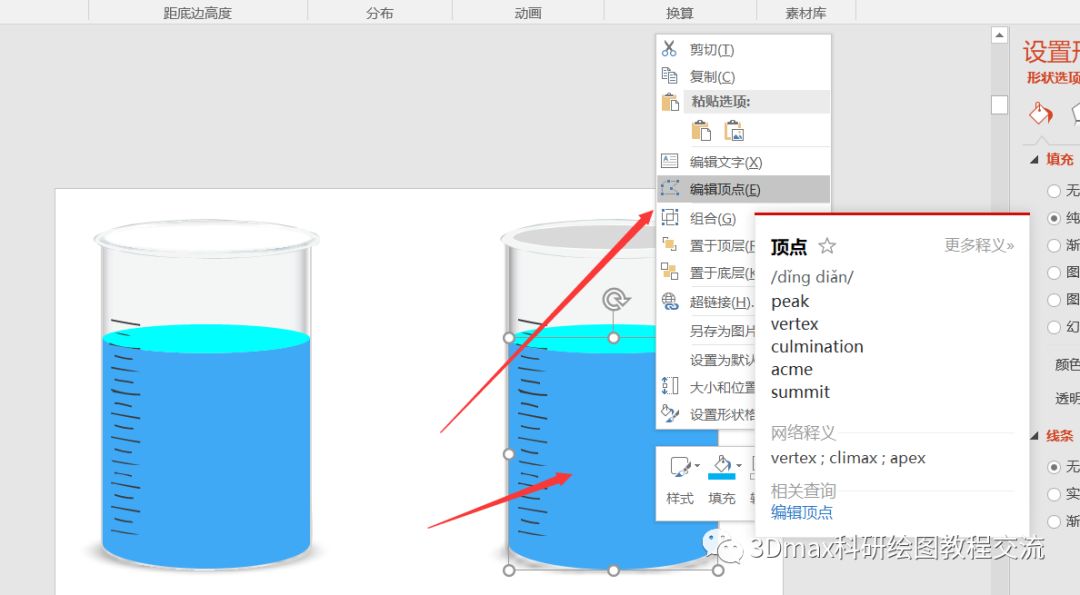
2. Select the imported graphics, right click - "Group" - "Ungroup" twice, it becomes a completely split editable format, right click to edit the vertices to further modify the shape, or change the fill color to your liking, etc.

3.Instructions for use (notes, important):Can all AI vector graphics be directly imported into PPT? No, after all, AI and PPT belong to two softwares, so some small problems often occur. What are the AI modes that PPT cannot recognize? Gradient color, blending mode, gradient grid, etc.; at this time, you need to change the effect again, import it into PPT, and then modify it again.
That is AI vector material, flat graphics (simple, solid-color mosaic graphics without the above problems, it is very convenient to import into PPT), otherwise it needs to be carefully adjusted before importing into PPT, the specific modification method is as follows:
1) If there is "opacity", change its opacity to 100% in AI, import it into PPT and change the transparency again;
2) "Gradient color", change the fill color of the object containing the gradient color to "solid color" in AI, and then import it into PPT, and re-assign the corresponding fill color of the object to the gradient (using the color picker).
3) "Blending Mode", change "Blending Mode" to "Normal" in AI ("Window-Transparency-Blending Mode" is changed to "Window-Transparency-Normal" ), it can be imported into PPT at this time, but the effect will be somewhat different, so you need to modify it yourself.
4) "Gradient grid", the function of adding color on the anchor point or surface in AI cannot be realized in PPT (after adding the gradient grid), so this problem cannot be solved, of course, you can export the outline separately (first Select this object, then "Object", "Offset Path", and select OK in the pop-up dialog box.
5) For other questions, please explore by yourself
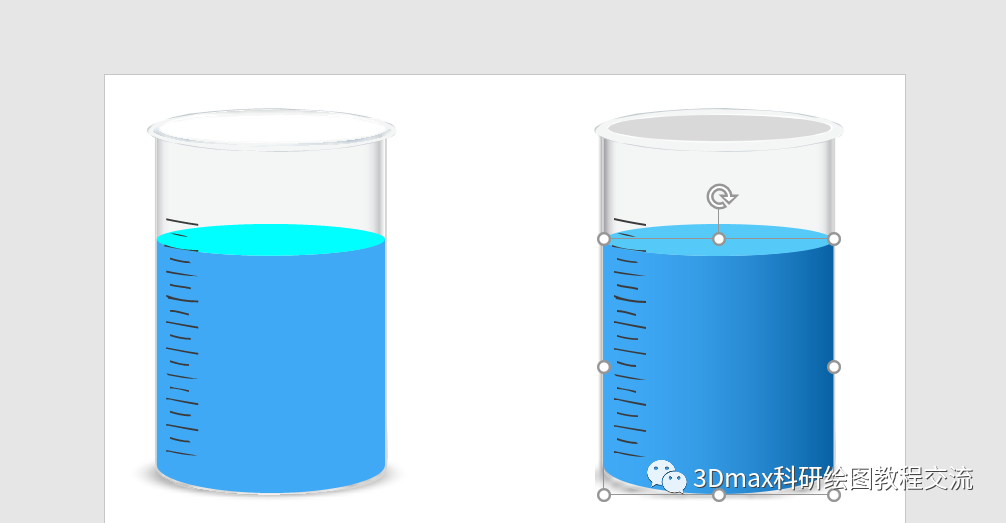
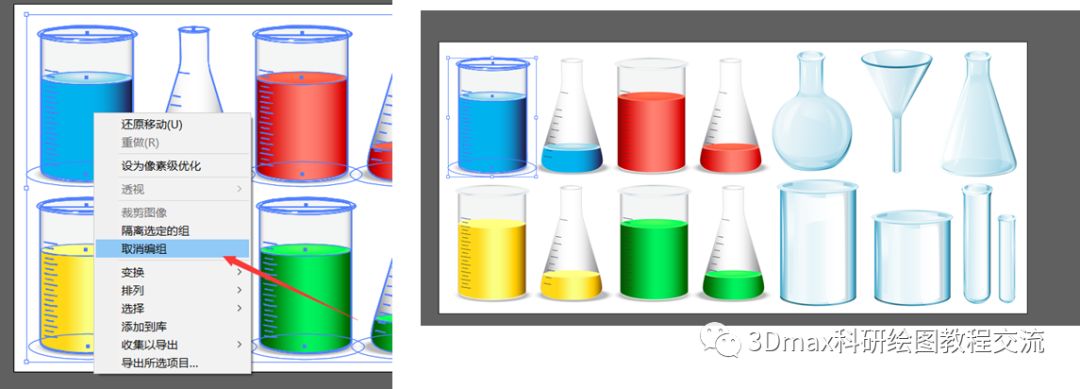
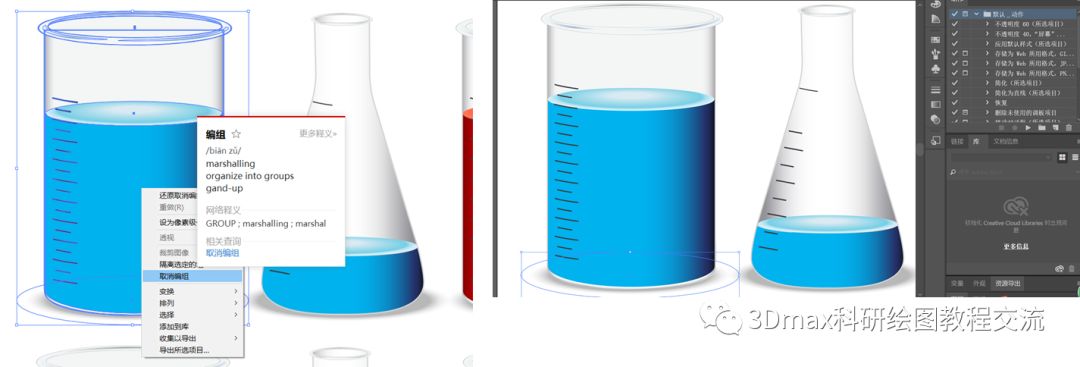
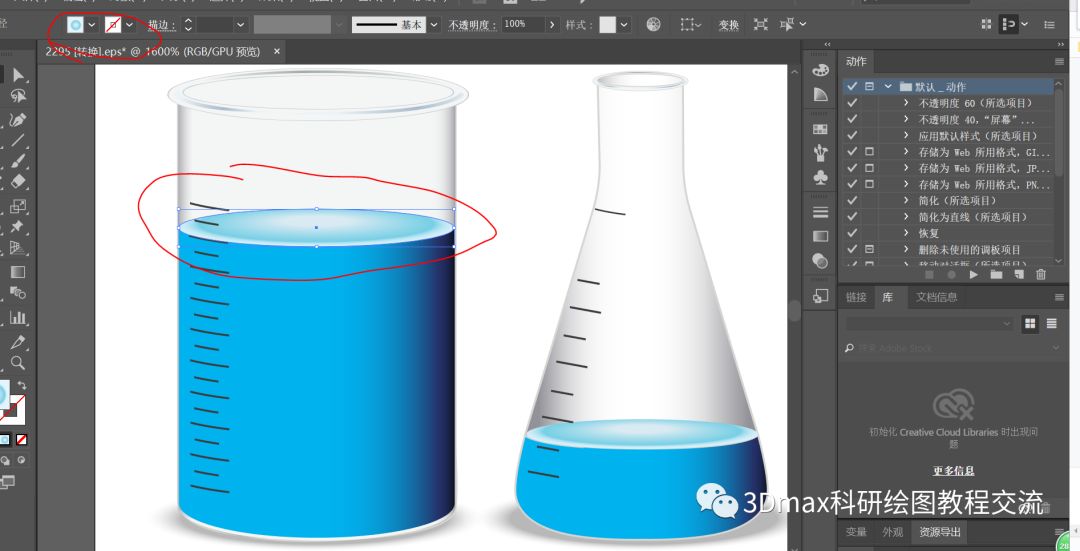
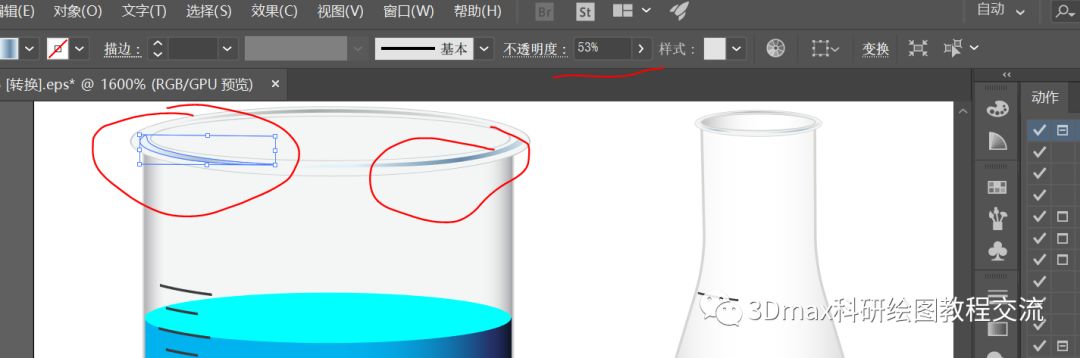
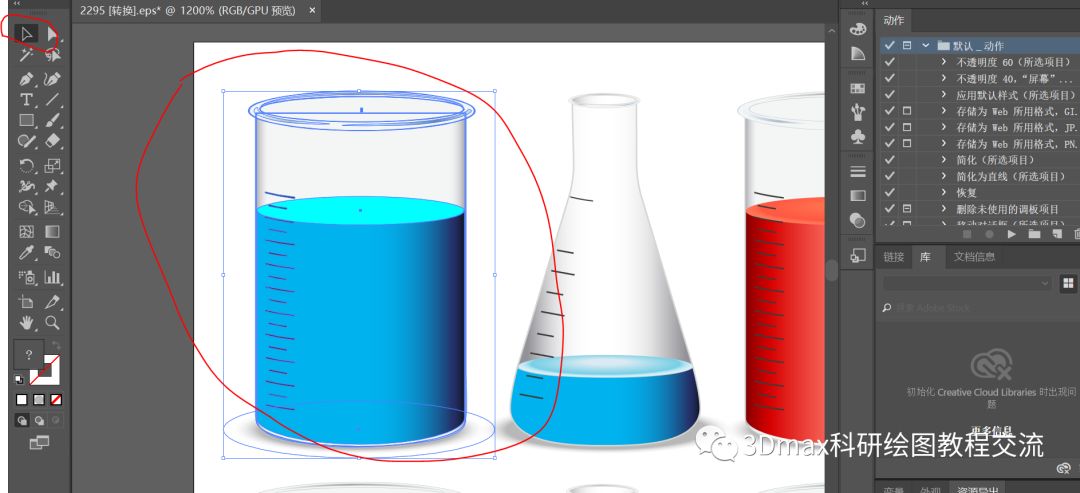
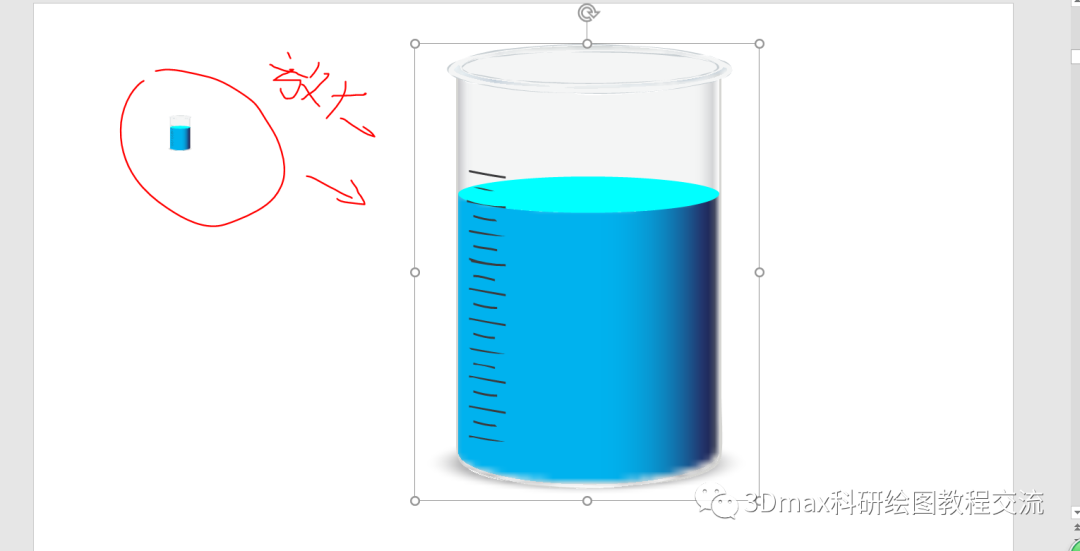
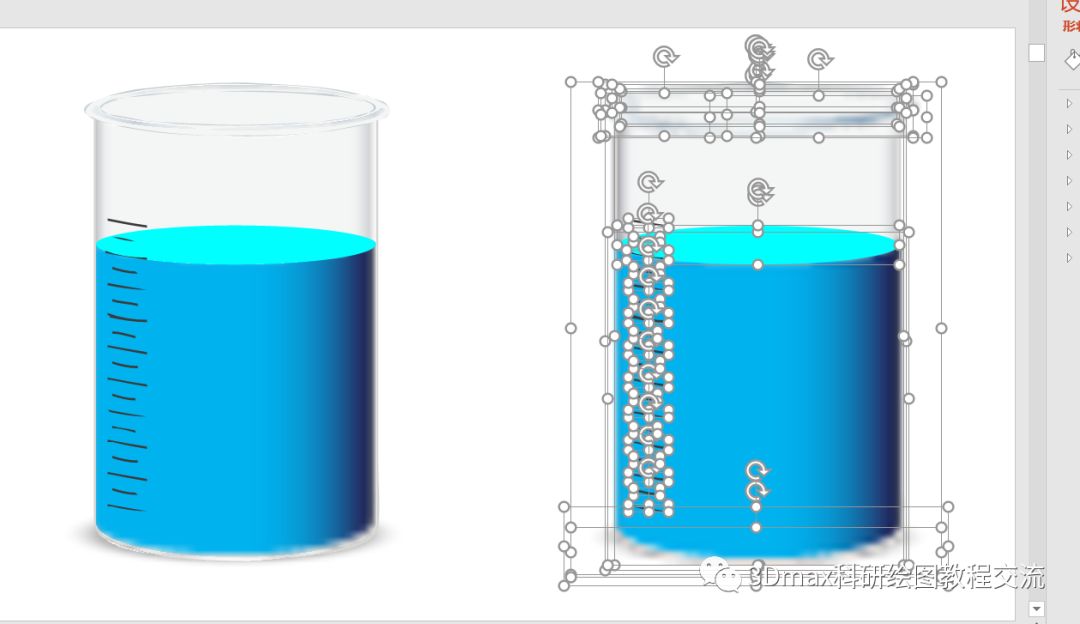
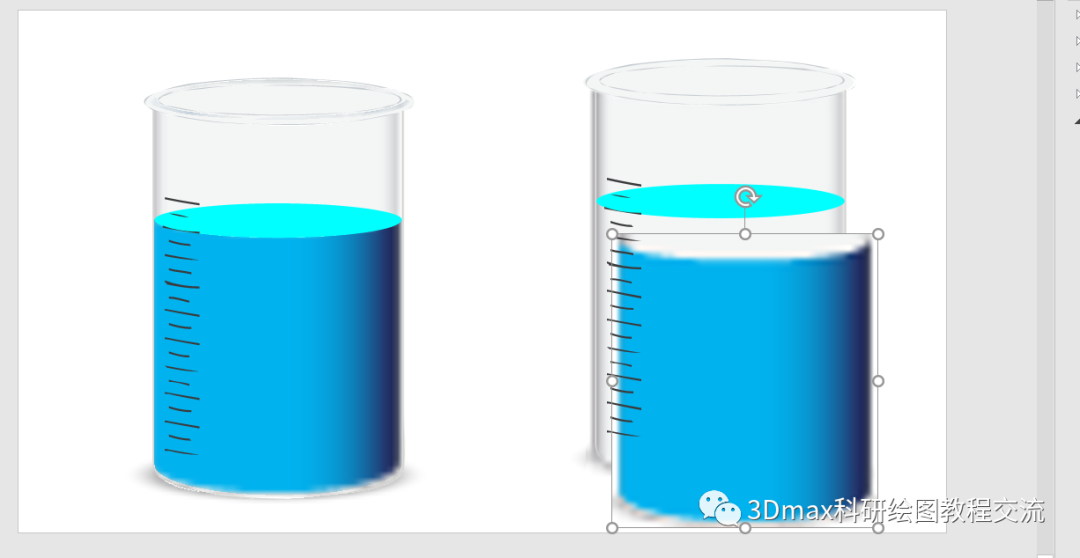
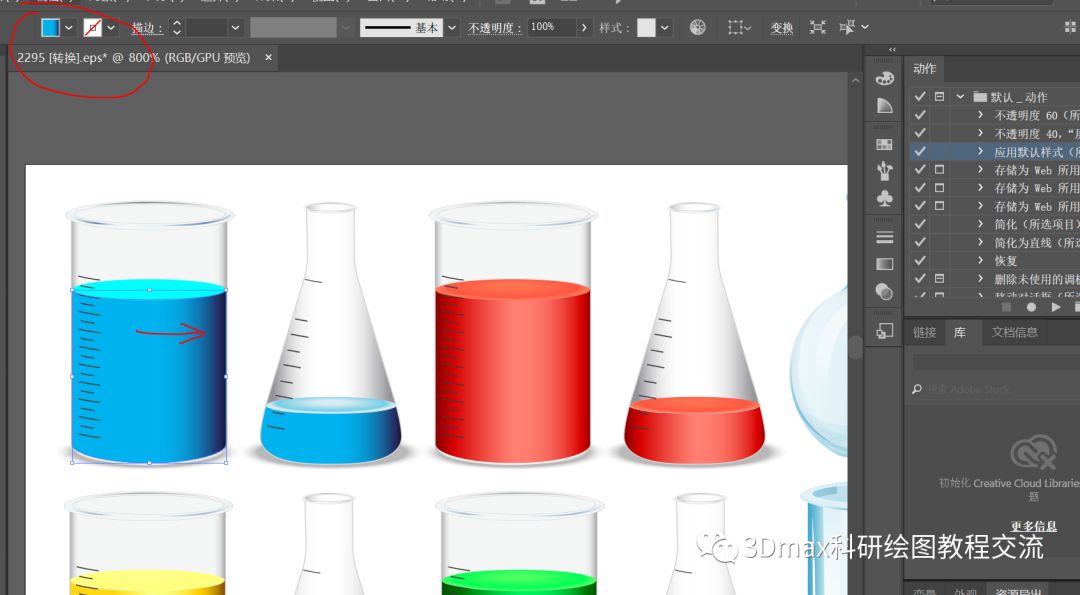
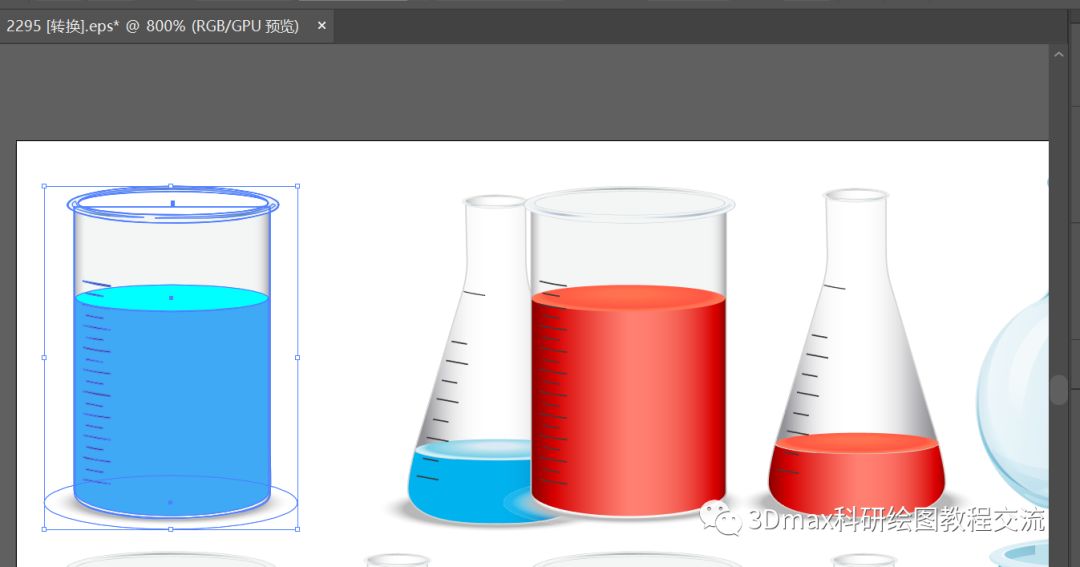
4. Beaker example: use AI to open the vector material, right-click and "ungroup" until the model is relatively independent (decompressed twice here), select the model to be exported and continue to right-click to cancel group, to Separate each module of the beaker model, change the gradient color, opacity, etc. (according to the method explained in 3), select the frame, drag it into the PPT, and hold down the shift key on the keyboard to enlarge the model (vector, zoom in and out will not change. Clear);Right click - ungroup, confirm, twice in total; refer to the graphics that have not been ungrouped, delete the unnecessary graphics on the upper side, because the solution part on the lower side is exported as a picture mode (the right button does not Edit the vertex option), indicating that the color has not been changed in AI, go back to AI and change it again and find that the solution is a gradient color, change it to a solid color, re-export, and repeat the modification as follows (contains AI materials with transparent, gradient, glowing and other effects are imported into PPT and have to be carefully changed. Here, the focus is on the idea, no longer optimized, please):
【Explain again: If you choose a relatively simple, solid-color stitching picture or just want a vector diagram There is no need for such detailed adjustments, the operation is as simple as a mouse example, and this type of AI Vector graphics account for more,So this method is a pretty good and general method]
. . . .
Sorry for the word count
Hi, welcome to pay attention to this official account, this official account is a shared official account for scientific research and drawing exchange, thank you for your attention! The answers to the questions you may encounter are as follows:1. Software and plug-in download and installation, the menu bar at the bottom of the official account-graphic tutorial-software and plug-in download; in addition, search the public The numbers "Software Installation Manager" and "Software Link" include various conventional software encyclopedias. 2. Please refer to the bottom menu for the content of the past schedule, graphic tutorials-max example tutorials/PPT attack tutorial series/dry goods express-scientific research related/materials, lighting maps, model downloads;3. Scientific research drawing exchange group or public account recommendation QQ: 838559510 (scientific drawing tutorial exchange group (1)), 521529355 (CG Yang Jie scientific research visualization) Other max public Number: YND scientific research drawing (with Tencent video tutorial, recommended), CG Yang Jie image design C4D public number: C4D scientific research drawing tutorial
PS: Thank you for your attention, if it is useful or you think it is good, please give a like or a reward, Thank you for your support, Good luck!
Articles are uploaded by users and are for non-commercial browsing only. Posted by: Lomu, please indicate the source: https://www.daogebangong.com/en/articles/detail/PPT%20Attack%20Tutorial%2012%20Use%20of%20AI%20Vector%20Material%20Mice%20and%20Infinite%20Pseudo3D%20Map%20Drawing%20Method%20%20Overweight.html
 支付宝扫一扫
评论列表(196条)
测试