After talking about the basic skills of PPT merging shapes, Mr. PP thinks that he can probably be counted as a master, and he can silently say that he is not a novice. (Sister O: Where is this, hehe)
Today we are going to learn how to make PPT animation. In fact, the function of PPT to make animation is very powerful, and the effect is also extremely powerful.
If you only know animation effects such as blinds, fly-in, and fading, then arrange them in order of 12345
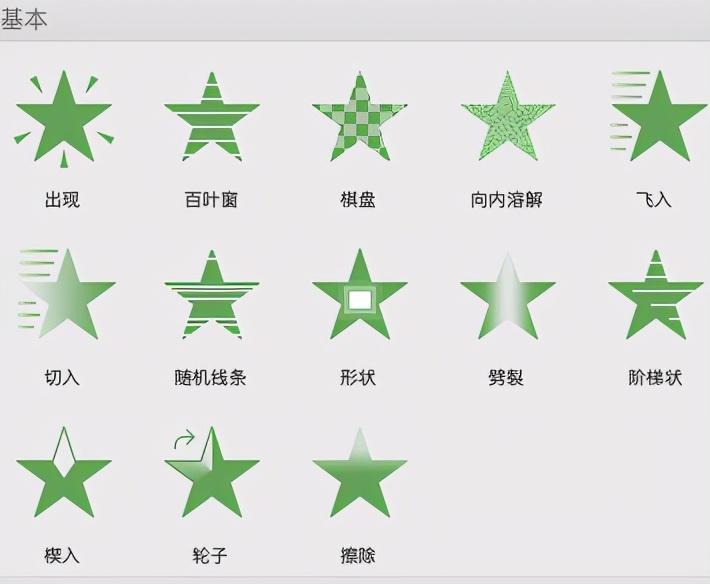
Then today's article is worth reading. Not much to say, Mr. PP first uploaded the finished renderings:

1. Everything is difficult at the beginning, let’s play an easy one first
First look at how a scroll moves
1) Create a new PPT page, then set the background to a dark color, and then draw a cylinder. Students who are not good at mathematics only need to know that it is a stick to draw
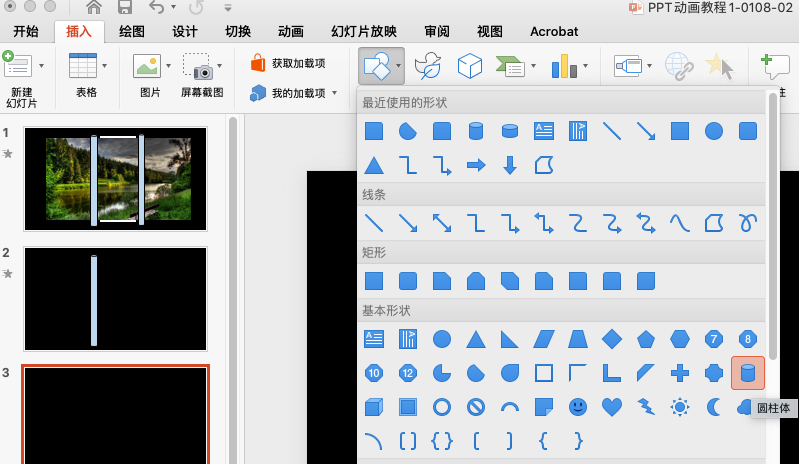
2) Then click the animation options page, select [Path Animation] - [Straight Line]
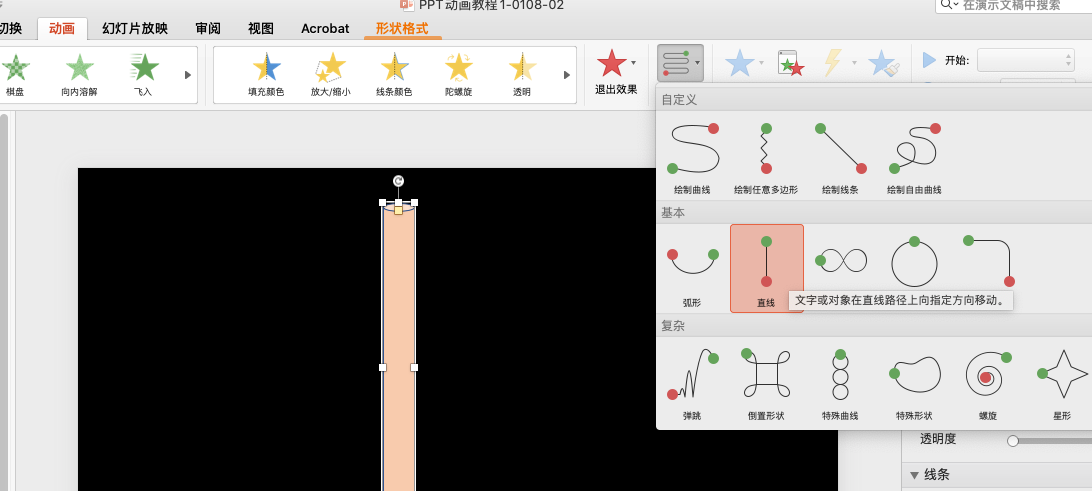
3) Then, here comes the important point, it moves up and down by default, but you can click and hold the small dot in the preview effect after the movement that appears, drag any direction to the direction of movement!
Mr. PP kindly offers the animation:
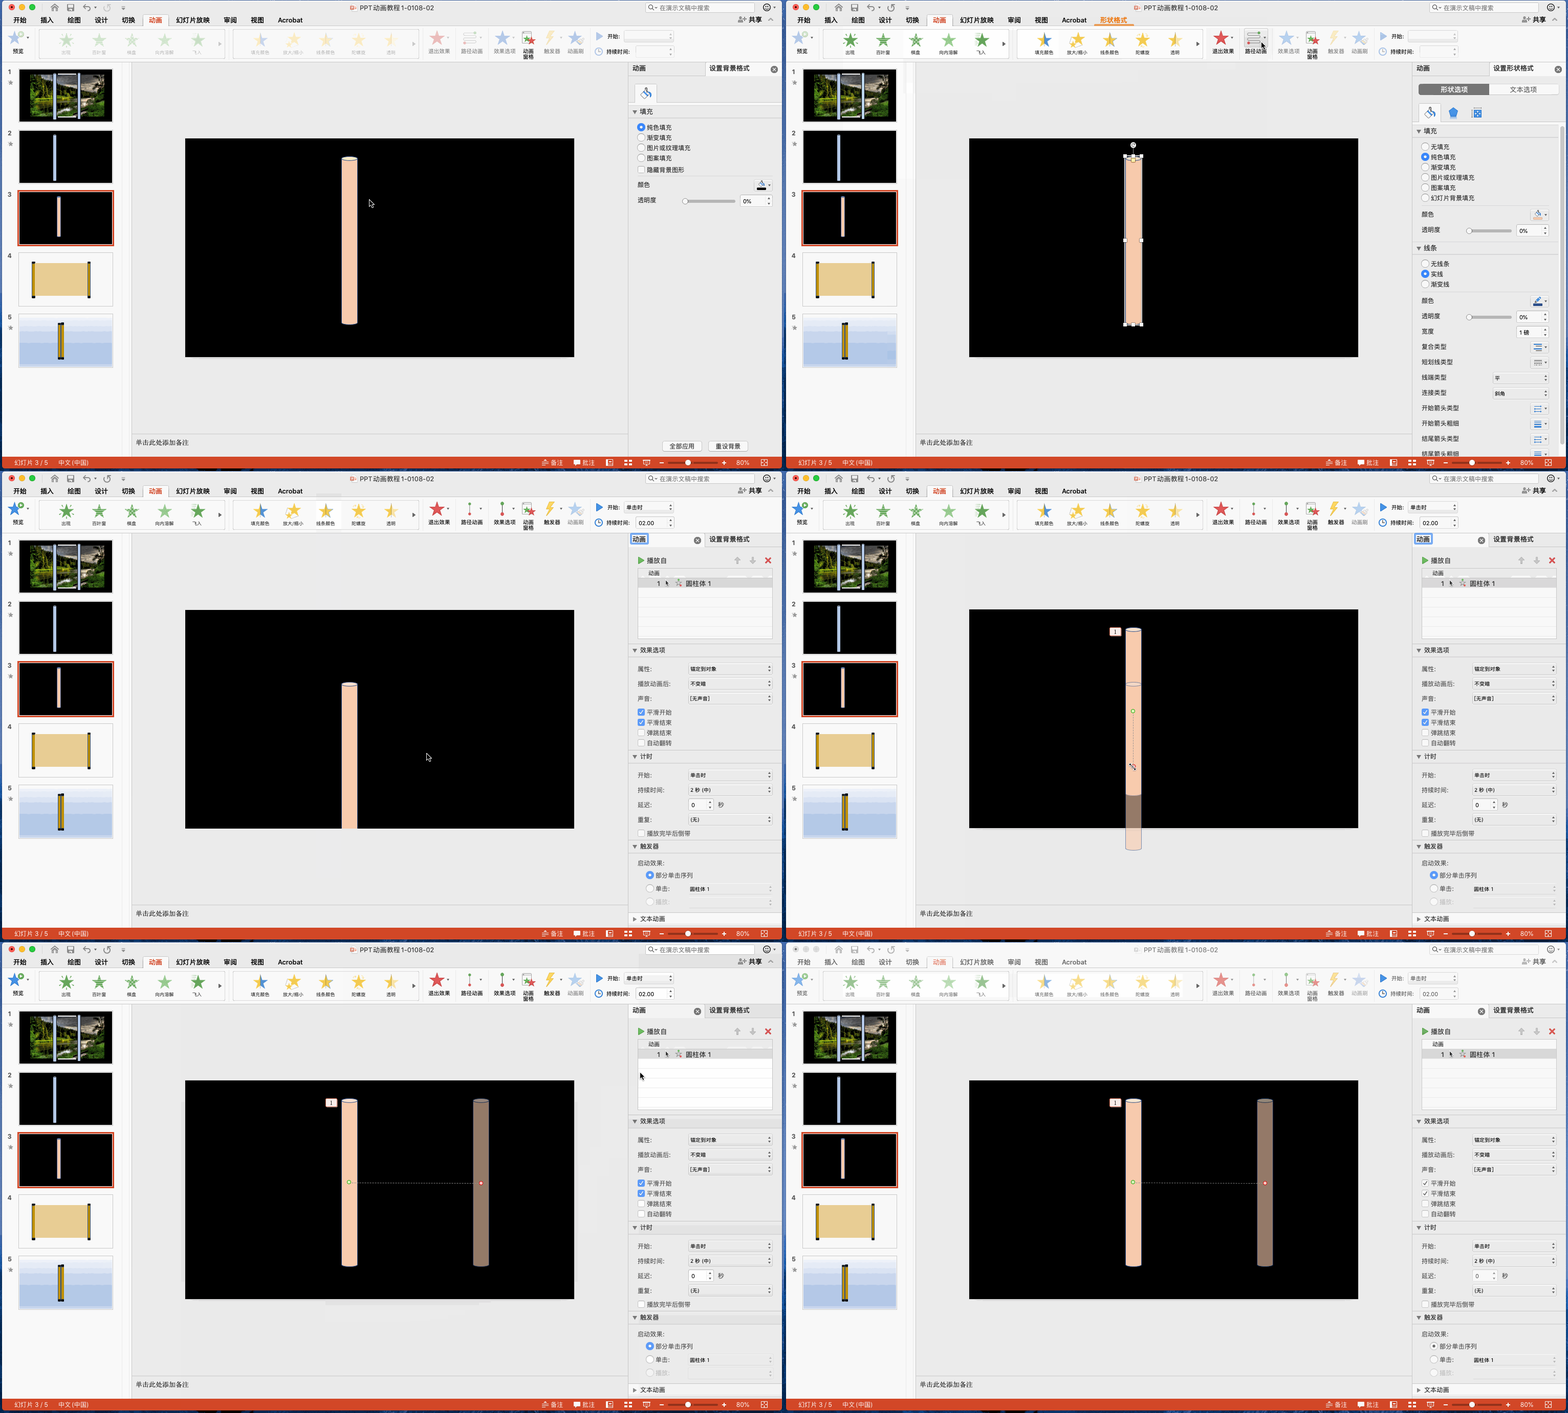
The end of the drag is the end point of the movement. Isn’t this kind of operation nice?
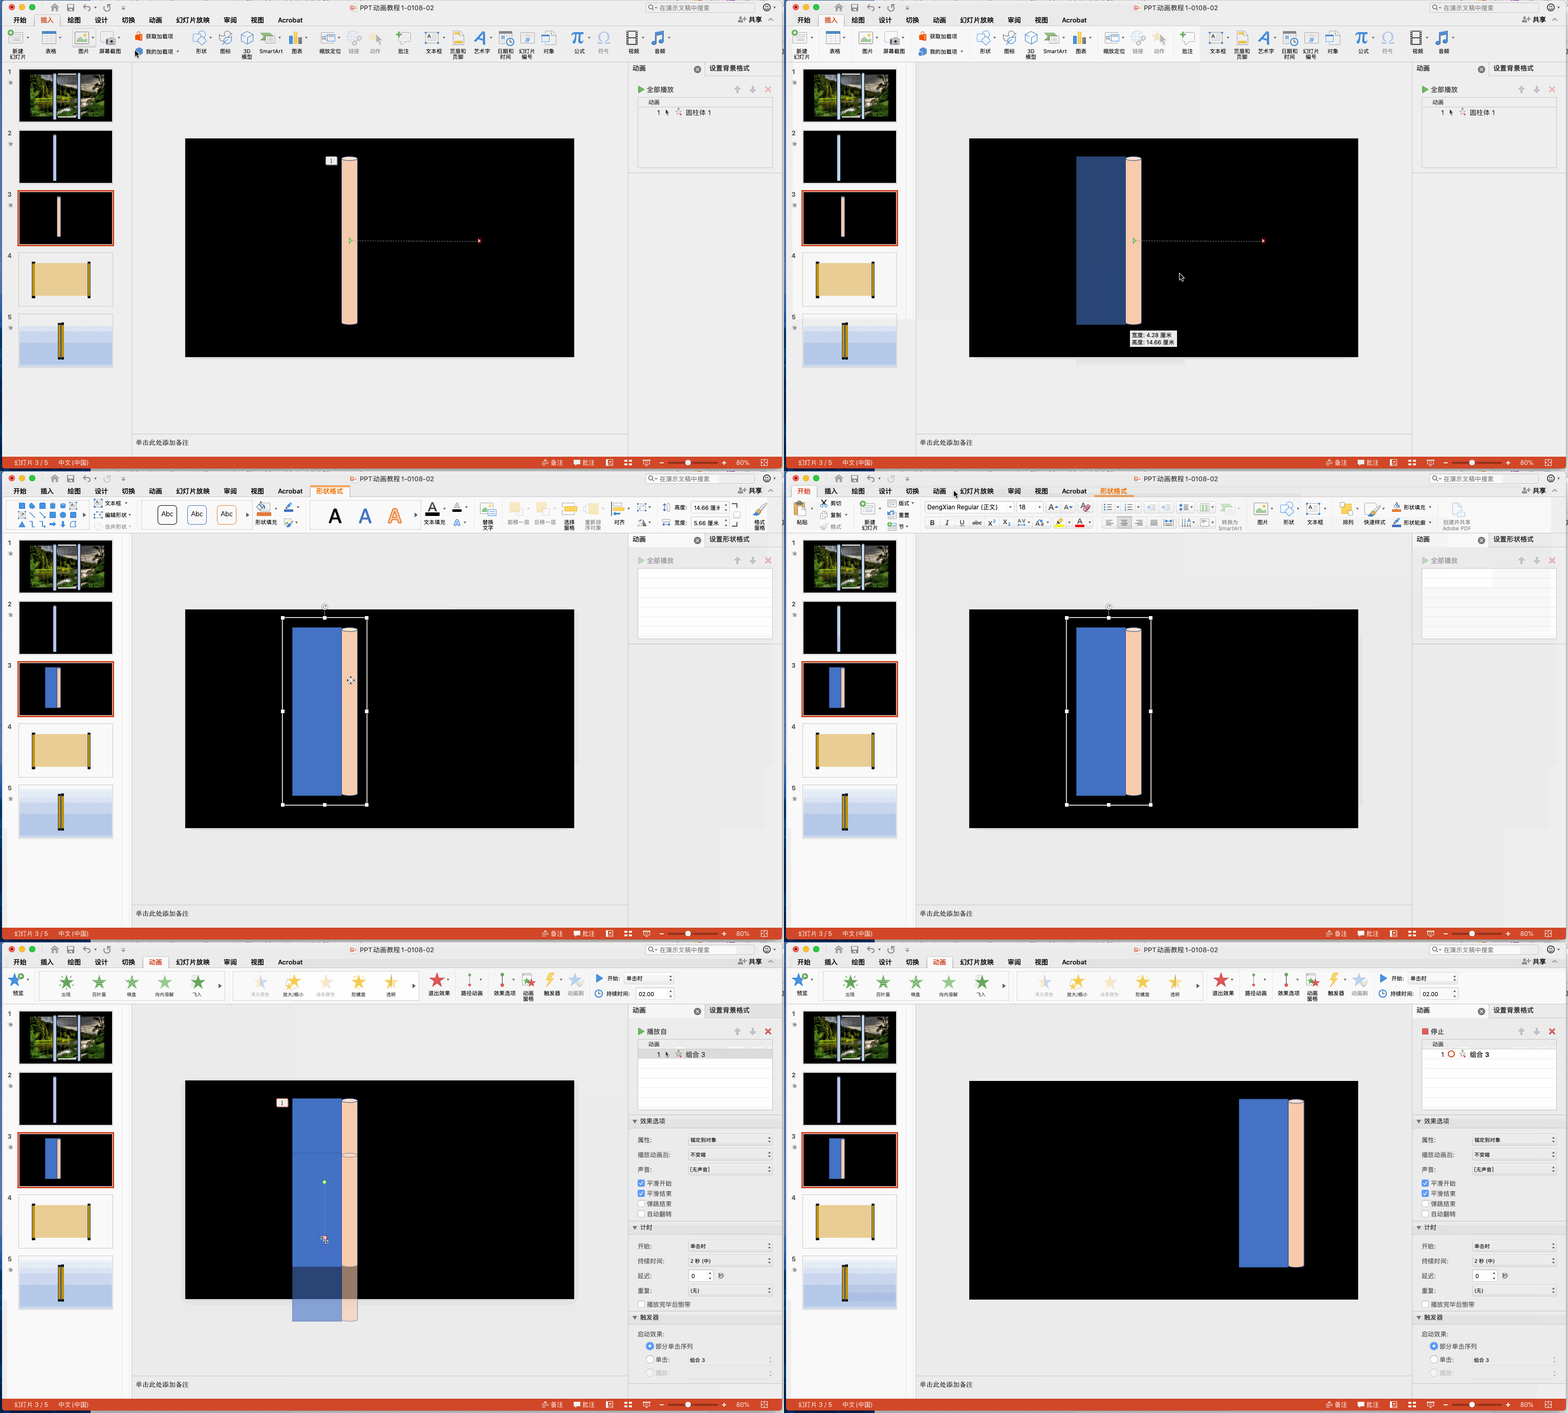
4) Enhance it again. If the stick moves together with a rectangle, and then gradually reveals the covered picture, is it the effect we want?
2. Officially make scrolls to open the Chinese painting effect
Let’s break it down first, its production process is divided into the following steps:
1) Draw the scroll + two rectangular bottoms, one for the bottom and one for the painting
2) First draw the effect of Chinese painting unfolding, then put it into the picture
3) Select a rectangle and combine it with the scroll, the same operation on the left and right sides
4) Put the scroll and rectangle on the top layer, move to the middle first, and cover the picture
5) Set two scrolls + rectangles to move in a straight line, slowly unfold the picture, and then O
This series of animations has been recorded by Mr. PP. After thanking him silently in my heart, let’s take a look together:
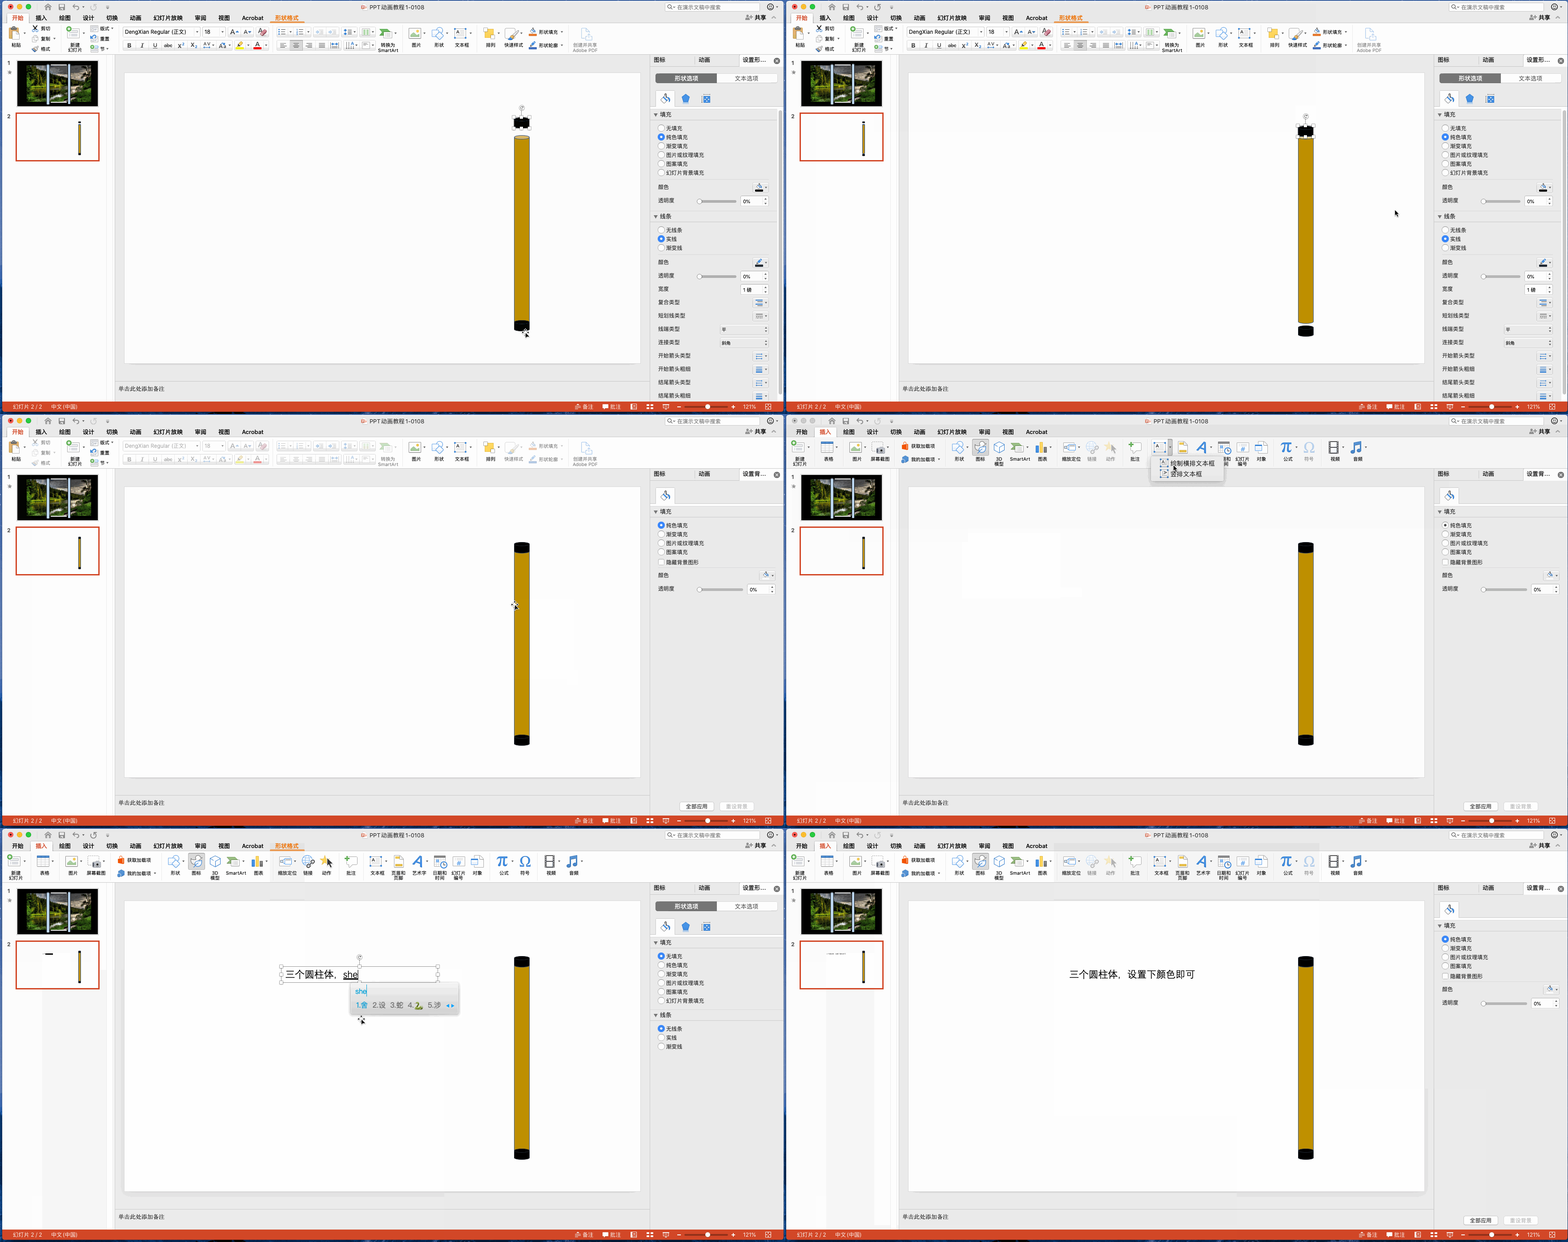
The first step: draw the scroll, let's make it simple, use three cylinders, and distinguish the colors
Step 2: Duplicate the scroll and add a rectangle, one for the base and one for the painting
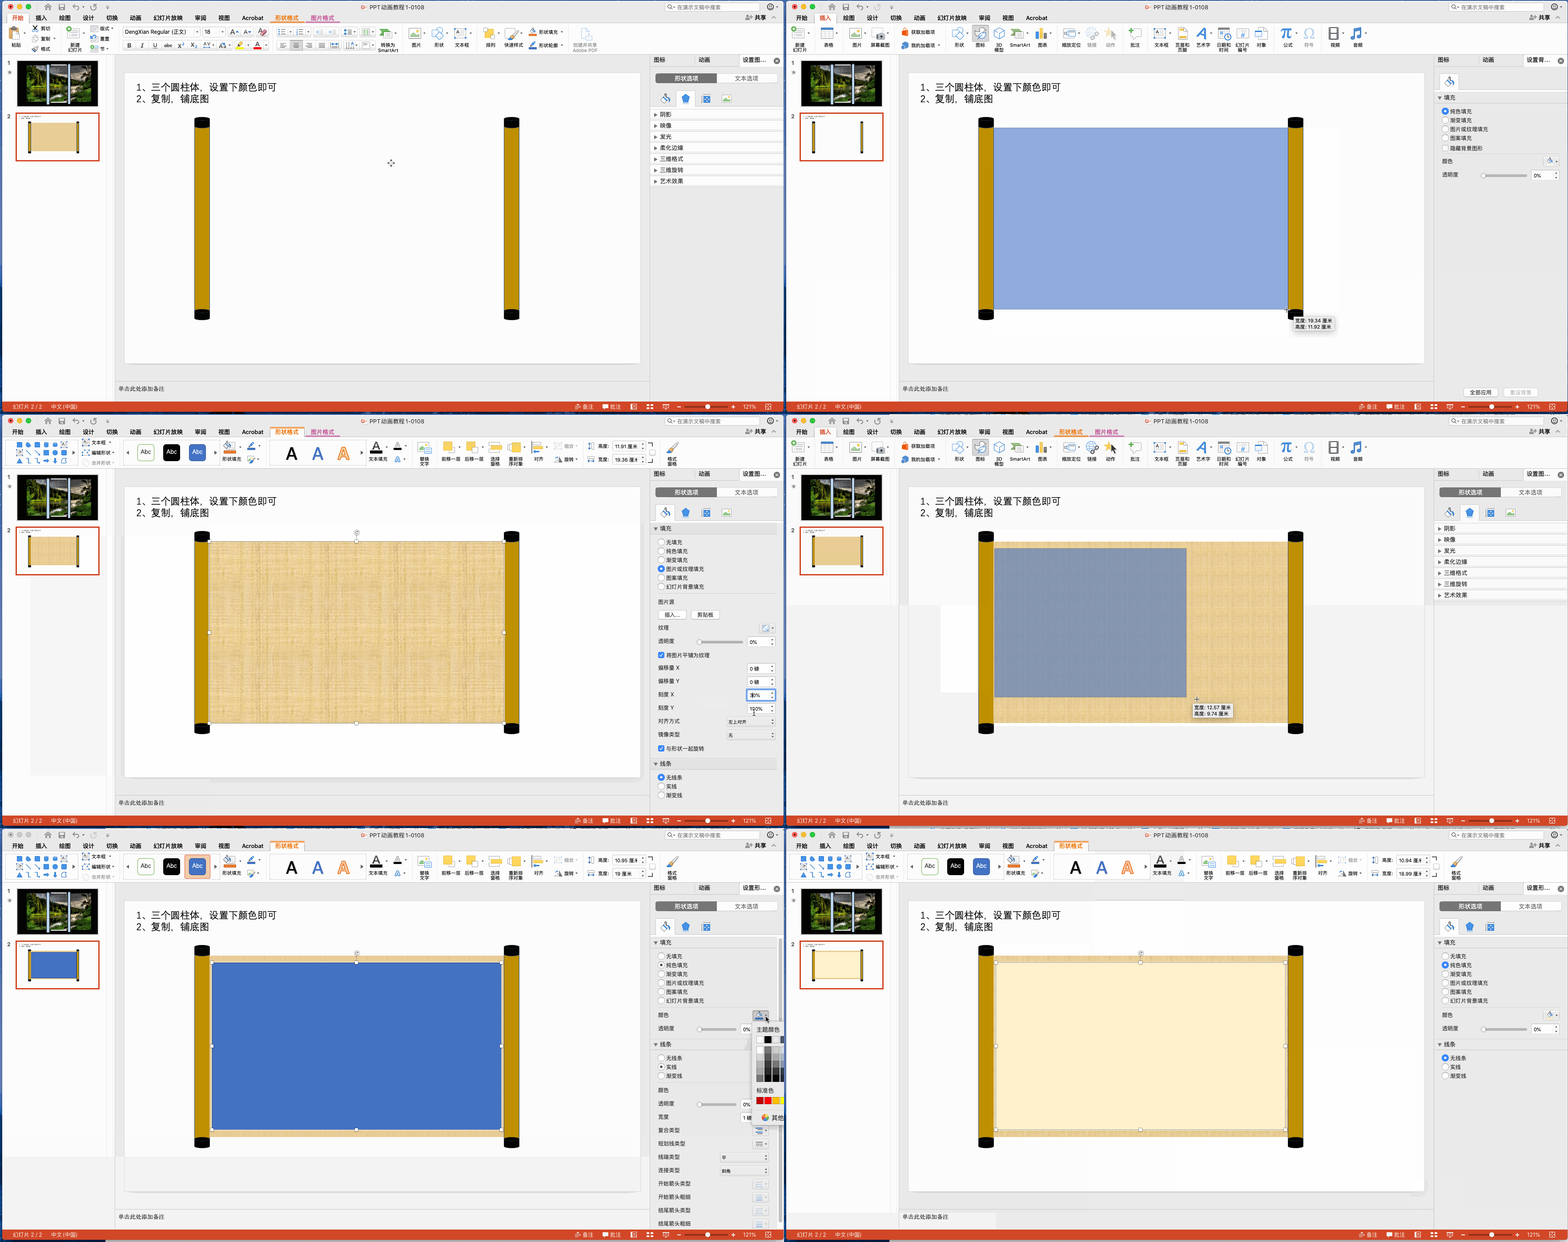
The third step, you need to spend some brains here, review the pruning function in shape merging we mentioned before.
Copy the whole page PPT made in the second step, and then insert a rectangle that just covers the entire page in the first copy, then first select the full-screen matrix, then select the rectangle where the picture is placed, and select cut. So I thought of hollowing out that part.
Then paste the full-screen matrix in the first page of PPT to the second page of PPT, and put it at the bottom
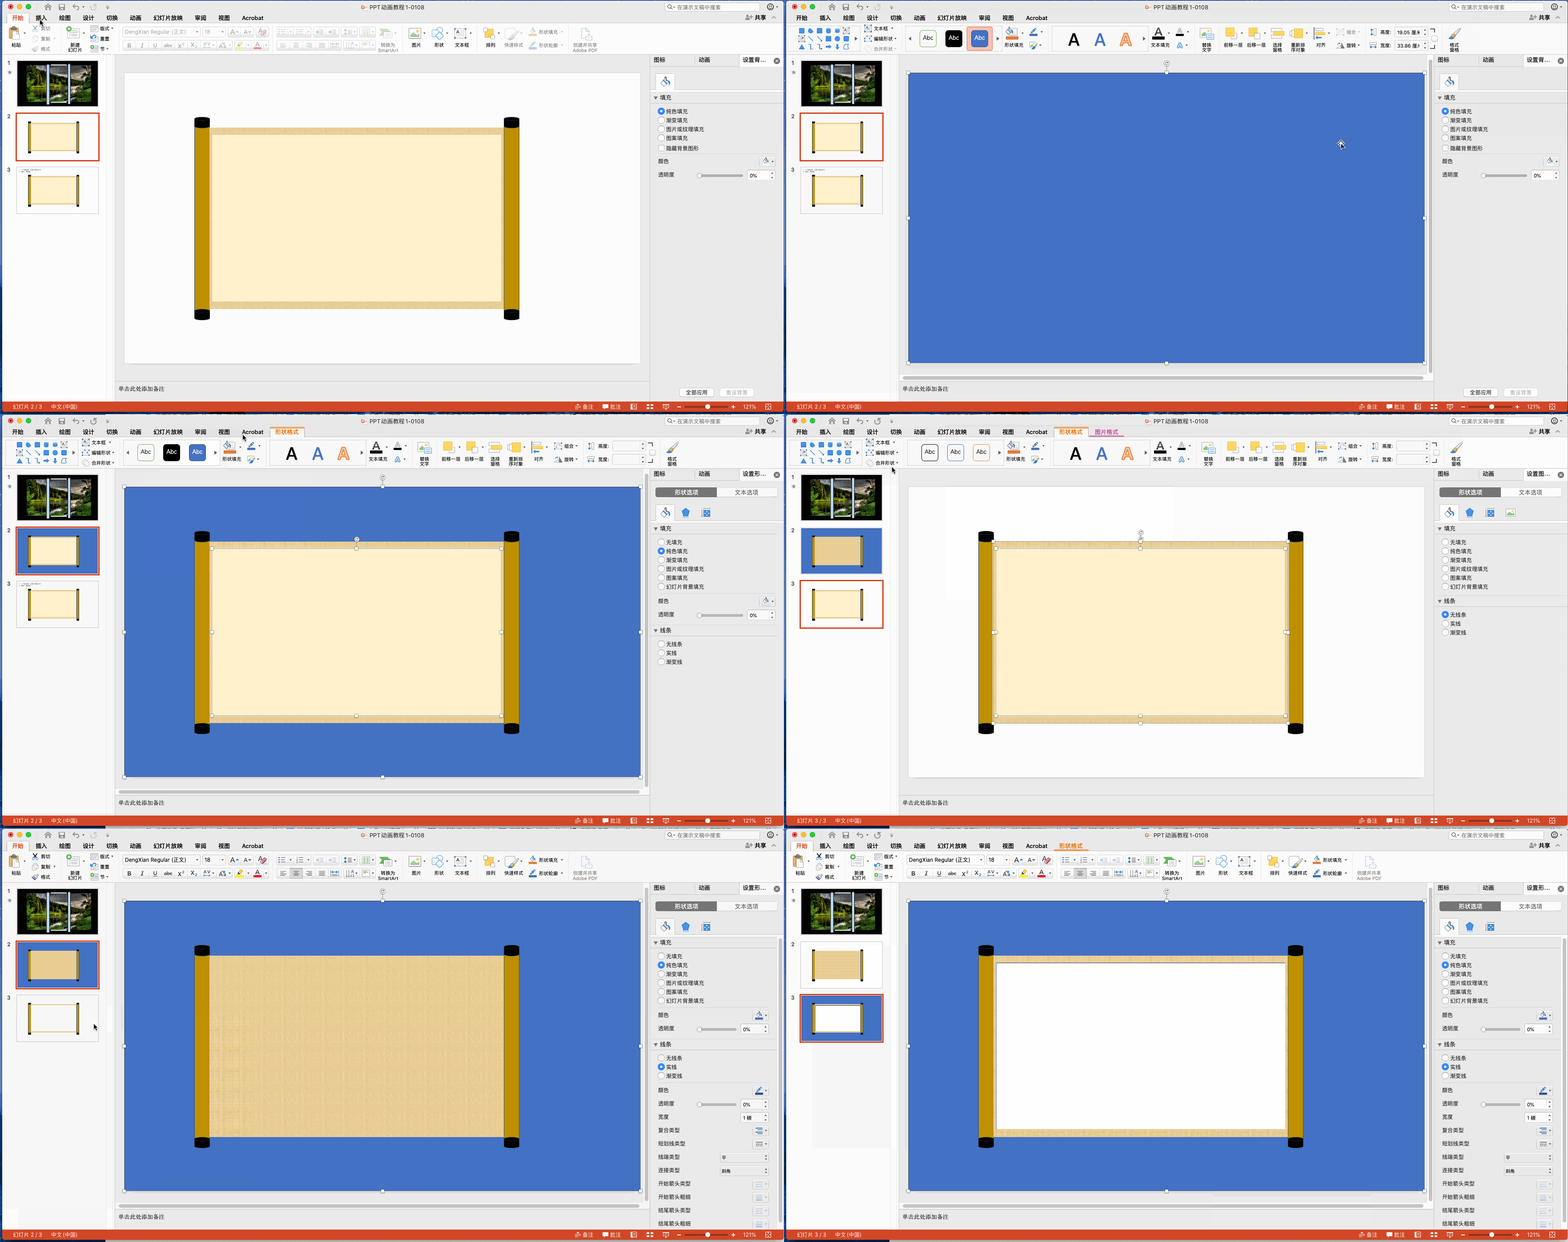
The fourth step is to drag in the Chinese painting picture and put it into the blank frame just made.
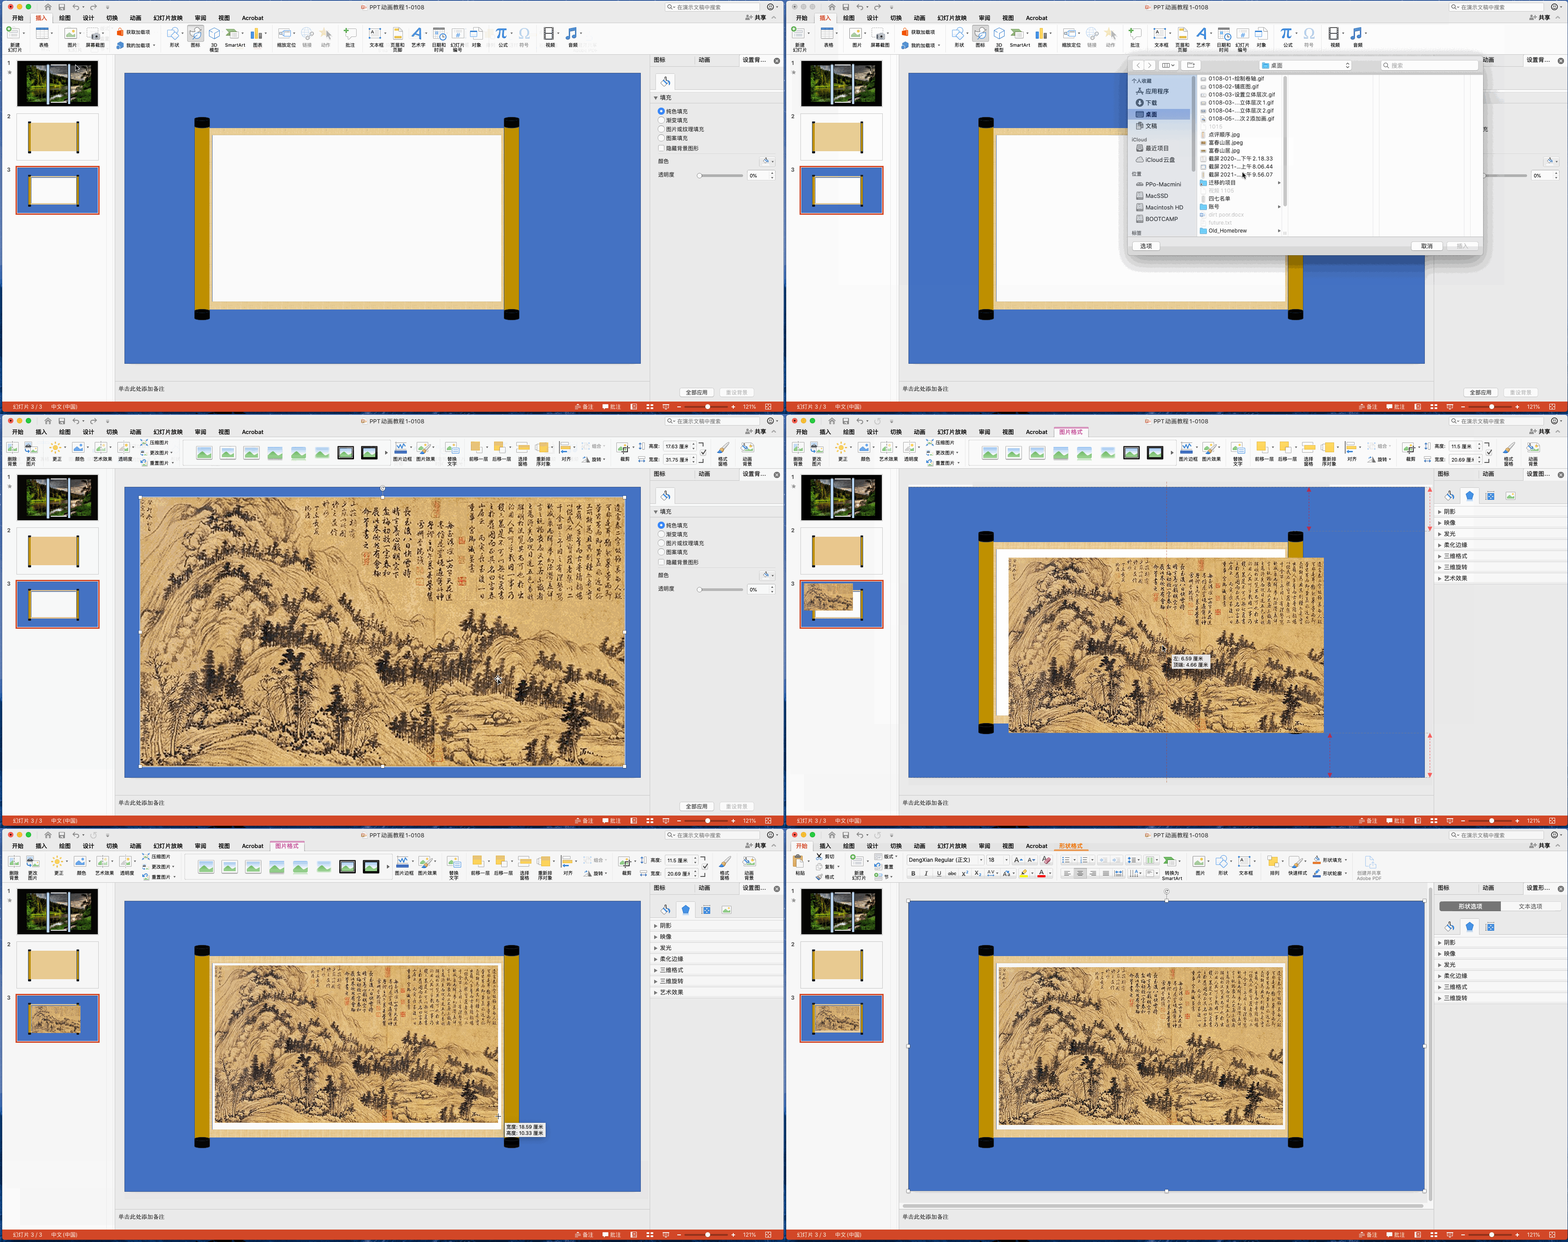
The fifth step is to add a rectangle on the left and right sides of the scroll, which is as high as the full-screen rectangle just now, just covering the height. (In addition, in order to make the PPT background not so monotonous, you can set a gradient color or texture for the full-screen matrix just now. For the rectangles added on both sides, you can also set gradient colors or add textures)
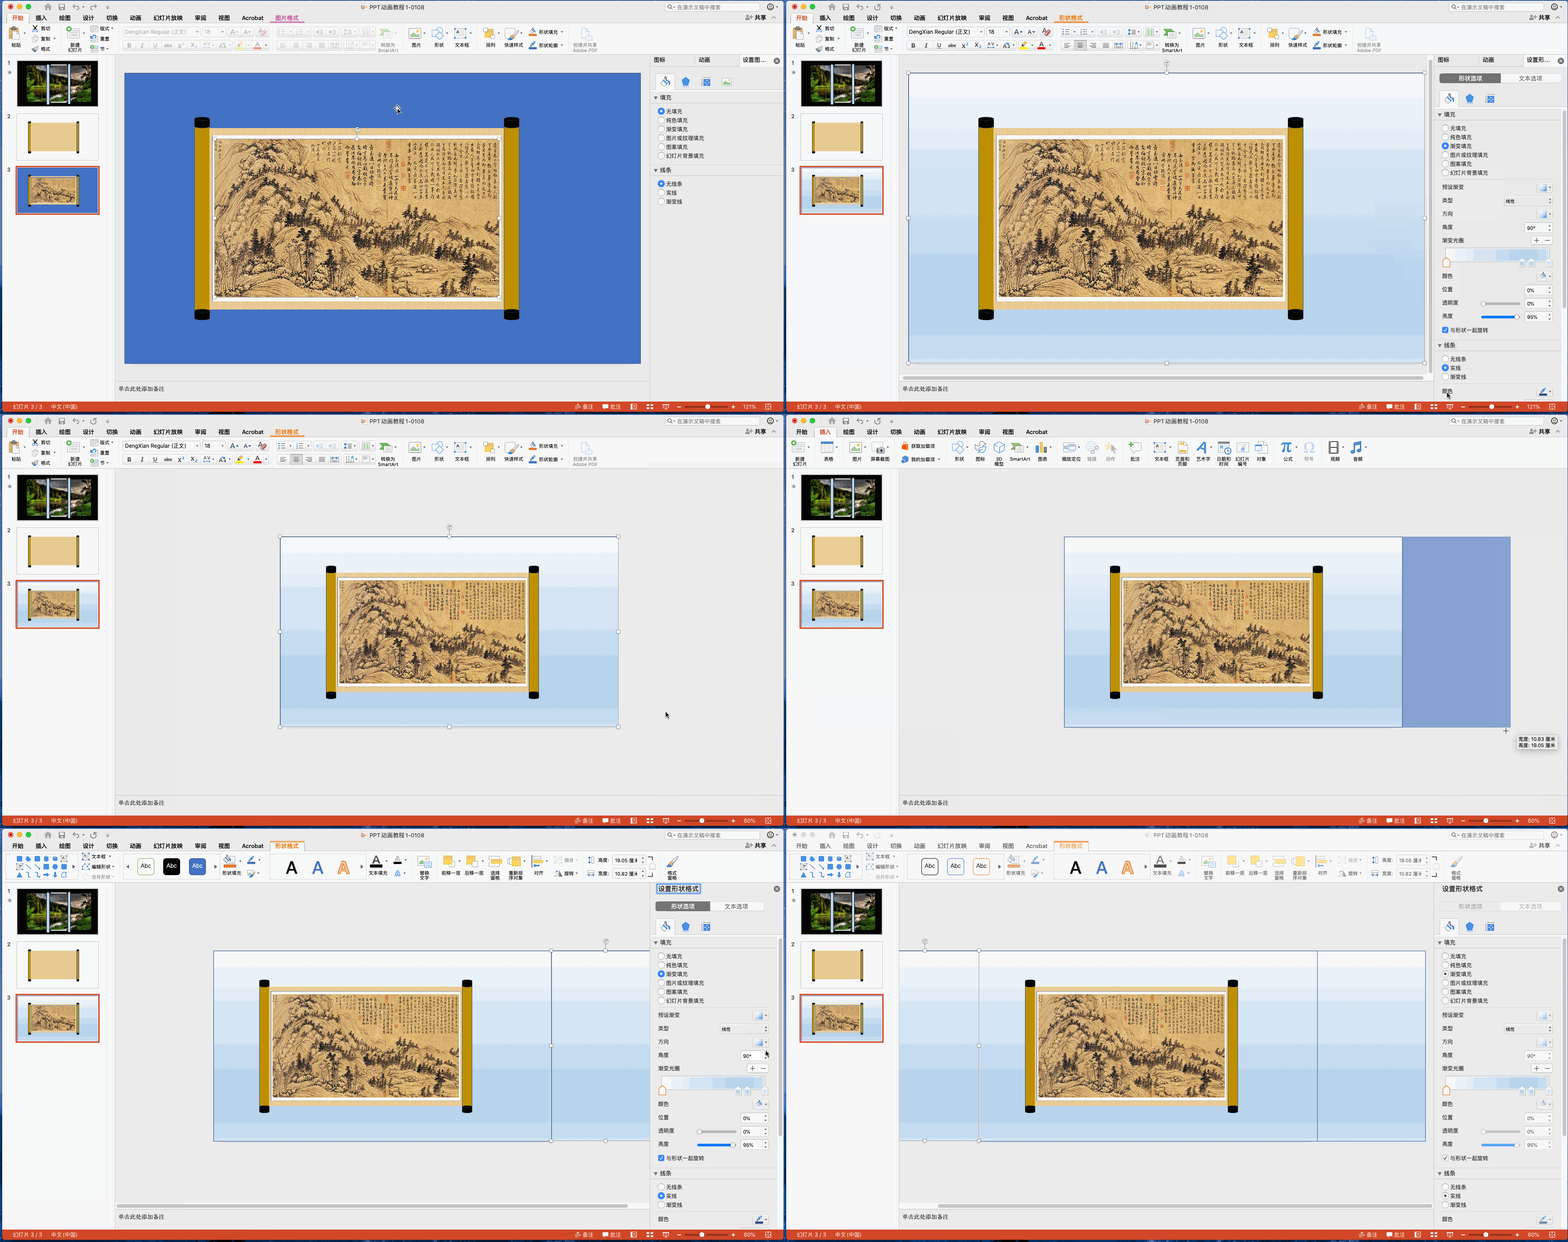
The sixth step is to combine the rectangle and the scroll, and do the same operation on the left and right sides
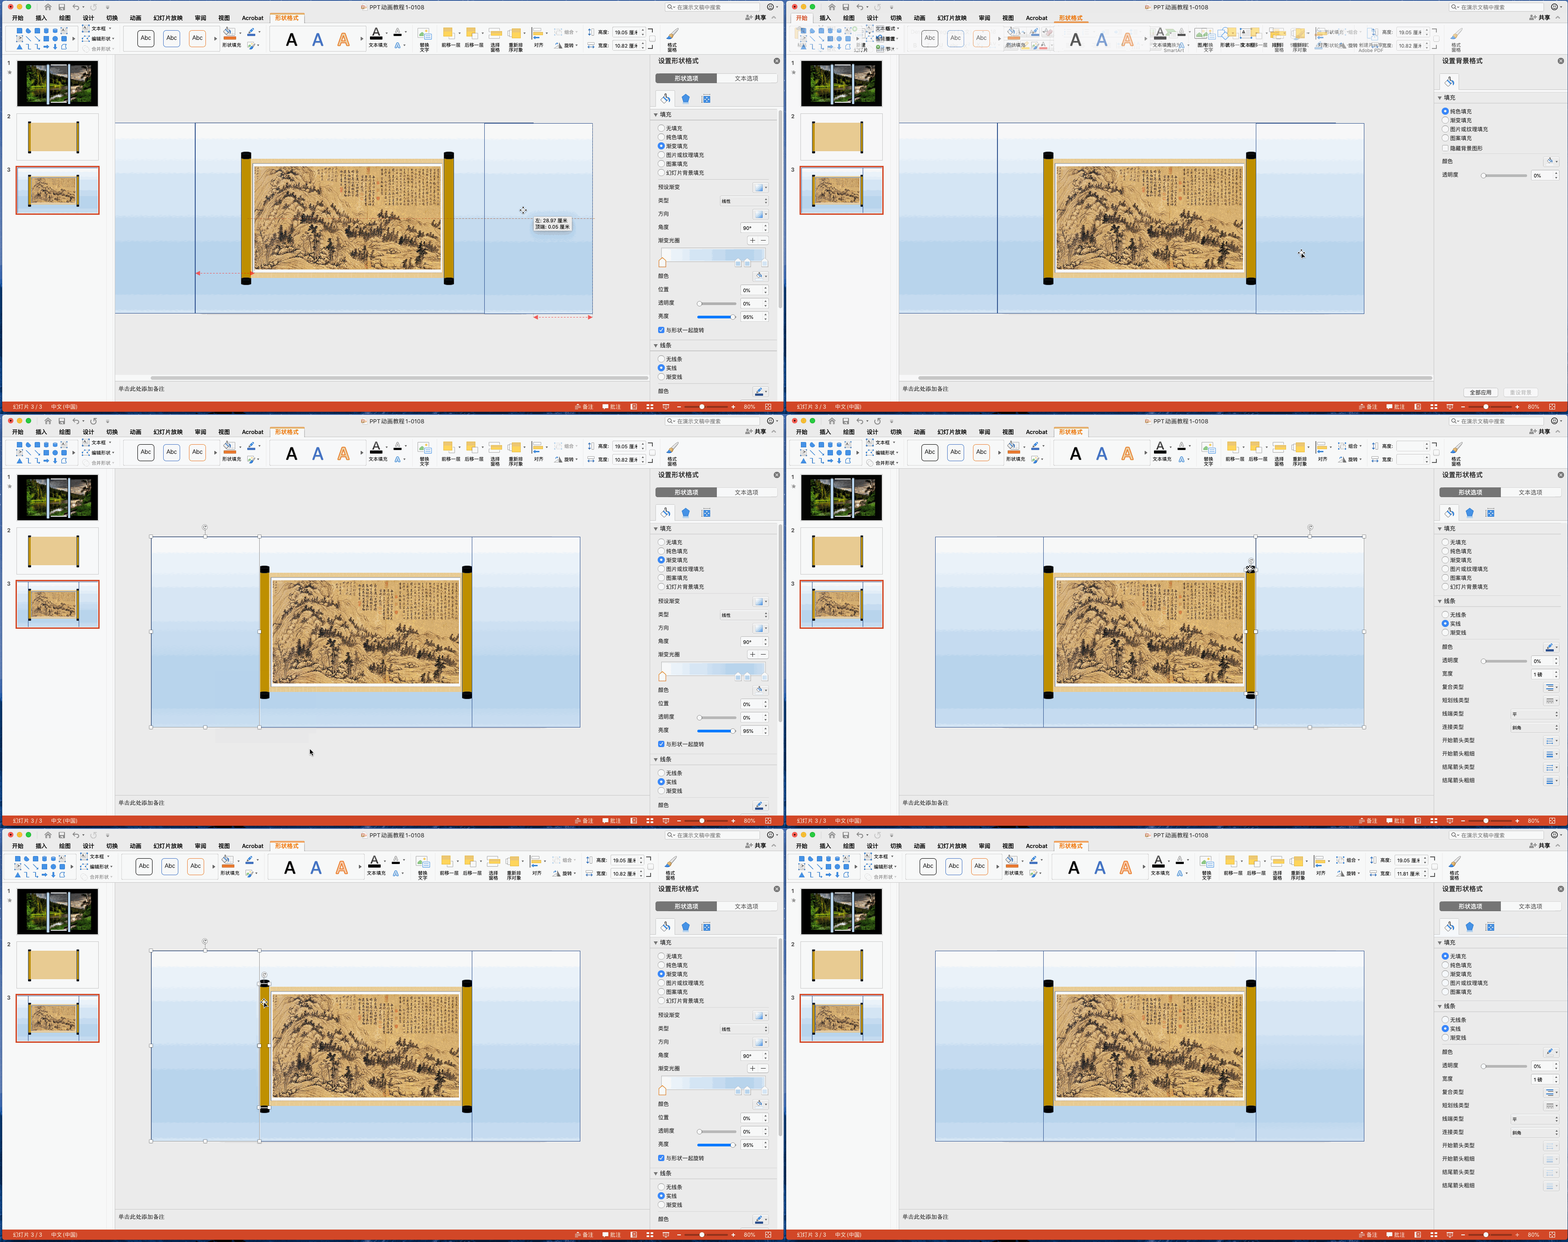
The seventh step is to set the reference line of the last moving position
In fact, it is also very simple, that is, draw a long straight line next to the scroll, and then you can move it here for alignment.
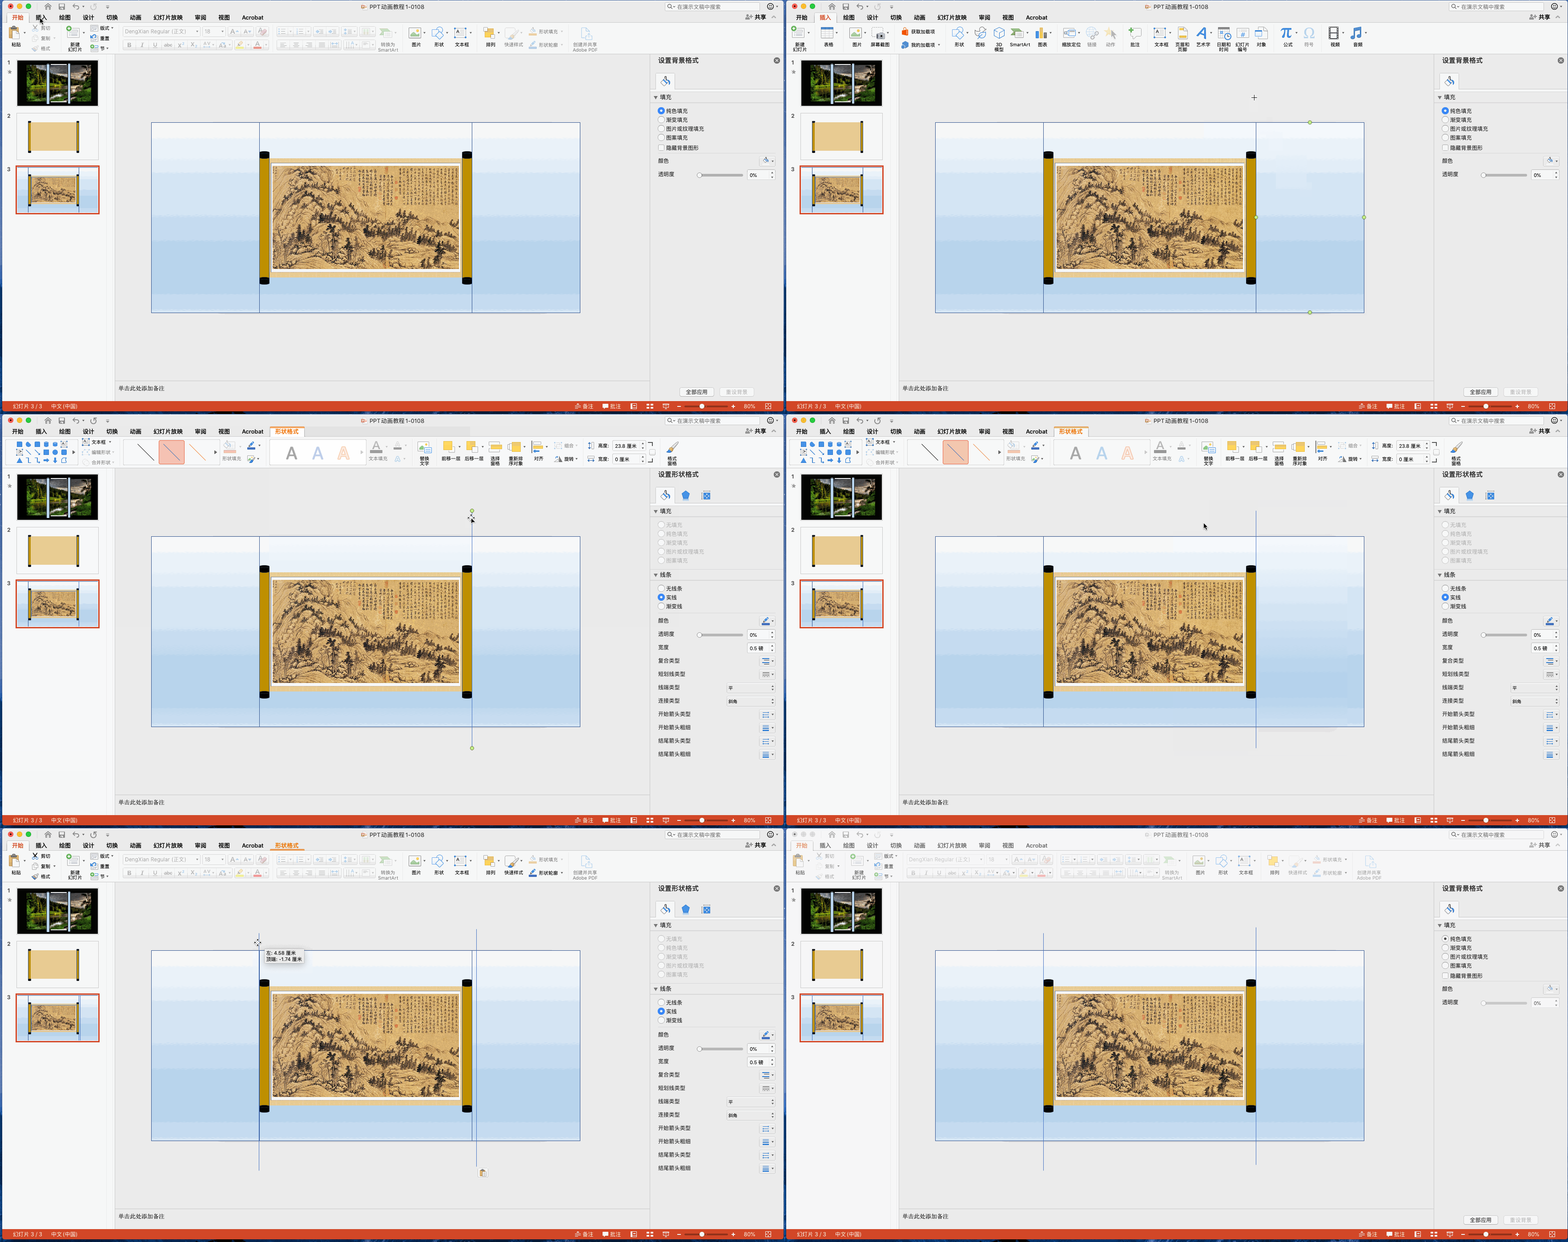
The eighth step, move the two combined rectangles to the center of the screen to create a fully rolled effect
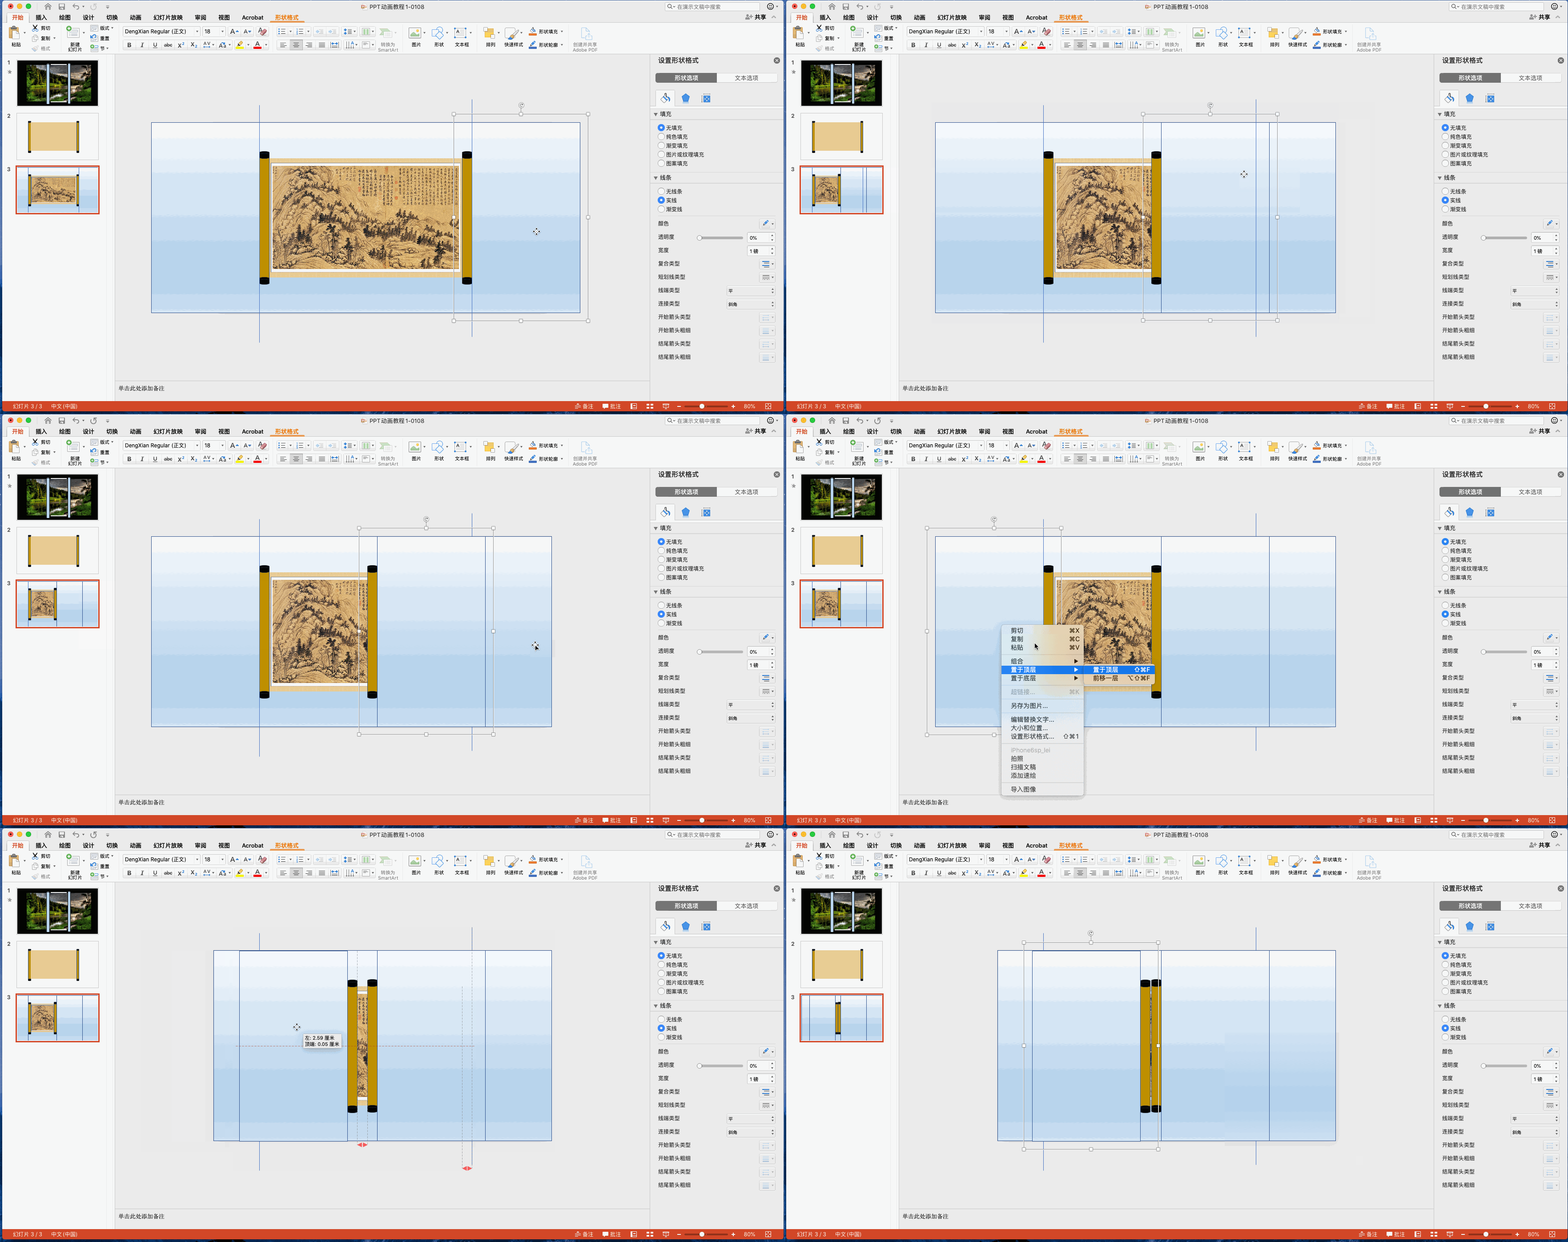
The ninth step is to make an animated moving line for the left and right sides, and move to the straight line reference line just now
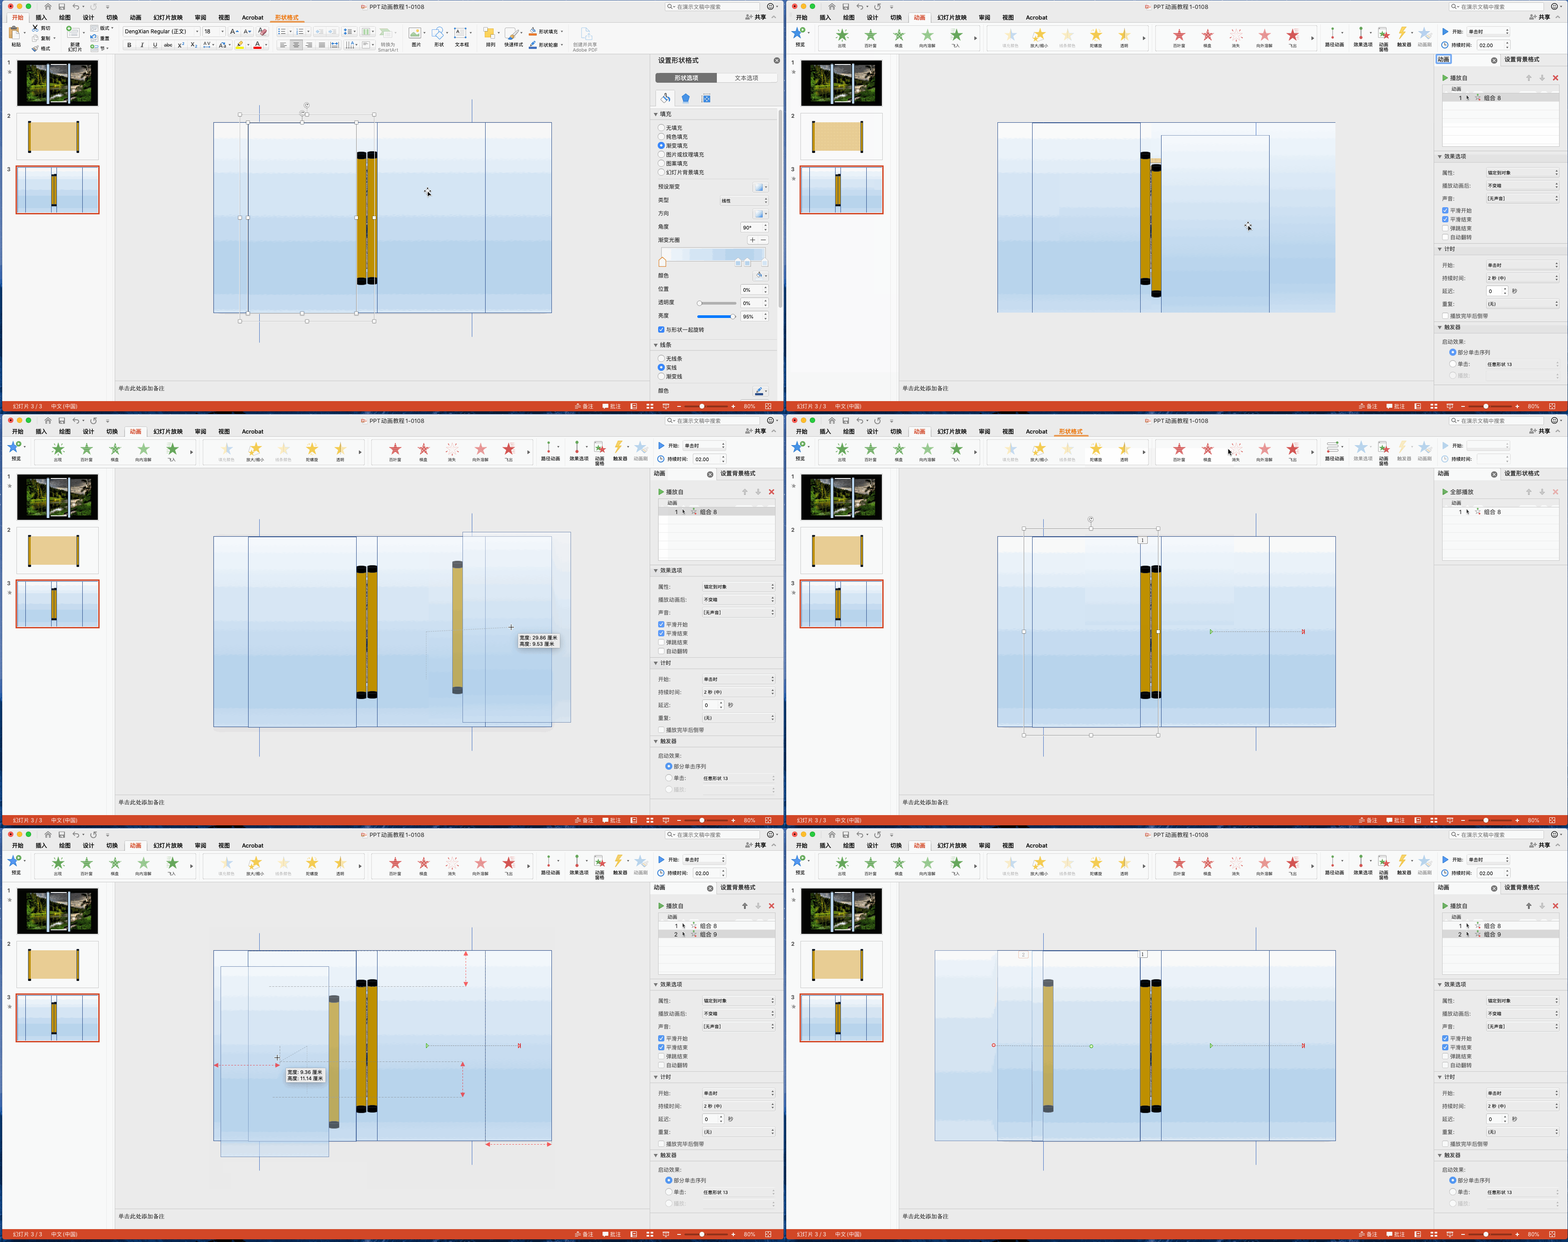
Step 10, add left and right side animation effects, select click (or the second option, after the previous animation), and choose a duration of 5 seconds
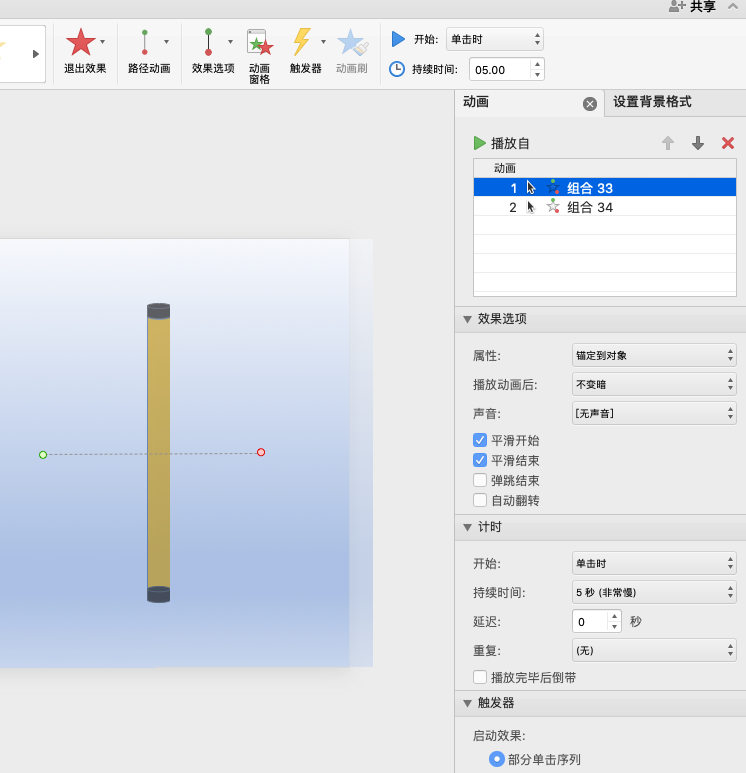
After that, you're done
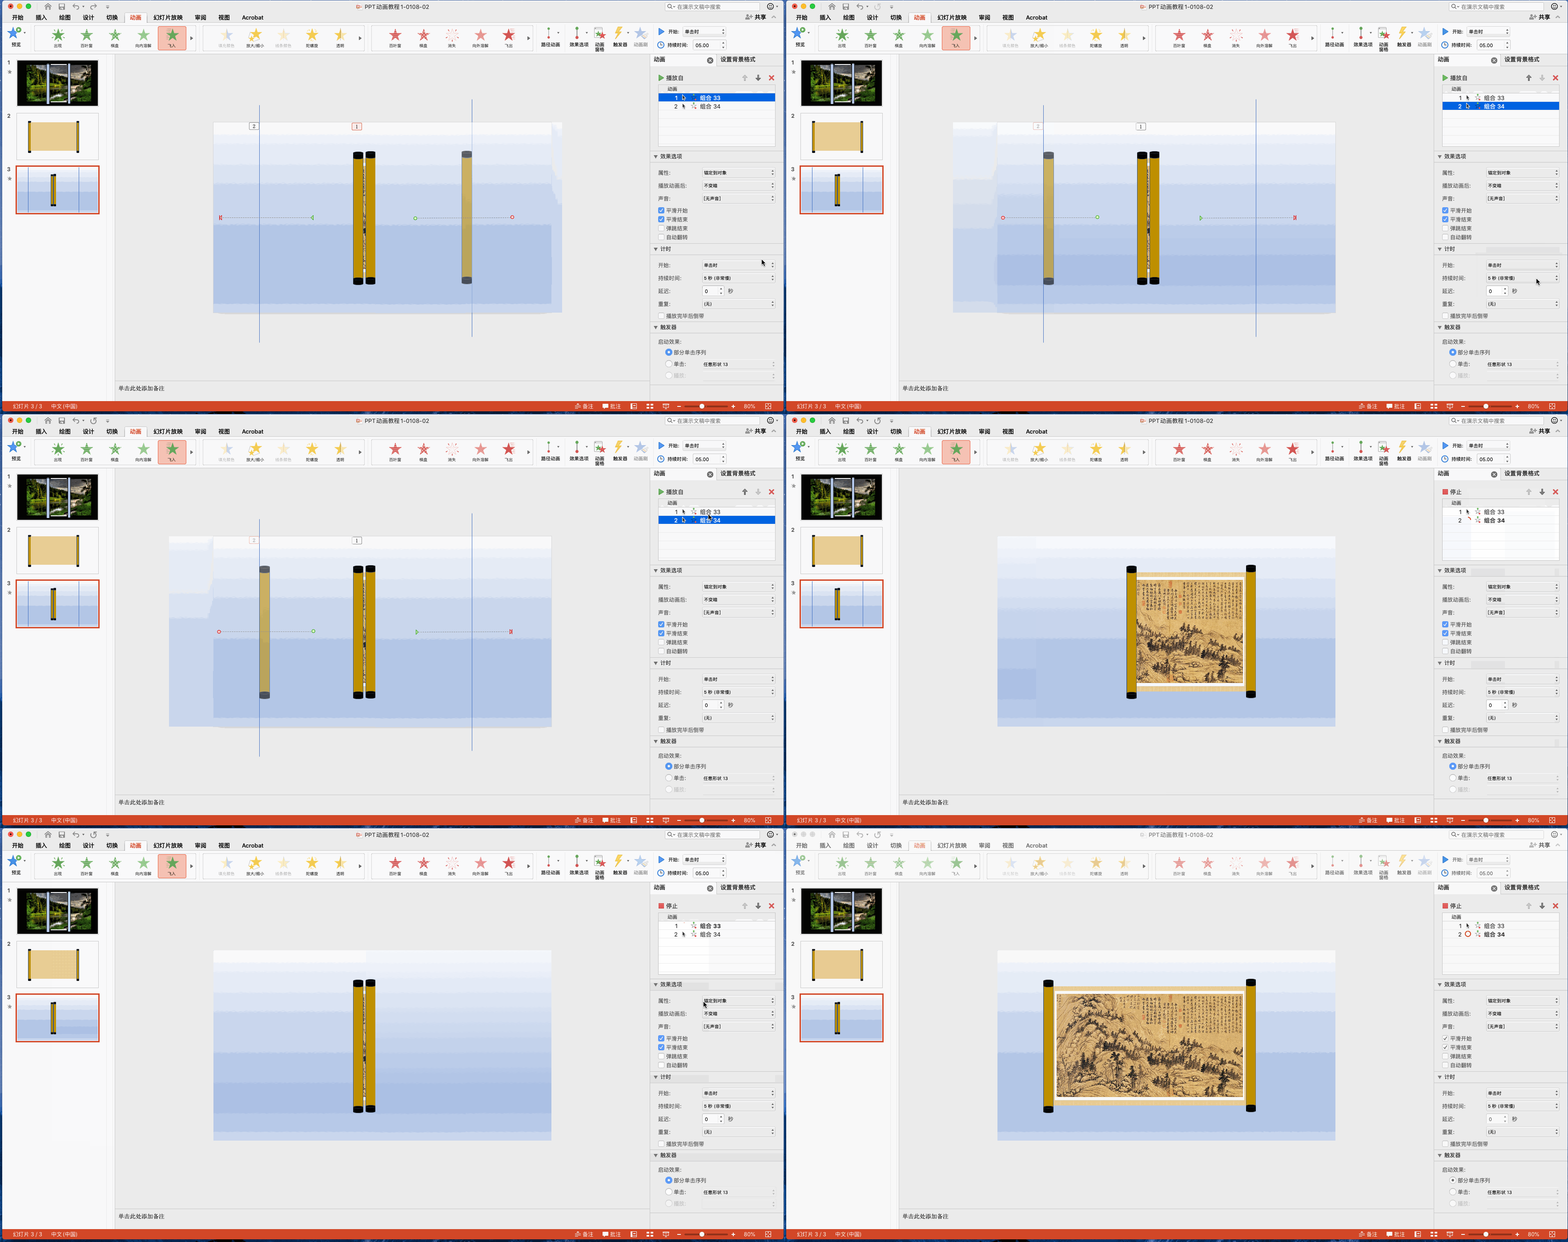
Let me talk a little bit more: two scrolls, what we are doing now is that one moves first and the other moves later. In fact, they can be moved together. Would you like to think about it?
(The dynamic picture in this article was recorded under Mac+PPT2016, and used under Win system, which is probably the difference in the position of some buttons)
Supporting video tutorial, please move hereScroll animation effect video
Written in the back
We are PPo, sister O and Mr. PP will release information about Tips for using PPT/PDF and Office.
If you have already seen this, please give a follow and like it.
If you have any questions, please leave a comment and ask us.
Articles are uploaded by users and are for non-commercial browsing only. Posted by: Lomu, please indicate the source: https://www.daogebangong.com/en/articles/detail/PPT%20Animation%20Tutorial%201%20Make%20a%20scroll%20to%20open%20the%20Chinese%20painting%20effect.html

 支付宝扫一扫
评论列表(196条)
测试