:Origin Tutorial | Combining the magnifying glass for drawing curves in front of PPT-PPT tutorial免费ppt模版下载-道格办公

Origin Tutorial | Combining the magnifying glass for drawing curves in front of PPT

Sorry, your instructions were not clear. What help do you need?

The following article comes from editor Tan, author Tan editor

Editor's story

Senior editor of sci-tech periodicals, publishes articles on sci-tech drawing skills, various data mining and data analysis, various editing tools and software in manuscript review and revision work.

Source丨Editor's Tan
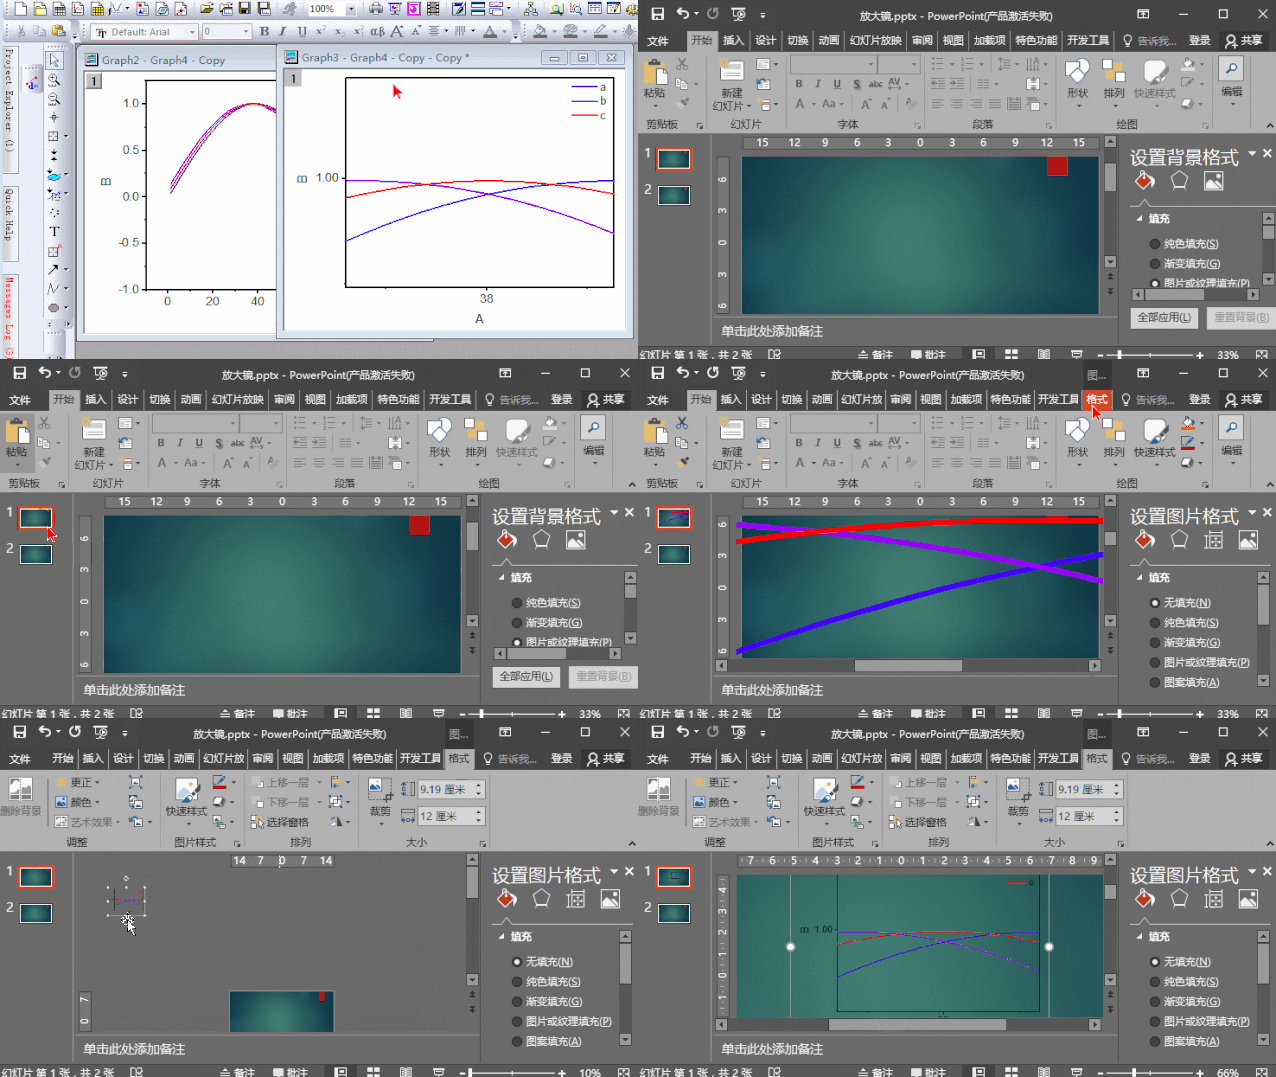

In drawing, it is often encountered that several curves are very close to each other, and the legend is usually difficult to distinguish, which requires local enlargement. The usual method is illustrations, which still retain the coordinate axes, need to occupy the corners of the space, and make the overall picture complicated.
Dr. Huang from the University of Electronic Science and Technology of China proposed: Use a magnifying glass to partially enlarge the curve instead of traditional illustrations. This idea is very novel.
Some brilliant Origin drawings often need to use other software (such as CDR or AI) to modify the picture or add other graphic effects, but Tan reminds everyone that PPT is actually a very good Some drawing software, some people have broken the PPT (for example:Zhang Laoshi scientific research drawing). Bian Tan advocates using one or two familiar software to solve drawing problems. Today, Bian Tan uses the cropping tool of PPT to create the magnifying glass effect of Origin drawing.
1. Draw two Origin graphs
First, we use Origin to draw a picture, and then copy a drawing. In the copied picture, click the magnifying glass on the left column, and drag to select a local curve to zoom in.
Then, select the enlarged picture, press Ctrl+J to copy (copypage), and paste in PPT as "picture (enhanced metafile)"
2. Circular clipping in PPT
In PPT, adjust the width of the pasted picture to 12cm. Then select the inverted triangle under "Format-Crop", select "Crop to Shape", and select a circle. The graphic is cropped, but the cropping area needs to be adjusted. Click on the picture, then click on the "Crop" tool, 8 handles appear at this time, drag these handles to adjust. Finally set the picture format, set the "line" to 2 points, and a black circular border appears.
3. In Origin
From the PPT, press Ctrl+c to copy the circular picture just cut out, in the original picture in the Origin software, press Ctrl+v to paste, add the circles and arrows with partial marks, adjust the position of the circular magnifying glass, and it’s done.
The final effect:
Shenzhen Huasuan Technology focuses on DFT computing simulation services, is< span>The only computing service company with VASP commercial copyright and a full-time technical team provides traceable original data throughout the process to ensure that your data is accurate and legal, Refuse academic risk.
At present, we have completed more than 500 service cases, and the customer work is well-known in JACS, Angew, AM, AEM, NanoEnergy, Nature Sub-Journal, Science Sub-Journal, etc. Journal publication.
Click to read the original text and submit calculation requirements!

Articles are uploaded by users and are for non-commercial browsing only. Posted by: Lomu, please indicate the source: https://www.daogebangong.com/en/articles/detail/Origin%20Tutorial%20%20Combining%20the%20magnifying%20glass%20for%20drawing%20curves%20in%20front%20of%20PPT.html

Like (810)
Reward 支付宝扫一扫 支付宝扫一扫
single-end

Related Suggestion