Today, I found that my colleague's PPT is very good-looking. I thought it was a template, but I didn't expect it to be completely made by him.
Only then did I know that the pictures in the original PPT only need one more operation to get cool and advanced effects.
❉Three-dimensional effect
Pictures directly inserted into the plane are a bit monotonous. Adding a three-dimensional effect to the picture will make it more special.
Steps:
Click [Insert], select a shape, the demonstration uses [Cube], and then select [Shape Fill] as [Picture], add a picture to get a three-dimensional effect.

❉Multi-image layout
If you add multiple pictures on the same slide, it will look confusing if you add them directly. We can layout multiple pictures to get a good-looking effect.
Steps:
Insert multiple pictures, press [Ctrl] + [A] to select all pictures, click [Format], and select [Picture Layout].

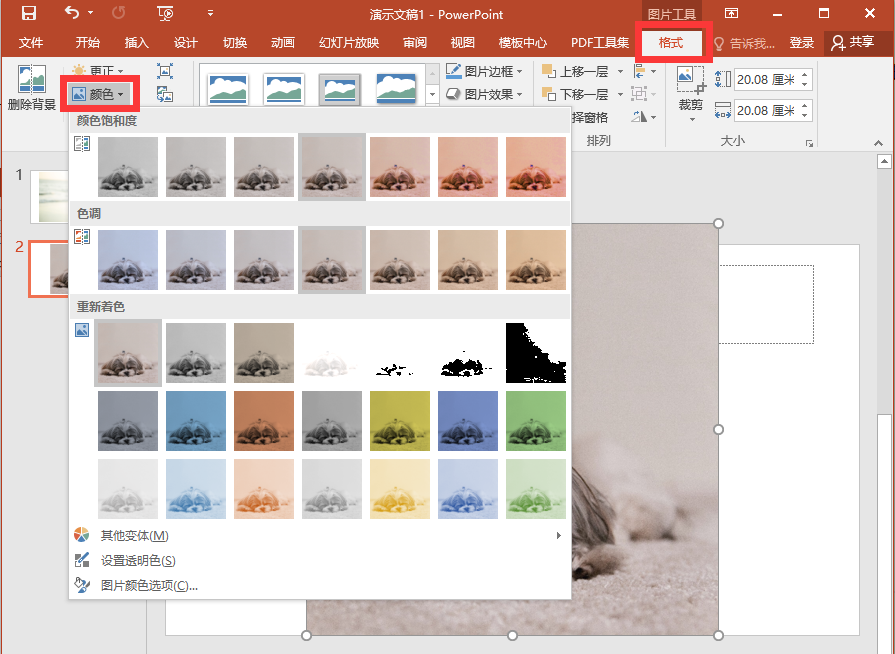
❉Adjust color
If you want to insert more pictures, you can adjust the color of the picture to make the picture look more coordinated with the PPT background, font and other content.
Steps:
After inserting the picture, select the picture to adjust the color, and click [Format]. Find [Color] in [Adjustment], and then select the appropriate color.
❉Remove background
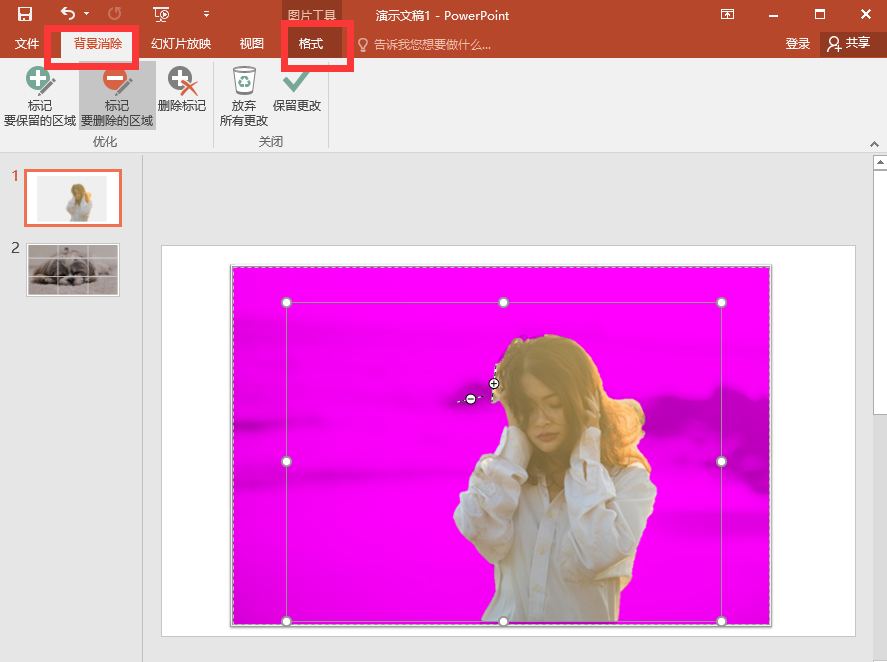
If we want to make the PPT more distinctive, we can delete the background of the picture and keep the main body of the picture, which will look more advanced.
Steps:
Select the picture, select [Format] - [Delete Background], then click [Mark the area to be kept/deleted], and then click [Keep Changes], the background of the picture will be deleted La.
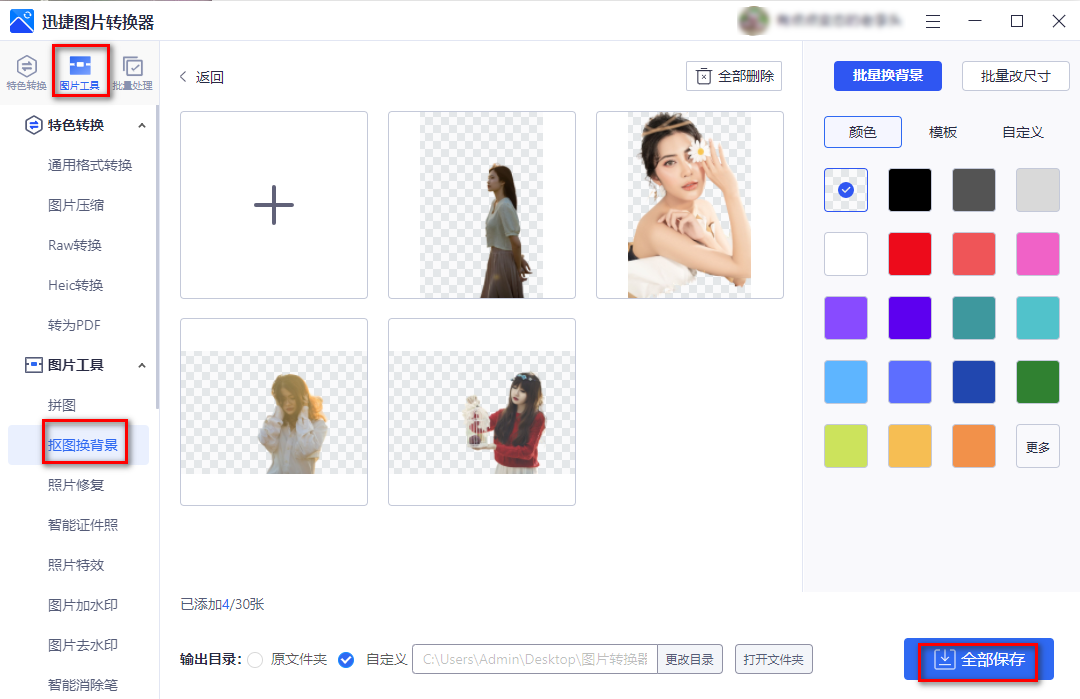
If you want to remove the background of multiple pictures, you can get better and faster results with "Justify Image Converter".
It can intelligently cut images in batches, and the edge processing is very detailed, the effect is very good, and the conversion speed is very fast, and the conversion can be completed in less than 1 second.
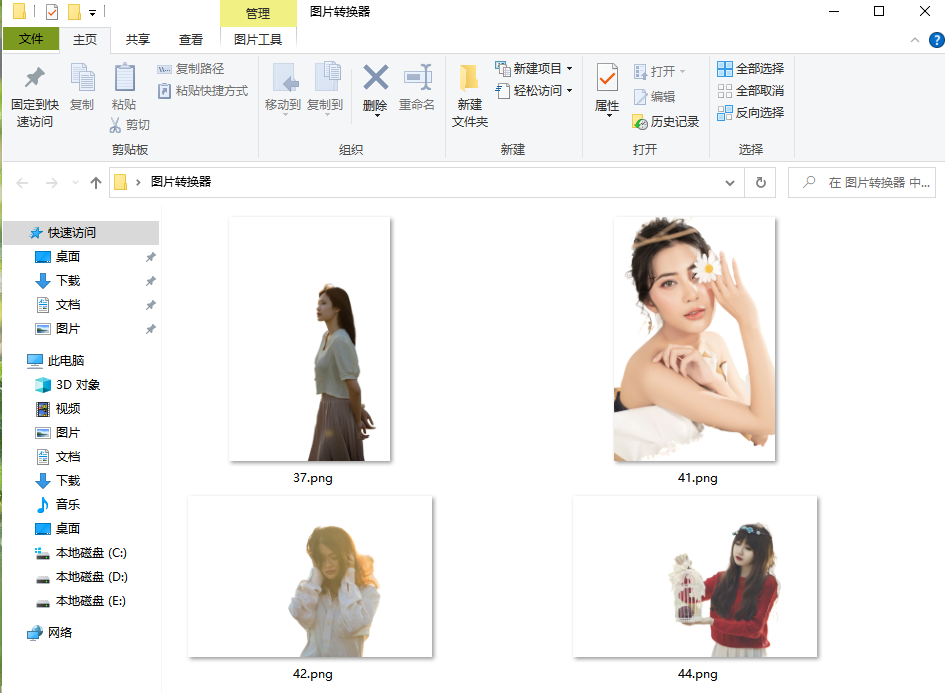
After opening the software, click [cutout background], after adding pictures, the software will intelligently identify and cut out the picture, wait for 1 second to complete the processing, at this time we can replace The picture background, modify the size, and then click [Save All].
❉art border
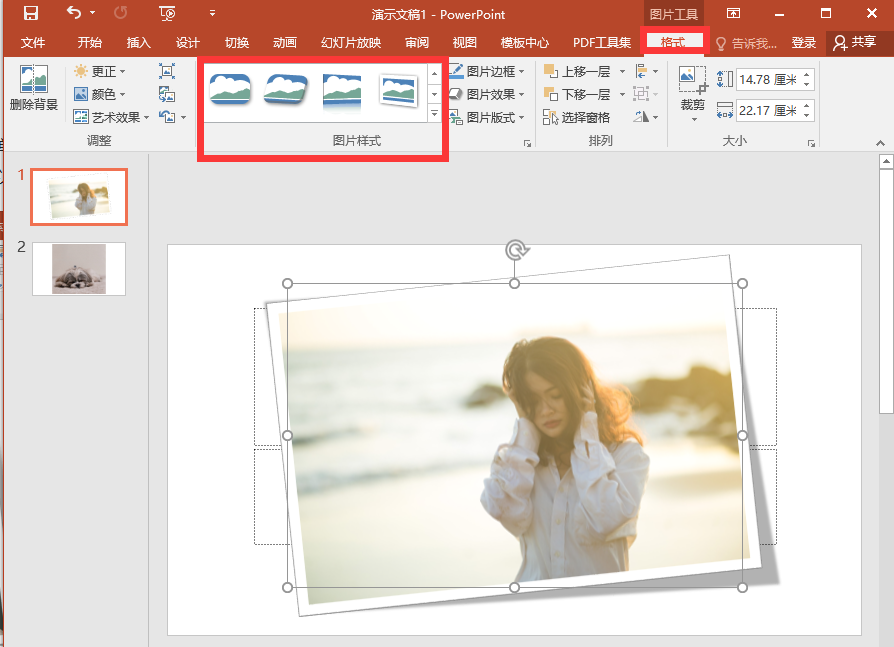
If the picture is all flat, it will look a little monotonous. If you add a border to the picture, it can increase the three-dimensional effect.
Steps:
Select the picture, click [Format], and you can find the preset picture effect in [Picture Style].
If you don't like the preset effect of the system, you can also customize the style of the picture border through [Picture Border], [Picture Effect] and [Picture Layout].
❉Image cutting
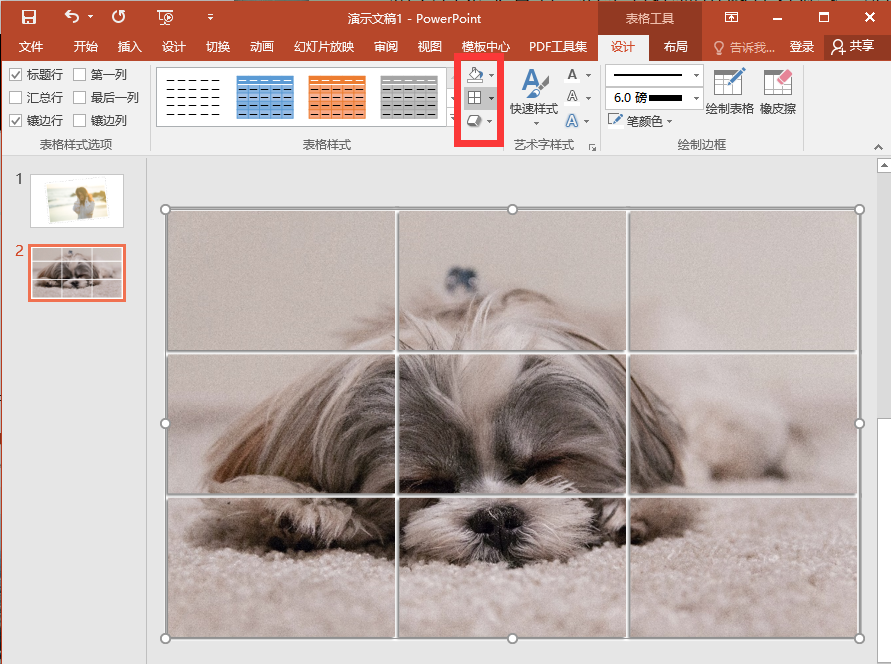
If you want to customize the background, but using the picture directly will look a bit monotonous, you might as well cut the picture into a multi-grid, which will look more distinctive.
Steps:
After inserting the picture, insert the table, then select [Table Tool - Design], set the table color to [No Fill], and also set the border [Bump Effect], [Shadow] And other effects, so that the picture is cut to look better.
The above is about the sharing of PPT image processing skills, friends who are interested can try it.
If you think the content is not bad, forward comments to support it~
Articles are uploaded by users and are for non-commercial browsing only. Posted by: Lomu, please indicate the source: https://www.daogebangong.com/en/articles/detail/Its%20so%20beautiful%20The%20pictures%20in%20the%20PPT%20only%20need%20one%20more%20operation%20and%20the%20effect%20is%20cool%20and%20advanced.html

 支付宝扫一扫
评论列表(196条)
测试