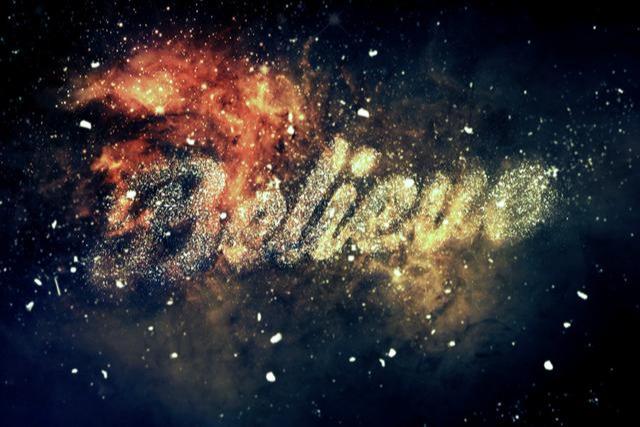
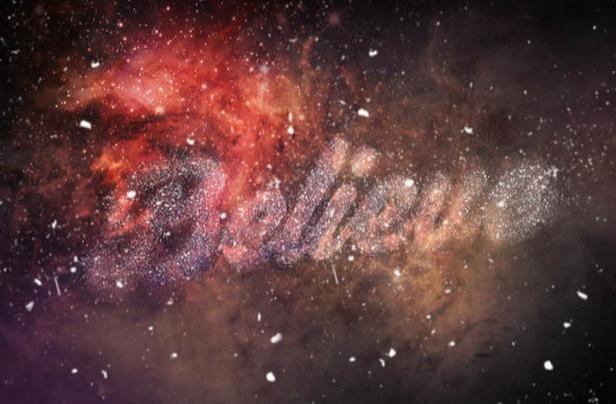
The text effect shared this time is mainly done with brushes. First enter the text you want, blur it properly and call out the selection area; after creating a new layer, add some small particles with a particle brush; finally adjust the color, and then render some highlights to get the desired effect. Let's take a look at the final effect
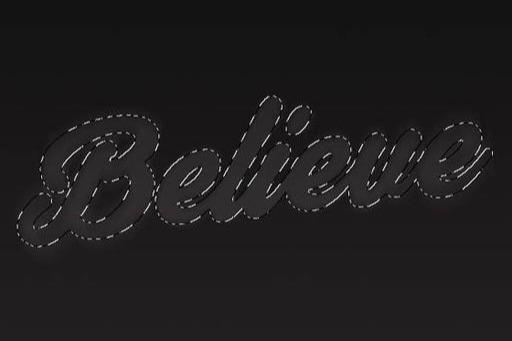
1. Select a font, enter text, create a 3000*2000 canvas, fill it with black #181717, and make it bold. The Thander font is used here (if you don’t have it, you can download it from the Internet).

2. After entering the text, copy the layer, press CTRL+click, select the layer, and use rasterization. Filter—Blur—Radial Blur, set the value to 5-10, and adjust the opacity to 75%.

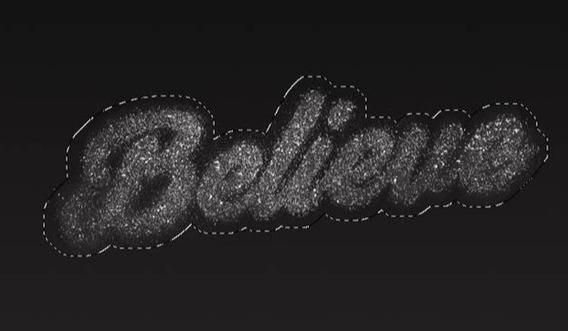
3. Turn off the visibility of the original layer. Press CTRL+click on the layer to make a text selection.
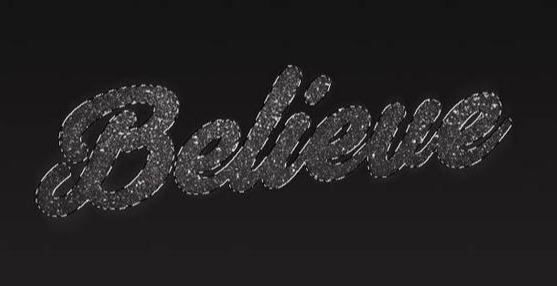
4. Add a brush to the text selection. Create a new layer above the Radial Blur layer, use a dust brush with a diameter of about 500, and use the brush in the selection.

5. Without canceling the selection, select ---Modify-Extend, the value is 20 pixels, select-Modify-Feather, the value is 5 pixels. Create a new layer, use another dust brush, scale down to 300-500 px in diameter, use around the feathered selection, not as much as the first brush.
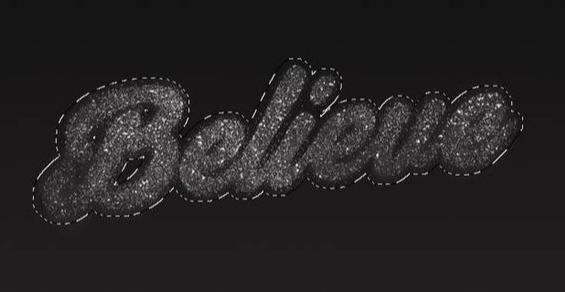
6. Now further use Select--Modify-Extend, the value is 20 pixels, create a new layer, use another brush, use a small amount of brush in the selection area, and appropriately reduce the difference of the layer according to personal interests and picture effects. Transparency, here it is 50%.
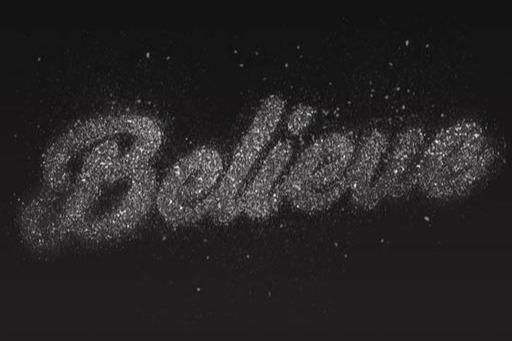
7. Add the background and some foreground fragments, cancel the text selection, create a new layer, and use the dust brush to add some dust around the text.
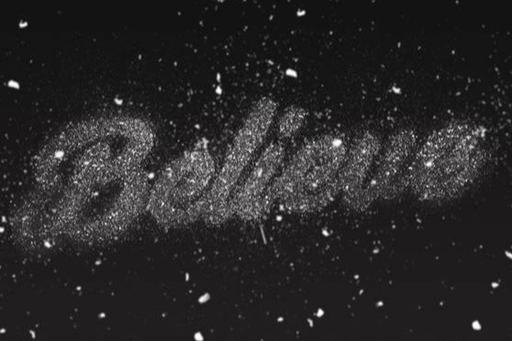
8. Create a new layer and use a new brush. This time it is not scaled down. The dust in the foreground brush is relatively large. Filter-Blur-Gaussian Blur, the value range is 2-5 pixels.
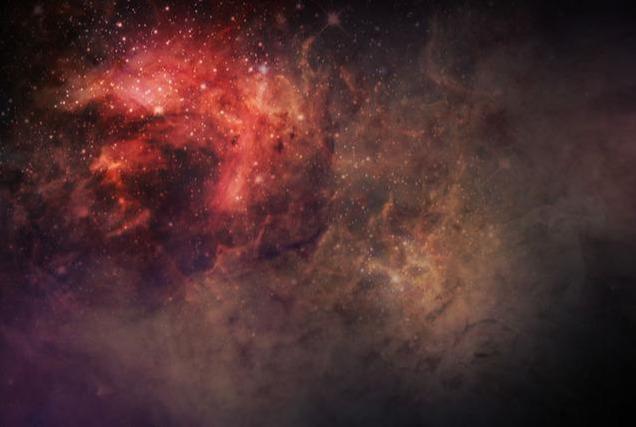
9. Add a background layer. Add your favorite nebula layer and place it below all layers.
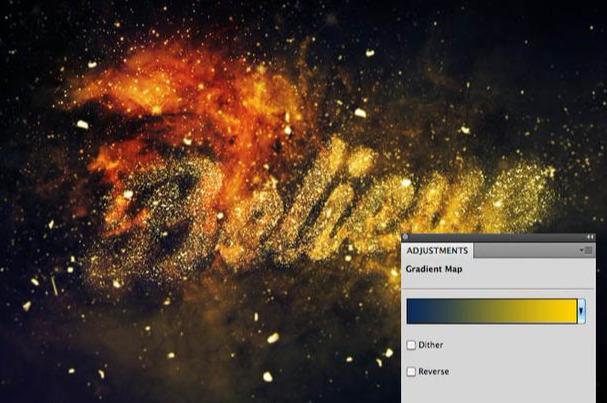
10. Final fine-tuning layer. Add a Gradient Map from the very bottom of the layer with colors from #0a2a59 to #ffd200 .
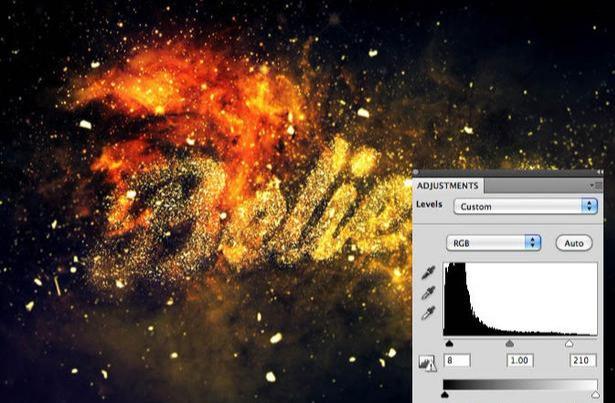
11. Add a level adjustment to the layer, and the value is shown in the figure below.
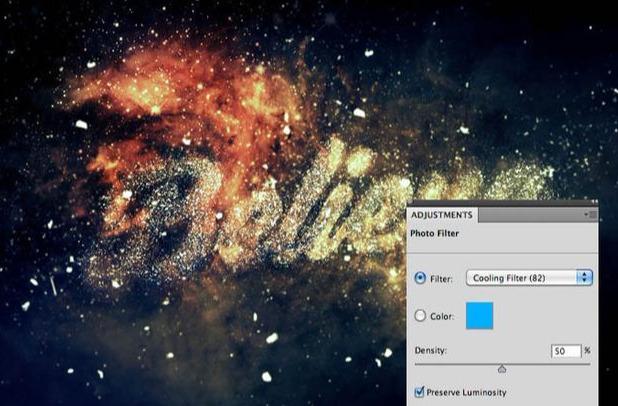
12. Add a photo filter, choose cooling filter 82, concentration 25%.
complete the final effect

Articles are uploaded by users and are for non-commercial browsing only. Posted by: Lomu, please indicate the source: https://www.daogebangong.com/en/articles/detail/Its%20so%20beautiful%20Its%20so%20simple%20to%20use%20PS%20software%20to%20make%20bright%20starlight%20effect.html
 支付宝扫一扫
评论列表(196条)
测试