Goal
- Restore the initial settings of PyCharm
- Start PyCharm for the first time
- Create a new Python project< /li>
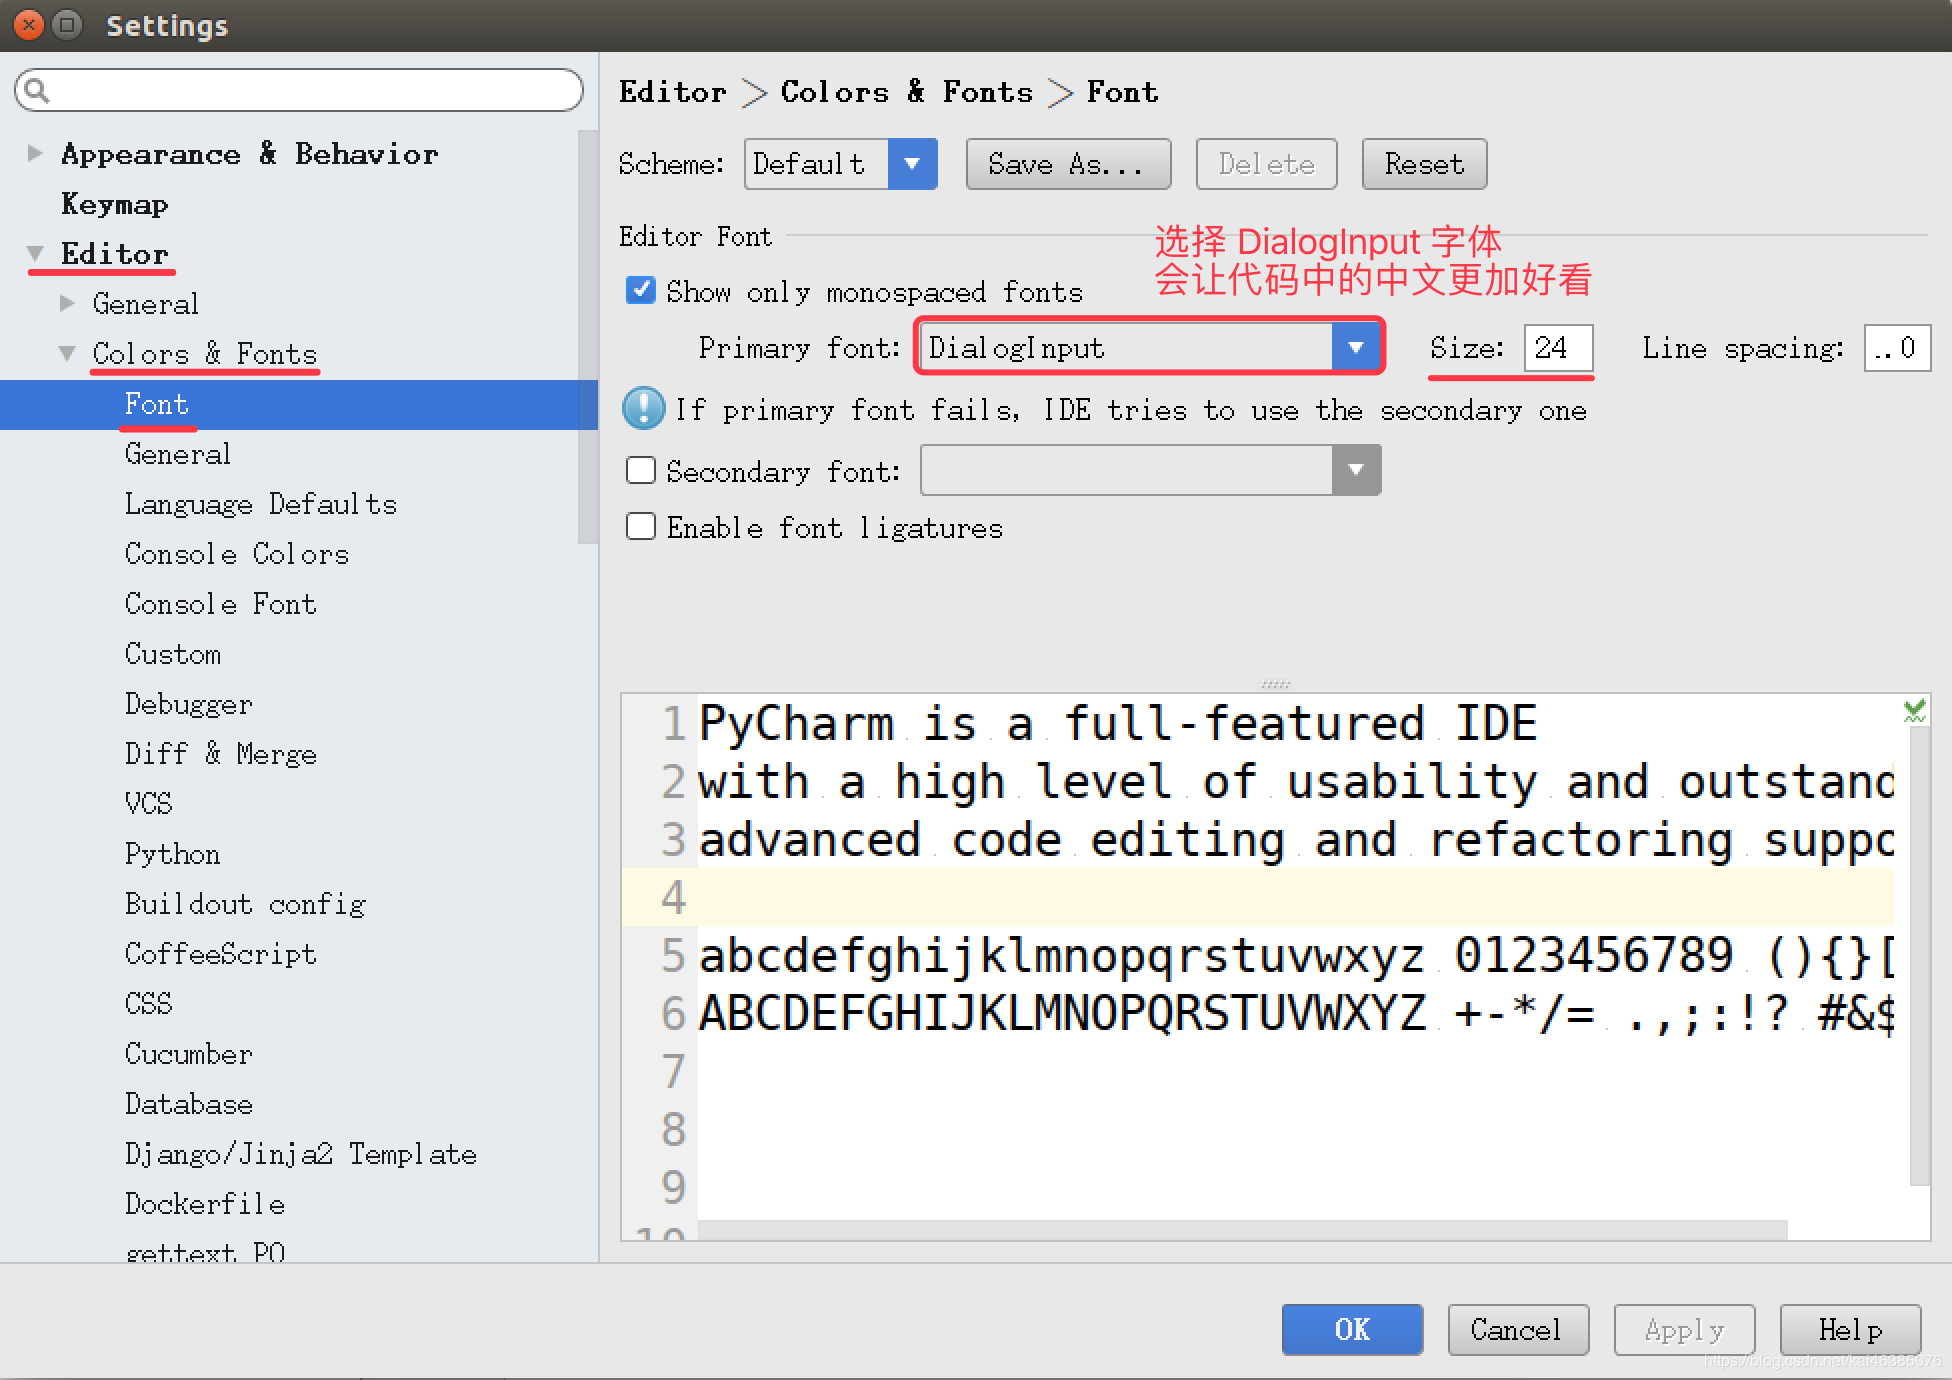
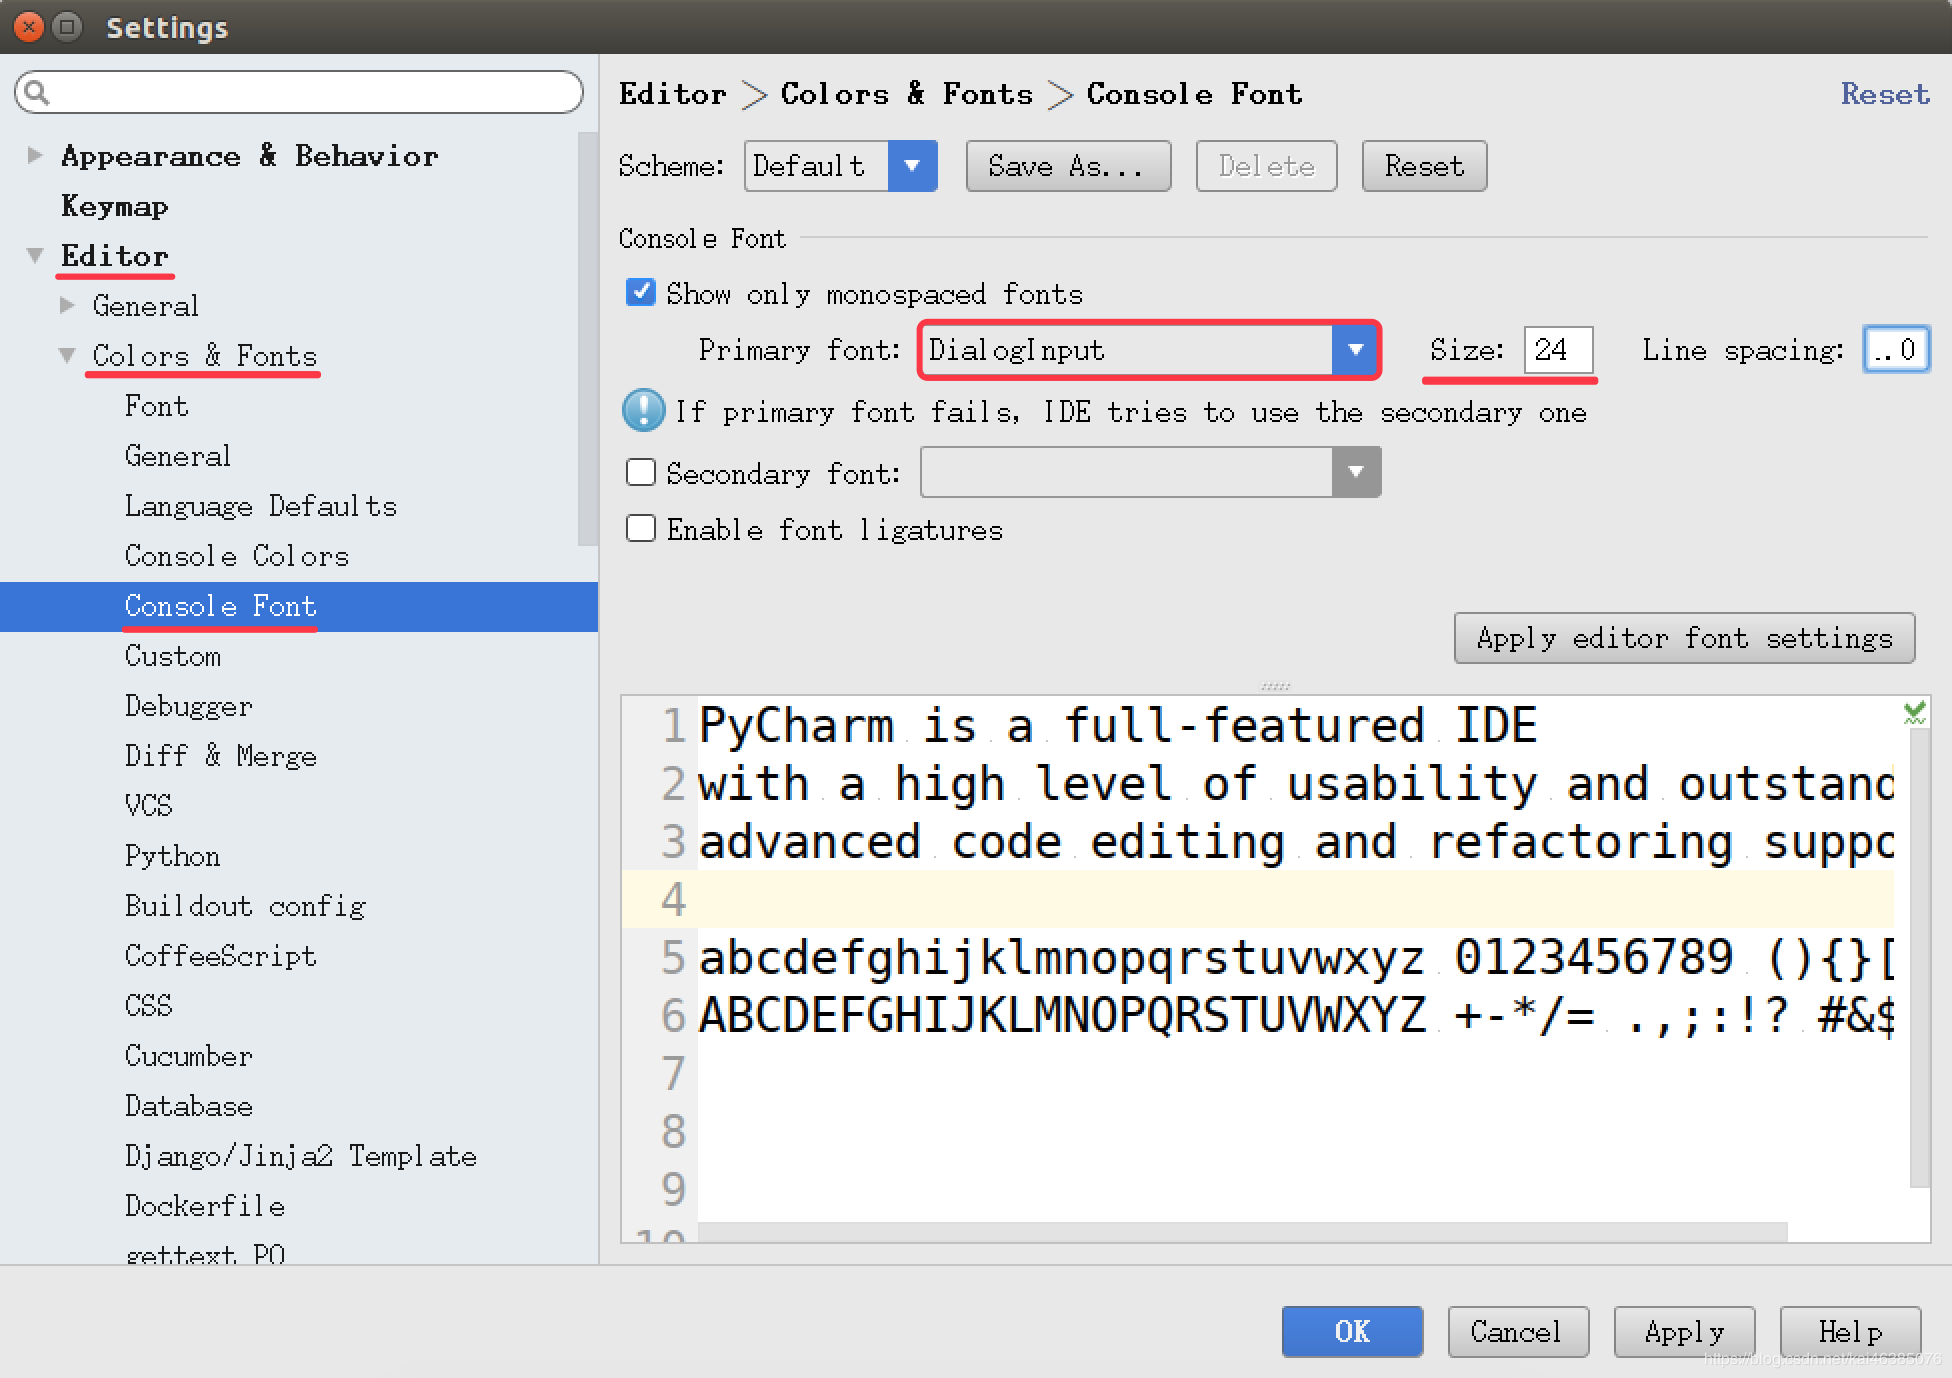
- Set PyCharm's font display
- PyCharm upgrade and others
The official website address of PyCharm is: https://www.jetbrains.com/pycharm/
01. Restore PyCharm to its original settings
The configuration information of PyCharm is saved in the .PyCharmxxxx.x directory in the user's home directory, where xxxx.x represents the version number of PyCharm currently in use
If you want to restore the original settings of PyCharm, you can follow the steps below:
- Close the running PyCharm
- Execute the following terminal command in the terminal to delete the configuration information directory of PyCharm :
- $ rm -r ~/.PyCharm2016.3
- restart PyCharm
02. Start PyCharm for the first time
- Import configuration information
- Select license agreement< /li>
- Configure the initial interface
2.1 Import configuration information
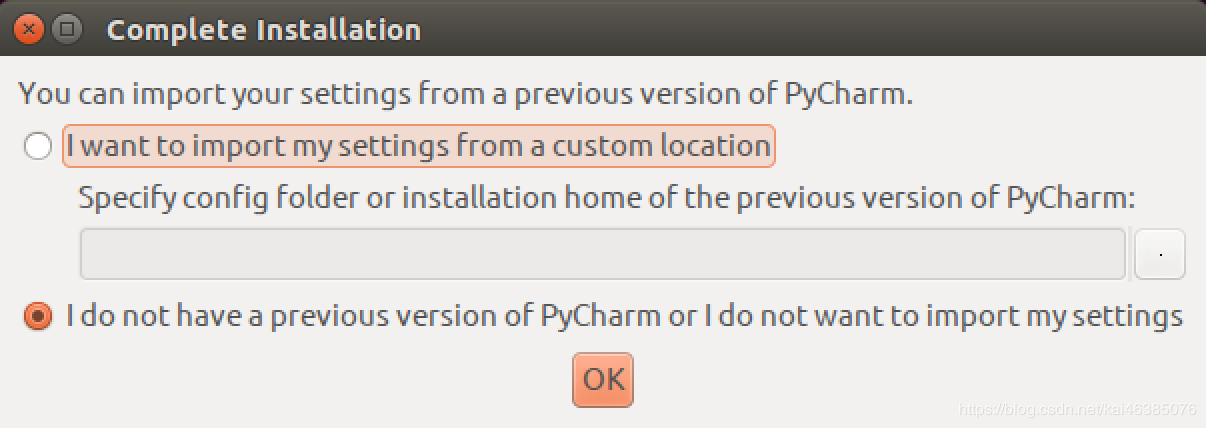
- When starting PyCharm for the first time, the user will first be prompted whether to import the previous configuration information
- If it is the first time to use, just click the OK button
2.2 Select a license agreement
- PyCharm is a paid software, the purchase fee is 199$/year or 19.90$/month
- However, PyCharm provides a free version for students and teachers
- The download address is: https://www.jetbrains.com/pycharm-edu/download/#section=linux
- The commercial version will prompt you to enter registration information, or choose Free evaluation
2.2 Choose a license agreement
PyCharm is a paid software, the purchase fee is 199$ / year or 19.90$ / month
- However, PyCharm provides a free version for students and teachers
- The download address is: https://www.jetbrains.com/pycharm- edu/download/#section=linux
- The commercial version will prompt to enter registration information, or choose free evaluation

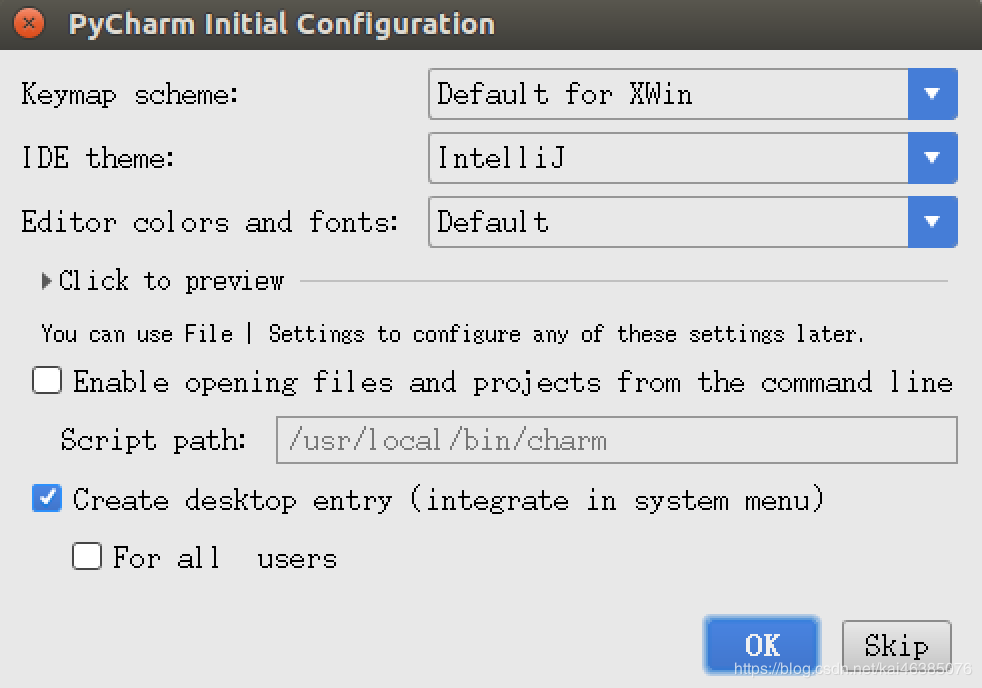
2.3 Initial configuration interface of PyCharm
- In the initial configuration interface, you can select the color scheme of the editor through Editor colors and fonts
2.4 Welcome screen
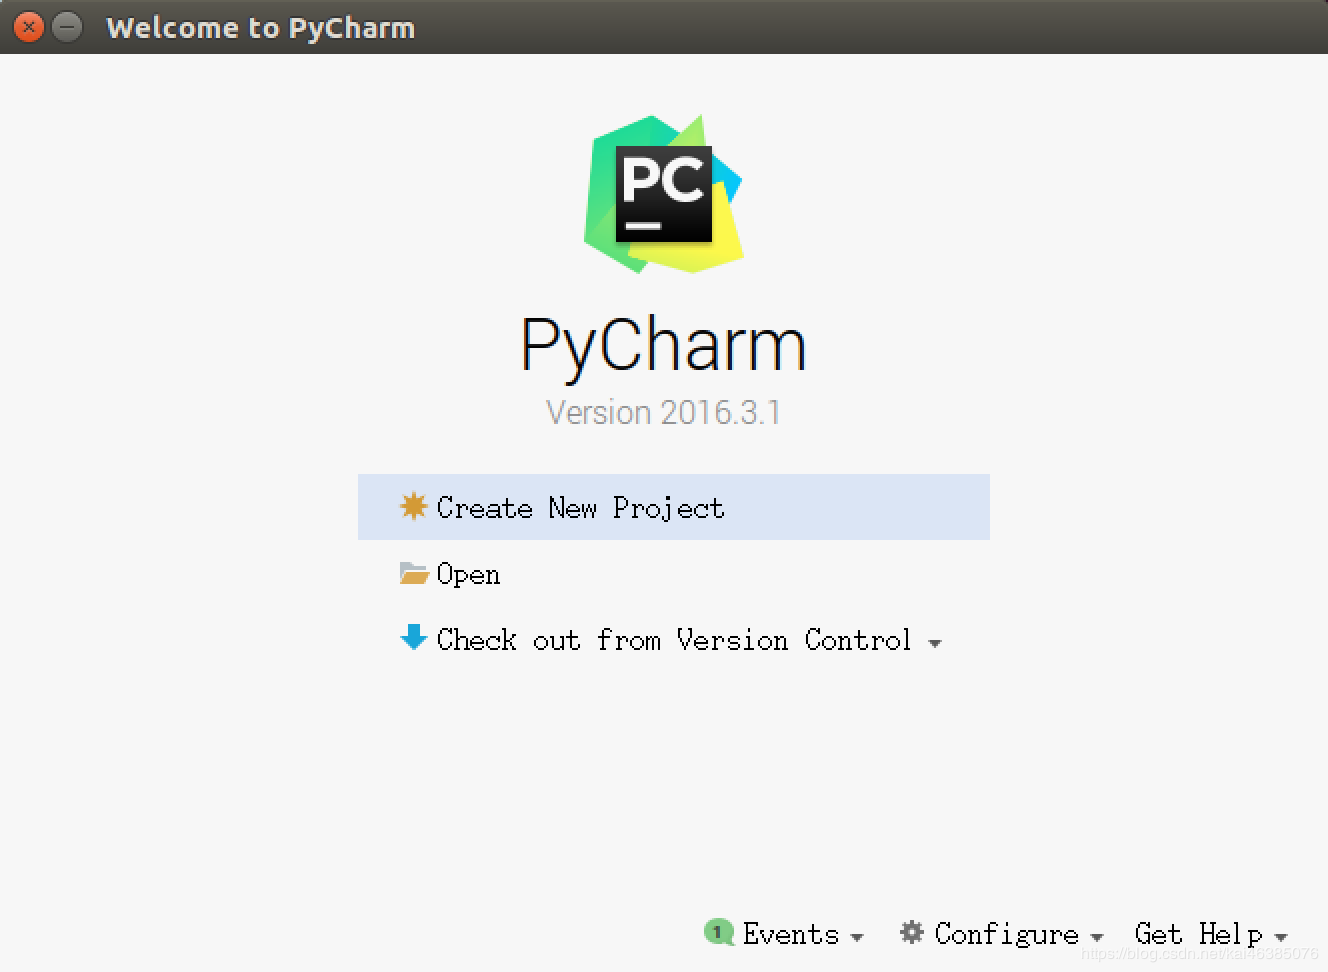
After all the basic configuration work is completed, you can see the welcome interface of PyCharm, and you can start developing Python projects through the welcome interface
03. Create/open a Python project
3.1 Project Introduction
- A development project is to develop a software that specifically solves a complex business function
- Usually each project has an independent and exclusive directory for saving all project-related files
- A project usually contains many source files
3.2 Opening a Python project
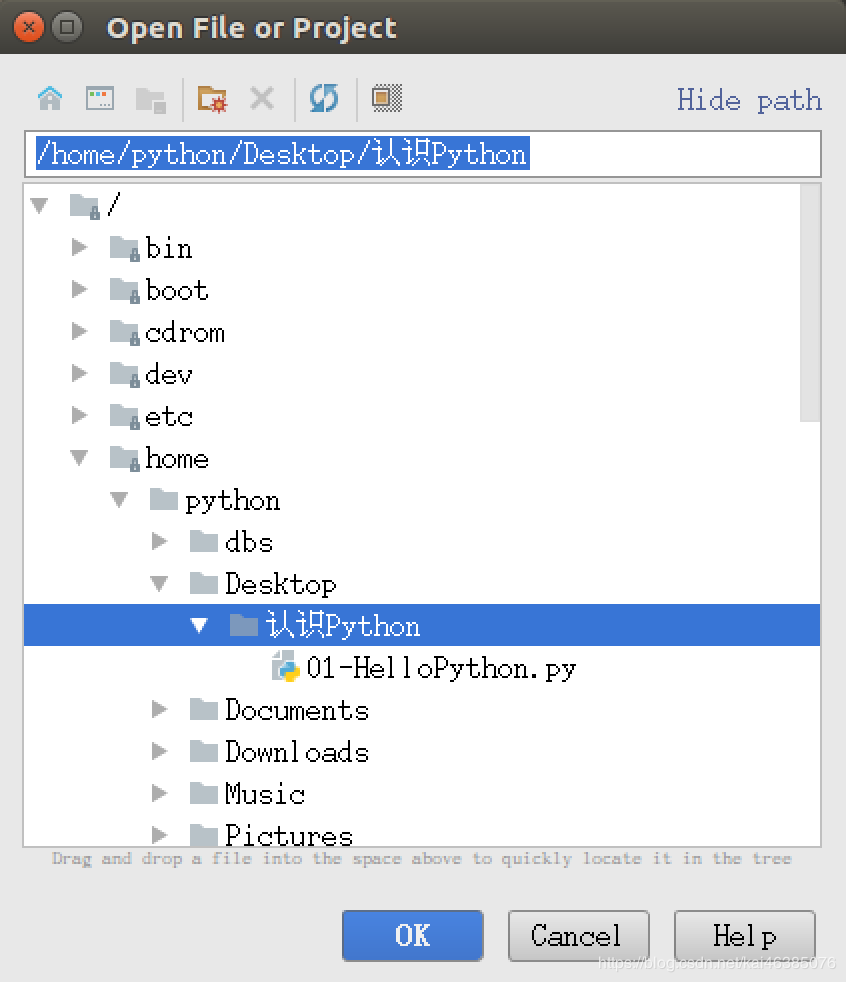
- Click the Open button directly, then browse to the directory where the Python file was saved before, you can open the project
- After opening, a new .idea directory will be created under the directory to save the project Relevant information, such as: interpreter version, files included in the project, etc.
- The first time you open the project, you need to wait patiently for PyCharm to initially set the project
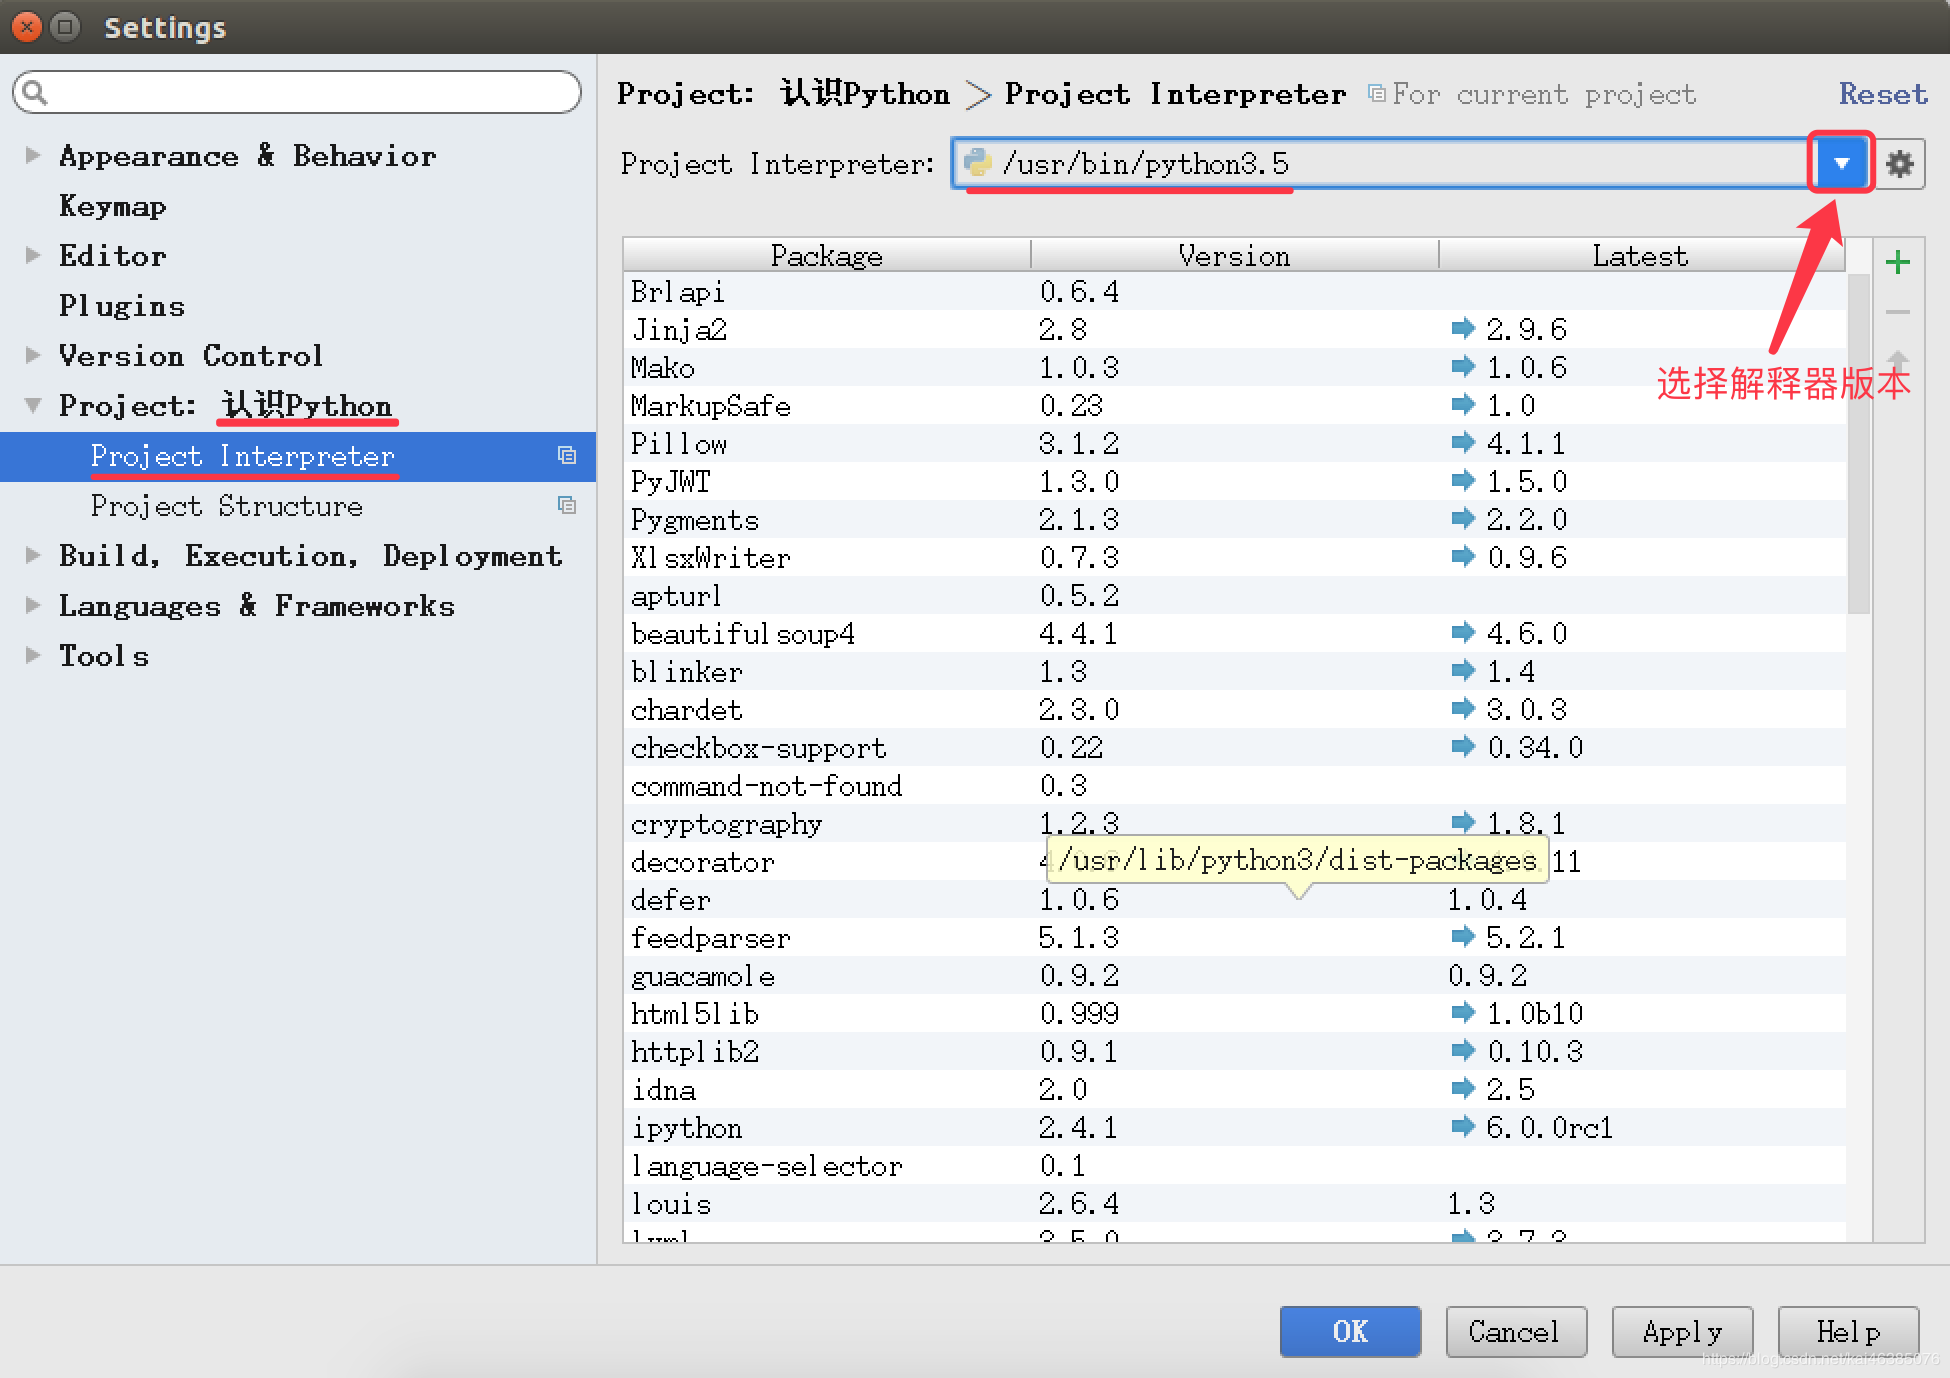
- Set the interpreter version used by the project
- If the opened directory is not a project directory created by PyCharm, sometimes the interpreter version used It is Python 2.x, you need to set the interpreter version separately
- You can open the setting window through File / Settings..., as shown in the figure below:
- 3.3 New project
- Naming rules
- After The project name is numbered in front of the number, and the number increases as the knowledge points increase
- For example: 01_Python basics, 02_branches, 03_cycles... < li>The file names under each project are named in the form of hm_xx_knowledge points
- where xx is the serial number of the drill file
- Attention< /li>
- It is recommended to use only lowercase letters, numbers and underscores when naming files
- The file name cannot start with a number
- You can create a new project through the welcome interface or the menu File / New Project
- Drill Steps< /li>
- Create a new 01_Python basic project, use the Python 3.x interpreter
- Create a new hm_01_hello.py Python file under the project
- Write print ("Hello Python") code
- Set the font display of PyCharm
05. PyCharm upgrade and others
PyCharm offers a free version for students and teachers
- Download address of educational version: https://www.jetbrains.com/pycharm-edu/download/#section=linux
- Download address of professional version: https://www.jetbrains .com/pycharm/download/#section=linux
5.1 Installation and Startup Steps
- Execute the following terminal command to decompress the downloaded installation package
- $ tar -zxvf pycharm-professional-2017.1 .3.tar.gz
- Move the decompressed directory to the /opt directory, which is convenient for other users
The /opt directory user stores additional software installed on the host
$ sudo mv pycharm-2017.1.3/ /opt/
- Switch working directory
- $ cd /opt/pycharm-2017.1.3/bin
- Start PyCharm
- < li>$ ./pycharm.sh
5.2 Set the professional version launch icon
- In the professional version, select the menu Tools / Create Desktop Entry... to set the taskbar startup icon
- Note: When setting the icon, you need to check Create the entry for all users

5.3 Uninstall the previous version of PyCharm
- Program Installation
- 1. Program files directory
- Unzip the installation package and move it to the /opt directory
- All related files are saved in the unzipped directory
- 1. Configuration file directory
- After starting PyCharm, a hidden directory of .PyCharmxxx will be created in the user's home directory
- Save PyCharm related configuration information
- 1. Shortcut file
- /usr/share/applications/jetbrains-pycharm.desktop
In ubuntu, shortcuts for application startup are usually stored in the /usr/share/applications directory
- Program Uninstall
- To uninstall PyCharm, you only need to do the following two steps:
- - 1. Delete the decompression directory
- $ sudo rm -r /opt/pycharm-2016.3.1/
- 1. Delete the hidden directory under the home directory for saving configuration information
$ rm -r ~/.PyCharm2016.3/
If you no longer use PyCharm, you need to delete jetbrains-pycharm.desktop under /usr/share/applications/
5.4 Education Edition Installation Walkthrough
# 1. Decompress the downloaded installation package $ tar -zxvf pycharm-edu-3.5.1.tar.gz# 2. Move the decompressed directory to the `/opt` directory, which is convenient for other users Use $ sudo mv pycharm-edu-3.5.1/ /opt/# 3. Start `PyCharm` /opt/pycharm-edu-3.5.1/bin/pycharm.sh
Subsequent courses will use the professional version to walk through
Set startup icon
- 1. Edit the shortcut file
$ sudo gedit /usr/share/applications/jetbrains-pycharm.desktop
- 1. Modify the content of the file according to the following content, you need to specify the correct pycharm directory
[Desktop Entry]Version=1.0Type=ApplicationName=PyCharmIcon=/opt/pycharm-edu-3.5.1/bin/pycharm.pngExec="/opt/pycharm-edu-3.5.1/bin/pycharm.sh " %fComment=The Drive to DevelopCategories=Development;IDE;Terminal=falseStartupWMClass=jetbrains-pycharm
Articles are uploaded by users and are for non-commercial browsing only. Posted by: Lomu, please indicate the source: https://www.daogebangong.com/en/articles/detail/Initial%20setup%20of%20Python%20basics%20PyCharm.html

 支付宝扫一扫
评论列表(196条)
测试