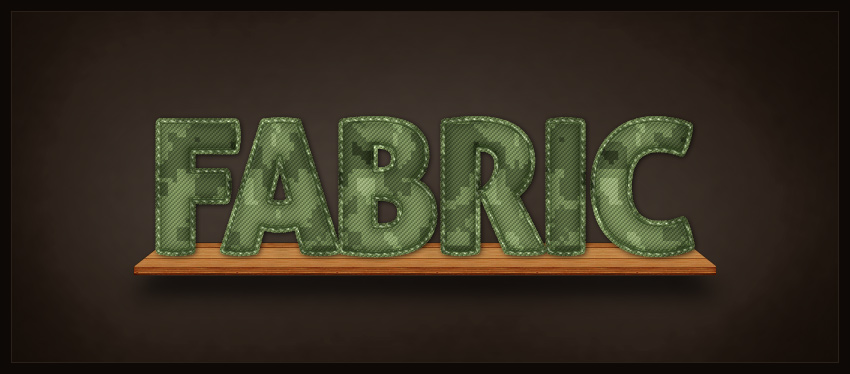
Wolf Warrior 2 is on fire, does it arouse your patriotic spirit, anyway, the editor is excited, love the country to the end, let the editor present the camouflage font effect below, express A little patriotism.
1. How to create a fabric pattern
Step 1 Open Photoshop and create a new 18 x 18 px document, changing the Foreground color to #6b6b6b. Create a new layer by pressing Control-Shift-N, then pick the Rectangle Tool and draw a 6 x 6 px square in the upper left corner, we will need a texture like in the image below, note that we have three different ones on the image Colors: #6b6b6b for light, #3f3f3f for medium, #121212 for dark. Keep the 6 x 6 px square on different layers until you fill the entire 18 x 18 px document.
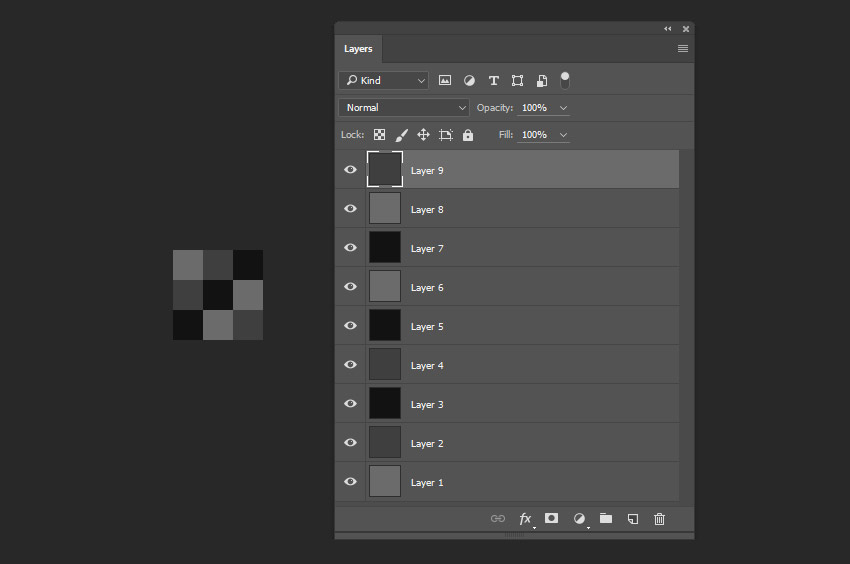
Step 2. Edit - Custom pattern, named "Fabric Texture Tutorial"

2. How to create fabric texture
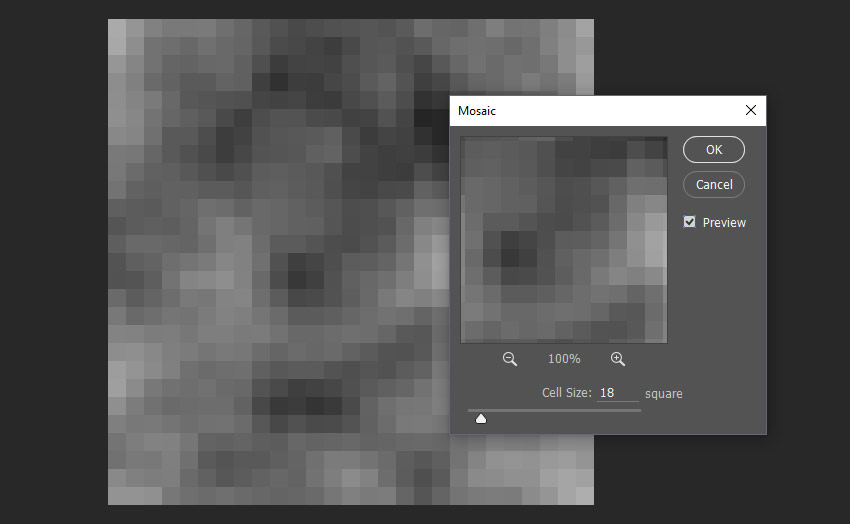
Step 1. Create a new 486 x 486 px document, press D to reset the foreground and background colors, then go to Filter > Render > Clouds, then Filter > Pixelate > Mosaic, set the value to 18.
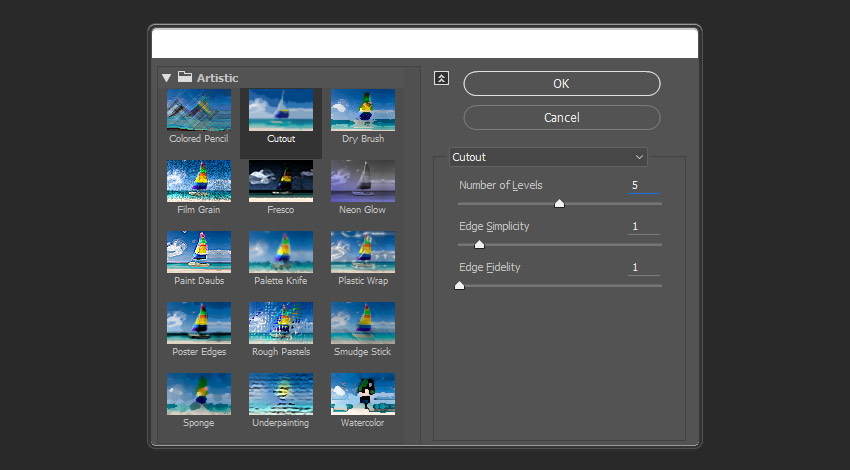
Step 2, Filter>Filter Library>Artistic Effect>Woodcut
Number of Color Scales: 4 or 5 (test to see which one you like)
Edge Simplification: 1
Edge Fidelity: 1
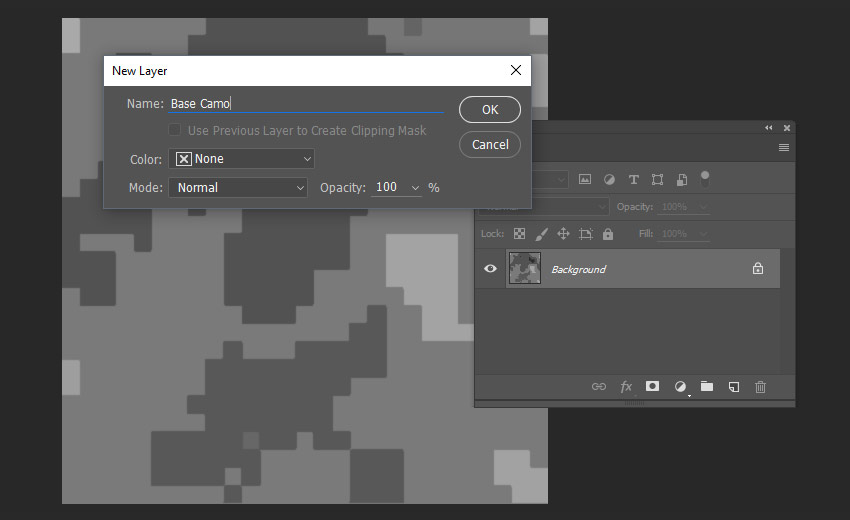
Step 3. Now double click on the background layer to unlock the layer. Then rename it Base Camo and click OK.
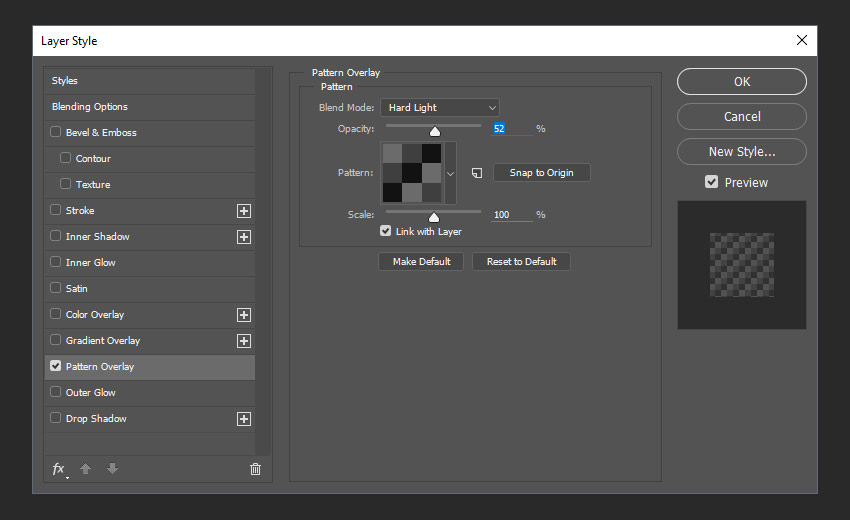
Step 4. Double-click the layer Base Camo to open the Layer Style window. Add a pattern overlay with the following settings:
Blending Mode: Hard Light
Opacity: 52%
Pattern: Select the pattern we created earlier (fabric texture tutorial)
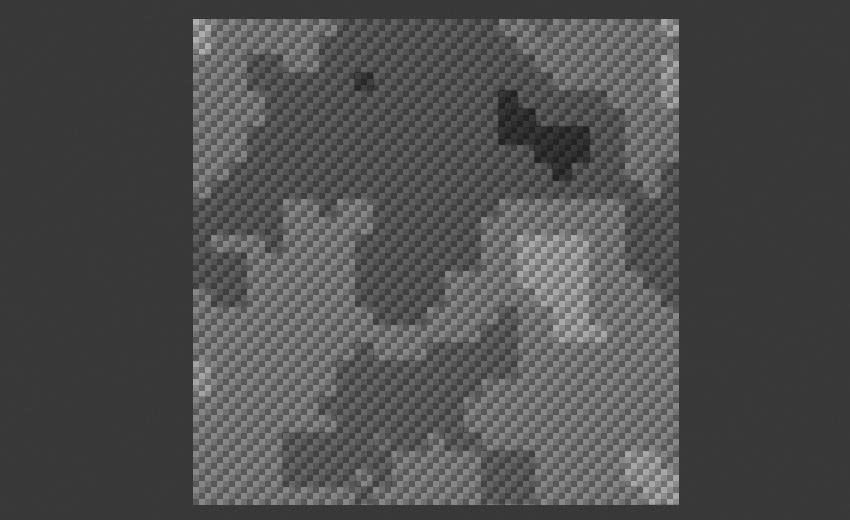
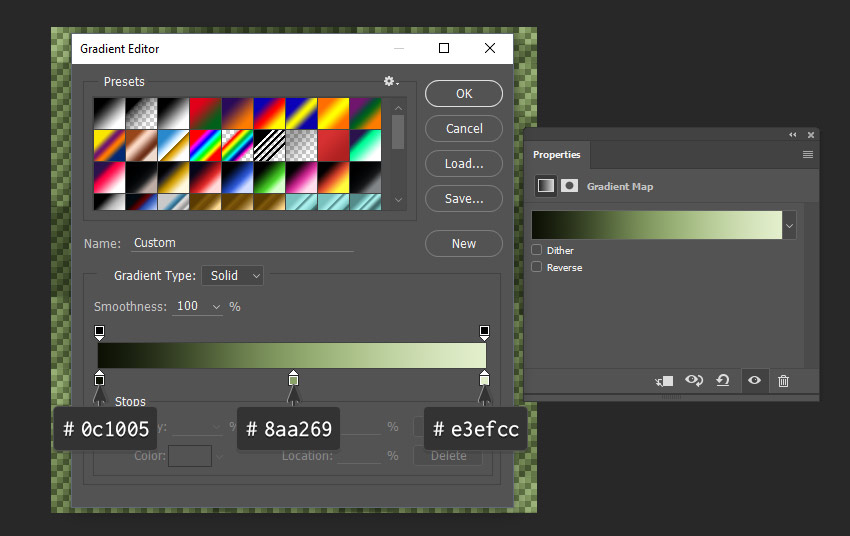
Step 5, Window>Adjust Click Gradient
Click on the gradient bar of the properties panel to open the gradient editor, you can play with the next step, and make different colors, I'm going to create a green texture, create a gradient with the following settings: select the layer Base Camp, and go to Edit > Define the pattern, then name the pattern Camo Fabric, and click OK.
3. How to create border texture
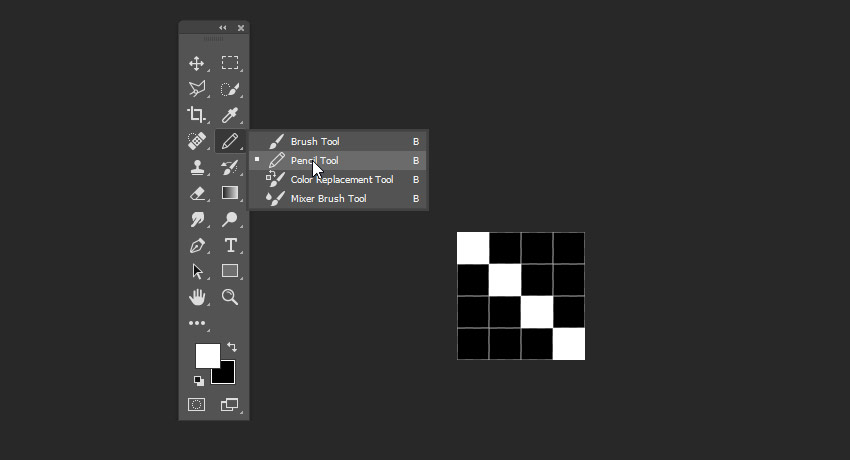
Step 1. Create a new 4 x 4 px document with a black background and zoom in on the image until you can see the individual pixels. Then select the pencil tool with a size of 1 pixel, and draw a diagonal white line, as shown in the picture below, then edit > set a custom pattern, named "Border Texture", we will use this pattern at the end.
4. How to create a layer style
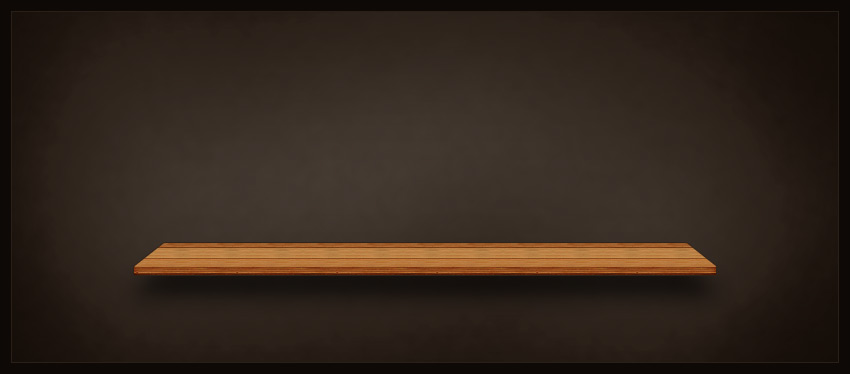
Step 1. Open the background image
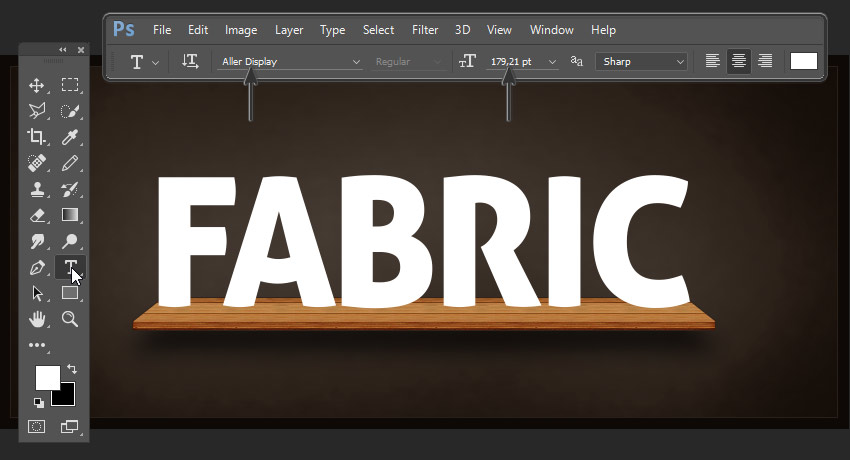
Step 2. Select Aller Display, enter the text FABRIC with a font size of 179 pixels, and place it on the background shelf.
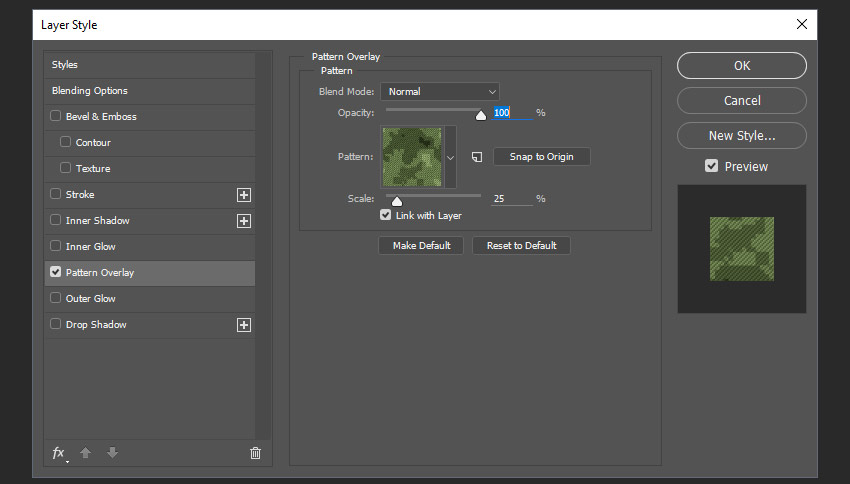
Step 3. Double-click the text layer to open the Layer Style window.
Add a pattern overlay with the following settings:
Blend Mode: Normal
Opacity: 100%
Pattern: Choose the texture we created (Camo Fabric)
Ratio: 25%
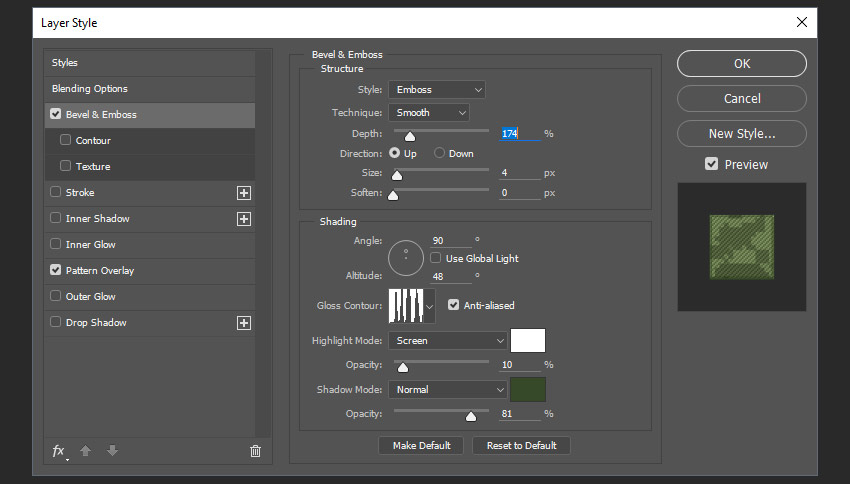
Step 4. Add Bevel and Emboss with the following settings:
Style: embossed effect
Method: smooth
Depth: 174%
Direction: Up
Size: 4 pixels
soft: 0 px
Use global light: Unchecked
Angle: 90º
Altitude: 48º
Glossy contour line: You can drag and adjust any point, as shown in the figure below
Layer blend mode: Screen
Highlight mode color: #ffffff
Highlight Mode Opacity: 10%
Shadow mode: normal
Shadow Mode Color: #364928
Shadow Mode Opacity: 81%
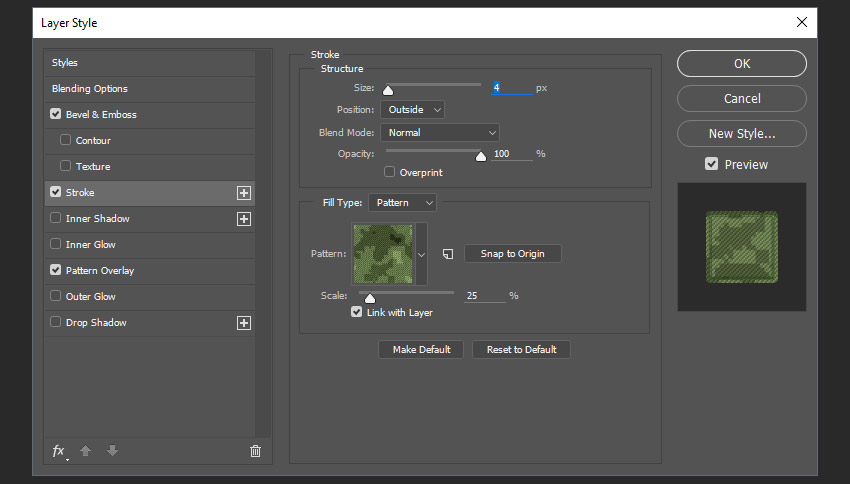
Step 5. Add a stroke using the following settings:
Size: 4 pixels
position: outside
Blending Mode: Normal
Opacity: 100%
Fill Type: Pattern
Pattern: select pattern Camo Fabric
Scale: 25%
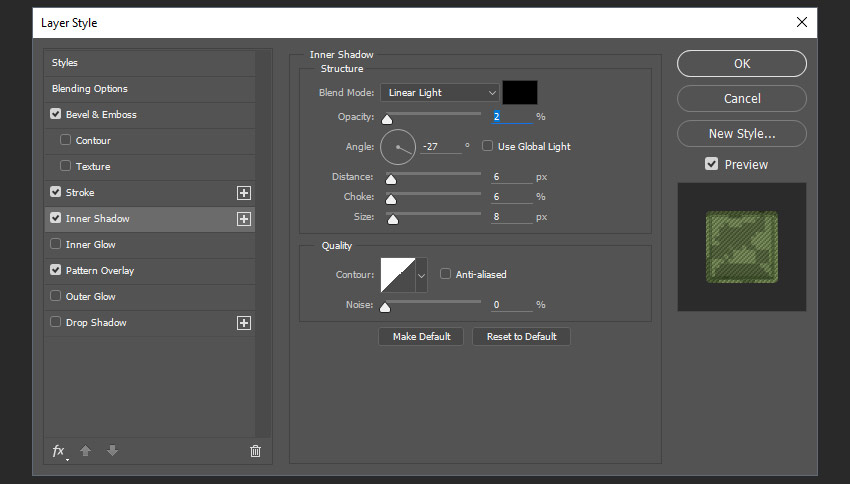
Step 6. Add an inner shadow using the following settings:
Blending Mode: Linear Light
Opacity: 2%
Use global light: Unchecked
Angle: -27º
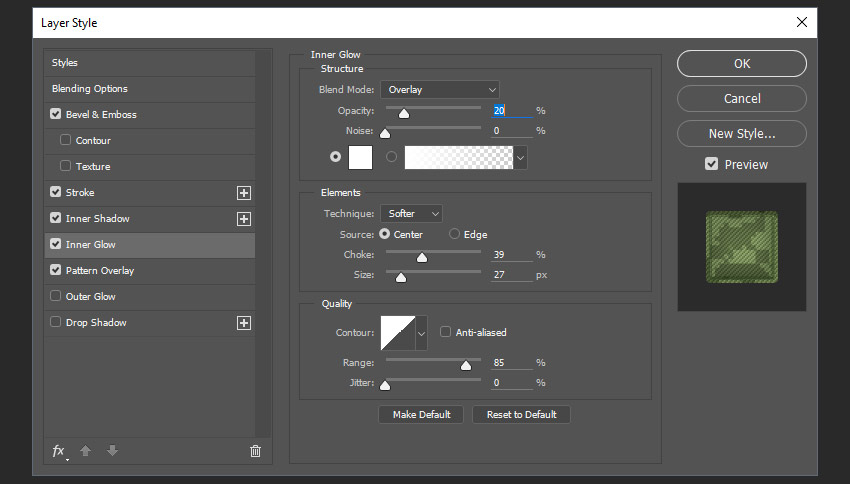
Step 7. Add an Inner Glow with the following settings:
Blend Mode: Overlay
Opacity: 20%
Noise: 0%
Color: #ffffff
Method: soft
Source: Center
Choking: 39%
Dimensions: 27 px
Outline: Linear
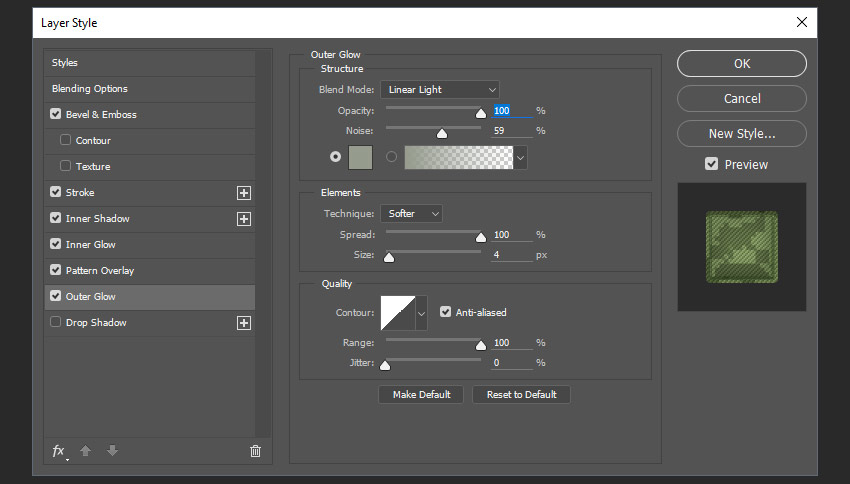
Step 8. Add an Outer Glow with the following settings:
Blend Mode: Linear Light
Opacity: 100%
Color: #969c8e
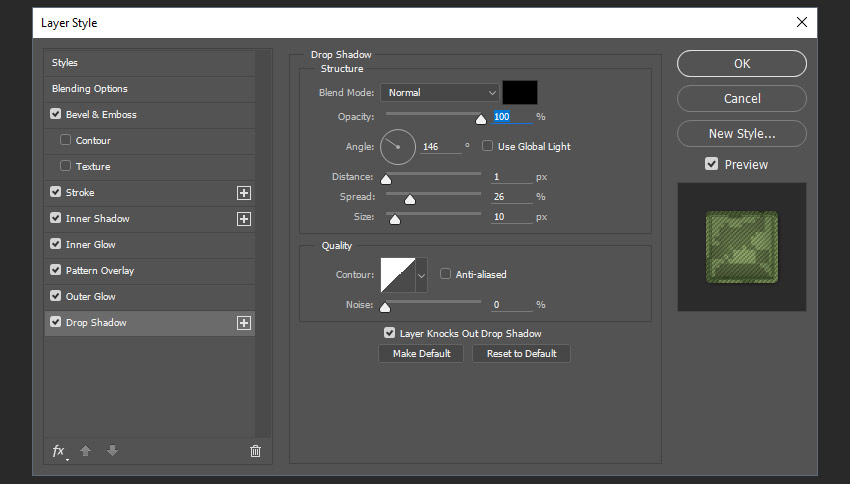
Step 9. Add a drop shadow with these settings:
Blending Mode: Normal
Color: #000000
Opacity: 100%
Use global light: Unchecked
Step 10. Select the text layer and press Ctrl-J to copy it. Then rename the copy to Camo TOP and set the fill value to 0.
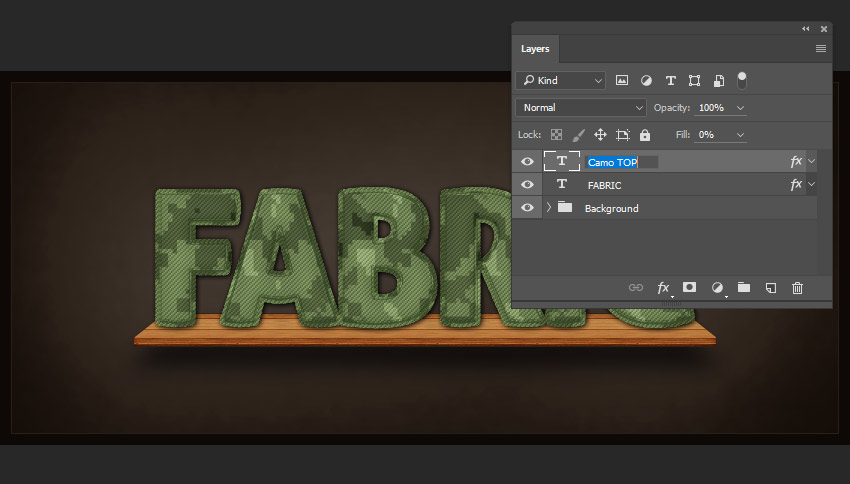
Step 11. Right-click on the "Camo Top" layer, then right-click and select Clear Layer Style, then double-click it to open the Layer Style window.
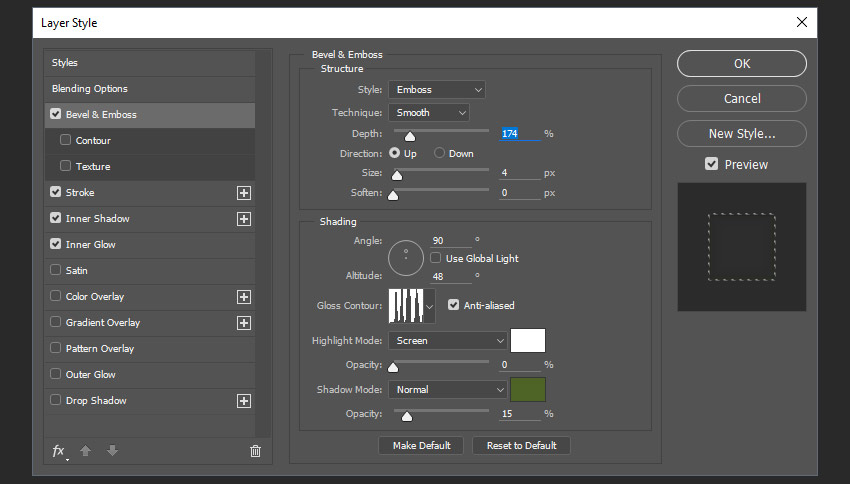
Add bevel and emboss with the following settings:
Style: embossed effect
Method: smooth
Depth: 174%
Direction: Up
Size: 4 pixels
soft: 0 px
Use global light: Unchecked
Angle: 90º
Altitude: 48º
Glossy contour: nodes can be adjusted arbitrarily, the effect is as shown in the figure
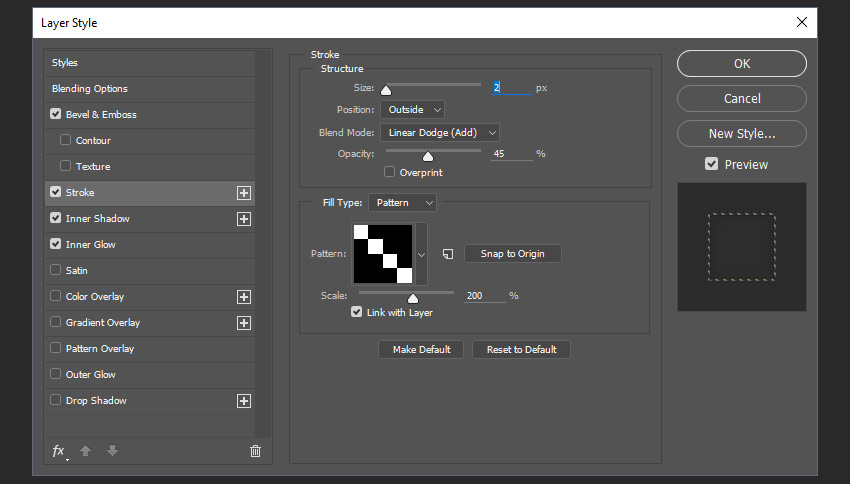
Step 12. Add a stroke using the following settings:
Size: 2px
position: outside
Blending Mode: Linear Dodge (Add)
Opacity: 45%
Fill Type: Pattern
Pattern: Choose a border texture (this will create the illusion of edge stitching)
Scale: 200%
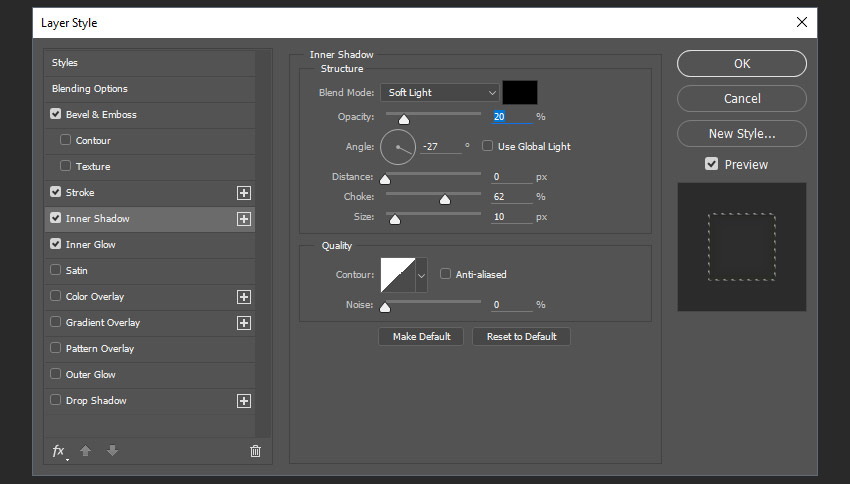
Step 13. Add an inner shadow using the following settings:
Blending Mode: Soft Light
Color: #000000
Opacity: 20%
Use global light: Unchecked
Angle: -27º
Distance: 0 pixels
Choking: 62%
Size: 10px
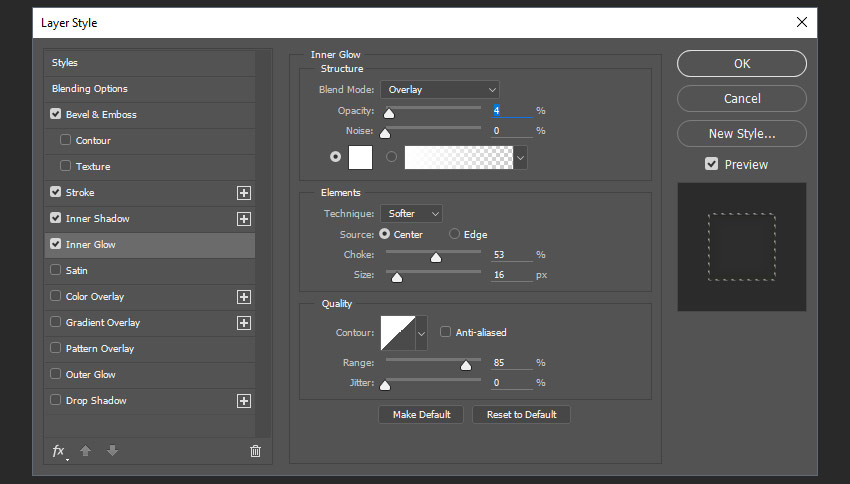
Step 14. Add an Inner Glow with the following settings:
Blending Mode: Overlay
Opacity: 4%
Color: #ffffff
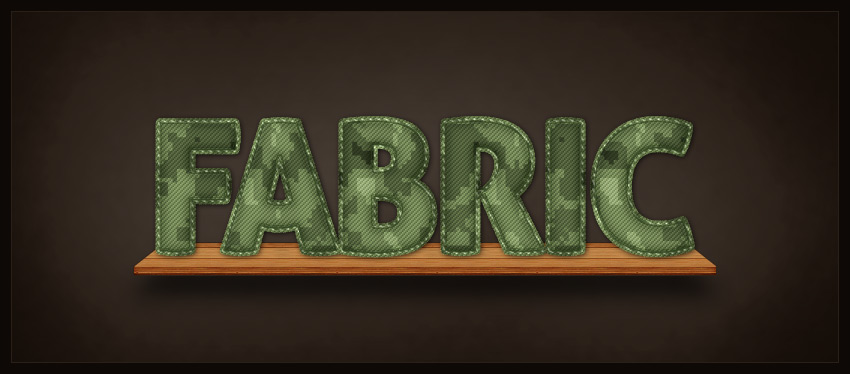
Congratulations on finishing~~
Articles are uploaded by users and are for non-commercial browsing only. Posted by: Lomu, please indicate the source: https://www.daogebangong.com/en/articles/detail/I%20want%20a%20camouflage%20style%20font%20effect%20like%20the%20spirit%20of%20the%20wolf%20warrior.html

 支付宝扫一扫
评论列表(196条)
测试