How to add gradient glass wind effect to PPT pictures? If you want to add a special effect to the picture in ppt and make it into a creative cover, how to add gradient glass wind effect to the picture? The following editor will explain to you the cover of ppt frosted glass effect way of doing.
ppt template article recommendation:
How to use PPT to draw the scenery at night
How to use PPT to design ins design style graphic layout
How to use ppt to design the work summary cover of oil painting style
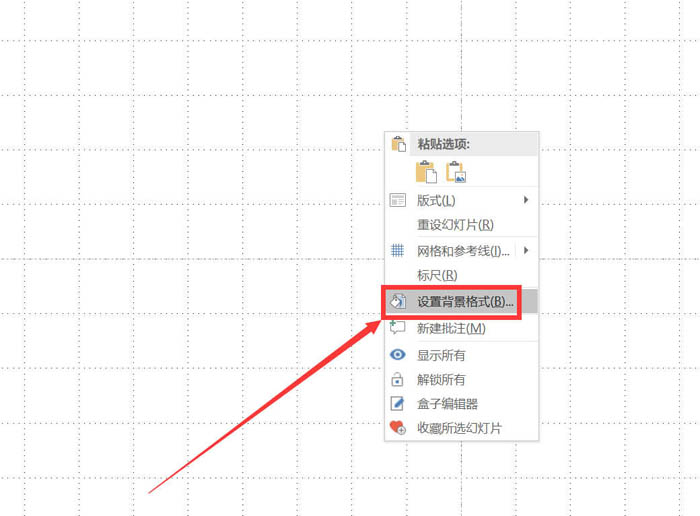
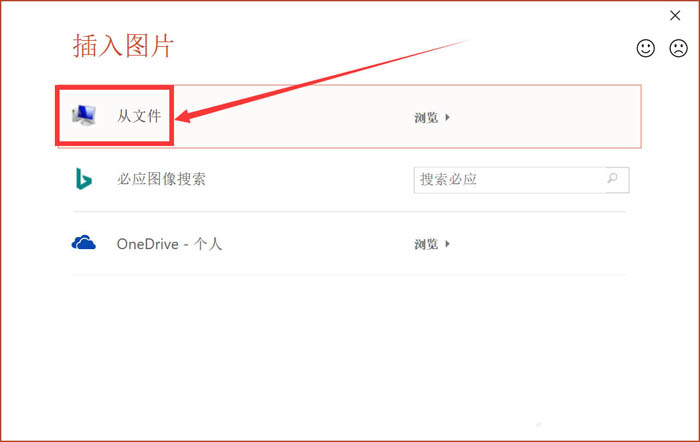
1. Right-click the blank area of the slide to bring up the shortcut menu, and select the [Set Background Format] option in the shortcut menu.
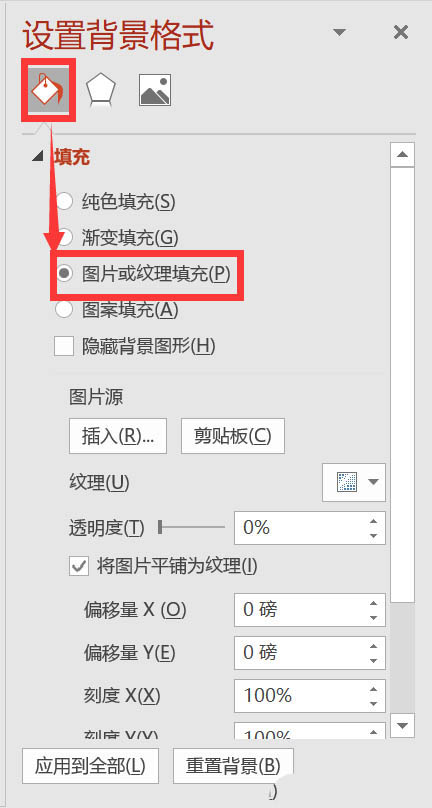
2. In the [Set Background Format] dialog box, click the [Fill and Line] tab - [Fill] option area - [Picture or texture fill] check box" with the left mouse button.
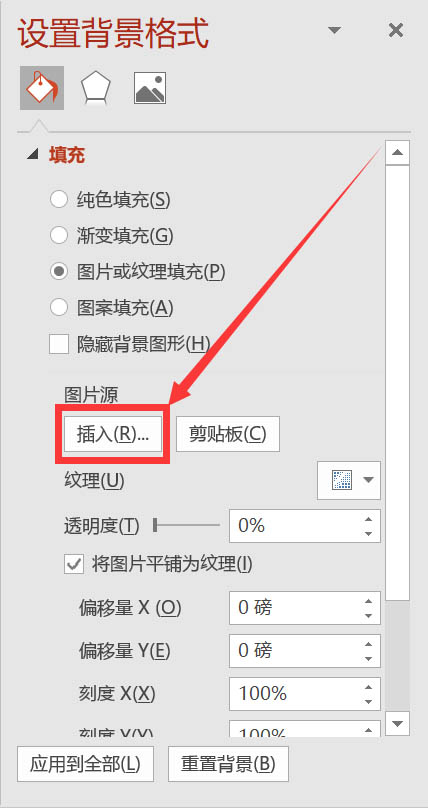
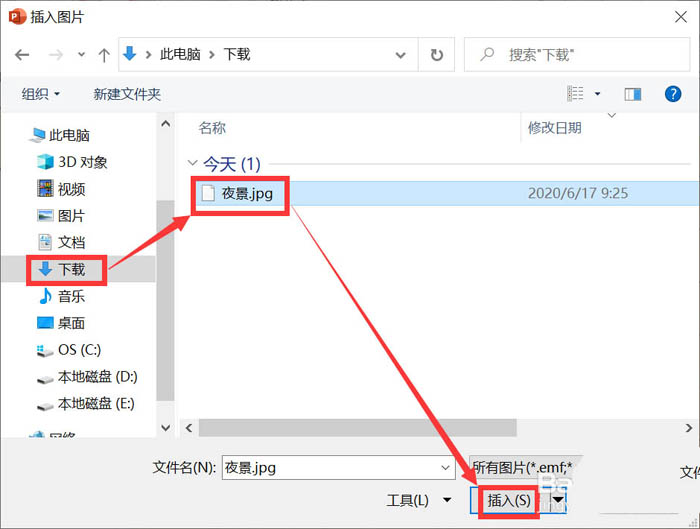
3. First, click the [Insert] button in the [Image Source] option area; secondly, select the [From File] option in the [Insert Image] dialog box; thirdly, in the [Insert Image] dialog box, click the Click "[Download] storage location - [Night scene] option - [Insert] button".
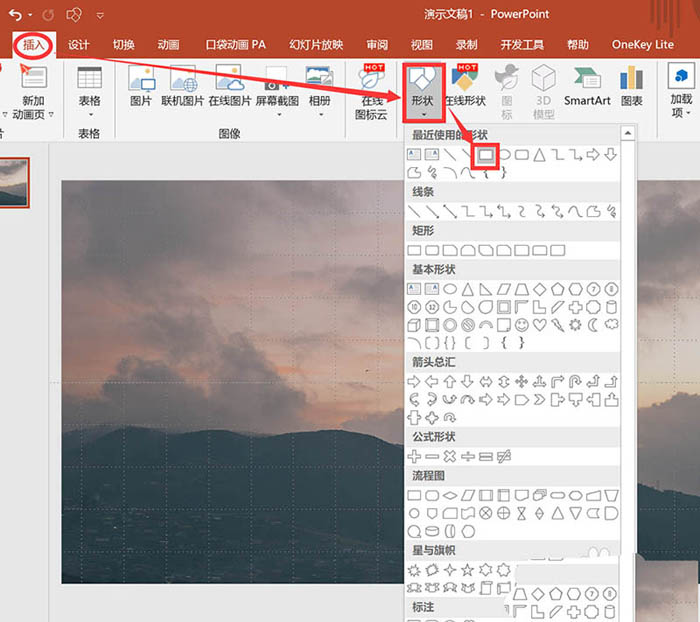
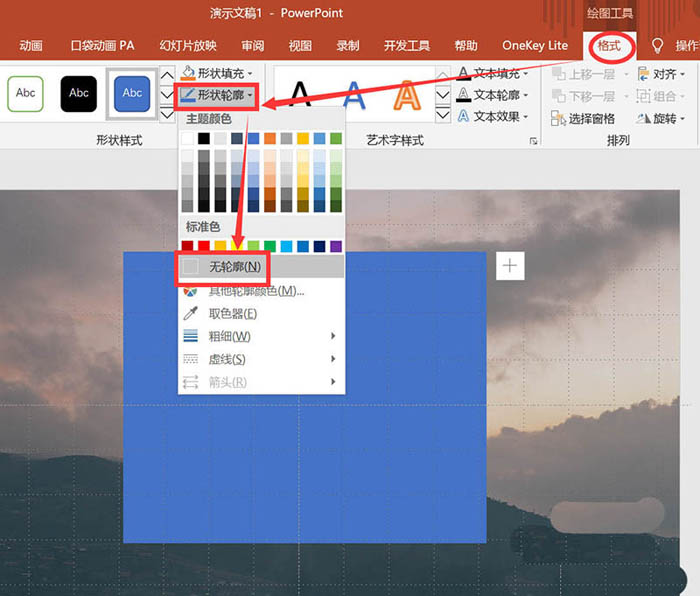
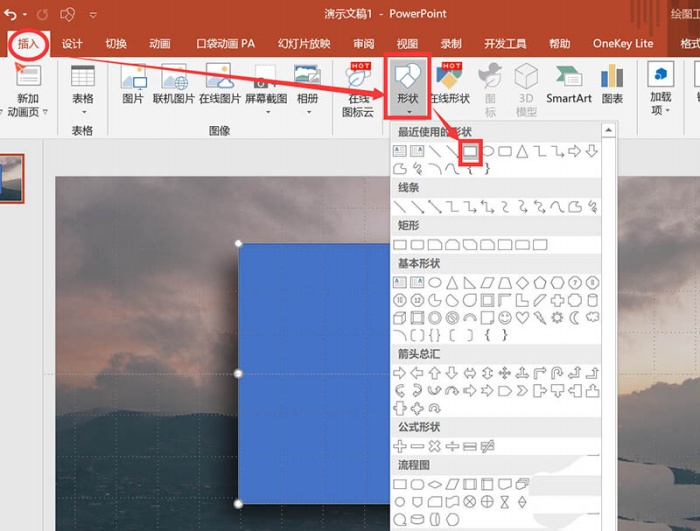
4. Insert shape. Click the left mouse button on "[Insert] function area - [Illustration] function group - [Shape] command"; select the rectangle in the pop-up drop-down menu; at this time, the mouse pointer becomes a "+" shape, and then use the mouse to Left click to draw a rectangle in place.
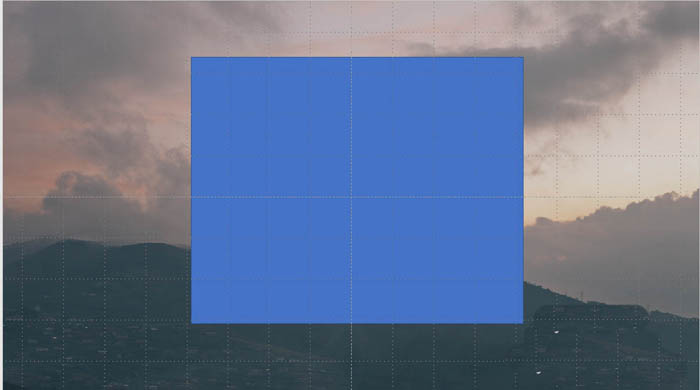
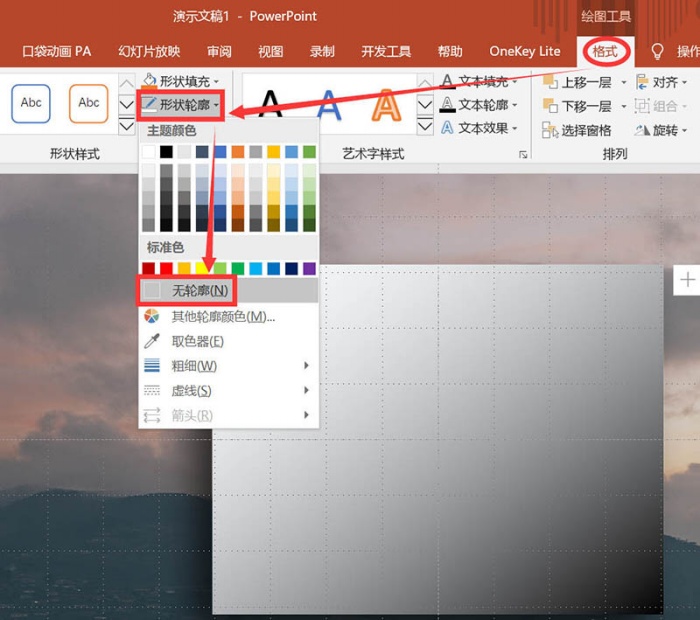
5. Set Shape Outline to No Outline. Select the rectangle, and then use the left mouse button to click "[Format] ribbon - [Shape Style] function group - the drop-down triangle button of [Shape Outline] - [No Outline]"
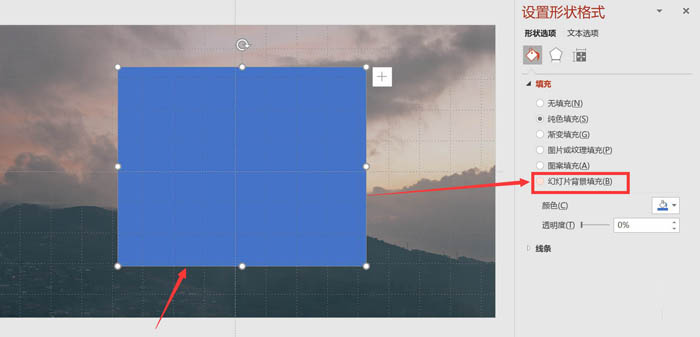
6. Click the left button of the mouse to select the rectangle, and then click the “[Fill] option area——[Slide background fill]” with the left button of the mouse.
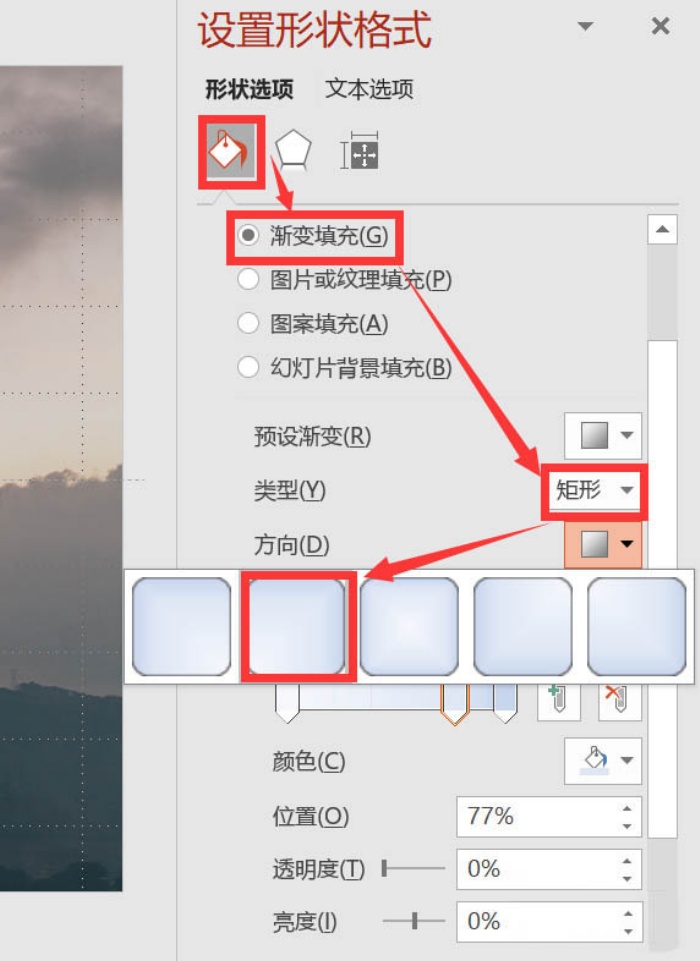
7. In the [Format Shape] dialog box, click the [Fill and Line] tab - [Gradient Fill] check box with the left mouse button; then, select the drop-down triangle button on the right side of [Type] [Rectangular]; select the option [From the lower left corner] in the drop-down triangle button on the right side of [Direction].
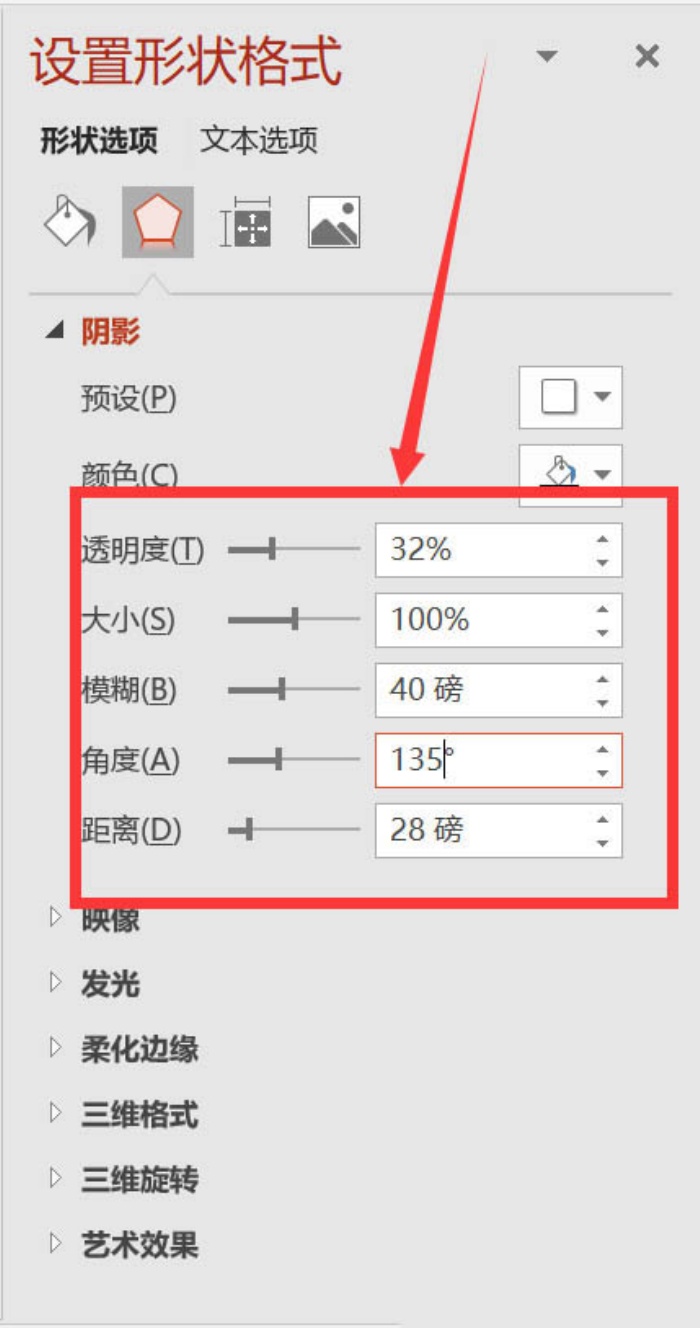
8. Click the left mouse button to switch to the [Effect] tab, and in the [Shadow] option area, set [Transparency] to [32%], [Size] to [100%], and [Blur] to [40] Pound], [Angle] is set to [135 degrees], distance is set to [28 pt].
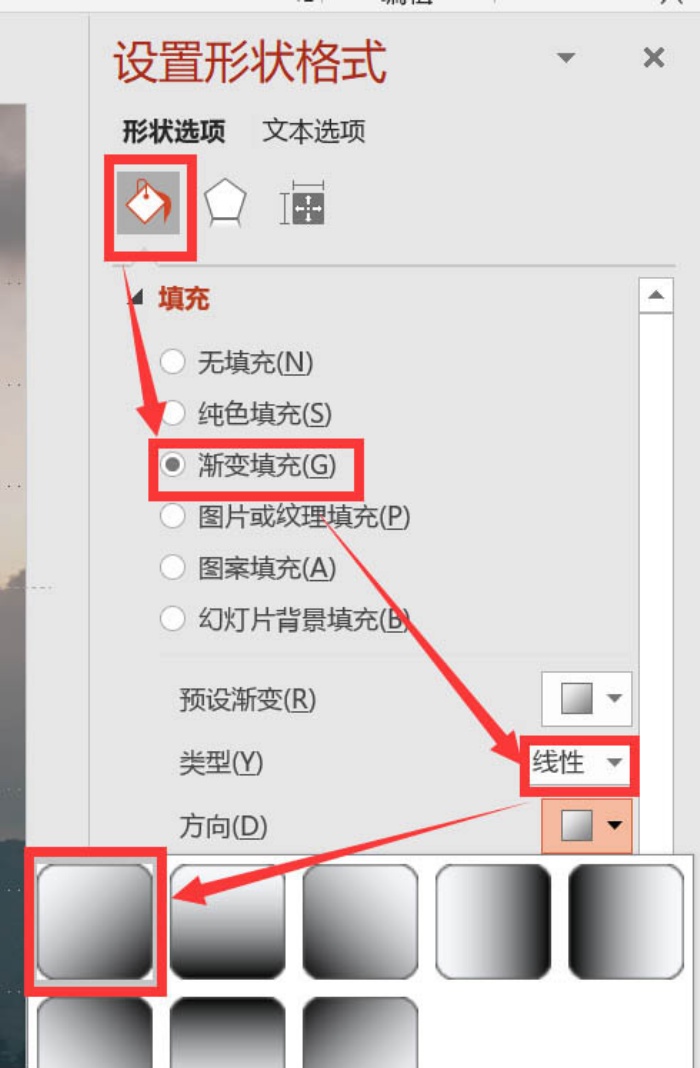
9. Insert the shape. Click the left mouse button on "[Insert] function area - [Illustration] function group - [Shape] command"; select the rectangle in the pop-up drop-down menu; at this time, the mouse pointer becomes a "+" shape, and then use the mouse to Left click to draw a rectangle in place.
10. In the [Format Shape] dialog box, click the [Fill and Line] tab - [Fill] option area - [Gradient Fill] check box with the left mouse button; then, click the [Type] right Select [Linear] in the drop-down triangle button on the side; select [From the upper left corner to the lower right corner] option in the drop-down triangle button on the right side of [Direction].
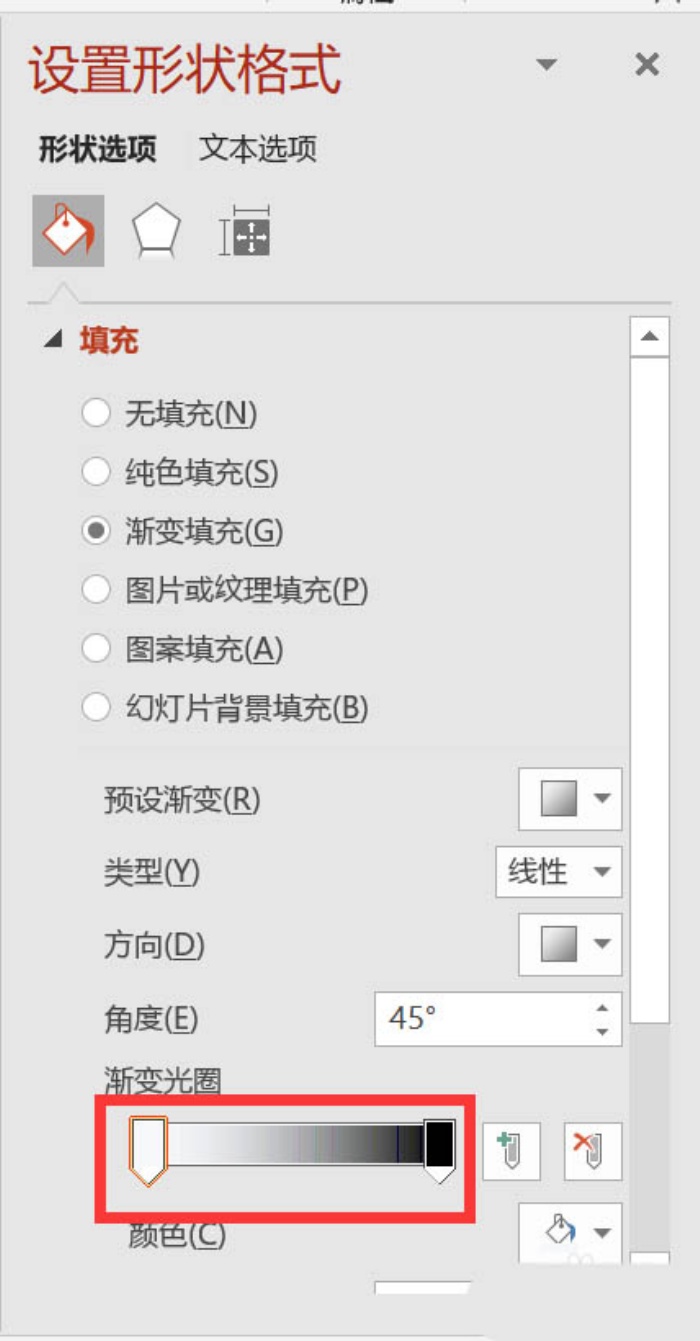
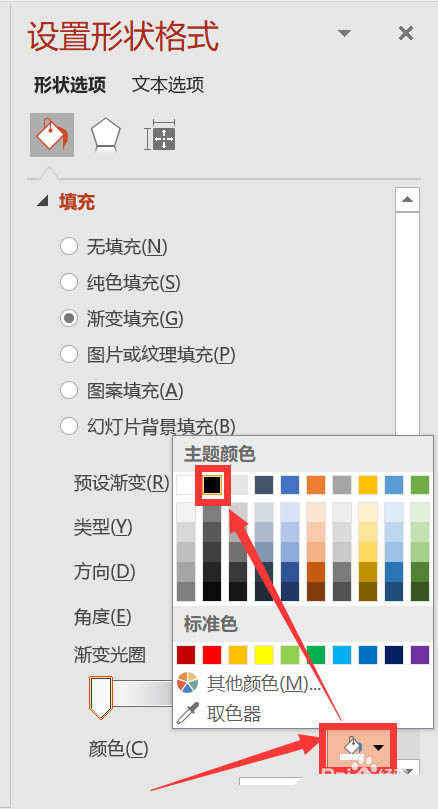
11. Set the gradient aperture to [black, text 1]. In the [Format Shape] dialog box, click the left mouse button on the [Fill and Line] tab - [Fill] option area - [Gradient Fill] check box"; then, under the [Gradient Aperture] In the official right, select the rightmost aperture; in the drop-down triangle button of [Color], select the [Theme Color] option area - [Black, Text 1].
12. Set Shape Outline to No Outline. Select the rectangle on the upper layer with the left mouse button, and then click "[Format] ribbon - [Shape Style] function group - [Shape Outline] drop-down triangle button - [No Outline]"
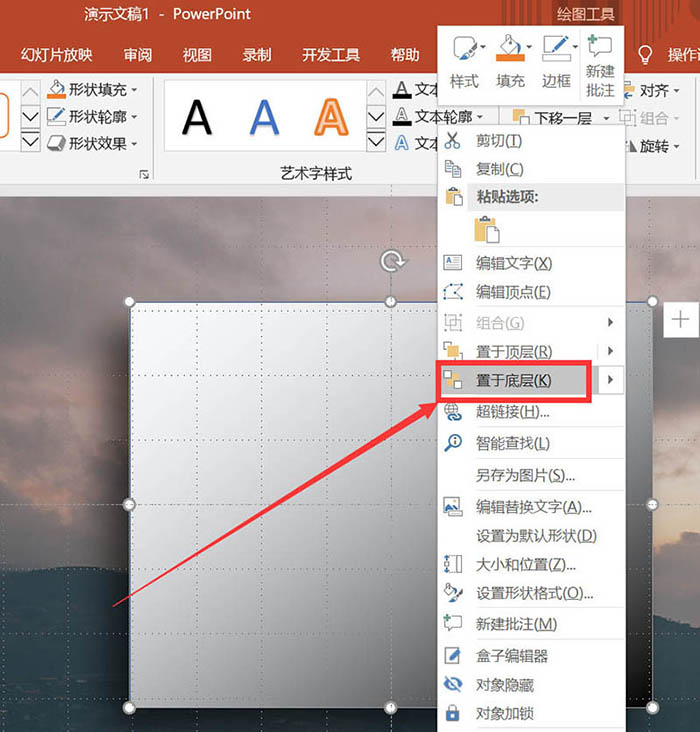
13. Select the upper rectangle with the left mouse button; right-click the blank area of the slide to bring up the shortcut menu, and select the [Place to Bottom] option in the shortcut menu.
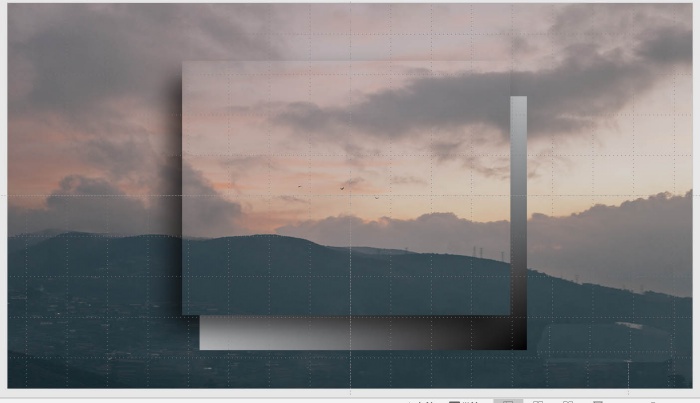
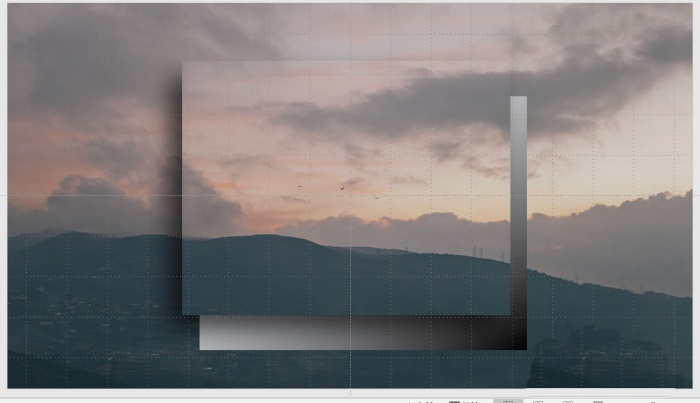
14. The effect is shown in the figure.
Articles are uploaded by users and are for non-commercial browsing only. Posted by: Lomu, please indicate the source: https://www.daogebangong.com/en/articles/detail/How%20to%20use%20ppt%20to%20add%20gradient%20glass%20wind%20effect%20to%20pictures.html
 支付宝扫一扫
评论列表(196条)
测试