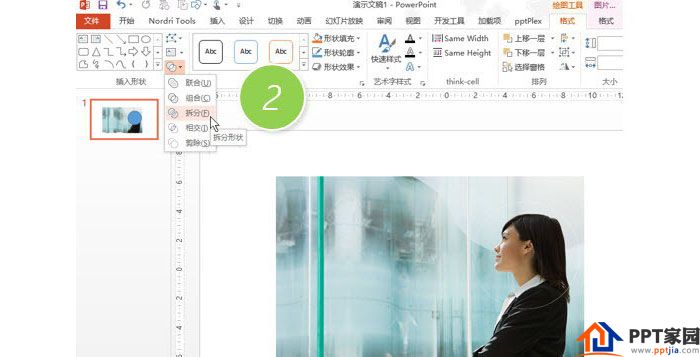
How does PPT realize the shape cutout of pictures? Just use the new function of PPT2013: the split function can be easily realized. For more downloads, please click ppt home.
ppt template article recommendation:
PPT merge shape function to make a turning bar tutorial
PPT text to change the color or shape of a stroke
First insert the picture you need to buckle in the PPT,

Then insert-shape-ellipse, hold down the shift keyboard, and drag out a circle. And cover the part that needs to be cut out. In this example, the head of the girl in the picture needs to be left. Figure 1 below

The next key steps come, pay attention to the order.
First select the picture, pay attention to the picture below, the picture is selected.

Next, hold down the Ctrl key and click to select the "circle". Remember to follow this order, and you can't be lazy to select the picture and the circle at the same time.

Next, quickly click the Drawing Tools-Merge Shapes-Split button. (Picture 2 below)

Finally, select the picture and press the delete keyboard to delete the circled part. The effect is as follows:

Articles are uploaded by users and are for non-commercial browsing only. Posted by: Lomu, please indicate the source: https://www.daogebangong.com/en/articles/detail/How%20to%20realize%20the%20shape%20cutout%20of%20pictures%20in%20PPT.html

 支付宝扫一扫
评论列表(196条)
测试