
Happy National Day, let’s all go out and play, I’m still trying the effect at home, let’s see the problem:

The original video has a lot of frames. Since the official account can only upload animations within 300 frames, I deleted the first part of the video and turned it into an animation. Let’s take a look:

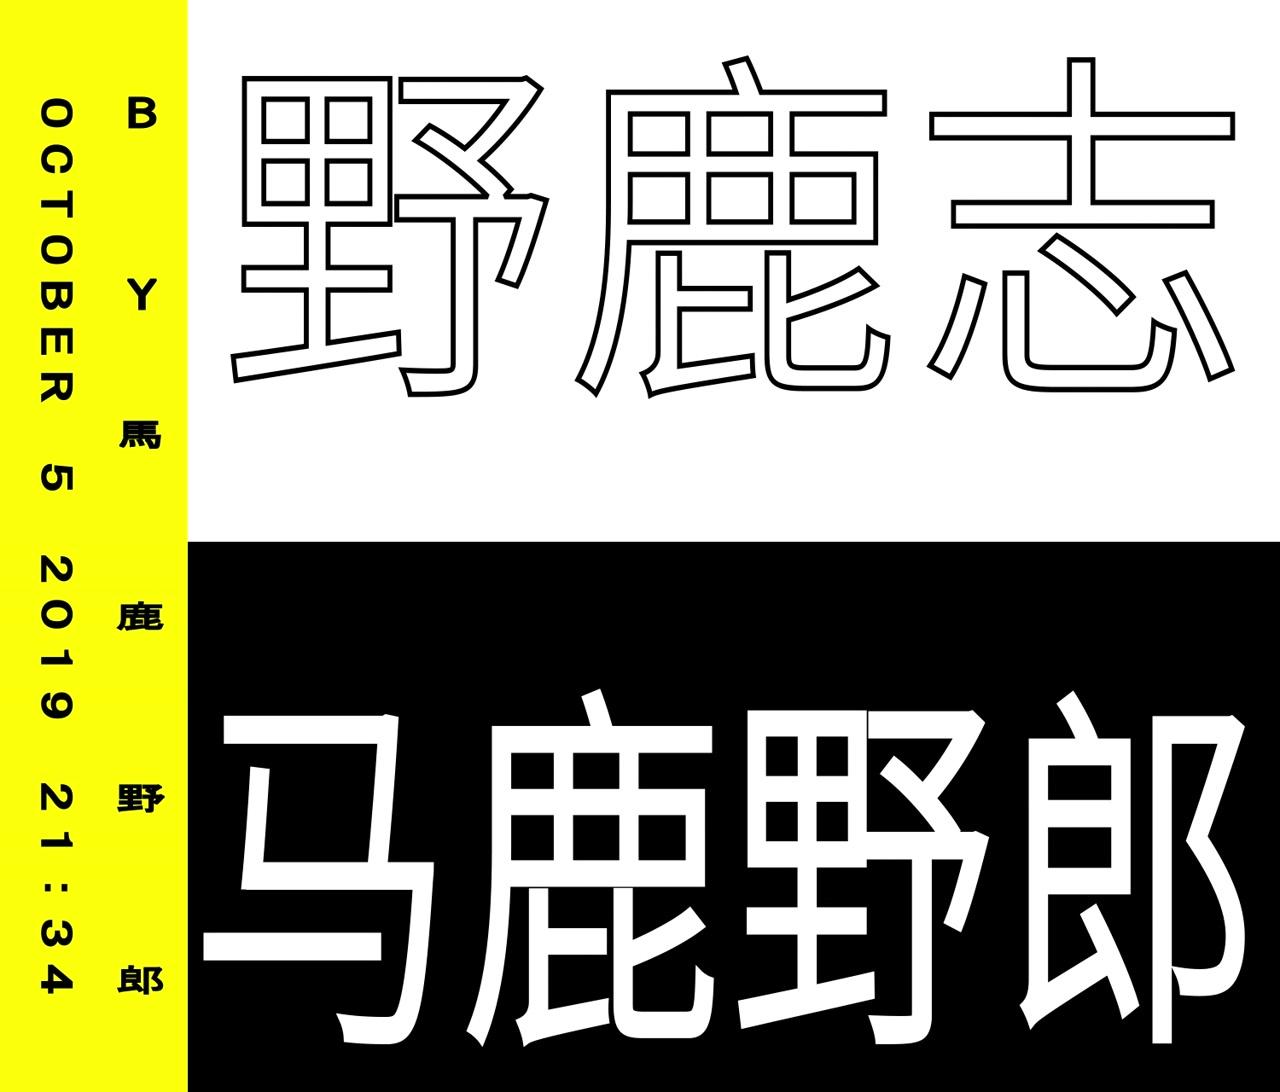
The picture comes from the Internet, please delete it if it is infringed
This effect looks simple, but has a strong sense of form. I originally wanted to write the last article, but the stretching effect has not been tried out:
Because the part I usually use most in AE is actually the color correction after 3D rendering, so I am not familiar with many special effects and expressions in AE.
So much so that such a simple text animation effect has been pondered for a long time. No, I don’t plan to go out on National Day anyway, so I continue to study at home.
It took another two days to try it out, and it is estimated that AE veterans can get this effect in minutes.
Recently, several deer friends asked about several special effects of text animation made with AE. I also plan to find opportunities to try them one by one, just to let myself have an introductory understanding of AE.
Deer friends who are not familiar with AE, let's get familiar with the operation of AE from this simple text animation.
Come on, let's make a text stretch animation with AE!

Before we start, let me say something long-winded, and share it with those who are still relatively unfamiliar with AE:
AE is also a software with a huge system, with various presets, scripts, and plug-ins. After we have a certain foundation for learning the software itself, we must learn to be good at using various scripts or plug-ins, which can greatly improve the our efficiency.
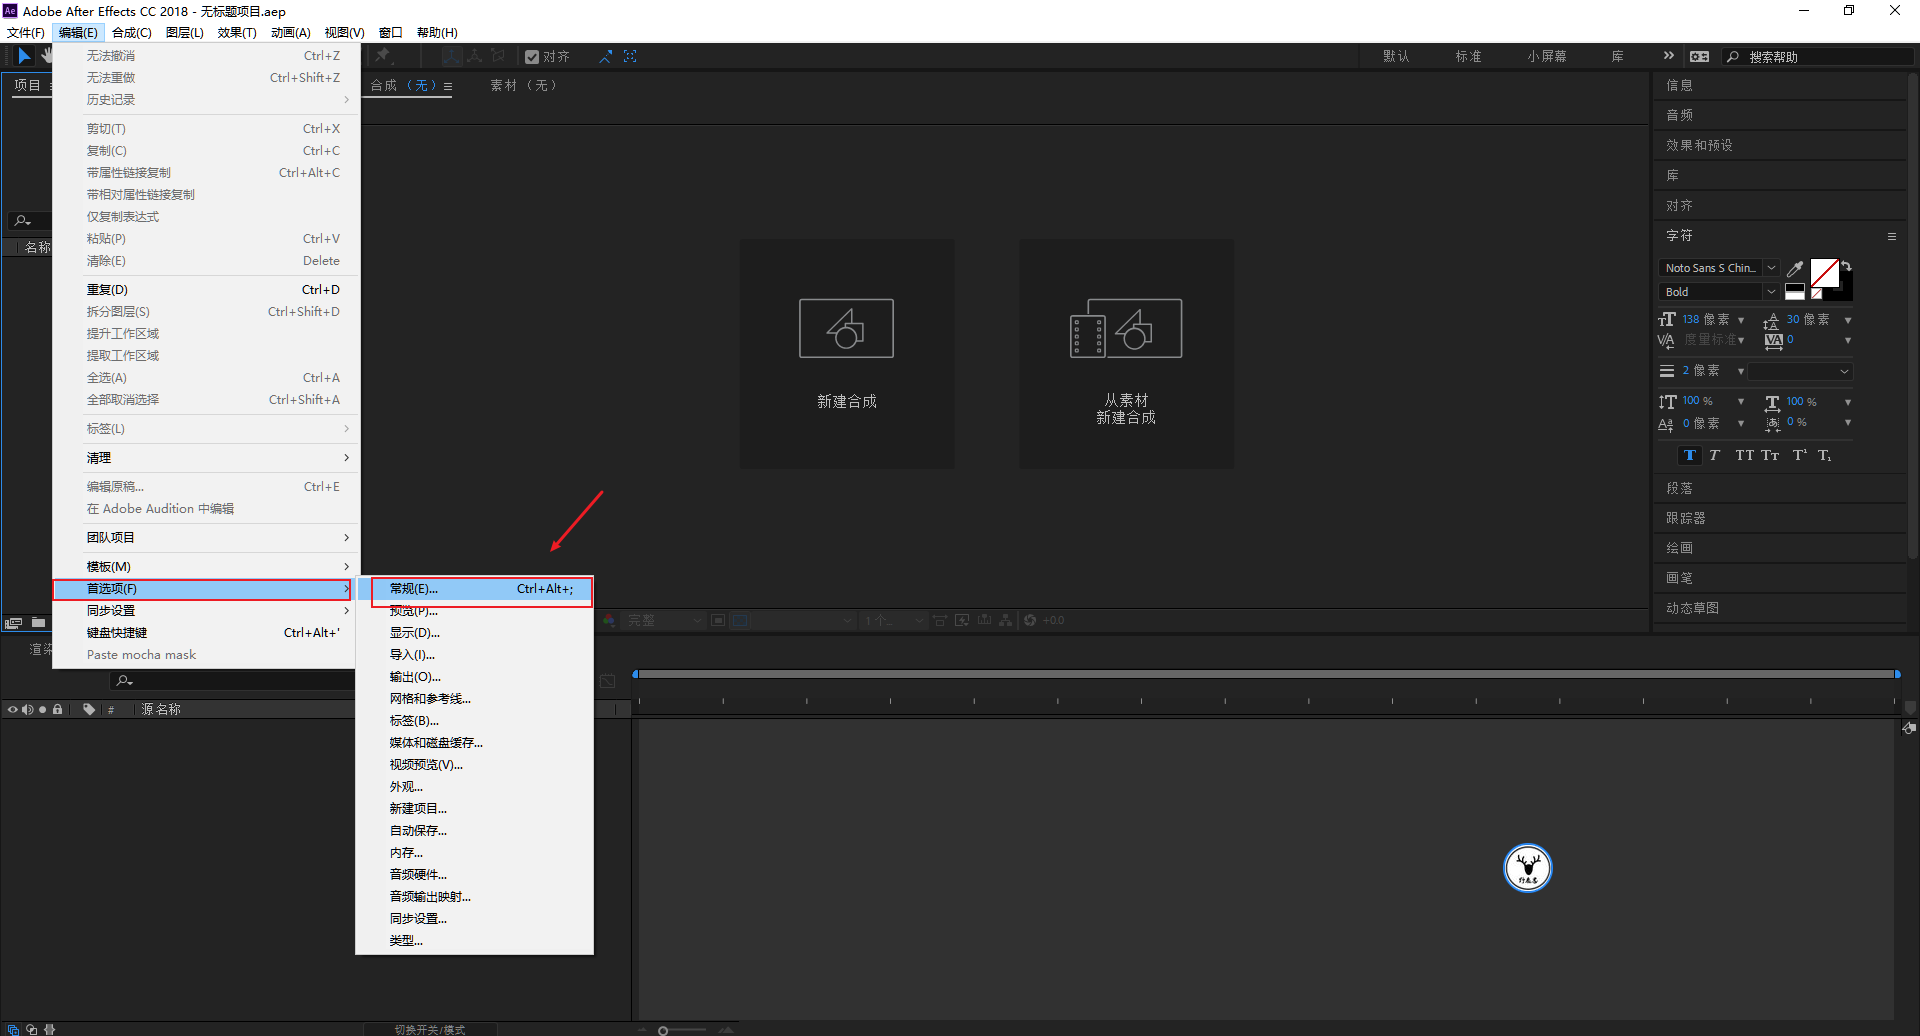
This article will also use the script of AE, let’s talk about the installation method of the script first, first open AE, execute Edit-Preferences-General:
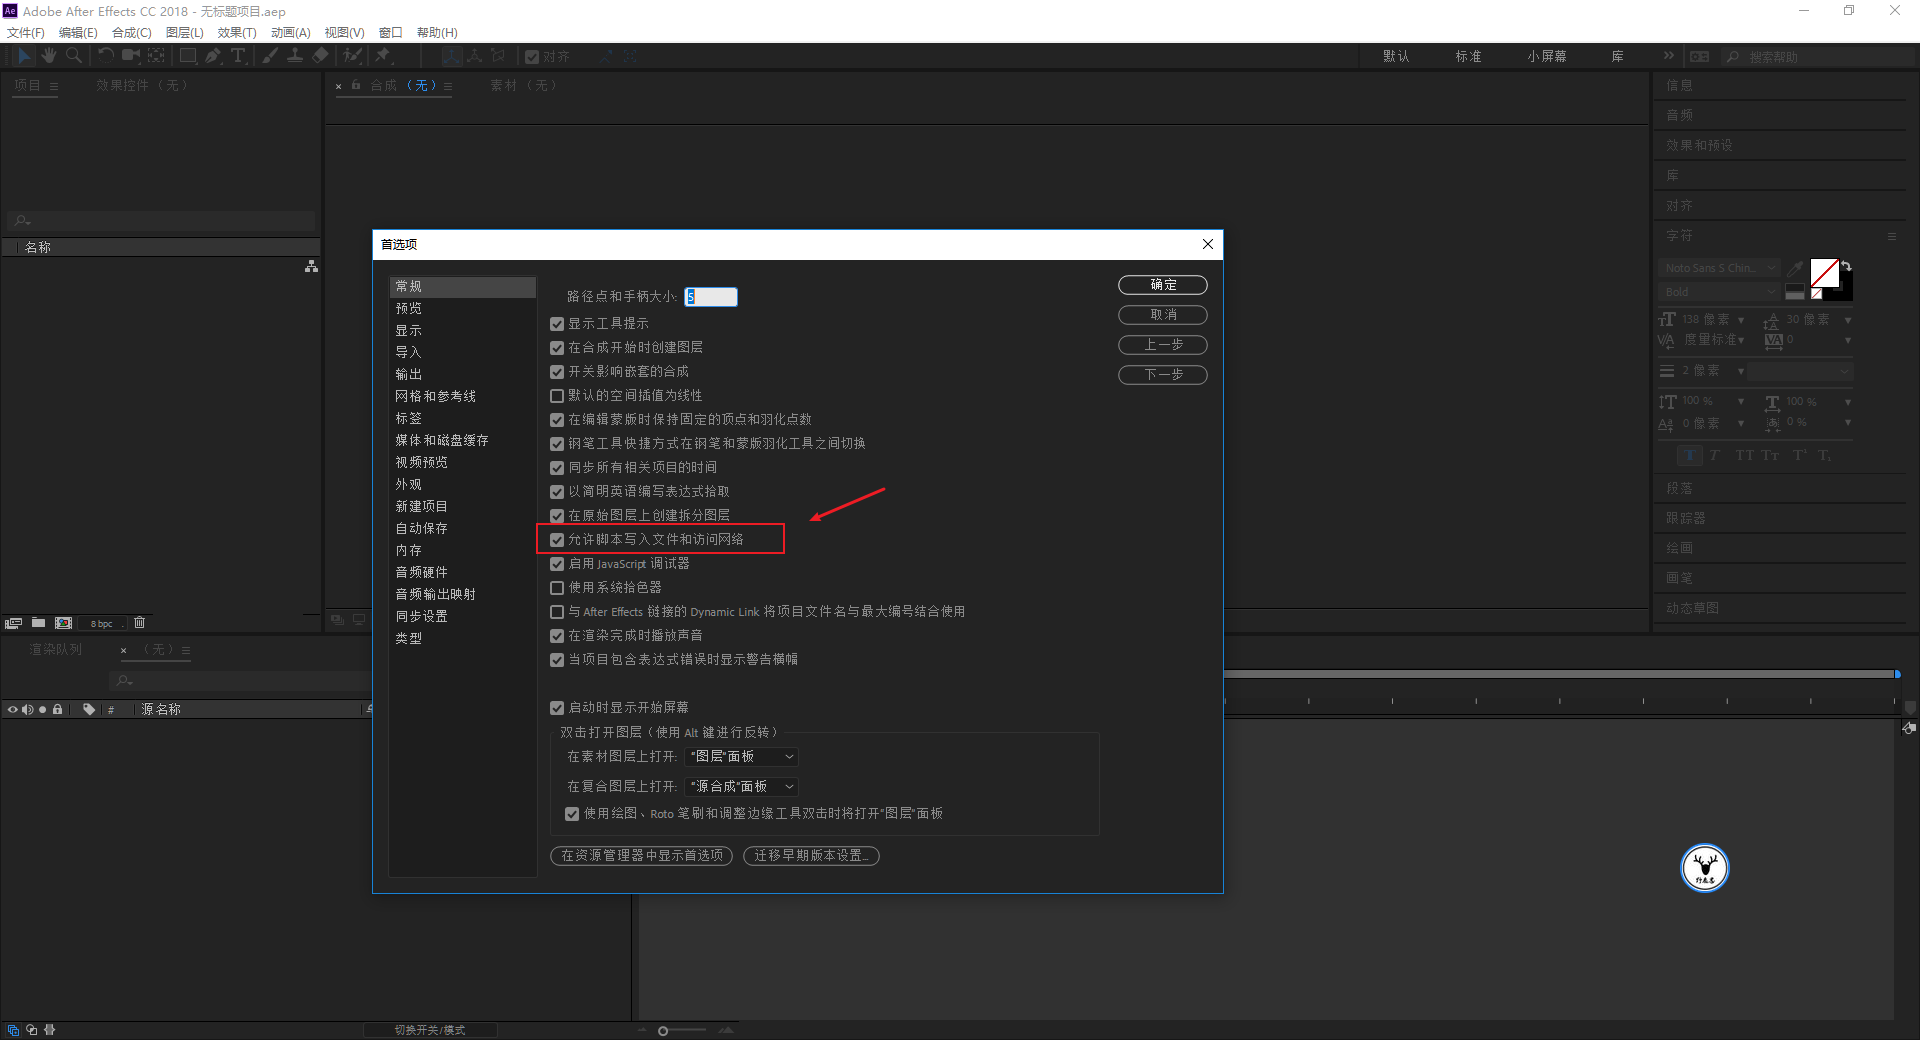
Be sure to check the box that allows scripts to write files and access the network:
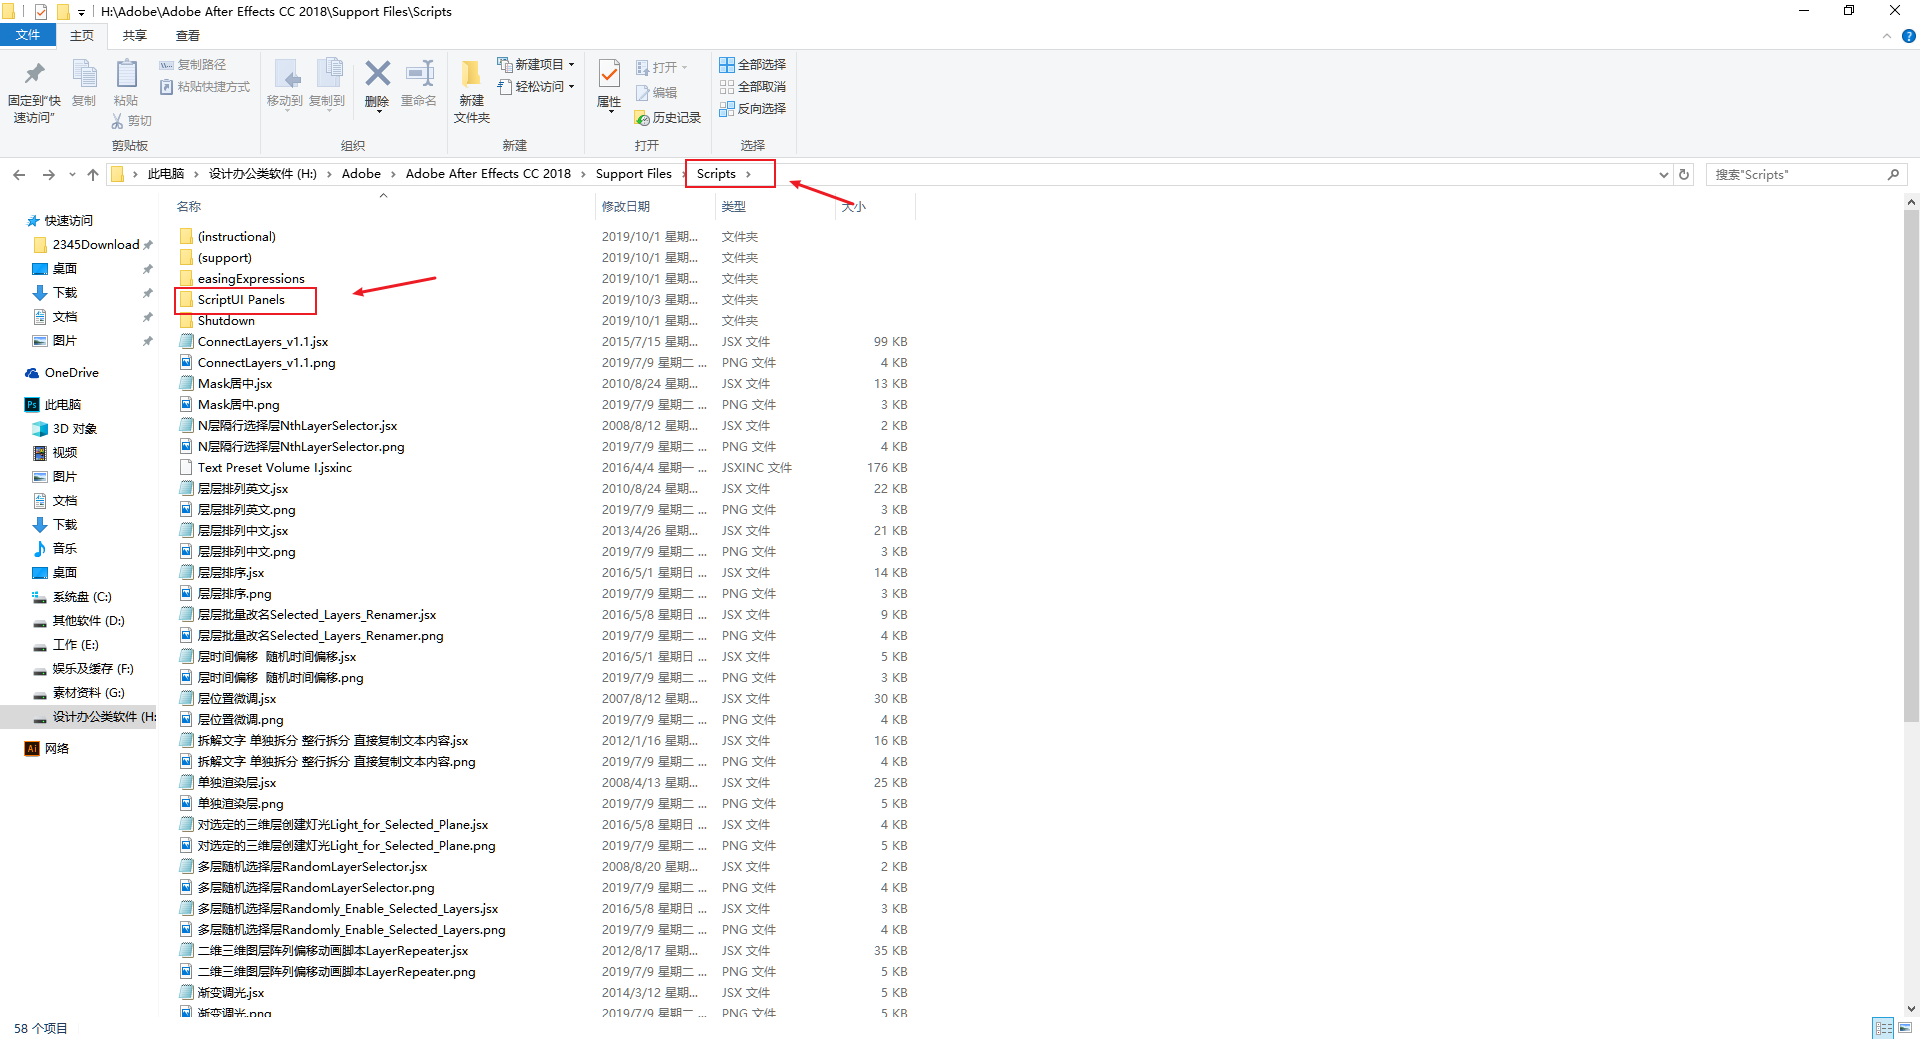
Due to the variety of AE scripts, some need to be stored in Scripts in the AE installation directory, and some need to be stored in ScriptUI Panels.
At the end of the article, I will directly package and send my Scripts folder to everyone, which contains all the AE scripts I installed and the script manager, for those who need it:
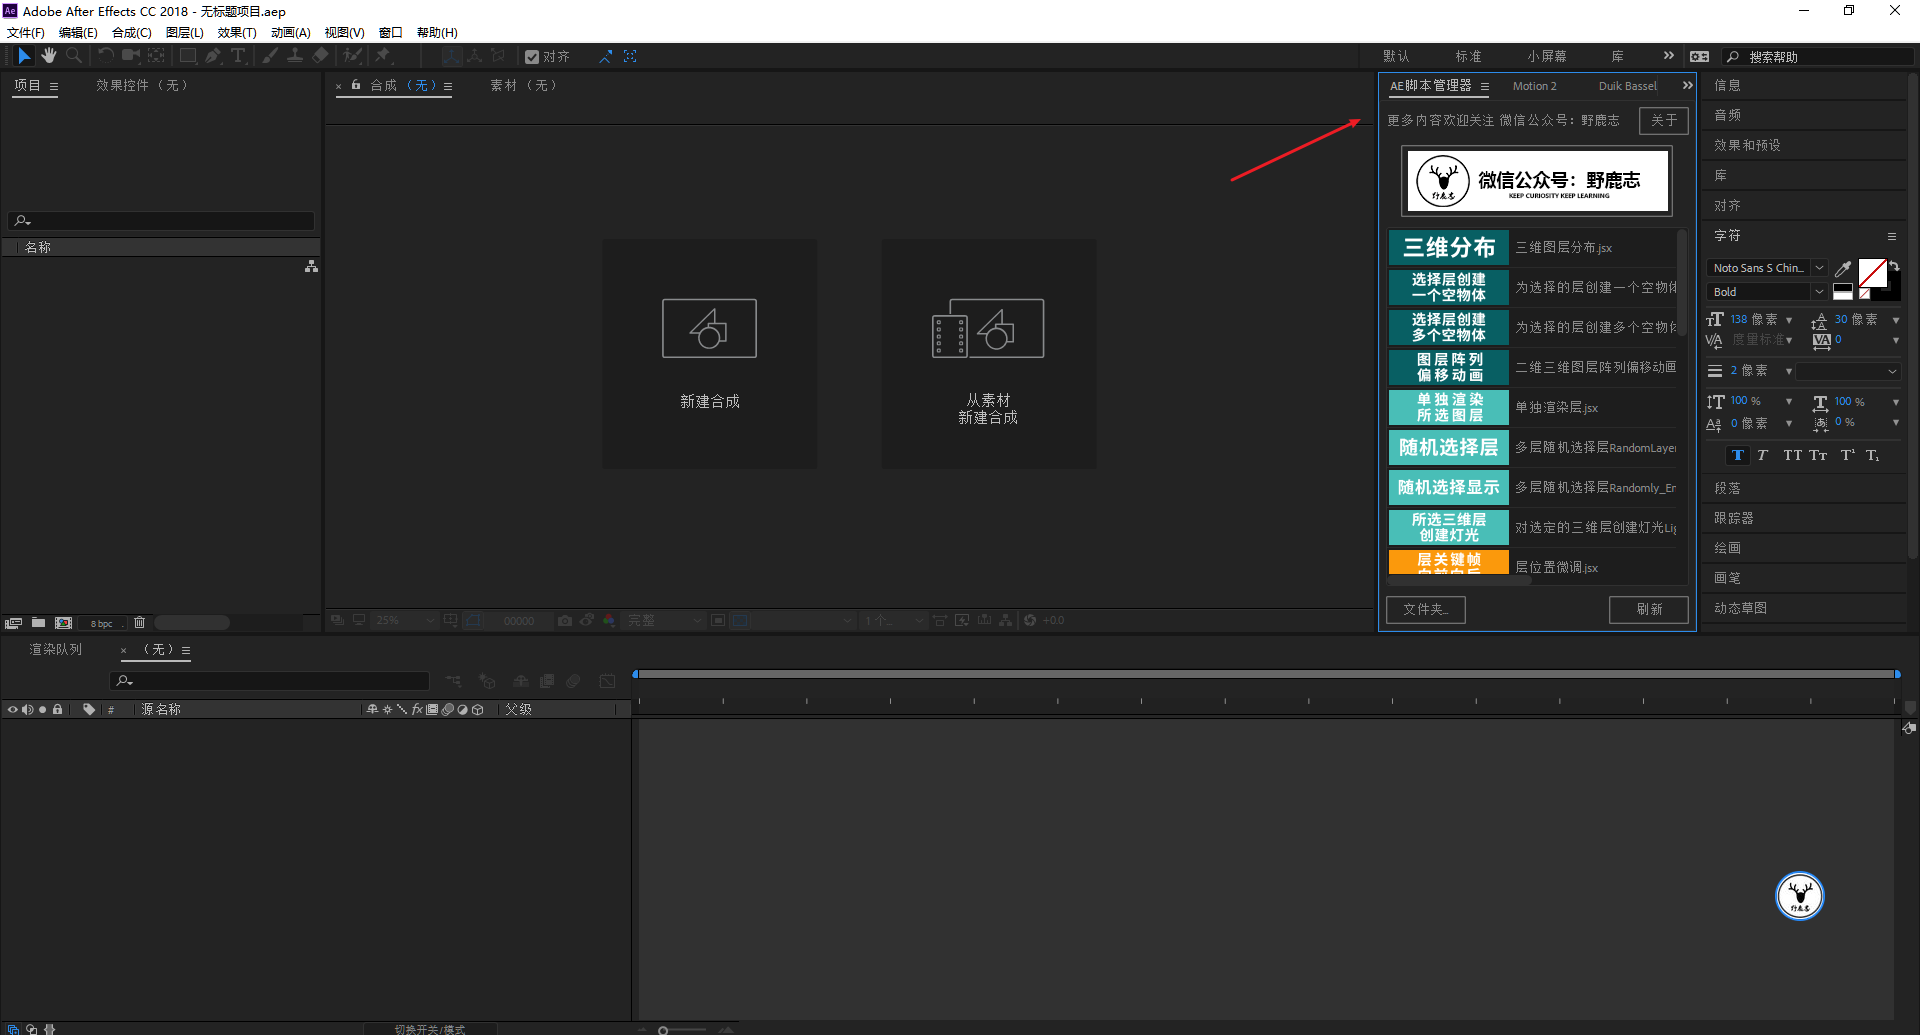
After installing the script, restart AE, and you can see the script you installed at the bottom of the window. Some scripts need to be called with the help of the script manager:
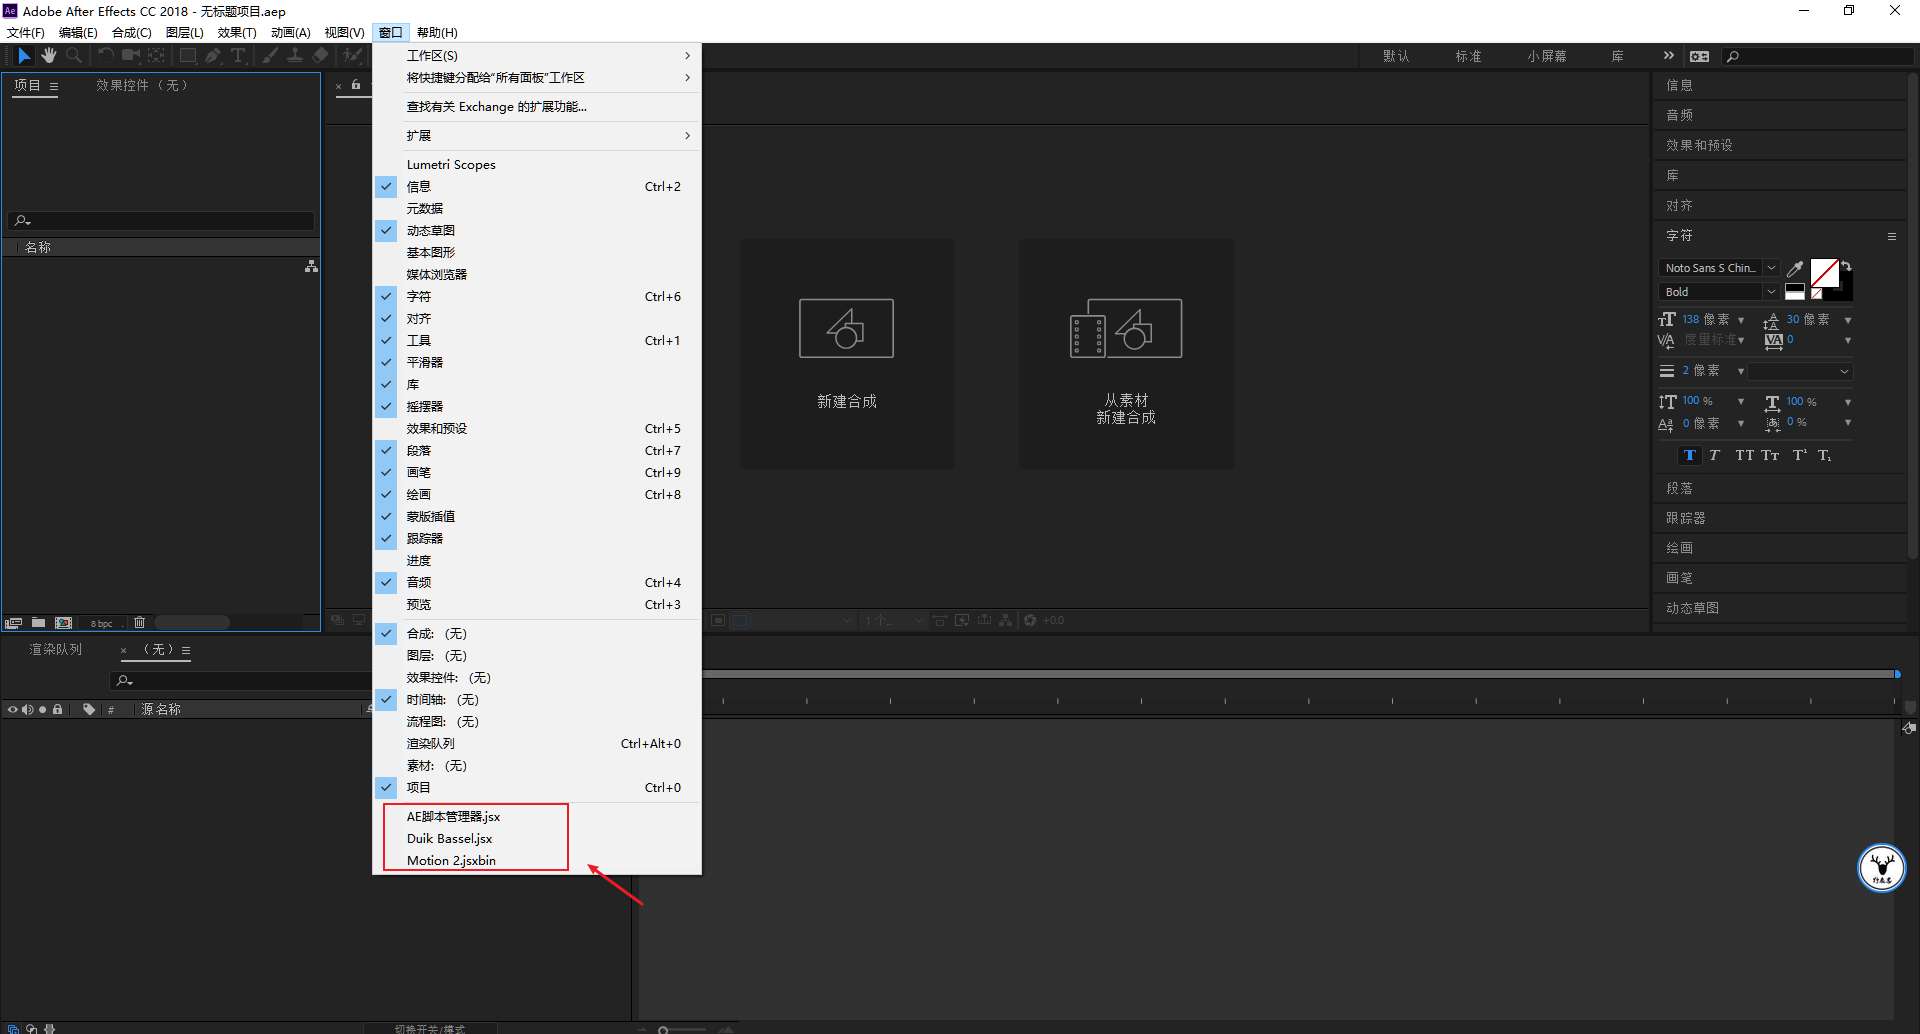
You can place them on the interface and use them directly the next time you start AE:
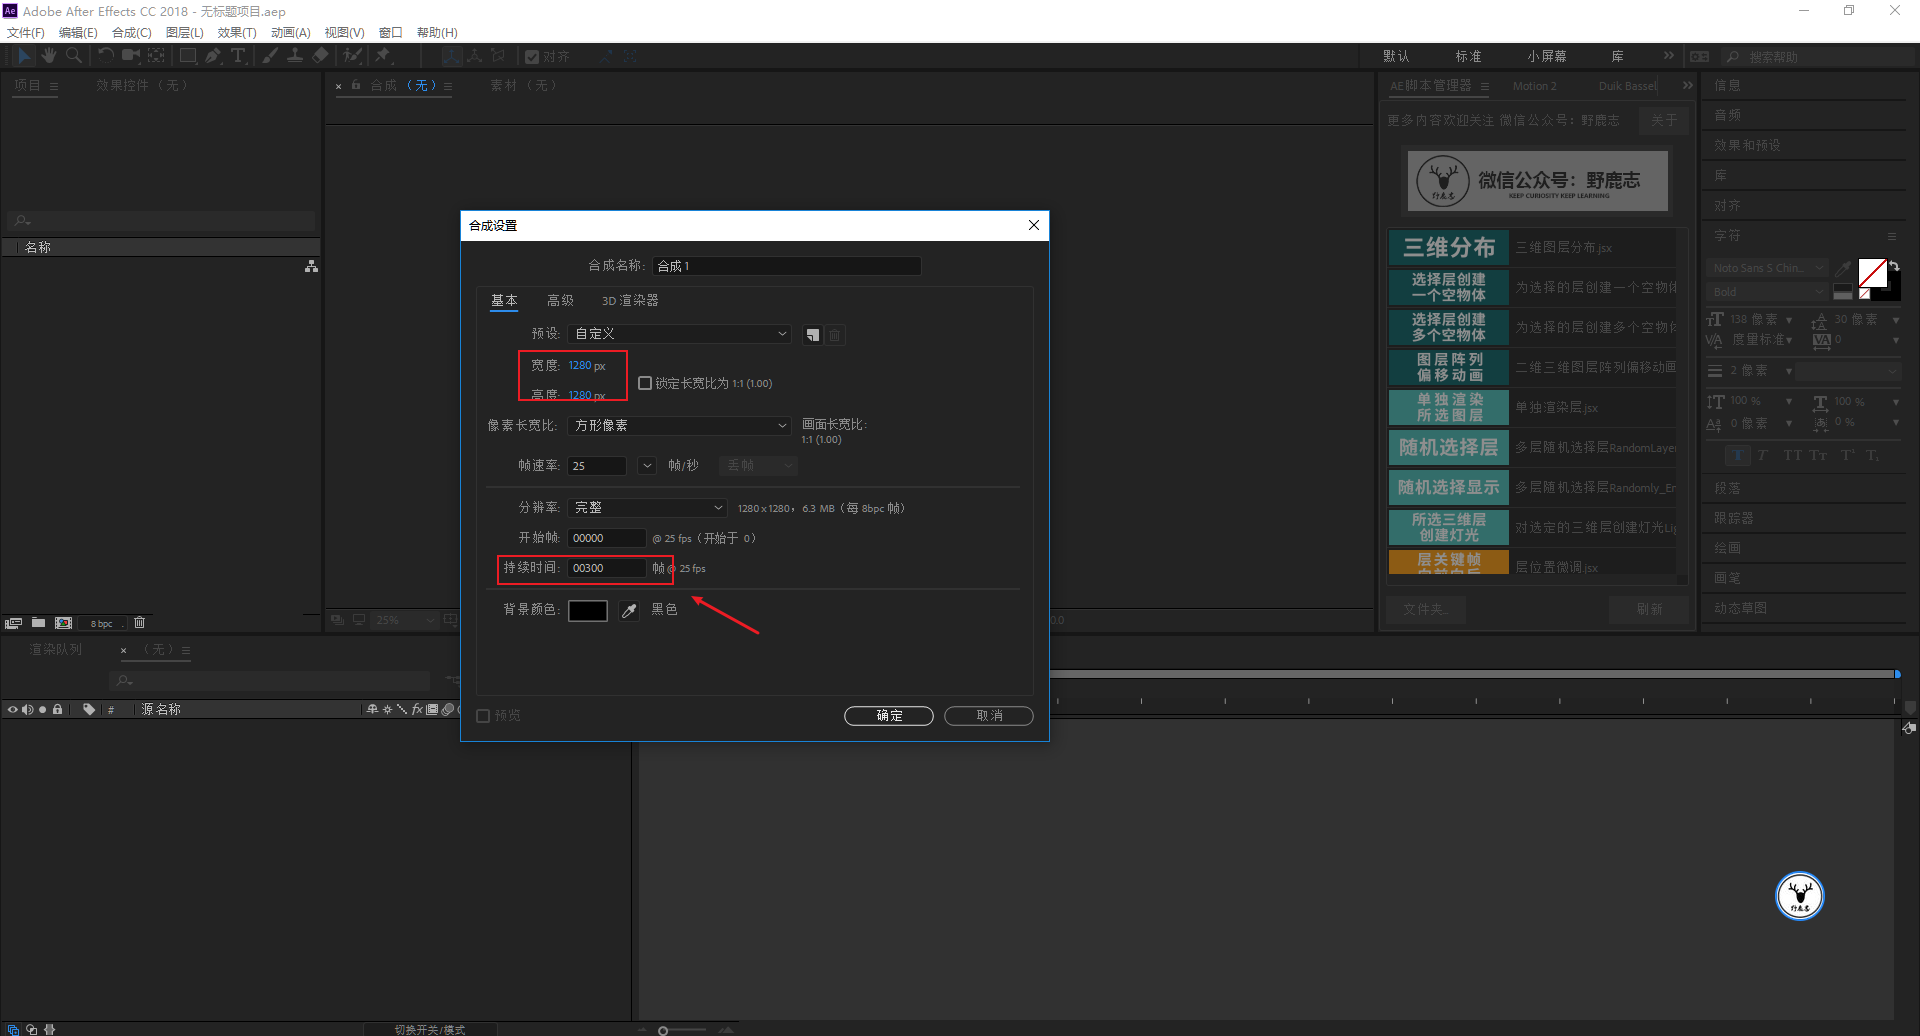
After the script is installed, let’s get to the point, create a new square composition, let’s get 300 frames for now:
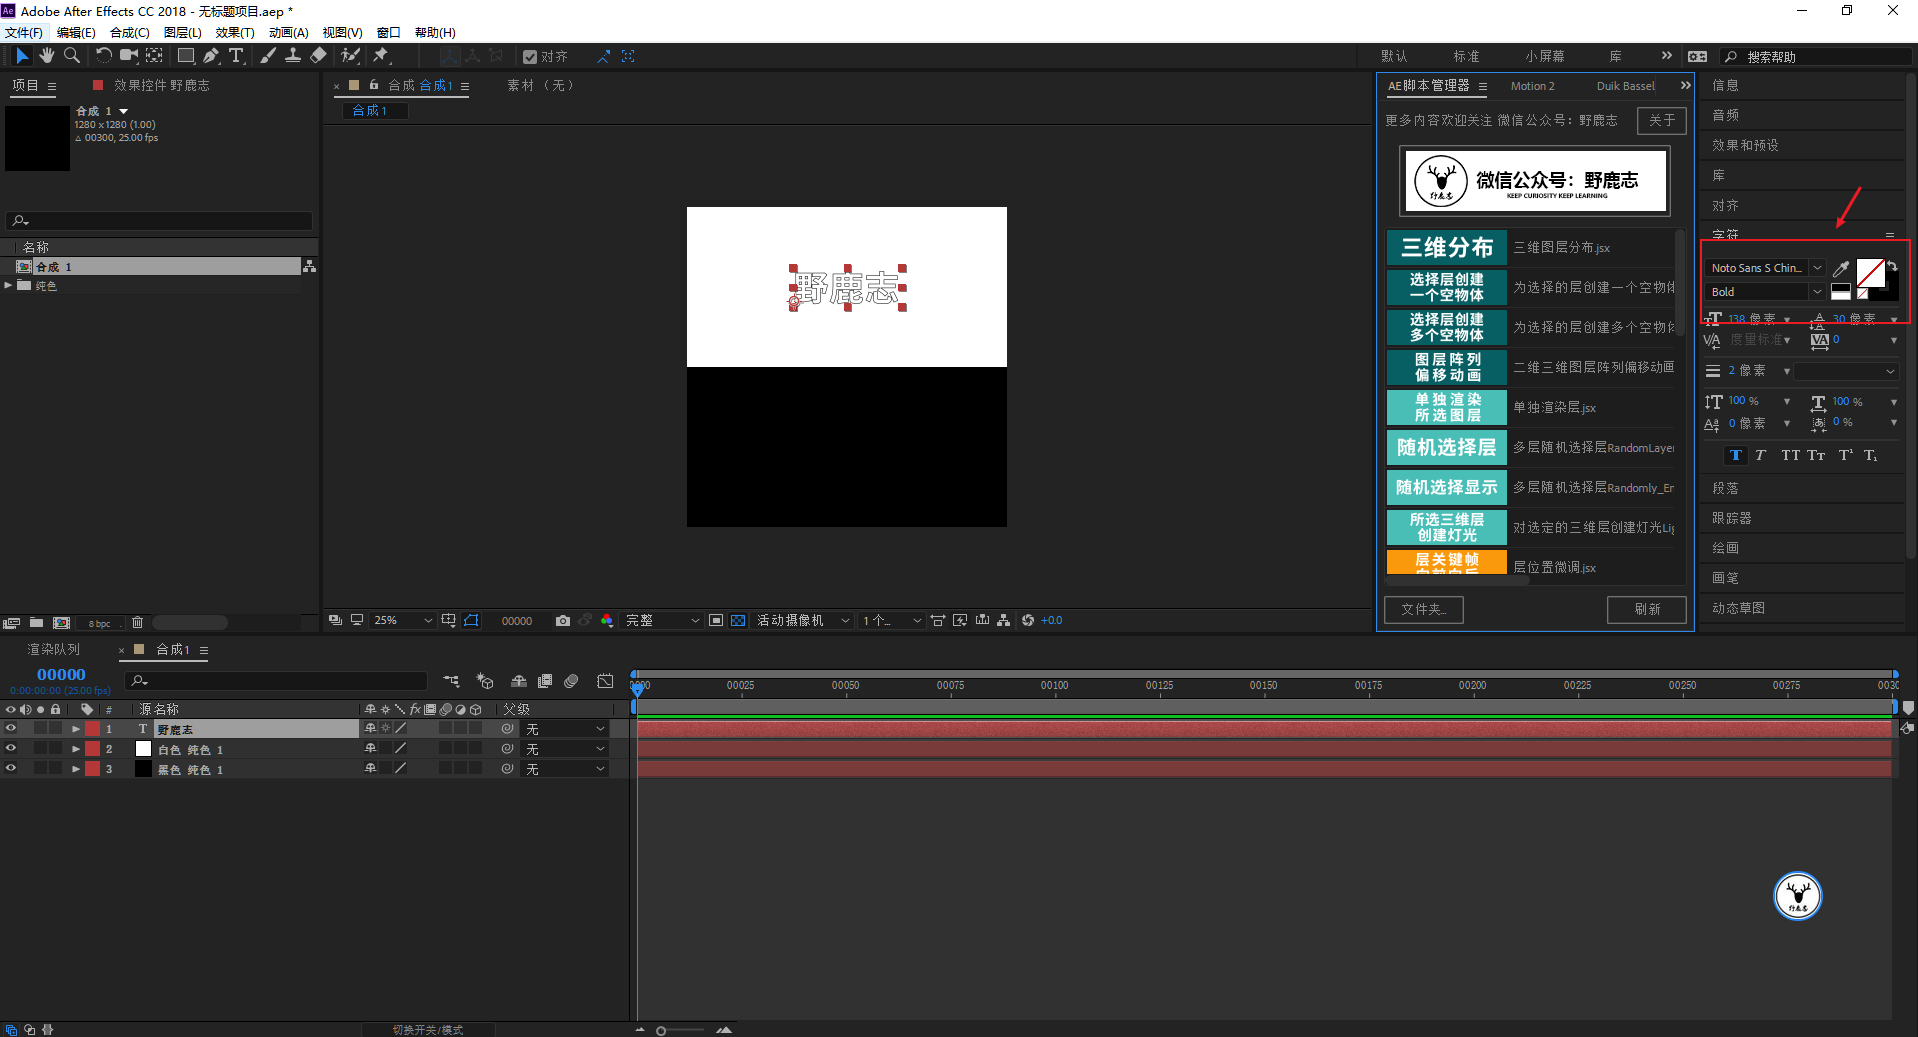
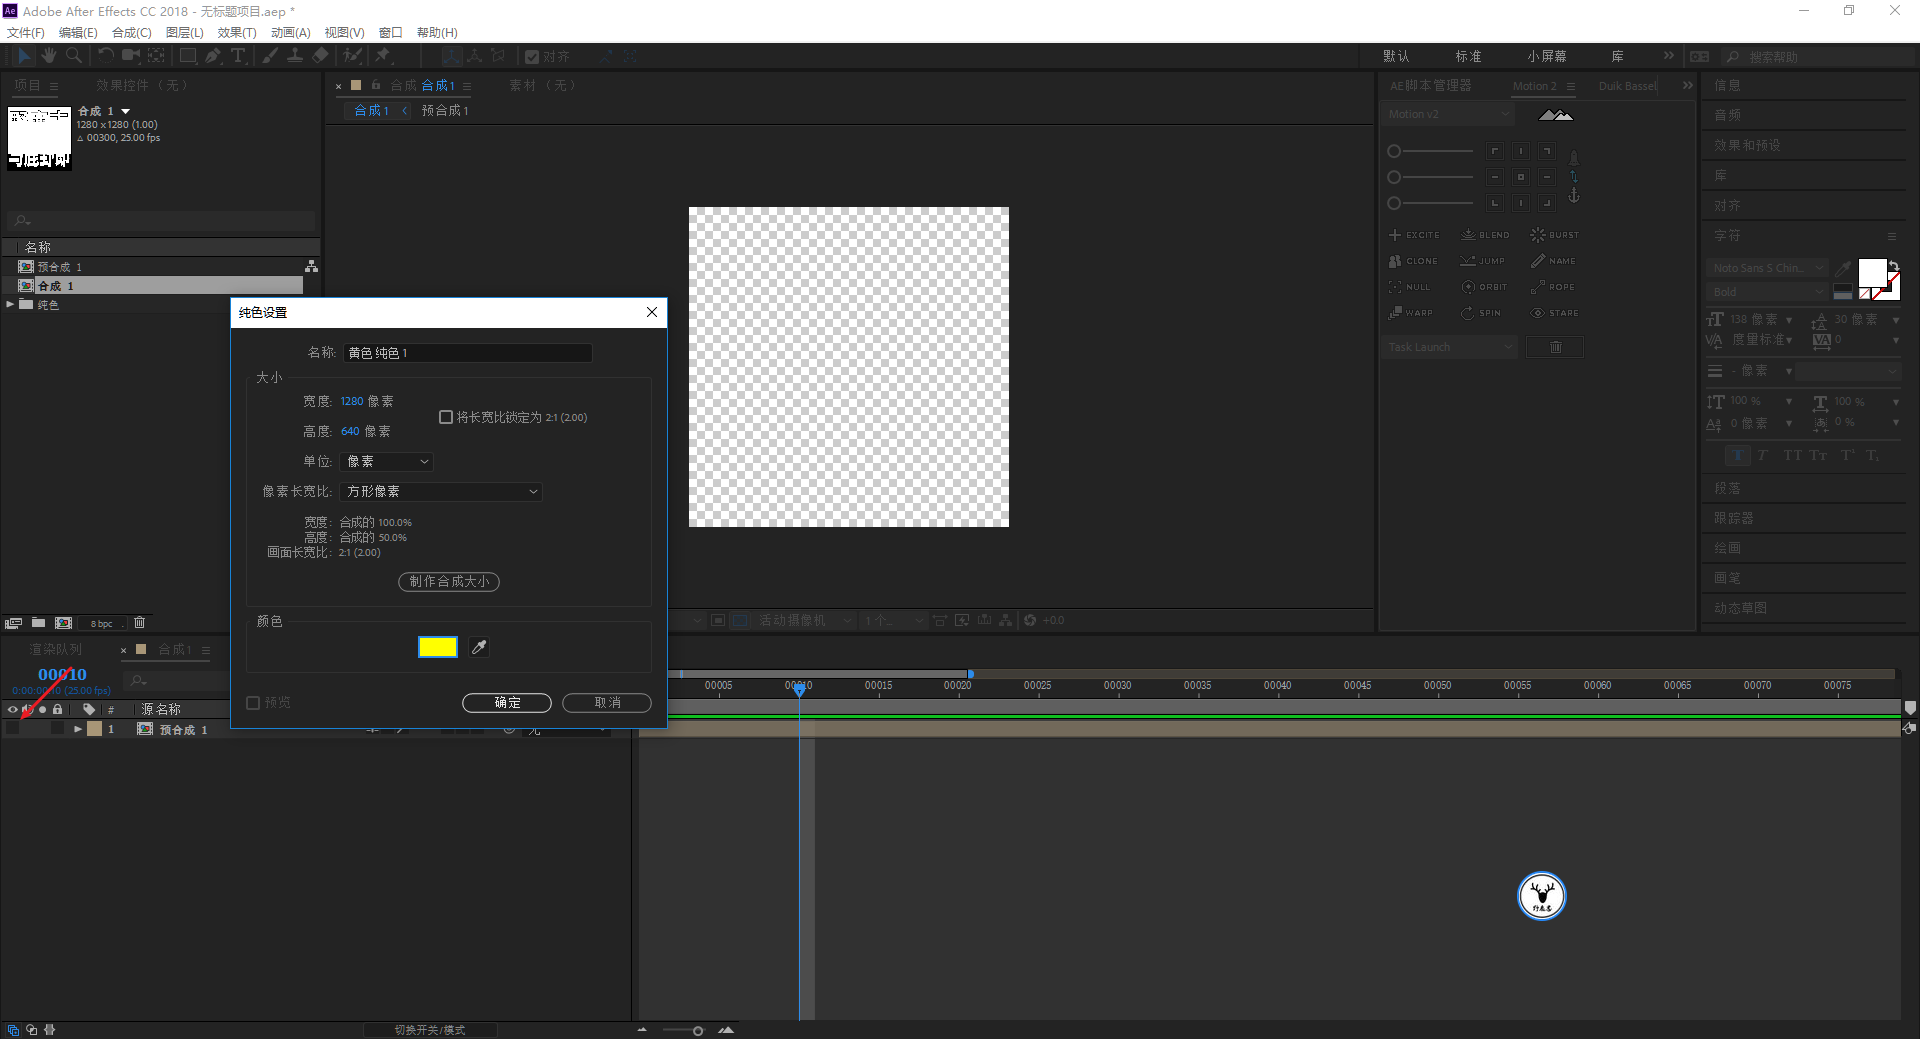
Then create a new black and white solid color layer, this step needless to say:

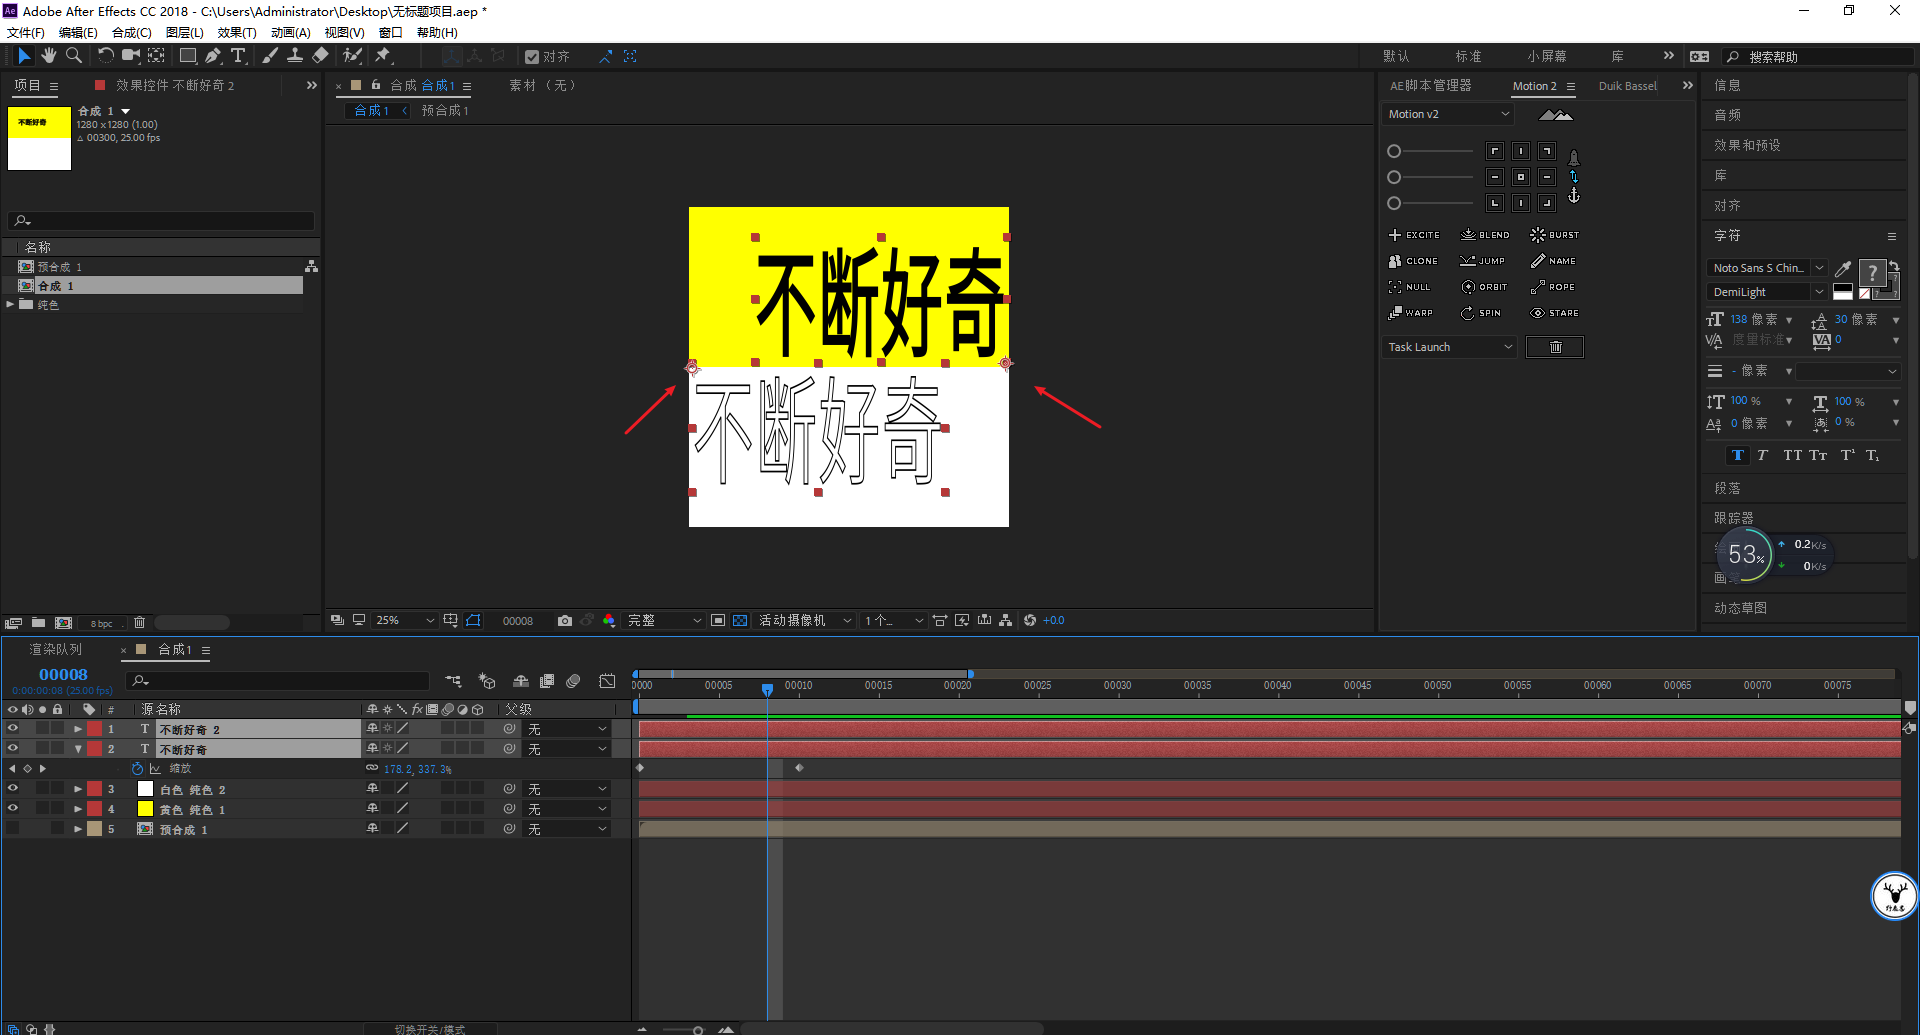
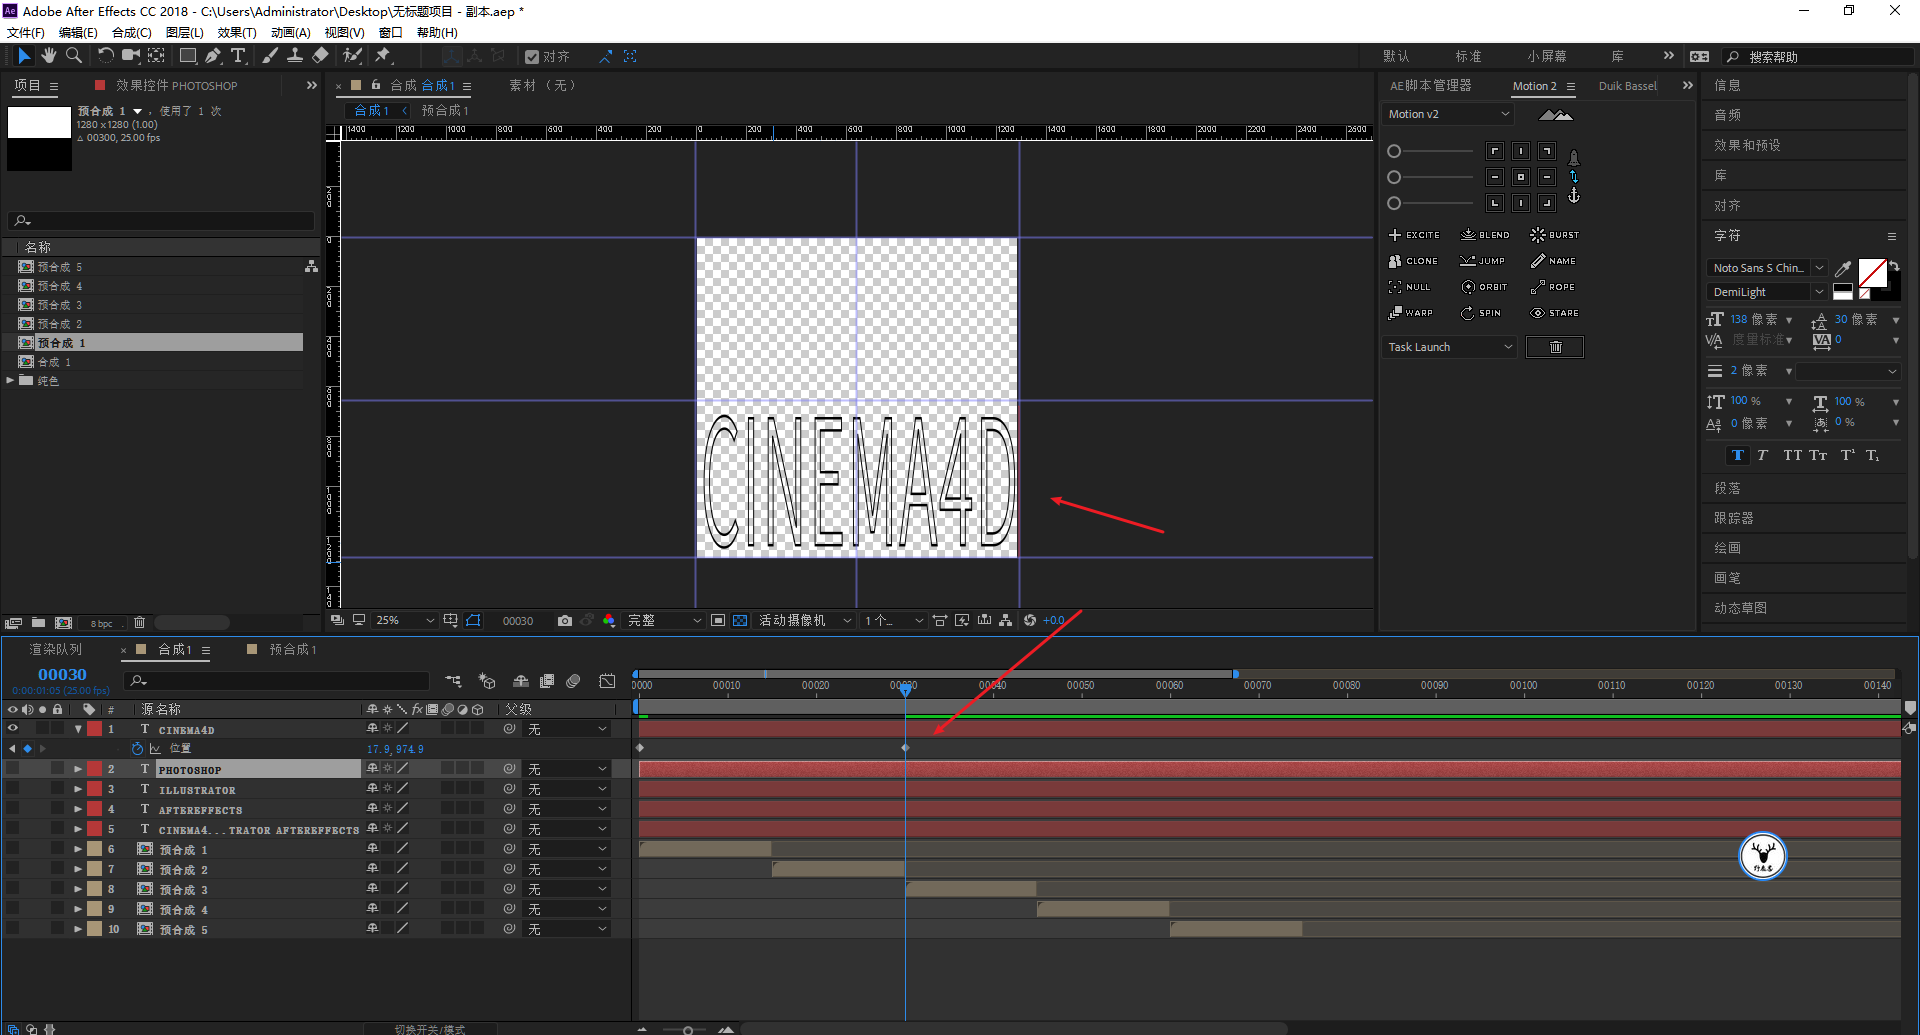
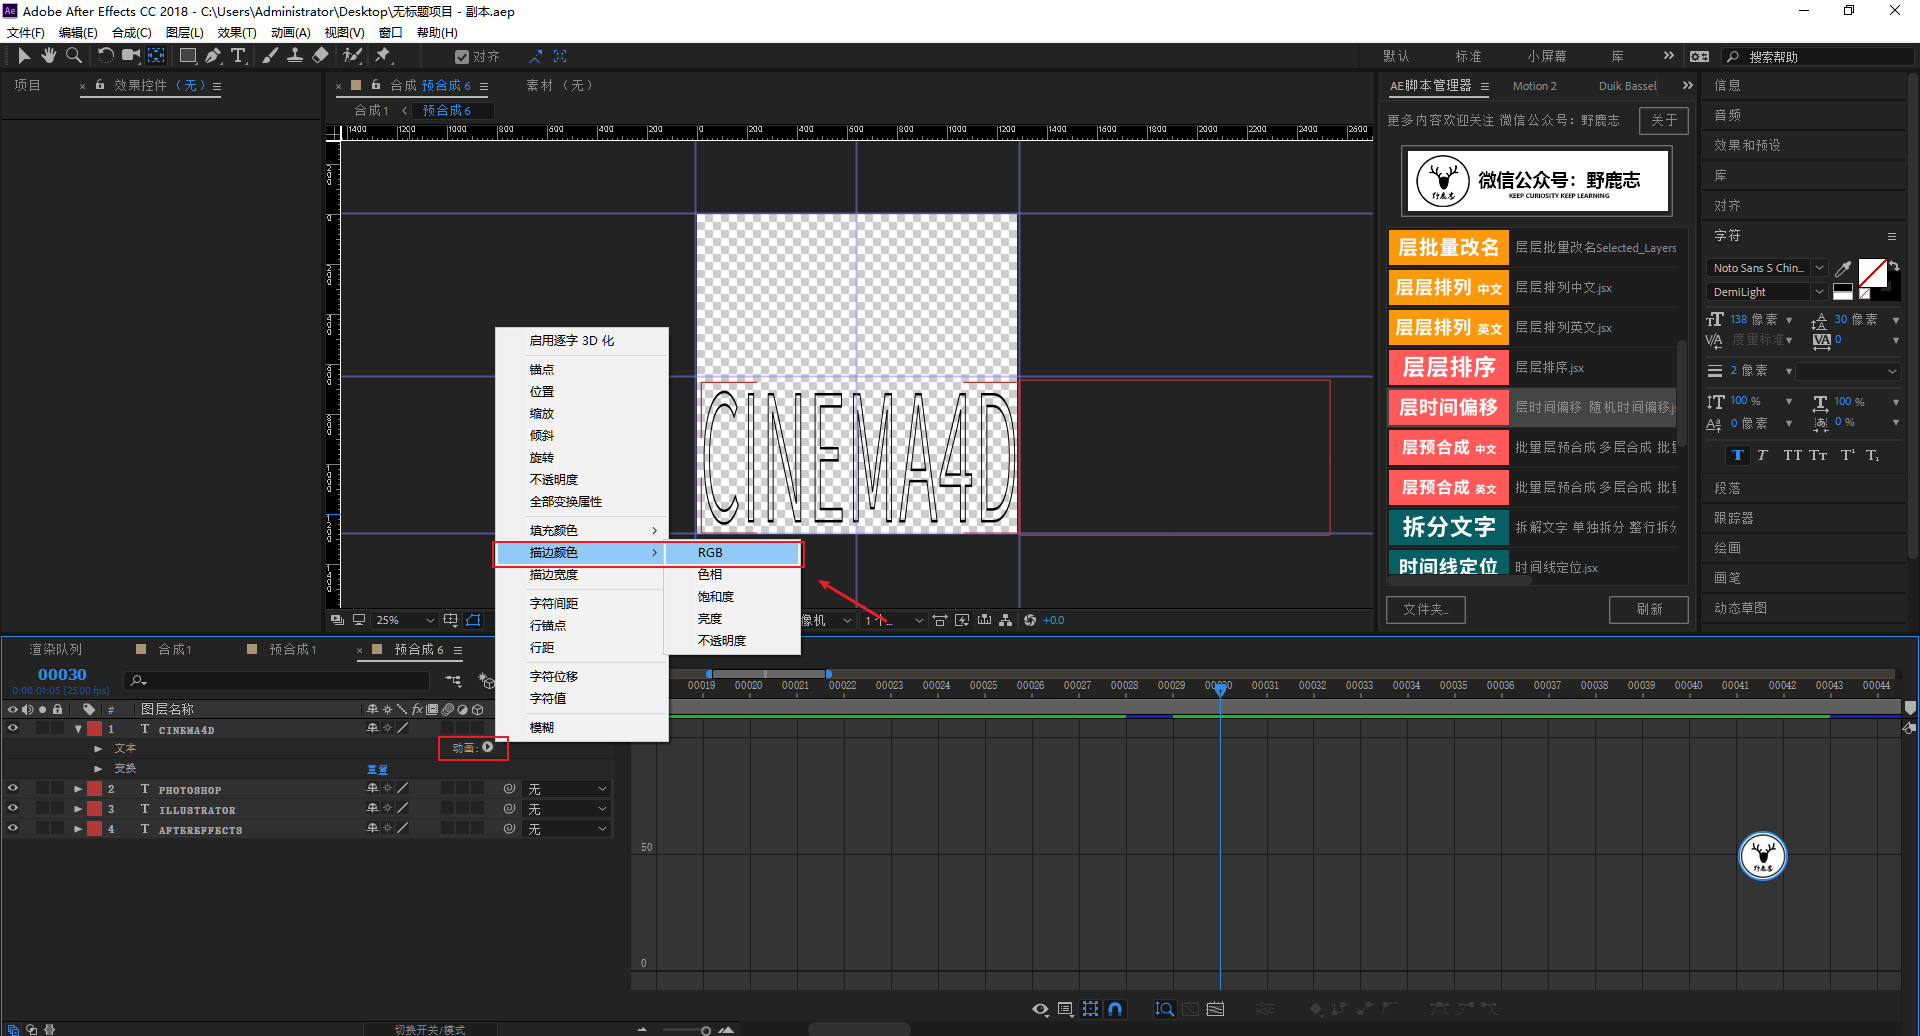
The first one is a text animation that stretches from top to bottom. First, type the text, with black strokes and no fill color:
At this time, you will find that the anchor point of the text is in the lower left corner. It is not very convenient to scale the text directly, so by default, we use the anchor point tool at the top of the AE interface to manually shift the anchor point of the layer.
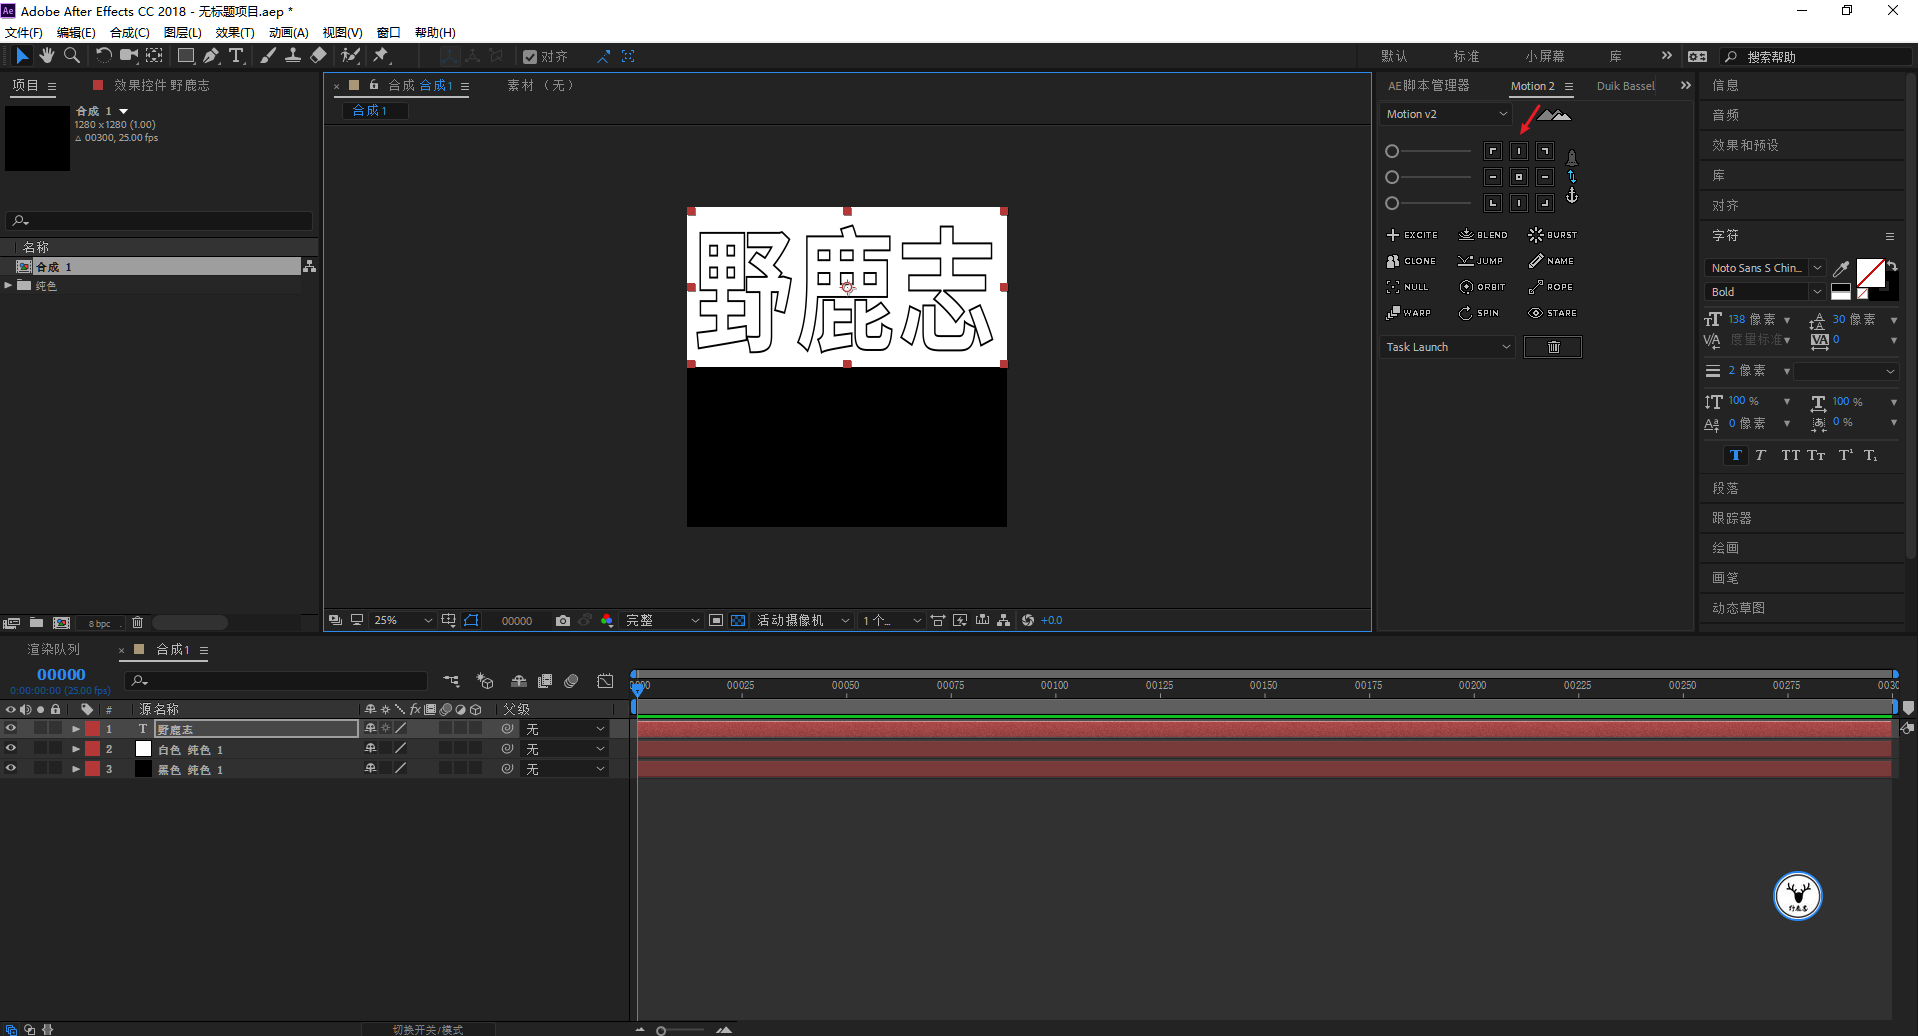
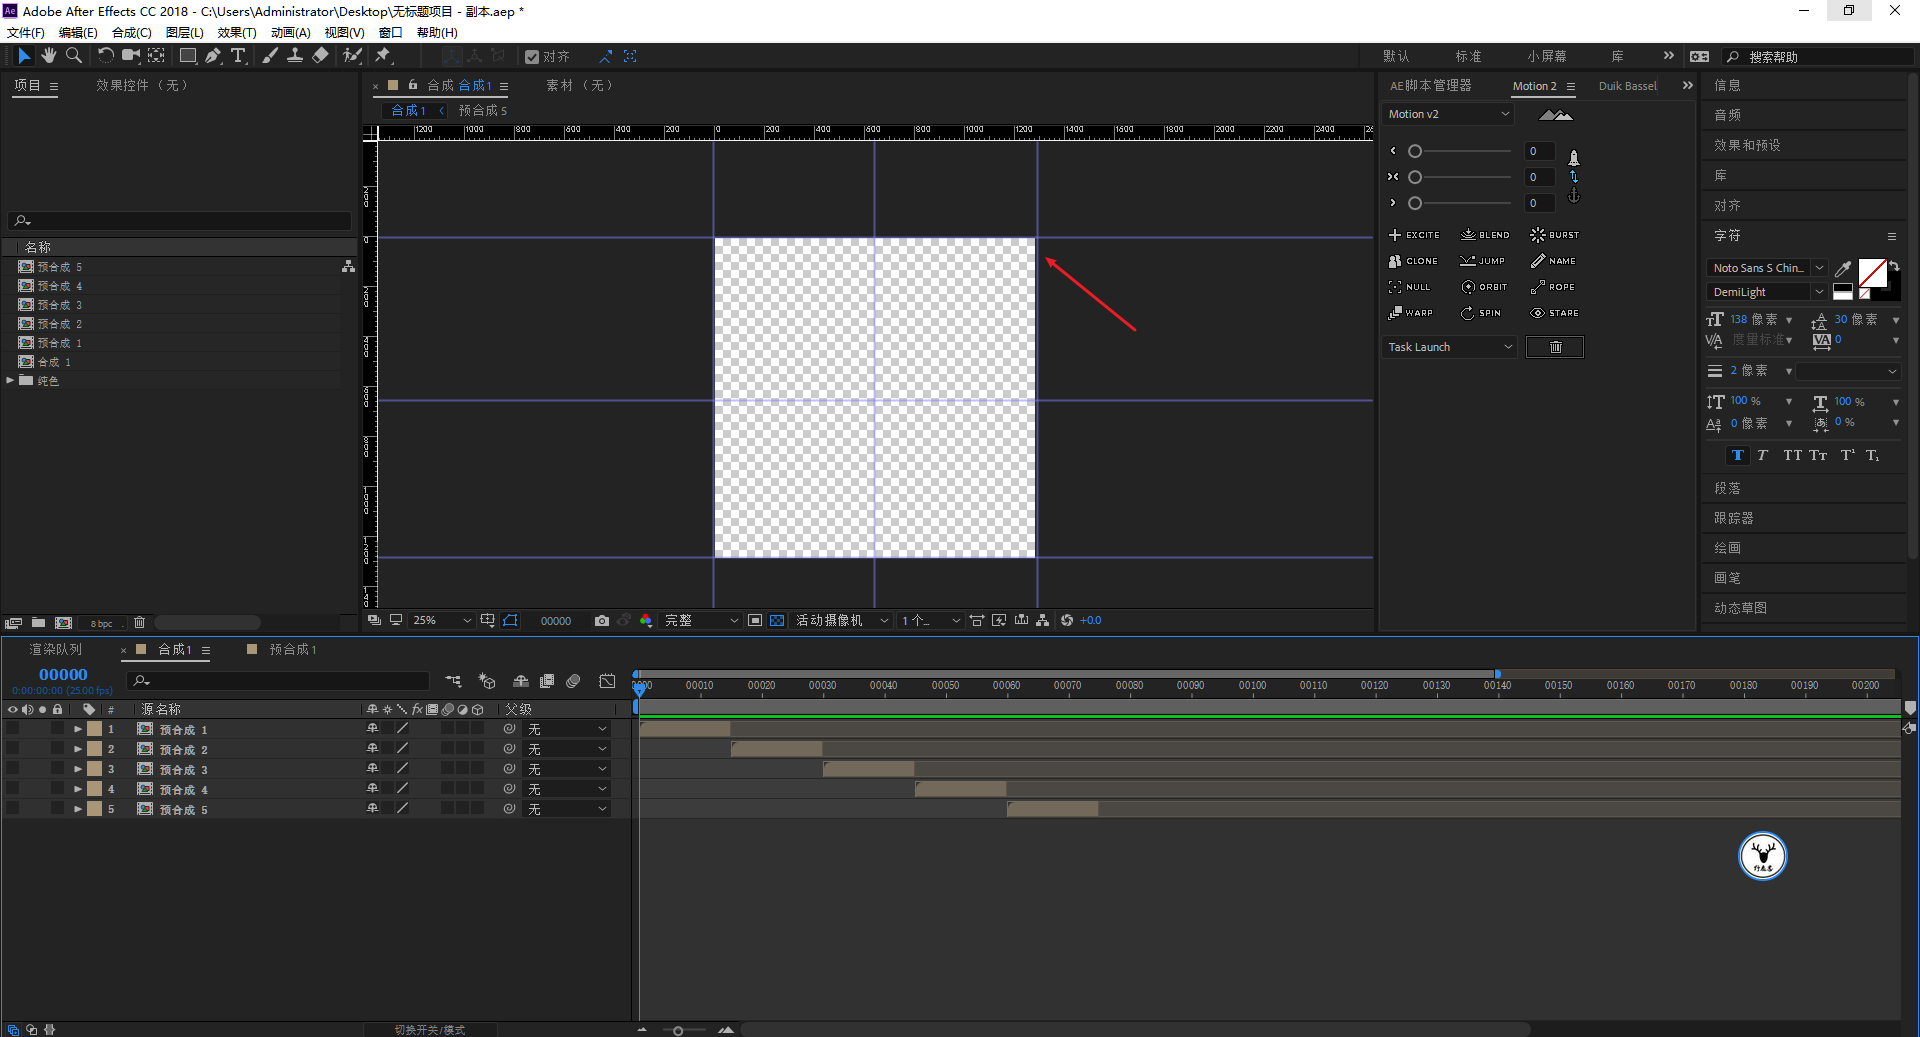
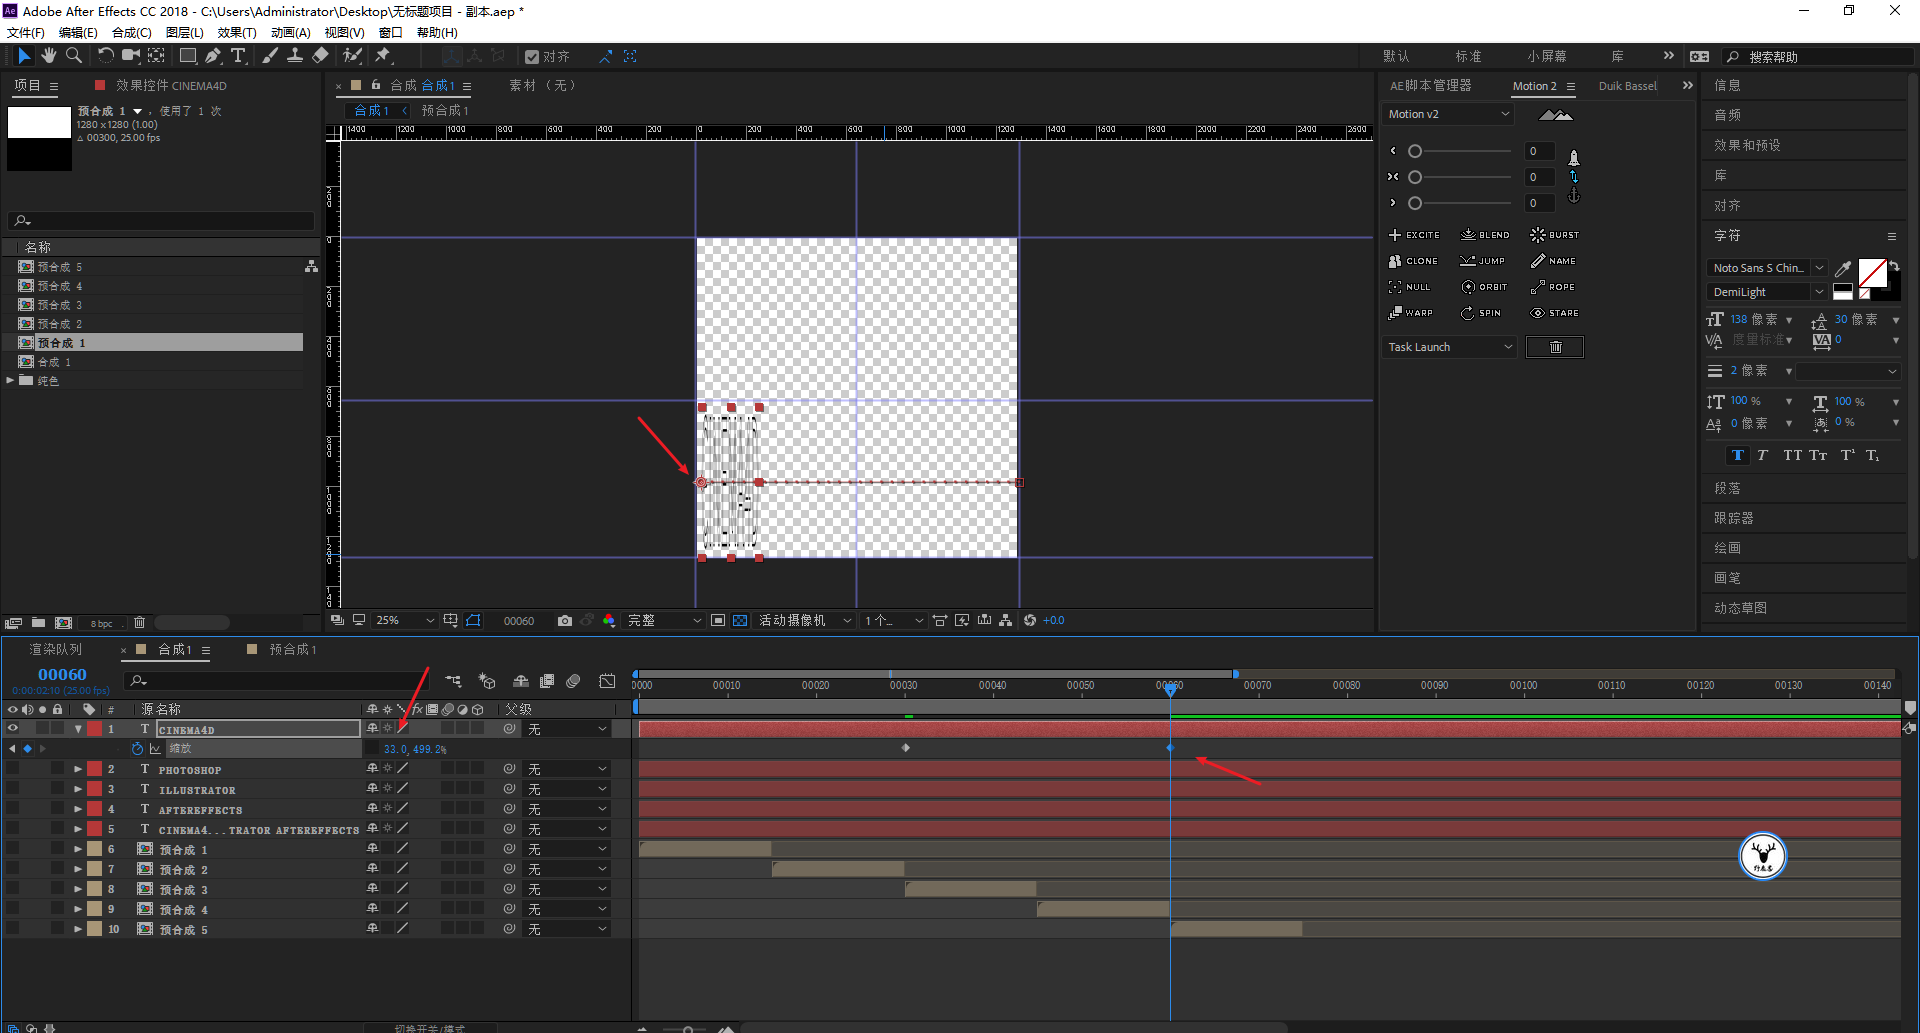
But this is not efficient, here we need to use this script called Motion2, click on the red arrow, you can directly modify the anchor point position through the instructions on the panel, which is quite convenient:

First center the anchor point of the text, after adjusting the size of the text, use motion2 to place the anchor point on the top of the text:
Select the text layer, press the shortcut key S to call out the scaling properties, and cancel the ratio lock:
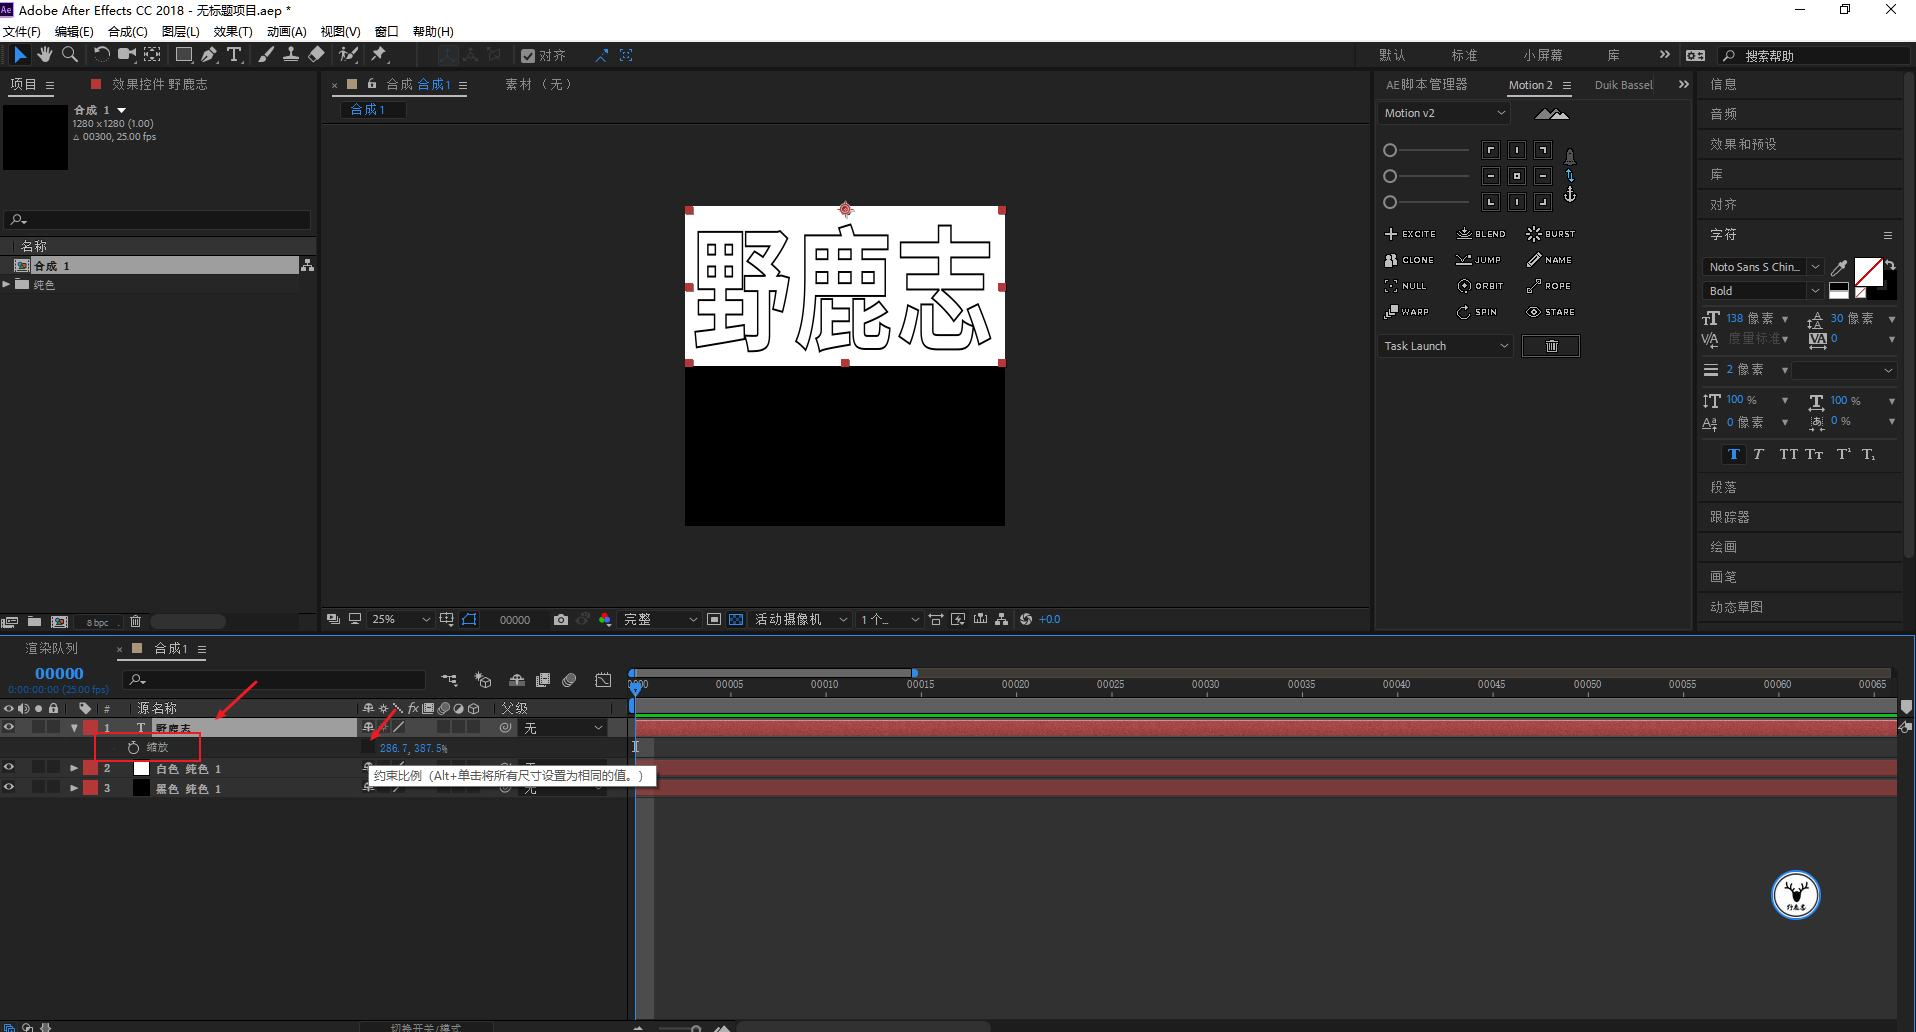
Let’s do 10 frames for the previous zoom animation. First, the original size is displayed on the 10th frame K, and then return to the 0th frame, and the height size is changed to 0:

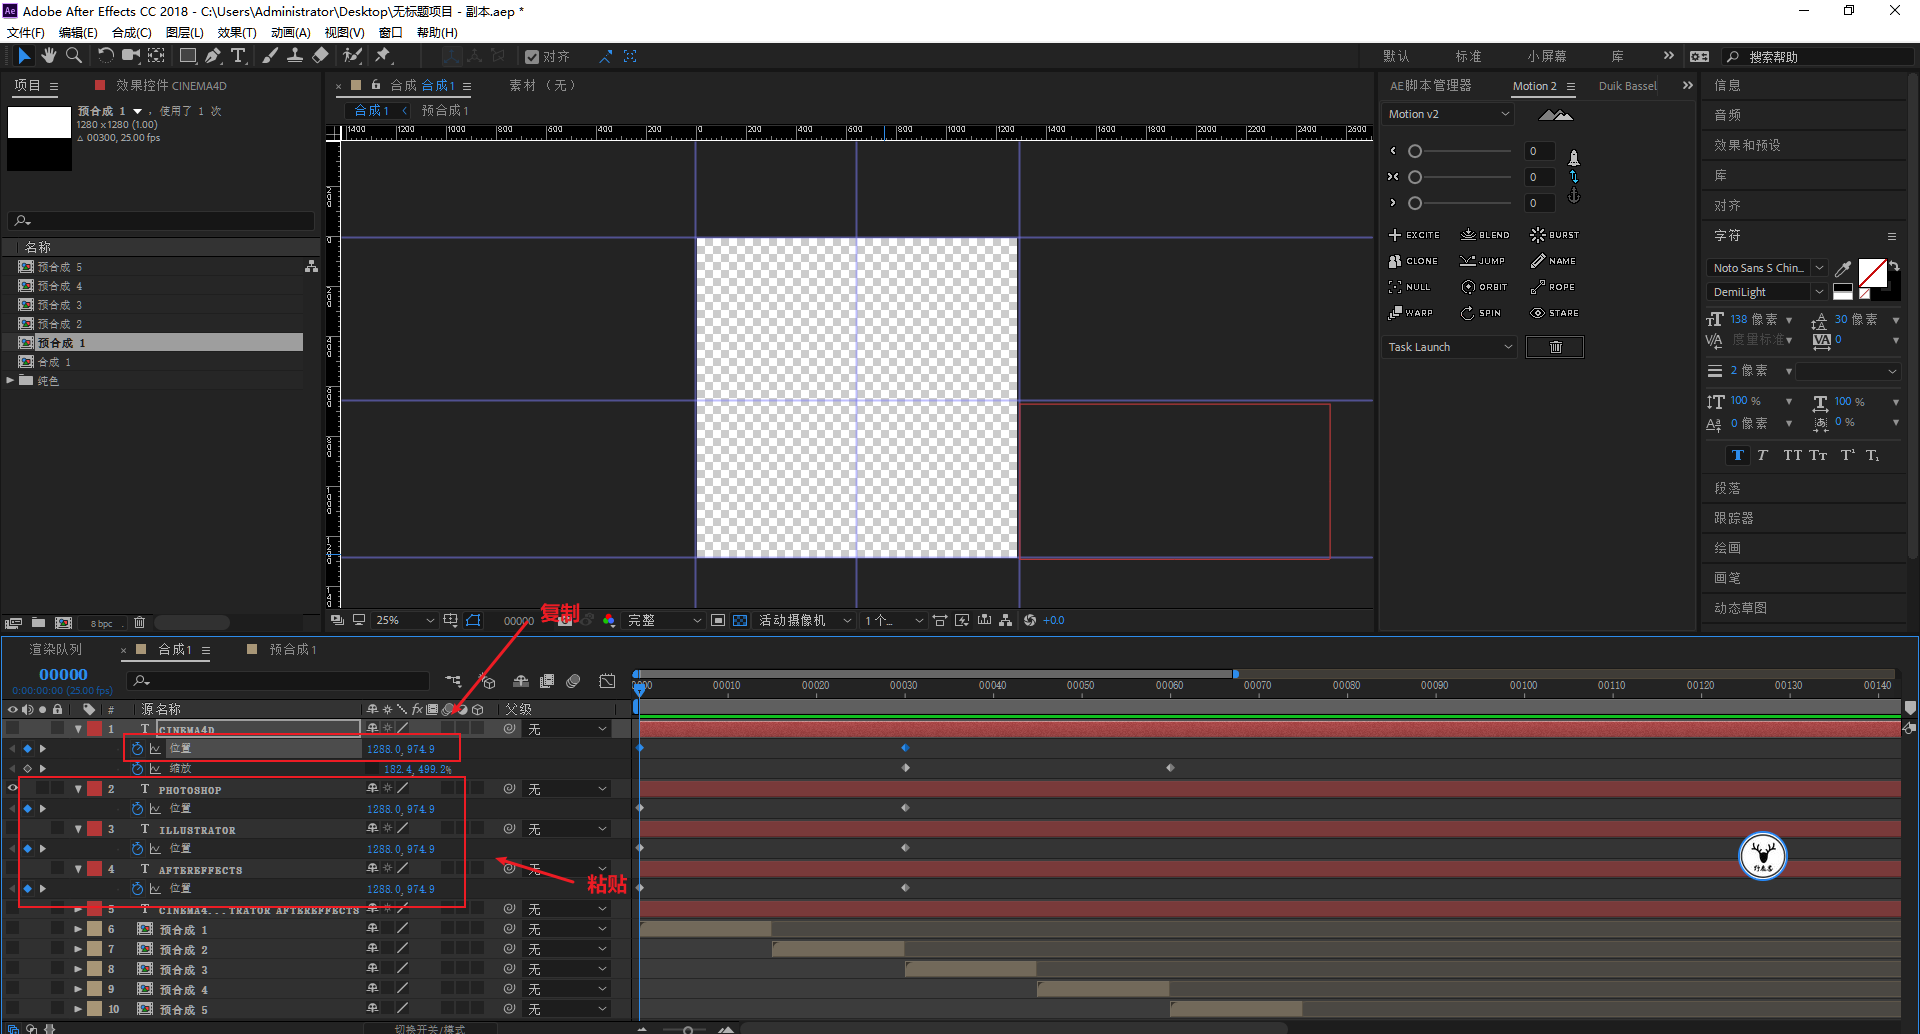
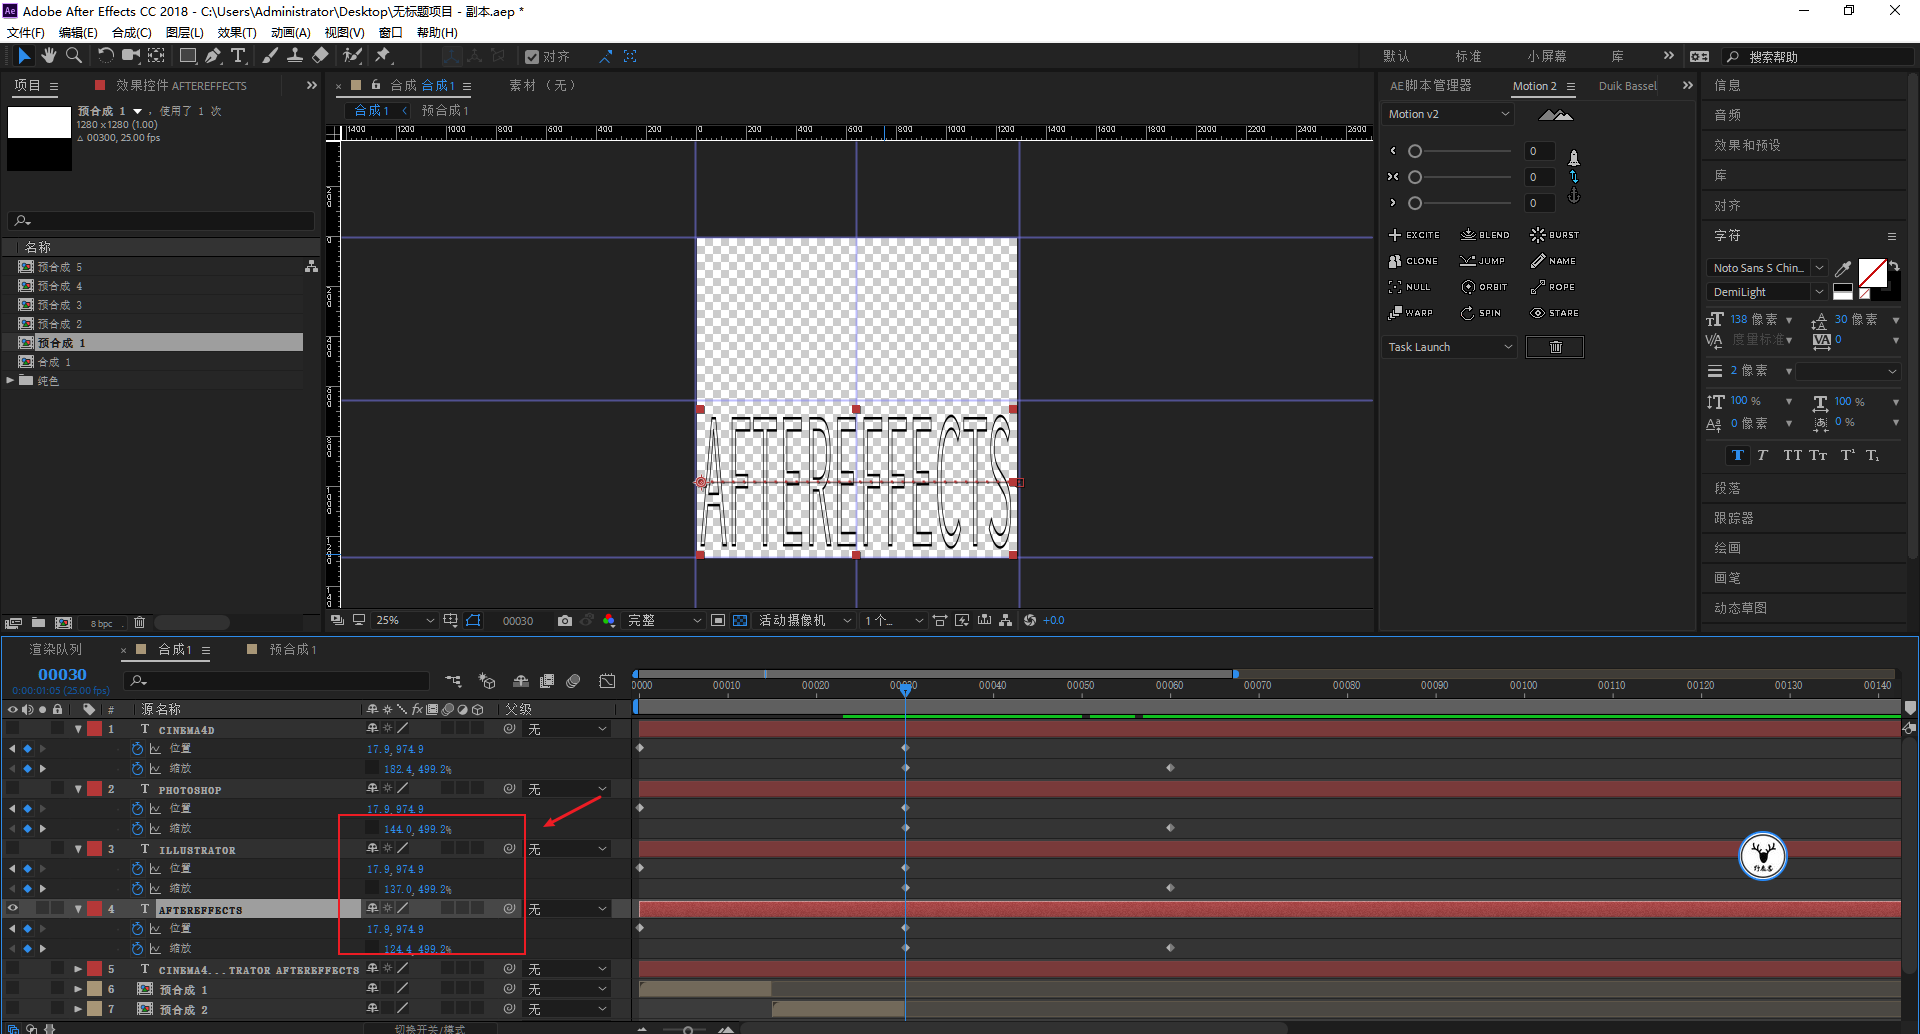
The text below is also the same. There is really nothing to say about this. The front part of today’s case effect is indeed too simple. It is very fast to cooperate with the script operation. Let’s take it as a small exercise:
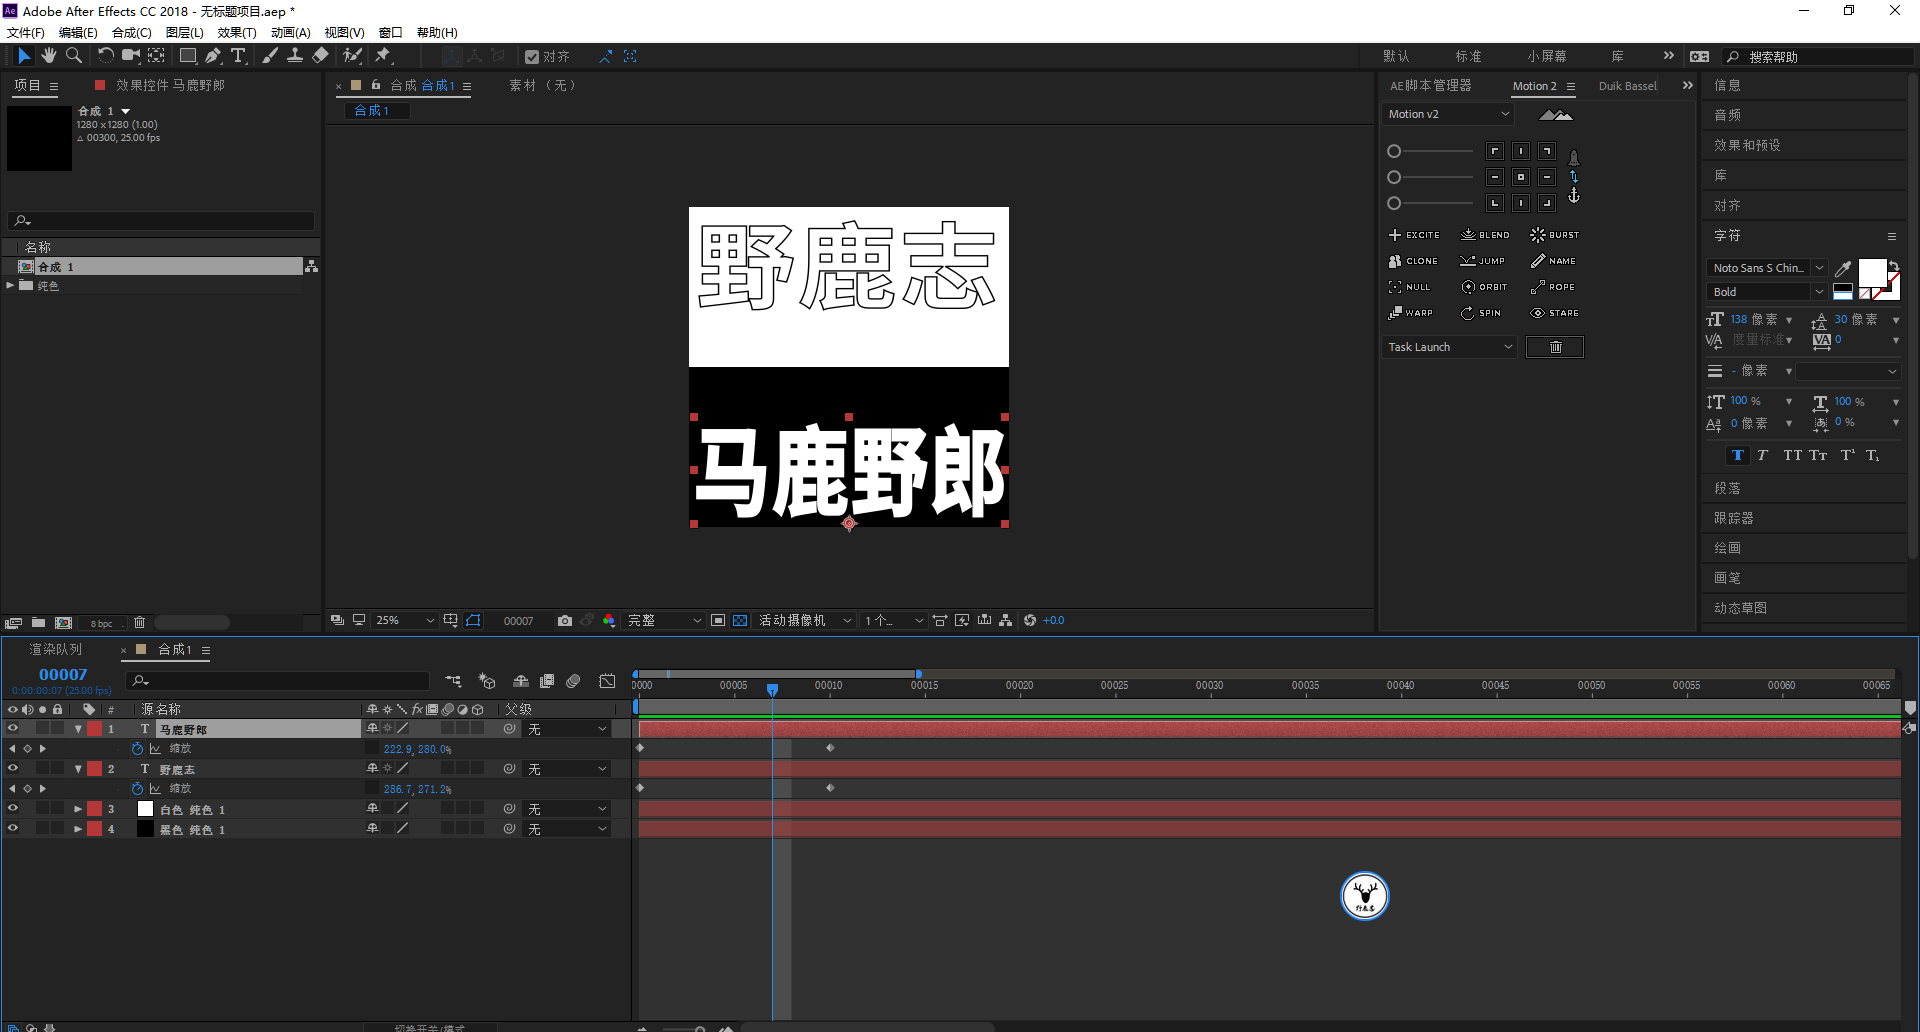
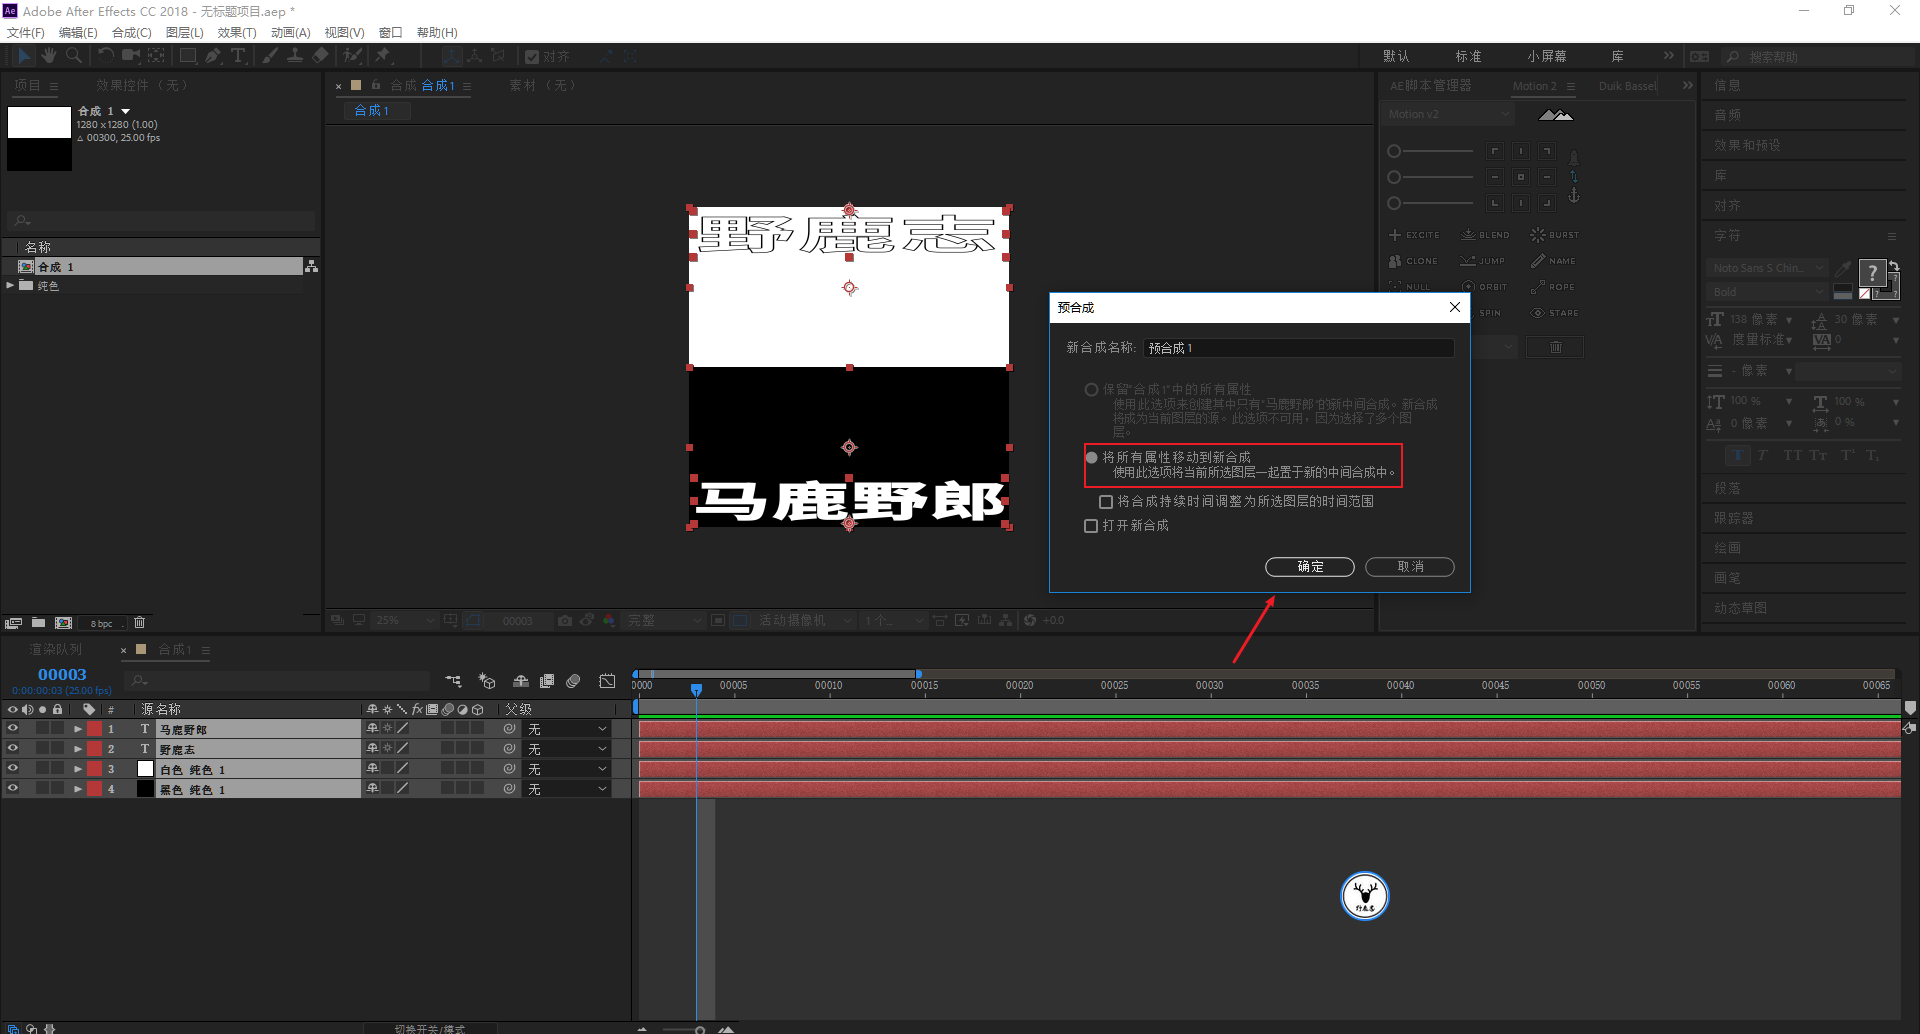
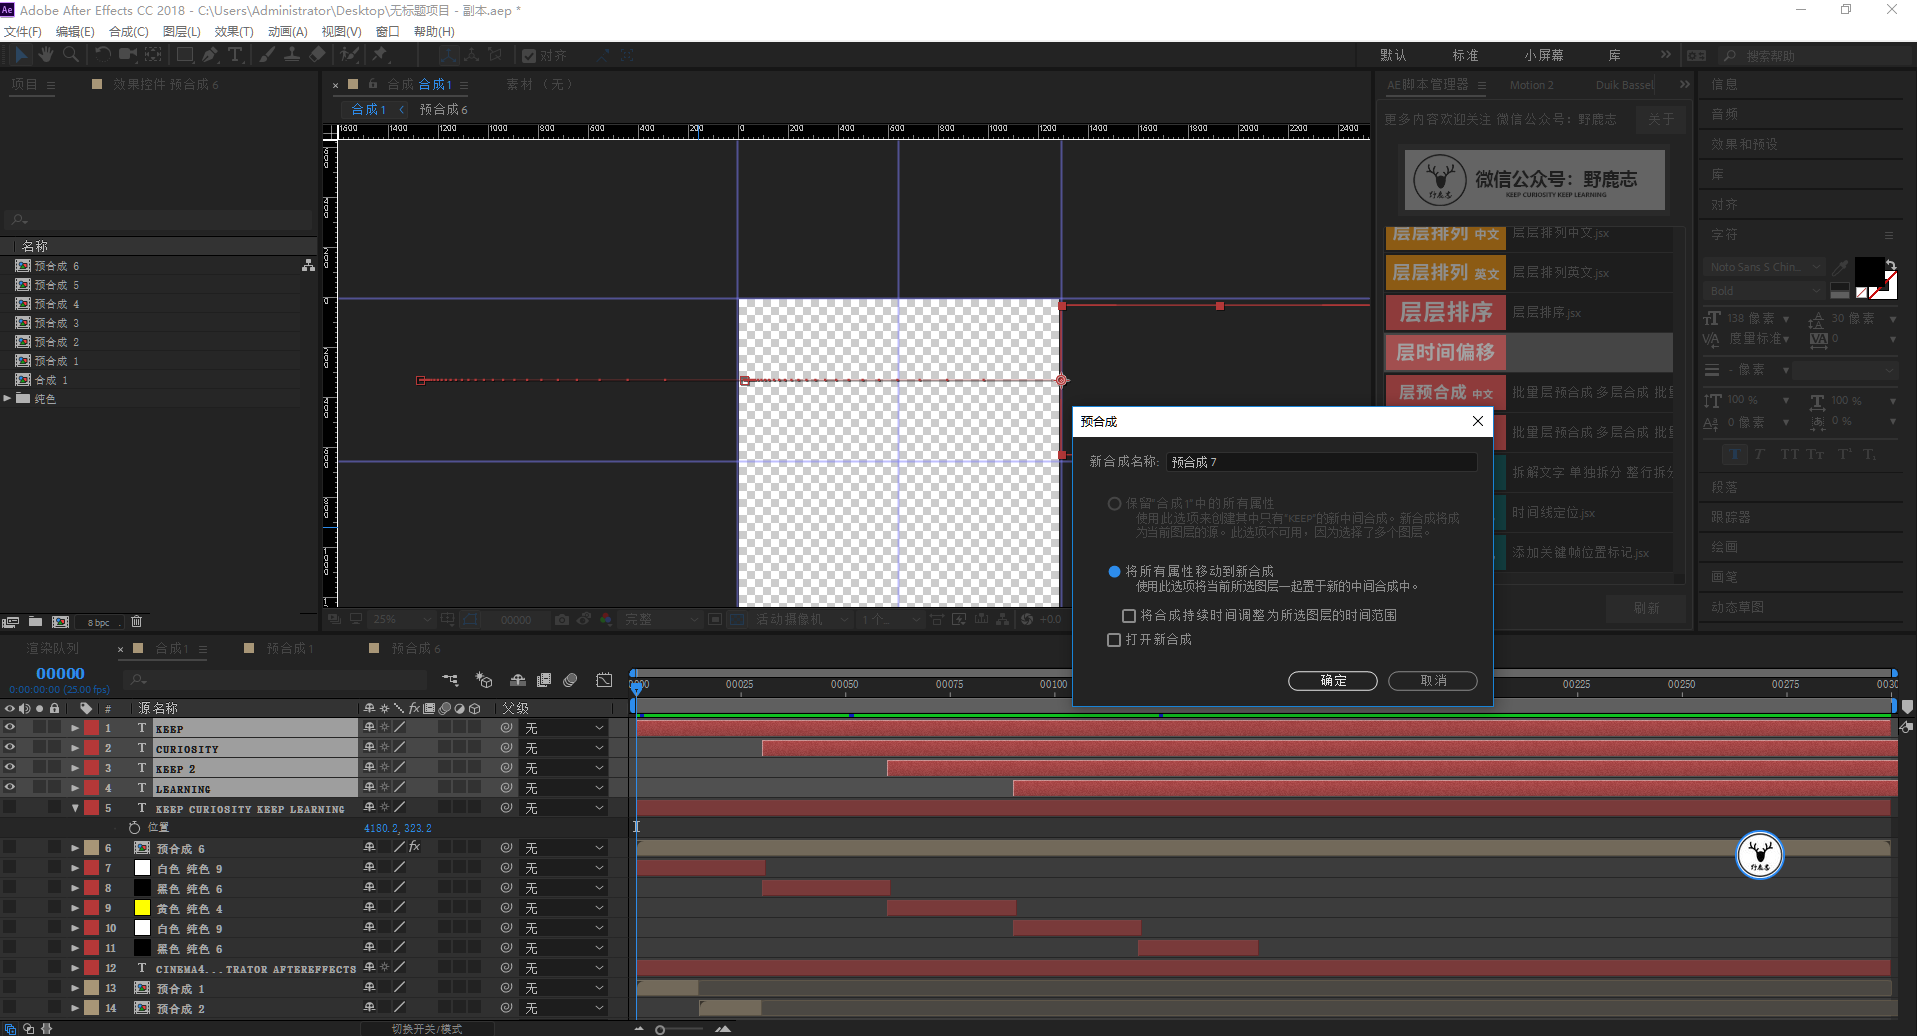
After the animation is done, select all the layers, press the shortcut key Kangqiujiaxie Vodka C, and add them to the pre-composition, so that the first text animation is ready:
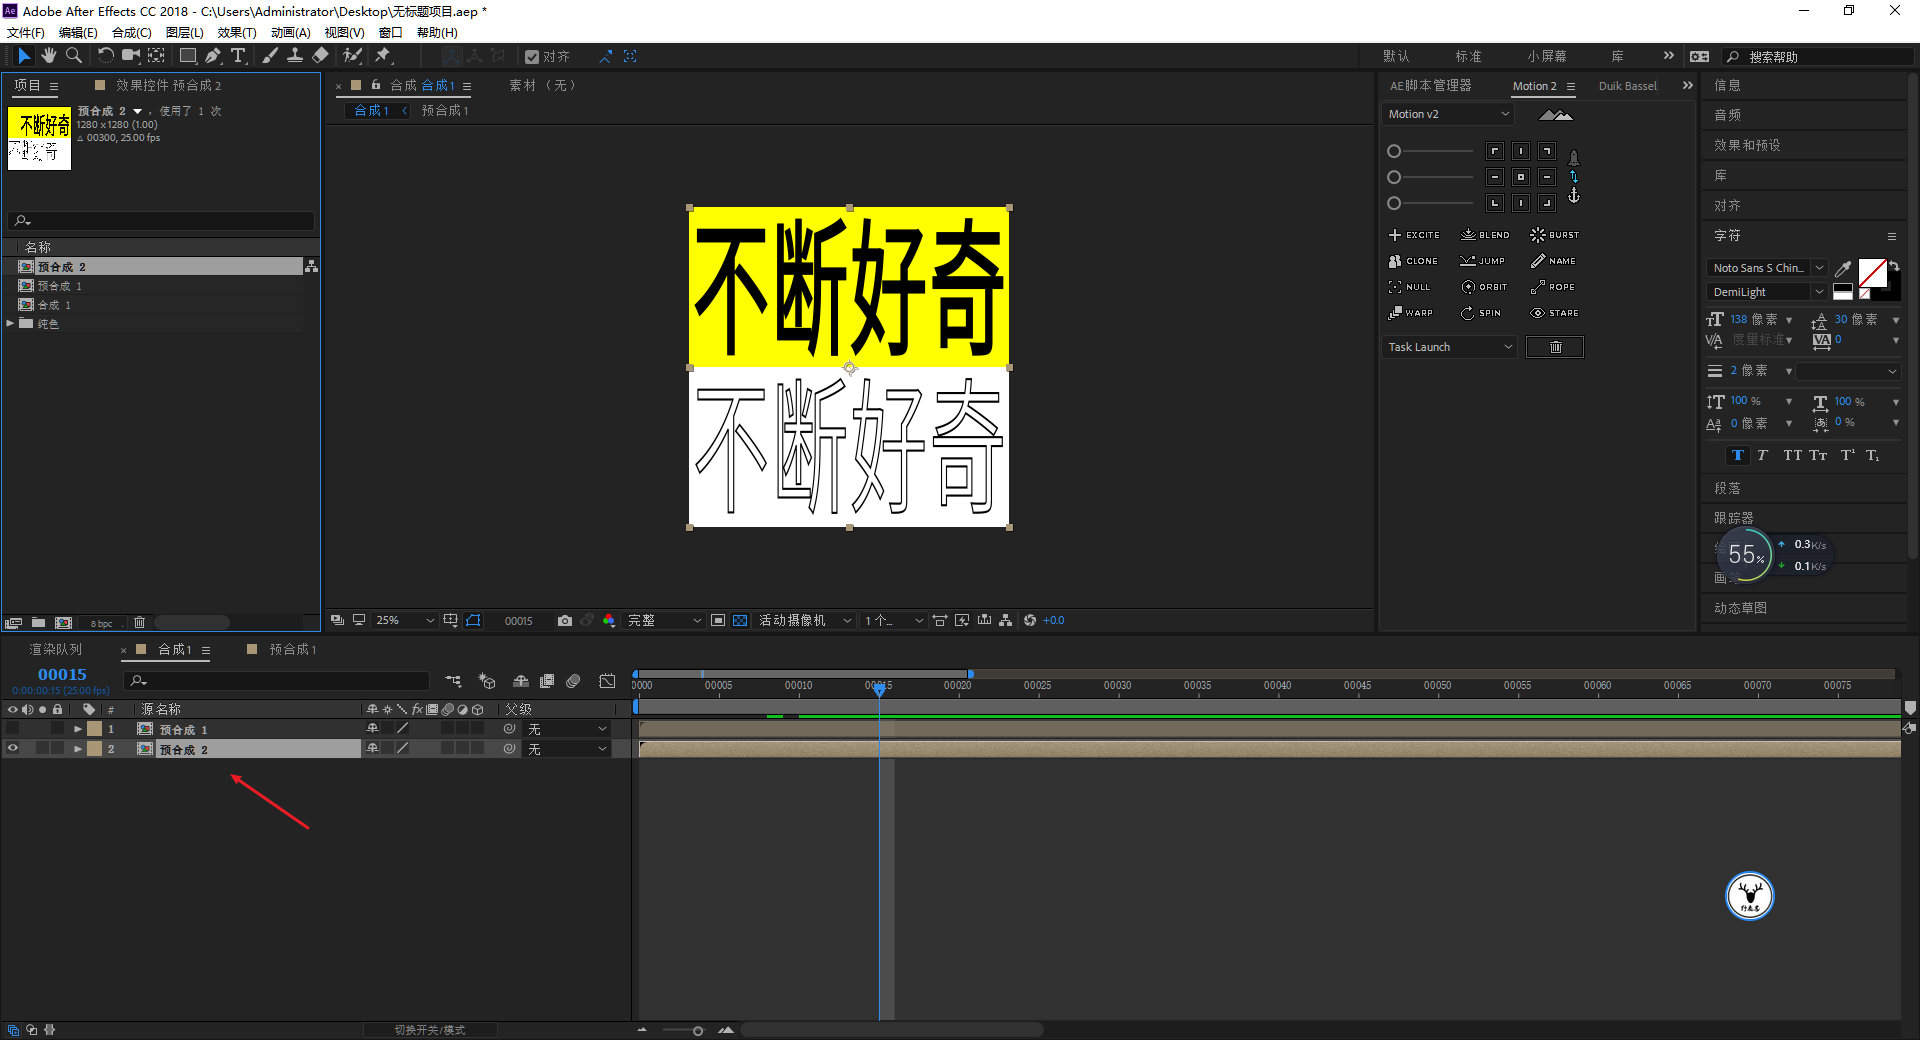
After you are done, you can hide the first precomposition, and then continue to create a new solid color layer to start the second animation:
The second animation is the proportional scaling animation of the text from the upper left corner and the lower right corner. This is simpler. After making one of the text animations, Kang Qiujia D copied it out.
Just change the anchor point and position of the text. Here I think a thinner font is better, so I modified the thickness of the text uniformly:
After finishing it, I also added Kangqiu Jiaxie Vodka C to the pre-synthesis, and then made the third text animation:
In this way, I made five simple text zoom animations, and I won’t write them all here, which is not the focus of today’s article.
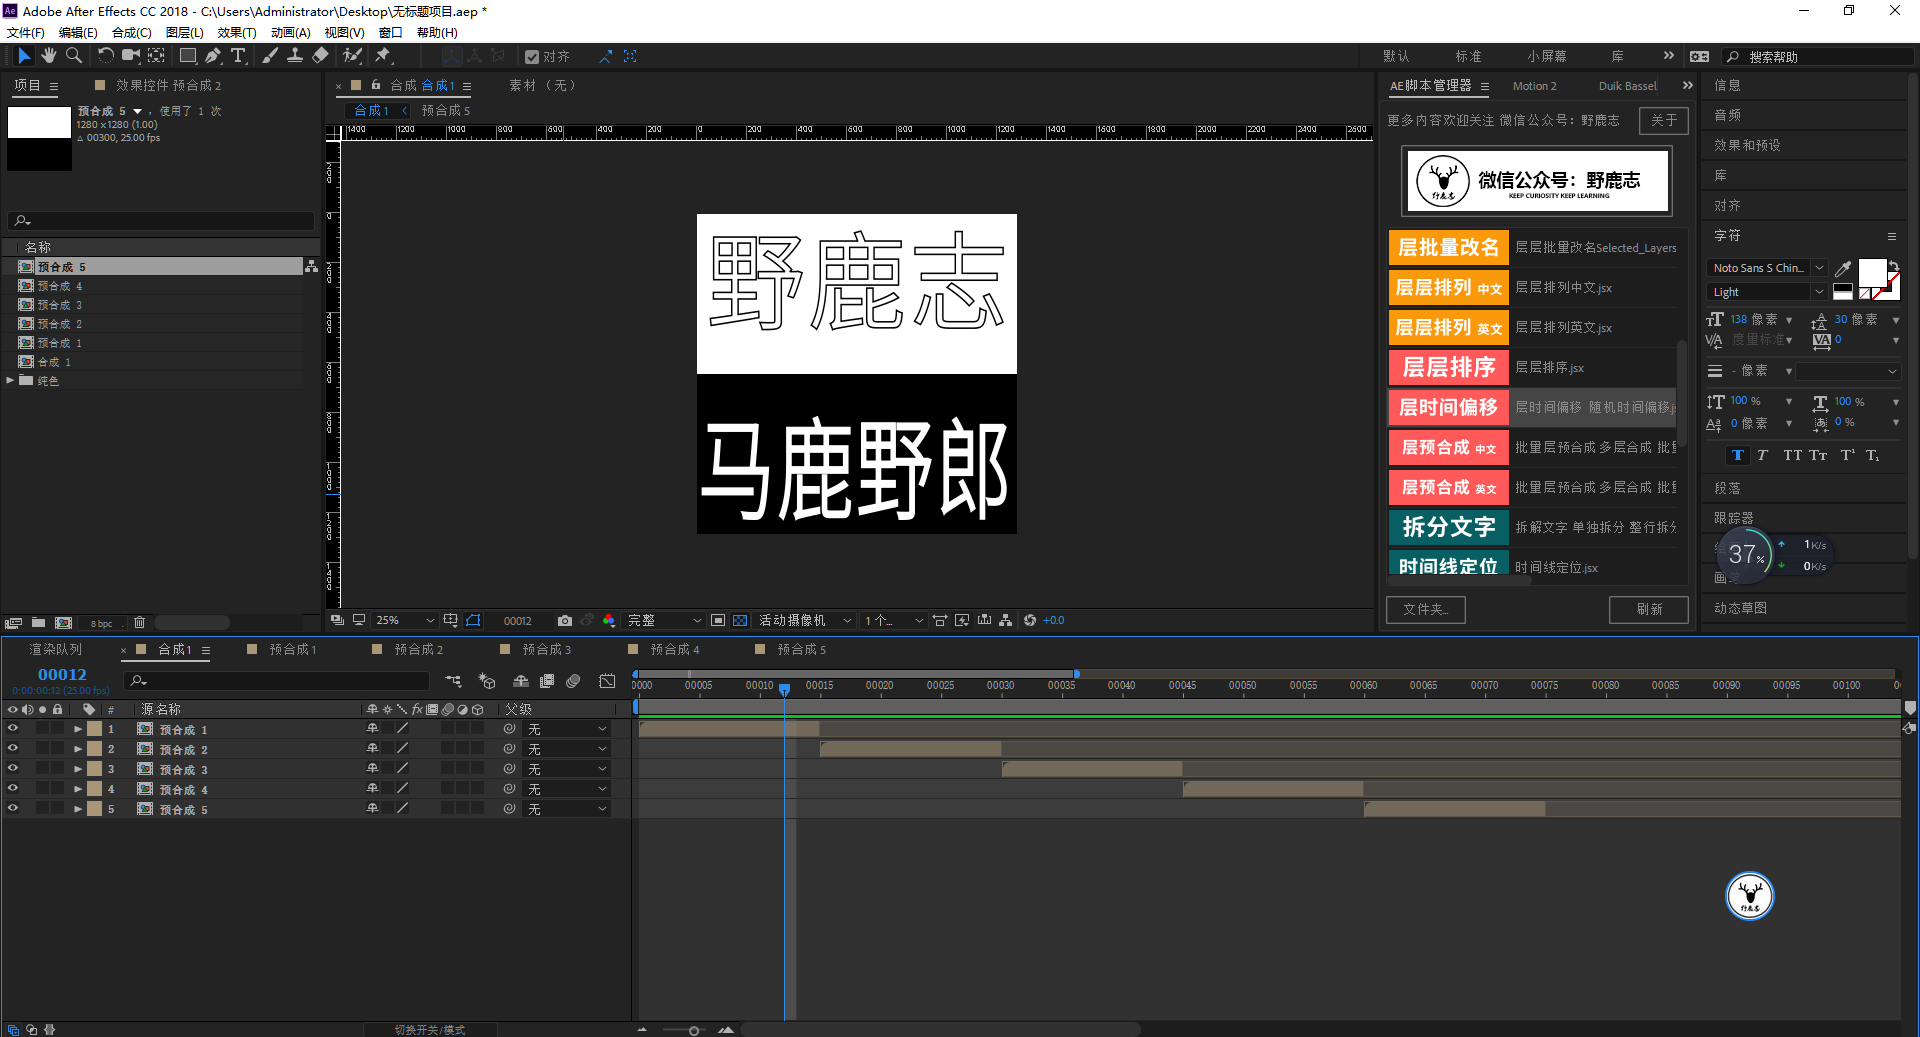
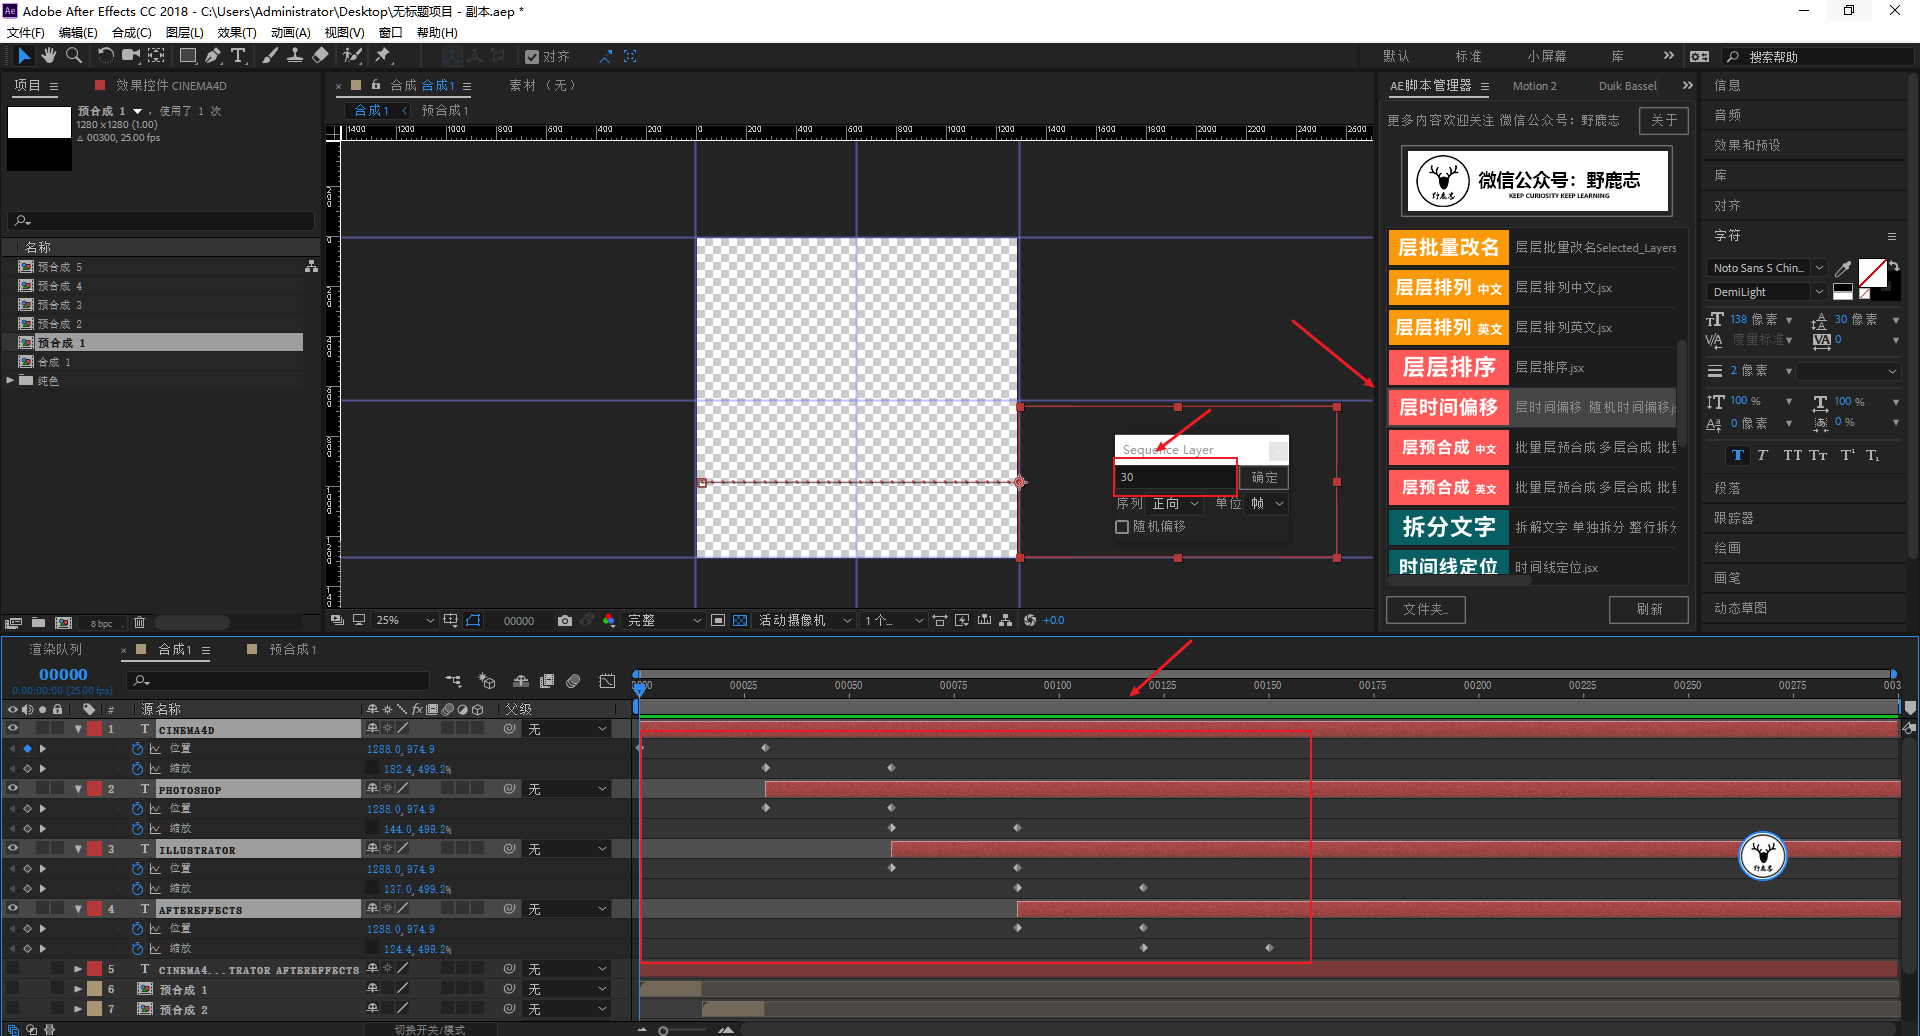
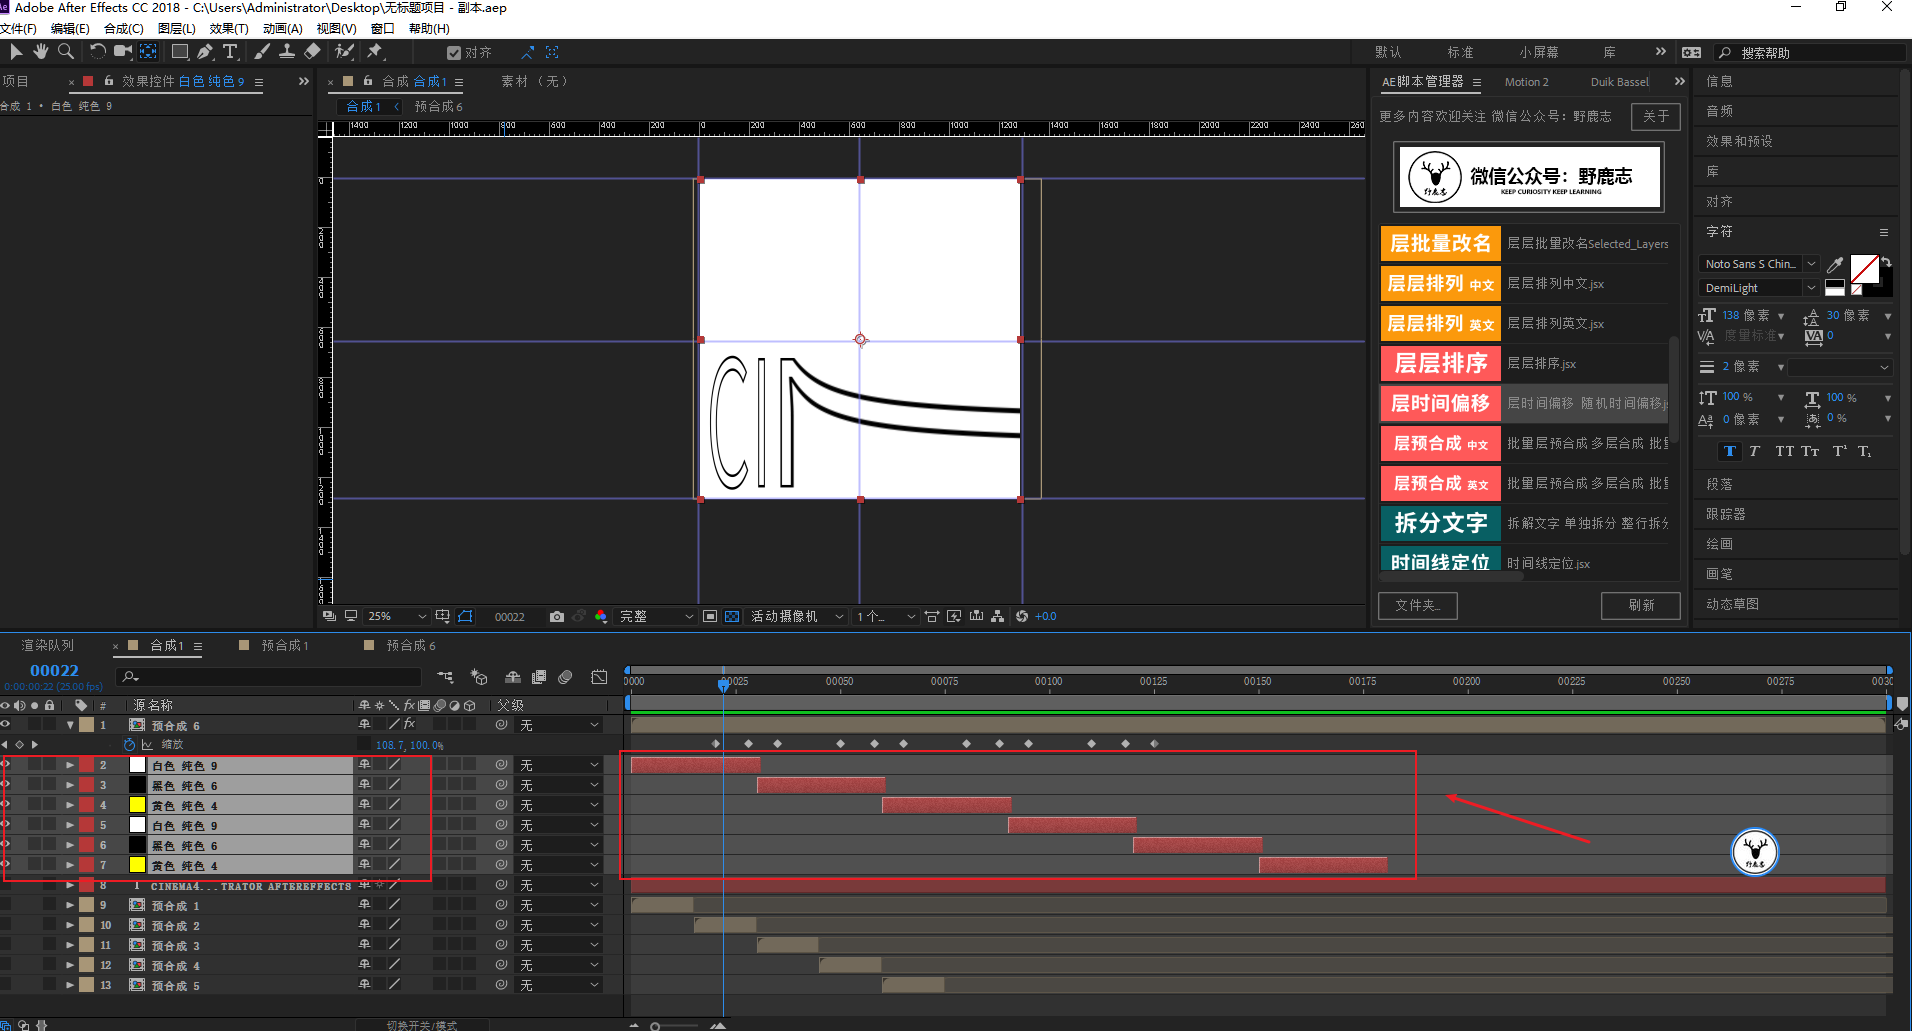
When finished, select the five precomposites and press Otter to add the square brackets to the right to cut off the redundant parts:
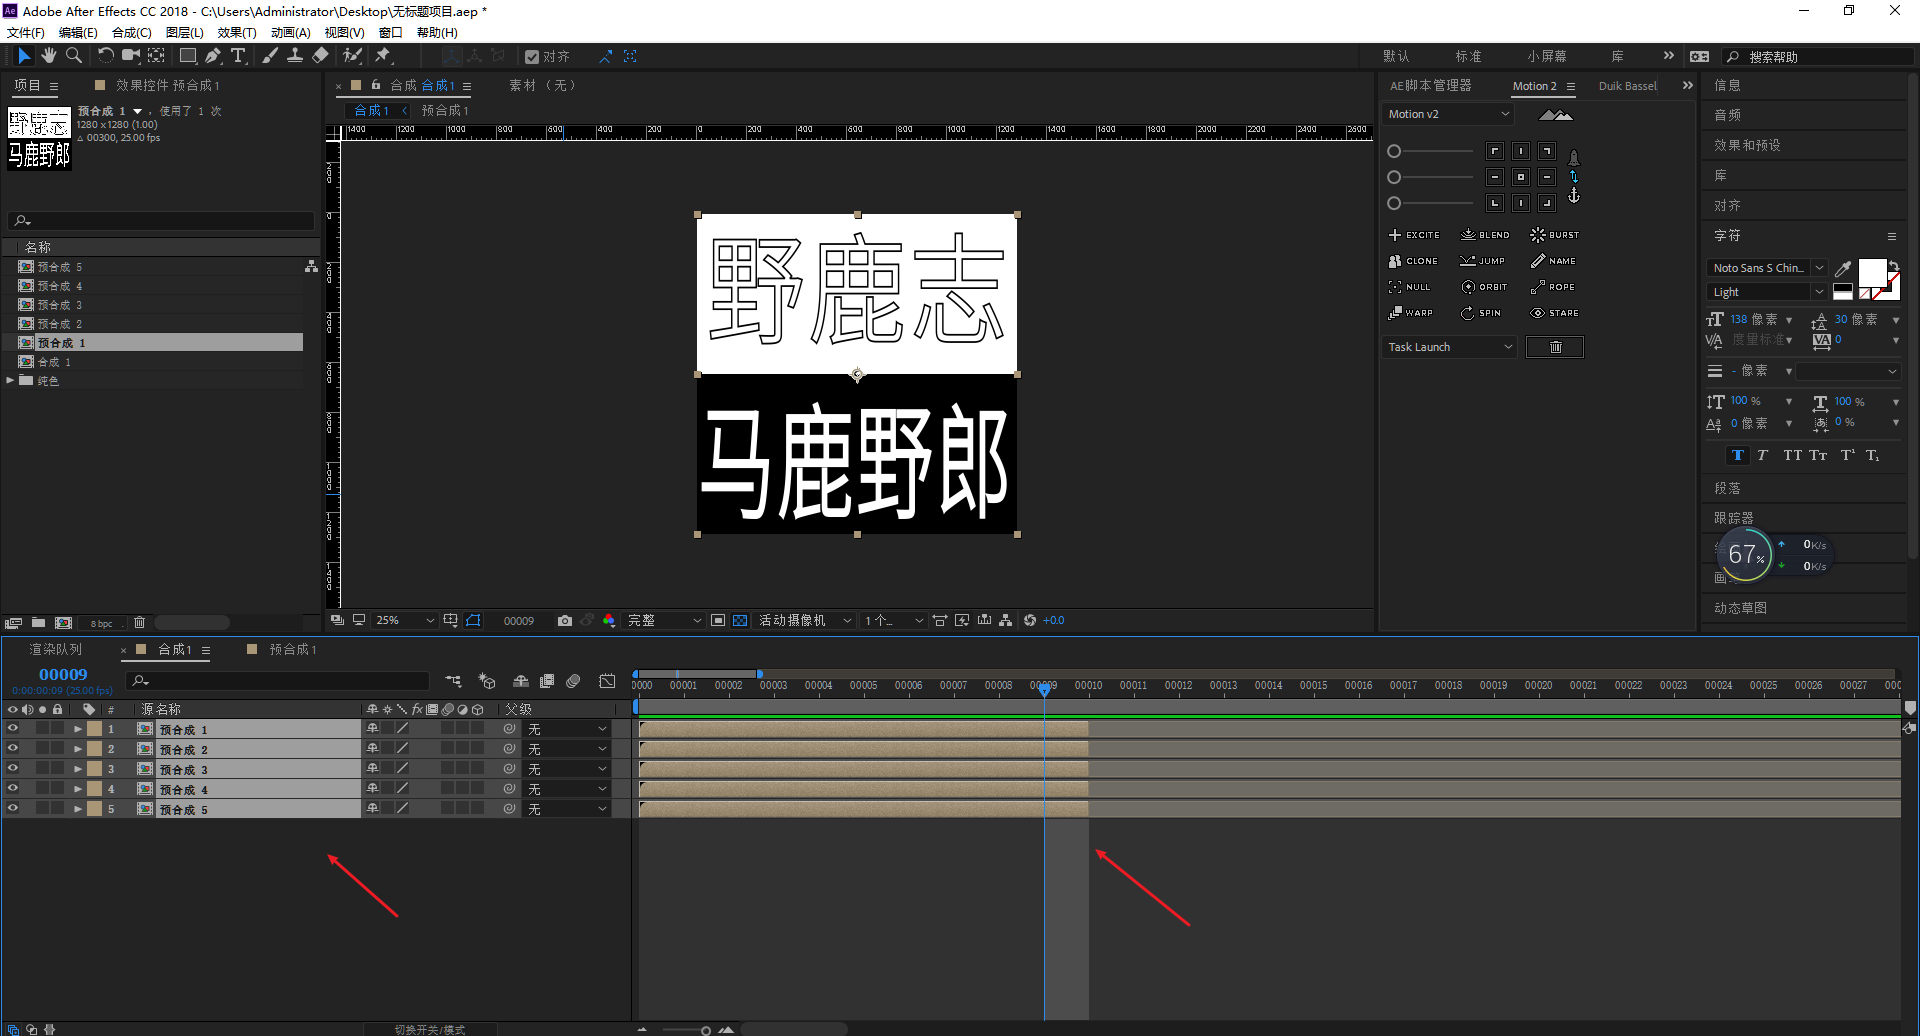
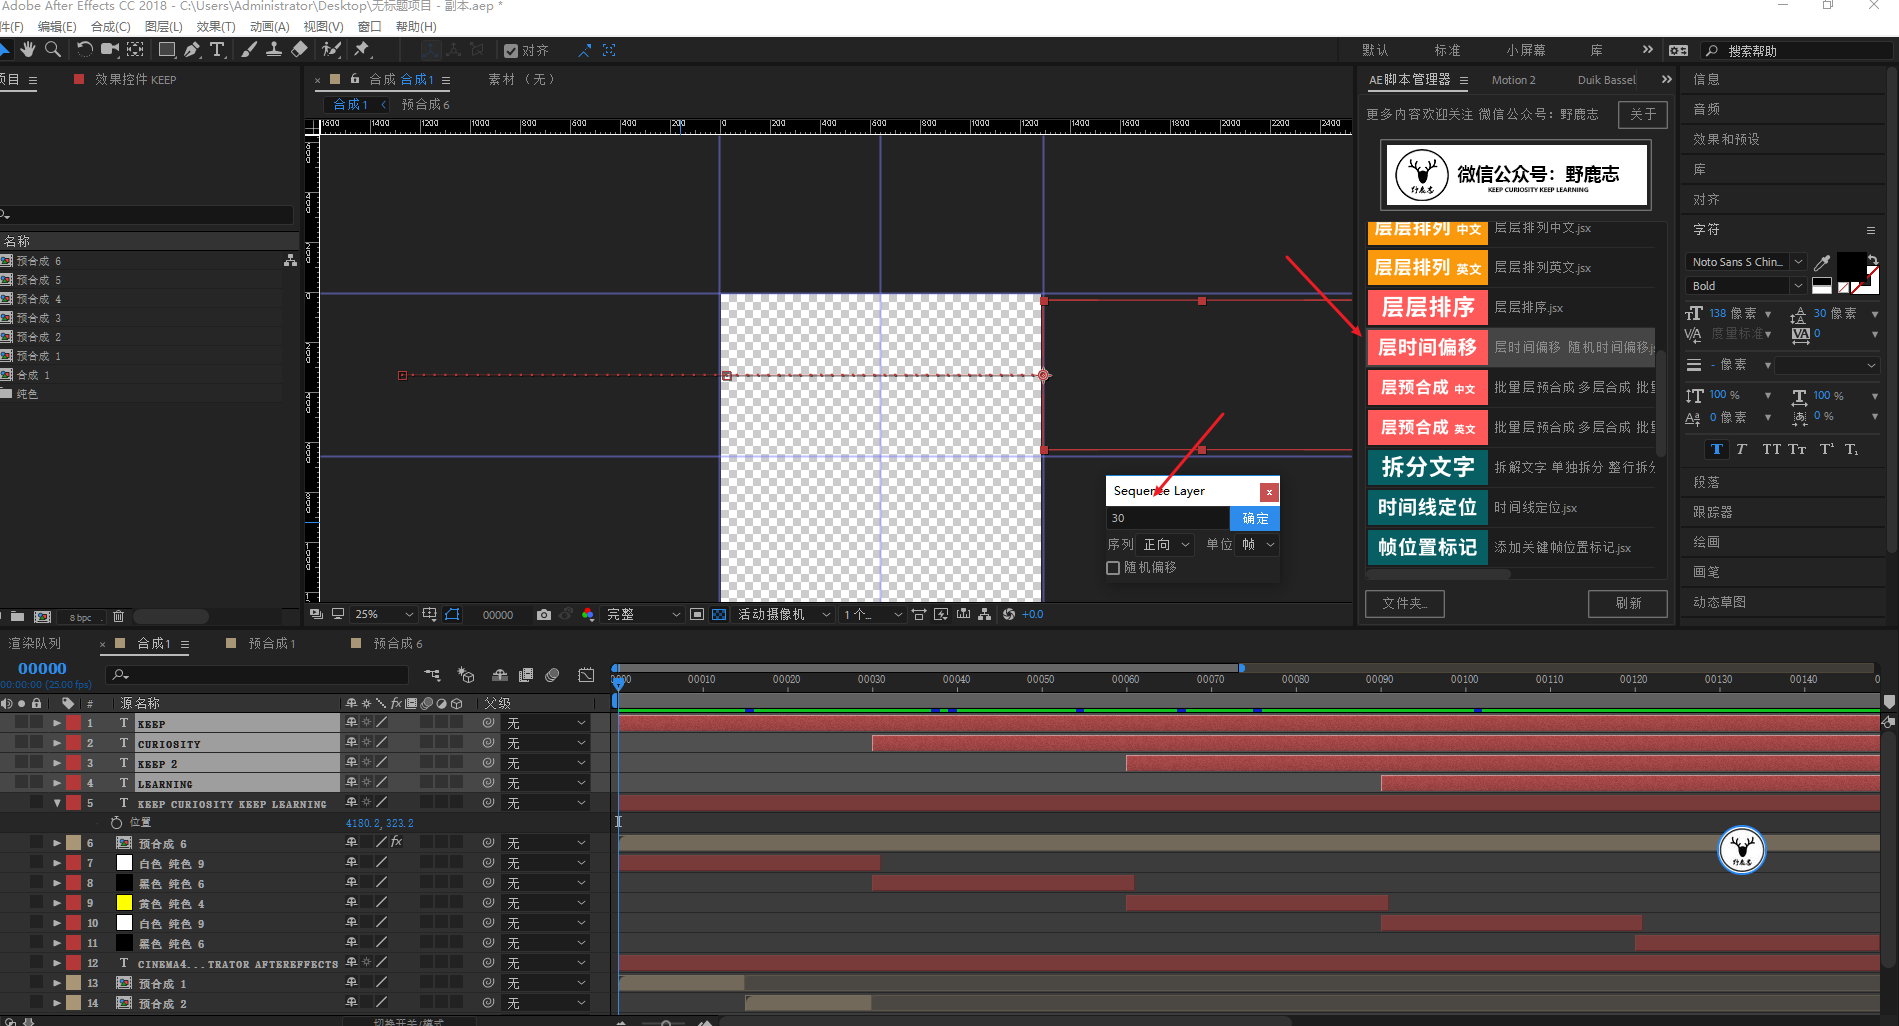
Also under the premise of selecting all precomposites, we find this script called layer time offset in the script manager.
After double-clicking, enter 10 frames, so that all the precompositions will be uniformly offset by 10 frames. Isn't it very convenient, using scripts flexibly will be much more efficient than manual:
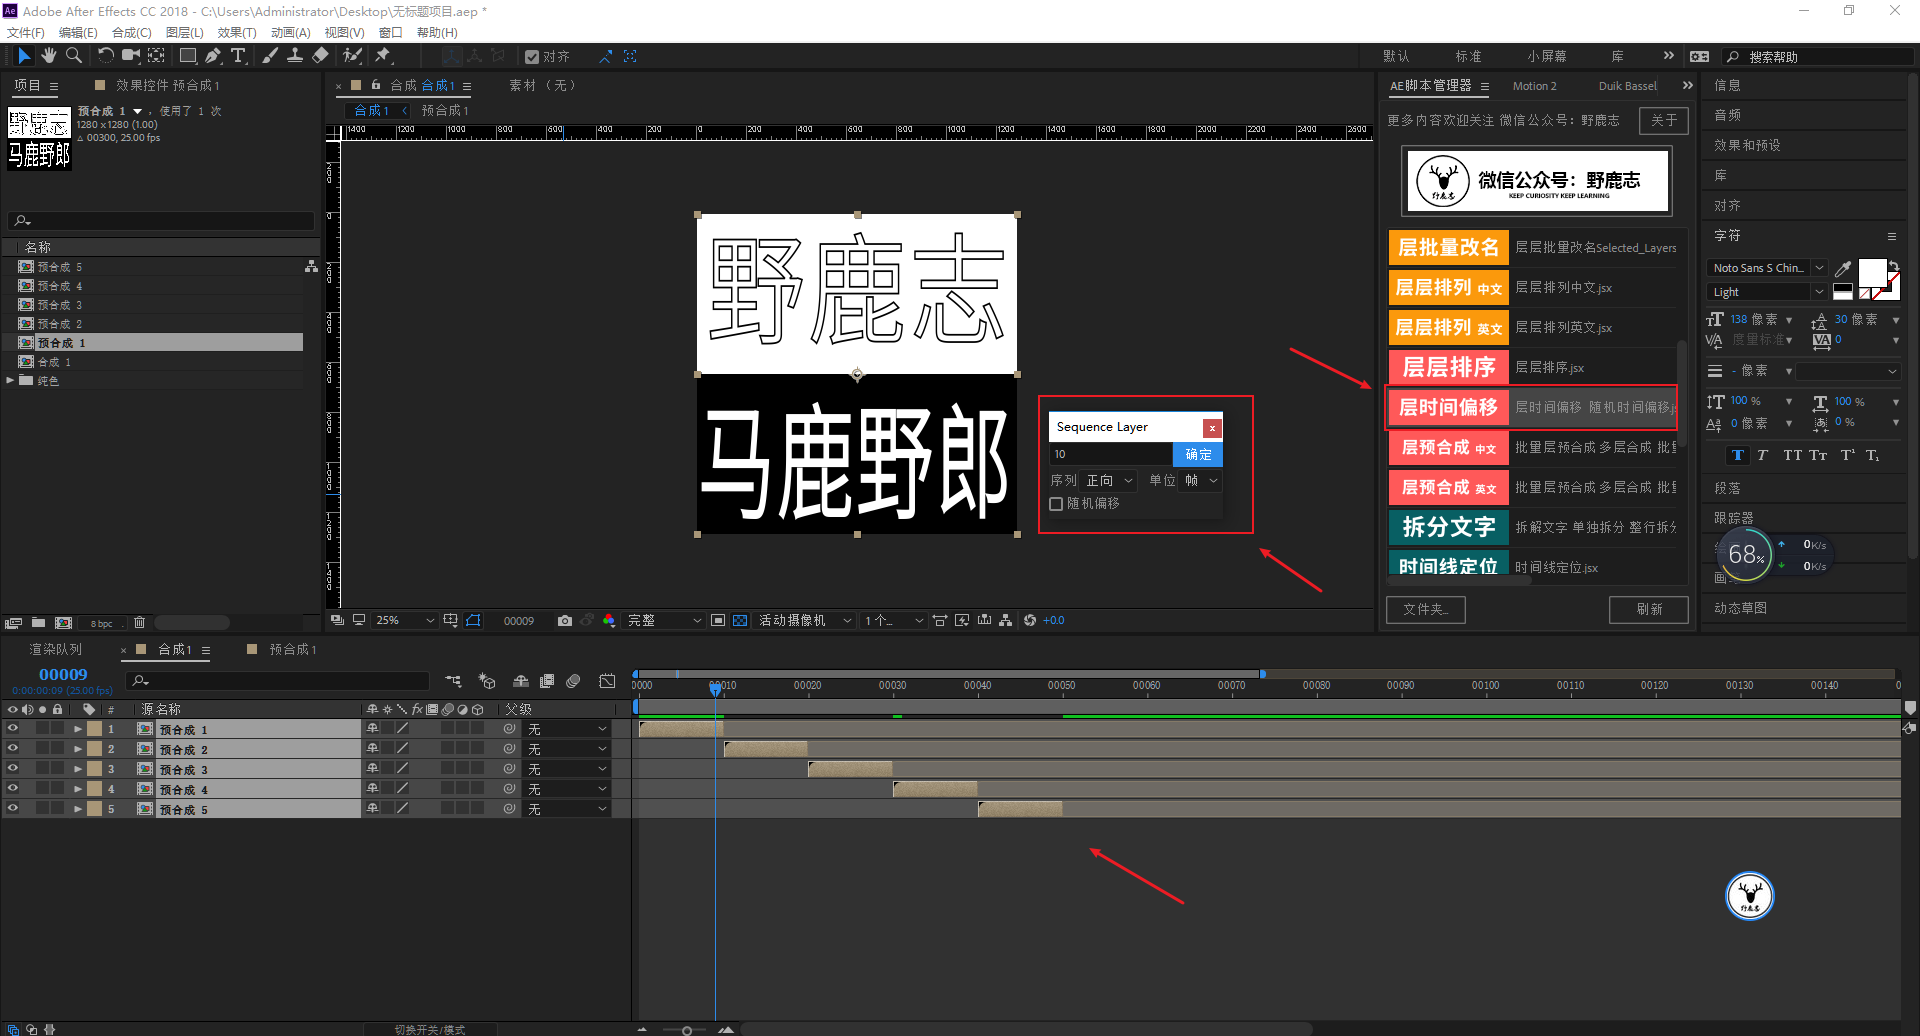
I previewed it and felt that 10 frames is too fast, so I changed it to 15 frames:
After finishing the first five simple animations, let's do the more troublesome part later. I made the second half of the animation separately, so let's take a look:
The picture comes from the Internet, if it is infringed, please delete it
Analyze first:
1. The animations of the first half and the second half are different and need to be done separately.
2. The upper and lower parts have the effect of stretching and distorting, and both have displacement animations. The text has a feeling of rebound, and the background color and the fill or stroke color of the text will change.
3. The text in the lower part also has an animation of X-axis compression.
Probably like this, let’s do the second half of the animation first, pull the reference line as shown in the picture, the use of the reference line is the same as that of Ps and Ai:
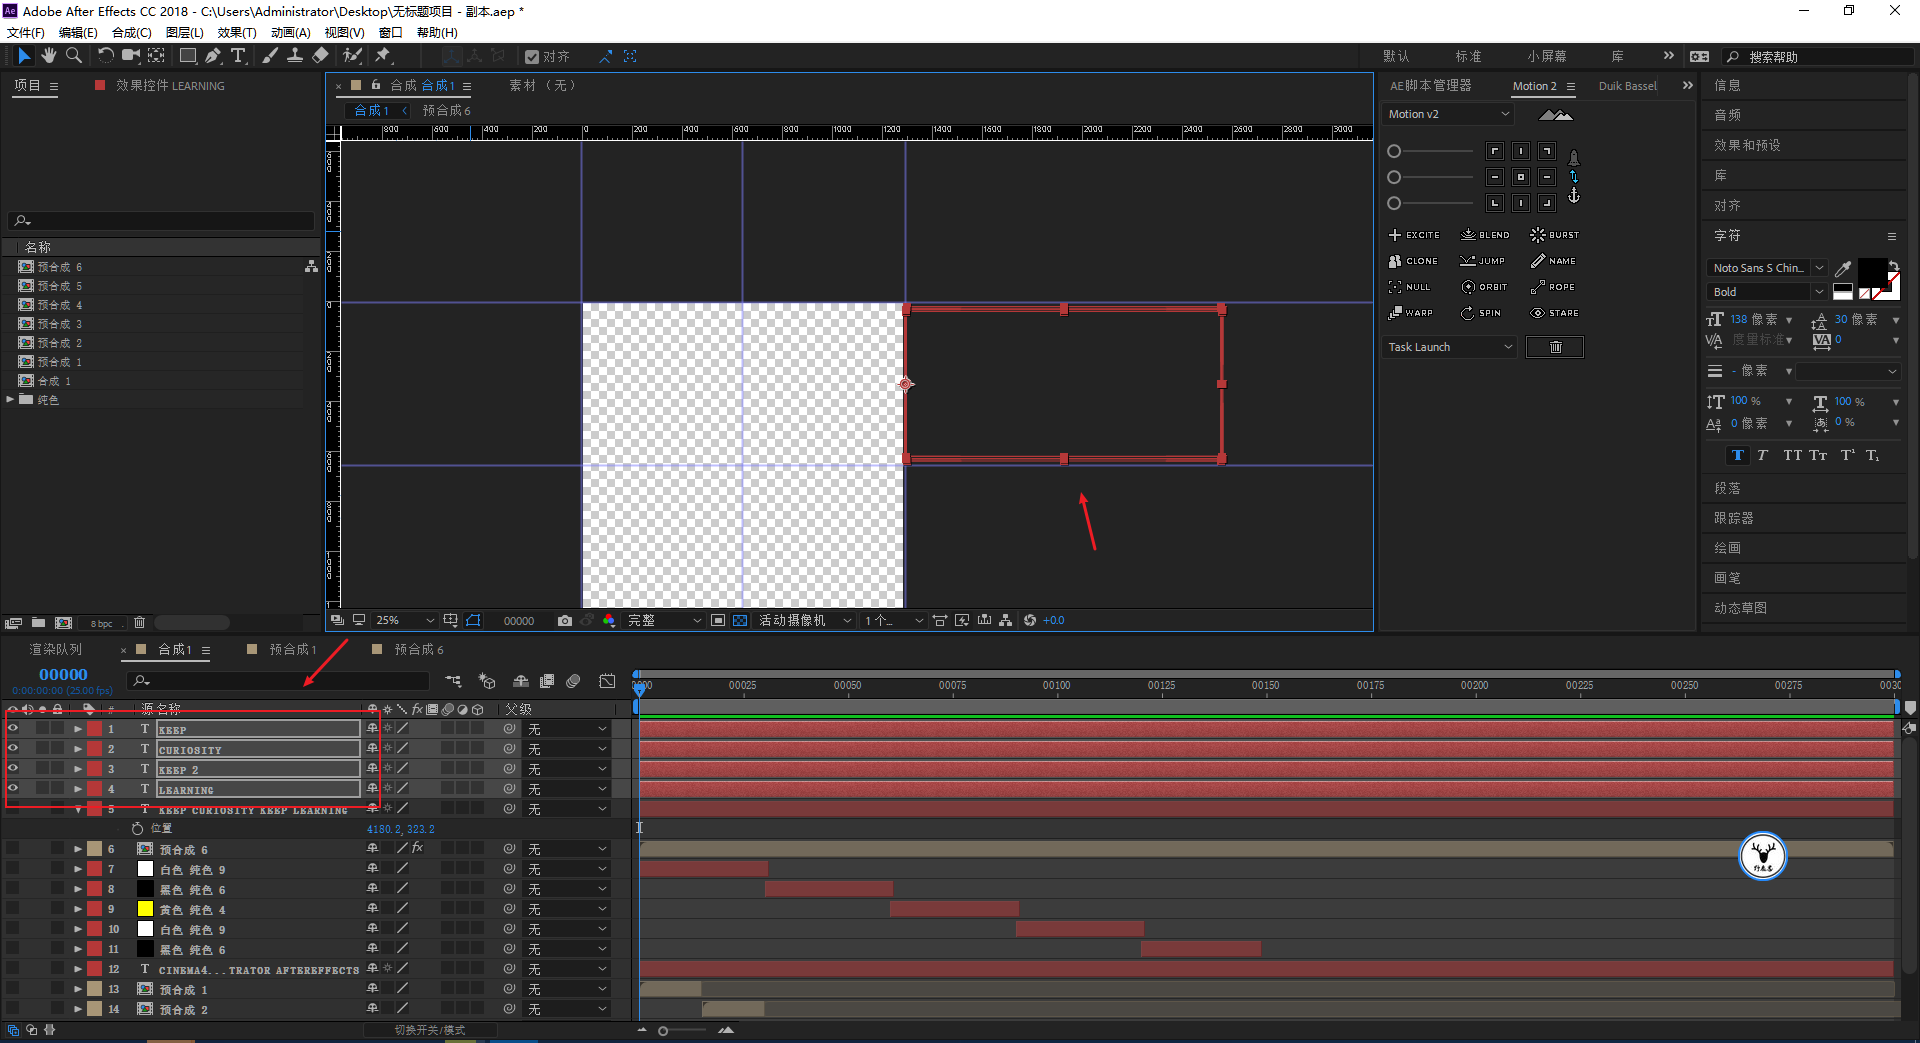
First type these texts in batches:
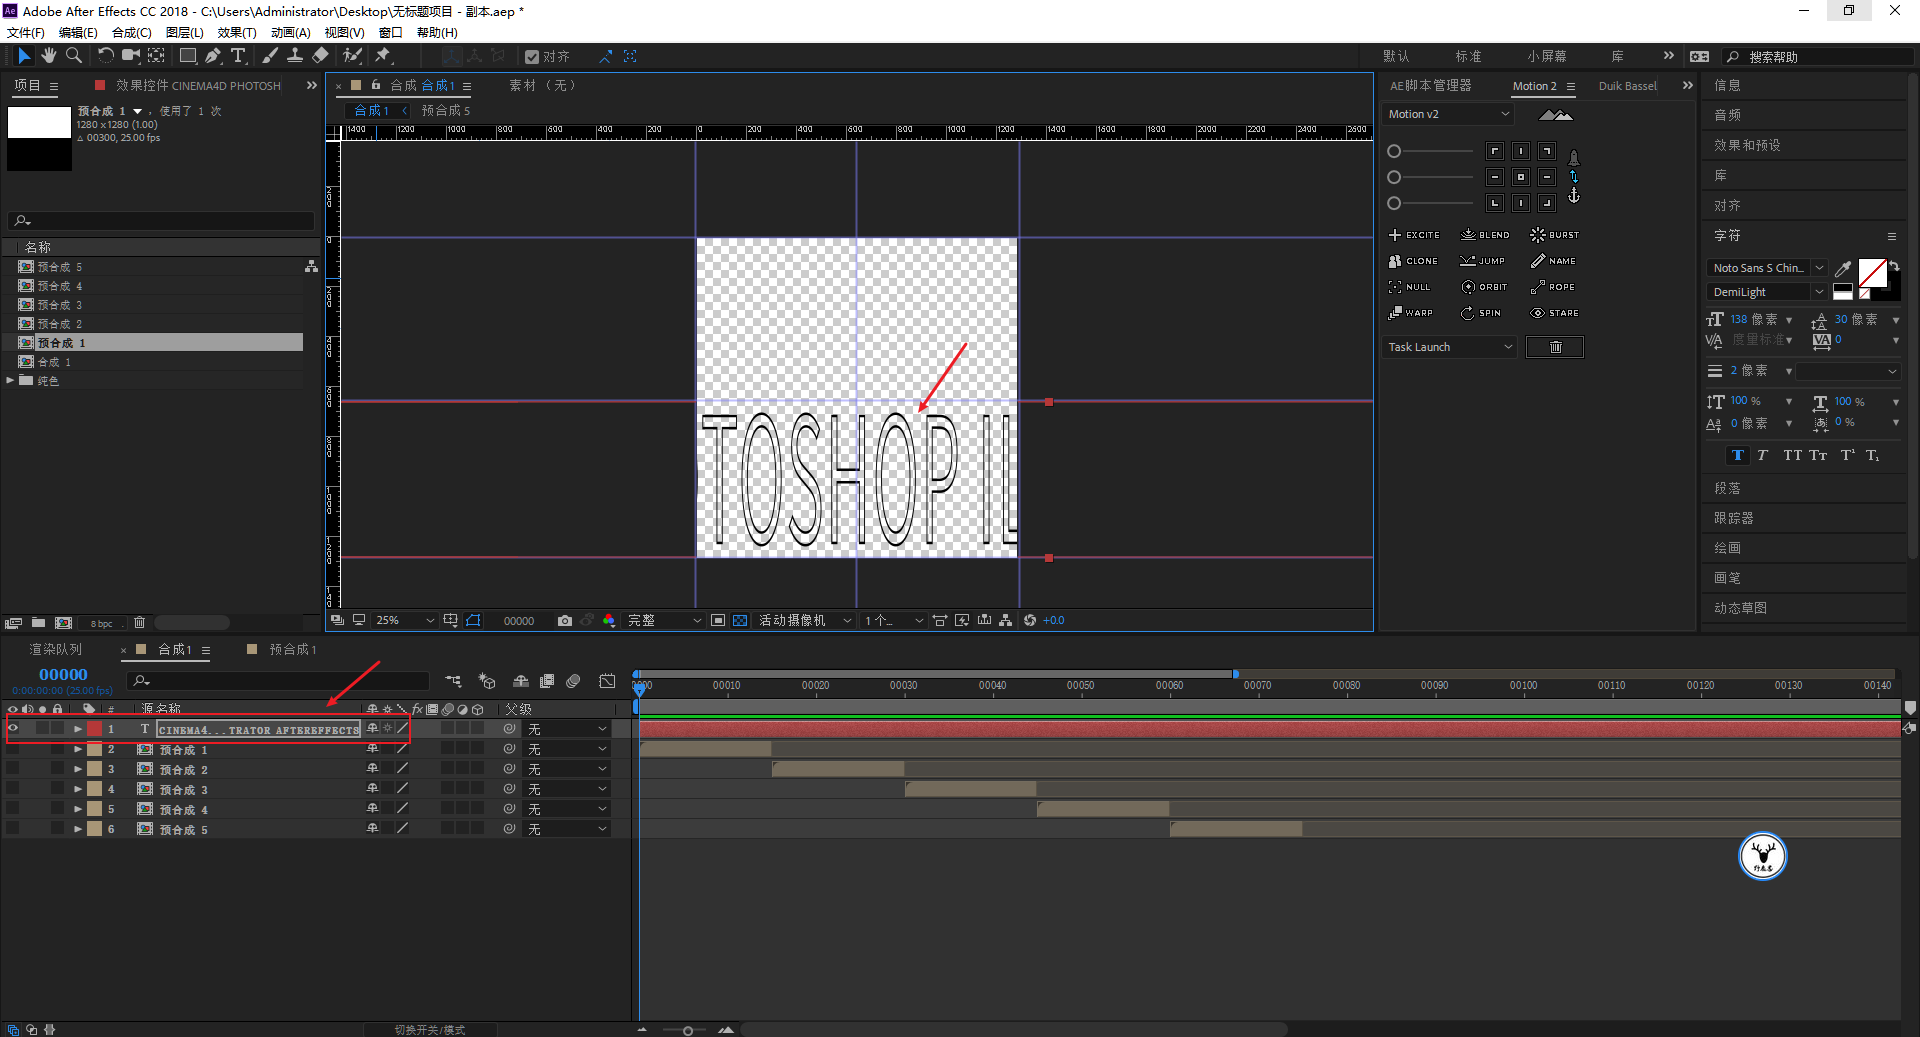
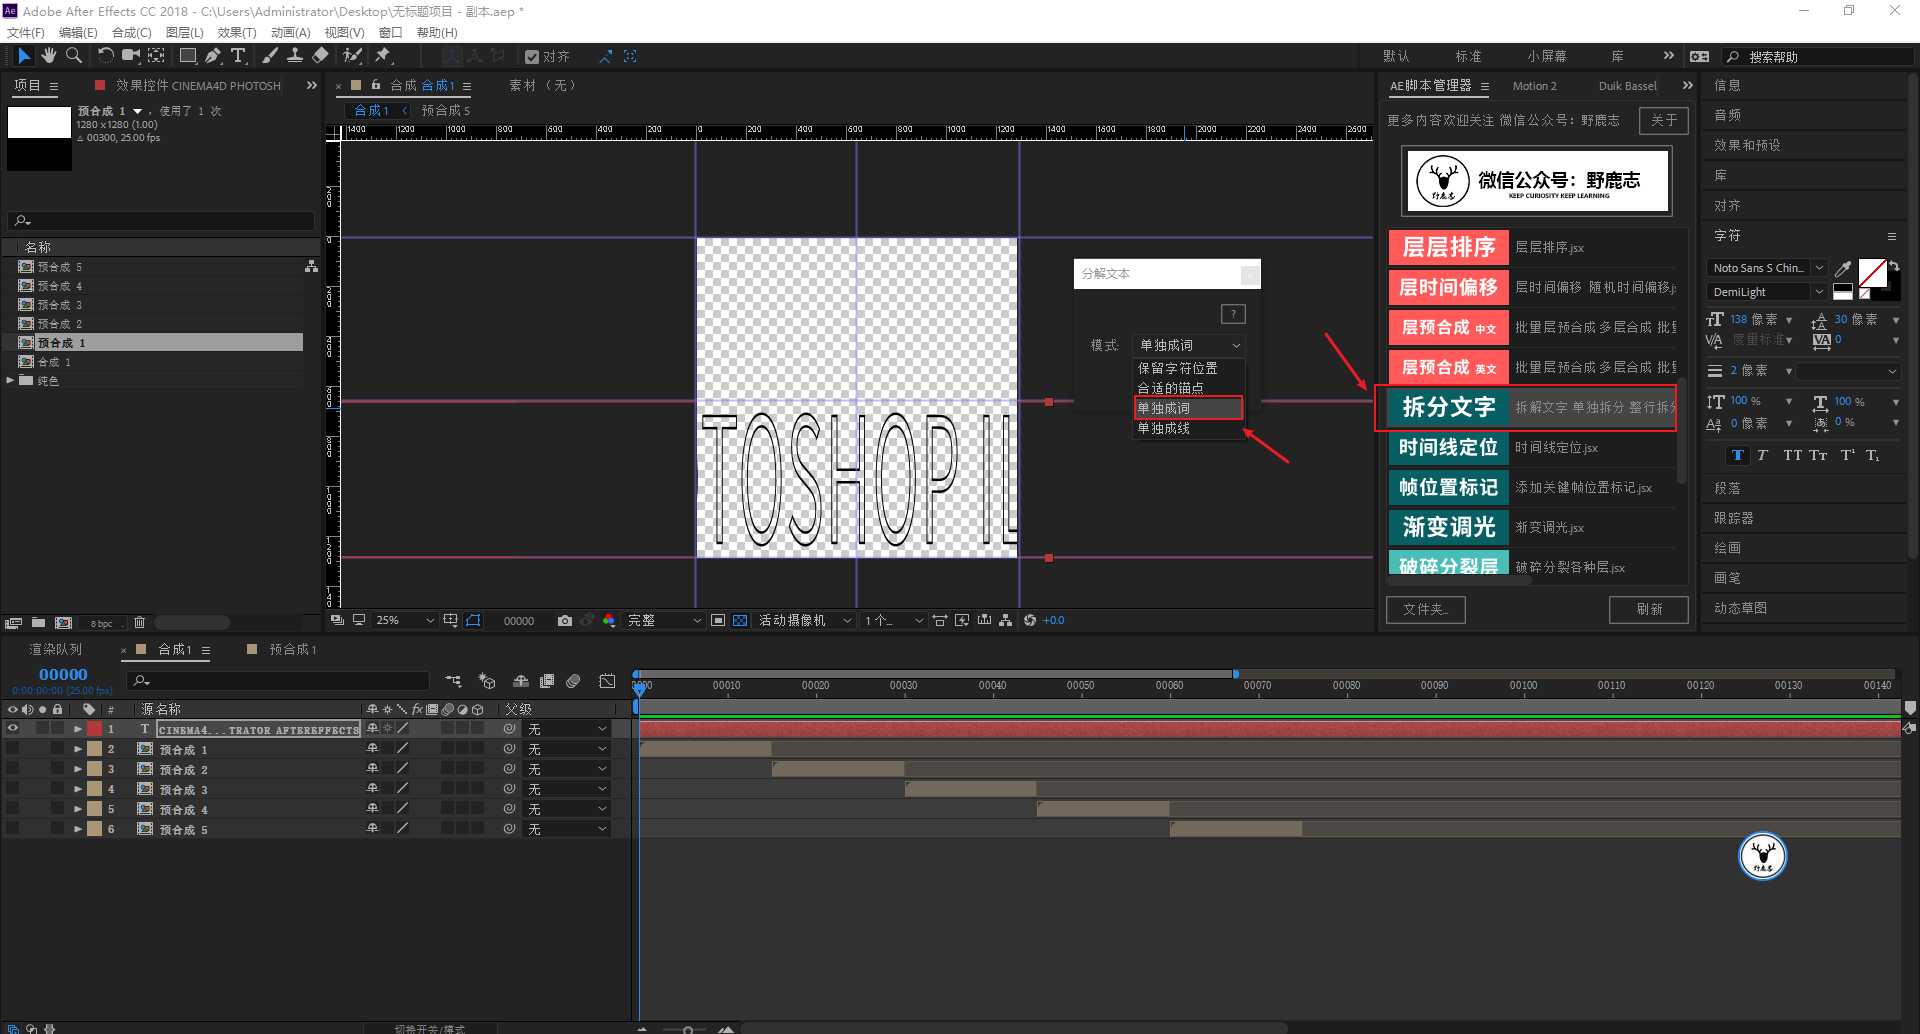
Using this script for splitting text, you can split this string of text into words:
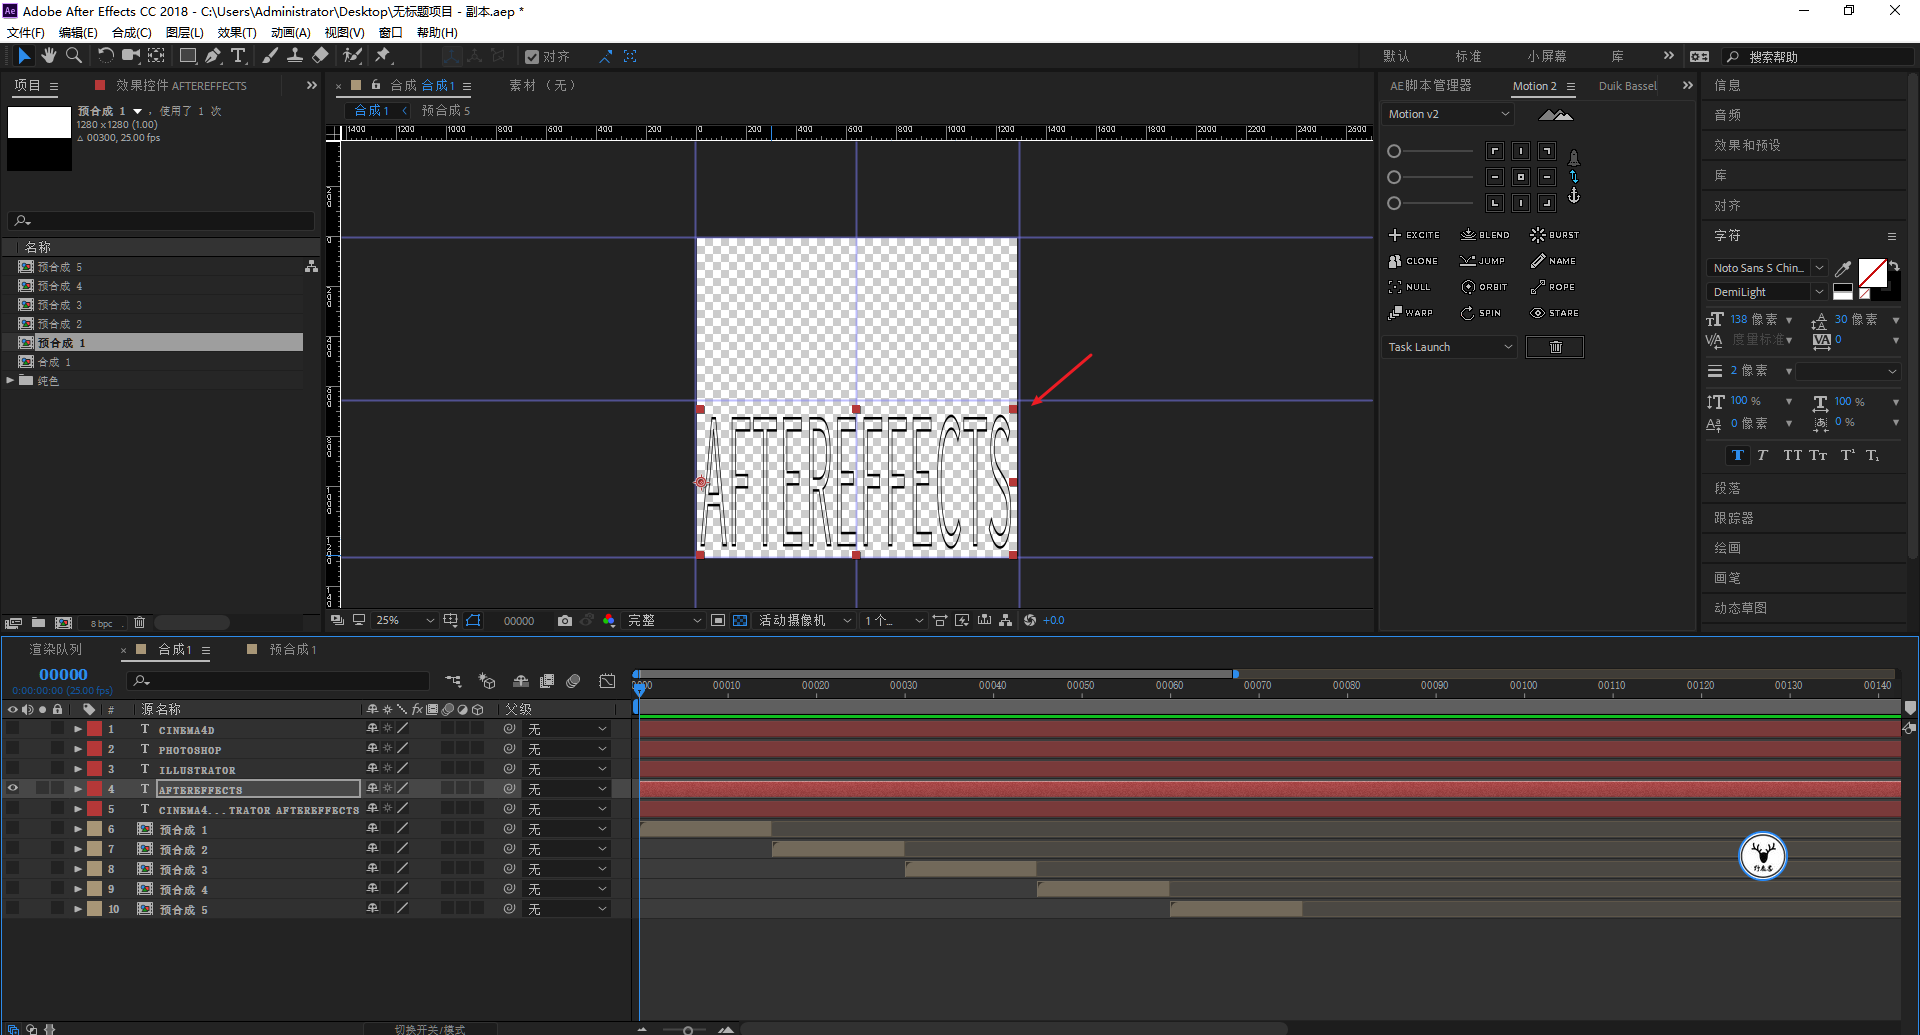
Adjust the size of each group of text after splitting:
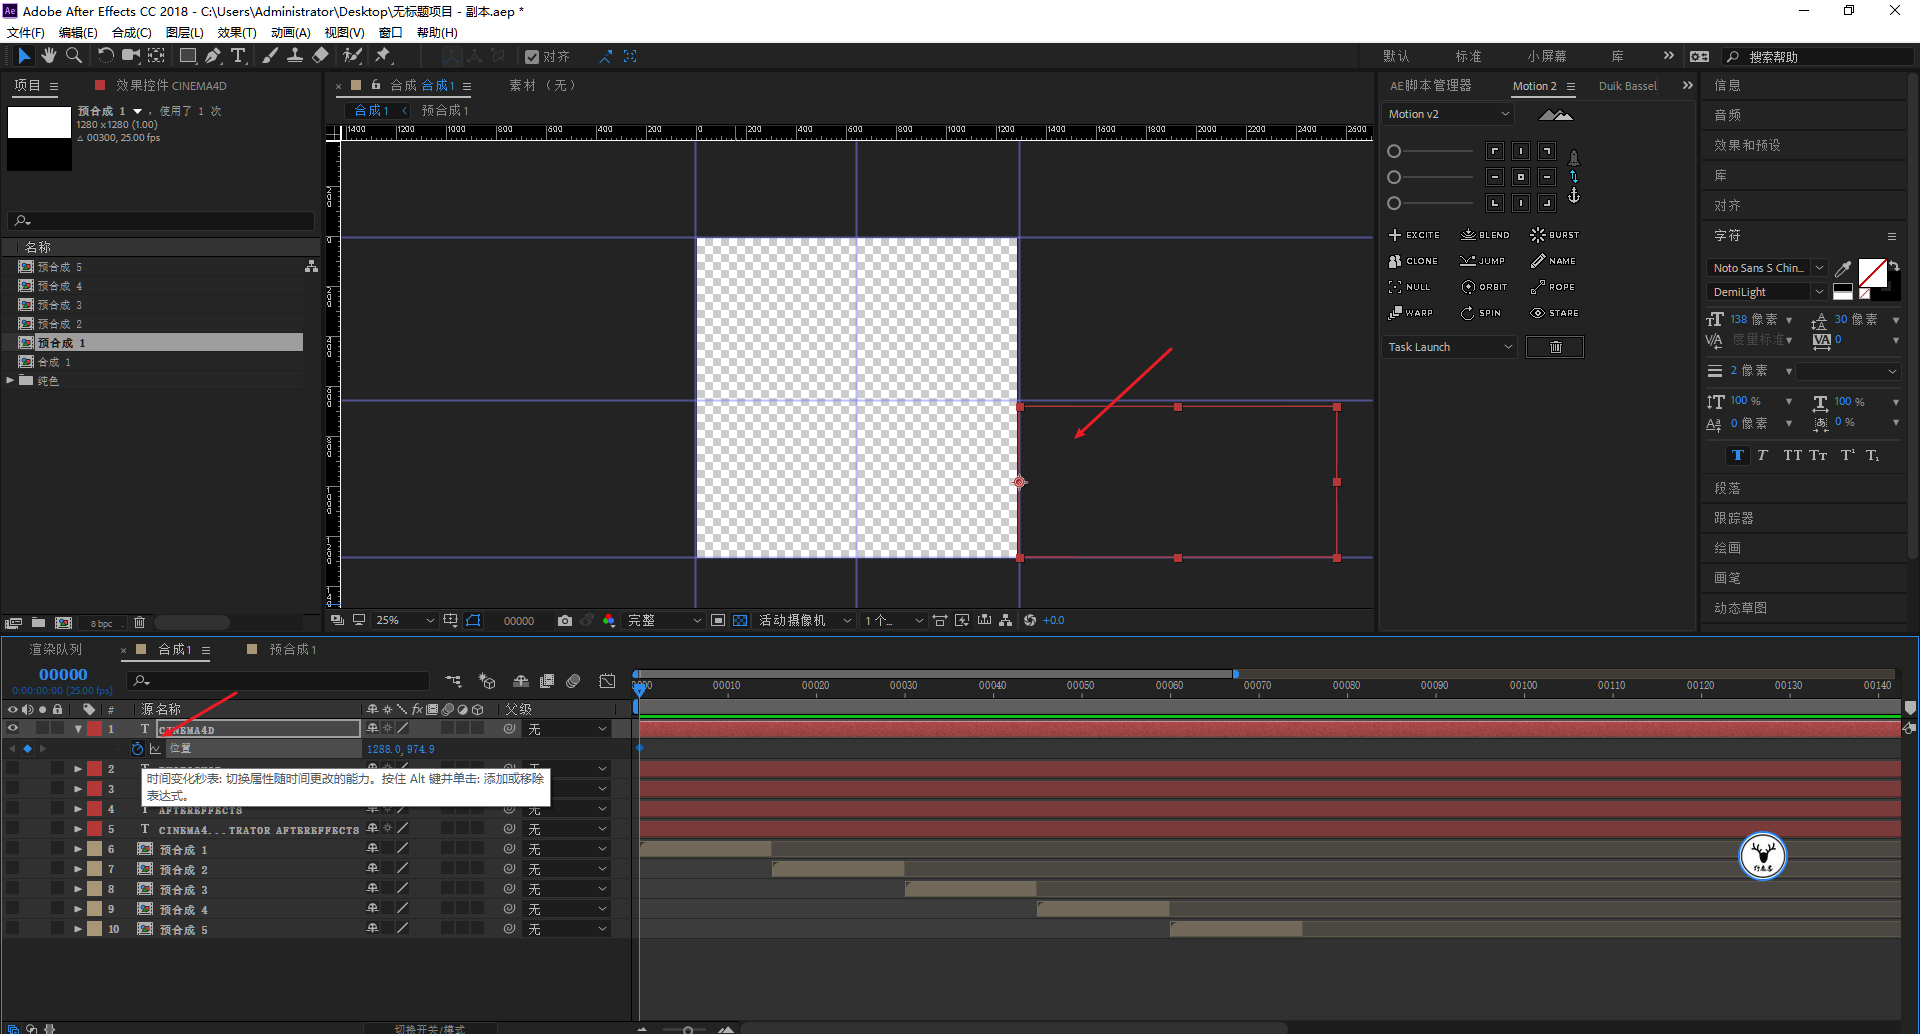
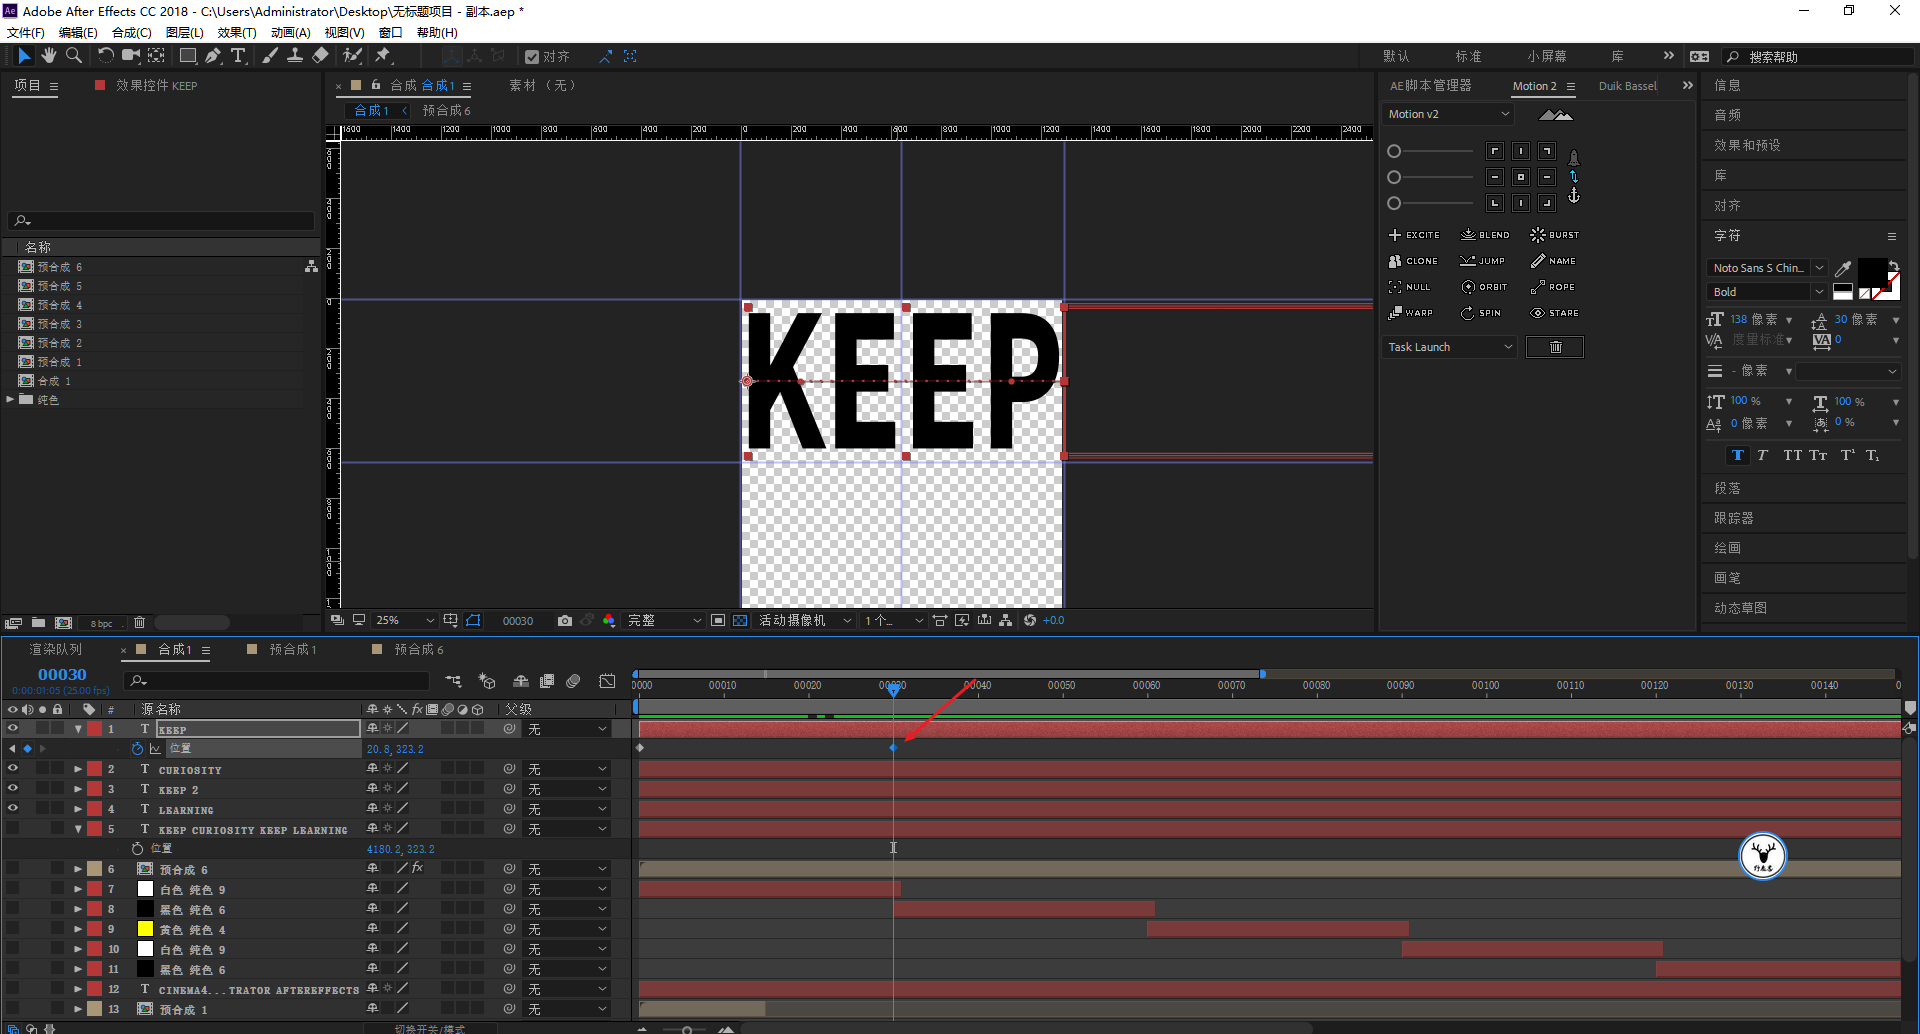
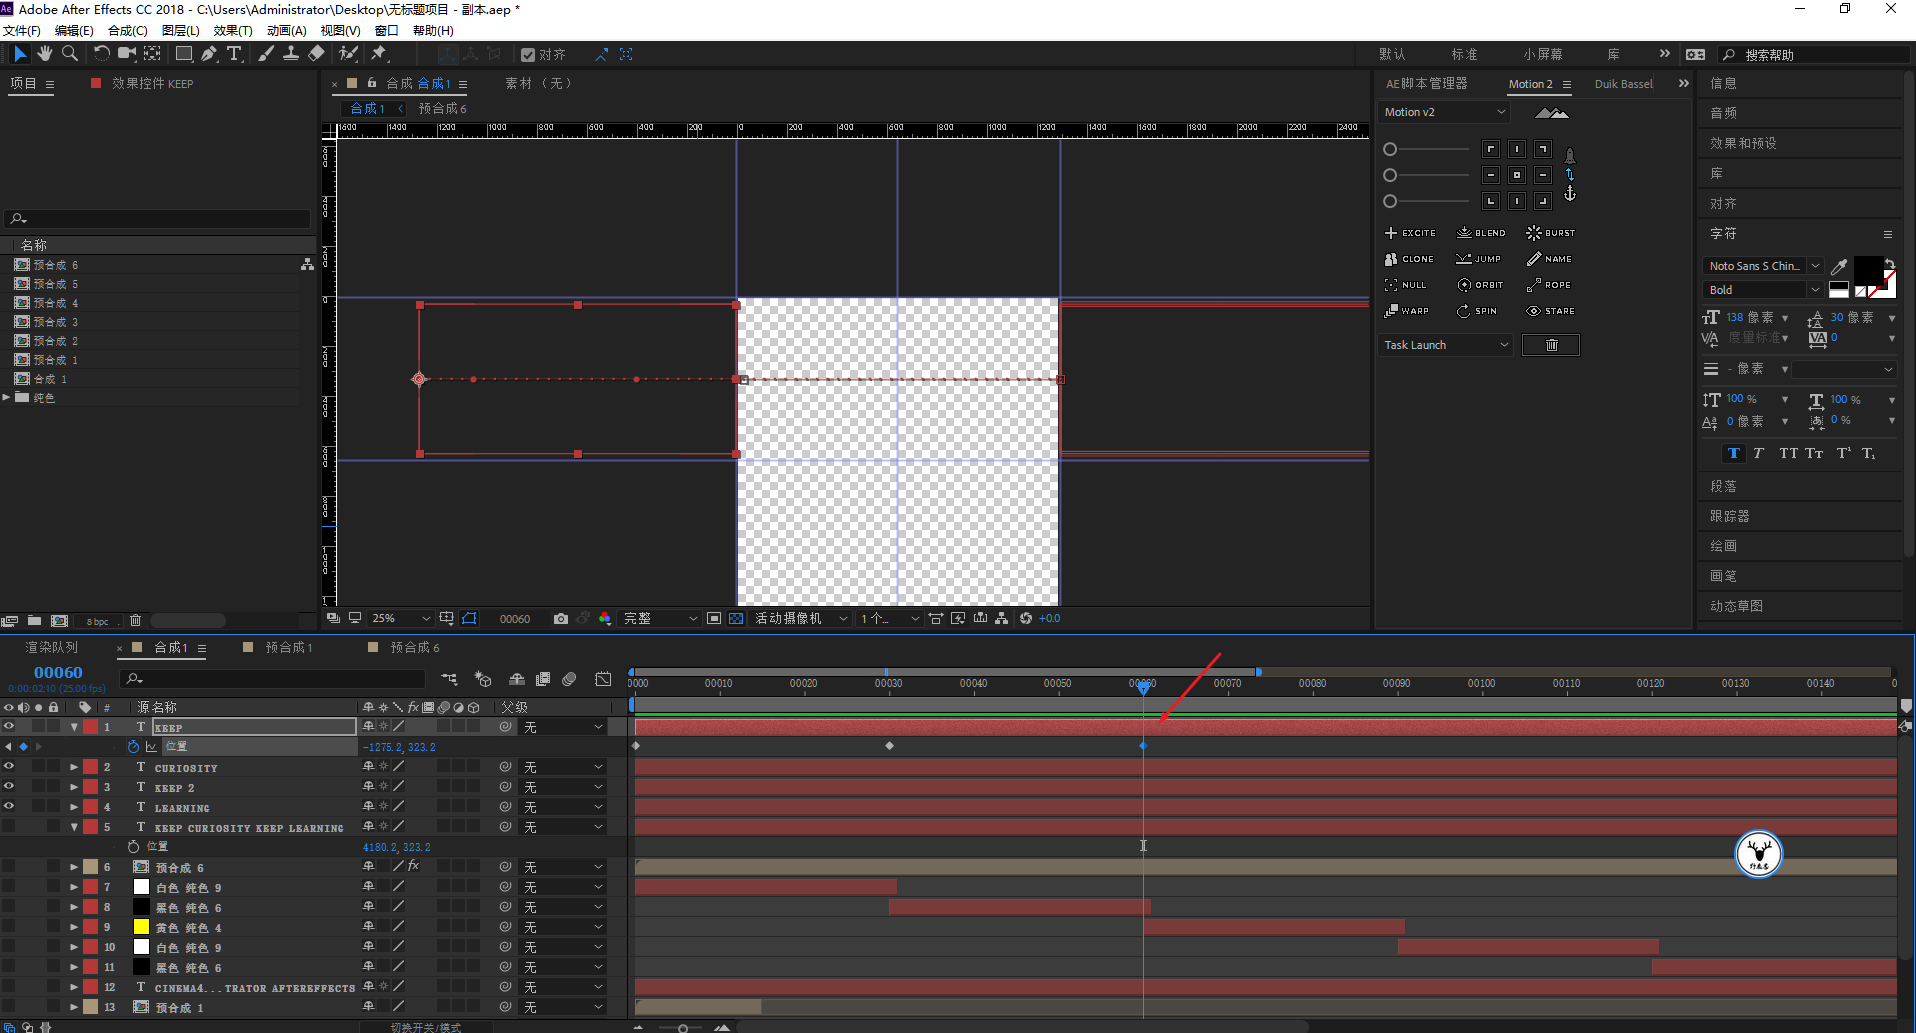
Let’s do the displacement animation of one of the texts first, the position of frame 0 as shown in the figure, the shortcut key P key to call up the position property and mark the key frame:
At frame 30, let it move to the position shown in the figure:
Then press the shortcut key S to call out the zoom properties, cancel the proportional zoom, and put a key frame:

When it reaches frame 60, let the X-axis scale to 0 and set a keyframe, pay attention to the position of the anchor point:
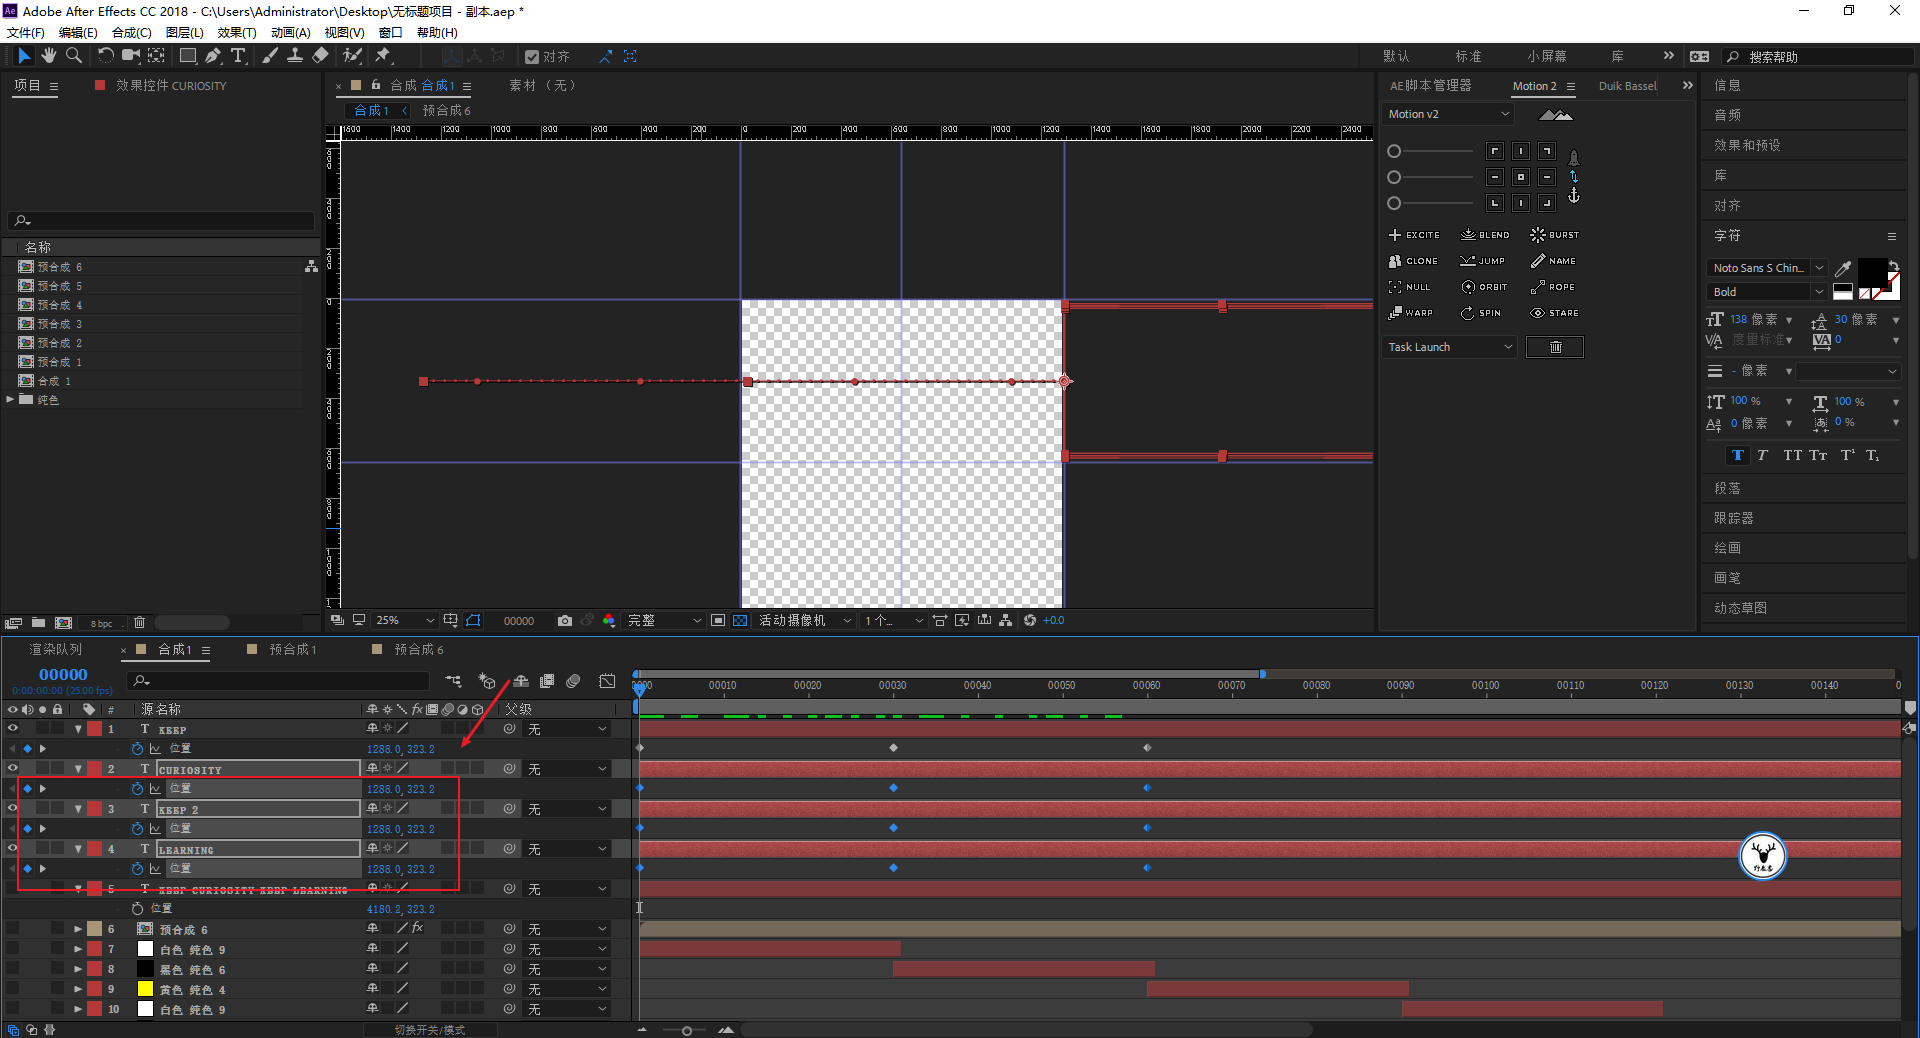
Since the displacement of each group of text is the same, you can directly copy the keyframe of the first group of text and paste it to other phrases:
When zooming the animation, because the size of each group of words is different, you can manually K it. This is not difficult or troublesome, so I won’t go into details here:
Then select all the phrases and use the layer time offset script to offset forward 30 frames uniformly:
Play the text at this time, and you will find that the displacement and scaling animation of the text is very rigid.
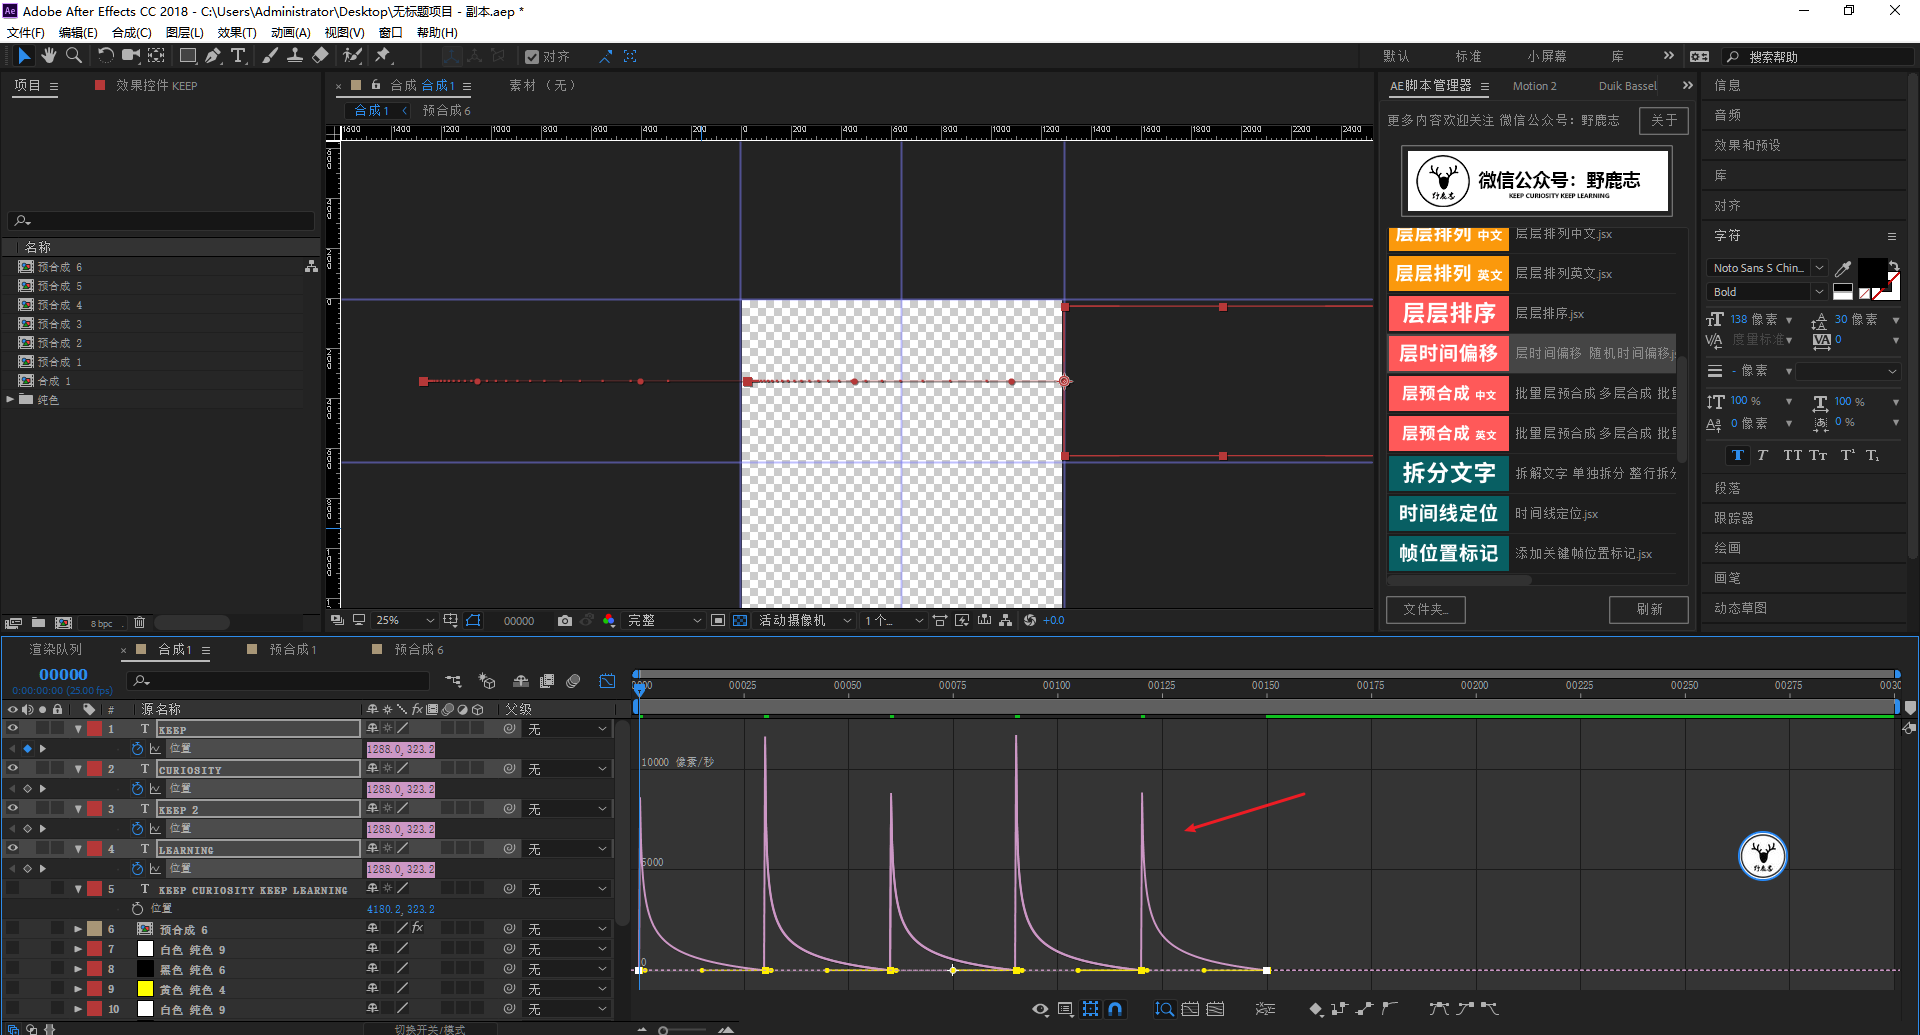
Select the position properties of all the phrases, click the icon editor, we can see that this is because the default keyframe animation is linear:

And our reference case should be very fast at the beginning, then gradually slow down and feel a bit of a pause, and then quickly, and repeat.
So we need to select the key frame in the chart editor, click Ease, so that the speed of the animation is slow in and slow out:
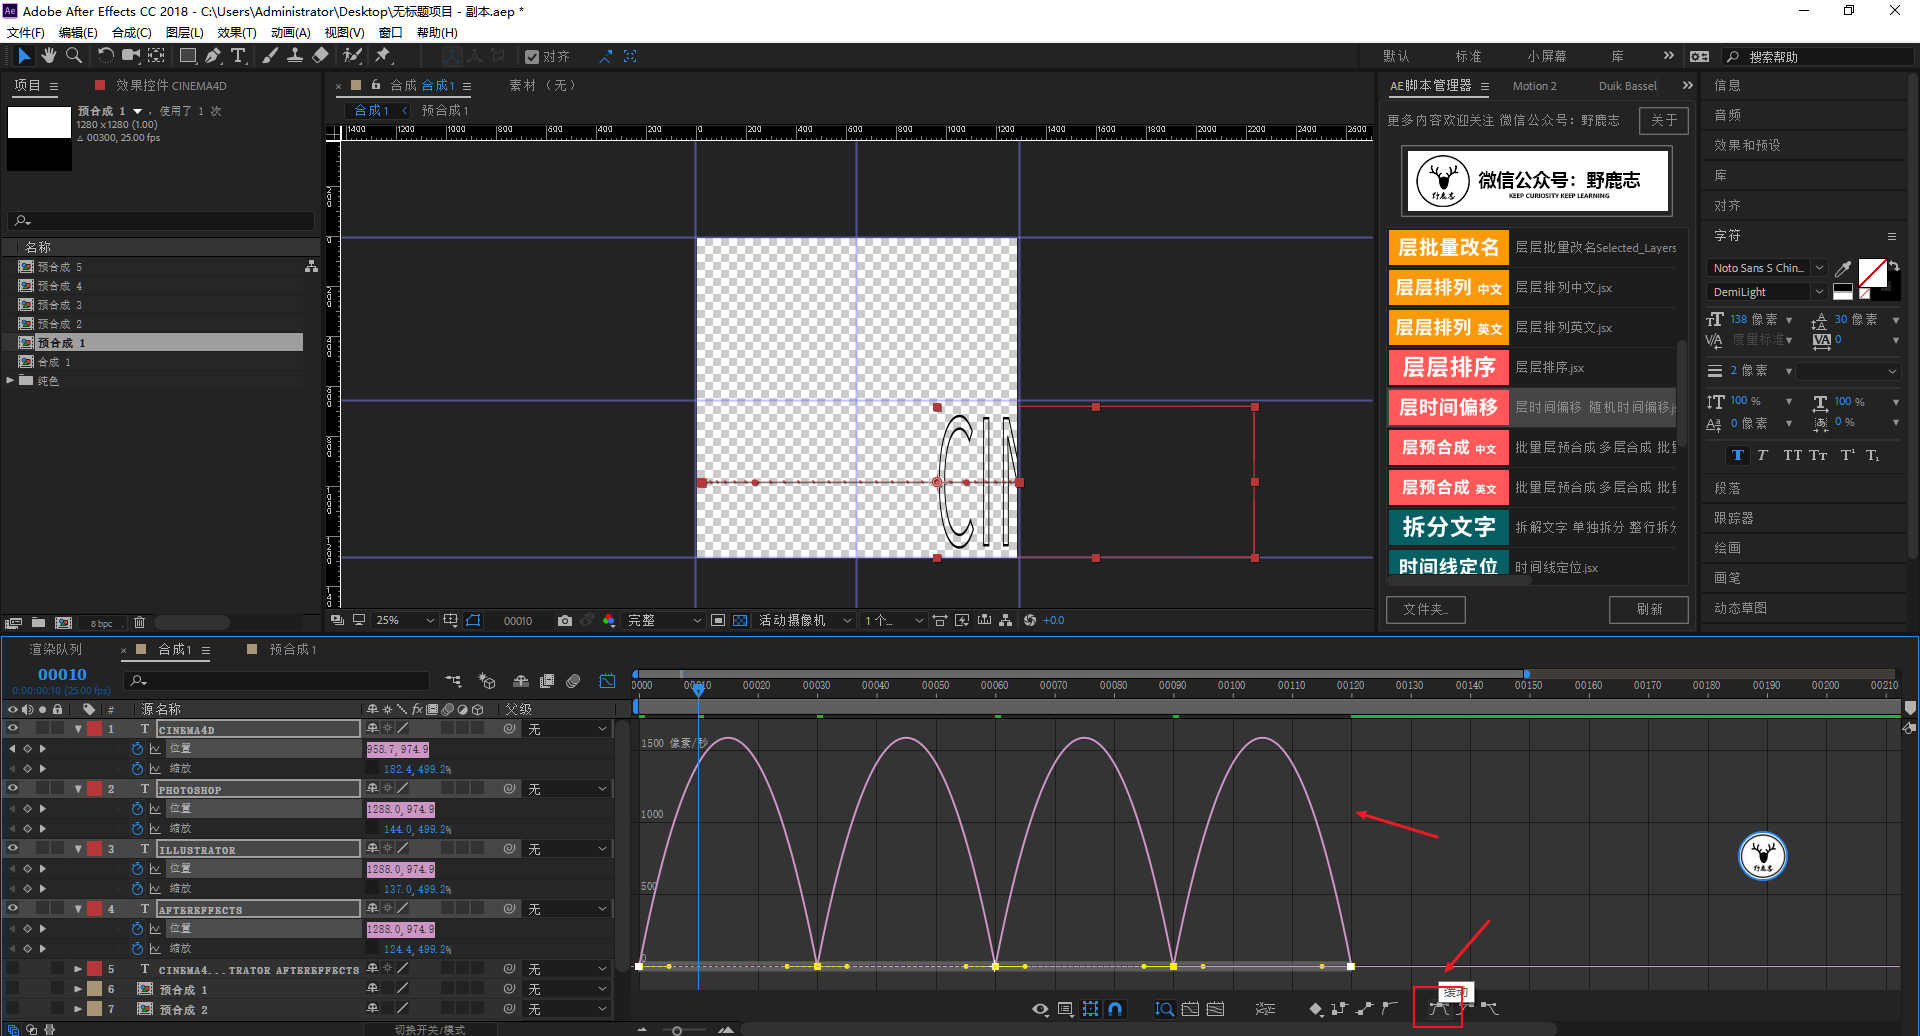
Then adjust the curve as shown in the figure by adjusting the handle on the curve, which means that the speed is very fast at the beginning, and then gradually slows down:

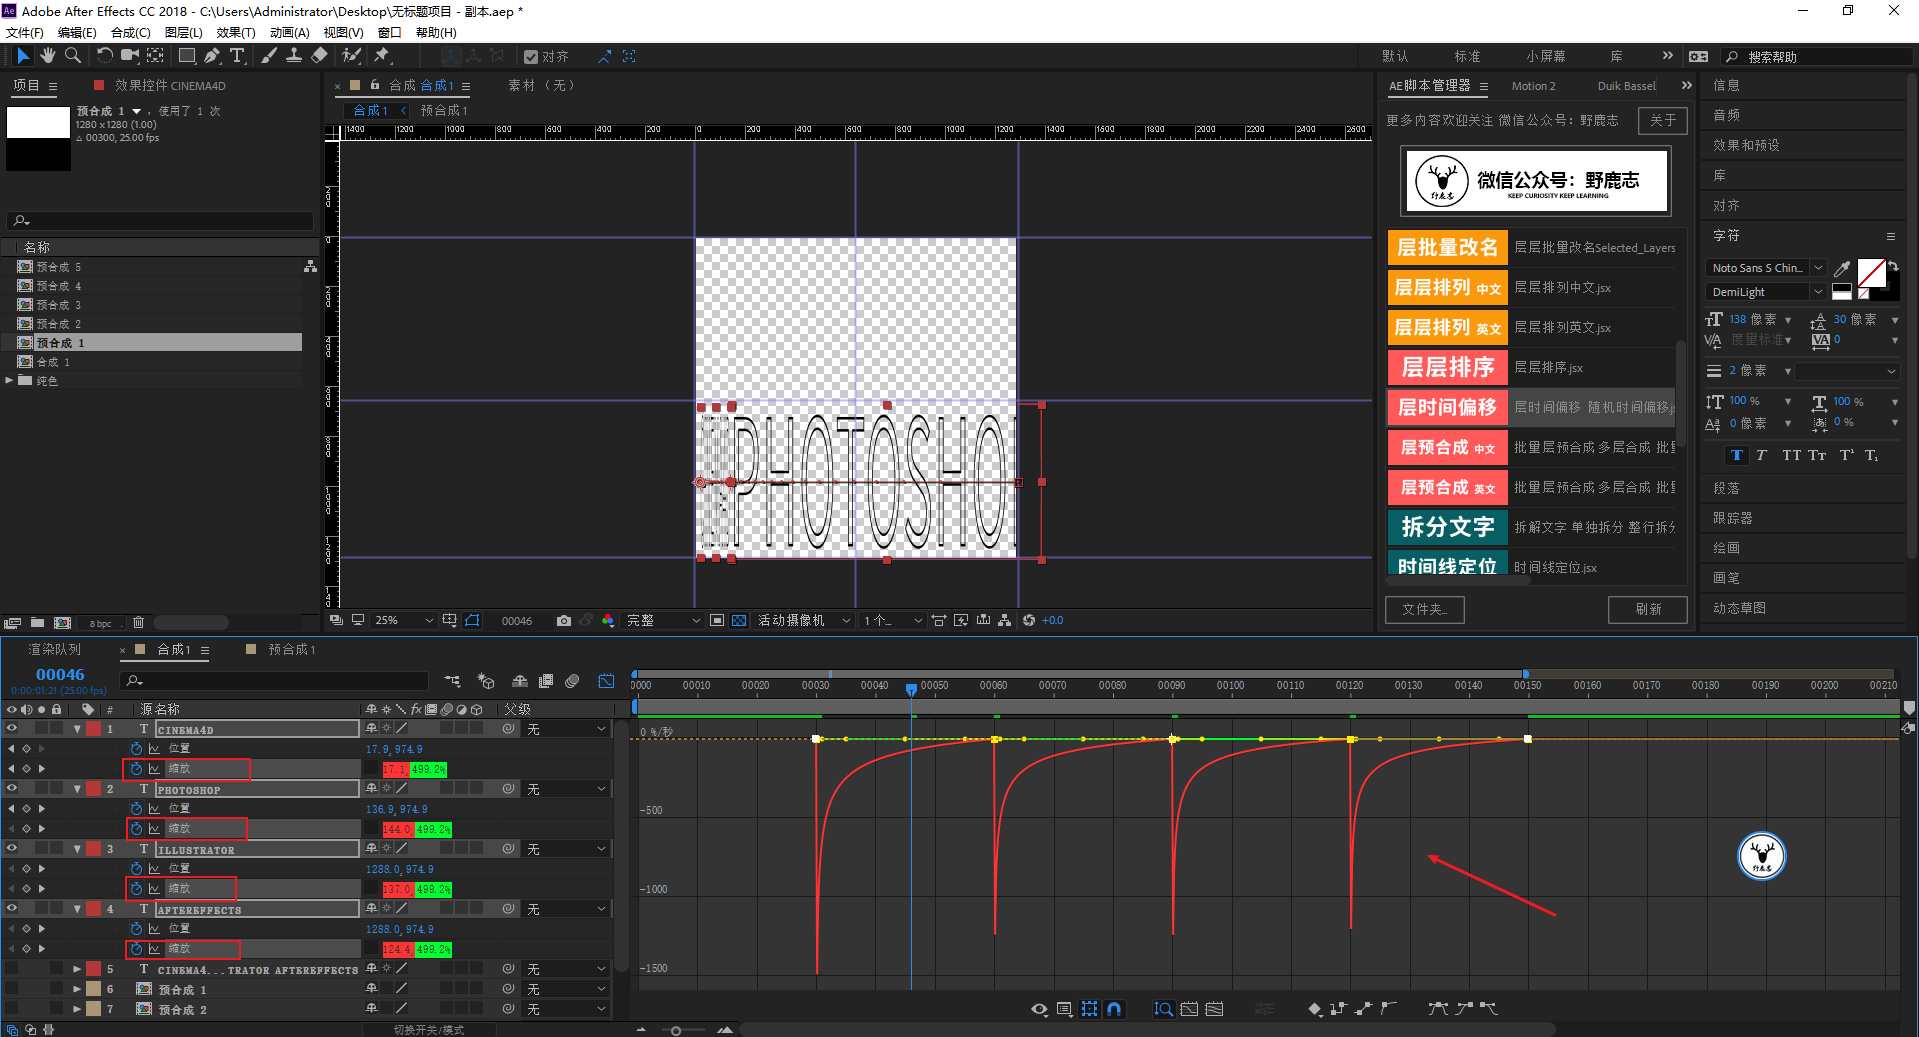
The scaling property also needs the same adjustment curve, so I won't repeat it here:
After the scaling and displacement animations of each group of text are done, add them to a new precomposition:

For the convenience of observation, first temporarily give a white solid color layer as the background, and then create the effect of text stretching.
This is because I tried all the twisted special effects in the AE effect before, but I didn't get a satisfactory result.
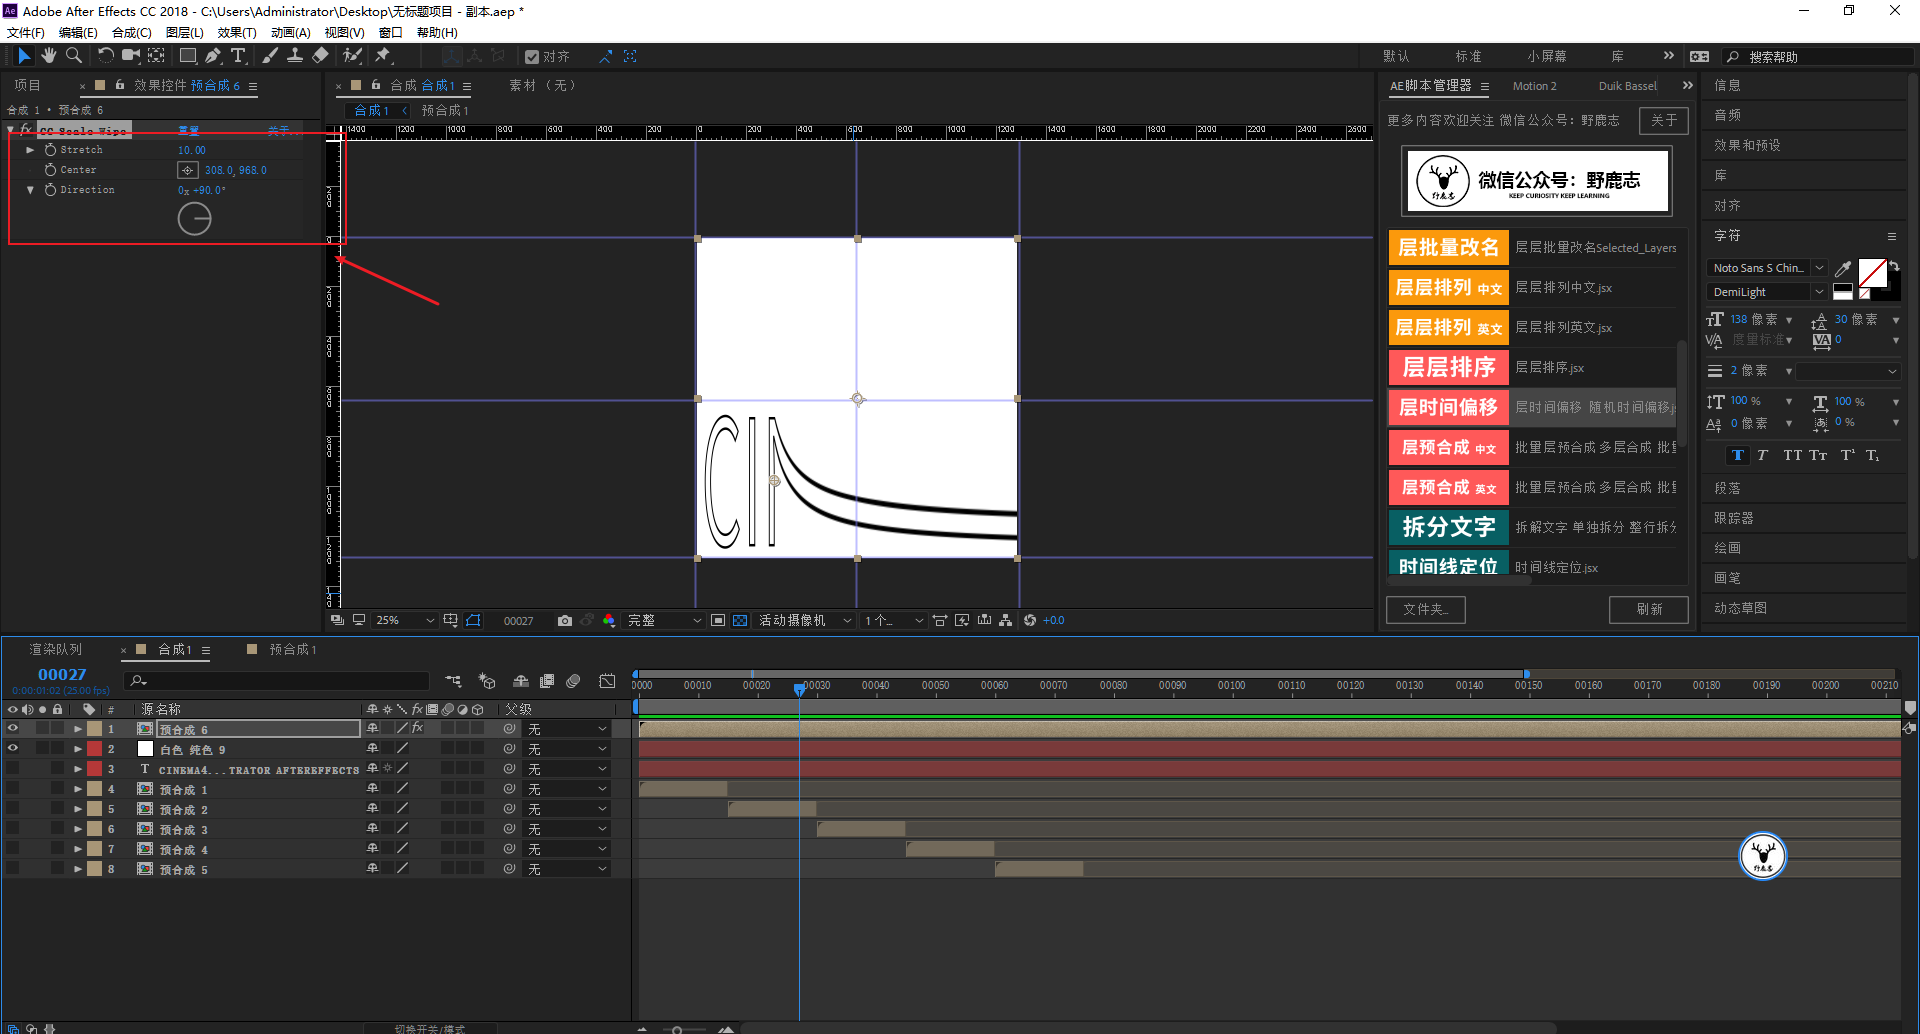
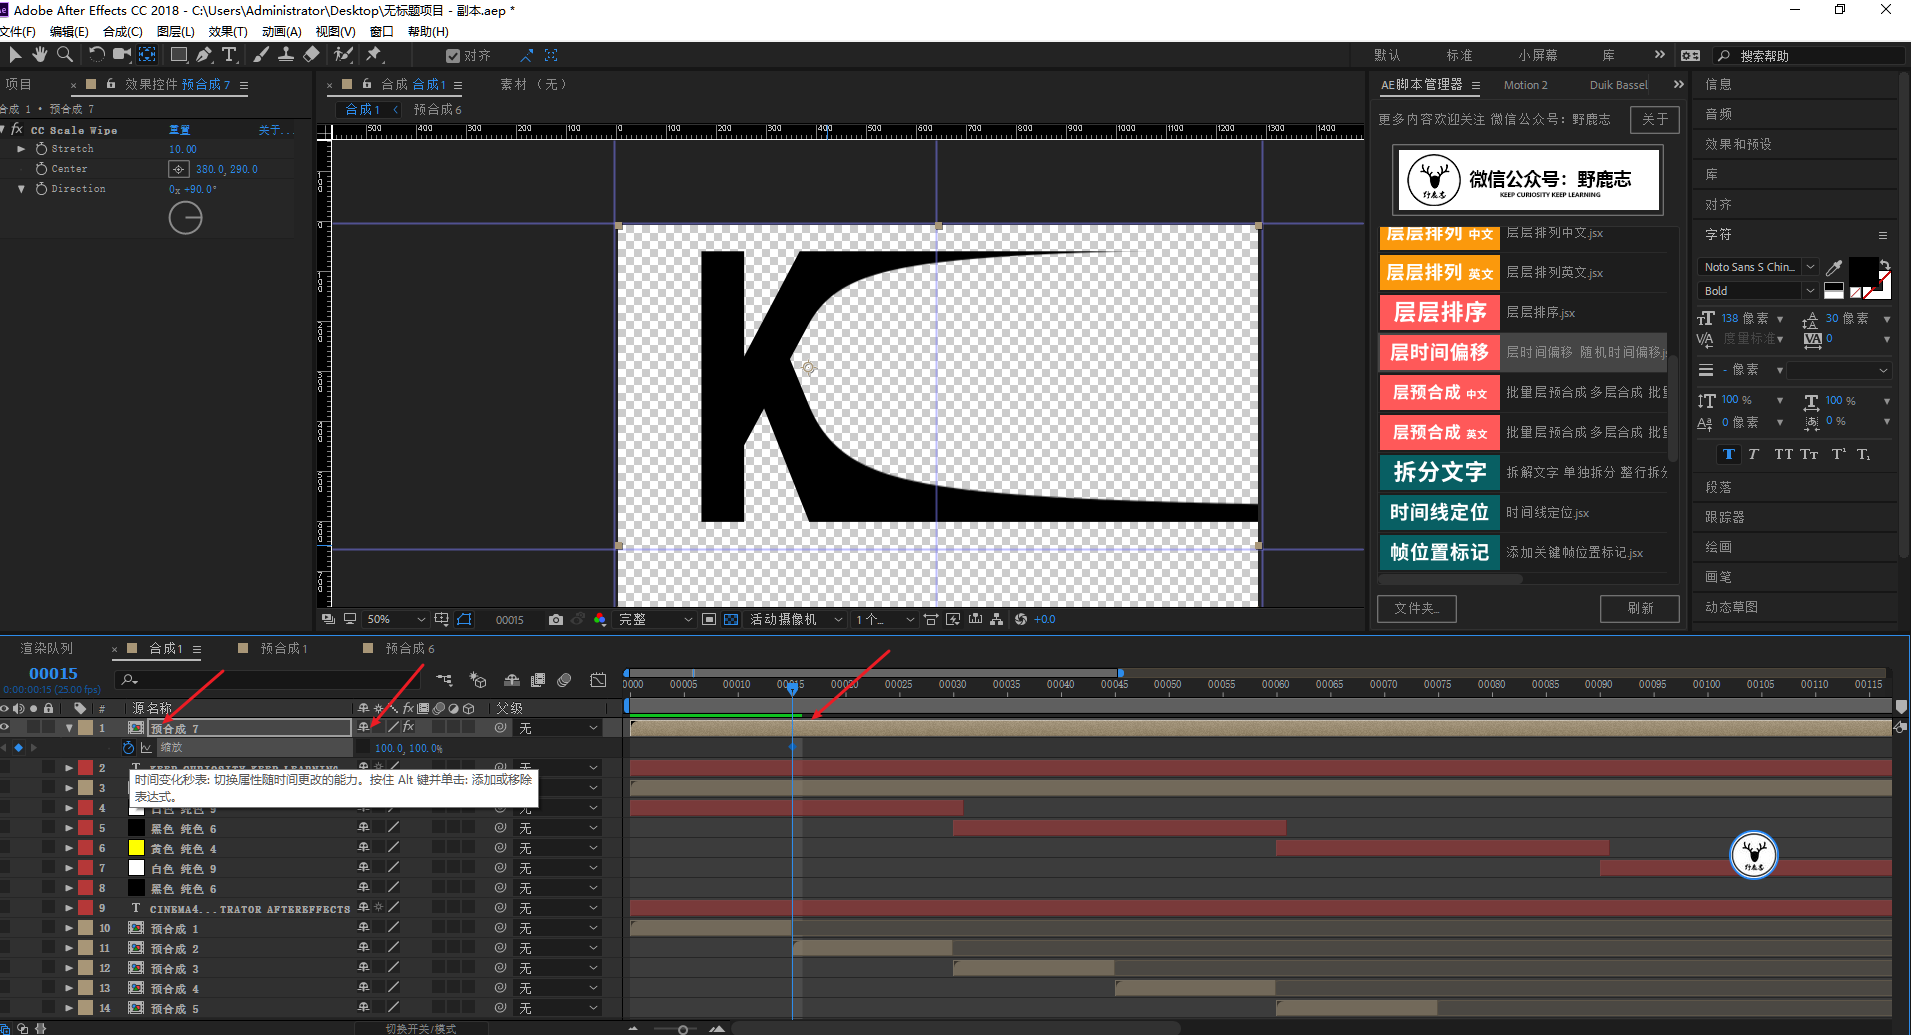
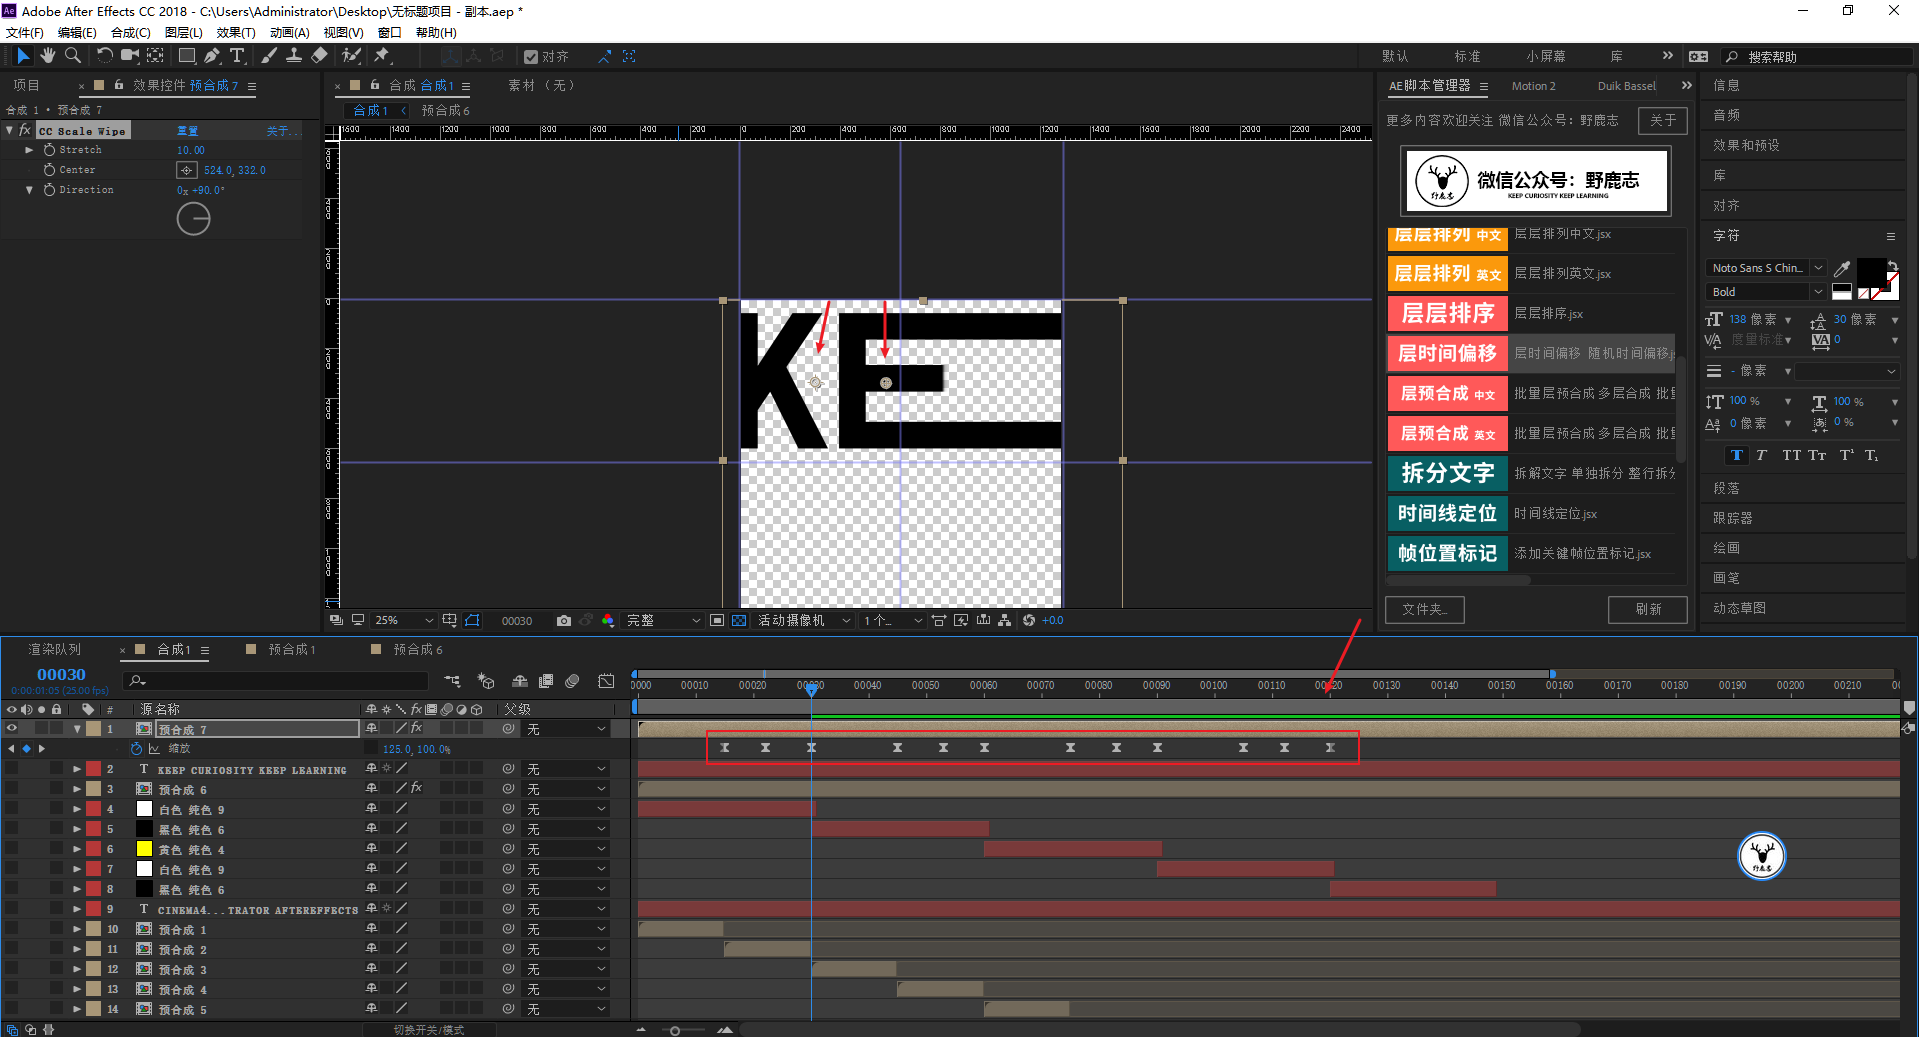
Then I tried one by one, and finally found this effect called CC Scale Wipe in the transition, which is translated into Chinese as scale wipe:
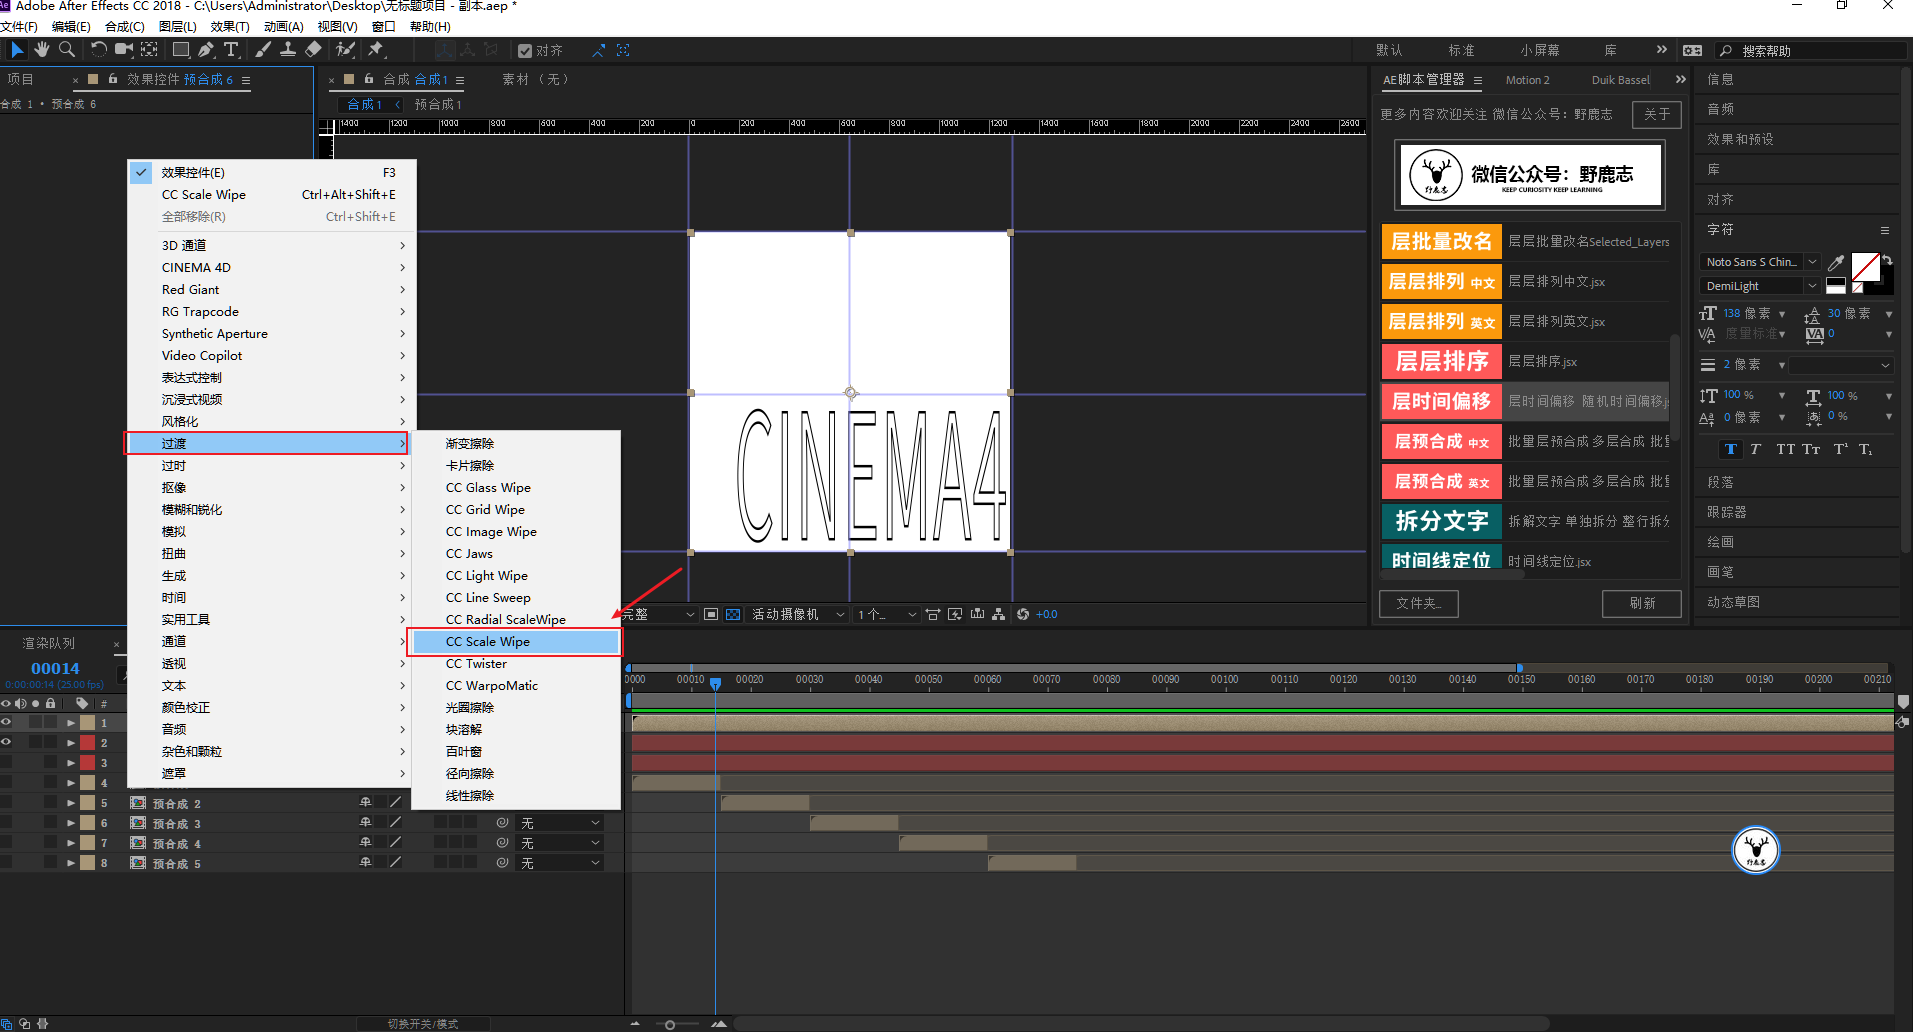
We change the direction to 90 degrees, and then by controlling the strength and the position of the action point, we can create this stretching effect, which is not easy:
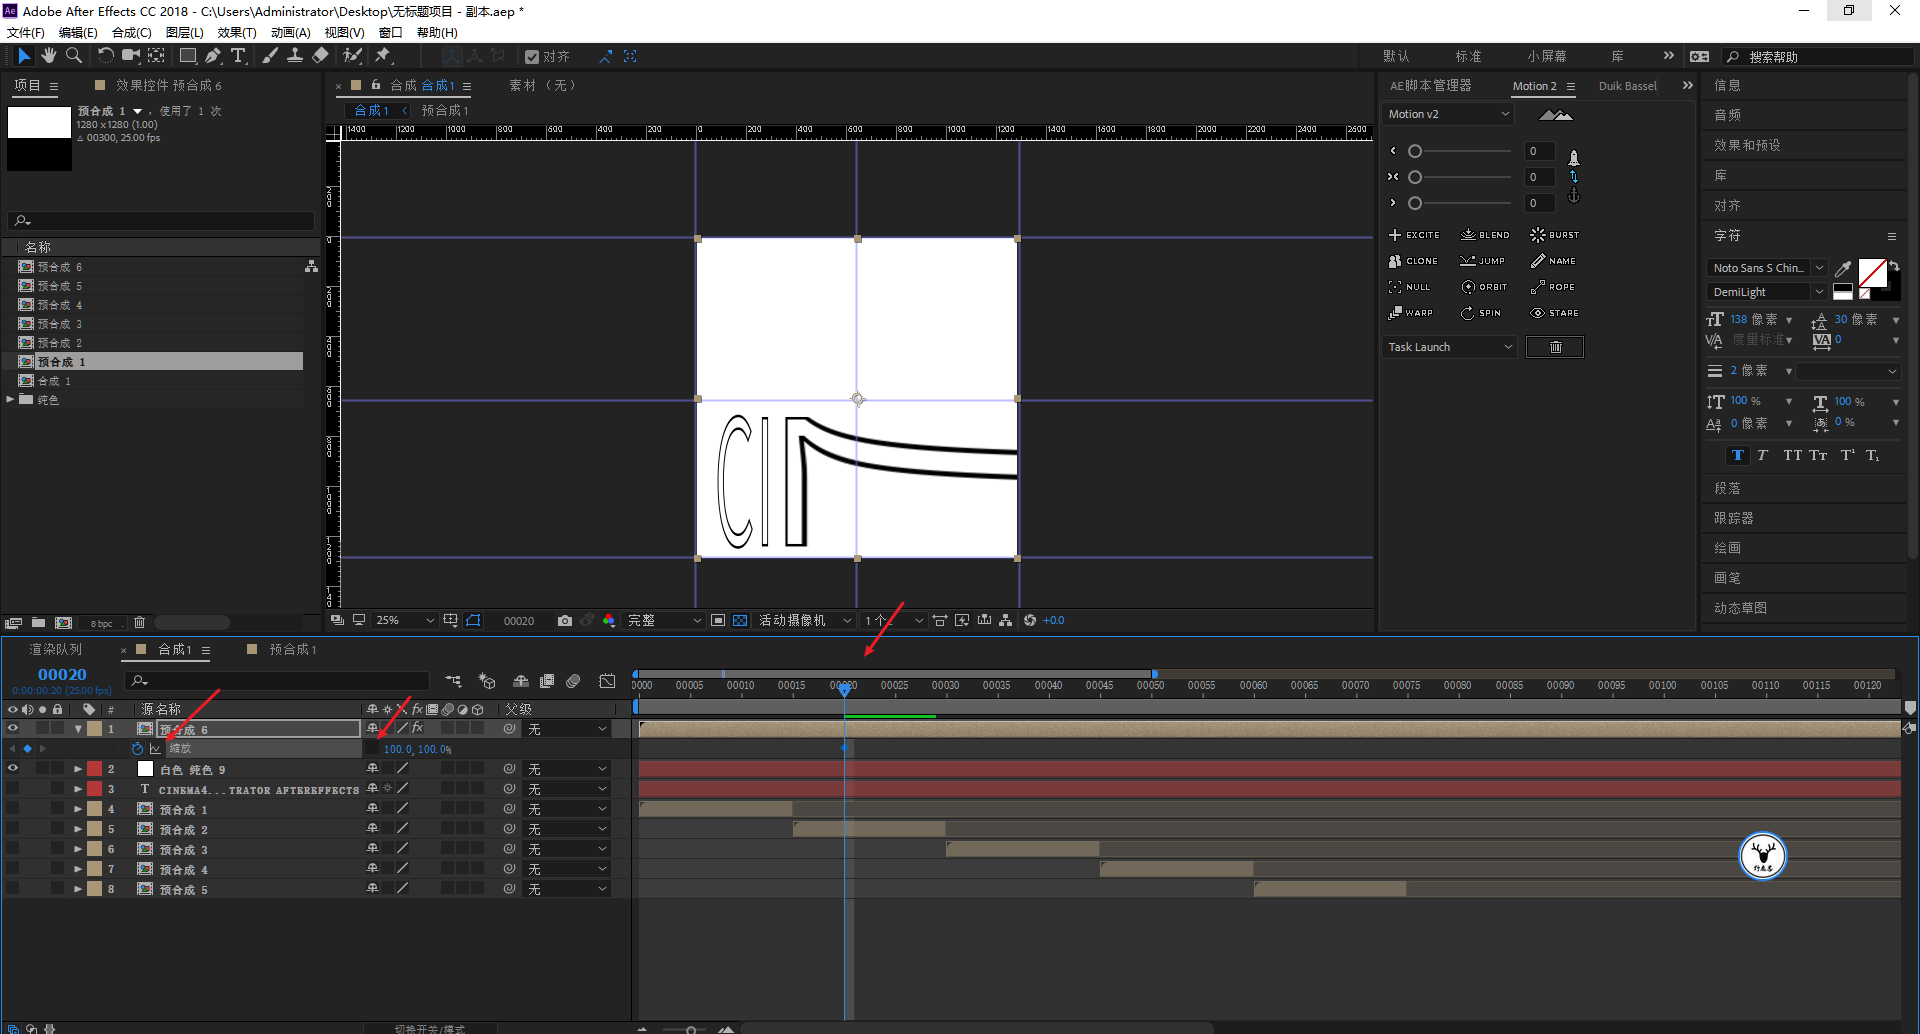
After the stretching effect is completed, the text does not have the feeling of bouncing back and distorting, but if you do elastic animation, Motion2 can make the feeling of bouncing back.
But after I tried it, I found that the effect is not good, because the reference picture not only has rebound, but also changes in size when it rebounds, so I am using K here.
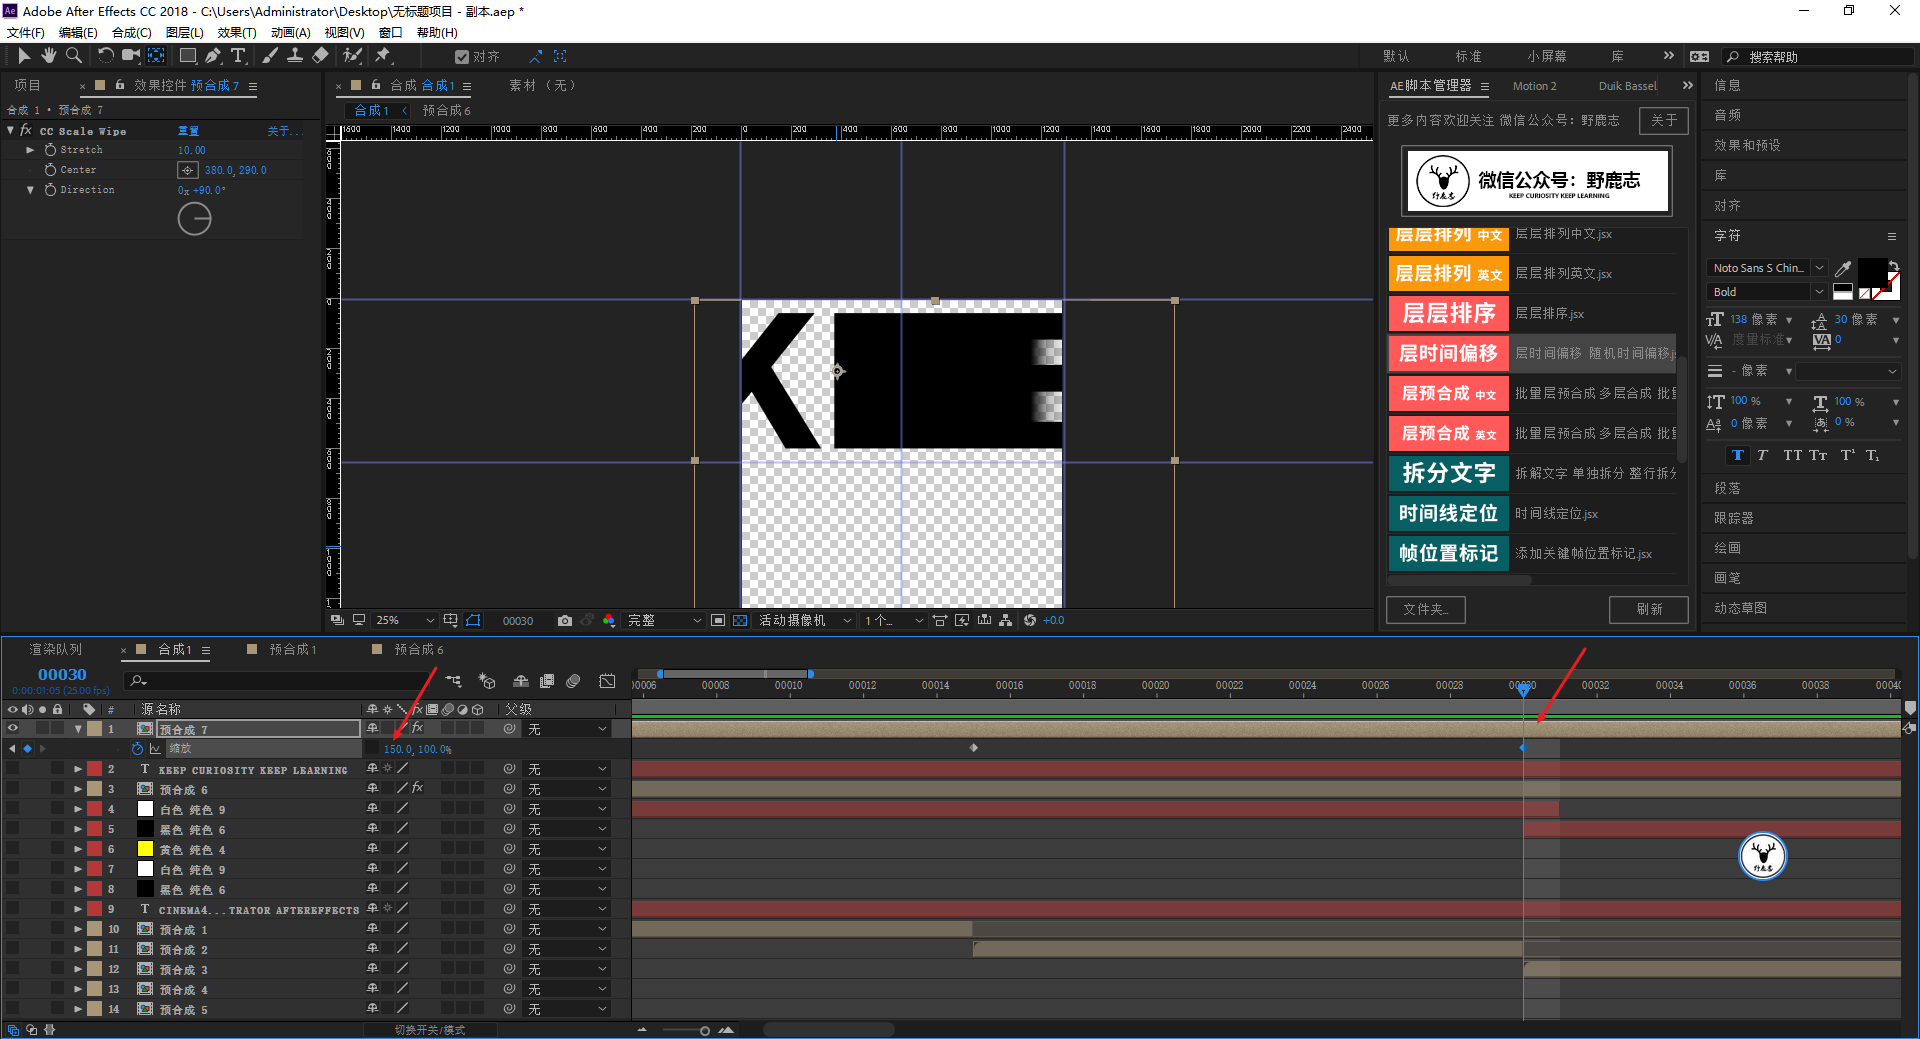
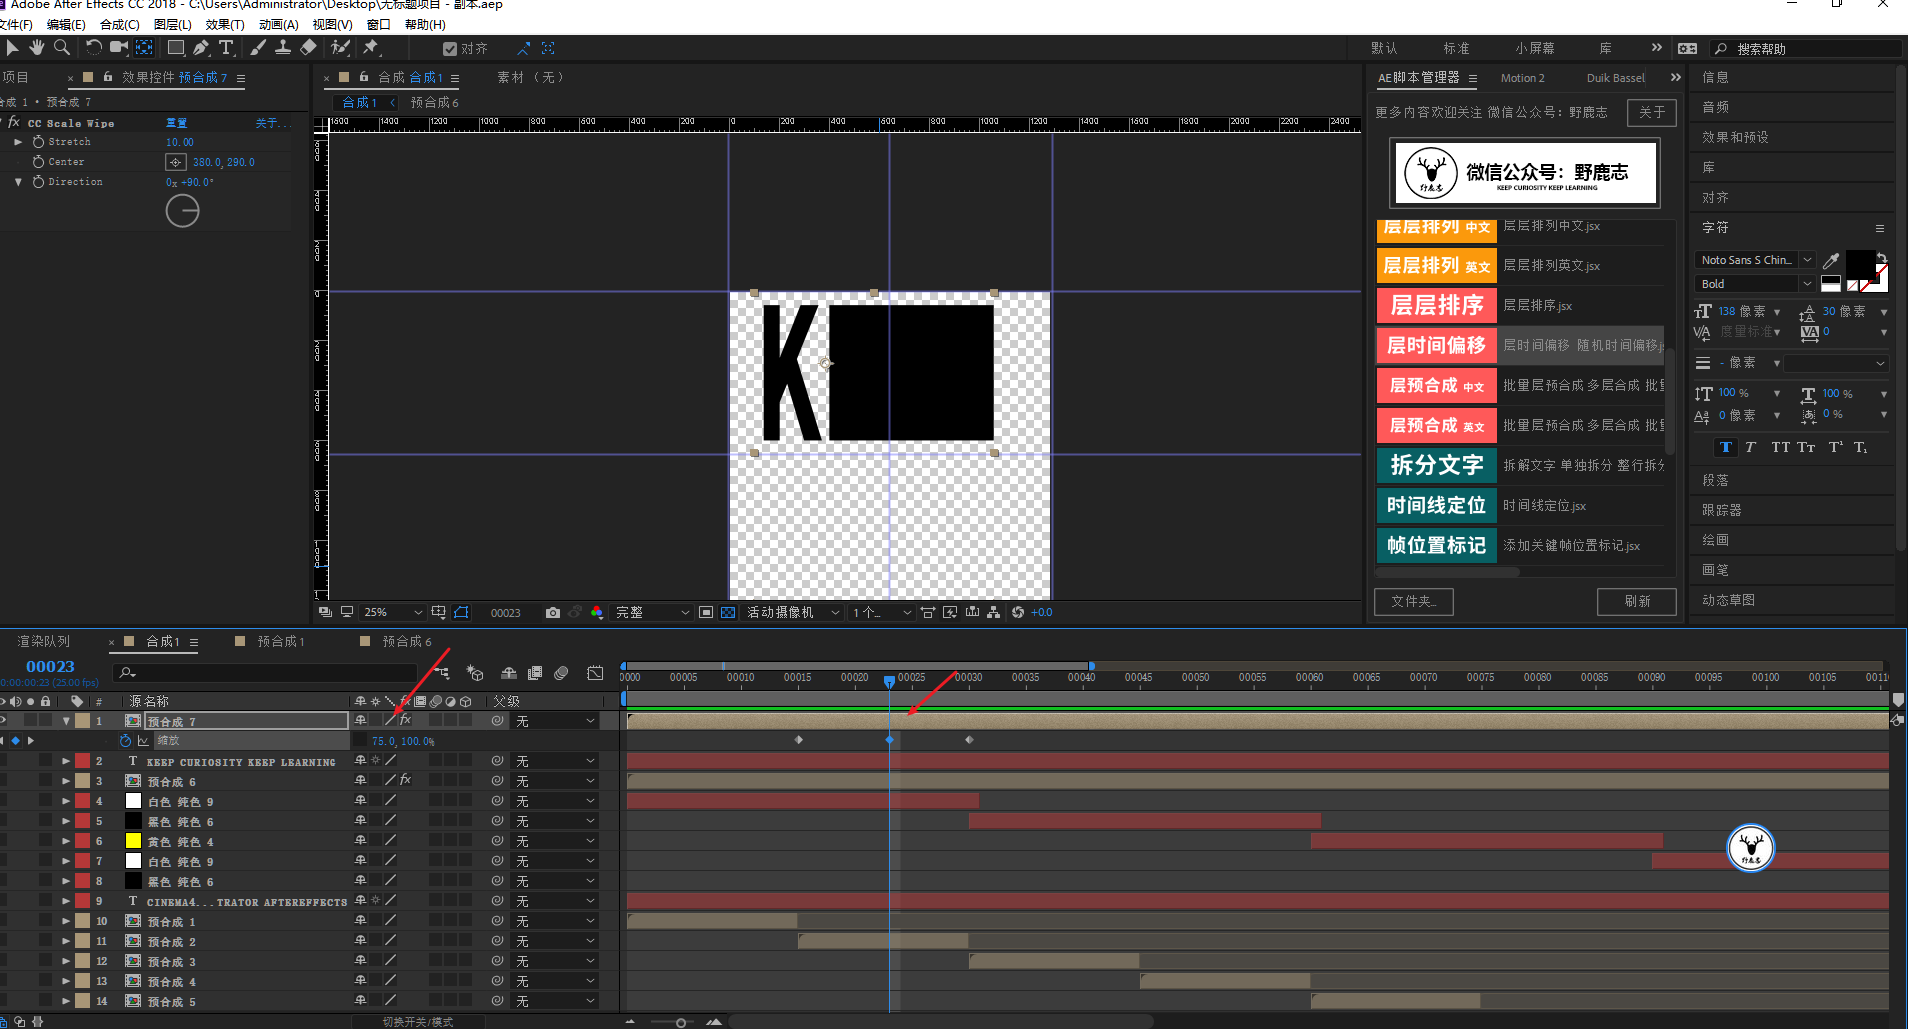
The shortcut key S calls up the pre-composited scaling properties, cancels the proportional scaling, and puts a key frame at about 20 frames:
In the 35th frame, the zoom value remains unchanged and the keyframe is marked:
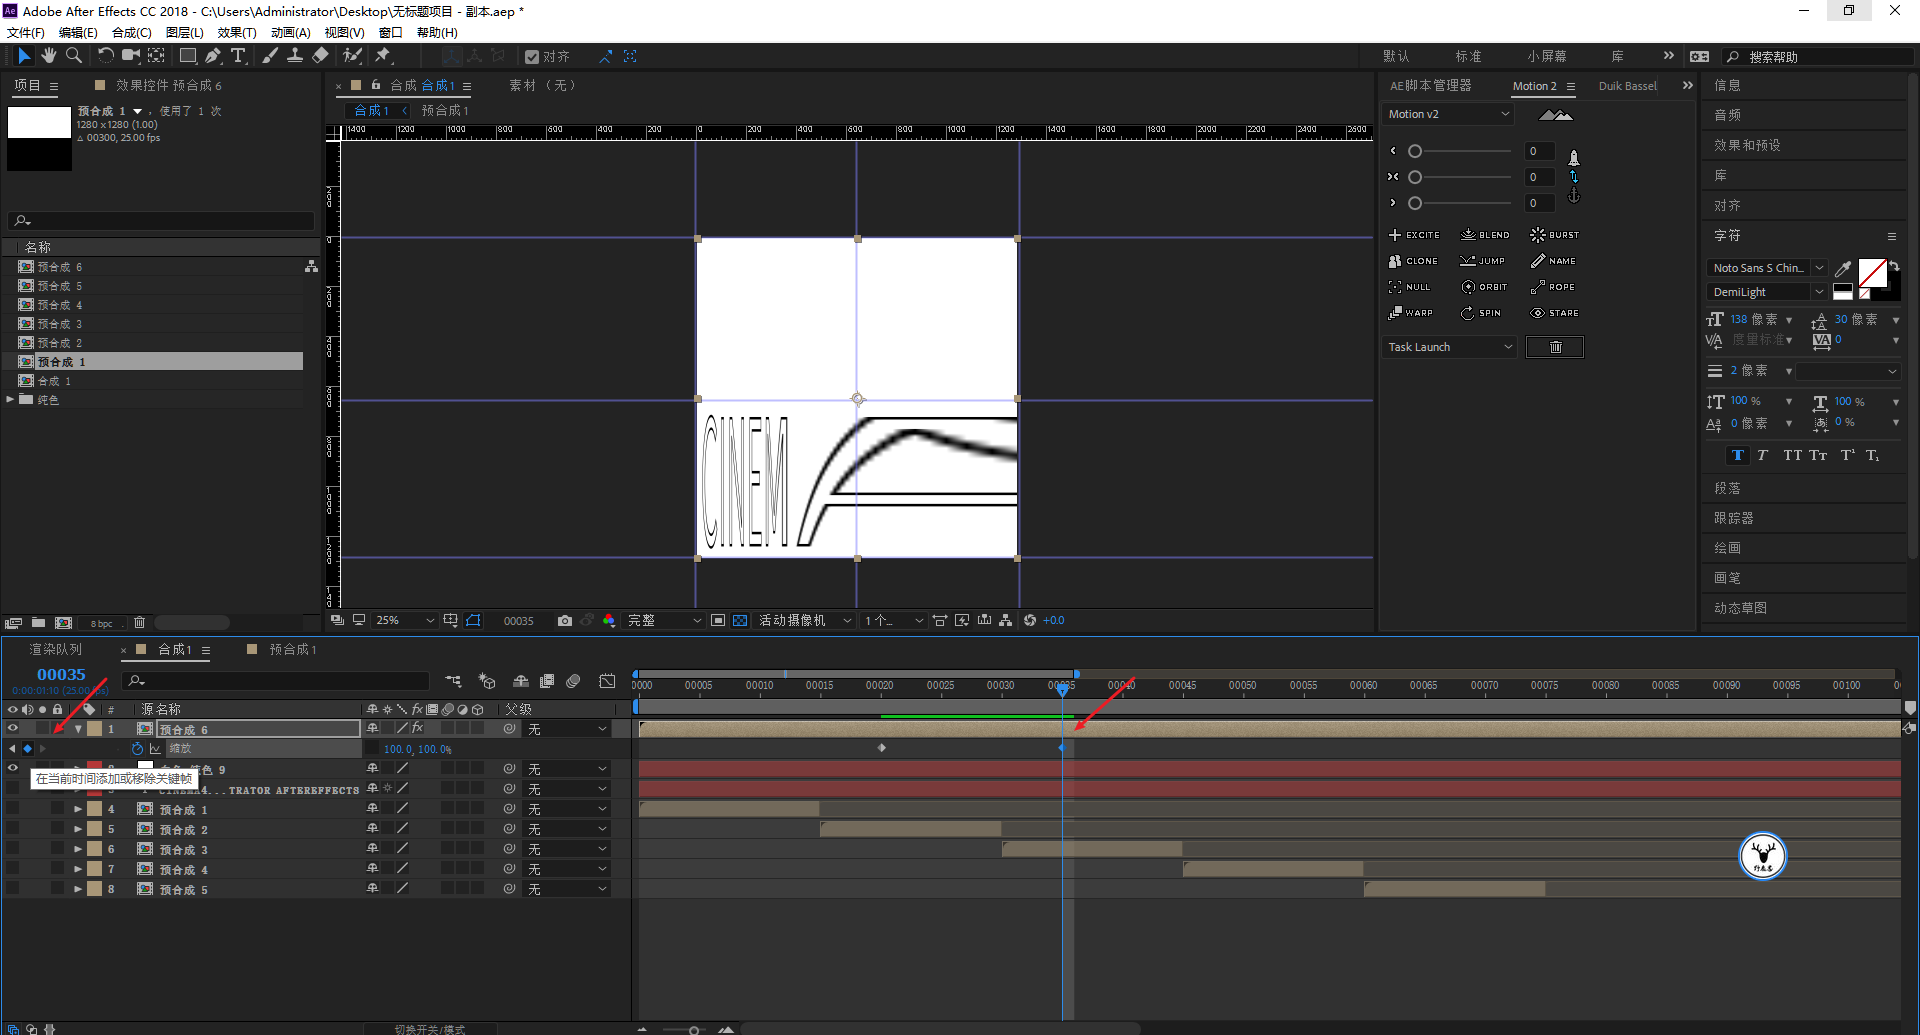
Then let the X-axis zoom value change to 135 and set a key frame at about the middle position, so that the zoomed animation becomes larger from the original size, and then restores the effect of the original size:

Here we need to use the anchor point tool to manually adjust the position of the anchor point, and the zoom will feel right:

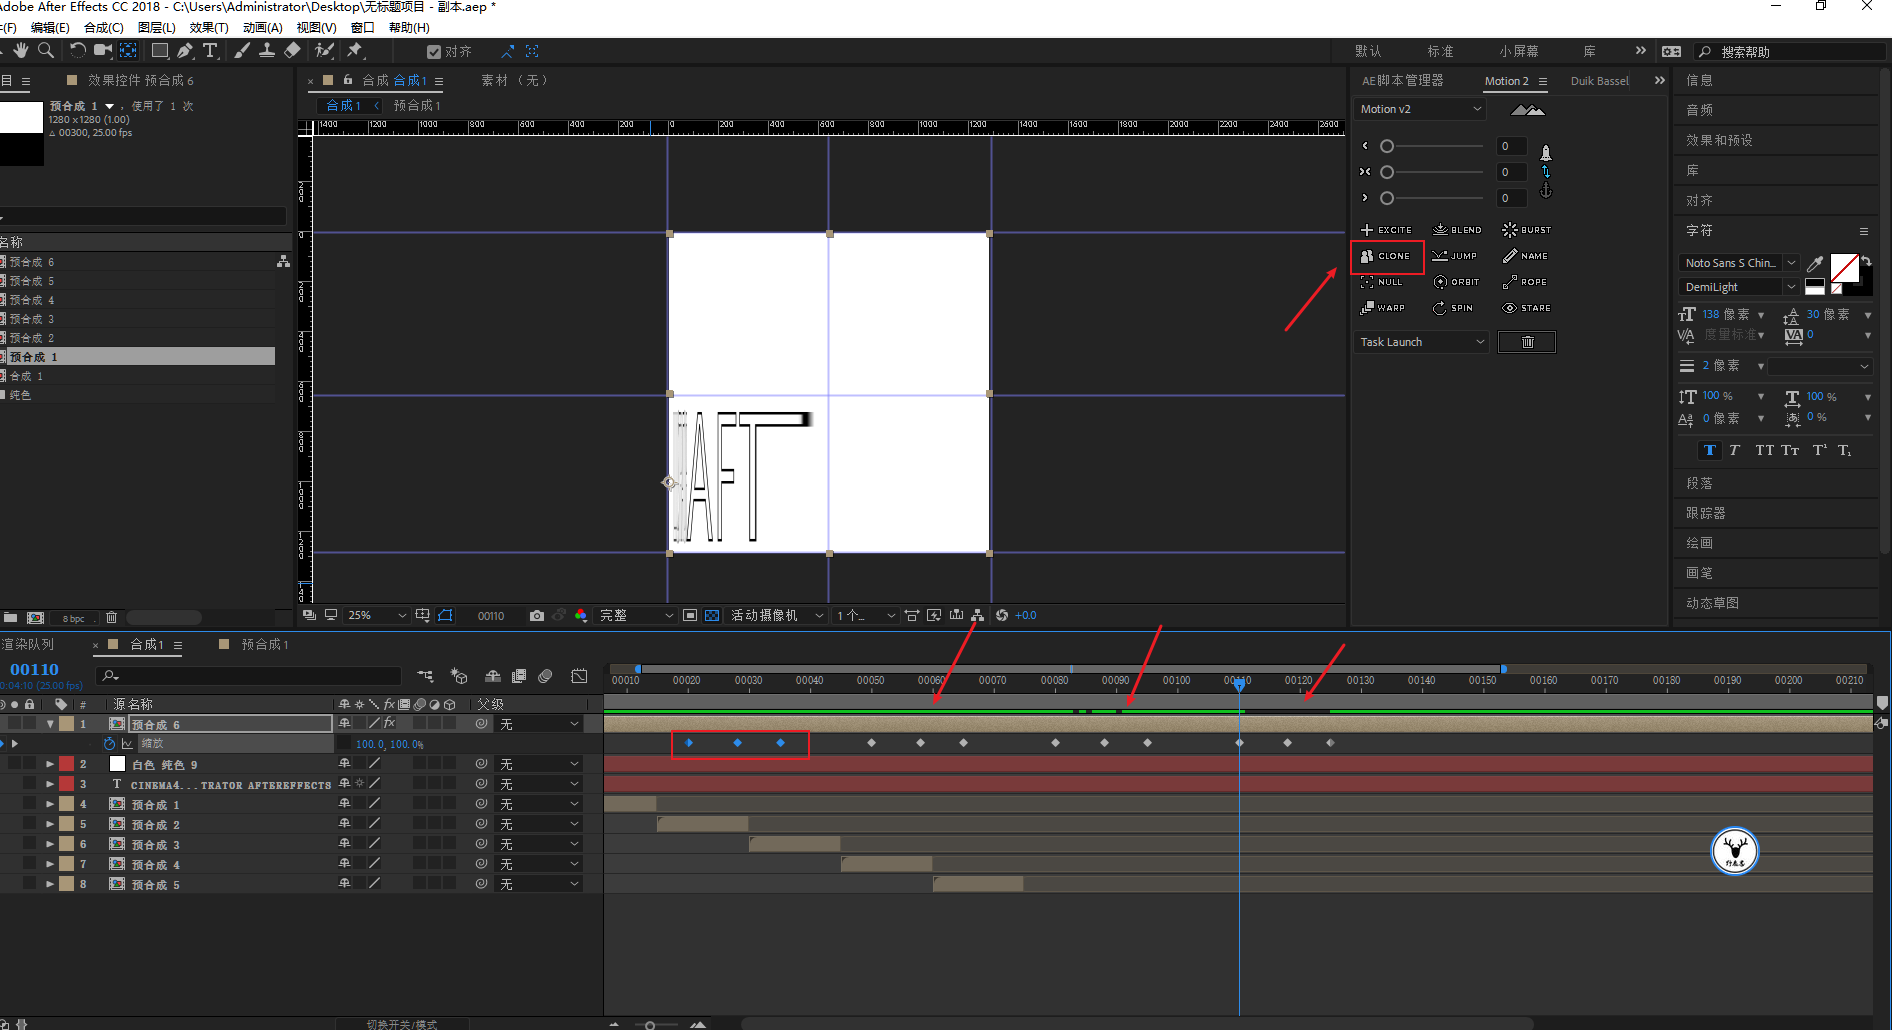
Select these keyframes, you can use the clone function of Motion2 to copy the keyframes to your desired position:
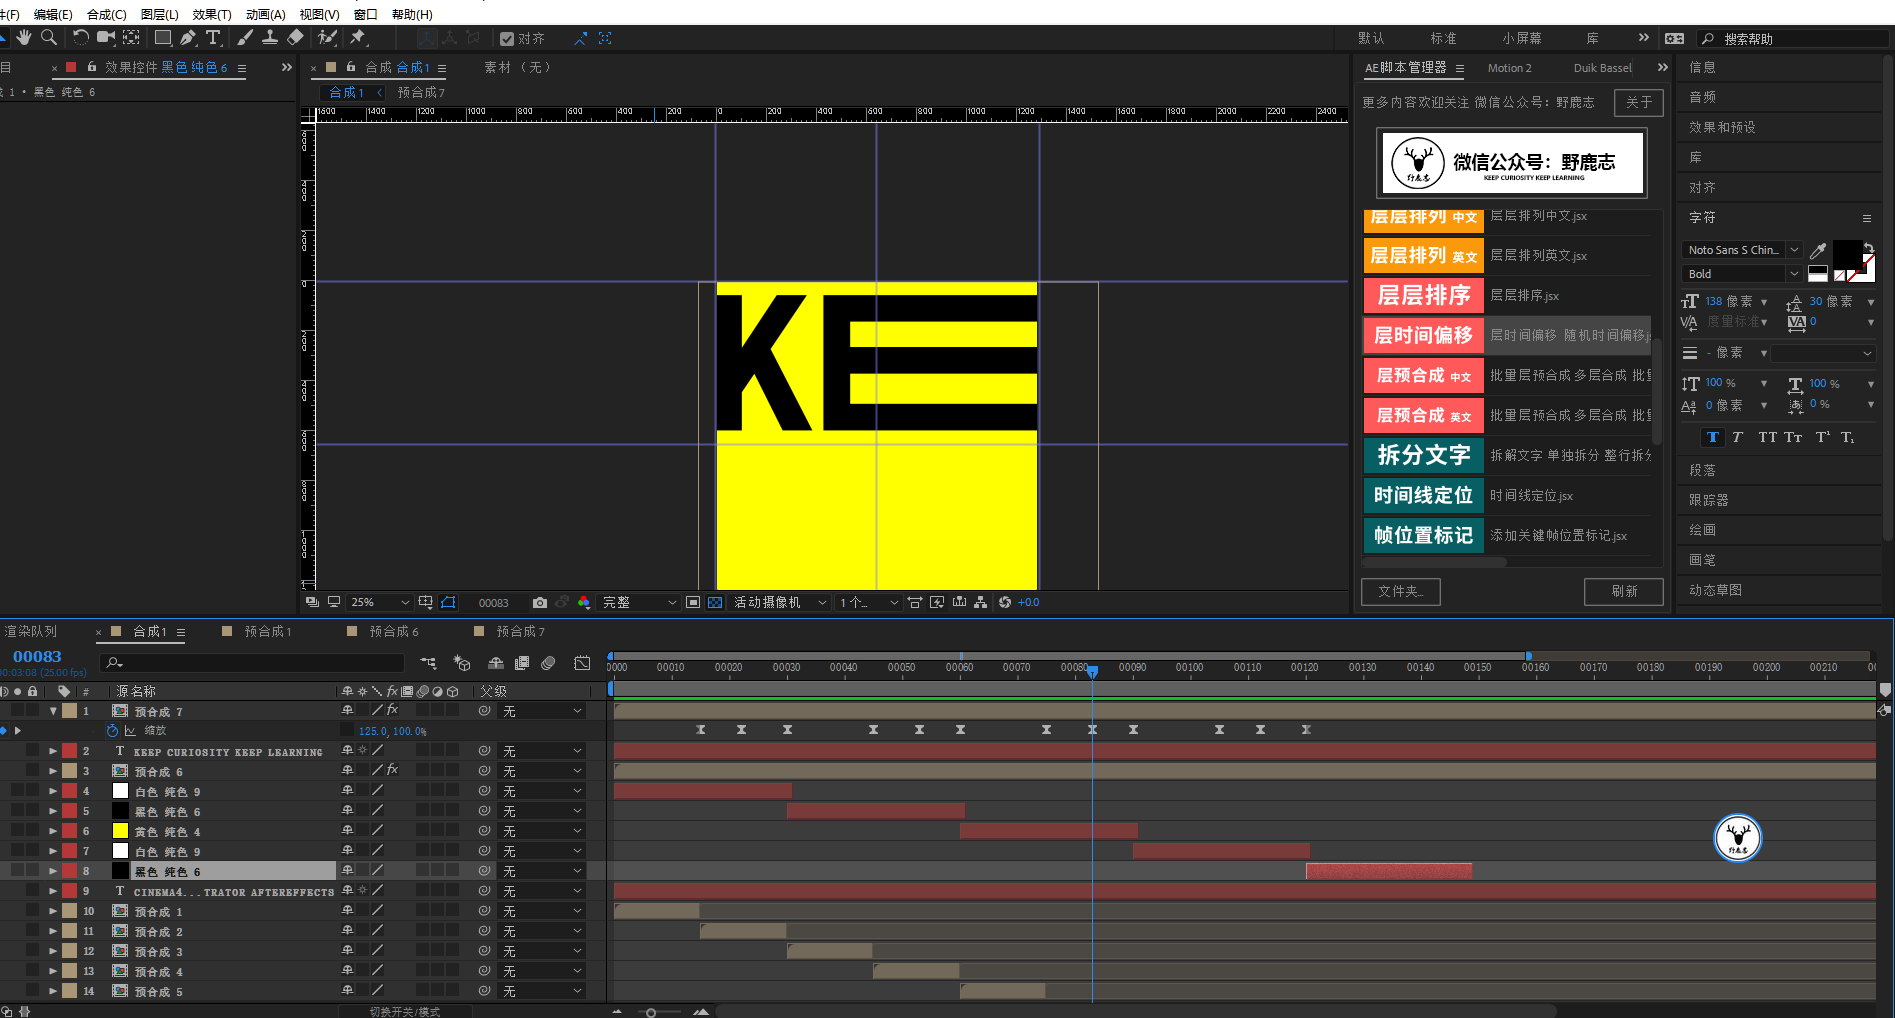
The transformation of the background color is directly multiple solid color layers of different colors. After cropping, use scripts to offset time. This is not difficult:
The color change of the text is in the text properties, click on the animation, you can keyframe the fill color or stroke color K, this is not much to say:
The first half is even simpler. Needless to say, the step of typing, text splitting, and resizing:
The shortcut key P calls up the position attribute, and the starting position of the 0th frame is marked with a key frame, and then the 30th frame goes to the position shown in the figure, and a key frame is marked:
The 60th frame is finished, and the key frame is marked:
Copy position keyframes to other phrases:
Also use the layer time offset script to offset several layers by 30 frames:
Don't forget to modify the velocity curve as well:
Also add the phrase to the precomposition:
Add CC Scale Wipe effect:

The S key calls out the zoom properties, cancels the proportional zoom, and puts a key frame at the position of about 15 frames:
Then at about 30 frames, let the zoom X axis zoom in:
In the middle of the two keyframes, let the X-axis parameter become smaller and add a keyframe. As for how appropriate this value is, you can try a lot:
The rest is the same, so I won’t repeat it here. As for the position of the key frame, you can see the effect, and K can be used where the text speed slows down.
Let’s try more at the position of the anchor point. I set the type of keyframe to ease:
I won’t talk about the text color, it’s too long today:
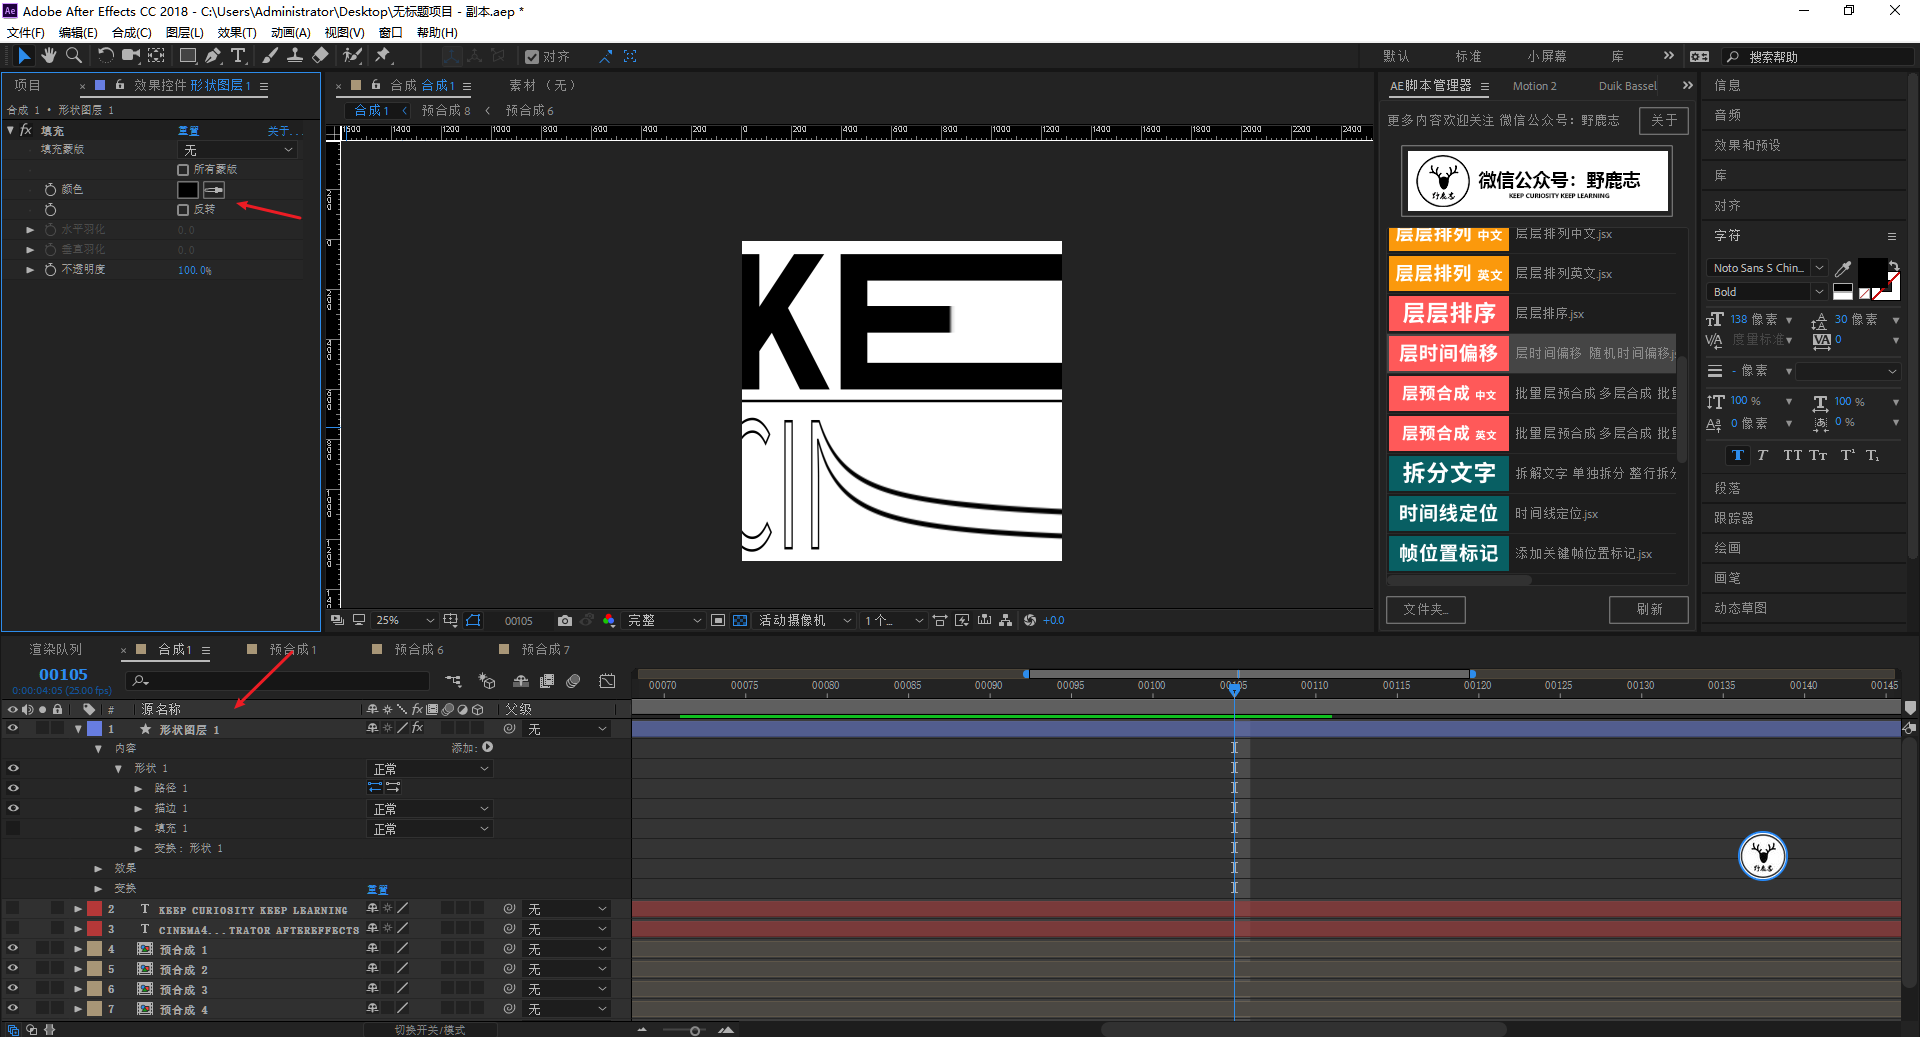
As for the horizontal line in the middle of the original picture, I just drew a straight line with the pen tool, and then changed the color by adding generate-fill:
Finally, export the animation to see the effect:

Still not as good as the original picture, I don’t know if there are other scripts or plug-ins that can be made more conveniently.
Today's content is a bit long, but all the basic operations of AE are used. I feel that this kind of formal animation with some BGM will make it feel better:
replace the cover
00:22 The video has not been published and is temporarily unavailable
Here's today's video version:
Video version will be sent separately later
Alright, that's all for today's sharing, if you want the script, source files and the children's shoes of the original video, please let me get them!
For more content, please pay attention to the official account:
This article was published by "Wild Deer"
Please contact Malu Yelang before reprinting
private transfer must be investigated
Articles are uploaded by users and are for non-commercial browsing only. Posted by: Lomu, please indicate the source: https://www.daogebangong.com/en/articles/detail/How%20to%20make%20AE%20text%20stretch%20animation.html
 支付宝扫一扫
评论列表(196条)
测试