When many people use CAD to open drawings, many characters will not be displayed or the fonts will all be displayed as "?". Sometimes the incomplete display may seriously affect the integrity of the drawings, resulting in the inability to fully view the drawings and affect the progress of construction. The main reason is that there is no CAD font used in the original CAD drawing on my computer. In this article, the editor will introduce how to install the CAD font library.
The fonts in CAD generally have the suffix ".HSX", and they are installed in the FONTS folder under the CAD installation directory:
1. First download the CAD font library or the required CAD fonts from the Internet, please search on Baidu, and unzip after downloading.
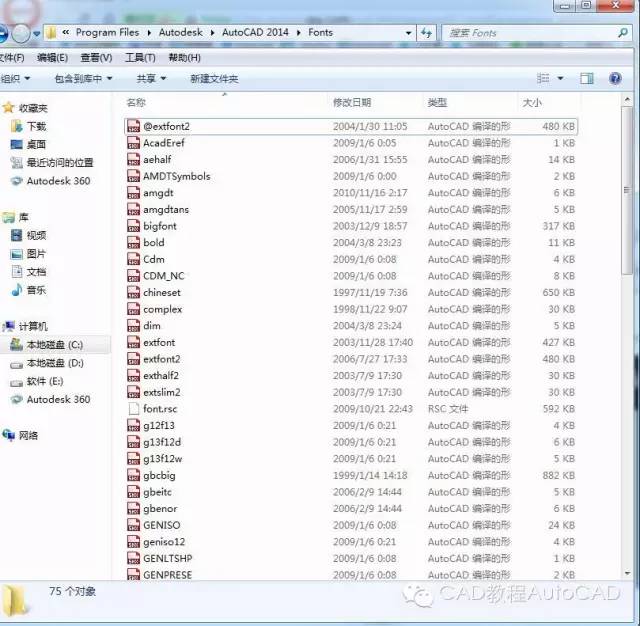
2. We copy the decompressed fonts to the FONTS folder in the installation directory.
For example, my CAD software is installed on the C drive, then I only need to find: C:Program FilesAutodeskAutoCAD 2014Fonts, and then copy the decompressed fonts to it. It doesn’t matter if it is overwritten, just overwrite it.
The quick steps to quickly open the Fonts folder under the CAD installation directory are as follows
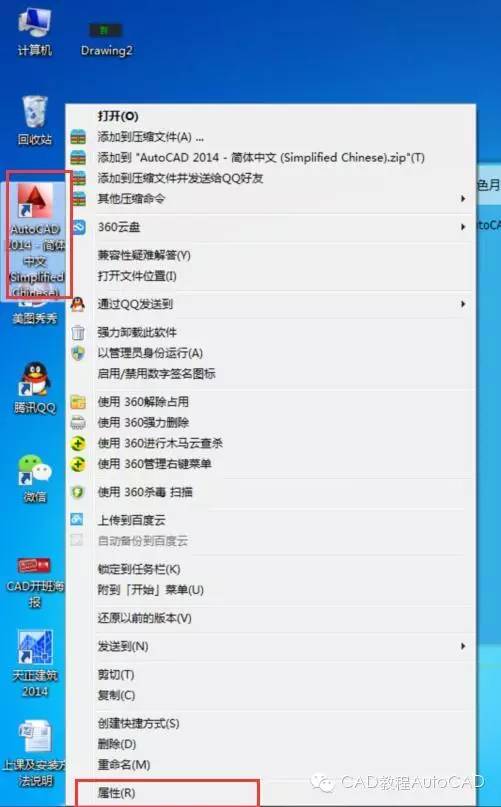
1. Click the AutoCAD2014 icon ------right click -----properties
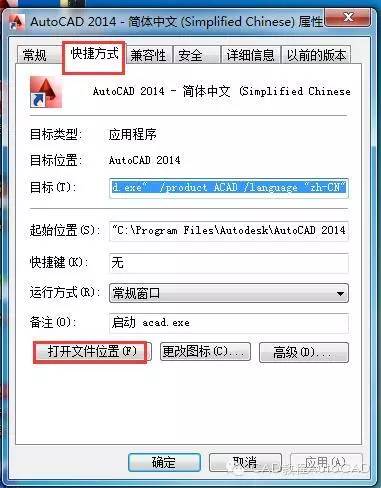
2. Then the Properties dialog box will open---shortcut--open file location
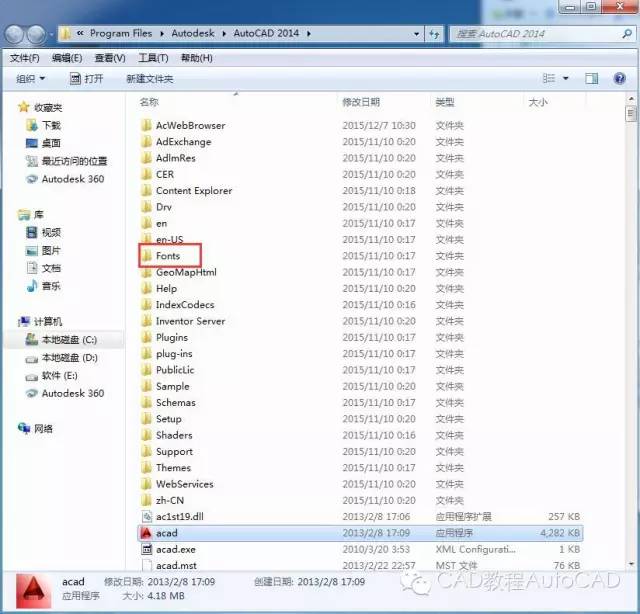
3. At this time, open the CAD installation folder and directory----open the Fonts folder and copy and paste the downloaded and decompressed CAD fonts to this folder.
Tribal Nest Education
CAD Quick Start Class< br>Signing upThis course is a quick start course for zero-based students
Dears who need to comprehensively and systematically learn CAD 2D and 3D foundation
Hurry up and sign up
The harder you work, the luckier you get!
After registration, you can attend classes in real time, download videos, answer questions, and comment on homework
One-time registration for permanent learning
Students who want to learn should contact the teacher to registerFor more details, please contact Tribal nest enterprise QQ: 800094815
Click below“Read the original text< /span>”Sign up for a trial!
Stamp"Read the original text", more Expected!
If you think the article is worth readingClickLike! Welcome to repost!
Articles are uploaded by users and are for non-commercial browsing only. Posted by: Lomu, please indicate the source: https://www.daogebangong.com/en/articles/detail/How%20to%20install%20CAD%20font%20library%20AutoCAD%20Tutorial.html


 支付宝扫一扫
评论列表(196条)
测试