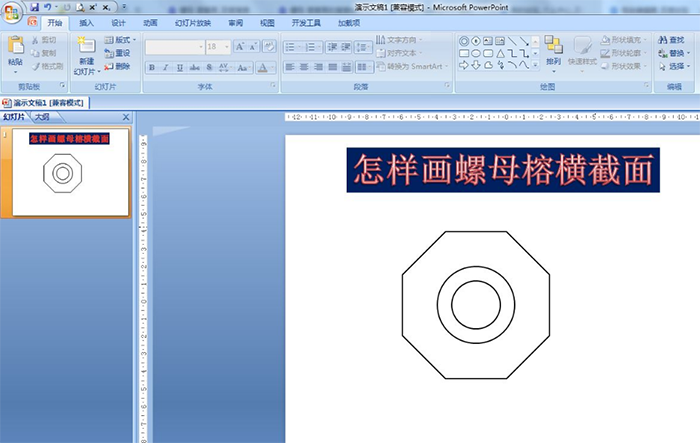
How to draw the cross-section of the nut tree? Today I will share with you how to use PPT to draw the cross-section of the nut.
ppt template article recommendation:
How to make a three-line border with PPT
How to make crystal clear snowflakes in ppt
How to set the print size and font for ppt notes
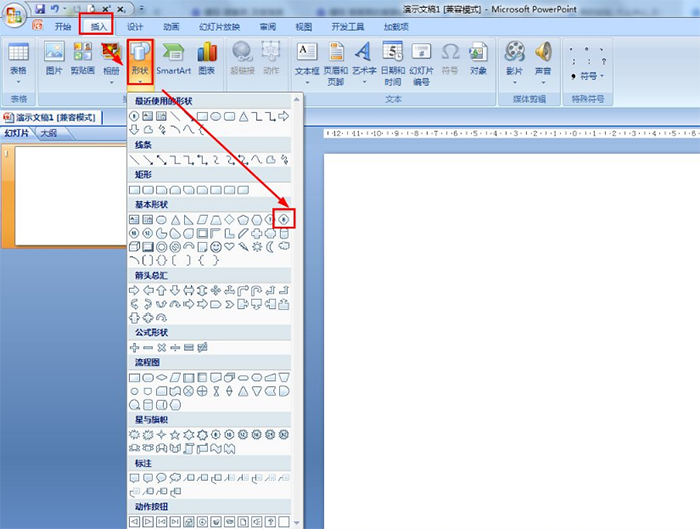
1. Insert - Shape - Select the basic shape of the octagon.
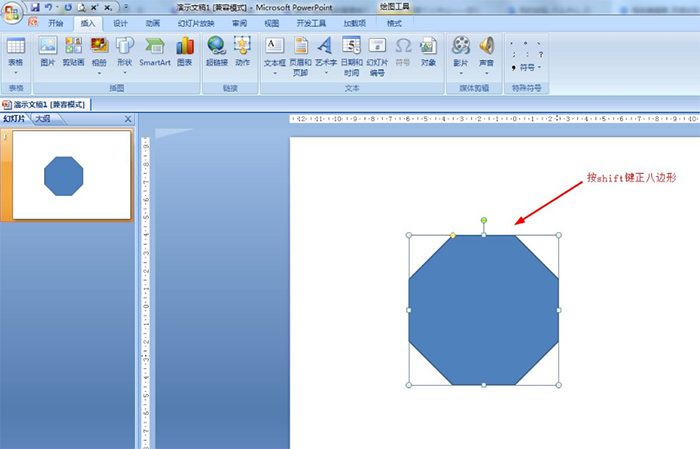
2. Hold down the shift key to draw a regular octagon.
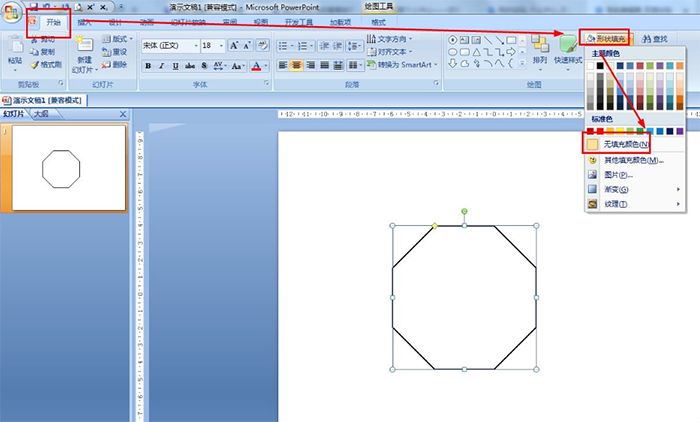
3. Start--Shape Fill--No Fill Color--Select Black for Shape Outline.
4. Start-Drawing-select concentric circles to draw inside the octagon-select no fill color for shape fill-set the outline of the shape to black.
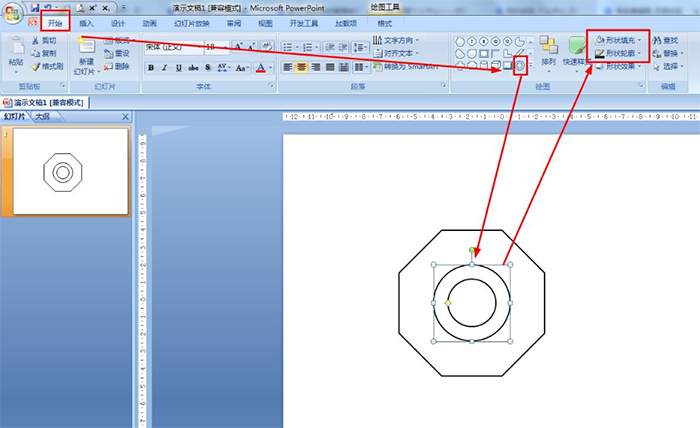
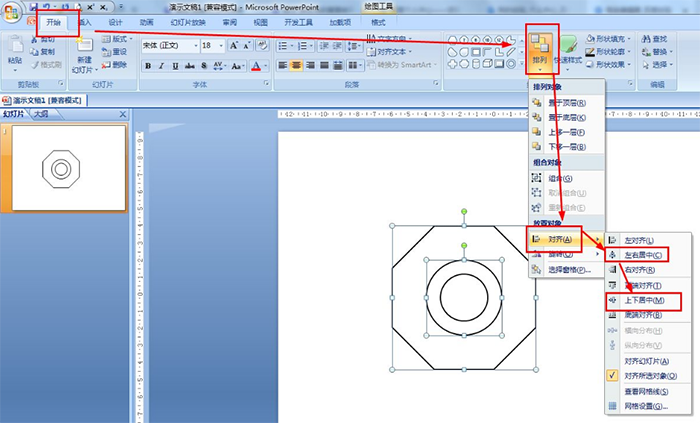
5. Select two shapes-Start-Arrange-Align, set left-right center and top-bottom center.
Articles are uploaded by users and are for non-commercial browsing only. Posted by: Lomu, please indicate the source: https://www.daogebangong.com/en/articles/detail/How%20to%20draw%20the%20cross%20section%20of%20nut%20ficus%20with%20PPT.html

 支付宝扫一扫
评论列表(196条)
测试